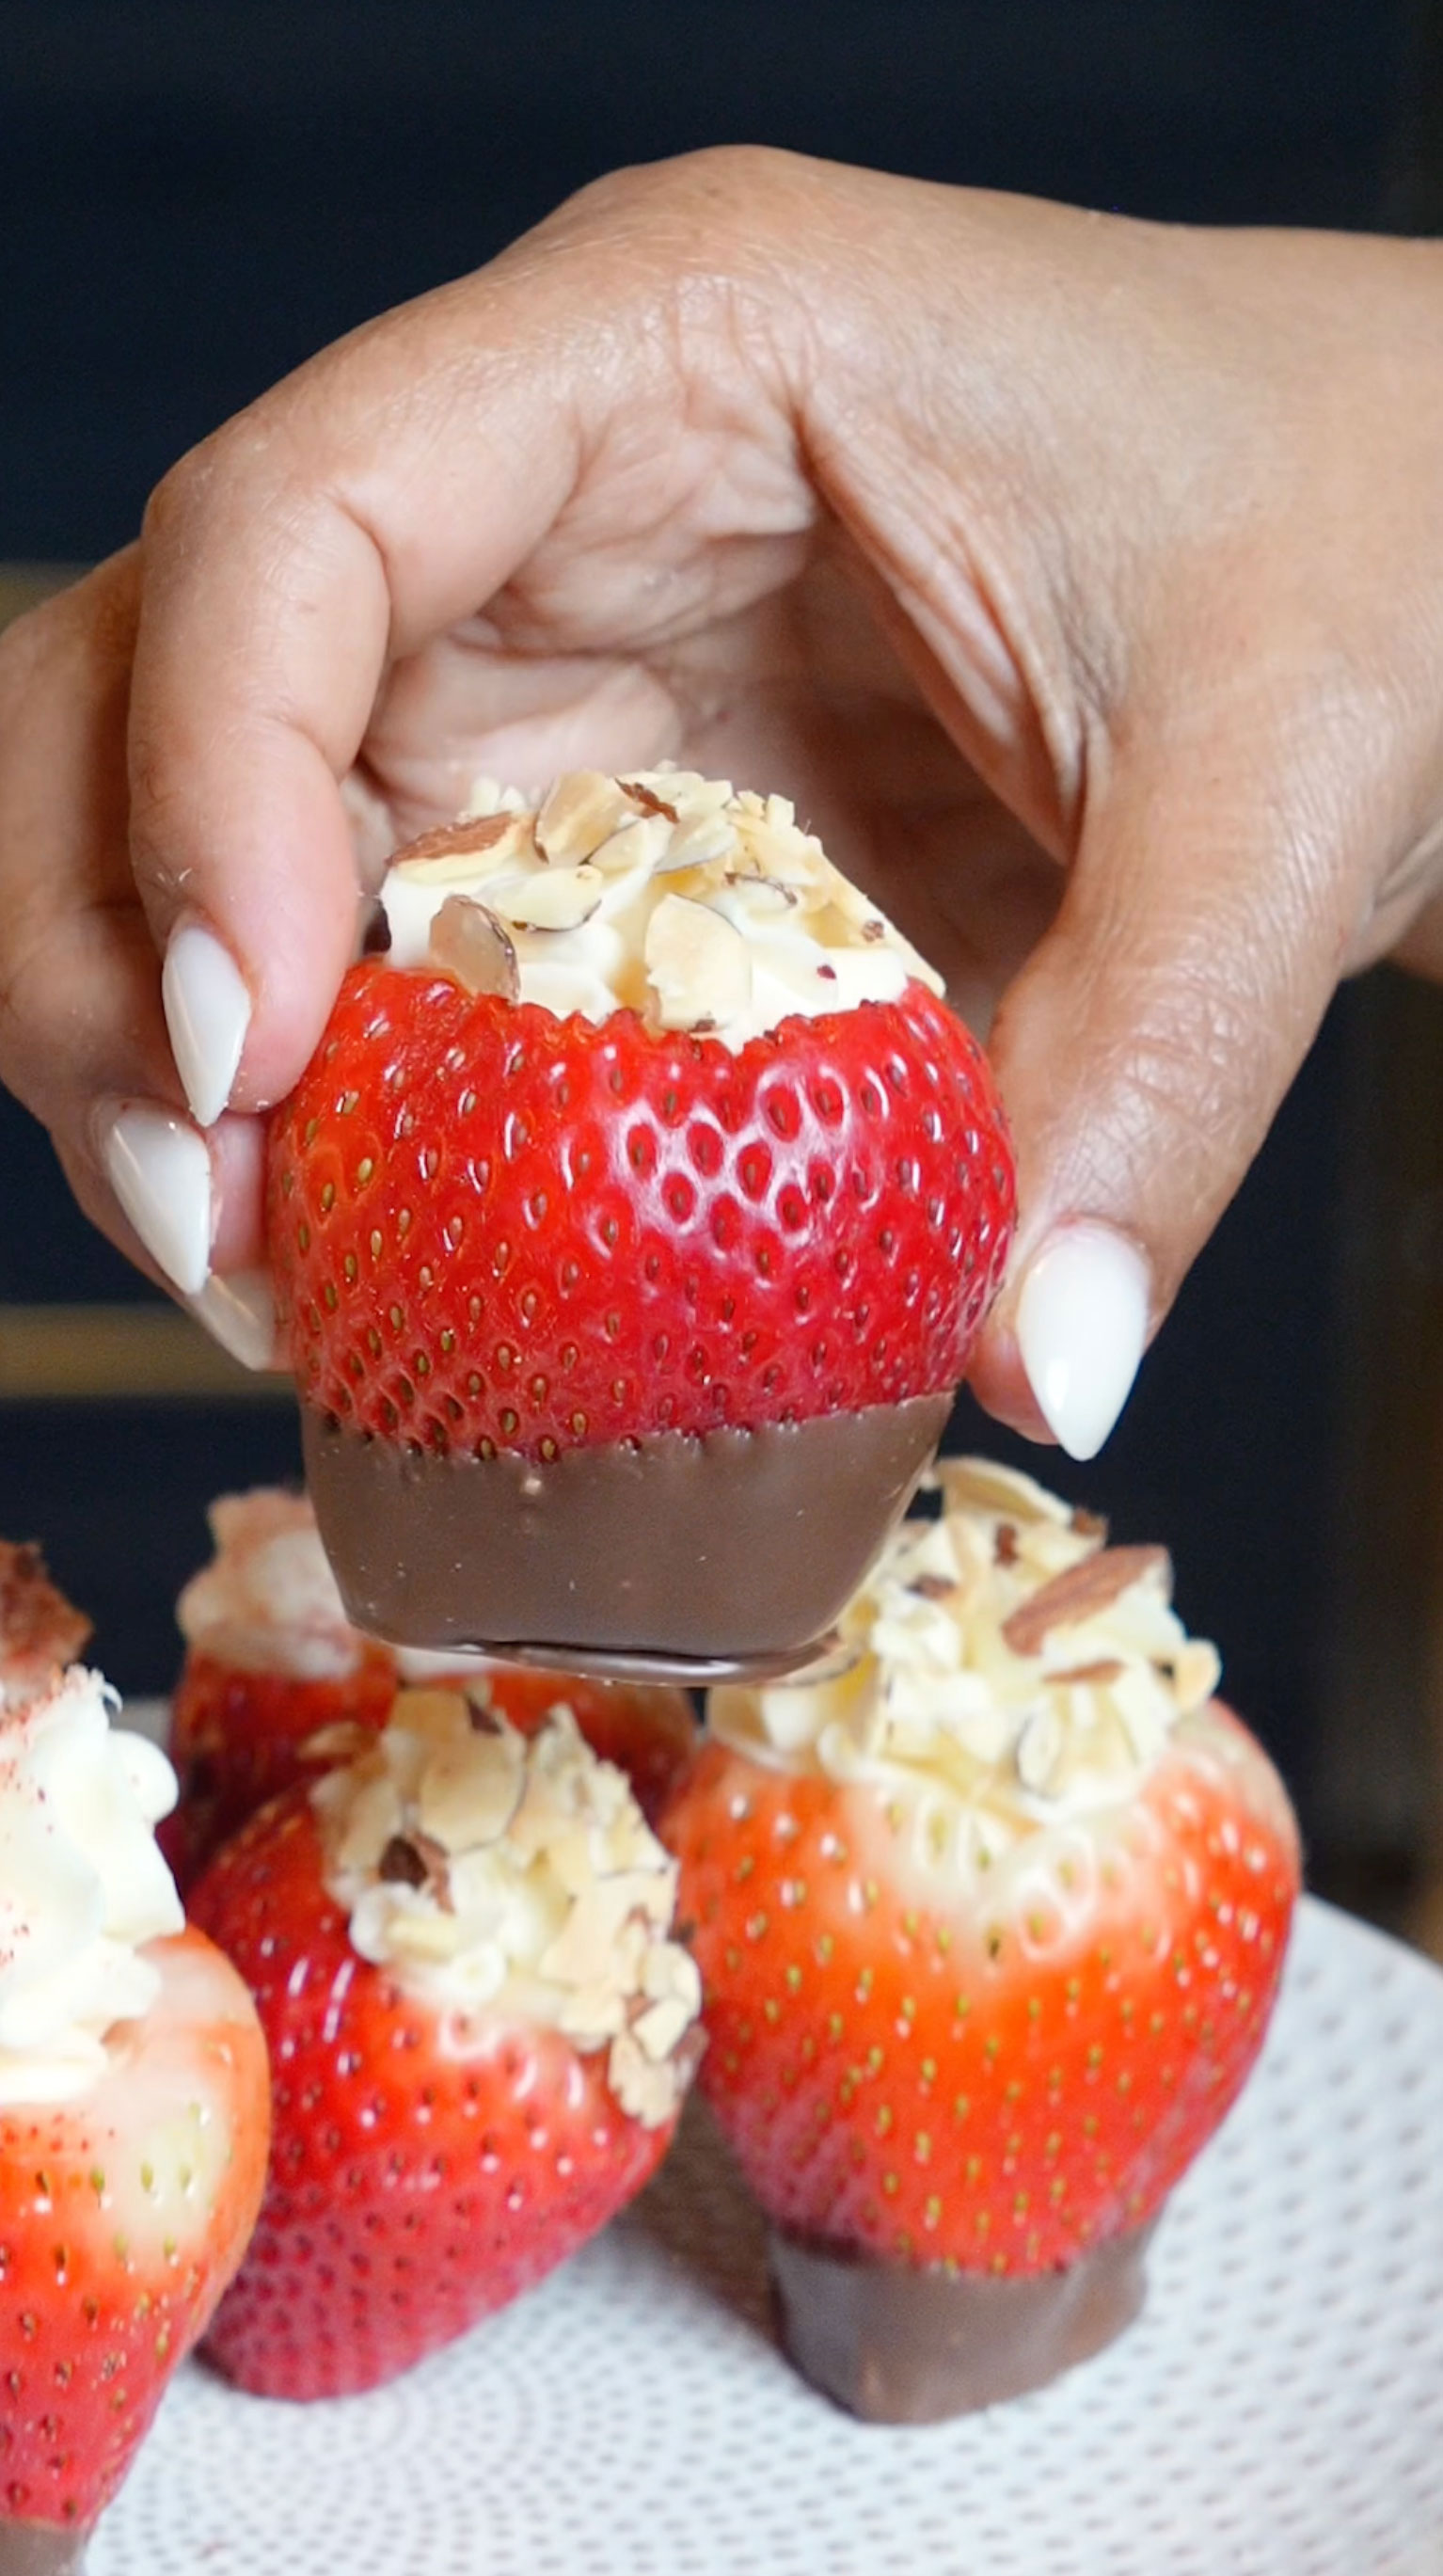
Cheesecake-Stuffed Strawberries
Posted on November 10, 2025
2 Comments
Share this recipe
Let me introduce you to Cheesecake-Stuffed Strawberries: elegant, easy, and ready in just 15 minutes. A party staple that looks bakery-fancy but requires zero baking, these bite-sized beauties have been stealing the show at gatherings for years, disappearing faster than any cake or pie ever could.
These chocolate-dipped strawberries are creamy, customizable, and irresistibly delicious, a beloved treat that combines fresh fruit with rich cheesecake filling and your favorite toppings. They're often described as the perfect finger dessert, with their sweet-tart strawberry base, velvety cream cheese center, and crunchy chocolate coating. The key is using large, firm strawberries and creating a stable chocolate base, giving each bite that perfect balance of textures and flavors.
Key Ingredients
1. Fresh Strawberries
Large, firm strawberries are the edible vessel for this dessert. Look for berries with bright red color and fresh green tops they need to be sturdy enough to hold the creamy filling without collapsing. The natural sweetness and slight tartness create the perfect balance against the rich cheesecake center.
2. Cream Cheese & Powdered Sugar
Softened cream cheese whipped with powdered sugar creates that signature cheesecake flavor and silky-smooth texture. The powdered sugar dissolves completely (no graininess!) and adds just the right amount of sweetness, while vanilla extract brings warmth and depth to the filling.
3. Semi-Sweet Chocolate
Melted chocolate creates a stable, delicious base for the strawberries to stand on. A touch of coconut oil makes the chocolate smooth and glossy, giving each berry that professional chocolate-dipped look. The chocolate also adds a satisfying snap with every bite.
4. Graham Cracker Crumbs
This classic cheesecake topping brings it all together. The buttery, slightly sweet crumbs add crunch and that unmistakable cheesecake crust flavor. You can also swap for crushed cookies, nuts, or any topping you love, this is where you get creative!
Step-by-Step Instructions
Step 1. Prep the Strawberries Rinse and pat dry 1 lb large, firm strawberries. Cut off the tops and use a small paring knife or melon baller to carefully hull out the centers, creating a cavity for the filling. Slice a small portion off the bottom of each berry so they can stand upright without tipping. Set aside on a parchment-lined tray.
Step 2. Melt the Chocolate Base In a microwave-safe bowl, combine ½ cup semi-sweet or dark chocolate chips with 1 teaspoon coconut oil (optional, but it makes the chocolate smoother). Microwave in 30-second intervals, stirring between each, until completely melted and glossy—about 1–1½ minutes total.
Step 3. Dip the Strawberry Bottoms Working one at a time, dip just the bottom tip of each hollowed strawberry into the melted chocolate, creating a stable base. Place chocolate-side down on the parchment paper and let set at room temperature for 10–15 minutes, or refrigerate for 5 minutes to speed it up.
Step 4. Make the Cheesecake Filling In a medium bowl, beat 8 oz softened cream cheese with ¼ cup powdered sugar, 1–2 tablespoons heavy cream, and ½ teaspoon vanilla extract until smooth, fluffy, and no lumps remain. Taste and adjust sweetness if needed—add more powdered sugar 1 tablespoon at a time.
Step 5. Prepare Your Piping Bag Transfer the cheesecake filling to a piping bag fitted with a large round or star tip. If you don't have a piping bag, use a zip-top bag and snip off one corner—just make sure the opening is wide enough to pipe smoothly.
Step 6. Fill the Strawberries Once the chocolate bases are set, pipe the cheesecake filling into each hollowed strawberry, filling generously until it mounds slightly above the top. Don't worry about being perfect—a little overflow looks rustic and delicious!
Step 7. Add Your Toppings Sprinkle each filled strawberry with your favorite toppings while the filling is still soft so they stick. Try graham cracker crumbs for classic cheesecake vibes, mini chocolate chips, crushed cookies, chopped nuts, or a drizzle of melted white or dark chocolate.t mauris.
Step 8. Chill and Set Refrigerate the filled strawberries for at least 15–20 minutes to let the filling firm up and flavors meld. They'll hold their shape better and taste even more amazing slightly chilled.
Step 9. Serve and Enjoy Arrange on a platter and watch them disappear! These are best enjoyed the same day but can be stored covered in the refrigerator for up to 24 hours. Pro tip: bring them to room temperature for 10 minutes before serving for the creamiest texture.
Frequently Asked Questions
Can I make these ahead of time?
Yes, but with a caveat. You can prep the strawberries (hull and chocolate-dip the bottoms) up to 24 hours ahead and store them in the fridge. However, it's best to fill them no more than 4–6 hours before serving. The cream cheese filling can make the strawberries weep if they sit too long, and you'll lose that fresh, crisp texture.
How long do cheesecake-stuffed strawberries last?
These are best enjoyed within 24 hours of filling. Store them in a single layer in an airtight container in the refrigerator. The strawberries will start releasing moisture after a day, which can make the filling runny and the chocolate base soften. For the freshest taste and texture, make them the same day you plan to serve.
Can I use a different type of chocolate?
Absolutely! Semi-sweet or dark chocolate is classic, but milk chocolate works great if you prefer something sweeter. White chocolate is also delicious and creates a beautiful contrast against the red strawberries. Just make sure to use real chocolate (not candy melts) for the best flavor and that satisfying snap.
What are the best toppings for stuffed strawberries?
The options are endless! Classic graham cracker crumbs give you that authentic cheesecake flavor. Other favorites include: crushed Oreos, mini chocolate chips, chopped pecans or almonds, shredded coconut, caramel or chocolate drizzle, or even a sprinkle of sea salt. Mix and match to create a variety platter, something for everyone!.
Cheesecake-Stuffed Strawberries are an elegant, no-bake dessert that's ready in just 15 minutes. Fresh strawberries are hollowed out, dipped in chocolate for a stable base, then filled with a sweet cream cheese mixture and topped with your favorite garnishes. Perfect for parties, these bite-sized treats combine the freshness of strawberries with rich cheesecake flavor, no oven required. Customize with graham cracker crumbs, chocolate drizzle, nuts, or caramel for a dessert that looks impressive but couldn't be easier to make.
Rate This Recipe!
Preparations
Prep Time:
15 minutes
Chill Time:
15 minutes
Total Time:
30 minutes
Cuisine:
American
Course:
Dessert
Calories:
85 kcal (approx. per strawberry)
Servings:
20-24 stuffed strawberries (depending on size)
Author:
Ronica Rupan
Ingredients
Cheesecake-Stuffed Strawberries Recipe
Forget about fussy, time-consuming desserts—let me introduce you to Cheesecake-Stuffed Strawberries: elegant, easy, and ready in just 15 minutes. A party staple that looks bakery-fancy but requires zero baking, these bite-sized beauties have been stealing the show at gatherings for years, disappearing faster than any cake or pie ever could.
These chocolate-dipped strawberries are creamy, customizable, and irresistibly delicious—a beloved treat that combines fresh fruit with rich cheesecake filling and your favorite toppings. They're often described as the perfect finger dessert, with their sweet-tart strawberry base, velvety cream cheese center, and crunchy chocolate coating. The key is using large, firm strawberries and creating a stable chocolate base, giving each bite that perfect balance of textures and flavors.
Yields
20-24 stuffed strawberries
Ingredients
For the Strawberries:
- 1 lb fresh strawberries (large and firm, about 20-24 berries)
- ½ cup semi-sweet or dark chocolate chips
- 1 teaspoon coconut oil (optional, for smoother chocolate)
For the Cheesecake Filling:
- 8 oz cream cheese, softened (room temperature)
- ¼ cup powdered sugar (adjust to taste)
- 1–2 tablespoons
- ½ teaspoon pure vanilla extract
For the Toppings:
- ¼ cup graham cracker crumbs (or crushed cookies)
- 2 tablespoons mini chocolate chips (optional)
- 2 tablespoons chopped sliced almonds (optional)
- 1 tablespoon melted white chocolate (for drizzle, optional)
- Caramel sauce, for drizzling (as desired)
- Additional toppings of choice (crushed Oreos, shredded coconut, sea salt)
Instructions
1. Prep the Strawberries
Rinse and pat dry the strawberries. Cut off the tops and use a small paring knife or melon baller to carefully hull out the centers, creating a cavity for the filling. Slice a small portion off the bottom of each berry so they can stand upright. Set aside on a parchment-lined tray.
2. Melt the Chocolate Base
In a microwave-safe bowl, combine the chocolate chips and coconut oil. Microwave in 30-second intervals, stirring between each, until completely melted and glossy—about 1–1½ minutes total.
3. Dip the Strawberry Bottoms
Working one at a time, dip just the bottom tip of each hollowed strawberry into the melted chocolate, creating a stable base. Place chocolate-side down on the parchment paper and let set at room temperature for 10–15 minutes, or refrigerate for 5 minutes.
4. Make the Cheesecake Filling
In a medium bowl, beat the softened cream cheese with powdered sugar, 1–2 tablespoons heavy whipping cream and vanilla extract until smooth, fluffy, and no lumps remain. The texture should be creamy and pipeable—think thick frosting consistency.
Tip: Make sure your cream cheese is fully softened to room temperature for the smoothest filling. Cold cream cheese will be lumpy and difficult to pipe.
5. Prepare Your Piping Bag
Transfer the cheesecake filling to a piping bag fitted with a large round or star tip. If you don't have a piping bag, use a zip-top bag and snip off one corner.
6. Fill the Strawberries
Once the chocolate bases are set, pipe the cheesecake filling into each hollowed strawberry, filling generously until it mounds slightly above the top.
Pro Tip: Work quickly and keep filled strawberries refrigerated. The cream cheese filling is stable but tastes best when fresh and chilled.
7. Add Your Toppings
Sprinkle each filled strawberry with your favorite toppings while the filling is still soft. Try graham cracker crumbs for classic cheesecake vibes, mini chocolate chips, crushed cookies, chopped nuts, or a drizzle of melted chocolate or caramel.
8. Chill and Set
Refrigerate the filled strawberries for at least 15–20 minutes to let the filling firm up and flavors meld.
9. Serve and Enjoy
Arrange on a platter and serve chilled. These are best enjoyed the same day for optimal freshness and texture.
Let's Talk Ingredients: Why They Matter
Fresh Strawberries
Large, firm strawberries are essential—they act as the edible vessel and need to be sturdy enough to hold the filling without collapsing. Look for berries with vibrant red color and fresh green tops. The natural sweetness and slight tartness balance perfectly against the rich cream cheese filling.
Cream Cheese & Powdered Sugar
This duo creates that signature cheesecake flavor and silky-smooth texture. Powdered sugar dissolves completely (no graininess!) and sweetens without weighing down the filling. Make sure the cream cheese is fully softened for the fluffiest, most pipeable consistency.
Semi-Sweet Chocolate
The chocolate base isn't just decorative—it creates a stable foundation so your strawberries stand upright and adds a delicious flavor contrast. A touch of coconut oil makes the chocolate smooth and glossy with that satisfying snap.
Graham Cracker Crumbs
This classic cheesecake topping brings authentic flavor and a satisfying crunch. It's the bridge between "stuffed strawberry" and "actual cheesecake experience." Feel free to swap for any topping that makes your heart happy, that's the beauty of this recipe!
More Recipes

Connect with Us on Social Media:

Hey! It’s Ronica!
This is where I love to share my passion for cooking, baking, and flavor. When I’m not creating delicious recipes, you’ll find me spending time with my family, working on my spice blends at Flora & Mana, or enjoying a homemade baked goods. Join me on this culinary journey to taste, healthy meals and fun kitchen hacks!
Read MoreWe'd Love to Hear from you!
Drop a Comment Below!
Leave a Reply
Get recipes first!
Subscribe now to get exclusive recipes, kitchen tips, and cooking inspiration delivered straight to your inbox.
Comments (2)
Margaret Werthwein
live these elegant sweet beautiful treat
Millie
Excelente