Quick links
3-Ingredient High-Protein Cottage Cheese Cheesecake
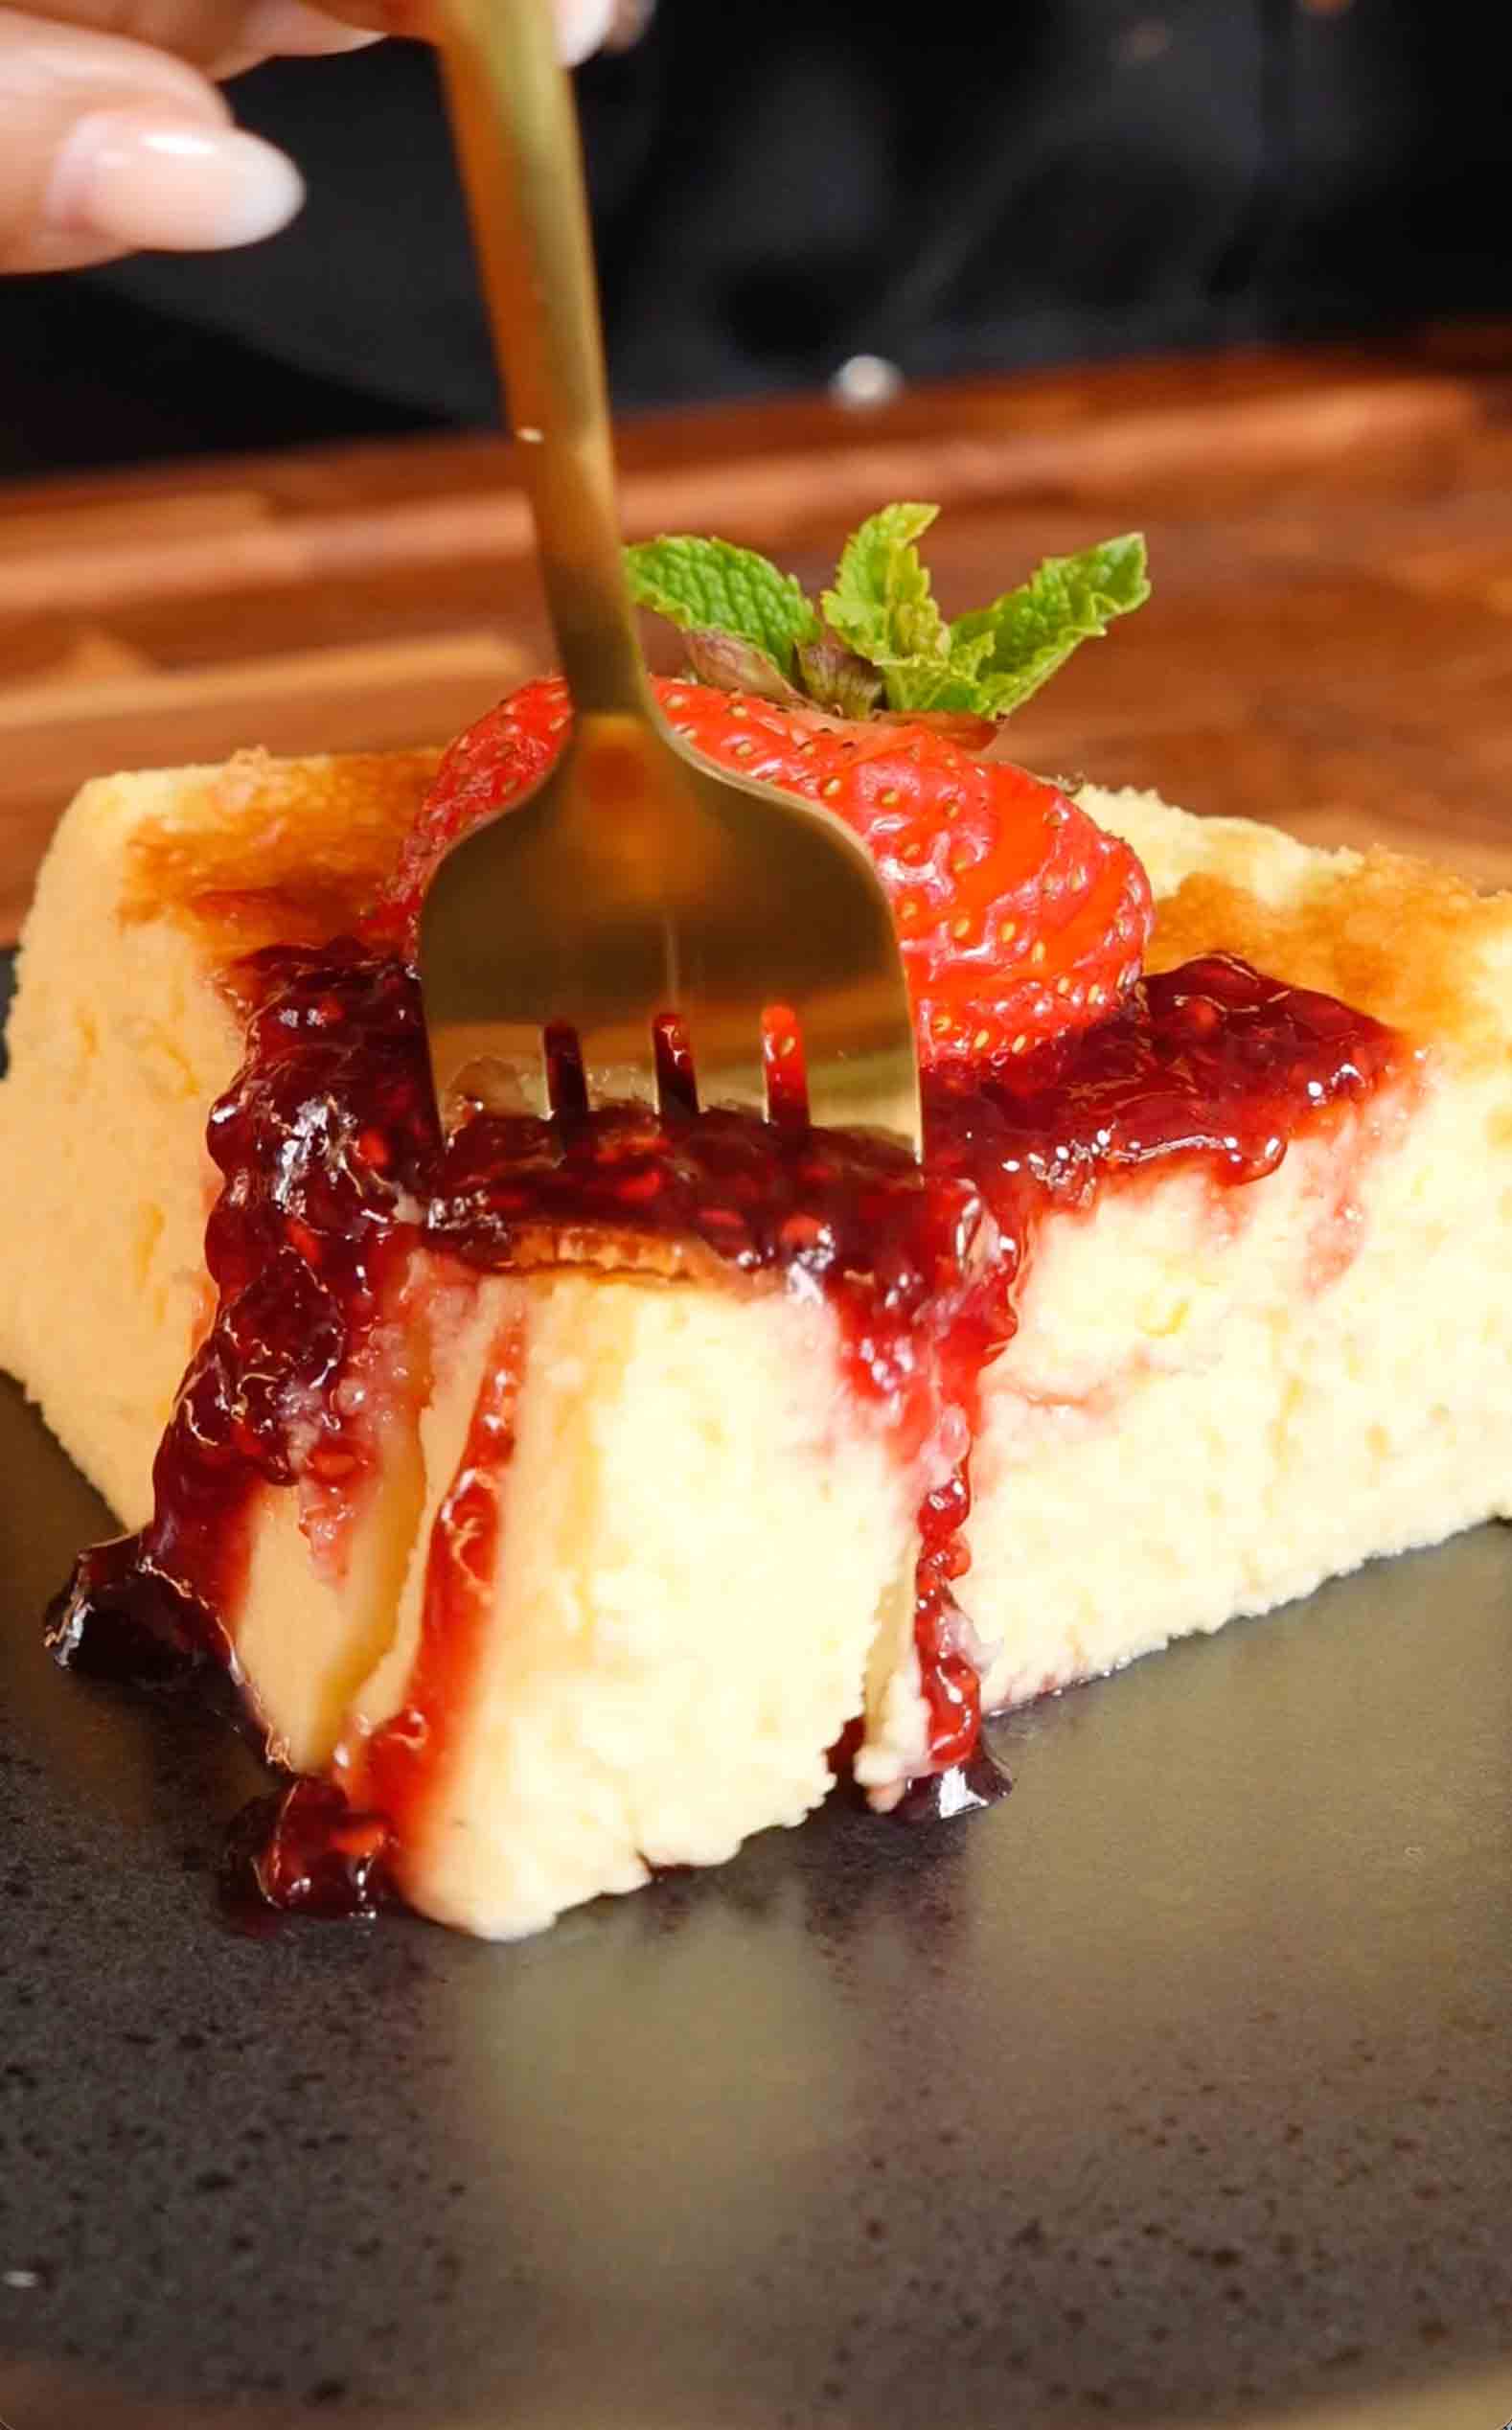
This 3-ingredient high-protein cottage cheese cheesecake is pure magic! With just white chocolate chips, cottage cheese, and eggs, you get the most creamy, decadent, protein-packed cheesecake that tastes like it came from a fancy bakery. The secret? Blending the cottage cheese until it's completely smooth and silky, which eliminates any graininess and creates that luxurious cheesecake texture. White chocolate chips get melted and blended into the cottage cheese and eggs, adding sweetness and richness without any added sugar. The cheesecake bakes in a water bath, which ensures even, gentle cooking and prevents cracking. After 50-60 minutes in the oven, the cheesecake comes out with set edges and a slightly jiggly center (about 1 inch in diameter), which is exactly what you want! As it cools at room temperature, it will deflate slightly, which is totally normal and expected. After a few hours chilling in the fridge (or ideally overnight), you're left with a dense, creamy, protein-rich cheesecake that slices beautifully and tastes incredible. Each slice has about 15-20 grams of protein depending on how you cut it, making this a dessert you can actually feel good about eating! Top with fresh berries like strawberries, blueberries, or raspberries for a pop of color and tartness that balances the sweet white chocolate. This is perfect for meal prep, healthier desserts, post-workout treats, or anytime you want cheesecake without all the guilt!
This 3-ingredient high-protein cottage cheese cheesecake is pure magic! Just white chocolate chips, cottage cheese, and eggs create the creamiest, most decadent cheesecake. The secret is blending until completely smooth. Baked in a water bath, topped with fresh berries, and packed with protein!
Rate This Recipe!
Preparations
Prep Time:
Chill Time:
Total Time:
Cuisine:
Course:
Calories:
Servings:
Author:
Ingredients
Ingredients
- 1¼ cups white chocolate chips
- 1⅔ cups Knudsen 4% cottage cheese, room temperature
- 5 large eggs, room temperature
For Serving:
- Fresh berries (strawberries, blueberries, raspberries)
- Optional: fresh mint leaves for garnish
Instructions
- Preheat and Prep the Pan Preheat your oven to 350°F (175°C). Generously grease a 6-inch round cake pan with cooking spray or butter, making sure to get the bottom and sides really well. Line the bottom with a circle of parchment paper, then grease the parchment too. Thoroughly grease the sides again. This double greasing ensures easy release!
- Melt the White Chocolate Place the white chocolate chips in a microwave-safe bowl. Microwave in 30-second intervals, stirring thoroughly between each interval, until the chocolate is completely melted and smooth. This usually takes 1½-2 minutes total. Let the melted chocolate cool for about 5 minutes so it doesn't scramble the eggs when you add it to the blender.
- Blend the Base - THE MOST IMPORTANT STEP Add the room temperature cottage cheese and eggs to a high-powered blender. Blend on high speed until the mixture is COMPLETELY smooth and silky with absolutely no lumps or graininess visible. This usually takes 1-2 minutes of blending. When you think it's done and looks smooth, blend for another 30 seconds! This extra blending is the secret to zero graininess and that perfect creamy cheesecake texture. The mixture should look like smooth cream with no cottage cheese curds visible at all.
- Add the Chocolate Pour the cooled melted white chocolate into the blender with the cottage cheese mixture. Blend again on high speed until the chocolate is fully incorporated and the batter is uniform in color with no white streaks. The batter should be smooth, pale, and creamy, about 30-45 seconds of blending.
- Prepare the Water Bath Pour the batter into your prepared 6-inch cake pan. Place the filled cake pan into a larger baking pan (a 9-inch square pan works perfectly). Carefully pour hot water (not boiling, just very hot tap water) into the outer larger pan until the water level reaches about halfway up the sides of the 6-inch cheesecake pan. Be careful not to splash any water into the cheesecake batter!
- Bake the Cheesecake Carefully transfer the water bath setup to the preheated oven. Bake for 50-60 minutes until the edges of the cheesecake are set and firm but the center still has a slight jiggle when you gently shake the pan. The jiggly area in the center should be about 1 inch in diameter. The cheesecake will continue cooking as it cools, so don't overbake! The top should look matte and set, not wet or shiny.
- Cool Completely Remove the cheesecake from the oven and carefully lift the 6-inch pan out of the water bath. Let the cheesecake cool completely at room temperature on a wire rack, about 1-2 hours. The cheesecake will deflate slightly as it cools, which is completely normal and expected! Don't worry, this is part of the process.
- Chill Once the cheesecake is at room temperature, cover the pan with plastic wrap or foil and refrigerate for at least 3-4 hours, but ideally overnight. The cheesecake needs this time to fully set and develop the best texture and flavor.
- Unmold and Serve When ready to serve, run a thin knife or offset spatula around the edges of the cheesecake to loosen it from the pan. Place a plate over the top of the pan and flip the whole thing upside down so the cheesecake releases onto the plate. Remove the pan and peel off the parchment paper. Carefully flip the cheesecake right side up onto your serving plate. Slice with a sharp knife, wiping the blade clean between each cut for neat slices. Top each slice with fresh berries and optional mint leaves. Serve chilled and enjoy!
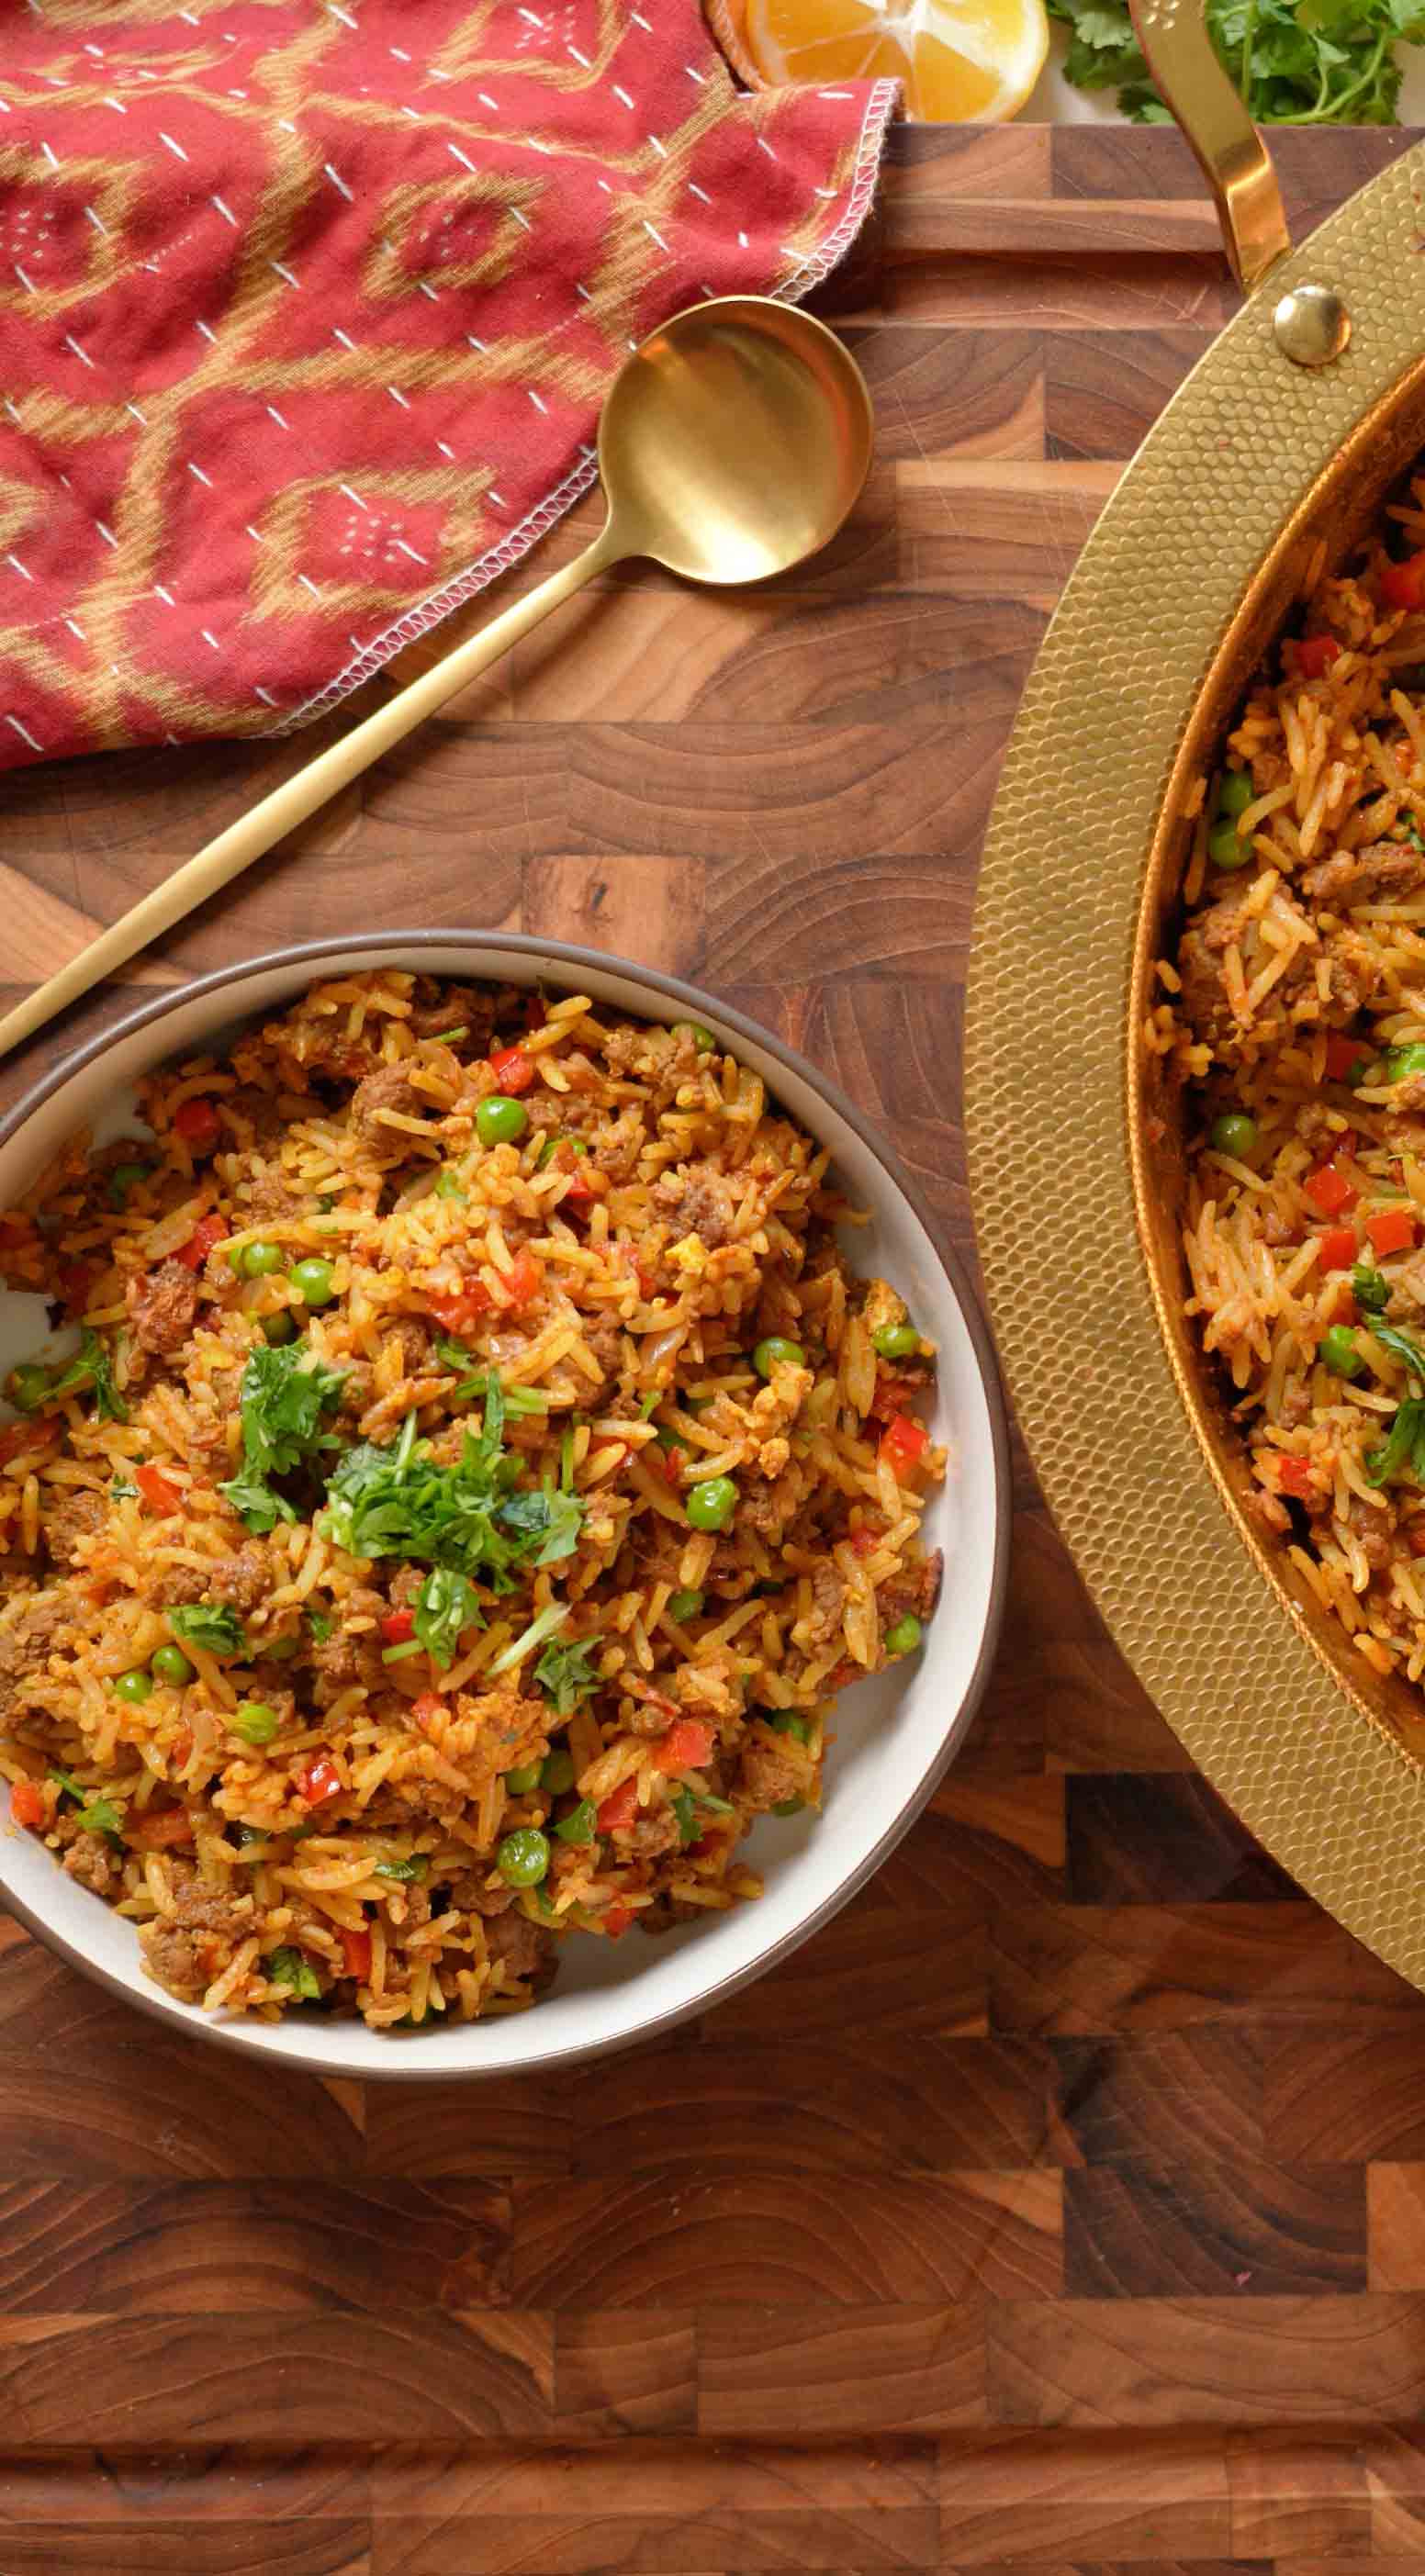
Spiced Keema Fried Rice
MANA5 for 5% off your Nuur Wok order (min $50 spend) at One.Pot.Kitchen.
This spiced keema fried rice made in the Nuur Wok by One.Pot.Kitchen is packed with bold South Asian flavors, comes together in one pot, and offers the easiest cleanup you've ever seen! Ground beef or lamb gets cooked with aromatic cumin seeds, garlic paste, ginger paste, and a robust blend of warming spices including curry powder, turmeric, cumin, coriander, and paprika, creating the most flavorful keema (spiced ground meat) base. Tomato paste adds depth and richness, while fresh Thai chilis bring heat that you can adjust to your preference. The keema simmers with a splash of boiling water until deeply flavored and tender. Then you push it to the side of the wok, scramble eggs in a little ghee right in the center, and add cold day-old basmati rice (the secret to perfect fried rice!), diced bell peppers, and green peas. Everything gets tossed together on high heat until the rice is slightly crispy and every grain is coated in those incredible spices. Soy sauce or coconut aminos and sesame oil go in for that classic fried rice umami, and the whole dish gets finished with fresh cilantro, a bright squeeze of lemon juice, and crispy fried onions on top for crunch and sweetness. The Nuur Wok's Ajrak-inspired design is rooted in South Asian tradition and honestly too beautiful to put away. The wide surface and even heat distribution make this dish come together perfectly with minimal effort and maximum flavor. This is comfort food that feels special, feeds a crowd, and uses one pan from start to finish!
This spiced keema fried rice is packed with bold South Asian flavors! Ground meat cooked with aromatic spices, scrambled eggs, day-old rice, peppers, and peas, all tossed together in one wok. Topped with cilantro, lemon juice, and crispy fried onions. Easy cleanup and maximum flavor!
Rate This Recipe!
Preparations
Prep Time:
15 minutes
Cook Time:
25 minutes
Total Time:
40 minutes
Cuisine:
South Asian Fusion
Course:
Main Course, Dinner
Calories:
520 kcal (approx. per serving)
Servings:
4
Author:
Ronica Rupan
Ingredients
Ingredients
For the Keema (Spiced Ground Meat):
- 1 pound lean ground beef or lamb
- 1 small red onion, finely diced
- 1 teaspoon cumin seeds
- 2 tablespoons garlic paste
- 2 tablespoons ginger paste
- 2 tablespoons tomato paste
- 1 teaspoon paprika
- 1 teaspoon ground coriander
- 2 tablespoons curry powder
- 1 teaspoon ground cumin
- 1 teaspoon ground turmeric
- Kosher salt and black pepper, to taste
- Fresh Thai chilis, sliced (adjust to taste for heat)
- ¼ cup boiling water
- 2 tablespoons ghee
For the Fried Rice:
- 3 cups cooked day-old basmati rice, cold
- 1 bell pepper, diced
- ½ cup frozen or fresh green peas
- 2 large eggs, lightly beaten
- 3 tablespoons soy sauce or coconut aminos
- 1 teaspoon sesame oil
- 2 tablespoons ghee
For Topping:
- Fresh cilantro, chopped
- Fresh lemon juice, for finishing
- Crispy fried onions, for topping
Instructions
- Toast the Cumin Seeds Heat 2 tablespoons of ghee in the Nuur Wok over medium-high heat. Once the ghee is hot and shimmering, add the cumin seeds. Let them sizzle for about 30 seconds until fragrant and toasted. This blooms the spices and releases their essential oils!
- Cook the Onion Add the finely diced red onion to the wok. Cook, stirring occasionally, for 4-5 minutes until the onion is softened, translucent, and starting to turn golden at the edges.
- Add Aromatics Stir in the garlic paste and ginger paste. Cook for 1 minute, stirring constantly, until very fragrant but not browned. The paste should smell amazing and aromatic.
- Brown the Meat Add the ground beef or lamb to the wok. Break it up with a wooden spoon or spatula and cook for 6-7 minutes, stirring occasionally, until the meat is browned and no pink remains. Break up any large chunks as you go.
- Add Spices and Simmer Add the tomato paste, turmeric, curry powder, ground cumin, paprika, ground coriander, salt, black pepper, and sliced Thai chilis to the browned meat. Stir everything together until the meat is completely coated in the spice mixture and it smells incredibly fragrant, about 1 minute. Pour in the ¼ cup of boiling water, stir to combine, then cover the wok with a lid. Reduce heat to medium-low and let simmer for 5 minutes until the keema is deeply flavored and the liquid has mostly absorbed.
- Scramble the Eggs Push the keema to the sides of the wok, creating a well in the center. Add a little more ghee to the center if needed. Pour the lightly beaten eggs into the center well. Let them set slightly for 10-15 seconds, then scramble gently until just cooked through but still soft. Mix the scrambled eggs into the keema.
- Add Rice and Vegetables Add the cold day-old basmati rice, diced bell pepper, and green peas to the wok. Increase heat to high. Using a spatula or large spoon, toss everything together vigorously for 2-3 minutes, breaking up any clumps of rice and mixing the keema throughout. The rice should start to get slightly crispy on the edges and heated through completely.
- Season and Finish Add the soy sauce (or coconut aminos) and sesame oil. Toss everything together to combine and coat every grain of rice. Cook for another 1-2 minutes on high heat, tossing constantly, until everything is well mixed and the rice is slightly crispy in spots.
- Top and Serve Transfer the keema fried rice to a large serving platter or individual bowls. Top generously with fresh chopped cilantro, a good squeeze of fresh lemon juice, and a handful of crispy fried onions for crunch and sweetness. Serve immediately while hot!
Golden Glow Juice for Your Skin

This golden glow juice for your skin is the ultimate beauty drink that nourishes your skin from the inside out! Packed with skin-loving ingredients like turmeric, mango, carrot, pineapple, oranges, and lemon, this juice is sweet, citrusy, and made to give your complexion that natural, healthy glow. Turmeric contains curcumin, which is known for its powerful anti-inflammatory and skin-brightening properties that may help fade hyperpigmentation and even out skin tone. Mango and carrot are loaded with beta-carotene and vitamin A, which support skin cell renewal and give your skin that lit-from-within radiance. Pineapple brings bromelain, a natural enzyme that supports digestion and helps reduce acne and puffiness by fighting internal inflammation. Oranges and lemons are bursting with vitamin C, which is essential for collagen production (hello, plump skin!) and helps fade dark spots and brighten overall complexion. A pinch of black pepper is key because it dramatically enhances the bioavailability of curcumin, ensuring your body actually absorbs all those turmeric benefits instead of just passing them through. Coconut water adds hydration from the inside out with its electrolytes, helping to maintain skin elasticity and that coveted dewy, glowing look. You juice all the fresh fruits and vegetables together, stir in coconut water and black pepper, and optionally strain for a smoother texture. The result is a vibrant golden-orange juice that tastes like a tropical vacation and makes your skin happy. This is beauty from within at its finest! Perfect for morning wellness routines, post-workout hydration, or anytime you want to boost your glow naturally.
Frequently Asked Questions
Q: Can I use turmeric powder instead of fresh turmeric root?
A: Yes! Use ½ teaspoon of turmeric powder if you don't have fresh turmeric root. Fresh turmeric has a slightly brighter, more vibrant flavor, but powder works perfectly and is much easier to find. Just make sure your turmeric powder is fresh and not old, as the curcumin degrades over time.
Q: Why do I need to add black pepper?
A: Black pepper contains piperine, which increases the bioavailability of curcumin (the active compound in turmeric) by up to 2000%! Without black pepper, your body absorbs very little of the turmeric's benefits. Just a tiny pinch makes a huge difference, and you won't taste it in the juice at all.
Rate This Recipe!
Preparations
Prep Time:
10 minutes
Cook Time:
0 minutes
Total Time:
10 minutes
Cuisine:
Wellness
Course:
Drinks
Calories:
140 kcal (approx. per serving)
Servings:
3
Author:
Ronica Rupan
Ingredients
Ingredients
- 1 cup fresh pineapple, chopped
- 1 ripe mango, peeled and chopped
- 2 oranges, peeled
- 2 carrots, peeled
- 1 lemon, peeled
- ½ inch fresh turmeric root (or ½ teaspoon turmeric powder)
- 1 cup coconut water
- Pinch of black pepper
Instructions
- Prep the Produce Wash and peel all your fruits and vegetables. Chop the pineapple and mango into chunks that will fit through your juicer. Peel the oranges and lemon, removing as much of the white pith as possible (though a little is okay and adds nutrients). Peel the carrots and the turmeric root if using fresh.
- Juice Everything Feed the pineapple, mango, oranges, carrots, lemon, and fresh turmeric root through your juicer according to your juicer's instructions. Alternate between soft fruits and harder vegetables for best results and to prevent clogging. Collect all the juice in a large pitcher or bowl.
- Add Coconut Water and Black Pepper Pour the fresh juice into a pitcher. Stir in 1 cup of coconut water and a generous pinch of black pepper. The black pepper is essential for curcumin absorption, so don't skip it! Mix everything together well.
- Optional: Strain for Smoothness If you prefer a completely smooth, pulp-free juice, pour the mixture through a fine-mesh strainer into a clean pitcher or glass. Use the back of a spoon to press down and extract as much liquid as possible. If you like pulp and fiber, skip this step!
- Serve Chilled Pour the golden glow juice into glasses over ice, or chill in the refrigerator for 30 minutes before serving. Drink immediately for maximum freshness and nutrient content. This recipe makes approximately 3 servings (about 8-10 ounces per serving).
Kiwifruit Coconut Chia Popsicles
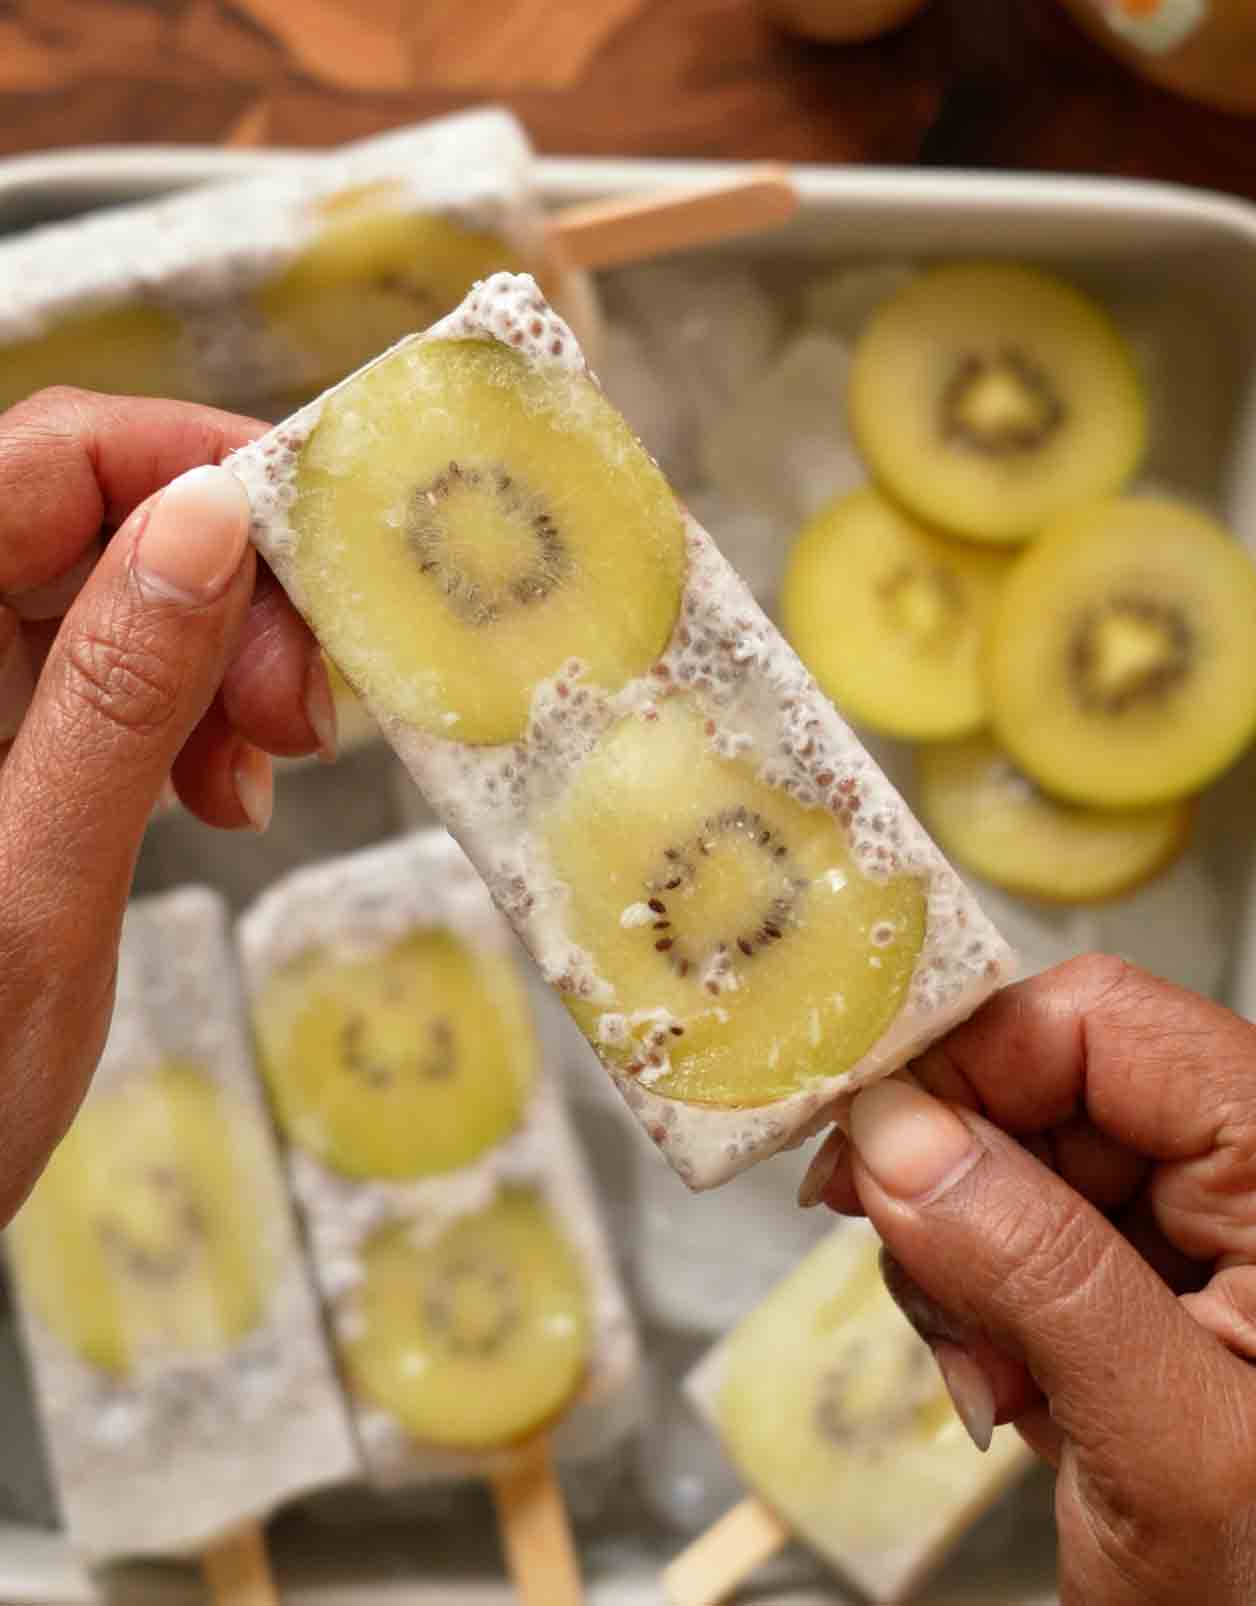
These Zespri SunGold kiwifruit coconut chia popsicles are the most refreshing, healthy frozen treat that's as beautiful as it is delicious! Zespri SunGold kiwifruit slices get pressed against the sides of popsicle molds so their gorgeous golden flesh faces outward, creating stunning visual rings when frozen. The filling is a creamy blend of full-fat canned coconut milk, coconut water, chia seeds, and a touch of honey or agave syrup for natural sweetness. The chia seeds add texture, protein, fiber, and omega-3s, plus they create little speckles throughout the popsicles that look like vanilla bean flecks. When you pour the coconut chia mixture into the molds over the kiwi slices and freeze for at least 4 hours or overnight, the result is a creamy, tropical popsicle studded with nutritious chia seeds and bright kiwifruit. The Zespri SunGold kiwi is perfectly sweet with a smooth, tropical flavor and that signature golden flesh that's packed with vitamin C. These popsicles are naturally dairy-free, refined sugar-free (if using agave), and feel like a treat while being genuinely nourishing. They're perfect for hot summer days, healthy after-school snacks, post-workout refreshment, or anytime you want something cold and sweet without all the added sugar. The contrast between creamy coconut, chewy chia, and juicy kiwi is absolutely perfect!
These Zespri SunGold kiwifruit coconut chia popsicles are refreshing, healthy, and stunning! Kiwi slices pressed against the molds create beautiful golden rings, filled with creamy coconut milk, coconut water, chia seeds, and honey. Naturally dairy-free and packed with nutrients!
Rate This Recipe!
Preparations
Prep Time:
15 minutes
Freeze Time:
4 hours (or overnight)
Total Time:
4 hours 15 minutes
Cuisine:
Tropical
Course:
Dessert, Snack
Calories:
180 kcal (approx. per popsicle)
Servings:
6 popsicles
Author:
Ronica Rupan
Ingredients
ngredients
- 3 Zespri SunGold Kiwifruit, sliced horizontally into rounds
- 1 can (13.5 ounces) full-fat canned coconut milk, well shaken
- ⅔ cup coconut water (or any milk alternative)
- 5 tablespoons chia seeds
- ½ tablespoon honey or agave syrup, plus more to taste
Instructions
- Make the Chia Coconut Mixture In a medium bowl or large measuring cup, stir together the full-fat coconut milk (make sure it's well shaken!), coconut water, chia seeds, and honey or agave syrup until everything is well combined. Taste the mixture and add more honey or agave if you prefer it sweeter. Remember, the kiwifruit will add natural sweetness too! Set aside for 5 minutes to let the chia seeds start to absorb liquid and thicken slightly.
- Check Kiwi Ripeness and Slice Hold each Zespri SunGold kiwifruit in your palm and gently squeeze to check for ripeness. The fruit should yield slightly to gentle pressure, similar to a ripe avocado or mango. If it feels rock hard, let it ripen at room temperature for a day or two. Once ripe, use a sharp knife to slice each kiwifruit horizontally (not lengthwise) into rounds about ¼ inch thick. The rounds should be thick enough to clearly display the beautiful golden center and star pattern. You'll need 2-3 slices per popsicle mold depending on the size of your molds.
- Layer Kiwi in Popsicle Molds Place kiwi slices into your popsicle molds, pressing them gently against the sides of the molds using a chopstick, the handle of a spoon, or your finger. Position the slices so the golden flesh faces outward toward the clear mold wall. This creates that gorgeous visual effect when frozen! You can use 2-3 slices per mold, arranging them at different heights for a layered look.
- Pour Chia Mixture and Freeze Give the chia coconut mixture another quick stir to redistribute the chia seeds (they settle!). Gently pour the mixture into each popsicle mold over the kiwi slices, filling almost to the top and leaving about ¼ inch of space for expansion. The chia seeds will distribute throughout as you pour. Insert popsicle sticks into the center of each mold. Freeze for at least 4 hours or overnight until the popsicles are completely solid and frozen through.
- Unmold and Serve When ready to serve, remove the popsicle mold from the freezer. Run warm (not hot!) water over the outside of the molds for 10-20 seconds until the popsicles loosen and release easily. Gently pull on the stick to remove each popsicle. If they're still stuck, run under warm water for a few more seconds. Serve immediately and enjoy the creamy, tropical deliciousness!
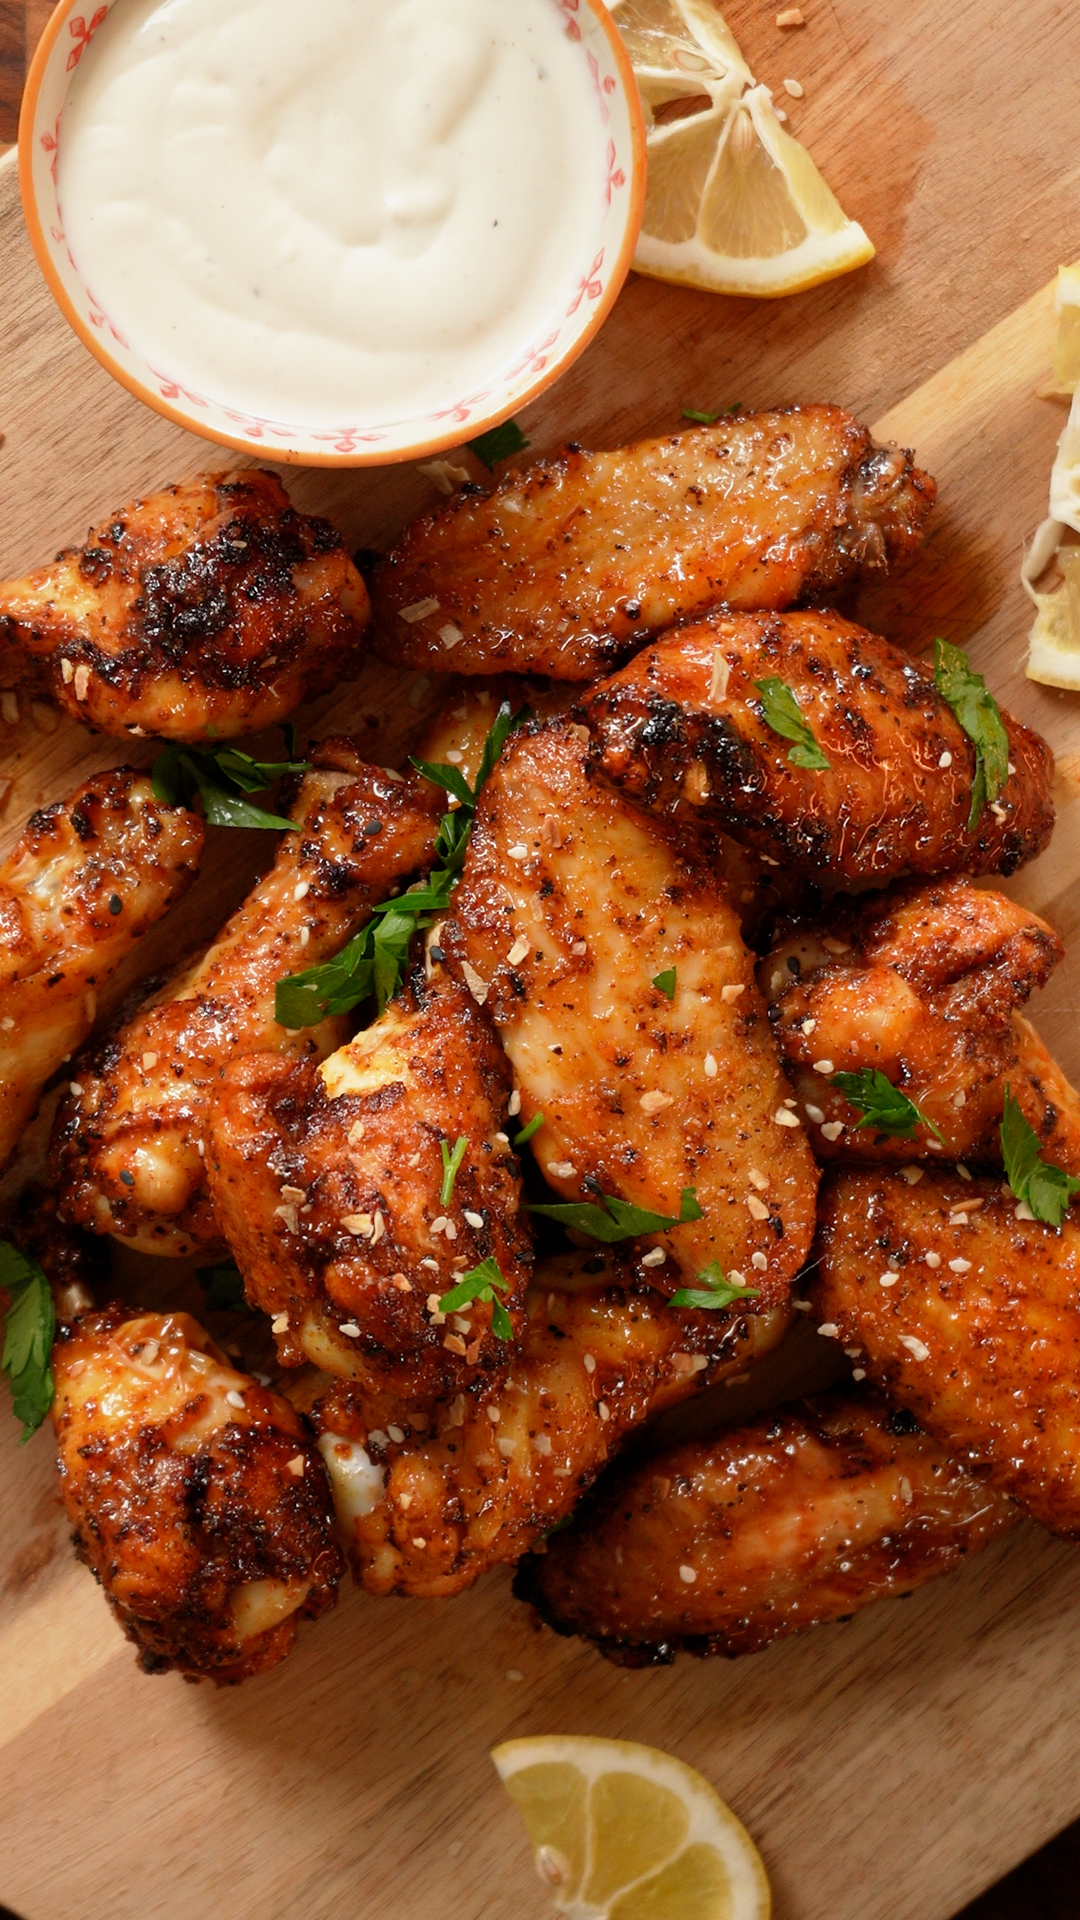
Air-Fried Lemon Pepper Honey Wings
These air-fried lemon pepper honey wings are crispy, golden, and absolutely addictive with the perfect balance of bright citrus, savory seasoning, and gentle sweetness! Chicken wings get split and patted completely dry (this is crucial for crispy skin!), then tossed with avocado oil, lemon pepper seasoning, garlic powder, smoked paprika, salt, and black pepper until every wing is fully coated in those bold spices. The wings go into a preheated air fryer arranged in a single layer, and here's where the magic happens: you sprinkle cornstarch on both sides of the wings right in the air fryer basket. The cornstarch creates an incredibly crispy, almost crackling skin that stays crispy even after tossing in the glaze. The wings air fry at 400°F for 22-25 minutes, flipping halfway through, until they're deep golden brown, crispy all over, and cooked through to 165°F. While the wings cook, you make the most incredible lemon honey butter glaze: unsalted butter gets melted in a small saucepan, then honey, fresh lemon zest and juice, lemon pepper seasoning, and a pinch of salt get stirred in and warmed through gently without boiling. This creates a glossy, buttery glaze that's tangy from the lemon, sweet from the honey, and savory from the lemon pepper seasoning. Once the wings are done, they get transferred to a large bowl and tossed in that warm lemon honey butter glaze until every wing is glistening and fully coated. The glaze soaks into all the crispy crevices while the cornstarch coating keeps the skin from getting soggy. The wings get arranged on a platter, sprinkled with fresh chopped parsley for color and freshness, and garnished with extra lemon pepper seasoning for an extra pop of flavor. Serve them immediately alongside ranch dressing for cooling dips and lemon wedges for anyone who wants extra citrus brightness. Every bite has crispy skin, juicy tender meat, and that perfect sweet-tangy-savory glaze. These are perfect for game day, parties, appetizers, or anytime you want wings that taste like they came from a restaurant but are made in your air fryer in under an hour!
Frequently Asked Questions
Q: Can I bake these in the oven instead of using an air fryer?
A: Yes! Preheat your oven to 425°F and line a baking sheet with a wire rack. Arrange the seasoned and cornstarch-dusted wings on the rack in a single layer. Bake for 40-45 minutes, flipping halfway through, until golden and crispy and the internal temperature reaches 165°F. The air fryer makes them crispier faster, but the oven works well too!
Q: Why do I need to pat the wings dry?
A: Moisture is the enemy of crispy skin! Patting the wings completely dry with paper towels removes excess moisture so the oil and seasonings can adhere properly and the cornstarch can create that extra-crispy coating. Skip this step and your wings will steam instead of crisp up. It's one of the most important steps!
Q: Can I use frozen wings?
A: It's best to thaw frozen wings completely before cooking. Thaw them in the fridge overnight, then pat them very dry before seasoning. Cooking from frozen will result in uneven cooking and won't give you that crispy skin. If you're in a pinch, you can air fry frozen wings at 380°F for 10 minutes first to thaw, then pat dry, season, add cornstarch, and continue with the recipe.
Q: Can I make these ahead of time?
A: Wings are always best fresh and hot! However, you can cook the wings up to 2 hours ahead and keep them warm in a 200°F oven. Toss them in the glaze right before serving. Leftover wings can be reheated in the air fryer at 375°F for 5-7 minutes to crisp them back up, though they won't be quite as crispy as fresh.
These air-fried lemon pepper honey wings are crispy, golden, and perfectly glazed! Chicken wings coated in lemon pepper seasoning and cornstarch for extra-crispy skin, air-fried until golden, then tossed in a buttery lemon honey glaze. Topped with parsley and served with ranch and lemon wedges. Bold flavor in under an hour!
Rate This Recipe!
Preparations
Prep Time:
15 minutes
Cook Time:
30 minutes
Total Time:
45 minutes
Cuisine:
American
Course:
Main Course, Dinner, Appetizer
Calories:
480 kcal (approx. per serving)
Servings:
4
Author:
Ronica Rupan
Ingredients
Ingredients
For the Wings:
- 2 pounds chicken wings, split into drumettes and flats
- 3 tablespoons avocado oil
- 2 teaspoons lemon pepper seasoning
- 1½ teaspoons garlic powder
- 1½ teaspoons smoked paprika
- 1 teaspoon kosher salt
- ½ teaspoon black pepper
- 2 tablespoons cornstarch
For the Lemon Honey Butter Glaze:
- 3 tablespoons unsalted butter
- 2 tablespoons honey
- 1 teaspoon lemon zest plus 2 tablespoons fresh lemon juice
- ½ teaspoon lemon pepper seasoning, plus more for garnish
- Pinch of kosher salt
For Serving:
- 2 tablespoons fresh flat-leaf parsley, chopped
- ½ cup ranch dressing
- Lemon wedges
Instructions
- Season the Wings Pat the chicken wings completely dry with paper towels. This step is crucial for crispy skin! Place the dried wings in a large bowl. Add the avocado oil, lemon pepper seasoning, garlic powder, smoked paprika, salt, and black pepper. Toss everything together with your hands or tongs until all the wings are fully coated in the oil and seasonings.
- Preheat the Air Fryer Preheat your air fryer to 400°F (200°C) for about 5 minutes. This ensures the wings start cooking immediately and get crispy faster.
- Add Cornstarch and Air Fry Arrange the seasoned wings in a single layer in the air fryer basket. Don't overcrowd them or they won't crisp up properly. You may need to work in batches depending on your air fryer size. Sprinkle the cornstarch evenly over the wings on both sides. Air fry at 400°F for 22-25 minutes, flipping the wings halfway through at the 11-12 minute mark, until the chicken is deep golden brown, crispy all over, and the internal temperature registers 165°F on an instant-read thermometer inserted into the thickest part of the wing.
- Make the Lemon Honey Butter Glaze While the wings cook, make the glaze. Melt the unsalted butter in a small saucepan over medium-low heat. Add the honey, lemon zest, lemon juice, lemon pepper seasoning, and a pinch of salt. Cook, stirring constantly, until everything is combined and warmed through, about 2 minutes. Do not let it boil or the butter will separate. Remove from heat and set aside until the wings are ready.
- Toss Wings in Glaze Transfer the cooked crispy wings to a large clean bowl. Pour the warm lemon honey butter glaze over the wings. Toss gently but thoroughly until every wing is fully coated in the glossy glaze.
- Serve Arrange the glazed wings on a large serving platter. Sprinkle with the chopped fresh parsley for color and freshness. Garnish with additional lemon pepper seasoning for extra flavor. Serve immediately while hot alongside ranch dressing for dipping and lemon wedges for squeezing over the top. Enjoy!
Creole Red Beans and Authentic Italian Rice
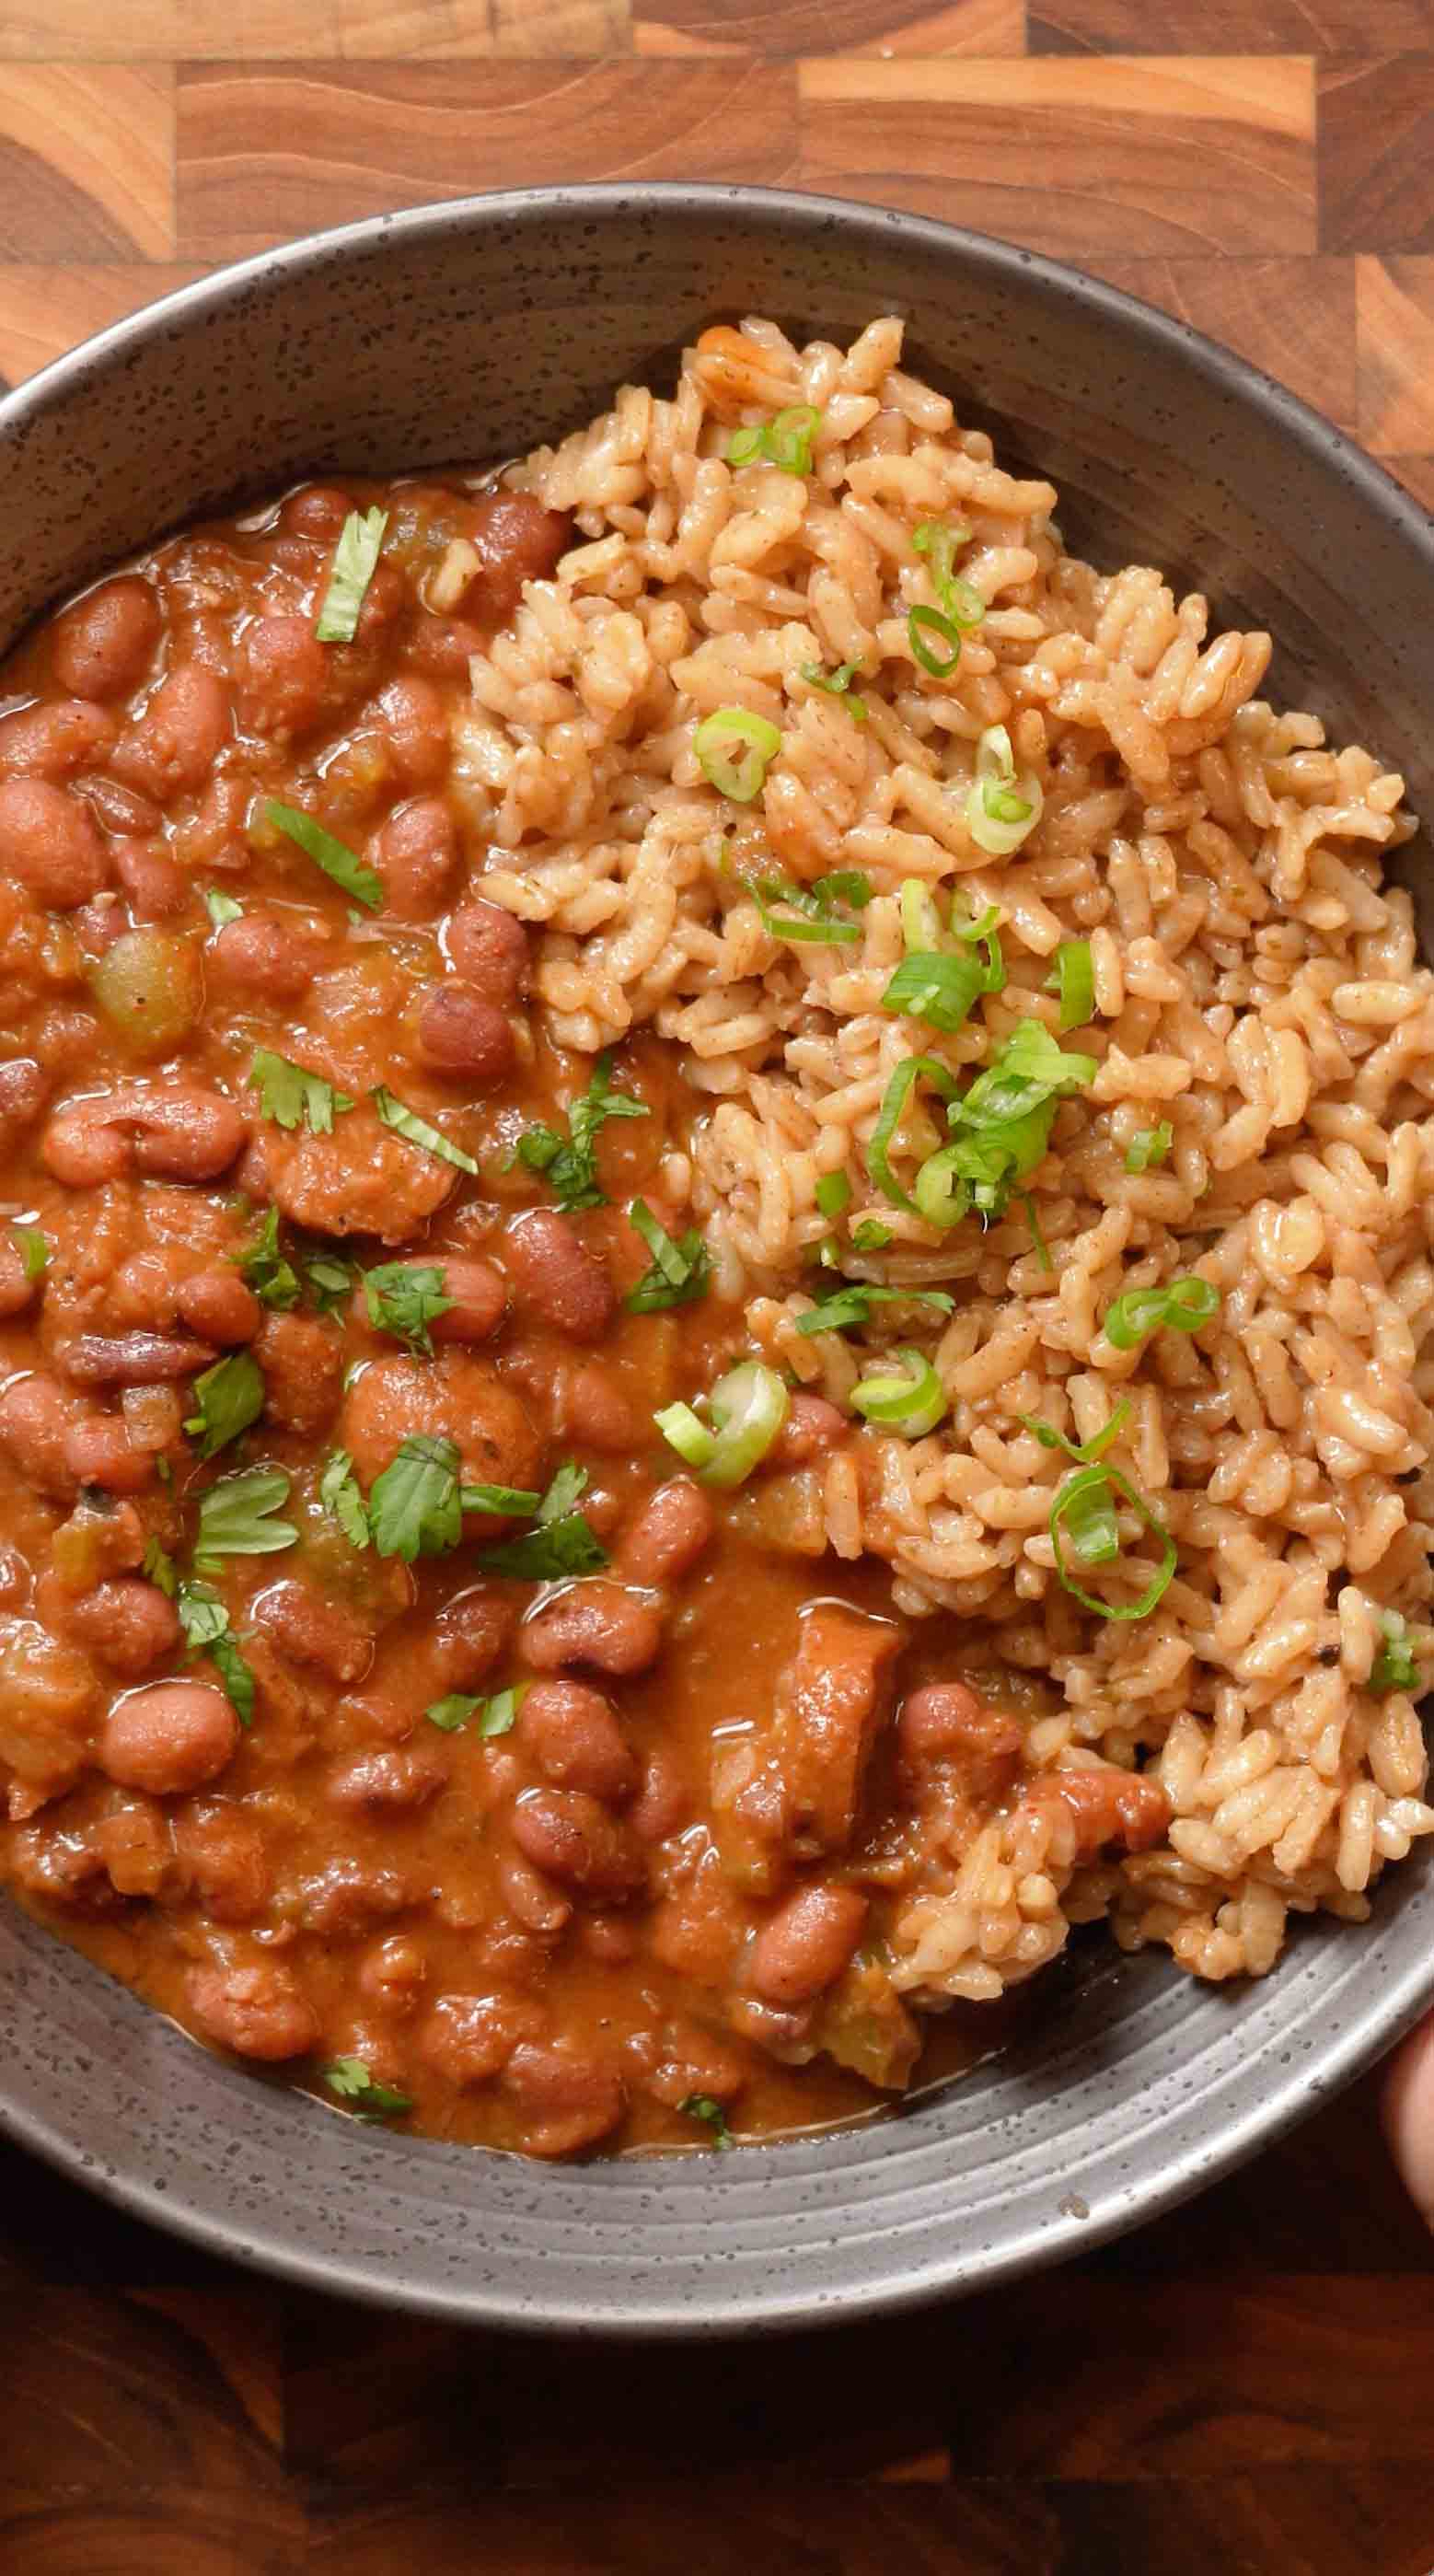
This Creole red beans and authentic Italian rice is the ultimate comfort food with a gourmet twist that elevates a classic Southern dish! Dried red beans get quick-soaked and then simmered low and slow with the holy trinity of Creole cooking: diced yellow onion, celery, and green bell pepper that get sautéed until softened and fragrant. Sliced smoked chicken sausage gets browned first to develop deep flavor, then joins the party along with minced garlic, Creole seasoning, smoked paprika, and bay leaves. Everything simmers together in chicken broth for 55-65 minutes until the beans are tender, creamy, and infused with all those incredible Creole spices. Here's where it gets brilliant: instead of serving the beans over plain rice, you ladle out 3 cups of that hot, spiced Creole broth from the beans and use it to cook authentic Italian rice (look for the Made in Italy label or PGI and PDO certified stamps to ensure you're getting authentic Italian quality). The authentic Italian rice gets toasted in golden brown butter with more Creole seasoning and smoked paprika until it smells nutty and aromatic, then you add the warm Creole broth one ladle at a time, stirring every few minutes and letting each addition absorb before adding the next, just like making risotto. This technique creates the creamiest, most flavorful rice where every grain is infused with that smoky, spicy Creole flavor from the bean broth. After 15-16 minutes, the authentic Italian rice is creamy and al dente with a slight firm bite in the center, and it looks slightly loose and sloppy. You turn off the heat, cover, and let it rest for 2-3 minutes, during which it firms up beautifully into the perfect creamy consistency. The presentation is stunning: creamy authentic Italian rice spooned into bowls, then the Creole red beans and sausage ladled generously over the top, garnished with fresh scallions and parsley for color and freshness. It's served alongside a Blood Orange Italian Soda made with blood orange syrup, pomegranate juice, and San Pellegrino sparkling water for a refreshing, ruby-colored drink that cuts through the richness. Every spoonful has creamy authentic Italian rice, tender red beans, smoky sausage, and bold Creole spices. This is comfort food that feels special and sophisticated!
This Creole red beans and authentic Italian rice is comfort food with a gourmet twist! Red beans simmered with smoked sausage, the Creole trinity, and warming spices, then ladled over creamy authentic Italian rice cooked risotto-style in the reserved Creole broth. Served with a Blood Orange Italian Soda!
Rate This Recipe!
Preparations
Prep Time:
20 minutes (plus quick soak time)
Cook Time:
90 minutes
Total Time:
2 hours
Cuisine:
Creole, Italian Fusion
Course:
Main Course, Dinner
Calories:
520 kcal (approx. per serving)
Servings:
6
Author:
Ronica Rupan
Ingredients
Ingredients
For the Creole Red Beans:
- 1 cup dried red beans, quick-soaked and drained
- 12 ounces smoked chicken sausage, sliced into rounds
- 1 yellow onion, diced
- 2 celery stalks, diced
- 1 green bell pepper, diced
- 8 cloves garlic, minced
- 6 cups chicken broth
- 2 tablespoons Creole seasoning
- 1 tablespoon smoked paprika
- 1 tablespoon chili powder
- 2 teaspoons garlic powder
- 2 bay leaves
- 2 tablespoons olive oil
- Kosher salt and black pepper, to taste
- Scallions and fresh parsley, for garnish
For the Authentic Italian Rice:
- 1 cup authentic Italian Carnaroli rice
- 3 cups reserved warm Creole broth (from the beans above)
- 2 tablespoons unsalted butter
- 1 tablespoon olive oil
- 1 tablespoon Creole seasoning
- 1 teaspoon smoked paprika
For the Blood Orange Italian Soda (1 serving):
- 2 tablespoons blood orange syrup
- 1 tablespoon pomegranate juice
- 6 ounces San Pellegrino sparkling water
- Ice
- Fresh blood orange slice and mint sprig, for garnish
Instructions
Part 1: Make the Creole Red Beans
- Brown the Sausage Heat 2 tablespoons of olive oil in a large 5-6 quart Dutch oven over medium-high heat. Add the sliced chicken sausage and cook for 3-4 minutes, stirring occasionally, until lightly browned on both sides. Remove the sausage with a slotted spoon and set aside on a plate.
- Cook the Holy Trinity In the same pot (don't wipe it out!), add the diced onion, celery, and bell pepper. Cook for about 5 minutes, stirring occasionally, until the vegetables are softened and the onion is translucent. Add the minced garlic and cook for 1 more minute, stirring constantly, until fragrant but not browned.
- Add Spices and Beans Stir in the Creole seasoning, smoked paprika, chili powder, garlic powder, and bay leaves. Cook for 30 seconds to toast the spices. Add the quick-soaked and drained red beans and the browned sausage back into the pot. Stir everything together to coat the beans and sausage in the spices.
- Simmer the Beans Pour in 6 cups of chicken broth and bring the mixture to a boil over high heat. Once boiling, reduce the heat to medium-low, cover the pot with a lid, and simmer for 55-65 minutes until the beans are tender and creamy. Important: At the 30-minute mark, you'll ladle out 3 cups of broth to use for the rice (see step 5), then continue cooking the beans for the remaining time. Check the liquid level occasionally and add more broth or water if needed to keep the beans covered. Stir every 15-20 minutes.
- Reserve Broth for Rice At the 30-minute mark of simmering, carefully ladle out 3 cups of the hot, spiced broth from the beans into a small pot. Keep this Creole broth warm over low heat. This is your secret weapon for cooking the authentic Italian rice! Continue cooking the beans for the remaining 25-35 minutes until tender.
- Finish the Beans Once the beans are tender and creamy, remove the bay leaves. Taste and adjust seasoning with salt and pepper if needed. Keep the beans warm over very low heat while you make the rice.
Part 2: Cook the Authentic Italian Rice
- Toast the Spices in Butter In a medium 3-4 quart heavy-bottomed saucepan, melt 2 tablespoons of unsalted butter over medium heat. Let it cook until it turns slightly golden and smells nutty, about 1-2 minutes. Add 1 tablespoon of olive oil and swirl to combine.
- Bloom the Seasonings Add the Creole seasoning and smoked paprika to the golden butter. Let the spices bloom for 30 seconds, stirring constantly, until fragrant. This toasts the spices and releases their essential oils.
- Toast the Rice Add the authentic Italian rice to the pan and stir well to coat every grain in the seasoned butter. Toast the rice for 1-2 minutes, stirring constantly, until it smells slightly nutty and the grains look translucent around the edges. Don't let it brown!
- Cook Risotto-Style Add the warm reserved Creole broth one ladle at a time (about ½ cup per addition). Stir every 2-3 minutes and let each addition of broth absorb almost completely before adding the next ladle. Keep the heat at medium-low so the rice maintains a gentle simmer. Don't rush this process!
- Finish the Rice Continue adding broth and stirring for 15-16 minutes total until the authentic Italian rice is creamy and al dente with a slight firm bite in the center. The rice should look slightly loose and sloppy, almost like a thick soup, when you turn off the heat. This is perfect! It will firm up as it rests.
- Rest the Rice Turn off the heat, cover the pan with a lid, and let the rice rest for 2-3 minutes. During this time, the rice will absorb the remaining liquid and firm up beautifully into a creamy consistency. Taste and adjust seasoning with salt and pepper if needed.
Part 3: Plate and Serve
- Build the Bowls Spoon the creamy authentic Italian rice into wide, shallow bowls, creating a bed of rice in each bowl.
- Top with Beans and Sausage Ladle the Creole red beans and sausage generously over the top of the rice in each bowl. Make sure everyone gets plenty of beans, sausage, and that flavorful broth!
- Garnish Garnish each bowl with sliced scallions and freshly chopped parsley for color, freshness, and a pop of flavor. Serve immediately while hot.
- Make the Blood Orange Italian Soda Fill a tall clear glass with ice. Add 2 tablespoons of blood orange syrup and 1 tablespoon of pomegranate juice over the ice and stir to combine. Top with 6 ounces of San Pellegrino sparkling water and stir gently. Garnish with a thin slice of blood orange on the rim and a fresh mint sprig. Serve alongside the Creole beans and rice.
Cajun Street Corn Chicken Skewers

These Cajun street corn skewers are the ultimate summer grilling recipe that combines smoky grilled sausage with all the flavors of Mexican street corn in one incredible dish! The base is Dietz & Watson Cajun Chicken Sausage links that get skewered two at a time (with two skewers running through each pair) so they stay together, are easy to flip on the grill, and can be sliced easily later. This double-skewer technique is brilliant for keeping everything secure! The sausages get grilled until hot and golden with those beautiful char marks. While the sausages cook, fresh corn on the cob gets grilled directly on the grates, turning occasionally until charred and smoky on all sides, which takes about 8-10 minutes. That char is essential for authentic street corn flavor! Once the corn is charred, the kernels get cut off the cob into a bowl and mixed with mayo, sour cream, fresh lime juice, Cajun seasoning, diced red bell pepper for crunch and sweetness, thinly sliced scallions for mild onion flavor, and fresh cilantro for brightness. This creates the most incredible creamy, tangy, slightly spicy street corn mixture that's loaded with texture and flavor. When the sausage skewers are browned and hot, you sprinkle shredded Mexican blend or Monterey Jack cheese generously over the top and close the grill lid for just 1-2 minutes until the cheese melts into gooey perfection. The skewers get transferred to a serving platter, and you spoon that amazing street corn mixture generously over the melted cheese. Crumbled cotija cheese goes on top for that classic salty, tangy Mexican cheese flavor, then diced fresh jalapeño adds heat, chili flakes add extra kick, and a squeeze of fresh lime brightens everything up. You slice between each sausage link so everyone can grab individual pieces, and serve with Dietz & Watson Barrel Style Pickle Chips on the side for tangy crunch. Every bite has smoky Cajun sausage, melty cheese, creamy charred corn, fresh vegetables, and all those bold flavors. Perfect for cookouts, game day, summer parties, or anytime you want something fun and impressive on the grill!
These Cajun street corn skewers are summer grilling perfection! Dietz & Watson Cajun Chicken Sausage links grilled until golden, topped with melted cheese and a creamy charred street corn mixture with mayo, sour cream, lime, red bell pepper, scallions, and cilantro. Finished with cotija, jalapeños, and chili flakes. Served with pickle chips!
Rate This Recipe!
Preparations
Prep Time:
15 minutes
Cook Time:
30 minutes
Total Time:
35 minutes
Cuisine:
Mexican-inspired, Cajun
Course:
Main Course, Dinner, Appetizer
Calories:
520 kcal (approx. per serving)
Servings:
4
Author:
Ronica Rupan
Ingredients
For the Base:
- 8 Dietz & Watson Cajun Chicken Sausage links
For the Street Corn Topping:
- 4 ears fresh corn, husked
- 1 red bell pepper, diced
- 3 tablespoons mayonnaise
- 3 tablespoons sour cream
- 2 tablespoons fresh lime juice
- 1 teaspoon Cajun seasoning
- 3 scallions, thinly sliced
- ¼ cup fresh cilantro, chopped
For the Cheese:
- 1 cup shredded Mexican blend cheese or Monterey Jack
- ½ cup cotija cheese, crumbled
For the Fresh Finish:
- 1 jalapeño, diced
- ¼ teaspoon red chili flakes
- Extra lime wedges, for serving
To Serve With:
- Dietz & Watson Barrel Style Pickle Chips
Instructions
- Preheat the Grill Preheat your grill to medium-high heat (about 375-400°F). Clean and oil the grates to prevent sticking.
- Grill the Corn Place the husked corn directly on the grill grates. Cook, turning occasionally with tongs, until the corn is charred and slightly blackened on all sides, about 8-10 minutes total. The kernels should have nice char marks and smell smoky and sweet. Remove from the grill and set aside to cool slightly.
- Skewer the Sausages While the corn cools, prepare the sausage skewers. Take 2 sausage links and run 2 parallel skewers through them lengthwise, spacing the skewers about 1 inch apart. The skewers should go through both links to hold them together as one unit. Repeat with the remaining sausages to create 4 skewer sets (2 links per set). This double-skewer method keeps them secure and makes flipping easy!
- Grill the Sausage Skewers Place the skewered sausages on the grill. Cook until hot throughout and golden brown with nice grill marks, turning once halfway through, about 6-8 minutes total. Since the sausages are fully cooked, you're just heating them through and adding char.
- Make the Street Corn Mixture While the sausages grill, cut the corn kernels off the cobs into a large bowl. Add the diced red bell pepper, mayonnaise, sour cream, fresh lime juice, Cajun seasoning, thinly sliced scallions, and chopped fresh cilantro. Stir everything together until well combined. The mixture should be creamy, slightly spicy, and loaded with charred corn and vegetables. Taste and adjust seasoning if needed.
- Melt the Cheese on the Skewers When the sausage skewers are browned and hot, sprinkle the shredded Mexican blend or Monterey Jack cheese generously over the top of each skewer while they're still on the grill. Close the grill lid and let the cheese melt for 1-2 minutes until it's gooey and bubbly. Don't walk away or it might burn!
- Assemble the Skewers Carefully transfer the cheese-topped sausage skewers to a large serving platter. Spoon the street corn mixture generously over the top of each skewer, covering the melted cheese and sausages. Be generous! You want plenty of that creamy, charred corn topping.
- Add Fresh Finishes and Serve Sprinkle the crumbled cotija cheese evenly over everything. Top with the diced fresh jalapeño and red chili flakes for heat and color. Squeeze fresh lime wedges over the top for brightness. Slice between each sausage link to separate them into individual pieces for easy serving. Serve immediately with Dietz & Watson Barrel Style Pickle Chips on the side for tangy crunch!
Chocolate Strawberry Yogurt Clusters
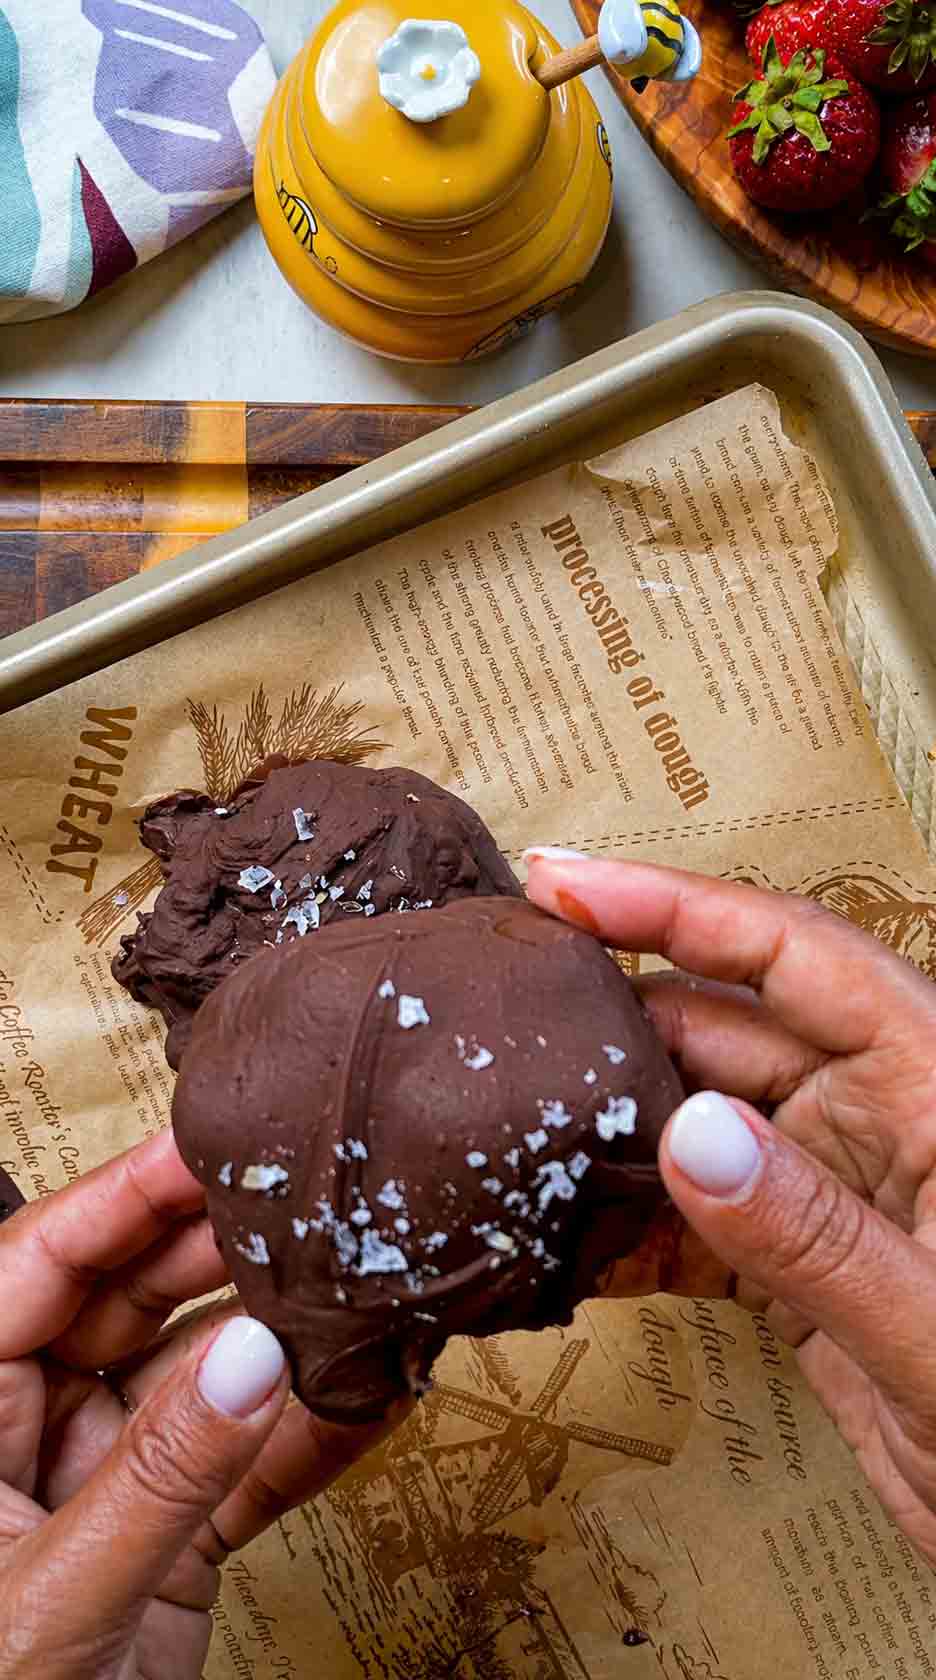
These chocolate strawberry yogurt clusters are the perfect healthy-ish treat that tastes indulgent but is actually made with good-for-you ingredients! Fresh strawberries get diced and tossed with creamy plain Greek yogurt, vanilla extract, and honey, creating this sweet, tangy mixture that tastes like strawberry cheesecake filling. The yogurt coating clings to every piece of strawberry, and the honey adds just the right amount of natural sweetness without being overpowering. You scoop this strawberry-yogurt mixture onto a parchment-lined baking sheet in 8 individual clusters (about 2 tablespoons each), leaving space between them so they don't touch. The clusters go into the freezer for 30-45 minutes, just long enough to firm up so they hold their shape when dipped, but not so long that they become rock-solid frozen blocks. While they freeze, you melt semisweet chocolate chips with a touch of coconut oil using a double boiler method, which ensures the chocolate melts smoothly and evenly without scorching or seizing. The coconut oil helps thin the chocolate slightly so it coats beautifully and sets with a nice sheen. Now comes the fun part: you dip each frozen strawberry-yogurt cluster into the melted chocolate, using a big spoon to generously coat it all over. The cold clusters cause the chocolate to start setting immediately, creating that signature chocolate shell. A sprinkle of flaky sea salt on top while the chocolate is still wet adds that perfect sweet-salty contrast that makes these absolutely addictive. After just a few minutes at room temperature (or back in the fridge), the chocolate hardens completely and you're left with these gorgeous chocolate-covered clusters that have a crispy chocolate shell, creamy tangy yogurt center, and juicy strawberry pieces throughout. They're like chocolate-covered strawberries meets frozen yogurt bark, and they're absolutely irresistible! Perfect for a healthier dessert, afternoon snack, or whenever you need something sweet but don't want to feel guilty!
Frequently Asked Questions
Q: Can I use frozen strawberries?
A: Fresh strawberries work best because they have better texture and less moisture. Frozen strawberries release a lot of liquid when thawed, which makes the clusters watery and prevents them from holding their shape well. If you must use frozen, thaw them completely, drain all the liquid, and pat them very dry with paper towels before mixing with the yogurt.
Q: How long do these last in the freezer?
A: Store the clusters in an airtight container or freezer bag in the freezer for up to 2 months. They're best eaten straight from the freezer while the chocolate is firm and the yogurt is cold and creamy. Let them sit at room temperature for 2-3 minutes before eating if you want a slightly softer texture.
Q: Can I use a different type of chocolate?
A: Absolutely! Dark chocolate (60-70% cacao) works beautifully and is less sweet. Milk chocolate makes them sweeter and creamier. White chocolate is delicious too, though it can be tricky to melt without seizing (add a bit more coconut oil to help). You can also use chocolate melting wafers designed for dipping, which are formulated to melt smoothly.
Q: Do I have to use a double boiler?
A: A double boiler is the safest method to prevent burning the chocolate, but you can carefully microwave it instead. Put the chocolate chips and coconut oil in a microwave-safe bowl and microwave in 20-second intervals, stirring between each interval, until smooth and melted. Be careful not to overheat or the chocolate will seize!
These chocolate strawberry yogurt clusters are the perfect healthy treat! Diced strawberries tossed with Greek yogurt, vanilla, and honey, frozen into clusters, then dipped in melted chocolate and topped with flaky sea salt. Crispy chocolate shell, creamy yogurt center, and fresh strawberries!
Rate This Recipe!
Preparations
Prep Time:
15 minutes (plus 30-45 minutes freezing)
Cook Time:
5 minutes
Total Time:
50 minutes
Cuisine:
American
Course:
Dessert, Snack
Calories:
180 kcal (approx. per cluster)
Servings:
8 clusters
Author:
Ronica Rupan
Ingredients
Ingredients
- 1 cup fresh strawberries, diced
- ½ cup plain Greek yogurt (full-fat or 2%)
- 1 teaspoon vanilla extract
- 1 tablespoon honey
- 1 cup semisweet chocolate chips
- 1 teaspoon coconut oil
- Flaky sea salt, for topping
Instructions
- Prepare the Baking Sheet Line a large baking sheet with parchment paper. This prevents the clusters from sticking and makes cleanup easy. Set aside.
- Mix the Strawberry Yogurt Mixture In a medium bowl, add the diced strawberries, Greek yogurt, vanilla extract, and honey. Stir everything together gently but thoroughly until all the strawberry pieces are perfectly coated in the creamy yogurt mixture. The mixture should look like strawberry cheesecake filling.
- Form the Clusters Using a large spoon or cookie scoop, scoop about 2 tablespoons of the strawberry-yogurt mixture onto the parchment-lined baking sheet. Form it into a mounded cluster shape. Repeat to make 8 clusters total, leaving about 2 inches of space between each cluster so they don't touch or stick together.
- Freeze Until Firm Place the baking sheet in the freezer and freeze the clusters for 30-45 minutes. You want them firm enough to hold their shape when dipped in chocolate, but not frozen rock-solid. They should be cold and set but still have a slight give when you touch them.
- Melt the Chocolate About 5 minutes before the clusters are done freezing, prepare your chocolate. Fill a small saucepan with about 1-2 inches of water and bring to a gentle simmer over medium heat. Place a heatproof bowl on top of the saucepan, making sure the bottom of the bowl doesn't touch the water. Add the chocolate chips and coconut oil to the bowl. Stir frequently with a spatula until the chocolate is completely melted and smooth, about 3-5 minutes. Remove from heat but keep the bowl over the warm water to keep the chocolate fluid.
- Dip the Clusters Remove the frozen clusters from the freezer. Working with one cluster at a time, use a large spoon to scoop it up and hold it over the bowl of melted chocolate. Use another spoon to drizzle and coat the cluster generously with chocolate, making sure it's beautifully covered on all sides. Let excess chocolate drip back into the bowl, then place the chocolate-coated cluster back on the parchment-lined baking sheet. Repeat with all remaining clusters.
- Add Sea Salt While the chocolate is still wet, immediately sprinkle a small pinch of flaky sea salt over each cluster. The salt should stick to the chocolate coating.
- Set the Chocolate Let the clusters sit at room temperature for about 5-10 minutes until the chocolate hardens completely. For faster setting, you can place the baking sheet back in the freezer for 3-5 minutes. Once the chocolate is firm and set, the clusters are ready!
- Serve or Store Serve immediately and enjoy, or transfer to an airtight container or freezer bag and store in the freezer for up to 2 months. Eat straight from the freezer for the best texture!
Lemon Herb Cottage Cheese Pasta with Crispy Chicken
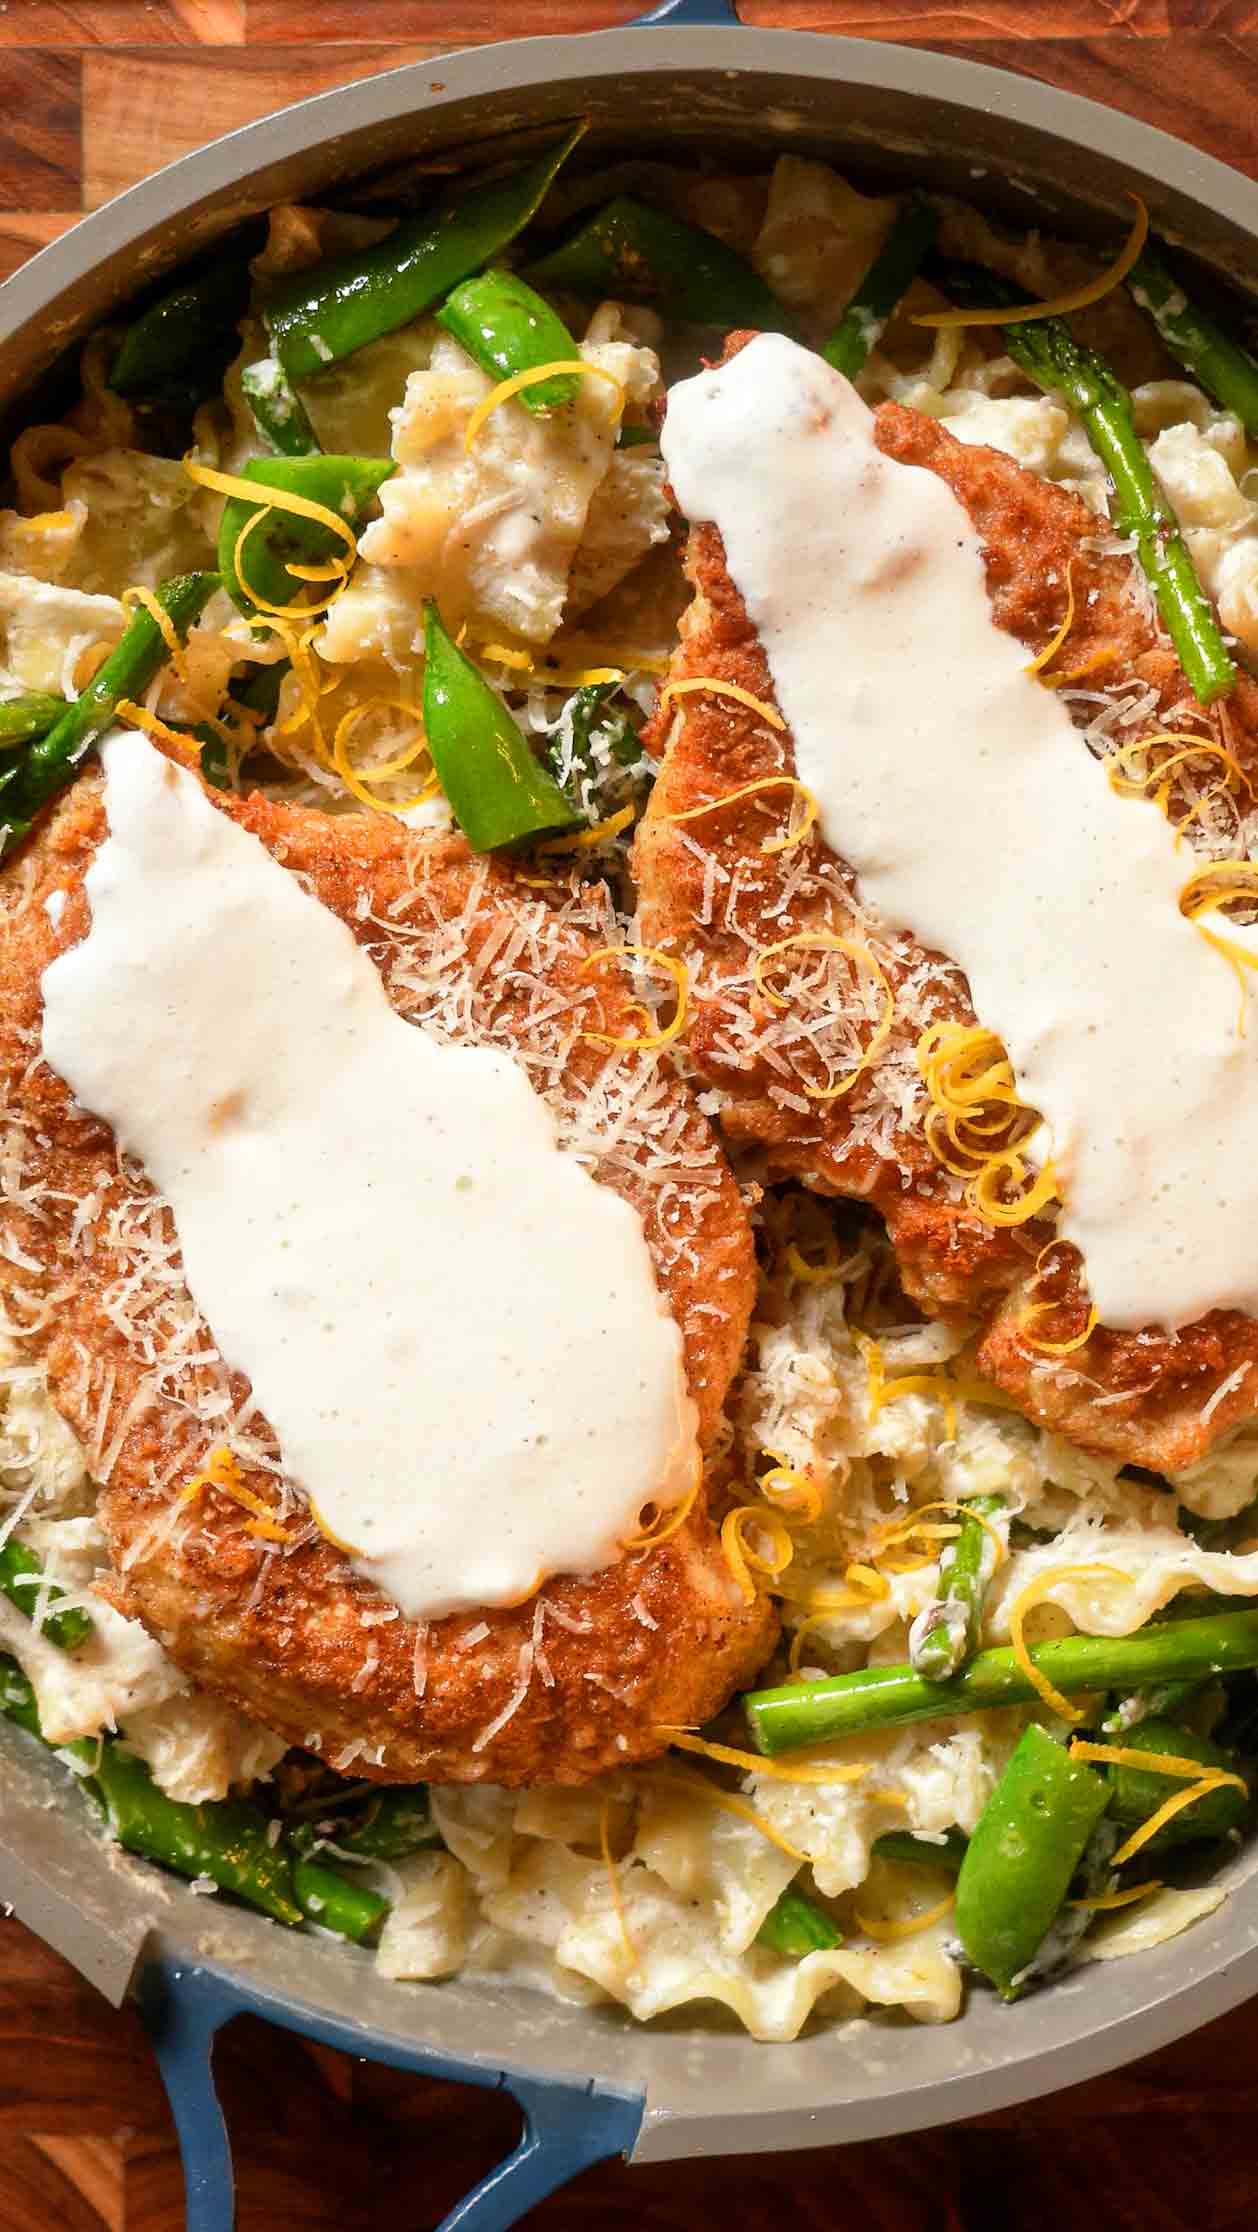
This lemon herb cottage cheese pasta with crispy chicken is the ultimate high-protein comfort food that's creamy, satisfying, and packed with fresh spring vegetables! Chicken breasts get butterflied into thin cutlets, pounded to an even thickness, then double-breaded in a mixture of flour and Parmesan cheese, creating this incredibly crispy, cheesy crust when pan-fried until golden brown. The chicken stays juicy inside while the outside gets shatteringly crisp. While the chicken cooks, you boil mafalde pasta (or penne) until al dente, making sure to reserve 2 cups of that starchy pasta water before draining, which is crucial for creating a silky sauce later. In the same skillet used for the chicken (so you get all those delicious browned bits), asparagus and sugar snap peas get sautéed until tender-crisp and bright green, then chopped garlic is added for aromatic punch. Here's where the magic happens: cottage cheese, milk, cornstarch, fresh lemon zest and juice, whole garlic cloves, salt, and pepper all go into a blender and get blended until completely smooth with no lumps or curds visible. This creates the most incredible creamy, tangy sauce that tastes like a rich cheese sauce but is secretly packed with protein from the cottage cheese. No one will know it's cottage cheese unless you tell them! The blended sauce, butter, cooked pasta, and more Parmesan get added to the skillet with the vegetables, and everything gets tossed together while gradually adding reserved pasta water until the sauce is thick, glossy, and coating every strand of pasta. The starch from the pasta water is what creates that restaurant-quality glossy finish. Sliced crispy chicken gets arranged on top of the pasta, and fresh lemon zest strips finish everything with brightness and color. Every forkful has creamy lemon pasta, tender spring vegetables, and crispy Parmesan-crusted chicken. With 52 grams of protein per serving, this is comfort food that actually fuels your body!
Frequently Asked Questions
Q: Can I taste the cottage cheese in the sauce?
A: Not at all! When you blend cottage cheese until completely smooth with the lemon, garlic, and milk, it transforms into a creamy, tangy sauce that tastes like a rich cheese sauce. The lemon and Parmesan flavors are what shine through. The cottage cheese just adds incredible creaminess and protein without any cottage cheese texture or taste. Blend it well and no one will know!
Q: What if I don't have mafalde pasta?
A: Mafalde (the long, wavy ribbon pasta) is beautiful, but any pasta shape works! Penne, rigatoni, farfalle, rotini, or even spaghetti all work great. Short pasta shapes like penne or rigatoni are especially good because they catch the sauce and vegetables in their ridges and tubes. Use whatever you have or prefer!
Q: Can I use chicken thighs instead of breasts?
A: Yes! Boneless, skinless chicken thighs work great and stay even juicier than breasts. Pound them to even thickness just like the breasts and follow the same breading and cooking method. The cooking time might be 1-2 minutes longer since thighs are slightly thicker, but they're more forgiving if you accidentally overcook them.
Q: Can I make this vegetarian?
A: Absolutely! Skip the chicken and either double the vegetables, add roasted chickpeas for protein, or serve the pasta topped with a fried egg. You can also add sautéed mushrooms, zucchini, or broccoli. The cottage cheese sauce is already vegetarian and packed with protein, so the dish will still be satisfying and nutritious!
This lemon herb cottage cheese pasta with crispy chicken is high-protein comfort food! Crispy Parmesan-crusted chicken, creamy lemon cottage cheese sauce blended until smooth, mafalde pasta, asparagus, and sugar snap peas. 52g protein per serving and absolutely delicious!
Rate This Recipe!
Preparations
Prep Time:
15 minutes
Cook Time:
30 minutes
Total Time:
45 minutes
Cuisine:
Italian-inspired
Course:
Main Course, Dinner
Calories:
680 kcal (approx. per serving)
Servings:
4
Author:
Ronica Rupan
Ingredients
Ingredients
For the Crispy Parmesan Chicken:
- 2 large chicken breasts (about 1.5 pounds), butterflied
- Kosher salt and black pepper, to taste
- ½ cup all-purpose flour
- 4 ounces Parmesan cheese, grated (2 cups total), divided
- 1 large egg
- ¼ cup olive oil
For the Lemon Cottage Cheese Sauce:
- 1 cup Knudsen cottage cheese
- 1 cup milk (whole or 2%)
- 2 teaspoons cornstarch
- 1 lemon, zested and juiced
- 3 cloves garlic, whole
- Kosher salt and black pepper, to taste
For the Pasta and Vegetables:
- 8 ounces mafalde pasta (or penne, rigatoni, or pasta of choice)
- 1 pound asparagus, tough ends trimmed, cut into 1-inch pieces
- 8 ounces sugar snap peas, cut into 1-inch pieces
- 6 cloves garlic, chopped
- 4 tablespoons unsalted butter
- Lemon zest strips, for garnish
Instructions
- Prepare the Chicken Butterfly each chicken breast by slicing horizontally through the middle, opening it like a book to create 2 thin cutlets per breast (4 cutlets total). Place each cutlet between two pieces of plastic wrap or parchment paper and pound with a meat mallet or rolling pin to an even ¼-inch thickness. Season both sides generously with salt and black pepper. Set aside.
- Cook the Pasta Bring a large pot of salted water to a boil. Add the mafalde pasta and cook until al dente, about 1 minute less than the package directions recommend. Before draining, scoop out and reserve 2 cups of the starchy pasta water (this is crucial for the sauce!). Drain the pasta and set aside.
- Bread the Chicken Set up your breading station: On a large plate, mix together the flour and 1 cup of the grated Parmesan cheese. In a shallow bowl, whisk the egg until smooth. Working with one cutlet at a time, dredge it in the flour-Parmesan mixture, coating both sides and shaking off excess. Dip the floured cutlet into the whisked egg, coating completely and letting excess drip off. Dredge again in the flour-Parmesan mixture for a double coating. Place on a clean plate and repeat with remaining cutlets.
- Fry the Chicken Heat the olive oil in a large skillet over medium heat until shimmering. Working in 2 batches to avoid overcrowding, add 2 breaded cutlets to the skillet. Cook for 3-4 minutes per side until deep golden brown, crispy, and cooked through (internal temperature should reach 165°F). Transfer cooked cutlets to a cutting board to rest. Repeat with the remaining 2 cutlets. Don't wipe out the skillet!
- Cook the Vegetables In the same skillet (with all those delicious browned bits), add the asparagus pieces and sugar snap peas. Sauté over medium heat for about 4 minutes, stirring occasionally, until the vegetables are tender-crisp and bright green. Add the chopped garlic and cook for 1 more minute, stirring constantly, until fragrant. The garlic should be golden but not burned.
- Make the Cottage Cheese Sauce While the vegetables cook, add the cottage cheese, milk, cornstarch, lemon zest, lemon juice, 3 whole garlic cloves, salt, and pepper to a blender. Blend on high speed for 45-60 seconds until the sauce is completely smooth with no lumps or cottage cheese curds visible. The sauce should be silky and pourable. Set aside.
- Combine Everything Add the blended cottage cheese sauce, butter, drained pasta, and the remaining 1 cup of grated Parmesan to the skillet with the vegetables. Toss everything together over medium heat, stirring constantly. Gradually add reserved pasta water, ¼ cup at a time, until the sauce is thick, glossy, and coating every piece of pasta. This should take 3-4 minutes. The sauce should cling to the pasta and look creamy and luxurious.
- Slice Chicken and Serve Slice the rested crispy chicken cutlets into strips. Divide the pasta among 4 serving plates or bowls. Arrange the sliced chicken on top of each portion. Garnish with fresh lemon zest strips for brightness and color. Serve immediately while hot and enjoy!
Smoked Salmon Cream Cheese Rangoons

These smoked salmon cream cheese rangoons are the ultimate fusion appetizer that takes classic crab rangoons to a whole new level! Instead of the traditional crab filling, these use coarsely chopped smoked salmon mixed with cream cheese for a rich, savory filling that's absolutely addictive. The cream cheese gets mixed with soy sauce for umami depth, a touch of sugar to balance the saltiness, garlic powder and freshly grated garlic for aromatic punch, white pepper for subtle heat, and sliced green onions for freshness and a mild onion flavor. This filling is creamy, smoky from the salmon, garlicky, and perfectly seasoned. Here's what makes these special: instead of folding them into traditional wonton triangles or purses, you sandwich about 3 tablespoons of filling between two egg roll wrappers and seal the edges with water to create these oversized, generously-filled rangoon "sandwiches." This double-wrapper method means way more filling in every bite and a satisfying crunch from the extra-crispy wrapper. The rangoons get deep-fried in neutral oil heated to 350°F until they're deep golden brown, crispy on both sides, and floating on the surface. A sprinkle of salt right when they come out of the oil enhances all the flavors. The presentation is what really makes these party-ready: you arrange the crispy rangoons overlapping slightly on a large plate or wooden board, then drizzle them generously with spicy mayo for creamy heat, sweet chili sauce for sticky sweetness with a kick, and chili oil for extra spice and that gorgeous red color. A sprinkle of white and black sesame seeds adds crunch and visual appeal, and fresh green onion garnish ties it all together. Every bite has crispy, golden wrapper, creamy smoky salmon filling, and that perfect combination of spicy, sweet, and savory from the sauces. These are perfect for parties, game day, appetizers, or anytime you want something that looks and tastes restaurant-quality!
These smoked salmon cream cheese rangoons are the ultimate fusion appetizer! Smoked salmon and cream cheese filling seasoned with soy sauce, garlic, white pepper, and green onions, sandwiched between two egg roll wrappers and fried until crispy and golden. Drizzled with spicy mayo, sweet chili sauce, and chili oil. Absolutely addictive!
Rate This Recipe!
Preparations
Prep Time:
Chill Time:
Total Time:
Cuisine:
Course:
Calories:
Servings:
Author:
Ingredients
Ingredients
For the Filling:
- 8 ounces smoked salmon, coarsely chopped
- 8 ounces cream cheese, softened to room temperature
- 1 teaspoon soy sauce
- 1 teaspoon granulated sugar
- 1 teaspoon garlic powder
- 1 teaspoon white pepper
- 4 cloves garlic, grated
- 3 green onions, thinly sliced, plus more for garnish
For Assembly and Frying:
- 12 egg roll wrappers
- Water, as needed for sealing
- 2 cups neutral oil (vegetable or canola)
- Kosher salt, to taste
For Topping:
- 3 tablespoons spicy mayonnaise
- 2 tablespoons sweet chili sauce
- 1 tablespoon chili oil
- 1 teaspoon white sesame seeds
- 1 teaspoon black sesame seeds (or more white sesame seeds)
- Sliced green onions, for garnish
Instructions
- Make the Filling In a medium bowl, combine the coarsely chopped smoked salmon, softened cream cheese, soy sauce, sugar, garlic powder, white pepper, grated garlic, and thinly sliced green onions. Stir everything together with a spoon or spatula until fully combined and creamy. The mixture should be well-blended with the salmon evenly distributed throughout. Set aside.
- Assemble the Rangoons Lay 1 egg roll wrapper flat on a clean work surface with one corner pointing toward you (diamond orientation). Scoop about 3 tablespoons of the salmon cream cheese filling onto the center of the wrapper, spreading it slightly but leaving about 1 inch of space around all edges. Place a second egg roll wrapper directly on top, aligning the edges. Dip your fingers in water and run them along all four edges of the wrappers to moisten. Press the edges together firmly all around to seal tightly, making sure there are no air pockets or gaps where filling could leak out during frying. Repeat with the remaining wrappers and filling to make 6 double-layer rangoons total.
- Heat the Oil Pour the neutral oil into a large, deep skillet or heavy-bottomed pot. Heat over medium-high heat until an instant-read thermometer inserted into the oil registers 350°F (180°C). This temperature is important! Too low and the rangoons will absorb oil and be greasy. Too high and they'll burn before the filling warms through.
- Fry the Rangoons Working in batches of 1 or 2 rangoons at a time (don't overcrowd!), carefully slide the rangoons into the hot oil using tongs or a slotted spoon. Fry for 2-3 minutes total, flipping halfway through at the 1-1½ minute mark, until the rangoons are deep golden brown and crispy on both sides and they float to the surface of the oil. The wrappers should be crackling and golden with darker brown spots. Use a slotted spoon or spider to transfer the fried rangoons to a paper towel-lined plate to drain. Immediately sprinkle with kosher salt to taste while they're still hot. Repeat with the remaining rangoons, allowing the oil to return to 350°F between batches.
- Plate and Drizzle Arrange all the crispy rangoons on a large serving plate or wooden serving board, overlapping them slightly in a single layer. Drizzle the spicy mayonnaise, sweet chili sauce, and chili oil generously over all the rangoons in a back-and-forth pattern. You want the sauces to drizzle down and pool around the rangoons.
- Garnish and Serve Sprinkle the white and black sesame seeds evenly over the top. Garnish with additional sliced green onions for color and freshness. Serve immediately while the rangoons are hot and crispy! Provide extra napkins because these are deliciously messy!
Citrus Jelly Wedges (Immune-Boosting)
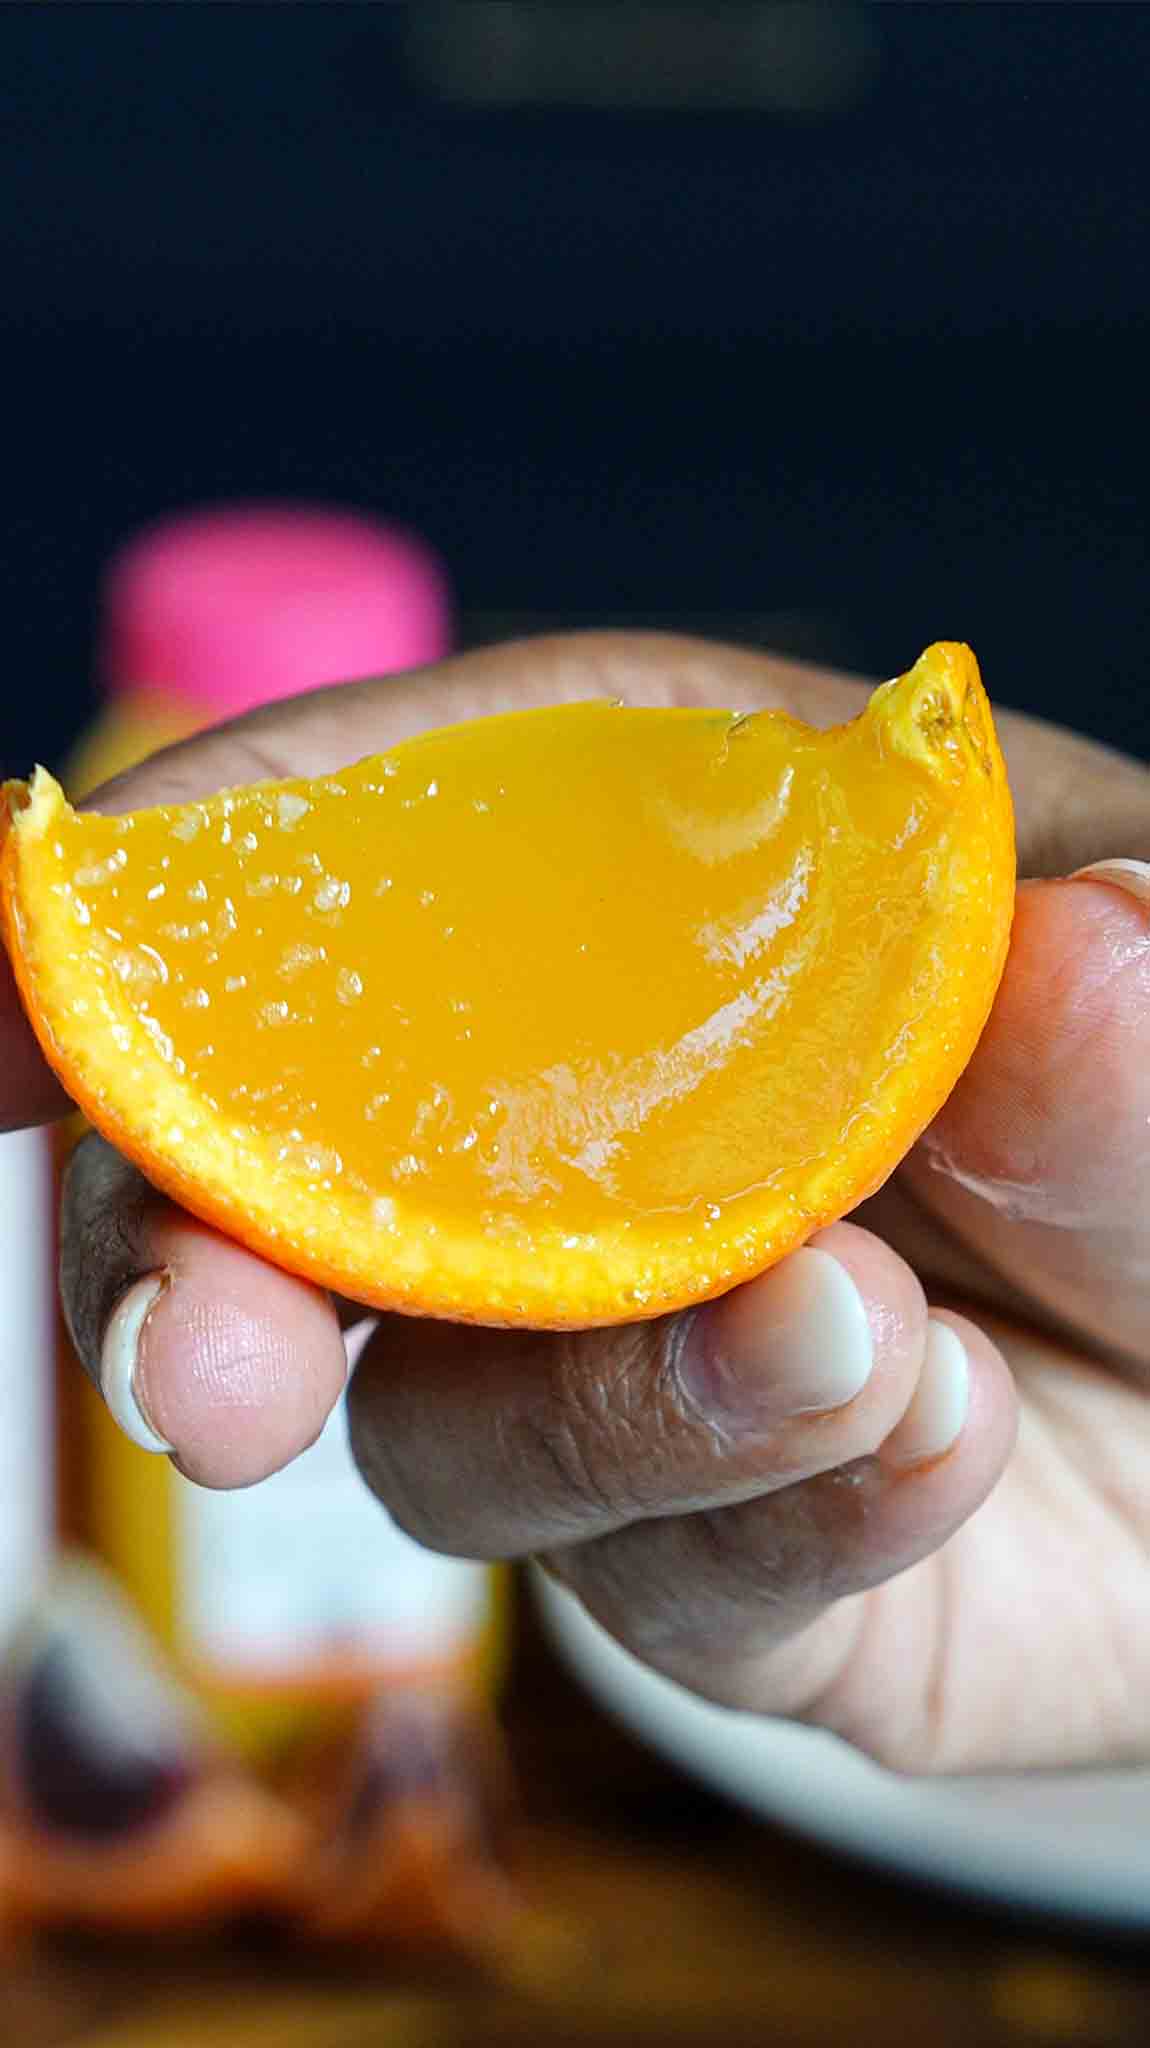
These citrus jelly wedges are my new favorite way to support immunity, and they're so fun to eat and made with real ingredients your body actually recognizes! Fresh-squeezed blood orange and orange juice get infused with fresh grated ginger and turmeric, which are both incredible for immune support and have natural anti-inflammatory properties. The ginger adds a warming, slightly spicy kick while the turmeric brings earthy depth and that gorgeous golden color. Grass-fed gelatin is the magic ingredient that transforms the citrus juice into these jiggly, sliceable wedges while also supporting gut health, skin elasticity, and joint health with all that collagen. The gelatin gets bloomed (softened) in a bit of cold juice first, then mixed into the warm, strained ginger-turmeric juice until completely smooth. Here's where it gets really fun and beautiful: instead of pouring the mixture into a regular pan, you pour it into hollowed-out orange and blood orange halves! The citrus shells become edible cups that hold the jelly, and when you slice them into wedges after they've set, you get these stunning, Instagram-worthy jelly slices that look like actual orange segments but are made of vibrant jelly. The whole thing chills in the fridge for about 3 hours until completely set and firm enough to slice. A tiny pinch of flaky sea salt sprinkled on top before serving enhances all the flavors and adds that perfect sweet-salty contrast. These are perfect as a healthy snack, a light dessert, an immune-boosting treat during cold and flu season, or anytime you want something that feels indulgent but is actually good for you. They're naturally sweetened by the fruit juice, packed with vitamin C from the citrus, and loaded with anti-inflammatory compounds from the ginger and turmeric. Kids love them because they're fun and jiggly, and adults love them because they're nourishing and delicious!
Frequently Asked Questions
Q: What if I can't find blood oranges?
A: Regular oranges work perfectly! You'll lose that gorgeous deep red-pink color that blood oranges provide, but the flavor will still be delicious and citrusy. You can also use a mix of orange and grapefruit for a different flavor profile. Any citrus fruit with a thick enough peel to hold the jelly works!
Q: Can I make these in a pan instead of citrus halves?
A: Absolutely! Pour the mixture into an 8x8 inch pan lined with parchment paper and chill until set. Once firm, cut into squares or use cookie cutters to make fun shapes. You'll lose the beautiful presentation of the citrus wedges, but they'll taste just as good and be easier to make if you're short on citrus fruits.
Q: How do I know when the gelatin is fully set?
A: The jelly should be firm to the touch and not jiggle excessively when you gently shake the citrus half. It should slice cleanly without oozing liquid. If it's still too soft after 3 hours, give it another hour in the fridge. The setting time depends on how cold your fridge is and how full each citrus half is.
These citrus jelly wedges are fun, beautiful, and immune-boosting! Fresh blood orange and orange juice infused with ginger and turmeric, set with grass-fed gelatin in hollowed citrus halves, then sliced into wedges. Naturally sweet, packed with vitamin C, and so good for you!
Rate This Recipe!
Preparations
Prep Time:
20 minutes (plus 3 hours chilling)
Cook Time:
5 minutes
Total Time:
3 hours 25 minutes
Cuisine:
Wellness
Course:
Dessert, Snack
Calories:
45 kcal (approx. per wedge)
Servings:
12-16 wedges (from 3-4 citrus halves)
Author:
Ronica Rupan
Ingredients
Ingredients
- 1 cup blood orange juice (fresh-squeezed or store-bought)
- ½ cup orange juice (fresh-squeezed or store-bought)
- 1 tablespoon fresh ginger, grated
- ½ tablespoon fresh turmeric, grated (or ¼ teaspoon ground turmeric)
- 2 tablespoons grass-fed beef gelatin powder
- 3-4 oranges or blood oranges, halved and hollowed out
- Pinch of flaky sea salt (optional, for topping)
Instructions
- Prepare the Citrus Halves Cut 3-4 oranges or blood oranges in half crosswise (not lengthwise). Using a spoon, carefully scoop out all the flesh and juice from each half, leaving just the empty peel shells. You want the shells intact with no holes. Set the empty citrus shells aside. Squeeze the scooped-out flesh to extract juice (you need 1½ cups total juice). Strain the juice to remove pulp and seeds.
- Infuse the Juice Pour 1¼ cups of the total citrus juice into a small saucepan (reserve ¼ cup for blooming the gelatin). Add the grated fresh ginger and grated fresh turmeric to the saucepan. Place over medium-low heat and warm gently for 3-5 minutes to infuse the flavors. Stir occasionally. Do NOT let it boil! You just want it warm enough to infuse the ginger and turmeric. The juice should become aromatic and slightly golden from the turmeric.
- Bloom the Gelatin While the juice is warming, place the 2 tablespoons of grass-fed gelatin powder in a small bowl. Add the reserved ¼ cup of cold citrus juice to the gelatin and stir briefly. Let it sit for 3-5 minutes to bloom (the gelatin will absorb the liquid and become thick and spongy). This step prevents lumps!
- Strain and Combine Once the juice has infused, strain it through a fine-mesh sieve into a clean bowl or measuring cup to remove all the ginger and turmeric pieces. You want smooth juice with no bits. Add the bloomed gelatin to the warm strained juice. Whisk vigorously for 1-2 minutes until the gelatin is completely dissolved and the mixture is smooth with no lumps. The mixture should be clear and liquid.
- Fill the Citrus Shells Place the hollowed-out citrus halves on a baking sheet or large plate with sides (in case of spills). Carefully pour the gelatin-juice mixture into each citrus shell, filling them almost to the top but leaving about ⅛ inch of space. If any mixture spills over the edge, wipe it clean immediately.
- Chill Until Set Carefully transfer the baking sheet to the refrigerator. Chill for at least 3 hours, or until the jelly is completely firm and set. The jelly should not jiggle excessively when gently shaken. For firmer jelly, chill for 4 hours or overnight.
- Slice into Wedges Once the jelly is fully set, remove from the fridge. Using a sharp knife, slice each citrus half into 3-4 wedges, just like you would slice an orange. The jelly will stay inside the peel and you'll have beautiful citrus wedge shapes!
- Serve Arrange the citrus jelly wedges on a serving platter. If desired, sprinkle a tiny pinch of flaky sea salt over the top of each wedge to enhance the flavors. Serve chilled and enjoy! Store any leftovers in an airtight container in the refrigerator for up to 5 days.
Strawberry Shaved Ice with Matcha Condensed Milk
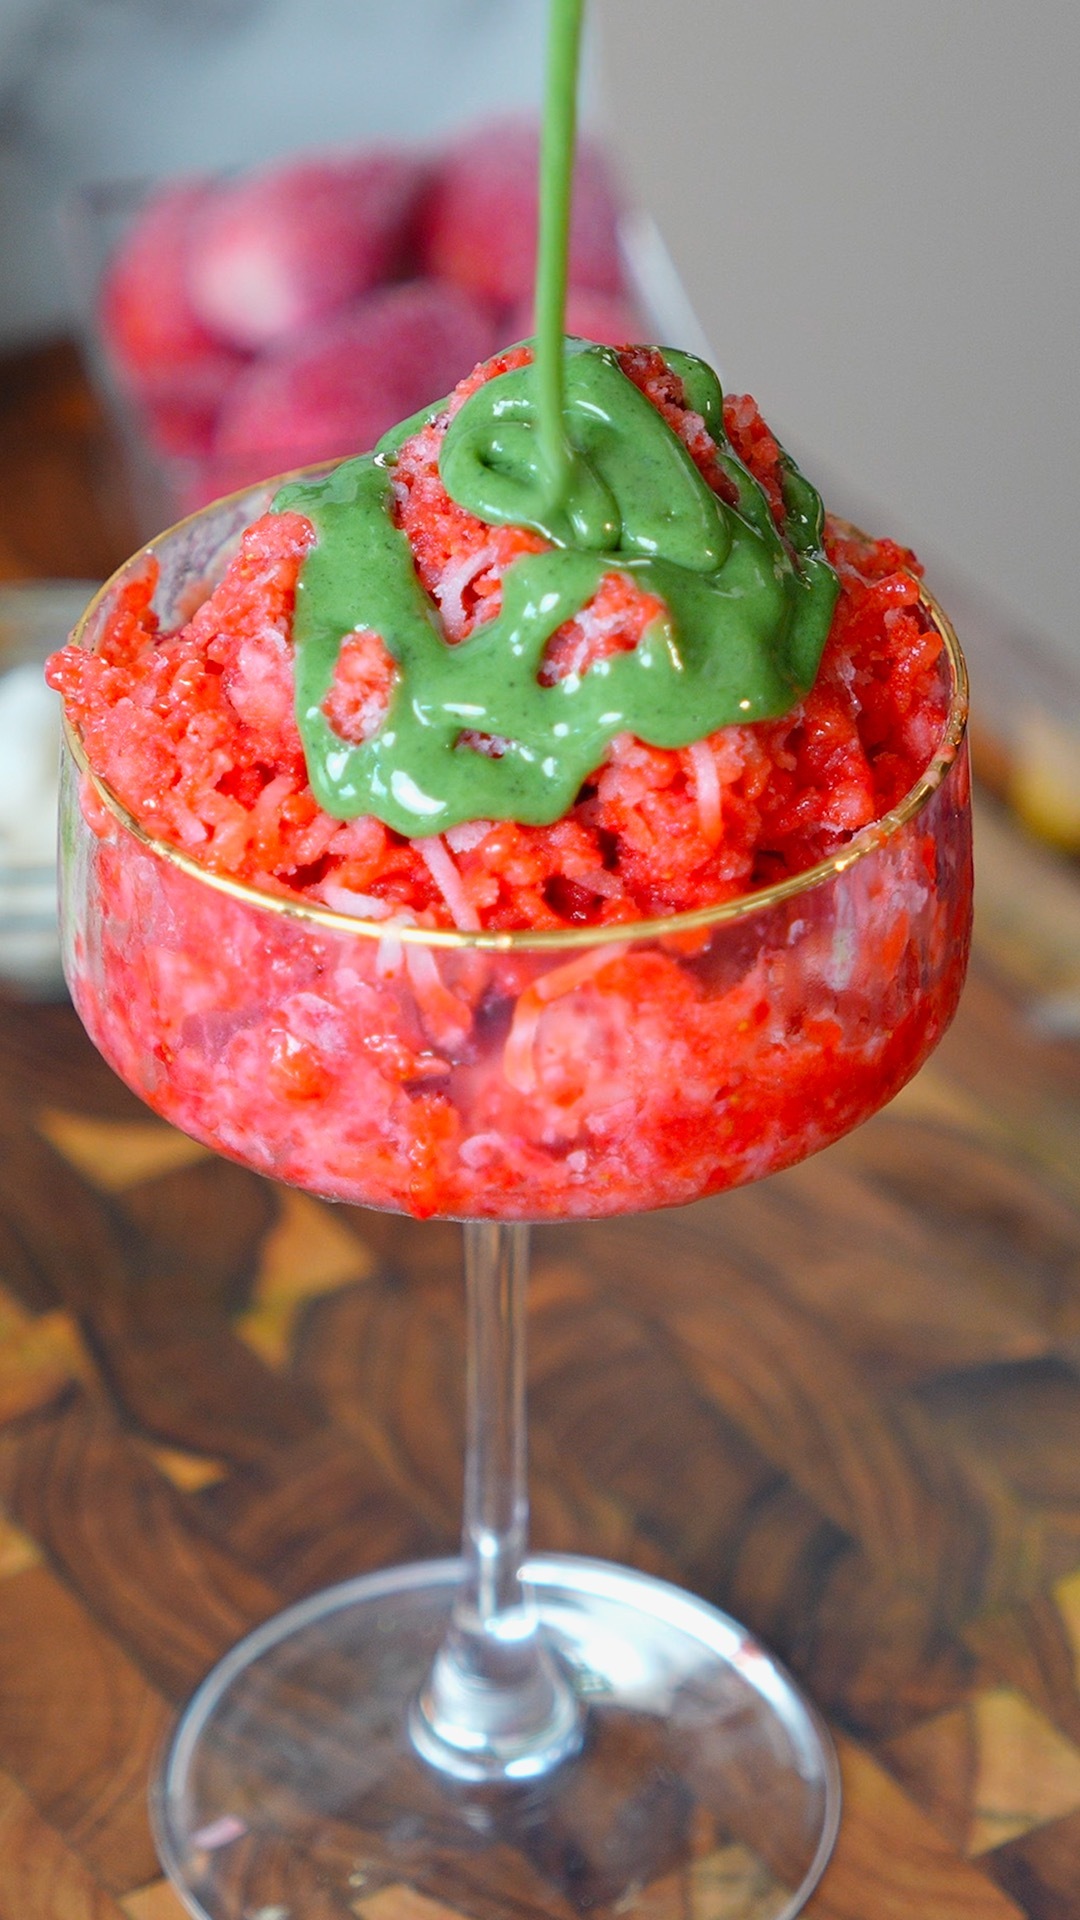
This strawberry shaved ice with matcha condensed milk is a refreshing, no-cook dessert that's light, fruity, and perfectly sweet with minimal effort! Frozen whole strawberries get shaved using a rotary cheese grater or box grater into the most amazing fluffy, snow-like texture that's completely different from regular crushed ice. The shaved strawberries are incredibly light and delicate, almost like strawberry snow, and they melt on your tongue instantly. This technique transforms frozen fruit into something that feels fancy and special, like Korean bingsu or Japanese kakigori, but you're making it at home with just a grater! The matcha condensed milk is what takes this from simple to spectacular: sweetened condensed milk gets whisked with matcha powder until smooth and evenly colored, creating this gorgeous green drizzle that's rich, sweet, earthy, and slightly bitter in the best way. The combination of sweet strawberry and earthy matcha is absolutely incredible. The strawberries are naturally sweet and fruity, while the matcha adds depth and complexity. When you drizzle that matcha condensed milk over the fluffy strawberry snow, it seeps down into all the layers and creates pockets of creamy sweetness throughout. Optional mini mochi on top adds chewy texture that contrasts beautifully with the light, melting strawberry ice. The whole thing comes together in just 10 minutes with no cooking, no ice cream maker, and minimal cleanup. It's perfect for hot days when you want something refreshing and not too heavy, a quick after-dinner dessert that feels impressive, or anytime you want to cool down with something sweet and fruity. Serve it immediately while the strawberry ice is still fluffy and frozen!
Frequently Asked Questions
Q: What's the best way to shave the strawberries?
A: A rotary cheese grater with a fine drum works best because it creates the fluffiest, most snow-like texture and is easiest to use. A box grater (fine side) also works, but you'll need to press the frozen strawberries against it carefully and it's a bit more effort. Don't use a food processor or blender, as those will chop the strawberries into chunks instead of creating that light, fluffy shaved texture.
Q: Can I use fresh strawberries instead of frozen?
A: No, the strawberries must be frozen solid! Fresh strawberries won't shave properly and will just turn to mush. Freeze whole strawberries (washed and dried, with stems removed) for at least 6-8 hours or overnight until rock solid before using. You can use store-bought frozen strawberries or freeze fresh ones yourself.
Q: Can I use a different fruit?
A: Yes! This technique works with any frozen fruit that's firm when frozen. Try frozen mango, pineapple, watermelon, peaches, or mixed berries. Each fruit will give you a different flavor and color. Softer fruits like bananas don't work as well because they're too mushy when frozen.
Q: What if I don't like matcha?
A: Skip the matcha and just use plain sweetened condensed milk! You can also flavor the condensed milk with vanilla extract, a pinch of cinnamon, cocoa powder for chocolate, or even a little strawberry syrup to keep it all-strawberry. The condensed milk adds creamy sweetness regardless of what flavor you choose.
This strawberry shaved ice with matcha condensed milk is refreshing, light, and ready in 10 minutes! Frozen strawberries shaved into fluffy, snow-like texture, drizzled with rich matcha-infused condensed milk. No cooking, no ice cream maker needed. Perfect for hot days!
Rate This Recipe!
Preparations
Prep Time:
10 minutes
Total Time:
10 minutes
Cuisine:
Asian-inspired
Course:
Dessert
Calories:
240 kcal (approx. per serving)
Servings:
2
Author:
Ronica Rupan
Ingredients
Ingredients
- ½ cup sweetened condensed milk
- 1 teaspoon matcha powder (ceremonial or culinary grade)
- 2 cups frozen whole strawberries (about 10-12 strawberries)
- Mini mochi, for topping (optional)
Instructions
- Make the Matcha Condensed Milk In a small glass or ceramic bowl, add the sweetened condensed milk and matcha powder. Using a small whisk or fork, whisk vigorously until the mixture is completely smooth with no lumps of matcha powder remaining and the color is evenly distributed throughout. The mixture should be a beautiful light green color. Set aside at room temperature.
- Prepare Your Equipment Work quickly once you start shaving the strawberries, so have everything ready! Place a medium stainless steel mixing bowl in the freezer for 5 minutes to chill it. Also chill your 2 serving bowls. This keeps the shaved ice from melting too quickly.
- Shave the Strawberries Remove the chilled bowl from the freezer. Place the frozen whole strawberries in the feed tube of a rotary cheese grater fitted with the fine drum. If using a box grater, hold it over the chilled bowl and press the frozen strawberries against the fine side. Working quickly and steadily, grate or shave the strawberries directly into the chilled bowl. The strawberries should come out in light, fluffy, snow-like pieces. Continue until all strawberries are shaved. Work fast because the shaved strawberries start to melt immediately!
- Divide into Bowls Immediately divide the shaved strawberries evenly between the 2 chilled serving bowls, mounding them up. Don't pack them down, keep them light and fluffy!
- Drizzle with Matcha Condensed Milk Drizzle the matcha condensed milk evenly over the top of each bowl of strawberry shaved ice. Use as much or as little as you like, but don't be shy! The creamy sweetness is what makes this dessert so good. The matcha milk will seep down into the strawberry ice.
- Add Toppings and Serve If using, top with mini mochi pieces for extra chewiness. Serve immediately with spoons while the strawberry ice is still fluffy and frozen. The shaved ice melts quickly, so enjoy it right away!
Pineapple Coconut Dream Smoothie
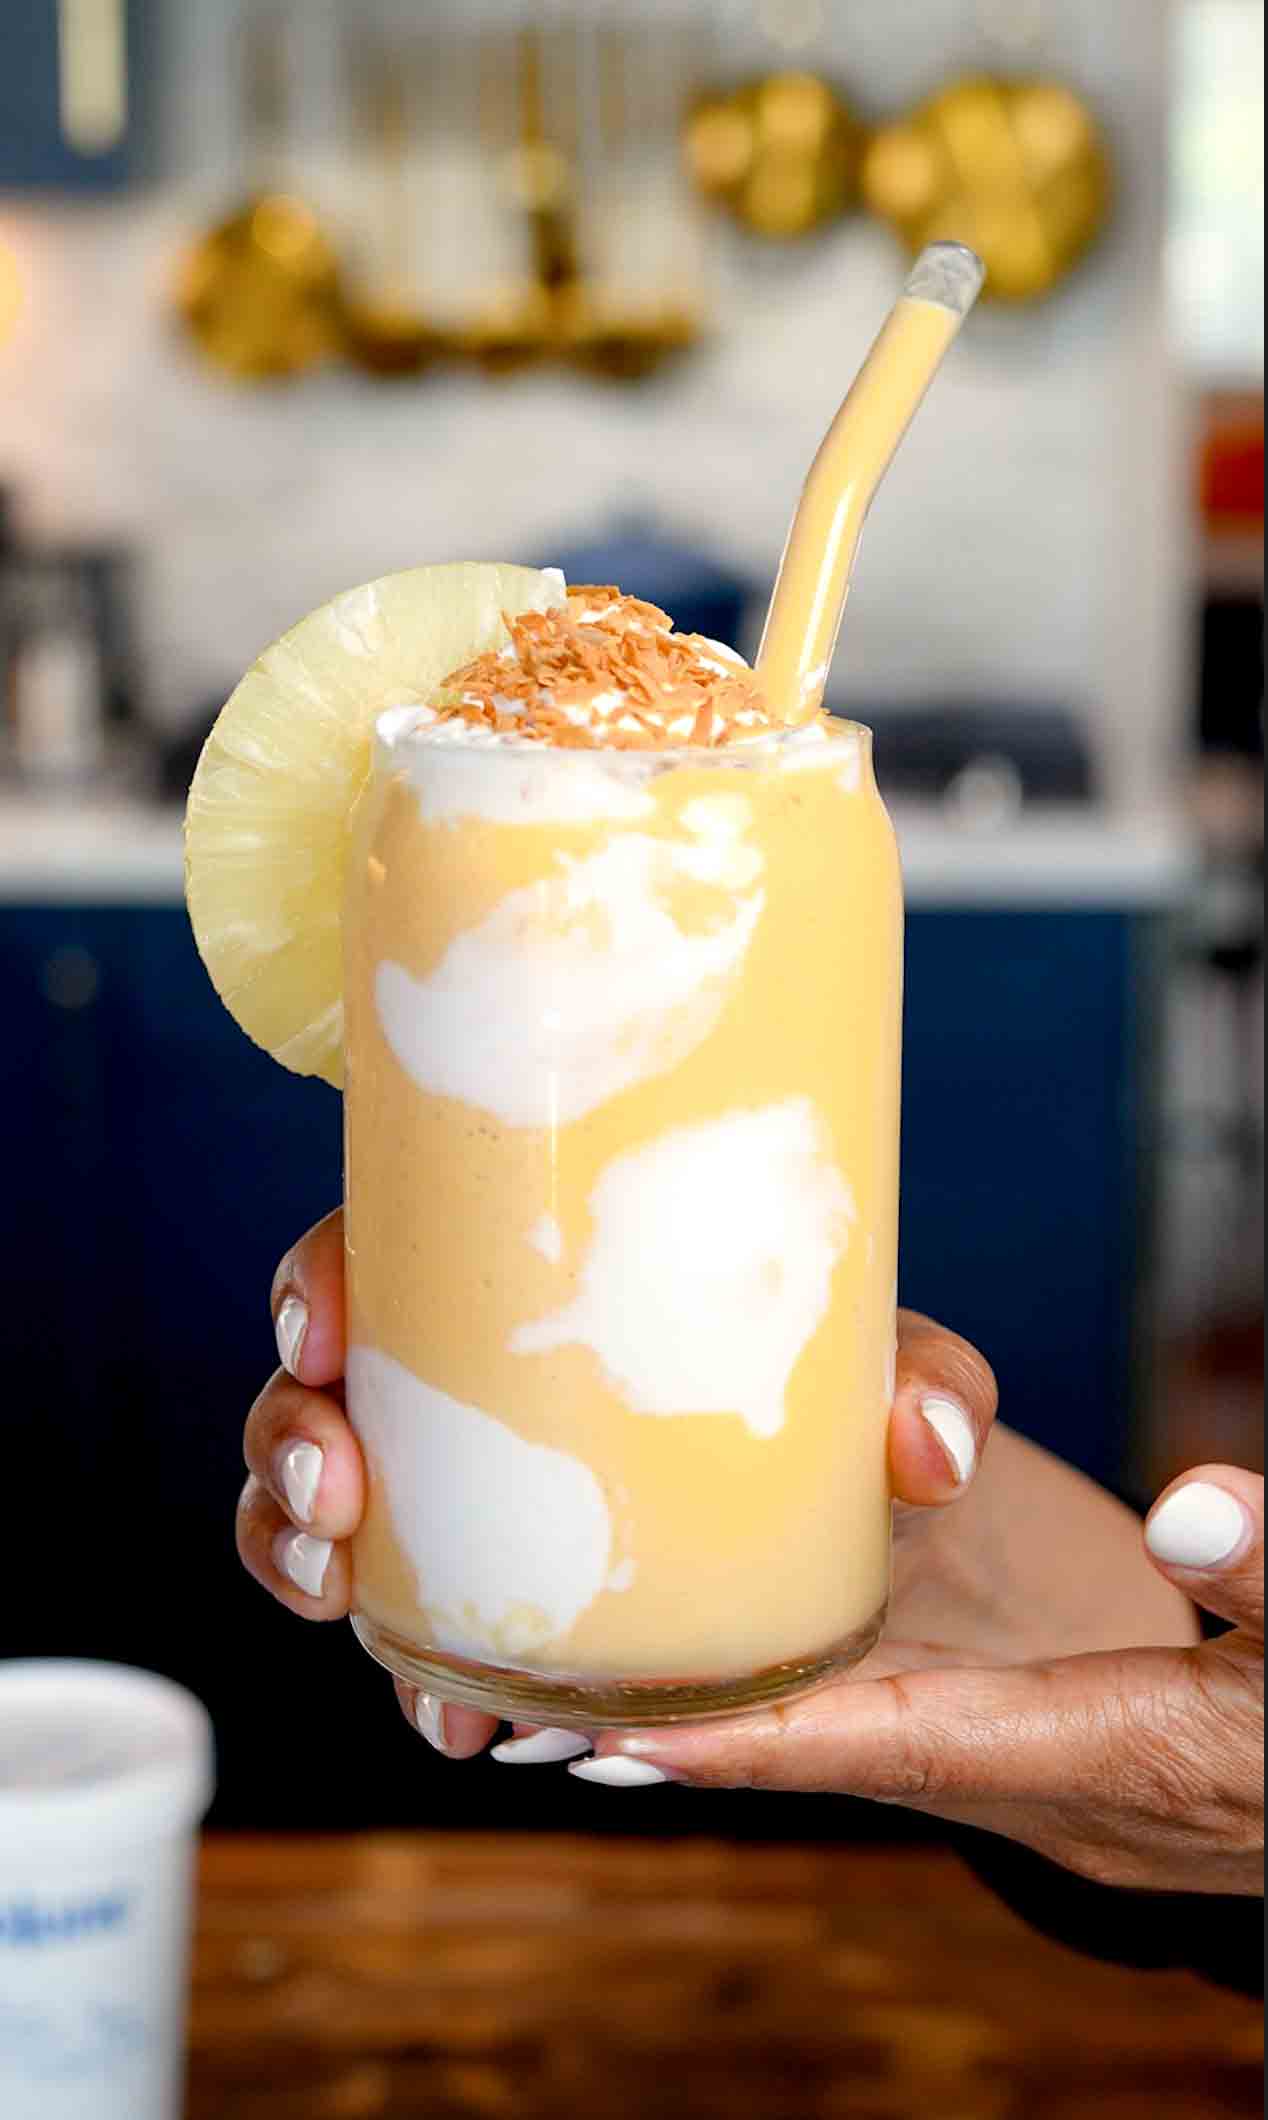
This pineapple coconut dream smoothie is the creamiest, dreamiest way to start your day with tropical vibes! Frozen pineapple chunks and frozen mango blend with a ripe banana, creamy Cocojune organic coconut yogurt, and pineapple juice to create this incredibly smooth, thick, and luxurious smoothie that tastes like you're sipping breakfast on a beach somewhere tropical. The Cocojune coconut yogurt is the secret weapon here, adding incredible creaminess, tang, and probiotics without any dairy. It makes the smoothie thick enough to eat with a spoon but still pourable and refreshing. The frozen fruit creates that perfect frosty texture while the banana adds natural sweetness and helps bind everything together. But what really makes this special is the presentation: before you pour the smoothie, you use a spoon to spread dollops of Cocojune yogurt on the inside of your glass, creating these gorgeous white yogurt clouds that look absolutely stunning against the golden-yellow smoothie. It's such a simple trick but makes your smoothie look bakery or café quality! The toasted coconut flakes on top add crunch and that toasty, nutty coconut flavor that takes this from good to incredible. You toast them in a dry skillet for just 2-3 minutes until golden and fragrant, and they add so much depth. A fresh pineapple wedge on the rim is optional but makes it feel extra special and Instagram-worthy. Every sip is creamy, tropical, naturally sweet, and packed with fruit, probiotics, and good-for-you ingredients. This is perfect for busy mornings when you want something quick but nourishing, post-workout fuel, or anytime you need a little tropical escape!
Frequently Asked Questions
Q: Can I use fresh fruit instead of frozen?
A: Yes, but frozen fruit is what creates that thick, frosty, milkshake-like texture! If using fresh fruit, add at least ½ cup of ice (or more) to get the right consistency. Frozen fruit also means you don't need as much ice, which keeps the flavor concentrated instead of watered down. For best results, freeze your banana ahead of time too!
Q: How do I make the yogurt clouds stick to the glass?
A: Make sure your glass is clean and dry before starting. Use the back of a spoon or a small spatula to spread dollops of thick coconut yogurt on the inside of the glass in swooshes or dots. The yogurt needs to be thick (not runny) to stick well. Cocojune works perfectly because it's naturally thick and creamy. If your yogurt is too thin, it will just slide down!

This pineapple coconut dream smoothie is the creamiest, dreamiest tropical breakfast! Frozen pineapple, mango, banana, and Cocojune organic coconut yogurt blended until smooth. Yogurt clouds on the glass make it Instagram-worthy, topped with toasted coconut flakes. Naturally sweet, dairy-free, and packed with probiotics!
Rate This Recipe!
Preparations
Prep Time:
5 minutes
Cook Time:
3 minutes (toasting coconut)
Total Time:
8 minutes
Cuisine:
Tropical
Course:
Drinks, Breakfast
Calories:
320 kcal (approx. per serving)
Servings:
1
Author:
Ronica Rupan
Ingredients
Ingredients
For the Smoothie:
- 1 cup frozen pineapple chunks
- ½ cup frozen mango chunks
- 1 ripe banana (fresh or frozen)
- ½ cup Cocojune organic coconut yogurt
- ½ cup pineapple juice
- ½ cup ice (if using fresh fruit; omit if using all frozen fruit)
For Topping and Garnish:
- 2-3 tablespoons Cocojune organic coconut yogurt (for yogurt clouds on glass)
- 2 tablespoons toasted coconut flakes
- Optional: fresh pineapple wedge for garnish
Instructions
- Toast the Coconut Spread the coconut flakes in a dry skillet (no oil needed) over medium heat. Stir frequently with a spatula for about 2-3 minutes until the coconut turns golden brown and becomes fragrant. Watch carefully as it can burn quickly! Once toasted, immediately transfer to a plate to cool. Set aside.
- Prepare the Glass with Yogurt Clouds This step is what makes your smoothie look café-quality! Using the back of a spoon or a small offset spatula, spread dollops of Cocojune coconut yogurt on the inside of your serving glass. Create swooshes, dots, or stripes. The yogurt should stick to the glass and create those signature white clouds. Use 2-3 tablespoons total and get creative with the pattern!
- Blend the Smoothie Add the frozen pineapple chunks, frozen mango chunks, banana, ½ cup Cocojune coconut yogurt, pineapple juice, and ice (if using fresh fruit) to a high-powered blender. Blend on high speed for 45-60 seconds until completely smooth and creamy with no chunks remaining. The mixture should be thick but pourable. If it's too thick, add a splash more pineapple juice. If it's too thin, add more frozen fruit or ice.
- Pour the Smoothie Carefully pour the blended smoothie into your yogurt-cloud prepared glass. Pour slowly down the center so you don't disturb the beautiful yogurt design on the sides. Fill almost to the top, leaving a little room for toppings.
- Add Toppings Sprinkle the toasted coconut flakes generously over the top of the smoothie. If desired, garnish with a fresh pineapple wedge on the rim of the glass for that extra tropical presentation.
- Serve Immediately Serve right away with a straw or spoon! The smoothie is best enjoyed immediately while it's cold, creamy, and the yogurt clouds are still beautifully visible on the glass. Enjoy your tropical escape!
Ube Ice Cream French Toast
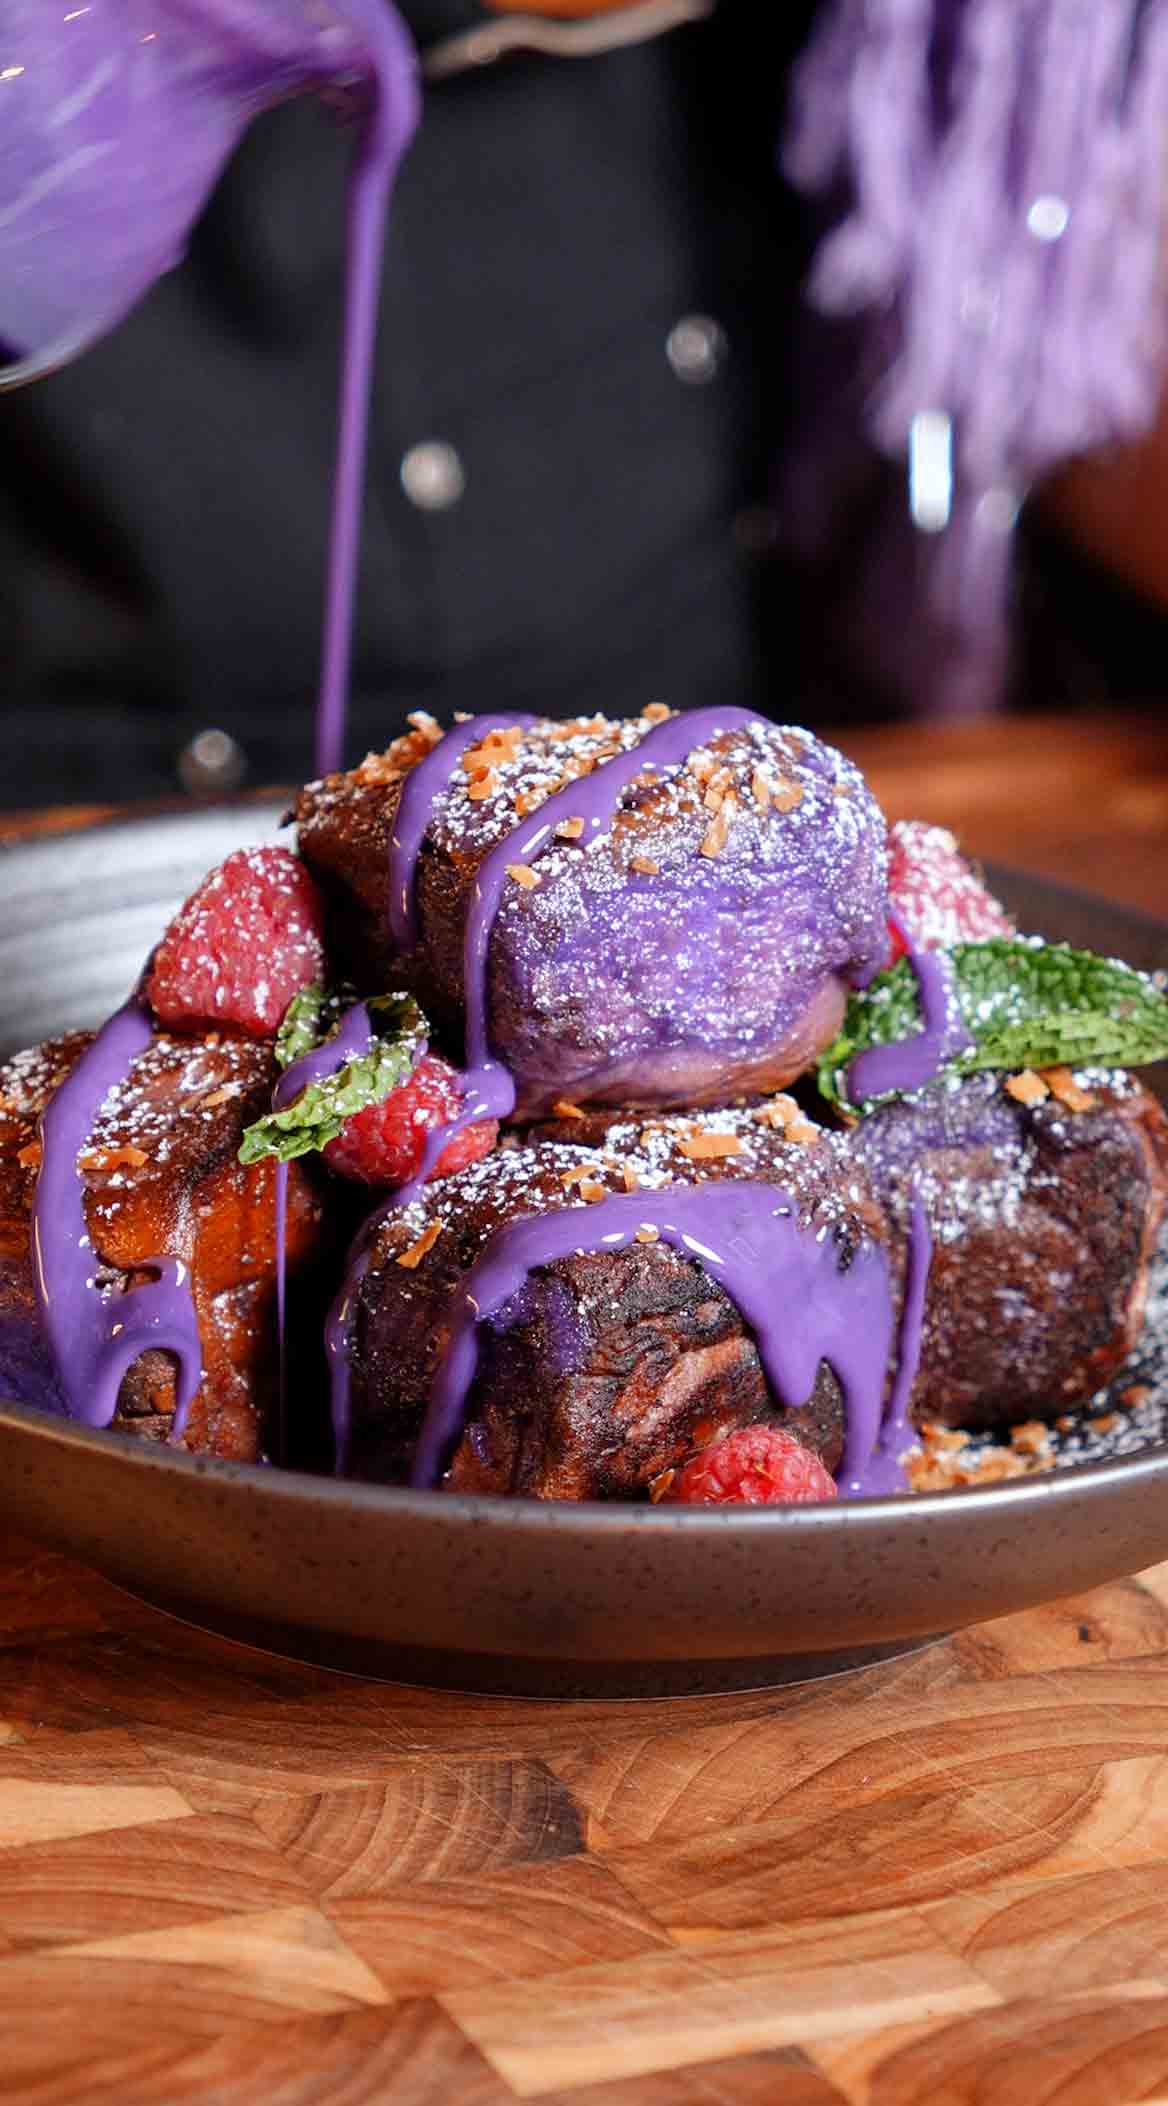
If you've been seeing the ice cream French toast trend everywhere, this is the version you actually need to try. I spotted ube coconut rolls at the store and knew immediately they were going to be the move for this, and honestly, this might be the easiest breakfast hack I've ever made.
Instead of making a traditional egg custard, you just melt down ube ice cream. That's it. The ice cream already has eggs, cream, and sugar built right in, so it creates this rich, silky dipping mixture without any extra work. You get all that custardy flavor with none of the fuss.
The rolls get dipped right into the melted ice cream, then go straight onto a buttered pan until every side is golden and caramelized. The smell alone will have everyone in your house wandering into the kitchen. Once they're cooked, you drizzle on a simple coconut condensed milk and ube glaze, and finish with powdered sugar, fresh raspberries, and toasted coconut.
The ube coconut flavor comes through in every single bite. It's soft, buttery, a little caramelized on the outside, and completely over the top in the best way.
And here's the thing: this trick works with ANY ice cream flavor. Vanilla, strawberry, cookies and cream, mango, chocolate, whatever you have in your freezer. The method is the same every single time. Just melt it down and let it do the work. But the ube coconut combo right here? That one hits different. You've been warned.
Frequently Asked Questions
Can I use a different type of bread?
Yes! Any soft, slightly sweet roll or brioche-style bread works beautifully here. Look for ube coconut rolls at your local Asian grocery store or Hawaiian market, or use any sweet dinner roll you love.
What if I can't find ube ice cream?
Vanilla, coconut, or even strawberry ice cream all work in this method. The technique stays the same no matter the flavor, just pick an ice cream you love and run with it.
Can I use regular condensed milk instead of coconut condensed milk?
Absolutely. Regular sweetened condensed milk works great. The coconut condensed milk just adds another layer of coconut flavor that pairs beautifully with the ube.
Do I need to add eggs to the melted ice cream?
Nope! That's the whole magic of this hack. Melted ice cream is already rich and creamy, so it acts as a perfect custard-style base without any extra ingredients. No mixing or beating required.
Melt ube ice cream, dip ube coconut rolls right in, and pan fry in butter until all sides are golden. Drizzle with a coconut condensed milk ube glaze and top with powdered sugar, raspberries, and toasted coconut. Done in under 20 minutes and dangerously good. The best part? This works with any ice cream flavor you have on hand.
Rate This Recipe!
Preparations
Prep Time:
5 minutes
Cook Time:
10 minutes
Total Time:
15 minutes
Cuisine:
Asian Fusion
Course:
Breakfast & Brunch
Calories:
380
Servings:
4
Author:
Ronica Rupan
Ingredients
Ingredients
French Toast
- 1 package ube coconut sweet rolls (12 count)
- 2 cups ube ice cream
- 2 tablespoons unsalted butter
Ube Coconut Glaze
- 1/4 cup sweetened condensed coconut milk
- 1/2 teaspoon ube flavoring (or more to taste)
Toppings
- Powdered sugar, for dusting
- Fresh raspberries
- 1/4 cup toasted coconut flakes
Instructions
- Add the ube ice cream to a shallow bowl and let it sit at room temperature for 5 to 10 minutes, or microwave in 15-second increments until fully melted and smooth.
- In a small bowl, whisk together the sweetened condensed coconut milk and ube flavoring until fully combined. Set the glaze aside.
- Heat a large skillet over medium heat and add the butter. Let it melt completely and begin to bubble slightly.
- Working in batches, dip each roll into the melted ice cream mixture, letting it soak for about 5 seconds per side so it absorbs the custard.
- Place the dipped rolls into the skillet and cook for 1 to 2 minutes per side, rotating with tongs so all sides become golden and caramelized. Repeat with remaining rolls, adding more butter as needed.
- Transfer the cooked rolls to a serving platter. Drizzle generously with the ube coconut glaze.
- Dust with powdered sugar, top with fresh raspberries and toasted coconut flakes, and serve immediately.
Bone Broth Chicken Tortilla Soup
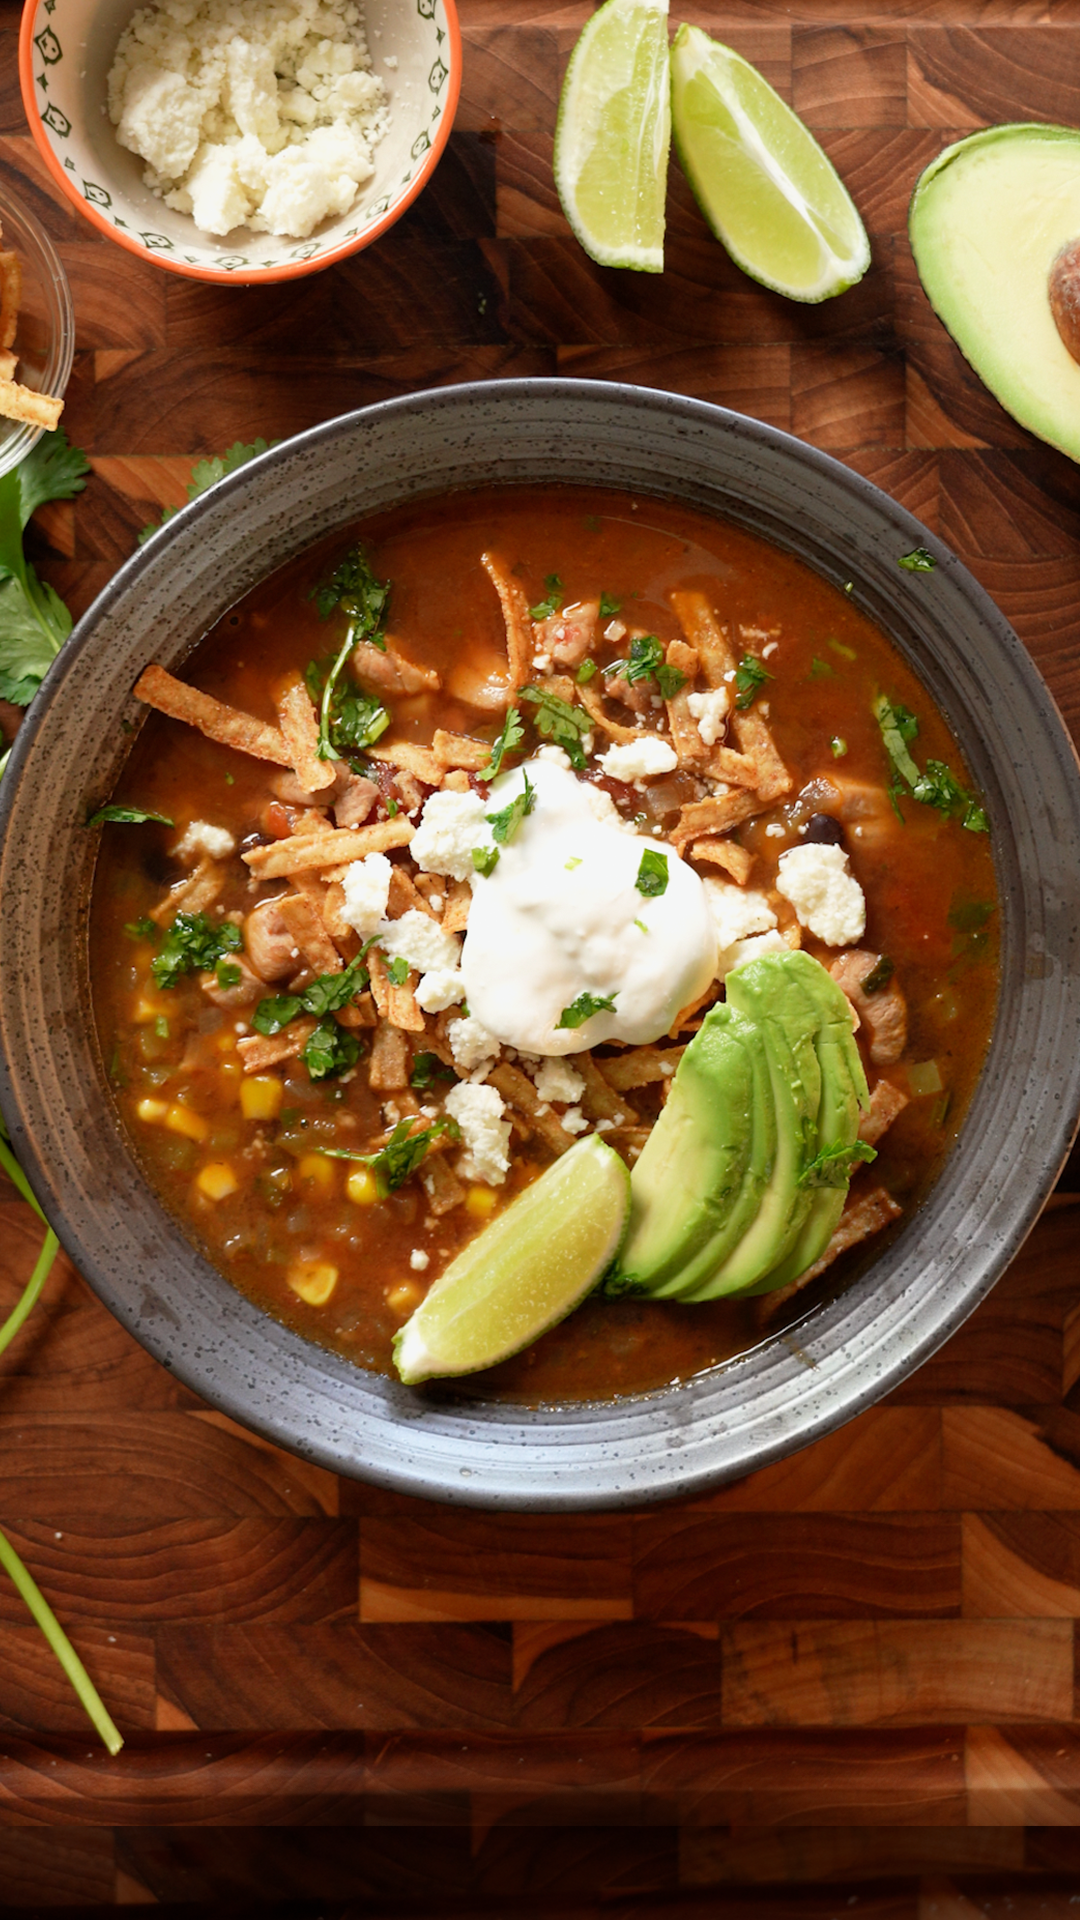
This bone broth chicken tortilla soup is a hearty, flavor-packed Mexican-inspired soup that's perfect for weeknight dinners, meal prep, or cozy make-ahead lunches! It starts with the holy trinity of aromatics: diced yellow onion, green bell pepper, and jalapeño that get sautéed in olive oil until softened and fragrant. Fresh minced garlic goes in next, followed by tomato paste and a robust blend of warming spices including cumin, chili powder, granulated garlic, smoked paprika, and dried oregano. The tomato paste gets cooked for a couple of minutes until it darkens slightly and caramelizes, which deepens the flavor and removes any raw taste. This creates an incredibly aromatic base that fills your whole kitchen with amazing smells. Chicken bone broth and a can of petite diced tomatoes (with all their juices) get stirred in, and the mixture comes to a boil. The bone broth is the secret weapon here, adding rich, savory depth, collagen, and nutrients that regular chicken broth just can't match. Boneless, skinless chicken thighs (cut into bite-sized pieces) go into the simmering broth and cook until tender and cooked through, about 12-15 minutes. Chicken thighs stay so much juicier and more flavorful than chicken breast in soup! Black beans and frozen corn get stirred in for heartiness, protein, and a touch of sweetness, and they cook just until heated through. Right before serving, fresh cilantro and lime juice get stirred in, which brightens everything up and adds that classic Mexican flavor. The soup gets ladled into bowls and topped with all the best toppings: crispy tortilla strips for crunch, crumbled cotija cheese for salty, tangy flavor, Mexican crema for cooling creaminess, sliced avocado for richness, fresh cilantro for color, and lime wedges for squeezing over the top. Every spoonful has tender chicken, black beans, sweet corn, rich tomato broth, and all those warming spices. The one-pot method keeps cleanup simple while building layers of smoky, savory depth. This soup is ready in under an hour and tastes even better the next day!
Frequently Asked Questions
Q: Can I use chicken breast instead of thighs?
A: Yes, but chicken thighs are highly recommended because they stay much juicier and more tender in soup. If using chicken breast, cut it into 1-inch pieces and reduce the cooking time to 8-10 minutes to prevent it from drying out. Check the internal temperature to ensure it reaches 165°F, then remove from heat immediately.
Q: Can I use regular chicken broth instead of bone broth?
A: Yes! Regular chicken broth or chicken stock works fine. You'll lose some of the rich, deep flavor and nutritional benefits (like collagen) that bone broth provides, but the soup will still be delicious. You can also use vegetable broth for a lighter option, though you'll want to add a bit more salt to compensate for the milder flavor.
Q: How spicy is this soup?
A: As written, this soup has a mild to moderate heat level. The jalapeño, chili powder, and smoked paprika add warmth without being overwhelming. For milder soup, remove the seeds and ribs from the jalapeño or skip it entirely. For spicier soup, leave the jalapeño seeds in, add a pinch of cayenne pepper, or use a serrano pepper instead of jalapeño.
Q: Can I make this in a slow cooker or Instant Pot?
A: Yes! For slow cooker: Sauté the vegetables and spices in a skillet first (steps 1), then transfer to slow cooker with broth, tomatoes, and chicken. Cook on low for 4-6 hours or high for 2-3 hours. Add beans and corn in the last 30 minutes. For Instant Pot: Use the sauté function for step 1, then add broth, tomatoes, and chicken. Pressure cook on high for 8 minutes, quick release, then stir in beans and corn and let sit for 5 minutes.
This bone broth chicken tortilla soup is hearty and flavor-packed! Tender chicken thighs, black beans, corn, and warming spices simmered in a rich tomato-bone broth base. Finished with lime juice, cilantro, and topped with crispy tortilla strips, cotija cheese, crema, and avocado. Ready in under an hour!
Rate This Recipe!
Preparations
Prep Time:
15 minutes
Cook Time:
25 minutes
Total Time:
40 minutes
Cuisine:
Mexican-inspired
Course:
Soup, Main Course, Dinner
Calories:
380 kcal (approx. per serving)
Servings:
6
Author:
Ronica Rupan
Ingredients
For the Soup:
- 2 tablespoons olive oil
- 1 large yellow onion, diced
- 1 medium green bell pepper, diced
- 1 medium jalapeño, diced (seeded if desired for less heat)
- 7 cloves garlic, minced
- 1½ tablespoons tomato paste
- 1 teaspoon ground cumin
- 1 teaspoon chili powder
- 1 teaspoon granulated garlic
- 1 teaspoon kosher salt, plus more to taste
- ½ teaspoon smoked paprika
- ½ teaspoon dried oregano
- 1 (32-ounce) package chicken bone broth (4 cups)
- 1 (20-ounce) can petite diced tomatoes, undrained
- 1 pound boneless, skinless chicken thighs, cut into 1-inch pieces
- 1 (14-ounce) can black beans, drained and rinsed
- 1 cup frozen corn kernels
- ½ cup fresh cilantro, coarsely chopped
- 2 tablespoons fresh lime juice
For the Toppings:
- 1 cup store-bought crispy tortilla strips
- ½ cup cotija cheese, crumbled
- ¼ cup Mexican crema (or sour cream)
- 1 avocado, sliced
- 2 limes, cut into wedges
- Fresh cilantro, chopped, for garnish
Instructions
- Sauté the Aromatics Heat the olive oil in a large pot or Dutch oven over medium-high heat. Once the oil is shimmering, add the diced onion, diced green bell pepper, and diced jalapeño. Cook, stirring occasionally, for 3-4 minutes until the vegetables are softened and the onion is translucent.
- Build the Flavor Base Add the minced garlic, tomato paste, ground cumin, chili powder, granulated garlic, kosher salt, smoked paprika, and dried oregano to the pot. Cook, stirring occasionally, for about 2 minutes until the tomato paste slightly darkens and caramelizes and all the spices become fragrant. This step is crucial for developing deep, complex flavors!
- Add Broth and Tomatoes Stir in the chicken bone broth and the entire can of petite diced tomatoes with all their juices. Bring the mixture to a boil over high heat, stirring occasionally.
- Cook the Chicken Once boiling, add the chicken thigh pieces to the pot. Reduce the heat to medium. Cover the pot and cook for 12-15 minutes, uncovering occasionally to stir, until the chicken is cooked through. Check doneness by inserting a thermometer into the thickest piece of chicken. It should register 165°F. The chicken will be tender and no longer pink in the center.
- Add Beans and Corn Stir in the drained and rinsed black beans and frozen corn kernels. Cook, uncovered, for 3 minutes to heat the beans and corn through. The corn can go in frozen, no need to thaw first!
- Finish with Fresh Flavors Remove the pot from heat. Stir in the coarsely chopped fresh cilantro and fresh lime juice. The lime juice and cilantro add brightness and that classic Mexican flavor. Taste the soup and add more salt if needed. Different brands of bone broth have varying sodium levels, so always taste and adjust!
- Serve with Toppings Ladle the hot soup evenly into 6 bowls. Top each bowl with crispy tortilla strips, crumbled cotija cheese, a drizzle of Mexican crema, sliced avocado, and chopped fresh cilantro. Serve with lime wedges on the side for squeezing over the top. Serve immediately while hot!
Strawberry and Cream Latte

This strawberry and cream latte is like drinking a strawberry shortcake in a cup, and it's about to become your new favorite coffee drink! You start by making homemade strawberry syrup from scratch, which is incredibly easy and tastes so much better than store-bought. Fresh strawberries get simmered with water and sugar until they break down and release all their sweet, fruity flavor into the liquid. The strawberries soften and the mixture reduces into a gorgeous pink syrup that's concentrated with strawberry flavor. You strain out the cooked strawberries (which you can actually save and use on toast, pancakes, or yogurt, so nothing goes to waste!), and you're left with this beautiful, fragrant strawberry syrup that you can store in an airtight container in the fridge for about a week. To build the latte, you add 2-3 tablespoons of that homemade strawberry syrup to the bottom of a glass, then fill the glass with ice. Pour in your milk of choice (dairy milk, oat milk, almond milk, whatever you prefer), which mixes slightly with the strawberry syrup and creates this gorgeous pink layer at the bottom. Here's where it gets beautiful: to create that signature layered effect, you slowly pour 2 shots of espresso over the back of a spoon so it cascades gently down into the glass rather than crashing through. This creates distinct layers of pink strawberry milk on the bottom and dark espresso on top. The final touches make it extra special: a generous dollop of whipped cream on top, a drizzle of sweetened condensed milk that adds extra creaminess and sweetness, and a garnish of freeze-dried strawberries and white chocolate shavings for that finishing touch. When you take your first sip, you get creamy whipped cream, sweet condensed milk, bold espresso, and that fruity strawberry flavor all in one. It's refreshing, indulgent, and tastes like a fancy coffee shop drink but costs a fraction of the price to make at home!
Frequently Asked Questions
Q: Can I use frozen strawberries for the syrup?
A: Absolutely! Frozen strawberries work just as well as fresh and are often more affordable, especially when fresh strawberries aren't in season. Use the same amount (about 1 cup) and no need to thaw them first. Just add them frozen to the pot with the water and sugar. They might take a few extra minutes to break down, but the syrup will taste just as delicious!
Q: Can I make this without an espresso machine?
A: Yes! If you don't have an espresso machine, you can use strong brewed coffee instead. Use about ½ cup of very strong coffee (double strength) to replace the 2 shots of espresso. You can also use instant espresso powder dissolved in a small amount of hot water, or use cold brew concentrate for a smoother flavor. The drink will still be delicious!
Q: How long does the strawberry syrup last?
A: Store the strawberry syrup in an airtight container or jar in the refrigerator for up to 1 week. Make sure to use a clean spoon each time you scoop some out to prevent contamination. You can also freeze the syrup in ice cube trays and store the cubes in a freezer bag for up to 3 months. Just thaw what you need!
Q: Can I make this dairy-free?
A: Yes! Use your favorite non-dairy milk (oat milk, almond milk, coconut milk, or soy milk all work great). For the whipped cream, use coconut whipped cream or a non-dairy whipped topping. For the condensed milk drizzle, use sweetened condensed coconut milk, which is available at most grocery stores. The strawberry syrup is already naturally vegan!
This strawberry and cream latte is like strawberry shortcake in a cup! Homemade strawberry syrup, ice, milk of choice, and espresso layered beautifully. Topped with whipped cream, condensed milk drizzle, freeze-dried strawberries, and white chocolate. Pure indulgence!
Rate This Recipe!
Preparations
Prep Time:
15 minutes (includes making syrup)
Cook Time:
10 minutes (for syrup)
Total Time:
25 minutes
Cuisine:
American, Café
Course:
Drinks, Breakfast
Calories:
280 kcal (approx. per serving)
Servings:
1
Author:
Ronica Rupan
Ingredients
For the Homemade Strawberry Syrup:
- 1 cup fresh strawberries, hulled and halved (or frozen strawberries)
- ½ cup water
- ¼ cup granulated sugar
For the Latte:
- 2-3 tablespoons homemade strawberry syrup
- 2 shots espresso (or ½ cup strong coffee)
- ¾ cup milk of choice
- Ice cubes
For Topping:
- Whipped cream
- Sweetened condensed milk, for drizzling
- Freeze-dried strawberries, for garnish
- White chocolate shavings or chips, for garnish
- Optional: fresh strawberry for garnish
Instructions
Make the Strawberry Syrup:
- Cook the Strawberries In a small saucepan, combine the hulled and halved strawberries, water, and sugar. Place over medium heat and bring to a gentle simmer, stirring occasionally to help the sugar dissolve. Let the mixture simmer for about 8-10 minutes, stirring occasionally, until the strawberries have broken down and softened completely and the liquid has reduced slightly and turned a beautiful pink color.
- Strain the Syrup Place a fine-mesh strainer over a bowl or measuring cup. Pour the strawberry mixture through the strainer, pressing down on the strawberries with the back of a spoon to extract all the flavorful syrup. Discard the cooked strawberry solids (or save them to use on toast, pancakes, yogurt, or oatmeal!). Let the syrup cool to room temperature, then transfer to an airtight container or jar. Store in the refrigerator for up to 1 week.
Make the Latte:
- Add Strawberry Syrup and Ice Add 2-3 tablespoons of the homemade strawberry syrup to the bottom of a tall glass. The amount depends on how sweet and strawberry-forward you want the drink. Fill the glass with ice cubes almost to the top.
- Pour the Milk Pour your milk of choice over the ice. The milk will mix slightly with the strawberry syrup at the bottom, creating a gorgeous pink layer. Use about ¾ cup of milk, or enough to fill the glass leaving about an inch at the top for the espresso and toppings.
- Layer the Espresso Brew 2 shots of espresso (or prepare ½ cup of very strong coffee). To create that beautiful layered effect, hold a spoon upside down just above the surface of the milk. Slowly pour the hot espresso over the back of the spoon, allowing it to cascade gently into the glass. This helps the espresso layer on top of the milk instead of mixing through. You should see distinct layers of pink strawberry milk on the bottom and dark espresso on top.
- Add Toppings Top the latte with a generous dollop of whipped cream. Drizzle sweetened condensed milk over the whipped cream in a zigzag pattern. The condensed milk adds extra sweetness and creaminess. Sprinkle freeze-dried strawberries and white chocolate shavings or chips over the top for garnish. If desired, add a fresh strawberry on the rim of the glass for extra prettiness.
- Serve and Enjoy Serve immediately with a straw! Give it a good stir before drinking to mix all the layers together, or sip it slowly to taste each layer separately. The choice is yours!
Dragon Fruit & Lychee Layered Mocktail

This dragon fruit and lychee layered mocktail is a stunning, tropical drink that's as beautiful as it is delicious! With vibrant pink and white layers, fresh tropical flavors, and a creamy coconut base, this drink looks like it came straight from a fancy resort bar but is incredibly easy to make at home. You start by blending ice with frozen lychees (seeds removed), coconut cream for richness, fresh lime juice for brightness, and your choice of sweetener (honey, agave, or stevia) until smooth and slushy. This creates a gorgeous pale, creamy lychee base with that delicate, floral-sweet lychee flavor. Here's where it gets fun: you pour half of the lychee blend into a separate container and set it aside. To the remaining lychee blend still in the blender, you add fresh dragon fruit (one whole dragon fruit, chopped) and blend again until smooth. The dragon fruit transforms the pale lychee mixture into this vibrant pink or magenta color (depending on whether you use white or pink dragon fruit). Now you have two beautiful layers: creamy white lychee and vibrant pink dragon fruit lychee. In a beautiful clear glass (so you can see those gorgeous layers!), you carefully pour the white lychee blend first, then slowly pour the pink dragon fruit blend on top. The two colors create this stunning ombré effect. Garnish with slices or small pieces of fresh lychee and dragon fruit on the rim or floating on top, and you've got a drink that's absolutely Instagram-worthy! The flavor is tropical, refreshing, slightly sweet, creamy from the coconut, and has that perfect balance of tart from the lime. It's naturally dairy-free, can be made refined sugar-free with the right sweetener, and is packed with antioxidants and vitamins from the dragon fruit. Perfect for summer parties, brunch, tropical-themed gatherings, or anytime you want a mocktail that feels special!
Frequently Asked Questions
Q: Can I use fresh lychee instead of frozen
A: Yes! If using fresh lychees, make sure they're peeled and seeded, then freeze them for at least 2 hours before using. Frozen lychee is key to getting that thick, slushy texture. If you use fresh lychees without freezing them first, add an extra cup of ice to compensate and get the right consistency.
Q: What's the difference between pink and white dragon fruit?
A: Pink (or red) dragon fruit has vibrant magenta flesh and will create a bright pink layer. White dragon fruit has white flesh with black seeds and will create a much paler, almost off-white layer with specks. For the most dramatic, Instagram-worthy color contrast, use pink dragon fruit! If you can only find white dragon fruit, the drink will still taste amazing but the color will be much more subtle.
Q: How do I create clean layers without them mixing?
A: The key is to pour slowly and gently! After pouring the white lychee layer into your glass, tilt the glass slightly and pour the pink dragon fruit layer very slowly down the side of the glass over the back of a spoon. This helps the heavier layer settle on top without immediately mixing. The layers will stay separated for about 10-15 minutes, giving you plenty of time for photos before drinking!
Q: Can I make this ahead of time?
A: You can blend both layers and store them separately in the fridge for up to 24 hours. They'll thicken and become more icy as they sit. When ready to serve, give each mixture a quick stir or blend to loosen it back up, then layer in glasses. Don't layer the drinks ahead of time or they'll mix together. Layer right before serving for the best visual effect!
This dragon fruit and lychee layered mocktail is stunning and tropical! Creamy white lychee layer with coconut cream and lime, topped with vibrant pink dragon fruit layer. Naturally dairy-free, refreshing, and absolutely beautiful!
Rate This Recipe!
Preparations
Prep Time:
10 minutes
Total Time:
10 minutes
Cuisine:
Tropical, Asian-inspired
Course:
Drinks
Calories:
180 kcal (approx. per serving)
Servings:
2
Author:
Ronica Rupan
Ingredients
Ingredients
- 1 whole dragon fruit (pink or white), peeled and chopped
- ½ cup frozen lychees, seeds removed (about 6-8 lychees)
- ¼ cup coconut cream
- Juice of 1 lime (about 2 tablespoons)
- 2-3 tablespoons sweetener of choice (honey, agave syrup, or stevia)
- 2 cups ice
For Garnish:
- Fresh lychee slices or pieces
- Fresh dragon fruit slices or cubes
Instructions
- Blend the Lychee Base In a blender, combine 2 cups of ice, the frozen lychees (seeds removed), coconut cream, and fresh lime juice. Add your chosen sweetener, starting with 2 tablespoons. Blend on high speed until the mixture is completely smooth and has a slushy, thick consistency. Taste and add the additional tablespoon of sweetener if you prefer it sweeter.
- Divide the Mixture Pour half of the lychee blend (about 1 cup) into a separate container or measuring cup and set it aside. This will be your white layer. Leave the other half in the blender.
- Make the Dragon Fruit Layer Add the chopped dragon fruit to the remaining lychee mixture still in the blender. Blend on high speed until completely smooth. The mixture should transform into a vibrant pink or magenta color (if using pink dragon fruit) or a pale speckled color (if using white dragon fruit).
- Layer in Glasses Take two beautiful clear glasses (so you can see the gorgeous layers!). Pour half of the white lychee blend into each glass first, filling them about halfway. Carefully and slowly pour the pink dragon fruit blend on top of the white layer in each glass. For the cleanest layers, tilt the glass slightly and pour the pink mixture slowly down the side over the back of a spoon. Fill to the top.
- Garnish and Serve Garnish each glass with fresh lychee slices or small pieces and fresh dragon fruit slices or cubes. You can place them on the rim of the glass, float them on top, or use a cocktail pick. Serve immediately with a straw and enjoy the beautiful layers before they mix together!
Burrata Dip Pasta
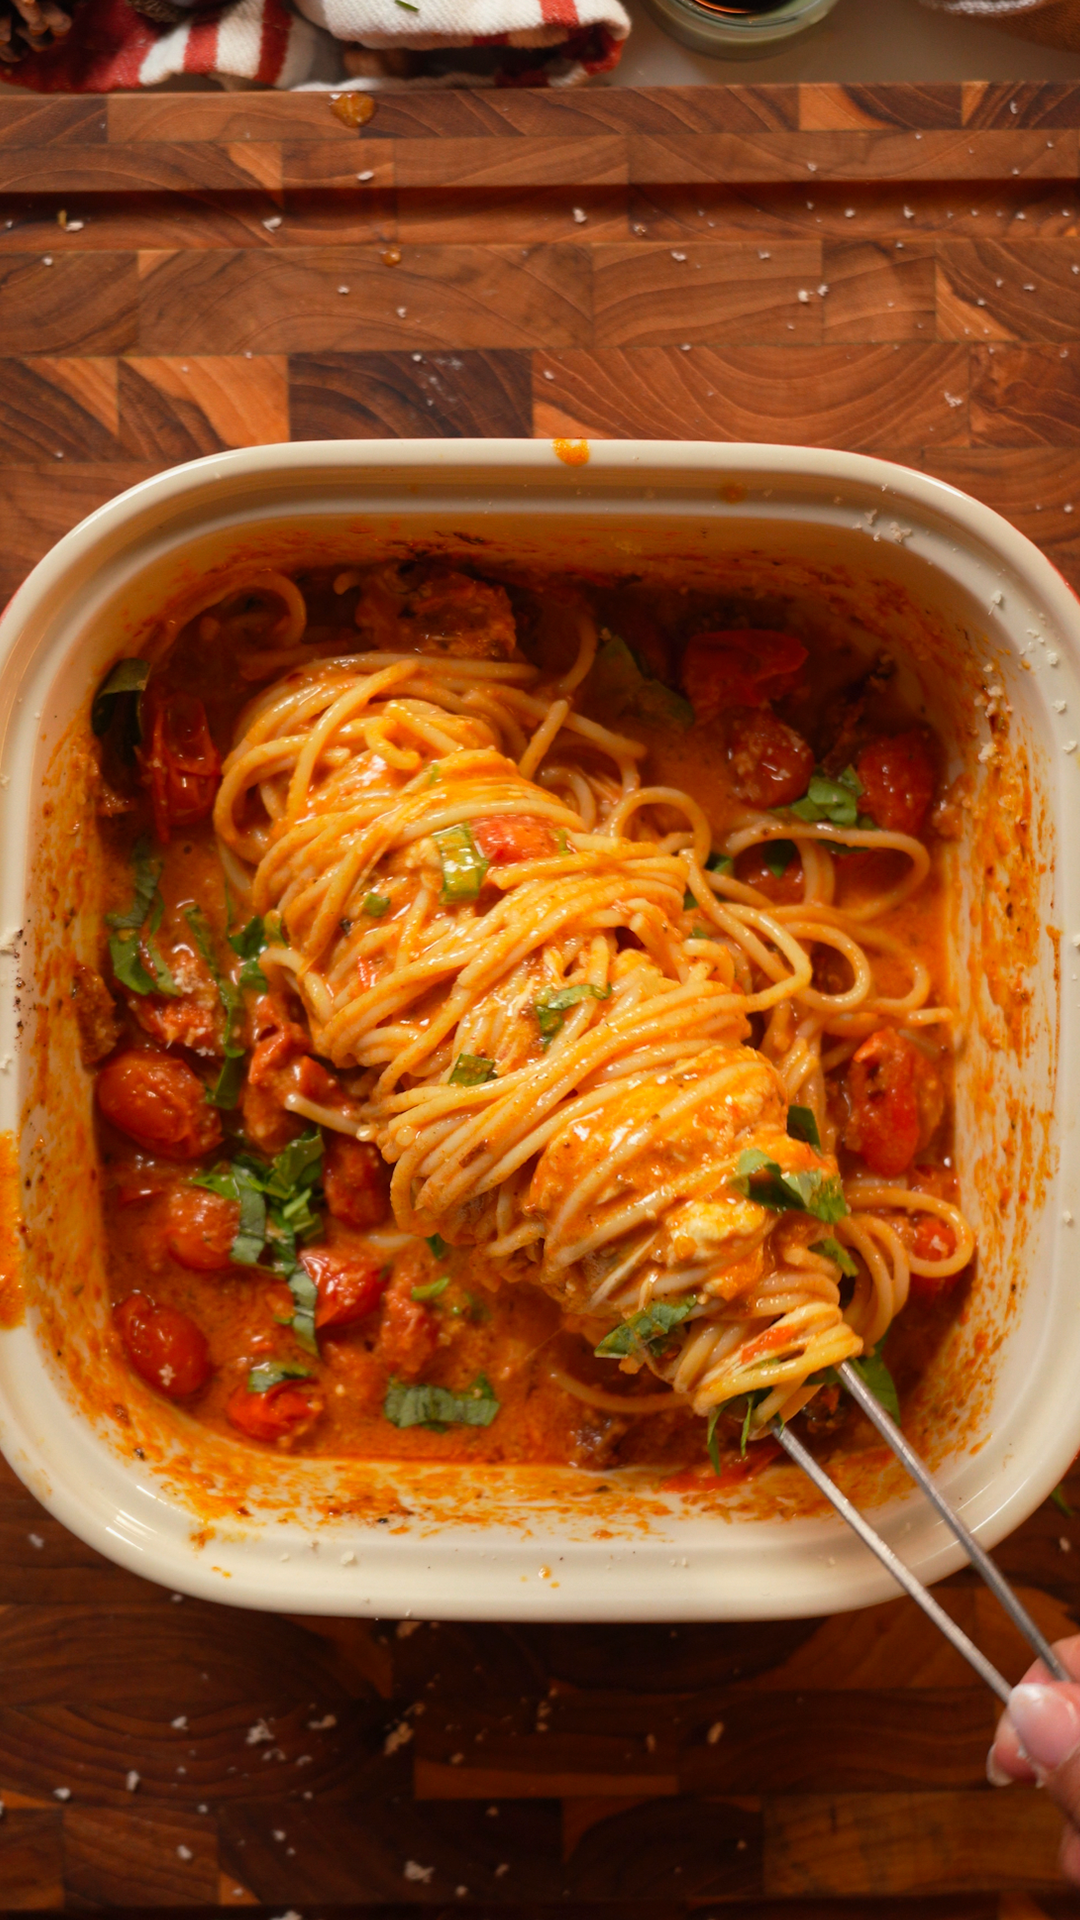
This burrata dip pasta is the ultimate combination of simplicity and elegance, turning just a handful of ingredients into something absolutely restaurant-worthy! Cherry tomatoes and roughly chopped sun-dried tomatoes get tossed with extra virgin olive oil, dried oregano, dried parsley, smoked paprika, sea salt, black pepper, red pepper flakes, and minced garlic, then roasted in a baking dish at 400°F for about 25 minutes. During this time, the cherry tomatoes burst and release their sweet juices, the sun-dried tomatoes soften and become jammy, the garlic mellows and caramelizes, and all those herbs and spices toast and become incredibly fragrant. Everything concentrates and intensifies in the oven, creating this deeply flavorful tomato base. The magic happens when you pull the dish from the oven: you immediately add fresh burrata cheese right on top of the hot roasted tomatoes. Using the back of a spoon, you gently break up the burrata, stirring it into the hot tomato mixture. The heat from the roasted tomatoes melts the burrata into this incredibly creamy, silky sauce that coats everything. The burrata's mild, milky flavor balances the intense roasted tomato sweetness and the warmth from the spices. Then you add your cooked pasta directly to the baking dish and toss everything together until every strand or piece is coated in that luscious burrata tomato sauce. Shaved Parmesan gets sprinkled on top for salty, nutty flavor, and fresh basil adds brightness and that classic Italian herb note. One more toss and you're ready to serve! This dish is all about the quality of ingredients: fresh burrata, good olive oil, ripe cherry tomatoes, and fresh basil make all the difference. It tastes like something from an upscale Italian restaurant but comes together in 40 minutes with minimal effort. Perfect for date nights, weeknight dinners when you want something special, or impressing dinner guests!
Frequently Asked Questions
Q: What type of pasta works best?
: Any pasta shape works! Short pasta like rigatoni, penne, or orecchiette are great because they catch the sauce in their crevices. Long pasta like spaghetti, linguine, or fettuccine also works beautifully. The recipe calls for 2 cups cooked pasta, which is about 6-8 ounces dried pasta. Use whatever shape you love or have on hand!
Q: Can I use fresh mozzarella instead of burrata
A: You can, but burrata is really what makes this special! Burrata has a creamy, stracciatella-filled center that melts into an incredibly rich sauce, while fresh mozzarella is firmer and doesn't create the same creamy texture. If you must substitute, use fresh mozzarella torn into small pieces and add 2-3 tablespoons of heavy cream to help create that creamy sauce consistency.
Q: Can I make this ahead of time?
A: This dish is best served immediately while the burrata is melty and the pasta is hot. However, you can roast the tomato mixture up to 2 days ahead, store it in the fridge, then reheat it in a 350°F oven for 10 minutes before adding the burrata and pasta. Don't add the burrata or pasta until right before serving, or the pasta will absorb all the sauce and the burrata will lose its creaminess.
Q: How do I store leftovers?
A: Store leftovers in an airtight container in the fridge for up to 3 days. Reheat gently in a skillet over low heat with a splash of pasta water or olive oil to loosen the sauce, as it will thicken as it sits. The burrata won't be as creamy after reheating, but it will still be delicious! You can also eat it cold as a pasta salad.
This burrata dip pasta combines roasted cherry tomatoes and sun-dried tomatoes with melted burrata to create a creamy, flavorful sauce! Seasoned with herbs, smoked paprika, and red pepper flakes, then tossed with pasta and finished with Parmesan and fresh basil. Rich, comforting, and elegant!
Rate This Recipe!
Preparations
Prep Time:
10 minutes
Cook Time:
30 minutes
Total Time:
40 minutes
Cuisine:
Italian
Course:
Main Course, Dinner
Calories:
480 kcal (approx. per serving)
Servings:
4
Author:
Ronica Rupan
Ingredients
Ingredients
- 10 ounces cherry tomatoes (about 2 cups)
- ½ cup sun-dried tomatoes, roughly chopped
- ¼ cup extra virgin olive oil
- 1½ teaspoons dried oregano
- 1½ teaspoons dried parsley
- 1 teaspoon smoked paprika
- 1 teaspoon sea salt or kosher salt
- ½ teaspoon freshly ground black pepper
- ½ teaspoon red pepper flakes
- 3 cloves garlic, minced
- 8 ounces fresh burrata cheese
- 2 cups cooked pasta of choice (from about 6-8 ounces dried pasta)
- ½ cup shaved Parmesan cheese
- ¼ cup fresh basil, chopped
Instructions
- Preheat the Oven Preheat your oven to 400°F (200°C).
- Prepare the Tomato Mixture Place the cherry tomatoes and roughly chopped sun-dried tomatoes in a 9x13-inch ceramic or glass baking dish. Add the extra virgin olive oil, dried oregano, dried parsley, smoked paprika, sea salt, black pepper, red pepper flakes, and minced garlic. Toss everything together with your hands or a spoon until all the tomatoes are evenly coated with the oil and seasonings.
- Roast the Tomatoes Roast uncovered in the preheated oven for about 25 minutes, stirring the mixture once halfway through at the 12-13 minute mark. The cherry tomatoes should burst and release their juices, and everything should be softened, caramelized around the edges, and incredibly fragrant. The garlic should be golden and the tomatoes should look jammy.
- Add the Burrata Remove the baking dish from the oven immediately. While the tomato mixture is piping hot, add the fresh burrata cheese right on top. Using the back of a spoon, gently break up the burrata, pressing and stirring it into the hot roasted tomatoes. The heat will melt the burrata into a creamy, luxurious sauce. Keep stirring for about 1 minute until the cheese is completely melted and creates a silky, creamy coating over the tomatoes.
- Add the Pasta Add the cooked pasta directly to the baking dish with the burrata tomato sauce. Using tongs or a large spoon, toss everything together for 1-2 minutes until every piece of pasta is well coated in the creamy sauce. The pasta should be completely coated and glossy.
- Finish and Serve Top the pasta with the shaved Parmesan cheese and chopped fresh basil. Toss once more to combine and distribute the Parmesan and basil throughout. Serve immediately while hot, right from the baking dish or transfer to individual serving bowls. Enjoy!
Mini Shakshuka Cups

These mini shakshuka cups are the most ingenious way to turn classic shakshuka into a portable, individual serving that's perfect for brunch gatherings or cozy weekend mornings! Instead of making traditional shakshuka in a skillet, you use flaky croissants cut in half widthwise and pressed into a jumbo muffin pan to create edible cups. The shakshuka filling is where all the flavor happens: you start by sautéing finely diced onion in olive oil until soft and sweet, then add finely diced red bell pepper and minced garlic that cook until fragrant and tender. Warm spices like cumin, smoked paprika, and optional red pepper flakes get stirred in to bloom and release their aromatics, followed by tomato paste that gets cooked for a minute to deepen its flavor and remove any raw taste. Diced tomatoes (slightly drained so the sauce isn't too watery) go in next, along with salt and black pepper, and the whole mixture simmers for about 5 minutes until it thickens into a chunky, rich sauce. Fresh cilantro gets stirred in at the end for brightness. This spiced tomato sauce gets spooned into each croissant cup (about 2 tablespoons per cup), then you crack a whole egg right on top of the sauce in each cup. A sprinkle of salt and pepper seasons the eggs, then everything bakes at 375°F for 14-16 minutes. The croissants turn golden and crispy on the edges while staying soft where they touch the sauce, and the eggs bake until the whites are just set but the yolks are still jammy and runny. If you want fully cooked yolks, bake for the full 16 minutes, but checking at 13-14 minutes gives you those gorgeous jammy yolks that ooze when you cut into them. Once out of the oven, you can top with crumbled feta cheese for salty, tangy richness and more fresh cilantro for color and flavor. Each cup is a complete little meal: buttery croissant, rich spiced tomato sauce, and a perfectly cooked egg, all in one portable package. These are perfect for meal prep, brunch parties, or anytime you want shakshuka without the hassle of a skillet!
Frequently Asked Questions
Q: Can I use store-bought croissants?
A: Yes! Store-bought croissants work perfectly for this recipe and save you tons of time. Look for all-butter croissants from a bakery or the bakery section of your grocery store for best flavor. Day-old croissants actually work great because they're slightly firmer and easier to press into the muffin cups without tearing.
Q: Can I make the shakshuka sauce ahead of time?
A: Absolutely! The shakshuka sauce can be made up to 3 days ahead and stored in an airtight container in the fridge. When ready to assemble, just reheat it slightly so it's easier to spoon, then proceed with pressing the croissants into the muffin pan, filling, and baking. This makes morning assembly super quick!
Q: What if I don't have a jumbo muffin pan?
A: You can use a regular 12-cup muffin pan, but you'll need to cut the croissants into smaller pieces to fit. Use 6 croissants cut into quarters (24 pieces total), press 2 pieces into each regular muffin cup to form the base, use about 1 tablespoon of sauce per cup, and crack in quail eggs or use regular eggs whisked and divided among the cups. Baking time will be slightly less, around 10-12 minutes.
Q: How do I prevent the eggs from overcooking?
A: Start checking at 13 minutes! The eggs go from perfectly jammy to fully hard very quickly. For runny yolks, pull them at 13-14 minutes when the whites are just set but still slightly jiggly. For medium yolks, bake for 15 minutes. For fully cooked yolks, go the full 16 minutes. Remember they'll continue cooking slightly from residual heat after you remove them from the oven.
These mini shakshuka cups are genius! Flaky croissants pressed into a muffin pan, filled with rich spiced shakshuka sauce (onions, bell peppers, tomatoes, cumin, smoked paprika), and topped with a soft-baked egg. Perfect for brunch or cozy weekend mornings!
Rate This Recipe!
Preparations
Prep Time:
10 minutes
Cook Time:
25 minutes
Total Time:
35 minutes
Cuisine:
Middle Eastern, Fusion
Course:
Breakfast, Brunch
Calories:
320 kcal (approx. per cup)
Servings:
6 croissant cups
Author:
Ronica Rupan
Ingredients
Ingredients
For the Shakshuka Sauce:
- 1 tablespoon olive oil
- ½ small yellow onion, finely diced
- ½ red bell pepper, finely diced
- 2 cloves garlic, minced
- ¾ teaspoon ground cumin
- ½ teaspoon smoked paprika
- ¼ teaspoon dried red pepper flakes (optional, for heat)
- 1 tablespoon tomato paste
- ½ (14-ounce) can diced tomatoes, drained slightly
- ½ teaspoon kosher salt, plus more to taste
- ¼ teaspoon black pepper, plus more to taste
- 1 tablespoon fresh cilantro, chopped, plus more for garnish
For the Cups:
- 3 large croissants, cut in half widthwise
- 6 small eggs
- Crumbled feta cheese (optional, for topping)
Instructions
- Preheat and Prepare Muffin Pan Preheat your oven to 375°F (190°C). Line a 6-cup jumbo muffin pan with parchment paper squares or use a nonstick muffin pan and spray it generously with cooking spray. Set aside.
- Sauté the Aromatics Heat the olive oil in a large skillet over medium heat until it shimmers. Add the finely diced onion and cook, stirring occasionally, for about 2 minutes until softened and translucent. Add the finely diced red bell pepper and minced garlic. Cook, stirring often, for about 3 minutes until the bell pepper is softened and the garlic is fragrant but not browned.
- Add Spices and Tomato Paste Stir in the ground cumin, smoked paprika, and red pepper flakes (if using). Cook, stirring constantly, for about 30 seconds until the spices are fragrant and toasted. Add the tomato paste and cook, stirring often, for 1 minute. The tomato paste will darken slightly and become more concentrated in flavor.
- Build the Shakshuka Sauce Stir in the slightly drained diced tomatoes, salt, and black pepper. Bring the mixture to a simmer over medium heat. Let the sauce simmer, uncovered, stirring occasionally, for about 5 minutes until it has thickened and reduced to a chunky consistency. You want it saucy but not watery. Stir in the chopped fresh cilantro and remove from heat. Taste and adjust salt and pepper if needed. Set aside to cool slightly.
- Form the Croissant Cups Cut each croissant in half widthwise (not lengthwise) so you have a top and bottom half. Press each croissant half, cut side up, into a jumbo muffin cup. Use your fingers to gently press and shape the croissant to form a cup that goes up the sides of the muffin cavity. Don't worry if it's not perfect or if there are small tears. It will still work beautifully!
- Fill with Shakshuka Sauce Spoon about 2 tablespoons of the warm shakshuka sauce into each croissant cup. Spread it evenly in the bottom of the cup, leaving a little well in the center for the egg.
- Add the Eggs Carefully crack 1 egg over the top of the sauce in each cup. The egg should sit right on top of the sauce. Season each egg with a small pinch of salt and black pepper.
- Bake Place the muffin pan in the preheated oven and bake for 14-16 minutes. Start checking at 13 minutes if you want jammy, runny yolks. The croissants should be golden brown and crispy on the edges, and the egg whites should be just set while the yolks are still slightly jiggly. For firmer yolks, bake the full 16 minutes.
- Top and Serve Remove from the oven and let cool in the pan for 2-3 minutes. Carefully remove each cup from the muffin pan using a spoon or small spatula. If desired, top with crumbled feta cheese and additional chopped fresh cilantro. Serve immediately while hot!
Family-Style Taco Lasagna

This family-style taco lasagna is the perfect quick and easy meal for all the busy parents out there, and it's about to become your new weeknight dinner hero! It's cheesy, saucy, packed with bold taco flavors, and ridiculously simple to make. Instead of traditional lasagna noodles, you use flour tortillas cut in half, which makes assembly so much faster and adds that soft, slightly chewy texture. The filling is where all the magic happens: ground beef gets browned until deeply caramelized, then onions are cooked until soft and sweet, followed by garlic and green bell peppers that add aromatics and a slight crunch. Black beans go in for protein and heartiness, along with jarred salsa for moisture and tangy tomato flavor, plus a generous amount of taco seasoning, cumin, and chili powder that create those classic taco flavors everyone loves. This savory, spiced beef mixture gets layered in a baking dish with the tortilla halves, chopped fresh tomatoes for brightness and juiciness, and a blend of sharp cheddar and Pepper Jack cheese. The cheddar brings that classic sharp, tangy flavor, while the Pepper Jack adds a subtle kick of heat and amazing melting quality. You build two complete layers: tortillas, beef mixture, tomatoes, cheese, then repeat! The whole thing gets covered with foil and baked for 10 minutes to heat everything through and start melting the cheese, then uncovered for another 10 minutes so the cheese gets bubbly, golden, and slightly crispy on top. After a 10-minute rest (which lets everything set up so it doesn't fall apart when you slice it), you cut it into squares and load it up with all your favorite taco toppings: sour cream for cooling creaminess, fresh cilantro and green onions for brightness, guacamole for richness, sliced jalapeños for heat, and pico de gallo for fresh tomato-y crunch. Each bite has layers of soft tortillas, seasoned beef, melty cheese, and all those fresh toppings. It's like a taco casserole meets lasagna, and it's absolutely crowd-pleasing! This is perfect for feeding a crowd, meal prep, potlucks, weeknight dinners, or anytime you want maximum flavor with minimum effort!
Frequently Asked Questions
Q: Can I use ground turkey or chicken instead of beef?
A: Absolutely! Ground turkey, ground chicken, or even ground pork all work great in this recipe. The cooking time stays the same. If using leaner meats like turkey or chicken breast, you might want to add an extra tablespoon of oil since they don't render as much fat as beef. The flavor will be slightly different but still delicious!.
Q: Can I make this vegetarian?
A: Yes! Skip the ground beef and double the black beans, or use a mix of black beans and pinto beans. You can also add sautéed mushrooms, zucchini, or bell peppers for extra vegetables and texture. Add an extra ½ cup of salsa to keep it moist since you won't have the fat from the beef. Everything else stays the same!
Q: Can I make this ahead of time?
A: Definitely! Assemble the entire lasagna (through step 3), cover tightly with plastic wrap and then foil, and refrigerate for up to 24 hours before baking. When ready to bake, let it sit at room temperature for 20-30 minutes, then bake as directed, adding 5-10 extra minutes since it's coming from cold. You can also freeze the unbaked lasagna for up to 3 months. Thaw in the fridge overnight, then bake as directed.
Q: What can I serve this with?
A: This is pretty hearty on its own, but it pairs beautifully with Mexican rice, cilantro lime rice, refried beans, a simple side salad, tortilla chips with salsa, or Mexican street corn. For a lighter meal, serve it with a big green salad dressed with lime vinaigrette. It's also great with chips and queso on the side for extra indulgence!
This family-style taco lasagna is the perfect quick and easy meal for busy parents! Cheesy, saucy, and packed with flavor. Layers of tortillas, spiced beef, black beans, tomatoes, and melty cheddar and Pepper Jack cheese baked until bubbly. Topped with sour cream, guac, pico, and jalapeños. Taco night leveled up!
Rate This Recipe!
Preparations
Prep Time:
20 minutes
Cook Time:
30 minutes
Total Time:
50 minutes
Cuisine:
Mexican-American, Fusion
Course:
Main Course, Dinner
Calories:
520 kcal (approx. per serving)
Servings:
8
Author:
Ronica Rupan
Ingredients
Ingredients
For the Lasagna:
- 2 tablespoons neutral oil, plus more for greasing
- 2 pounds ground beef
- 1 medium yellow onion, chopped (plus more for serving)
- 4 cloves garlic, chopped
- 1 green bell pepper, seeds and ribs removed, chopped
- 1 (15-ounce) can black beans, drained and rinsed
- 1 (15-ounce) jar medium salsa (about 1½ cups)
- 2 tablespoons taco seasoning
- 1 tablespoon ground cumin
- 1 tablespoon chili powder
- ½ teaspoon kosher salt, plus more to taste
- 8 (8-inch) flour tortillas, cut in half
- 2 medium tomatoes, chopped
- 8 ounces sharp cheddar cheese, shredded (about 2 cups)
- 8 ounces Pepper Jack cheese, shredded (about 2 cups)
For Toppings:
- Sour cream
- Fresh cilantro, chopped
- Green onions or chives, sliced
- Guacamole
- Sliced jalapeños
- Pico de gallo
Instructions
- Preheat and Prepare Pan Preheat your oven to 400°F (200°C). Generously grease a 9x13-inch glass or ceramic baking dish with oil or cooking spray. Set aside.
- Brown the Beef Heat 2 tablespoons of neutral oil in a large nonstick skillet over medium heat. Add the ground beef and cook, breaking it up with a wooden spoon and stirring often, until browned and no pink remains, about 7-8 minutes. The beef should have some nice caramelized bits. Drain the excess fat and drippings from the skillet, leaving just the cooked beef.
- Cook the Vegetables Add the chopped onion to the skillet with the beef. Cook, stirring occasionally, for 3-4 minutes until the onion is softened and translucent. Add the chopped garlic and chopped green bell pepper. Cook, stirring often, until the garlic is fragrant and the bell pepper is softened, about 1-2 minutes. Watch the garlic carefully so it doesn't burn!
- Build the Beef Mixture Stir in the drained and rinsed black beans, salsa, taco seasoning, ground cumin, chili powder, and ½ teaspoon of kosher salt. Cook, stirring occasionally, for 2-3 minutes until everything is well mixed and heated through. The mixture should be saucy but not soupy. Remove from heat. Taste and add more salt if needed.
- First Layer Arrange 6 tortilla halves in the bottom of the greased baking dish, overlapping them slightly to cover the entire bottom. It's okay if they go up the sides a bit. Spread half of the beef mixture evenly over the tortillas. Sprinkle half of the chopped tomatoes over the beef. Top with one-third of the combined shredded cheddar and Pepper Jack cheese (about 1⅓ cups total).
- Second Layer Repeat the layers: arrange the remaining 10 tortilla halves over the cheese layer (you'll have 16 halves total from 8 tortillas), spread the remaining beef mixture on top, add the remaining chopped tomatoes, and finish with the remaining two-thirds of the cheese (about 2⅔ cups) spread evenly over everything.
- Bake Covered Cover the baking dish tightly with aluminum foil. Bake for 10 minutes. This heats everything through and starts melting the cheese without browning the top.
- Bake Uncovered Remove the foil and bake for an additional 10 minutes, uncovered, until the cheese is bubbly, melted, and starting to turn golden brown in spots. The edges should be bubbling.
- Rest and Slice Remove from the oven and let the lasagna rest for 10 minutes before slicing. This resting time is important! It allows the layers to set up so the lasagna holds its shape when you cut it instead of falling apart. After resting, cut into 8 squares.
- Top and Serve Serve each square topped with your favorite taco toppings: a dollop of sour cream, chopped fresh cilantro, sliced green onions or chives, a scoop of guacamole, sliced jalapeños, and a generous spoonful of pico de gallo. Dig in while it's hot!
Rosemary Pesto Crown Bread with Apricot Glaze
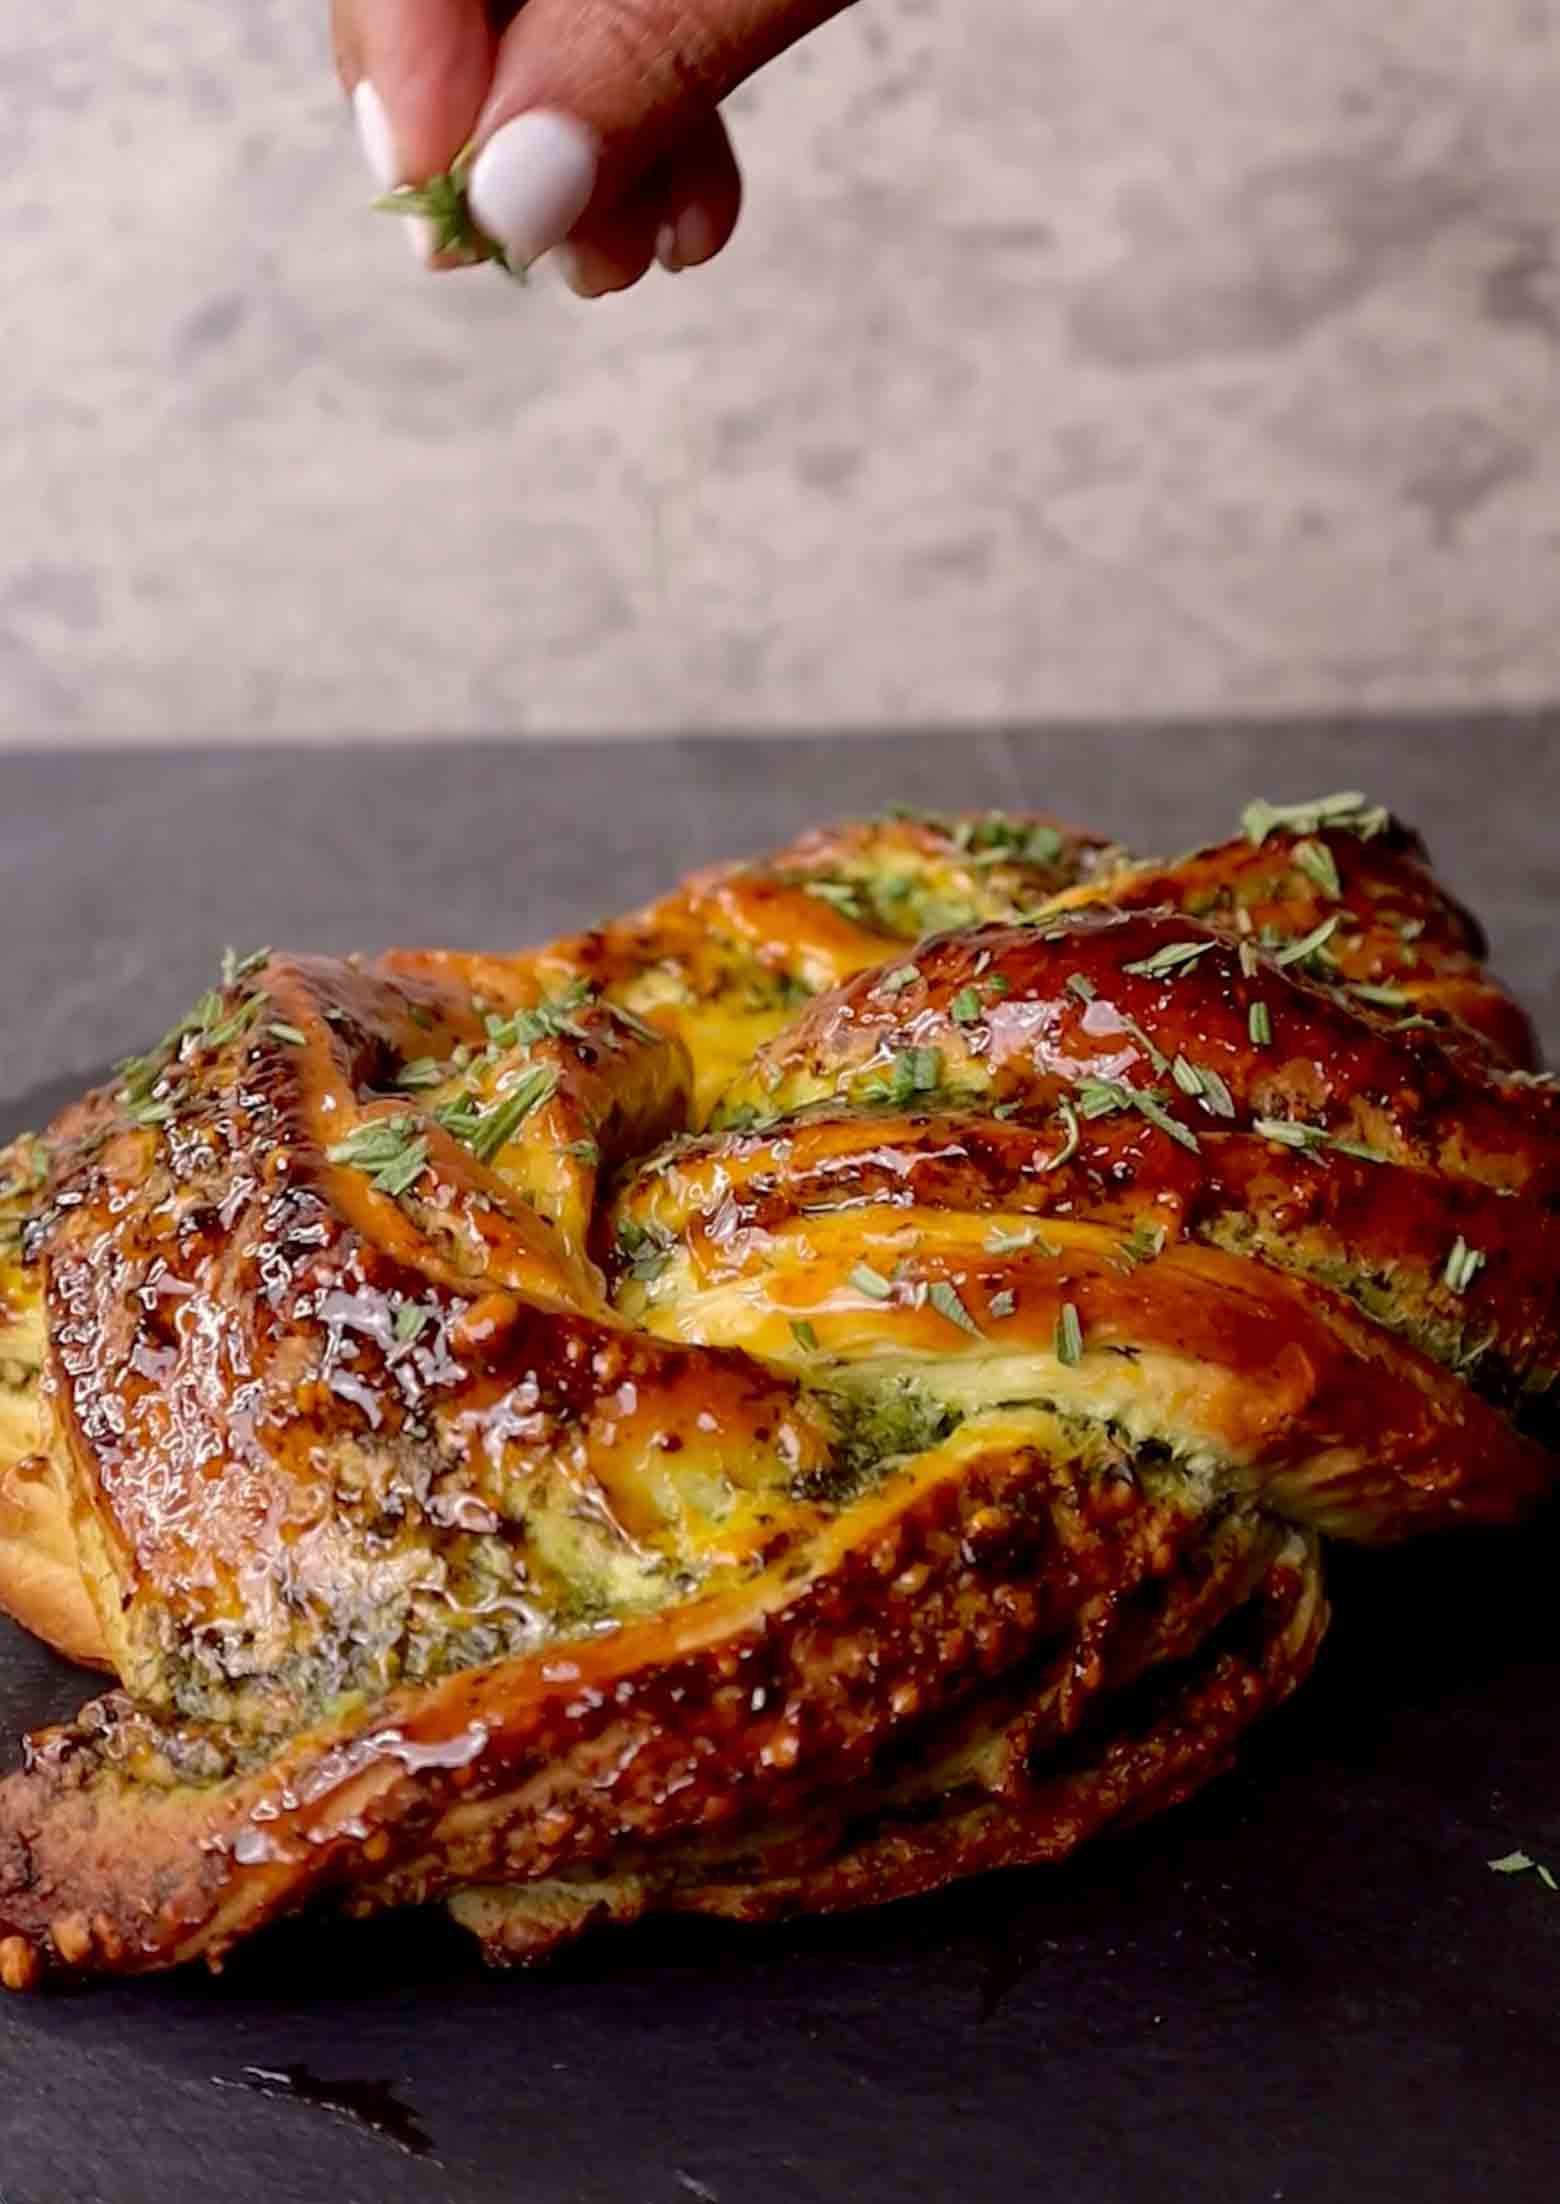
This rosemary pesto crown bread with apricot glaze is an absolutely stunning showstopper that looks incredibly impressive but is totally doable at home! A soft, fluffy yeast dough infused with fresh rosemary gets kneaded until smooth and elastic, then rests and rises until doubled. Once risen, you roll the dough into a large rectangle and spread it generously with homemade nut-free pesto made with fresh basil, garlic, Parmesan, olive oil, and seasonings, plus dollops of cream cheese throughout that add pockets of tangy creaminess. The whole thing gets rolled up tightly into a long log, then here's where the magic happens: you cut the log lengthwise down the middle (leaving about 2 inches at the top intact), creating two long pieces that are still connected at one end. You braid these two pieces over and under each other, exposing all those gorgeous pesto swirls, then shape the braid into a circular crown, pinching the ends together to seal. After a final 30-minute rest to let it rise again, the crown bakes at 415°F for 25 minutes until golden brown and puffed. The aroma of rosemary, garlic, and baking bread fills your entire kitchen! Once it cools slightly, you brush the warm bread with apricot jam that's been heated until pourable, creating this beautiful glossy glaze that adds subtle sweetness, then sprinkle fresh chopped rosemary over the top for color and extra herbaceous flavor. The result is this gorgeous, bakery-quality bread crown with swirls of green pesto throughout, pockets of cream cheese, a soft fluffy interior, a golden crust, and that sweet-savory apricot glaze. It's perfect for tearing and sharing at gatherings, holiday dinners, potlucks, or anytime you want bread that doubles as centerpiece!
This rosemary pesto crown bread with apricot glaze is a stunning showstopper! Soft rosemary-infused dough filled with homemade nut-free pesto and cream cheese, braided into a gorgeous crown shape, baked until golden, and brushed with sweet apricot glaze. Perfect for sharing!
Rate This Recipe!
Preparations
Prep Time:
30 minutes (plus 2 hours rising time)
Cook Time:
25 minutes
Total Time:
2 hours 55 minutes
Cuisine:
Italian-inspired
Course:
Bread, Appetizer, Side Dish
Calories:
280 kcal (approx. per serving)
Servings:
8
Author:
Ronica Rupan
Ingredients
Ingredients
For the Dough:
- 1½ cups plus 2 tablespoons unbleached all-purpose flour
- 2 tablespoons unbleached all-purpose flour (for dusting)
- 1 teaspoon kosher salt
- 1½ teaspoons fast-acting yeast (instant yeast)
- 1½ tablespoons fresh rosemary, finely chopped
- ¼ cup (½ stick) unsalted butter, softened
- 4½ ounces warm milk (about ½ cup plus 1 tablespoon, 105-110°F)
- 1 large egg, at room temperature
For the Nut-Free Pesto:
- 2 cups fresh basil leaves, packed
- 3 cloves garlic
- ½ cup freshly grated Parmesan cheese
- ¼ cup extra virgin olive oil
- ¼ teaspoon kosher salt
- ⅛ teaspoon black pepper
For the Filling:
- ¾ cup pesto (from above recipe or store-bought)
- 2 tablespoons cream cheese, softened
For the Topping:
- 3 tablespoons apricot jam (homemade or store-bought)
- Fresh rosemary, chopped (for garnish)
Instructions
Make the Pesto:
- Blend the Pesto Add the fresh basil leaves, garlic cloves, freshly grated Parmesan cheese, olive oil, salt, and black pepper to a food processor. Pulse several times until everything is blended into a thick, slightly chunky paste. Scrape down the sides as needed. The pesto should be spreadable but not watery. Set aside until ready to use.
Make the Dough:
- Mix the Dry Ingredients In a large mixing bowl, combine the flour (1½ cups plus 2 tablespoons), kosher salt, fast-acting yeast, and finely chopped fresh rosemary. Add the softened butter and rub it into the flour mixture with your fingertips until the texture resembles coarse breadcrumbs. This should take about 2-3 minutes of rubbing.
- Add Wet Ingredients and Form Dough Add the egg and warm milk to the flour mixture. Using your hands or a wooden spoon, bring the dough together until it forms a shaggy ball. It will be slightly sticky at this point, which is normal.
- Knead the Dough Turn the dough out onto a lightly floured surface (use the 2 tablespoons of flour for dusting). Knead the dough for about 10 minutes until it becomes smooth, elastic, and no longer sticky. The dough should bounce back when you poke it with your finger. If it's too sticky, add a tiny bit more flour, but don't add too much or the bread will be dense.
- First Rise Shape the dough into a smooth ball and place it back in the bowl. Cover with a clean kitchen towel or plastic wrap. Let it rest in a warm spot for 90 minutes until doubled in size. A warm kitchen or an oven with just the light on works great!
Shape the Crown:
- Roll Out the Dough Once the dough has doubled, punch it down gently to release air bubbles. On a lightly floured surface, roll the dough out into a rectangle about 12 inches by 10 inches. Try to keep the thickness even throughout.
- Add the Filling Spread the pesto evenly over the entire surface of the dough, leaving about ½ inch border around the edges. Drop small dollops of softened cream cheese all over the pesto layer, spacing them evenly. Don't spread the cream cheese, just leave it in dollops.
- Roll into a Log Starting from one long side (12-inch side), tightly roll the dough up into a long log, like a jelly roll. Keep the roll tight as you go to minimize air pockets. Pinch the seam at the end to seal.
- Cut and Braid Using a sharp knife, cut the log lengthwise down the middle, starting from one end but leaving about 2 inches at the top intact and uncut. You should now have two long pieces that are still connected at one end, with all the pesto layers exposed. Starting at the connected end, braid one piece over the other, alternating left over right, right over left, all the way down the length. The exposed pesto swirls will be visible throughout the braid.
- Shape into Crown Transfer the braided dough to a parchment-lined baking sheet. Carefully shape the braid into a circular crown, bringing the two ends together. Pinch the ends firmly together to seal so they don't open up during baking.
- Second Rise Cover the shaped crown loosely with a kitchen towel and let it rest for 30 minutes. The dough should puff up and look lighter.
Bake:
- Preheat and Bake While the crown does its second rise, preheat your oven to 415°F (213°C). Once the crown has doubled in size and looks puffy, bake for 25 minutes until golden brown on top and cooked through. The bread should sound hollow when you tap the bottom.
- Cool Slightly Remove the crown from the oven and let it cool on the baking sheet for about 10 minutes. It should be warm but not piping hot when you glaze it.
Glaze and Serve:
- Apply Apricot Glaze While the bread cools, warm the apricot jam in a small saucepan or microwave until it's thin and pourable, about 15-20 seconds. Using a pastry brush, generously brush the warm apricot jam all over the crown, making sure to get it into all the crevices. The glaze will soak in slightly and create a beautiful glossy finish.
- Garnish and Serve Sprinkle freshly chopped rosemary over the glazed crown for extra color and flavor. Let the bread cool for another 5-10 minutes, then serve warm! Encourage everyone to tear off pieces to share.
Sweet and Spiced Lamb Leg
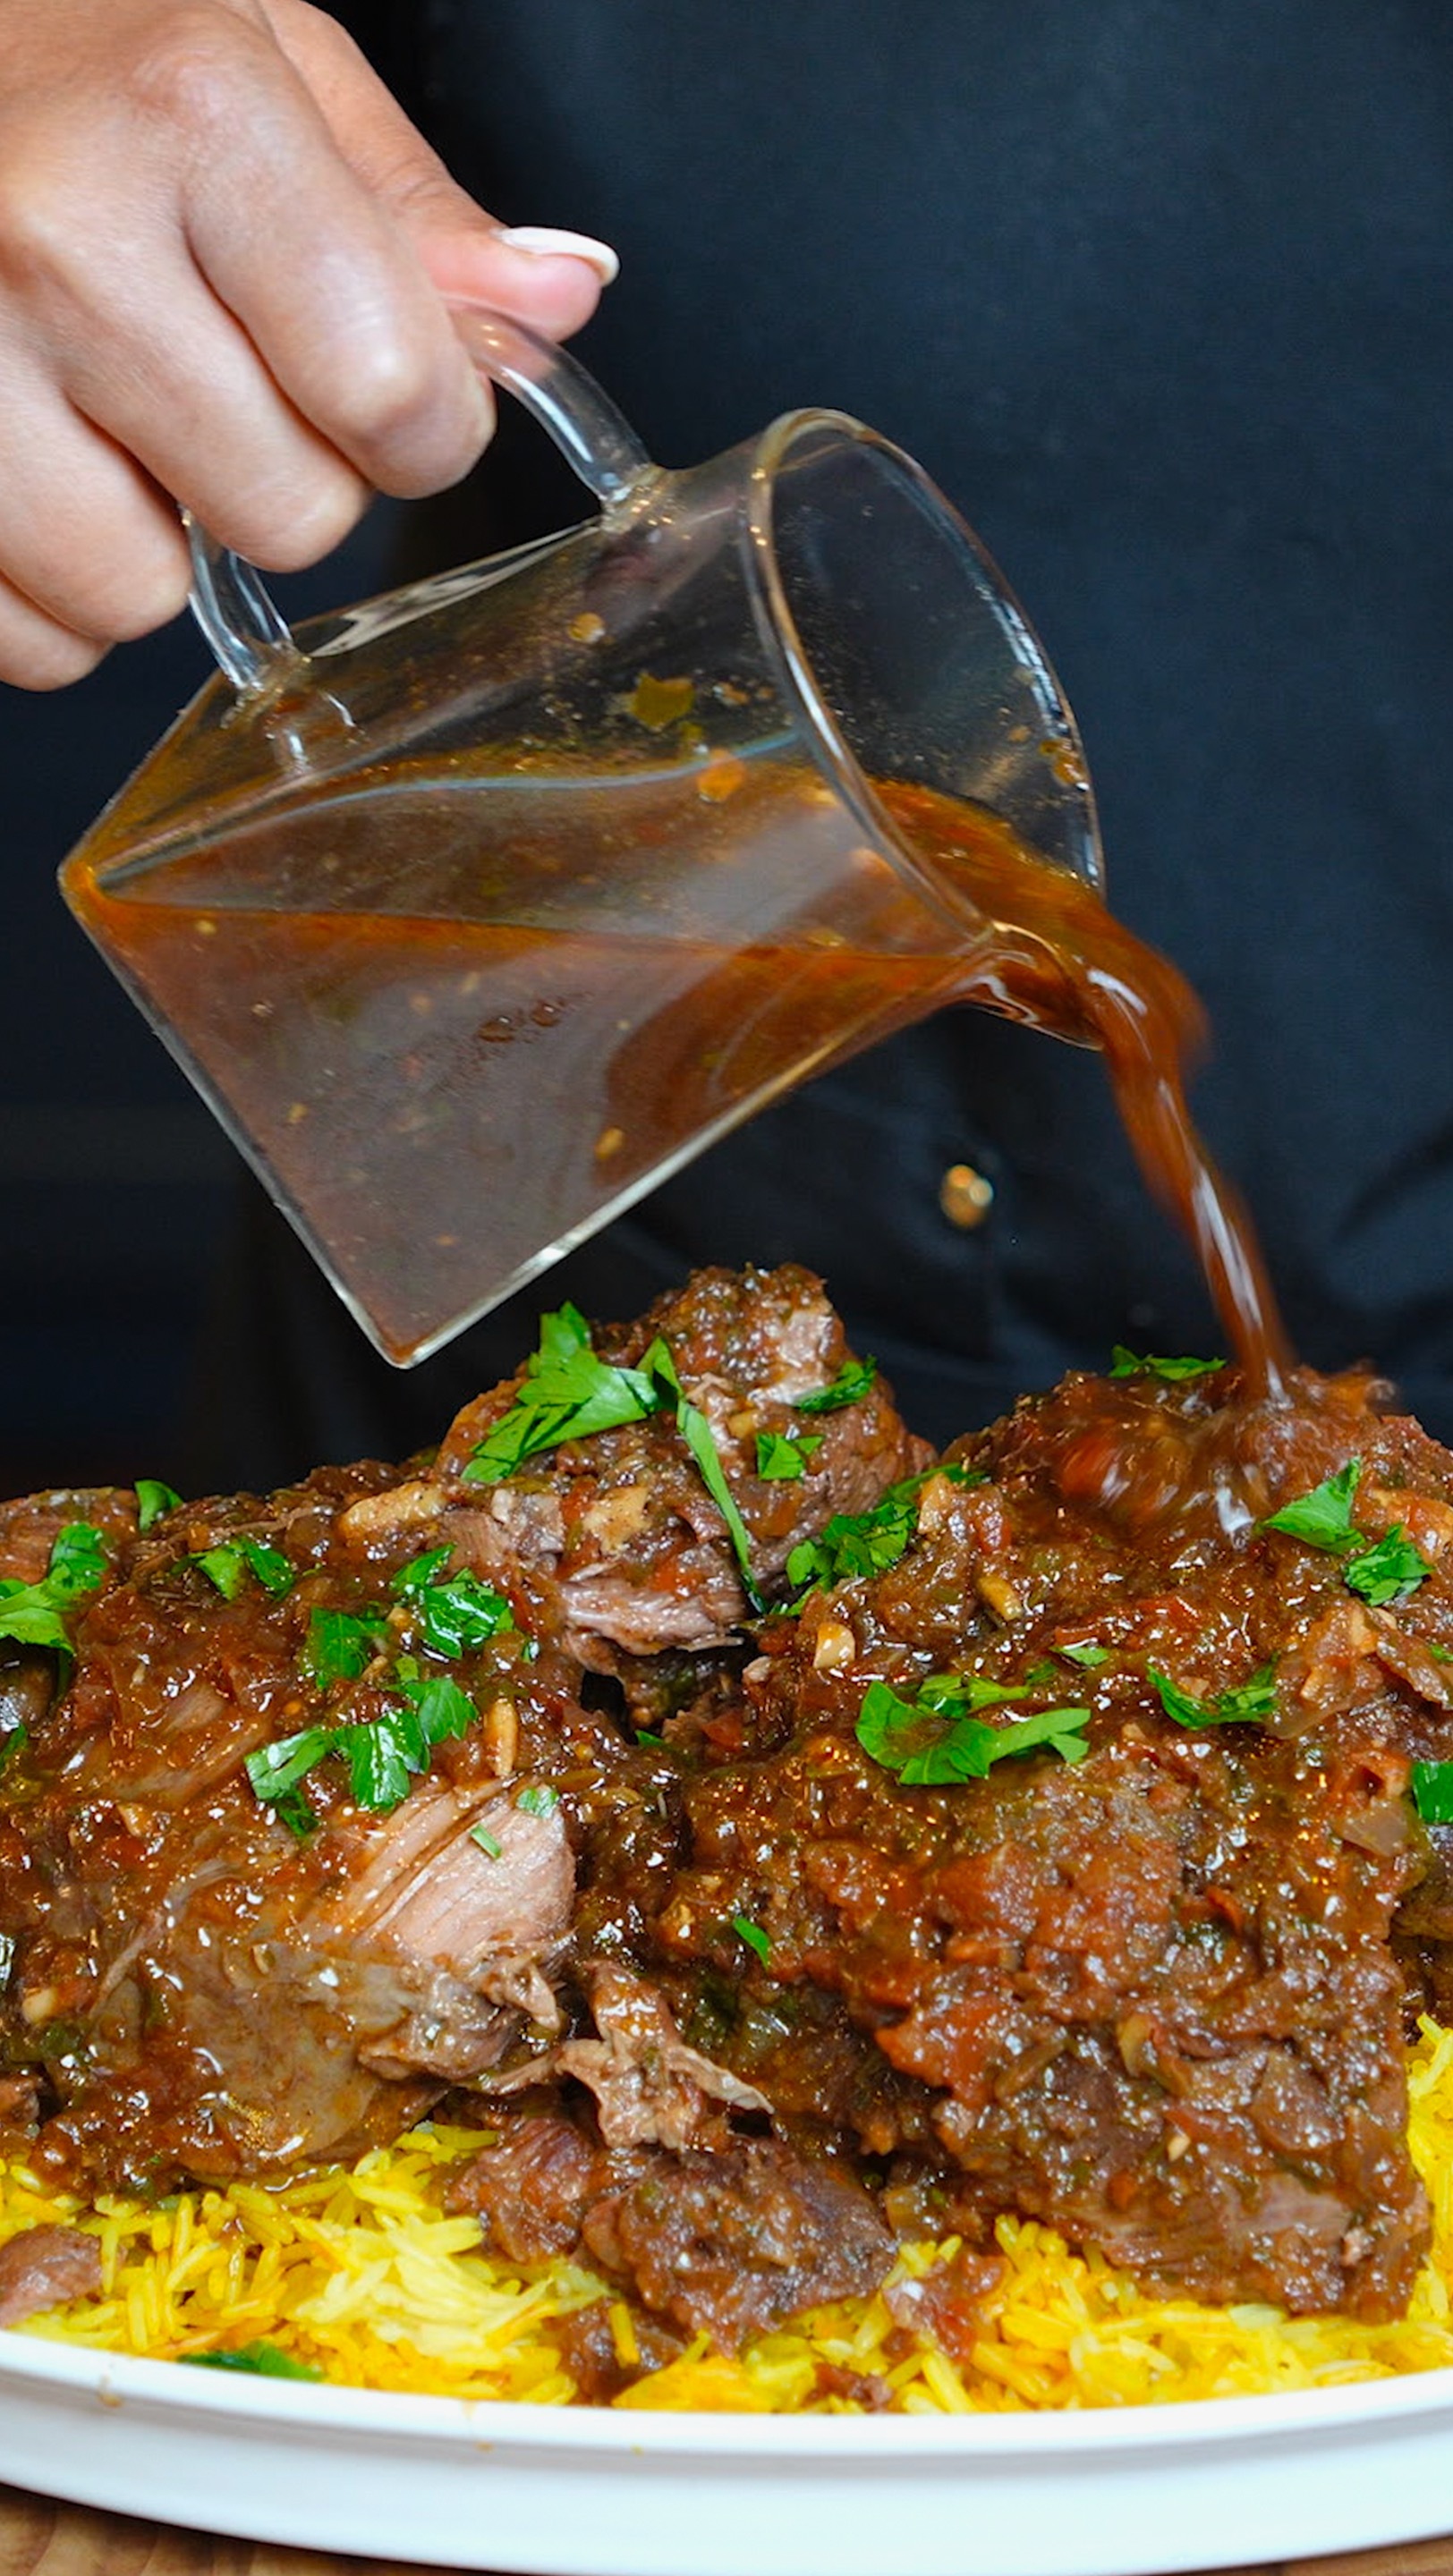
This sweet and spiced lamb leg is an absolutely show-stopping centerpiece that's perfect for special occasions, holiday dinners, or anytime you want to impress! A whole lamb leg (about 3½ pounds) gets seasoned generously with kosher salt and black pepper, then seared in hot olive oil until deeply golden brown on all sides, which creates an incredible crust and locks in all the juices. While the lamb sears, you make the most aromatic and flavorful sauce base by blending garlic, fresh ginger, chopped tomatoes, onions, jalapeños, and fresh cilantro stalks in a food processor until chopped but not fully puréed. This chunky mixture gets cooked in the same pan the lamb was seared in (so you get all those delicious browned bits), along with warm spices like cumin, cinnamon, and allspice that create this incredible depth and complexity. The sauce is both sweet and savory, with water, orange juice for brightness and subtle sweetness, brown sugar for caramelization, soy sauce for umami depth, and more salt and pepper. The seared lamb goes back into the pot with all that sauce, everything comes to a boil, then the whole pot gets covered tightly and transferred to a 330°F oven to braise low and slow for 3 hours. During this time, you baste the lamb occasionally with the pan juices, which keeps it moist and builds up layers of flavor. After 3 hours, you uncover the pan, baste again, and return it to the oven for another 30 minutes uncovered, which allows the sauce to thicken and the lamb to develop a gorgeous caramelized exterior. The result is lamb that's fall-apart tender, infused with warm spices, sweet and tangy from the orange juice and brown sugar, and sitting in this incredible aromatic sauce. You can slice or shred the lamb and serve it with that thickened sauce drizzled on top. This is the kind of dish that makes your whole house smell amazing and has everyone asking for seconds!
Frequently Asked Questions
Q: Can I use a different cut of lamb?
A: Yes! Lamb shoulder works beautifully with this recipe and is actually more marbled, so it stays even more moist. Bone-in lamb shoulder (about 3-4 pounds) is perfect. You can also use lamb shanks (increase to 4-6 shanks), though the cooking time might be slightly less. Boneless leg of lamb also works but may cook faster, so start checking at 2½ hours.
Q: Can I make this in a slow cooker?
A: Absolutely! Sear the lamb in a skillet on the stovetop first, then transfer to a slow cooker. Make the sauce as directed and pour over the lamb. Cook on low for 7-8 hours or on high for 4-5 hours until the lamb is fall-apart tender. Uncover for the last 30 minutes on high to thicken the sauce, or transfer the sauce to a pot and reduce it on the stovetop while the lamb rests..
Q: What should I serve this with?
A: This pairs beautifully with fluffy basmati rice, couscous, mashed potatoes, roasted vegetables, or warm pita bread. The sauce is so flavorful you'll want something to soak it up! A simple cucumber yogurt salad or fresh herb salad on the side adds brightness. This is also amazing in wraps or pitas with pickled onions and fresh herbs.
Q: Can I make this ahead of time?
A: Yes! This dish actually tastes even better the next day as the flavors continue to develop. Make it completely, let it cool, then refrigerate in an airtight container for up to 3 days. The sauce will solidify on top (that's the fat, which you can skim off if desired), and you can reheat gently in a 300°F oven for 30-40 minutes or on the stovetop over low heat until warmed through. You can also freeze the cooked lamb and sauce for up to 3 months.
This sweet and spiced lamb leg is fall-apart tender and packed with flavor! Lamb seared until golden, then braised in an aromatic sauce with garlic, ginger, tomatoes, onions, jalapeños, cilantro, cumin, cinnamon, allspice, orange juice, and brown sugar. Slow-cooked for 3½ hours until incredibly tender!
Rate This Recipe!
Preparations
Prep Time:
20 minutes
Chill Time:
3 hours 30 minutes
Total Time:
3 hours 50 minutes
Cuisine:
Middle Eastern, Fusion
Course:
Main Course, Dinner
Calories:
450 kcal (approx. per serving)
Servings:
6
Author:
Ronica Rupan
Ingredients
Ingredients
- 1 lamb leg (3½ pounds), bone-in
- 2 teaspoons kosher salt, divided, plus more to taste
- Freshly ground black pepper, to taste
- 3 tablespoons olive oil
- 8 cloves garlic
- 1 (1½-inch) piece fresh ginger, peeled
- 4 large tomatoes, chopped
- 2 medium yellow onions, chopped
- 2 jalapeños, deseeded (optional, for less heat)
- 1 bunch fresh cilantro (leaves and stalks separated)
- 1 tablespoon ground cumin
- 1 tablespoon ground cinnamon
- 1½ teaspoons ground allspice
- 4 cups water
- ½ cup fresh orange juice
- ½ cup packed light brown sugar
- 3 tablespoons soy sauce
Instructions
- Preheat the Oven Preheat your oven to 330°F (165°C).
- Season and Sear the Lamb Pat the lamb leg completely dry with paper towels. This helps it sear properly. Sprinkle generously all over with ½ teaspoon of the kosher salt and freshly ground black pepper to taste. Heat the olive oil in a large oven-safe saucepan or Dutch oven over medium-high heat. Once the oil is shimmering and hot, add the lamb leg. Sear on all sides until deeply golden brown, about 10 minutes total, turning every few minutes to brown evenly. You want a nice crust all over! Once seared, transfer the lamb to a plate and set aside. Don't clean the pan, you'll use those browned bits for the sauce!
- Make the Aromatic Sauce Base While the lamb is searing or right after, add the garlic cloves, peeled ginger, chopped tomatoes, chopped onions, jalapeños, and cilantro stalks (save the leaves for garnish) to a food processor. Pulse a few times until the mixture is chopped into small pieces but not fully puréed. You want some texture, not a smooth paste.
- Cook the Sauce Base Add the blended vegetable mixture to the same saucepan or Dutch oven you used to sear the lamb (with all those delicious browned bits still in there). Cook over medium heat, stirring occasionally, for about 10 minutes until the mixture is fragrant and slightly golden. The vegetables will release their moisture and start to caramelize. Stir in the ground cumin, ground cinnamon, and ground allspice. Cook for an additional 30 seconds, stirring constantly, until the spices are fragrant and toasted.
- Add Liquids and Build the Braising Sauce Return the seared lamb leg to the saucepan, nestling it into the aromatic vegetable mixture. Add the water, orange juice, brown sugar, soy sauce, and the remaining 1½ teaspoons of kosher salt. Add more black pepper to taste. Stir everything together around the lamb to combine. Bring the mixture to a boil over medium-high heat, then immediately cover the pan tightly with a lid or heavy-duty aluminum foil.
- Braise in the Oven Carefully transfer the covered pan to the preheated 330°F oven. Cook for 3 hours, basting the lamb occasionally (every 45 minutes to 1 hour) with the juices from the pan. This keeps the lamb moist and builds up layers of flavor. Just open the oven, remove the lid, spoon the sauce over the lamb, re-cover, and return to the oven.
- Finish Uncovered After 3 hours, uncover the pan and baste the lamb one more time with the pan juices. Return the uncovered pan to the oven for another 30 minutes. This final uncovered cooking allows the sauce to thicken and concentrate, and gives the lamb a beautiful caramelized exterior.
- Rest and Serve Remove the lamb from the oven and let it rest for 5-10 minutes before slicing or shredding. The lamb should be incredibly tender and may fall off the bone on its own! Slice or shred the lamb and arrange on a serving platter. Drizzle generously with the thickened sauce from the pan. Garnish with the reserved fresh cilantro leaves. Serve hot with your favorite sides!
Crispy Masala Okra

This crispy masala okra is the ultimate way to transform okra into something absolutely addictive and irresistible! Fresh okra gets sliced lengthwise into slender strips, then coated in an incredible spice blend with cornstarch and rice flour (which create that extra crispy texture), garam masala for warmth and complexity, curry powder for depth, fresh minced garlic for punch, chili powder for heat, and salt. The cornstarch and rice flour combination is the secret to getting okra ultra crispy without any of that slimy texture that okra is notorious for. After coating the okra strips in the dry spice mixture, you drizzle them with olive oil and toss until every piece is well-coated. The okra then gets air-fried at 350°F for 14-18 minutes, shaking the basket halfway through, until each piece is golden brown, crispy, and absolutely perfect. The high heat and circulating air in the air fryer evaporate any moisture and create this incredible crunchy exterior while the inside stays tender. If you don't have an air fryer, you can also deep fry them in hot oil at 375°F for just 2-3 minutes until golden and crispy. Once cooked, the okra gets garnished with fresh chilies for heat, a squeeze of fresh lemon juice for brightness, flaky sea salt for that satisfying crunch and salt burst, and chopped cilantro for freshness. The result is okra that's completely transformed: crispy on the outside with no slime whatsoever, tender inside, and packed with bold Indian spices. Even people who say they don't like okra will devour these! These are perfect as an appetizer with drinks, a side dish with any Indian meal, a snack on their own, or anytime you want vegetables that taste like you're indulging. Serve them hot right out of the air fryer or skillet for maximum crispiness!
Frequently Asked Questions
Q: How do I prevent okra from being slimy?
A: The key is keeping the okra completely dry! Wash and thoroughly pat the okra dry with a kitchen towel before slicing. Any moisture will cause that slimy texture. The cornstarch and rice flour coating also helps absorb any remaining moisture and creates a barrier that prevents slime. Cooking at high heat (whether air frying or deep frying) quickly evaporates moisture before slime can develop. Make sure your okra is bone dry before coating!
Q: Can I bake these in the oven instead of air frying?
A: Yes! Preheat your oven to 425°F. Spread the coated okra in a single layer on a parchment-lined baking sheet, making sure pieces don't touch. Bake for 20-25 minutes, flipping halfway through, until golden and crispy. The oven won't get them quite as crispy as the air fryer or deep frying, but they'll still be delicious. Spray lightly with cooking spray before baking for extra crispiness.
Q: Can I use frozen okra?
A: Fresh okra works best for this recipe because frozen okra contains extra moisture that makes it harder to get crispy. If you must use frozen, thaw it completely, then spread it on paper towels and press firmly to remove as much moisture as possible. Pat completely dry before coating. You may need to increase cooking time slightly since frozen okra releases more moisture.
Q: What can I serve this with?
A: These are incredibly versatile! Serve as an appetizer with tamarind chutney, mint chutney, or yogurt raita for dipping. As a side dish, they pair beautifully with any Indian curry, biryani, dal, or grilled meats. They're also great as a snack on their own with a cold drink. You can even add them to grain bowls, salads, or wraps for extra crunch and flavor!
This crispy masala okra is the ultimate way to cook okra with zero slime! Okra strips coated in cornstarch, rice flour, garam masala, curry powder, garlic, and chili powder, then air-fried until golden and incredibly crispy. Garnished with fresh chilies, lemon, flaky salt, and cilantro. Addictive!
Rate This Recipe!
Preparations
Prep Time:
15 minutes
Cook Time:
18 minutes
Total Time:
33 minutes
Cuisine:
Indian
Course:
Appetizer, Side Dish
Calories:
120 kcal (approx. per serving)
Servings:
4
Author:
Ronica Rupan
Ingredients
Ingredients
For the Okra:
- 1½ cups okra (about 8-10 ounces)
- 2 tablespoons cornstarch
- 2 tablespoons rice flour
- 1 teaspoon garam masala
- 2 teaspoons curry powder
- 4 cloves garlic, minced
- 1 teaspoon chili powder
- ½ teaspoon kosher salt (or to taste)
- 2-3 tablespoons olive oil
For Garnish:
- Fresh chilies, sliced
- Lemon wedges
- Flaky sea salt
- Fresh cilantro, chopped
For Deep Frying (Optional Method):
- Neutral oil for frying (about 2 cups)
Instructions
- Wash and Dry the Okra Wash the okra thoroughly under cold running water. This is the most important step! Pat them completely dry using a clean kitchen towel or paper towels. The okra must be entirely dry for a crispy finish with no slime. Take your time with this step and make sure there's no moisture left on the okra.
- Trim and Slice Trim off both ends of each okra pod. Slice the okra lengthwise into slender strips, about ¼ inch thick. You should get 2-4 strips per okra depending on size. Slicing them lengthwise rather than into rounds gives you more surface area for crispiness.
- Make the Spice Coating In a large mixing bowl, combine the cornstarch, rice flour, garam masala, curry powder, minced garlic, chili powder, and salt. Whisk together until well combined and there are no lumps. The cornstarch and rice flour are key for that extra crispy texture!
- Coat the Okra Add the sliced okra strips to the bowl with the dry spice mixture. Toss gently but thoroughly to ensure every piece is evenly coated with the spices. Use your hands to really work the coating into all the crevices.
- Add Oil Drizzle the olive oil over the coated okra. Mix gently with your hands or a spoon until all the okra pieces are well-coated with oil. The oil helps the coating stick and promotes even browning.
- Preheat the Air Fryer Preheat your air fryer to 350°F for about 5 minutes. While it preheats, lightly spray or brush the air fryer basket with a thin layer of oil to prevent sticking.
- Air Fry the Okra Arrange the coated okra pieces in a single layer in the air fryer basket. Don't overcrowd! The pieces should not be touching or overlapping. Work in batches if necessary. Air fry for 14-18 minutes at 350°F, shaking the basket or using tongs to turn the okra halfway through at the 7-9 minute mark. The okra is done when it's golden brown, crispy, and the edges are slightly charred.
- Garnish and Serve Transfer the crispy okra to a serving dish. Immediately garnish with sliced fresh chilies, a generous squeeze of fresh lemon juice, a sprinkle of flaky sea salt, and chopped cilantro. Serve hot while still crispy!
Alternative Deep Frying Method:
If you prefer to deep fry instead of air frying, heat about ¾ inch of neutral oil in a large cast-iron skillet or heavy-bottomed pot over medium-high heat until a deep-fry thermometer registers 375°F. Carefully add the coated okra in small batches (don't overcrowd or the temperature will drop) and fry for 2-3 minutes, turning once, until golden brown all over. Use a slotted spoon or spider to transfer the fried okra to a paper towel-lined plate to drain. Repeat with remaining batches. Garnish and serve immediately.
Thai Tea Crème Brûlée Croissants

These Thai tea crème brûlée croissants are an absolutely stunning fusion dessert that transforms simple store-bought croissants into something extraordinary! Imagine flaky, buttery croissants filled with the most incredible creamy Thai tea pastry cream, then topped with a delicate caramelized sugar glaze that shatters when you bite into it, just like classic crème brûlée. The Thai tea pastry cream is the star of the show: whole milk gets infused with Thai tea mix and sugar, simmered until fragrant and that gorgeous orange color develops, then strained to remove the tea leaves. This infused milk gets tempered into a mixture of eggs, egg yolks, cornstarch, and sugar, then cooked low and slow until it thickens into a luscious, silky pastry cream. Butter gets stirred in while it's still warm for richness, then the whole thing chills in the fridge for at least 6 hours (or overnight) until it's completely set and cold. Right before filling the croissants, you fold in freshly whipped cream, which lightens the pastry cream and gives it this incredible mousse-like texture that's fluffy and rich at the same time. The caramelized sugar topping is pure magic and what makes these true crème brûlée croissants: you simmer sugar and water together until it reaches 320°F and turns a beautiful light amber color. Working quickly and carefully (because this stuff is dangerously hot!), you use tongs to dip the top of each croissant into the caramelized sugar, creating a thin, crispy, glass-like shell that adds incredible texture and a subtle caramel sweetness. Once the sugar hardens, you slice the croissants open and pipe or spoon in generous amounts of that chilled Thai tea pastry cream. The result is this incredible combination of textures and flavors: flaky, buttery croissant layers, crispy caramelized sugar shell that cracks like crème brûlée, and creamy, aromatic Thai tea filling that tastes like the most sophisticated cream puff you've ever had. These are perfect for special occasion breakfasts, brunch gatherings, dessert, or anytime you want to absolutely wow people with something that looks and tastes bakery-quality but is totally doable at home!
Frequently Asked Questions
Q: Can I use homemade croissants?
A: Absolutely! If you're ambitious and want to make croissants from scratch, go for it. However, high-quality store-bought croissants work perfectly for this recipe and save you hours of work. Look for all-butter croissants from a bakery or the bakery section of your grocery store for best results. Day-old croissants actually work great because they're slightly firmer and easier to fill. .
Q: Where do I find Thai tea mix?
A: Thai tea mix is available at Asian grocery stores, online (Amazon, specialty tea shops), or sometimes in the international aisle of well-stocked supermarkets. Look for brands like Pantai or Number One. It's the orange-colored tea powder that gives Thai iced tea its distinctive flavor and color. Don't substitute with regular black tea, it won't have the same flavor or color!
Q: Do I have to caramelize the sugar on top?
A: The caramelized sugar topping adds an incredible crispy texture and looks stunning, but if you're nervous about working with hot sugar or short on time, you can skip it. The croissants will still be delicious with just the Thai tea pastry cream filling. Alternatively, you can dust the tops with powdered sugar or drizzle with a simple glaze made from powdered sugar and milk.
Q: How far ahead can I make these?
A: The Thai tea pastry cream needs at least 6 hours to chill, so you can make it the day before. The caramelized sugar topping should be done right before serving because it can get sticky and melt in humid conditions. You can fill the croissants up to 2 hours before serving and keep them refrigerated, but they're best filled right before serving so the pastry stays crisp. Don't caramelize the sugar more than 1-2 hours ahead or it will start to dissolve.
These Thai tea crème brûlée croissants are a stunning fusion dessert! Flaky croissants filled with creamy Thai tea pastry cream and topped with a caramelized sugar glaze that cracks like crème brûlée. The perfect blend of buttery pastry, sweet caramel crunch, and rich Thai tea cream!
Rate This Recipe!
Preparations
Prep Time:
30 minutes (plus 6 hours chilling)
Cook Time:
30 minutes
Total Time:
7 hours
Cuisine:
Thai, French Fusion
Course:
Dessert, Breakfast
Calories:
420 kcal (approx. per croissant)
Servings:
6
Author:
Ronica Rupan
Ingredients
Ingredients
For the Croissants:
- 6 croissants (store-bought or homemade)
For the Thai Tea Pastry Cream:
- 2 cups whole milk
- 5 tablespoons Thai tea mix
- 2 tablespoons sugar (for infusing milk)
- ⅓ cup sugar (for egg mixture)
- 1 large egg
- 2 egg yolks
- ¼ cup cornstarch
- 2 tablespoons unsalted butter
- ½ cup heavy whipping cream, whipped to stiff peaks
For the Caramelized Sugar Glaze:
- 1 cup granulated sugar
- 1 cup water
Instructions
Make the Thai Tea Pastry Cream:
- Infuse the Milk In a medium saucepan, combine the whole milk, Thai tea mix, and 2 tablespoons of sugar. Place over medium heat and bring to a gentle simmer, stirring occasionally. Do not let it boil! Once it reaches a simmer and the milk has turned that gorgeous orange color, remove from heat. Let it steep for 5 minutes to intensify the Thai tea flavor.
- Prepare the Egg Mixture While the milk infuses, whisk together the egg, 2 egg yolks, cornstarch, and ⅓ cup sugar in a medium bowl until smooth and well combined. The mixture should be thick and pale yellow.
- Strain the Tea Leaves Pour the infused milk through a fine-mesh strainer into a clean container to remove all the Thai tea leaves. Discard the leaves. Return the strained, infused milk to the saucepan.
- Temper the Eggs This step is crucial to prevent scrambled eggs! Slowly drizzle about ½ cup of the hot Thai tea-infused milk into the egg mixture while whisking constantly. This gradually raises the temperature of the eggs without cooking them. Once combined, pour the tempered egg mixture back into the saucepan with the remaining milk, whisking constantly.
- Cook the Pastry Cream Place the saucepan over medium heat. Whisk constantly for 14-17 minutes until the mixture thickens significantly and coats the back of a spoon. It should look like thick pudding. Don't stop whisking or you'll get lumps! The mixture will go from thin and liquidy to suddenly very thick, so watch carefully.
- Finish with Butter Once thickened, remove from heat immediately. Add the butter and stir until completely melted and incorporated. The butter adds richness and helps create a silky texture.
- Chill Completely Transfer the pastry cream to a clean bowl. Press plastic wrap directly onto the surface of the cream (this prevents a skin from forming). Refrigerate for at least 6 hours or overnight until completely cold and set.
- Fold in Whipped Cream Right before filling the croissants, whip the heavy cream to stiff peaks. Gently fold the whipped cream into the chilled Thai tea pastry cream using a spatula. This lightens the texture and adds volume. The pastry cream is now ready to use!
Make the Caramelized Sugar Glaze:
- Cook the Sugar Syrup In a small saucepan, combine the sugar and water. Place over medium heat and stir until the sugar dissolves completely. Once dissolved, stop stirring! Let the mixture simmer undisturbed.
- Reach Caramelization Temperature Clip a candy thermometer to the side of the pan. Continue simmering without stirring until the temperature reaches 320°F and the syrup turns a light amber color. This takes about 10-15 minutes. Watch carefully in the final minutes as it can go from perfect to burnt quickly! Once it reaches 320°F and is light amber, immediately remove from heat.
- Caramelize the Croissants Working very quickly and carefully (the sugar is extremely hot!), use tongs to hold each croissant by the bottom and dip just the top into the caramelized sugar. Let excess drip off, then place the croissant caramelized-side up on a piece of parchment paper or a silicone mat. The sugar will harden within 30-60 seconds, creating a crispy crème brûlée-style shell. Repeat with all croissants. Be extremely careful not to touch the hot sugar!
Assemble the Croissants:
- Fill with Pastry Cream Once the caramelized sugar has hardened and cooled (about 5 minutes), carefully slice each croissant in half horizontally using a serrated knife. Transfer the Thai tea pastry cream (with whipped cream folded in) to a piping bag fitted with a large round tip, or use a spoon. Pipe or spoon a generous amount of the cream into the bottom half of each croissant.
- Serve Immediately Place the top half of the croissant back on, pressing gently. The croissants are now ready to serve! They're best enjoyed immediately while the pastry is crisp and the cream is cold. The caramelized sugar adds an incredible crème brûlée-style crunch that contrasts beautifully with the flaky croissant and creamy filling.
Spicy Creole Chicken Skewers with Honey Glaze
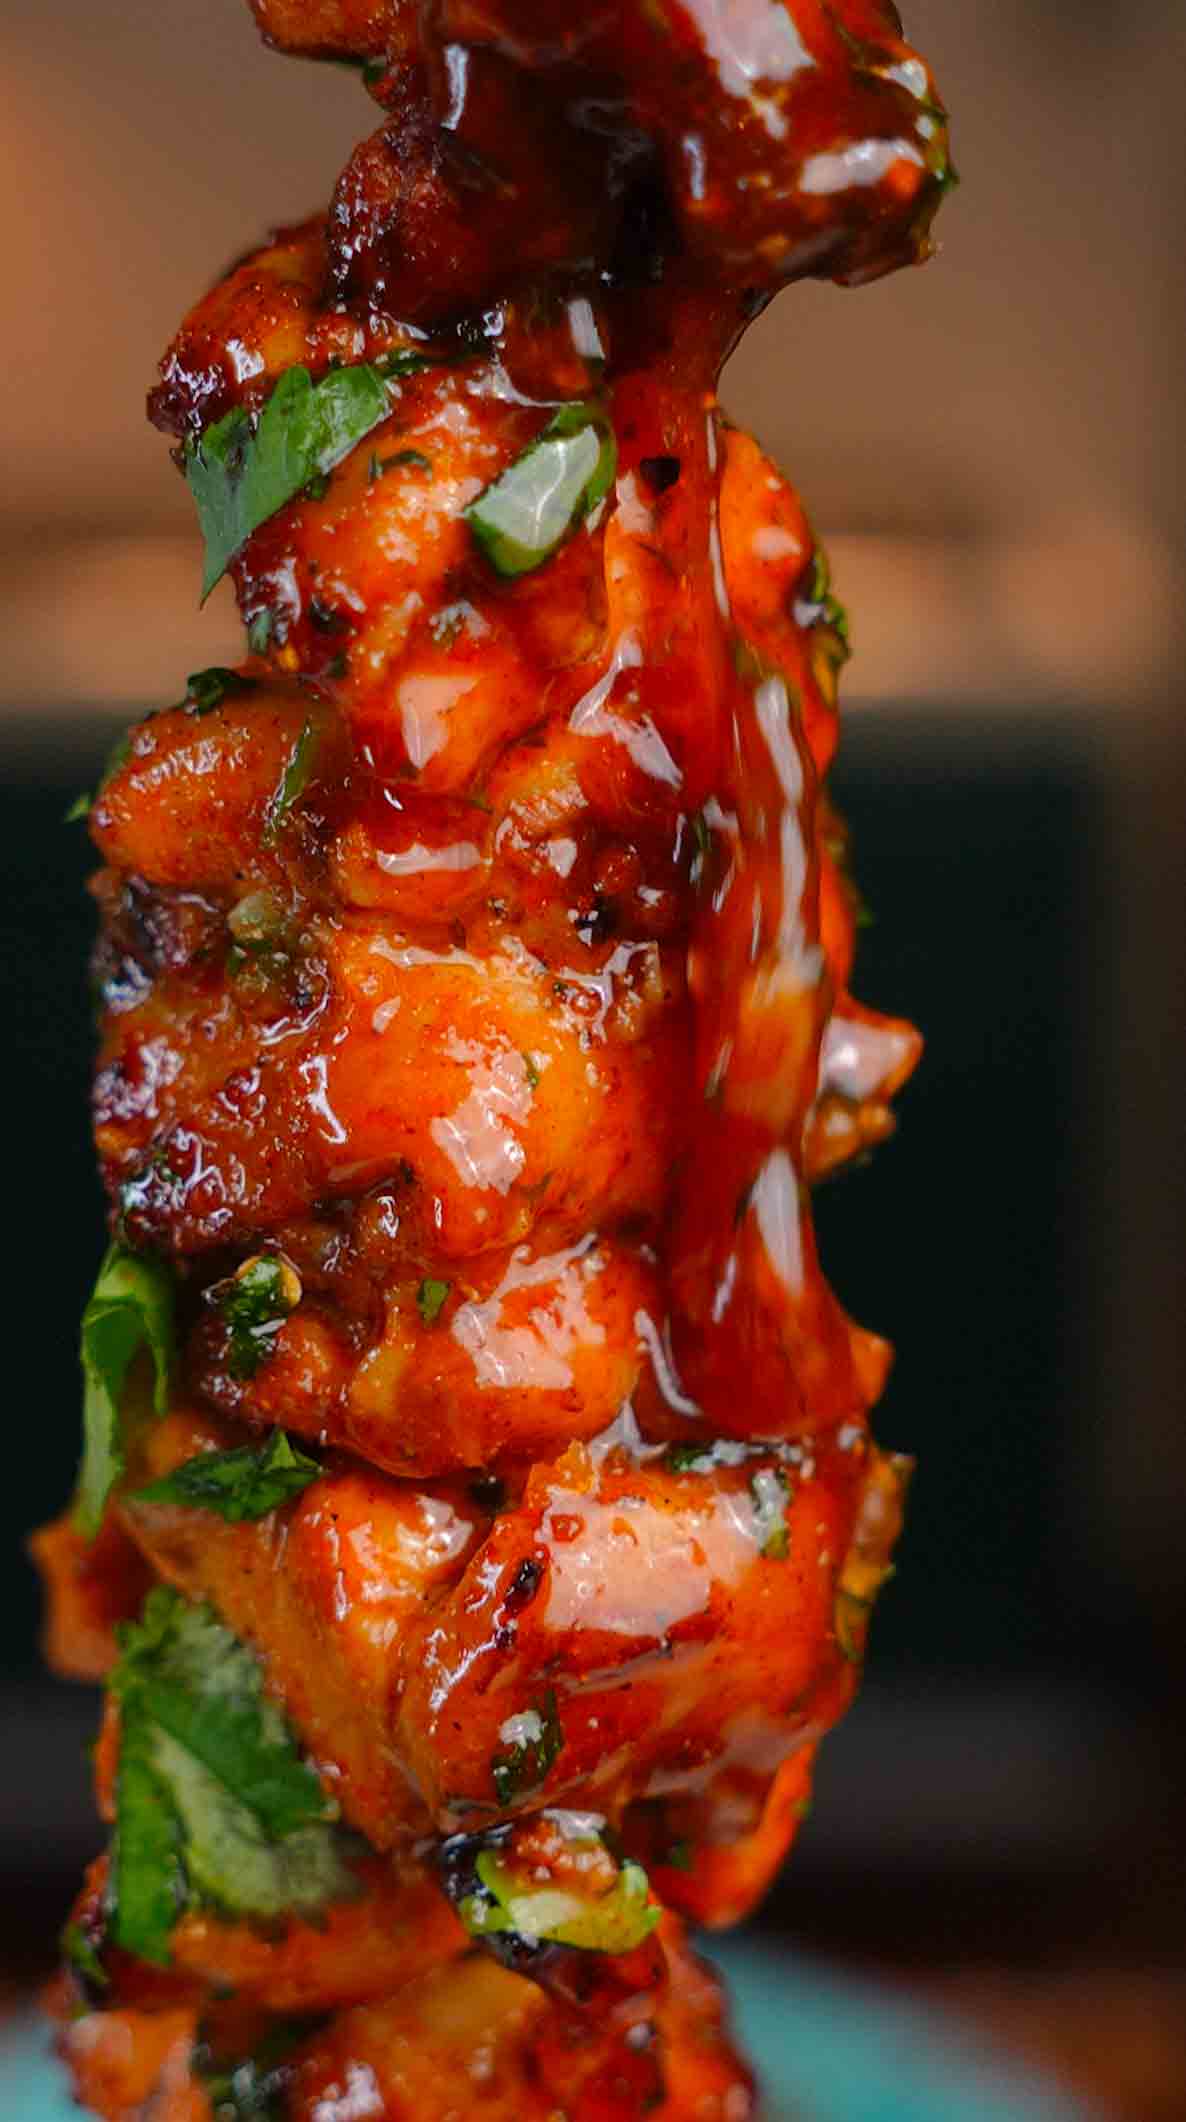
These spicy Creole chicken skewers with honey glaze are quick, savory, and absolutely bursting with flavor! Bite-sized pieces of juicy chicken thighs get marinated in a bold Creole blend with olive oil, loads of fresh garlic, Flora & Mana's Creole Kick Carnival seasoning, smoked paprika, and fresh lime juice that tenderizes the meat and adds brightness. The chicken marinates for at least an hour (or up to a full day for maximum flavor), soaking up all those spices and aromatics. Once marinated, the chicken pieces get threaded onto skewers and air-fried or baked at 400°F until perfectly cooked through with slightly charred, caramelized edges that have so much flavor. While the chicken cooks, you make the most incredible honey glaze by melting butter with minced garlic until fragrant, then stirring in more Creole Kick seasoning and Taste of Sora honey, which adds sweetness with a subtle spicy kick that complements the Creole spices beautifully. Fresh cilantro gets stirred in at the end for brightness and herbaceous flavor. Once the chicken skewers come out of the air fryer or oven, you brush them generously with that warm honey butter glaze, which soaks into all the crevices and creates this gorgeous glossy coating. The combination of spicy Creole seasoning, smoky paprika, sweet honey, rich butter, and bright lime and cilantro is absolutely incredible. Each bite has tender, juicy chicken with a slight char, bold spices, and that sweet-savory-spicy glaze that makes you want to reach for another skewer immediately. These are perfect for weeknight dinners, game day appetizers, meal prep, serving at parties, or anytime you want chicken that tastes way more impressive than the effort required. Serve with rice, grilled vegetables, a fresh salad, or just enjoy them on their own!
Frequently Asked Questions
Q: Can I use chicken breast instead of thighs?
A: Yes, but chicken thighs are recommended because they stay juicier and more tender, especially when cooked at high heat. Chicken breast can dry out more easily. If using breast, cut it into slightly larger pieces, watch the cooking time closely, and consider reducing the cooking time by 3-5 minutes. Check for doneness early to avoid overcooking.
Q: Can I grill these instead of air frying?
A: Absolutely! These are fantastic on the grill. Preheat your grill to medium-high heat (about 400°F). Oil the grates well to prevent sticking. Grill the skewers for 10-12 minutes, turning every 3-4 minutes, until the chicken is cooked through and has beautiful char marks. Brush with the honey glaze during the last minute of cooking and once more after removing from the grill.
Q: How long should I marinate the chicken?
A: Minimum 1 hour for the flavors to penetrate, but the sweet spot is 4-6 hours or overnight for maximum flavor. The lime juice in the marinade tenderizes the chicken, so don't marinate for more than 24 hours or the texture can get mushy. If you're short on time, even 30 minutes of marinating is better than nothing!
Q: Can I make these ahead of time?
A: Yes! You can marinate the chicken up to 24 hours ahead and keep it in the fridge. You can also thread the chicken onto skewers up to 6 hours ahead, cover, and refrigerate until ready to cook. The honey glaze can be made up to 3 days ahead and stored in the fridge, then gently reheated before brushing on the cooked chicken. For meal prep, cook the skewers completely, let cool, and refrigerate for up to 4 days. Reheat in the air fryer at 350°F for 3-5 minutes.
These spicy Creole chicken skewers with honey glaze are quick, savory, and packed with flavor! Chicken thighs marinated in Flora & Mana's Creole Kick Carnival seasoning, garlic, lime, and smoked paprika, air-fried to perfection, then brushed with Taste of Sora honey butter glaze with cilantro. Your family will thank you!
Rate This Recipe!
Preparations
Prep Time:
15 minutes (plus 1 hour minimum marinating)
Cook Time:
25 minutes
Total Time:
1 hour 40 minutes
Cuisine:
Creole, American
Course:
Main Course, Dinner, Appetizer
Calories:
340 kcal (approx. per serving)
Servings:
4
Author:
Ronica Rupan
Ingredients
Ingredients
For the Chicken:
- 4-6 pieces chicken thighs (about 1½-2 pounds), chopped into bite-sized pieces
- Wooden or metal skewers
For the Marinade:
- 2-3 tablespoons olive oil
- 6 cloves garlic, minced
- 2 teaspoons Flora & Mana Creole Kick Carnival seasoning blend
- 1 teaspoon kosher salt
- ½ teaspoon black pepper
- 1 teaspoon smoked paprika
- Juice of 1 lime (about 2 tablespoons)
For the Honey Glaze:
- 4 tablespoons hot honey
- 2 cloves garlic, minced
- 1 teaspoon Flora & Mana Creole Kick Carnival seasoning blend
- 2 tablespoons unsalted butter
- 2 tablespoons fresh cilantro, roughly chopped
Optional Garnish:
- Lime wedges
- Fresh chilies, sliced
Instructions
- Make the Marinade In a small bowl, whisk together the olive oil, minced garlic, Creole Kick Carnival seasoning, kosher salt, black pepper, smoked paprika, and lime juice until well combined and emulsified.
- Marinate the Chicken Place the bite-sized chicken thigh pieces in a medium bowl or zip-top bag. Pour the marinade over the chicken, tossing or massaging to ensure every piece is well coated. Cover the bowl with plastic wrap (or seal the bag) and refrigerate for at least 1 hour, or up to 24 hours for maximum flavor. The longer it marinates, the more flavorful it becomes!
- Prepare the Skewers If using wooden skewers, soak them in water for at least 30 minutes before threading the chicken. This prevents them from burning during cooking. Metal skewers don't need soaking and can be used immediately.
- Preheat Air Fryer or Oven Preheat your air fryer to 400°F (200°C). If using an oven, preheat to 400°F and line a baking sheet with parchment paper or aluminum foil.
- Thread the Chicken onto Skewers Remove the marinated chicken from the refrigerator. Thread the chicken pieces onto the prepared skewers, leaving a small space between each piece so they cook evenly. Don't pack them too tightly or the insides won't cook through. Depending on the size of your skewers, you should get 4-6 skewers total.
- Cook the Chicken Skewers Place the skewers in the air fryer basket in a single layer (work in batches if needed). Air fry for 20-25 minutes, flipping the skewers halfway through at the 10-12 minute mark. The chicken is done when it reaches an internal temperature of 165°F and the juices run clear. To check, slice into the thickest piece to ensure there's no pink in the middle. If using an oven, bake for 25-30 minutes, flipping halfway through.
- Make the Honey Glaze While the chicken cooks, make the honey glaze. In a small saucepan over medium heat, melt the butter. Add the minced garlic and sauté for about 1 minute, stirring constantly, until fragrant and slightly golden. Don't let it burn! Stir in the Creole Kick Carnival seasoning and Taste of Sora honey. Warm the mixture for about 2 minutes, stirring occasionally, until everything is combined and bubbly. Remove from heat and stir in the roughly chopped cilantro.
- Glaze the Skewers Once the chicken skewers are fully cooked, remove them from the air fryer or oven. Using a basting brush or spoon, generously brush the warm honey glaze all over the cooked chicken skewers, making sure to coat every piece. The glaze will soak into the chicken and create a beautiful glossy coating.
- Garnish and Serve Transfer the glazed skewers to a serving platter. Garnish with lime wedges for squeezing and sliced fresh chilies if you want extra heat. Serve immediately while hot! These are great on their own or with rice, salad, grilled vegetables, or your favorite sides.
Bone Broth Broccoli Cheddar Soup
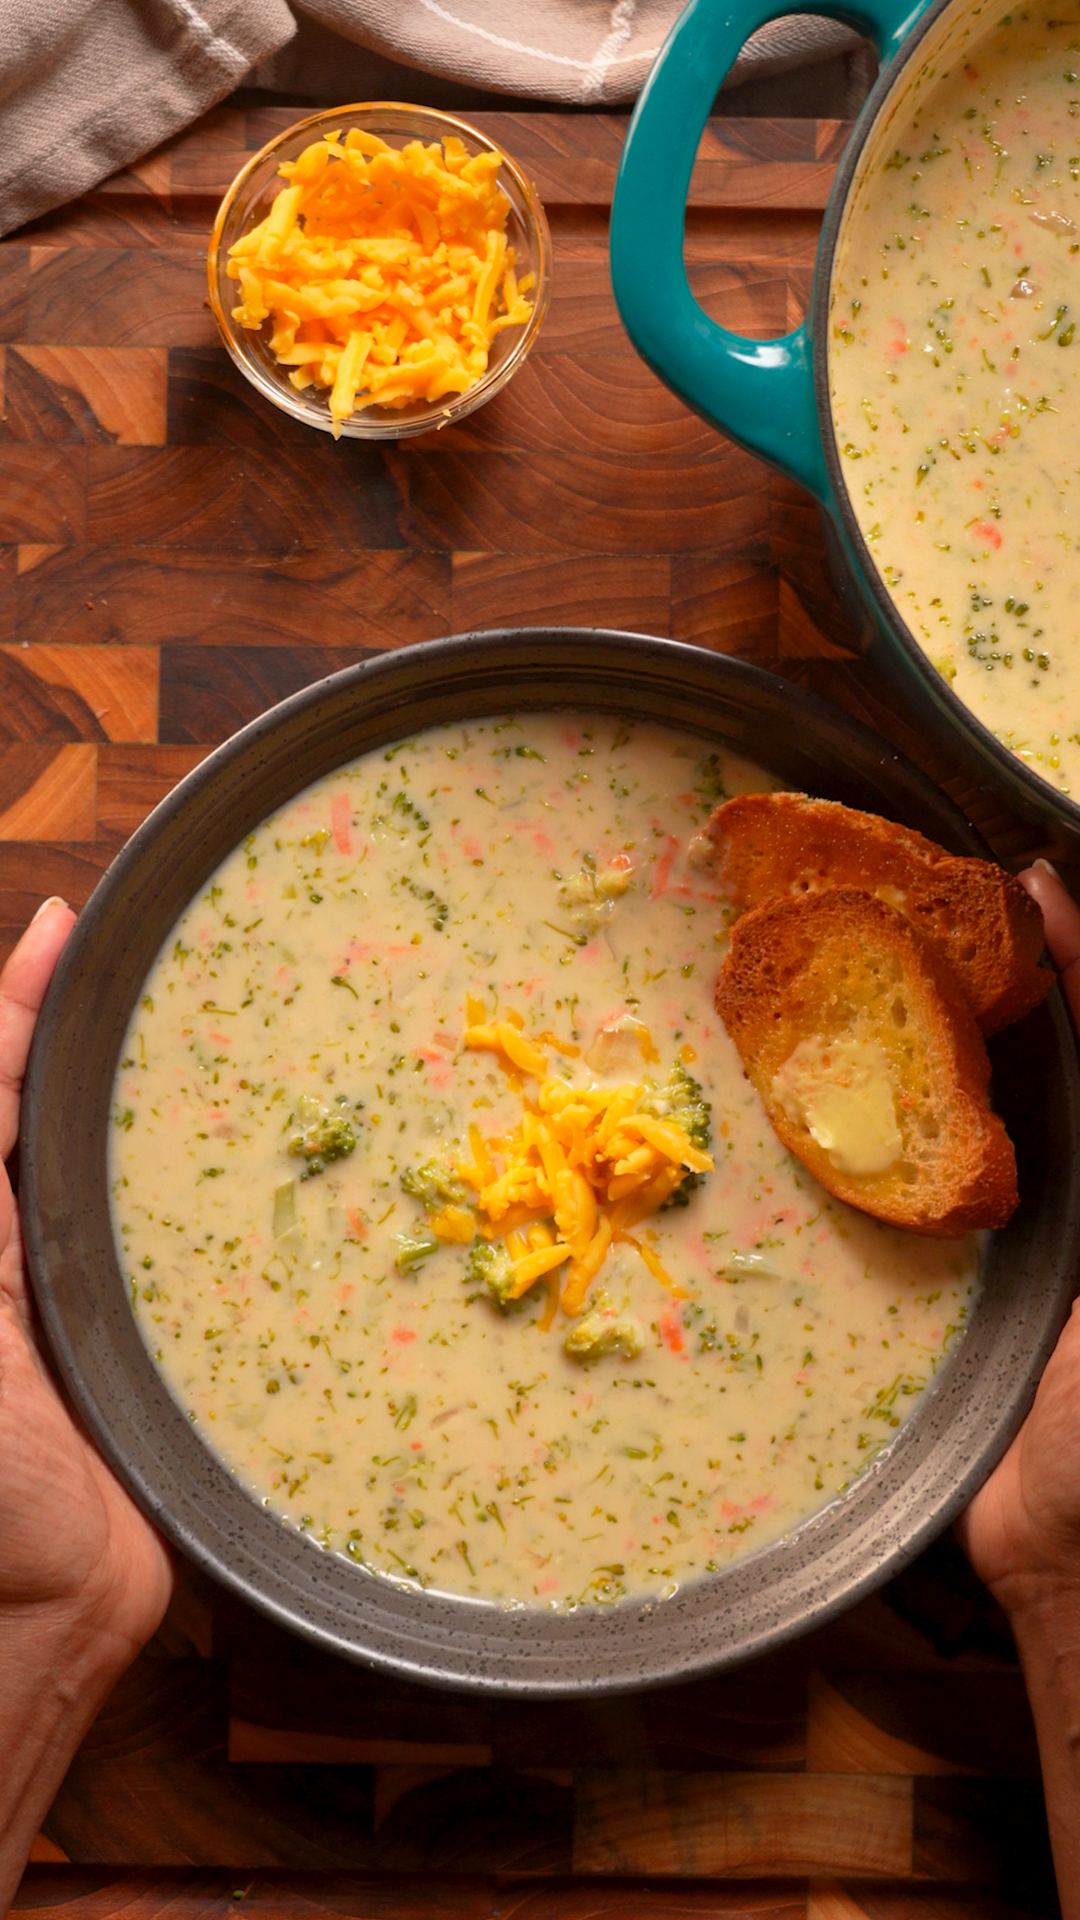
This bone broth broccoli cheddar soup is the ultimate comfort food that's lighter and healthier than traditional broccoli cheddar soup but just as rich, creamy, and satisfying! The secret ingredient is cottage cheese, which gets blended until completely smooth and creates this incredibly creamy texture without all the heavy cream. You start by building a classic soup base with butter, diced onions, and celery that get sautéed until soft and sweet, then garlic gets added for aromatic depth. Flour and smoked paprika create a roux that thickens the soup and adds a subtle smoky note. Bone broth (chicken or turkey) gets whisked in slowly to create a smooth, lump-free base that's packed with collagen, minerals, and that rich, savory depth that only bone broth can provide. Chopped broccoli florets and shredded carrots go in to simmer until tender, cooking in that flavorful broth and absorbing all those aromatics. Once the veggies are perfectly tender, whole milk gets stirred in for richness, followed by the star of the show: that blended cottage cheese, which adds creaminess and a protein boost without the heaviness of cream. Sharp cheddar cheese melts into the soup, creating that classic broccoli cheddar flavor with stretchy, melty goodness in every spoonful. A touch of nutmeg (optional but so good!) adds warmth and depth that makes the cheese flavor pop. After everything is combined, you blend just 1 cup of the soup and stir it back in, which creates a partially smooth, partially chunky texture that's more interesting than fully smooth or fully chunky soup. You get tender bites of broccoli and carrots in every spoonful, but the base is silky and luxurious. This soup is packed with protein from the cottage cheese and bone broth, loaded with vegetables, and tastes like you're indulging even though it's actually quite healthy. Serve it hot with crusty sourdough bread for dipping and you've got the perfect cozy meal for chilly days, weeknight dinners, or meal prep for the week!
Frequently Asked Questions
Q: Can I taste the cottage cheese in the soup?
A: Not at all! When you blend cottage cheese until completely smooth, it becomes a neutral, creamy base that just adds richness and protein without any of that cottage cheese texture or tang. It disappears into the soup and you'd never know it was there. It's a genius way to make creamy soups healthier without sacrificing that luxurious texture!
Q: Can I make this vegetarian?
A: Yes! Just swap the bone broth for vegetable broth. You'll lose some of the rich, savory depth that bone broth provides, but the soup will still be delicious. Consider adding 1-2 teaspoons of soy sauce or miso paste to the vegetable broth version to add back some of that umami depth. Everything else stays exactly the same!
Q: Can I use frozen broccoli?
A: Yes! Frozen broccoli works great and is super convenient. Use about 4 cups of frozen broccoli florets (no need to thaw first) and add them directly to the soup. They might need an extra 2-3 minutes of simmering time to cook through since they start frozen, but otherwise the recipe is exactly the same. Frozen broccoli is also already chopped, which saves prep time!
Q: How do I store and reheat leftovers?
A: Store leftover soup in an airtight container in the refrigerator for up to 4 days. Reheat gently on the stovetop over low heat, stirring frequently, or in the microwave in 1-minute intervals, stirring between each. The soup may thicken as it sits, so add a splash of milk or broth when reheating to thin it back to your desired consistency. You can also freeze this soup for up to 3 months, though the texture of the broccoli may soften slightly after freezing.
This bone broth broccoli cheddar soup is comfort food made lighter! Blended cottage cheese creates incredible creaminess without heavy cream. Loaded with broccoli, carrots, sharp cheddar, and nutrient-rich bone broth in a silky, satisfying soup. Perfect with crusty bread!
Rate This Recipe!
Preparations
Prep Time:
10 minutes
Cook Time:
40 minutes
Total Time:
50 minutes
Cuisine:
American
Course:
Soup, Main Course, Dinner
Calories:
280 kcal (approx. per serving)
Servings:
6
Author:
Ronica Rupan
Ingredients
Ingredients
- 1 cup low-fat cottage cheese
- 3 tablespoons salted butter
- 1 small yellow onion, diced
- ½ cup celery, chopped
- 2 cloves garlic, minced
- ¼ cup all-purpose flour
- ½ teaspoon smoked paprika
- 4 cups bone broth (chicken or turkey)
- 4 cups broccoli florets, chopped into bite-sized pieces
- 1 cup carrots, shredded
- 2 cups whole milk
- 1 cup sharp cheddar cheese, shredded
- 1½ teaspoons kosher salt, or more to taste
- ⅛ teaspoon ground nutmeg (optional)
- Freshly ground black pepper, to taste
- Crusty or sourdough bread, for serving
Instructions
- Blend the Cottage Cheese Add the cottage cheese to a blender and process on high speed for 30-60 seconds until completely smooth with no lumps or curds remaining. The mixture should look like thick cream. Transfer to a bowl and place in the refrigerator until ready to use. This step is crucial for creating that creamy texture without any cottage cheese chunks in the final soup!
- Build the Soup Base Melt the butter in a large pot or Dutch oven (at least 5-quart capacity) over medium heat until foaming, about 1 minute. Add the diced onion and chopped celery. Cook, stirring occasionally, for 8-10 minutes until the vegetables are softened, translucent, and starting to turn golden around the edges. Add the minced garlic and cook, stirring constantly, for about 1 minute until fragrant and slightly golden. Watch carefully so the garlic doesn't burn!
- Create the Roux Add the flour and smoked paprika to the softened vegetables. Cook, stirring constantly with a wooden spoon or spatula, for 1-2 minutes until all the vegetables are evenly coated with flour and the mixture smells slightly toasty. This cooks out the raw flour taste and creates a base for thickening the soup.
- Add Broth and Vegetables Slowly pour in the bone broth, whisking constantly to break up any lumps of flour and create a smooth base. Keep whisking until the mixture is completely smooth with no flour clumps. Add the chopped broccoli florets and shredded carrots. Bring the mixture to a simmer over medium heat, then reduce the heat to medium-low. Simmer, uncovered, stirring occasionally, for 8-10 minutes until the broccoli and carrots are tender when pierced with a fork but still have a slight bite. Don't overcook or the broccoli will get mushy!
- Add Milk and Cottage Cheese Reduce the heat to low. Stir in the whole milk and cook, stirring occasionally, for 2-3 minutes until warmed through. Don't let it boil or the milk might curdle. Add the blended cottage cheese, stirring constantly to fully incorporate it into the soup. The soup should become noticeably creamier and thicker.
- Melt in the Cheddar Add the shredded sharp cheddar cheese to the soup. Cook, stirring constantly, for about 2 minutes until the cheese is completely melted and the soup is smooth. The cheese should melt into silky ribbons throughout the soup. Add the salt, nutmeg (if using), and black pepper to taste. Stir to combine. Remove from heat.
- Partially Blend for Texture Transfer 1 cup of the soup to a blender. Remove the blender vent cap lid to allow steam to escape (hot liquids expand and can explode if sealed!), and place a clean kitchen towel over the opening. Process on low speed until smooth, about 30 seconds. Pour the blended soup back into the pot and stir to combine. This creates a partially smooth, partially chunky texture that's more interesting than fully smooth soup. Alternatively, use an immersion blender directly in the pot and pulse it a few times to blend some (but not all) of the soup.
- Serve Hot Ladle the hot soup into bowls and serve immediately with crusty or sourdough bread on the side for dipping. The
Chocolate-Drizzled Berry Protein Yogurt Cups

This chocolate-drizzled berry protein yogurt bowl is the perfect high-protein breakfast or snack that tastes like dessert but is actually incredibly healthy and satisfying! Starting with Straus Family Creamery Organic Nonfat Greek Yogurt as the creamy, tangy base, you blend it with vanilla protein powder for a major protein boost, frozen mixed berries for natural sweetness and antioxidants, and chia seeds for fiber and omega-3s. The blending process creates this thick, smooth, almost soft-serve ice cream-like texture that's so much more interesting than just eating plain yogurt with a spoon. The frozen berries give it that cold, creamy consistency that makes it feel like a treat. Once blended smooth, you pour it back into your serving cup or bowl (you can also pour it into a glass for a smoothie bowl presentation). Then comes the best part: the chocolate drizzle! You melt dark chocolate chips with just a touch of coconut oil, which helps thin the chocolate slightly so it drizzles beautifully and creates those gorgeous chocolate ribbons over the top of the pink-purple yogurt. The coconut oil also helps the chocolate stay slightly soft instead of rock-hard when it hits the cold yogurt. A final sprinkle of flaky sea salt on top adds that sweet-salty contrast that makes the chocolate taste even more intense and luxurious. Each spoonful has creamy tangy yogurt, sweet-tart berries, crunchy chia seeds, rich dark chocolate, and that pop of sea salt. This is perfect for meal prep (make several at once and store in the fridge), post-workout fuel, a filling breakfast that keeps you satisfied for hours, or a healthy dessert that doesn't feel like you're sacrificing anything. It's packed with protein, probiotics, antioxidants, and healthy fats, but tastes like you're indulging!
This chocolate-drizzled berry protein yogurt bowl is high-protein, packed with antioxidants, and tastes like dessert! Straus Family Creamery Organic Nonfat Greek Yogurt blended with vanilla protein powder, frozen berries, and chia seeds until thick and creamy, topped with melted dark chocolate drizzle and flaky sea salt. So good!
Rate This Recipe!
Preparations
Prep Time:
5 minutes
Cook Time:
1 minute
Total Time:
6 minutes
Cuisine:
American
Course:
Breakfast, Snack
Calories:
320 kcal (approx. per serving)
Servings:
1
Author:
Ronica Rupan
Ingredients
Ingredients
For the Yogurt Bowl:
- 1 cup Straus Family Creamery Organic Nonfat Greek Yogurt
- 1 scoop vanilla protein powder (about 25-30g)
- 1 cup frozen mixed berries (strawberries, blueberries, raspberries, blackberries)
- 1 tablespoon chia seeds
For the Chocolate Drizzle:
- 2 tablespoons dark chocolate chips
- ½ teaspoon coconut oil
For Topping:
- Flaky sea salt (like Maldon)
Instructions
- Blend the Yogurt Base Add the Straus Family Creamery Organic Nonfat Greek Yogurt, vanilla protein powder, frozen mixed berries, and chia seeds to a blender. Blend on medium-high speed for 30-45 seconds until completely smooth and creamy. The mixture should be thick like soft-serve ice cream. If it's too thick to blend, add 1-2 tablespoons of milk or water to help it along. If it's too thin, add a few more frozen berries or a handful of ice.
- Pour into Serving Bowl Pour the blended yogurt mixture back into your serving cup, bowl, or glass. Use a spatula to scrape every bit out of the blender. Smooth the top with the back of a spoon so it's nice and even for the chocolate drizzle.
- Melt the Chocolate In a small microwave-safe bowl, combine the dark chocolate chips and coconut oil. Microwave in 15-second intervals, stirring between each interval, until the chocolate is completely melted and smooth. This usually takes 30-45 seconds total. The coconut oil helps thin the chocolate slightly so it drizzles beautifully. Stir well to combine.
- Drizzle the Chocolate Using a spoon, drizzle the melted chocolate back and forth over the top of the yogurt bowl in zigzag patterns. You can also transfer the chocolate to a small zip-top bag, cut a tiny corner off, and pipe it on for more control. Let some of the chocolate drip down the sides for a pretty presentation!
- Add Flaky Sea Salt Immediately sprinkle a generous pinch of flaky sea salt over the chocolate drizzle while it's still melted. The salt will stick to the chocolate and create that perfect sweet-salty contrast.
- Serve Immediately or Chill You can eat this immediately while the chocolate is still slightly melted and drippy, or refrigerate it for 5-10 minutes to let the chocolate firm up slightly. Either way is delicious! Grab a spoon and dig in!
Parmesan Garlic Crispy Game Day Wings

These Parmesan garlic crispy game day wings are the ultimate shortcut to restaurant-quality wings that taste like you spent hours making them, but they're actually ready in minutes! Starting with PERDUE AIR FRYER READY ROASTED CRISPY WINGS from Costco (which are already seasoned and pre-cooked, so they just need to be heated and crisped), you air fry them until they're hot and crackling crispy, then toss them in the most incredible buttery garlic spice blend that takes them from good to absolutely crave-worthy. The garlic butter is where the magic happens: you melt butter with freshly minced garlic (cooking it just until fragrant but not browned so it stays sweet and aromatic), then stir in garlic powder for double garlic punch, onion powder for savory depth, smoked paprika for a subtle smoky note, black pepper, and salt. This warm, fragrant butter gets tossed with the hot wings so every single piece is coated in garlicky goodness. But here's the pro move that makes these truly restaurant-quality: after tossing in the garlic butter, you pop the wings back in the air fryer for just 1 more minute. This locks in all that garlic flavor while re-crisping the skin so you get the best of both worlds: intensely flavored wings that are still shatteringly crispy, not soggy. Right after that final air fry, you toss the wings with freshly grated Parmesan cheese (the real stuff, not the powdered kind) which melts slightly onto the hot wings and creates this salty, umami-rich coating, plus fresh chopped parsley for color and freshness. A light squeeze of lemon at the end adds brightness that cuts through the richness and makes you want to reach for another wing immediately. These are perfect for game day, bracket season, Super Bowl parties, casual weeknight dinners, or anytime you want wings that taste gourmet but require minimal effort. They're crispy, garlicky, cheesy, and absolutely addictive!
Frequently Asked Questions
Q: Why do you put them back in the air fryer after tossing in butter?
A: This is the secret to keeping the wings crispy! When you toss hot wings in butter or sauce, the moisture can make the skin soggy. By returning them to the air fryer for just 1 minute after coating, you re-crisp the exterior while locking in all that garlic butter flavor. It's that final step that makes these taste restaurant-quality instead of soggy takeout wings.
Q: Can I make these in the oven instead of an air fryer?
A: Absolutely! Preheat your oven to 425°F. Place the Perdue wings on a baking sheet lined with parchment paper or a wire rack and bake according to package directions until hot and crispy (usually 15-20 minutes). Toss with the garlic butter, then return to the oven for 2-3 minutes to re-crisp. The air fryer is faster and makes them extra crispy, but the oven works great too!
Q: How do I keep wings crispy for a party?
A: Keep finished wings warm in a 200°F oven on a wire rack (not a flat pan, which traps steam and makes them soggy). Don't stack them or cover them, which creates moisture. If you're making a big batch, cook them in batches and keep finished ones warm while you cook more. They're best served within 30 minutes of cooking for maximum crispiness!
These Parmesan garlic crispy game day wings start with PERDUE AIR FRYER READY ROASTED CRISPY WINGS from Costco and get tossed in buttery garlic spice blend, then re-crisped in the air fryer and finished with fresh Parmesan and parsley. Restaurant-quality wings in minutes
Rate This Recipe!
Preparations
Prep Time:
5 minutes
Cook Time:
15 minutes
Total Time:
20 minutes
Cuisine:
American
Course:
Appetizer, Main Course
Calories:
420 kcal (approx. per serving)
Servings:
4
Author:
Ronica Rupan
Ingredients
Ingredients
- 1 bag PERDUE AIR FRYER READY ROASTED CRISPY WINGS from Costco
- 3 tablespoons unsalted butter
- 4 cloves garlic, very finely minced
- 1 teaspoon garlic powder
- ½ teaspoon onion powder
- ½ teaspoon smoked paprika
- ¼ teaspoon black pepper
- ½ teaspoon kosher salt (adjust to taste)
- ¼ cup freshly grated Parmesan cheese
- 1 tablespoon fresh parsley, chopped
- Optional: pinch of red pepper flakes
- Optional: fresh lemon wedge for squeezing
Instructions
- Cook the Wings Preheat your air fryer according to the package directions on the PERDUE AIR FRYER READY ROASTED CRISPY WINGS. Place the wings in a single layer in the air fryer basket, making sure they're not overcrowded. You may need to work in batches depending on your air fryer size. Air fry according to the package instructions until the wings are hot throughout and the skin is crispy and golden. This usually takes about 12-15 minutes.
- Make the Garlic Butter While the wings are cooking, prepare your garlic butter. Melt the butter in a small saucepan over medium-low heat. Once melted, add the very finely minced garlic and cook for 30 to 60 seconds, stirring constantly, until fragrant and softened but not browned. Browned garlic tastes bitter, so watch it closely! Once the garlic is fragrant, stir in the garlic powder, onion powder, smoked paprika, black pepper, and kosher salt. Mix everything together, then remove from heat and set aside. The butter should be warm but not hot when you toss the wings.
- Toss the Wings in Garlic Butter Transfer the hot, crispy wings from the air fryer to a large mixing bowl. Pour the warm garlic butter over the wings. Using tongs, toss the wings quickly and thoroughly to coat every piece evenly in the garlicky butter. Make sure every wing gets some of that delicious coating!
- Re-Crisp in the Air Fryer This step is key! Return the butter-coated wings to the air fryer basket in a single layer. Air fry for 1 more minute at the same temperature. This short blast of heat locks in all the garlic flavor while re-crisping the skin so you don't end up with soggy wings. Don't skip this step, it makes all the difference!
- Finish with Parmesan and Parsley Immediately after the final air fry, transfer the wings back to your bowl (or to a serving platter). While they're still piping hot, toss with the freshly grated Parmesan cheese and chopped fresh parsley. The heat from the wings will melt the Parmesan slightly, creating an amazing cheesy coating. If using, add a pinch of red pepper flakes for heat and a light squeeze of fresh lemon juice for brightness.
- Serve Immediately Serve the wings immediately while they're hot and at peak crispiness! These are perfect on their own or with your favorite dipping sauces like ranch, blue cheese, or extra garlic aioli.
Lori Harvey Vanilla Matcha Glow Smoothie (Erewhon Copycat)
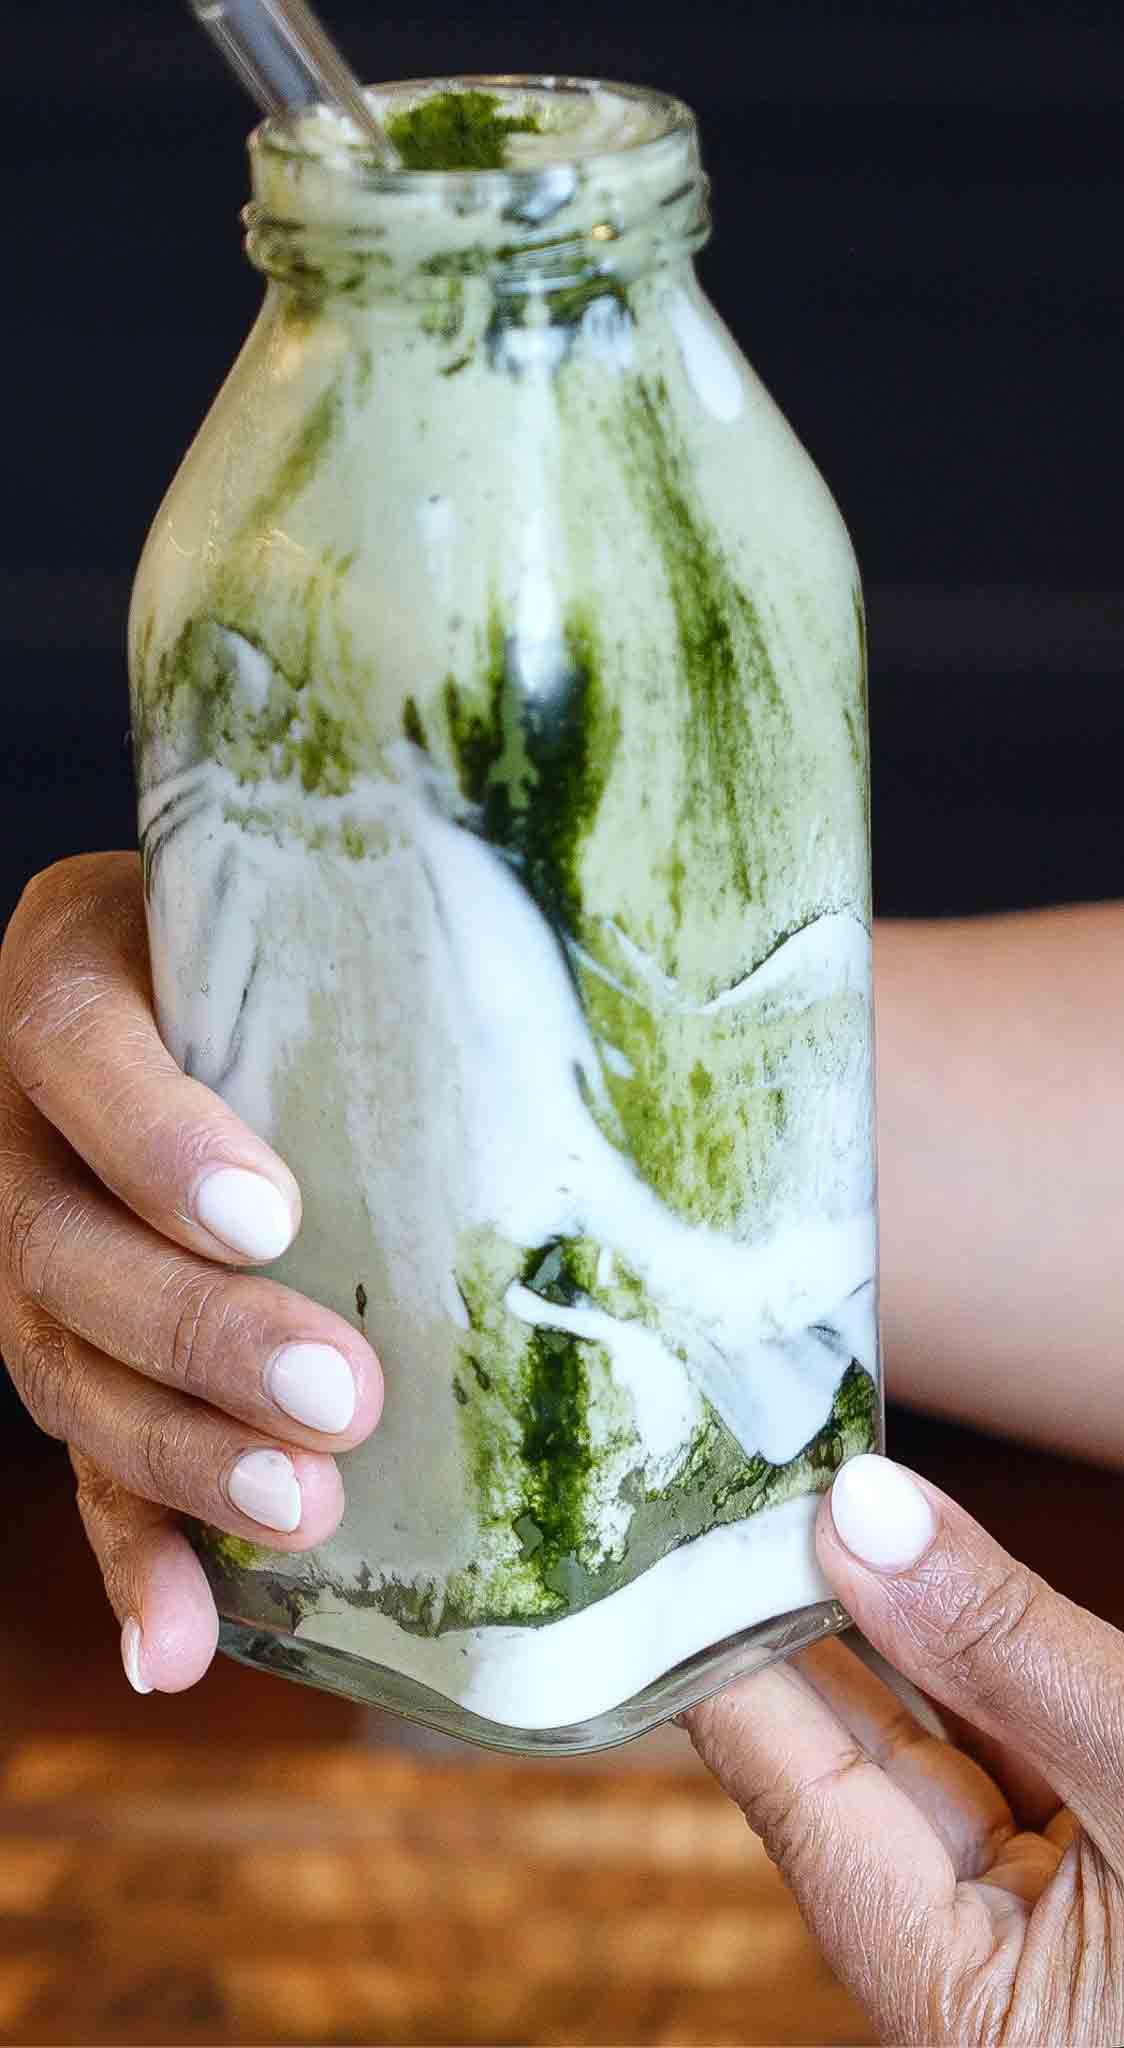
This Lori Harvey vanilla matcha glow smoothie is an Erewhon-inspired beauty booster that's packed with superfoods for glowing skin, healthy hair, and strong nails, and it tastes like a luxurious vanilla matcha latte in smoothie form! Inspired by Lori Harvey's famous $23 Erewhon smoothie, this recipe recreates that gorgeous green drink at home for a fraction of the price. The base is creamy organic oat milk blended with coconut cream for richness, MCT oil for sustained energy and metabolism support, and maple syrup for natural sweetness. Then comes the powerhouse lineup of superfoods: ceremonial grade matcha for antioxidants and gentle caffeine, lion's mane powder for cognitive function and focus, sea moss for minerals and thyroid support, vanilla collagen for skin elasticity and joint health, vanilla protein powder for muscle recovery and satiety, tocos (rice bran solubles) which are rich in vitamin E for skin health, and chlorella powder for detoxification and that gorgeous green color. Vanilla paste adds warm, aromatic vanilla flavor that ties everything together and makes this taste like a dessert instead of a health drink. Everything gets blended with ice (or frozen banana if you want extra creaminess and natural sweetness) until smooth and frothy. The presentation is what makes this feel like the Erewhon experience: you brush coconut whip on the inside of your glass, then sprinkle chlorella powder over it to create those gorgeous green streaks. When you pour the smoothie in, you get this stunning marbled effect that looks just like the original. Top with more coconut whip and a final dusting of chlorella for that Instagram-worthy finish. Each sip is creamy, slightly sweet, earthy from the matcha, and so satisfying. This isn't just a smoothie, it's a beauty ritual in a glass that supports your wellness from the inside out. Perfect for breakfast, post-workout fuel, or anytime you want to feel like you're treating yourself to something luxurious!
Frequently Asked Questions
Q: Do I need all these superfoods or can I skip some?
A: The beauty of this recipe is that it's completely customizable! The core flavors are the oat milk, matcha, vanilla, and sweetener. Everything else is a bonus superfood add-in. If you don't have lion's mane, tocos, or chlorella, you can absolutely skip them and it will still taste delicious. Start with what you have and add more superfoods as you want to level up. The collagen and protein powder are great for keeping you full, and the sea moss adds creaminess and minerals, but they're all optional based on your goals and budget.
Q: Where do I buy these ingredients?
A: Most of these superfoods can be found at health food stores like Whole Foods, Sprouts, or online at Amazon, Thrive Market, or specialty wellness shops. Ceremonial grade matcha is available at tea shops or online. Sea moss can be found at health food stores or from specialty vendors. Collagen, protein powder, lion's mane, and tocos are available at most supplement stores or online. If you can't find something locally, Amazon has most of these ingredients!
Q: Can I make this without a high-powered blender?
A: A high-powered blender like a Vitamix or Blendtec works best to get everything super smooth and creamy, especially with the sea moss and all the powders. However, a regular blender can work! Just blend a bit longer and make sure your sea moss is well-blended (you can also use sea moss gel instead of whole sea moss for easier blending). If your blender struggles, add a bit more liquid to help it blend smoothly.
Q: Is this smoothie actually good for skin, hair, and nails?
A: Yes! The ingredients are chosen specifically for their beauty-boosting benefits. Collagen supports skin elasticity and reduces fine lines. Sea moss is rich in minerals that support hair growth and skin hydration. Matcha has antioxidants that fight free radicals and inflammation. Tocos provide vitamin E for skin health. Lion's mane supports overall wellness and reduces stress (which affects skin). MCT oil supports metabolism. While no single food is a magic bullet, consistently consuming nutrient-dense ingredients like these absolutely supports healthy skin, hair, and nails from within!
This Lori Harvey vanilla matcha glow smoothie is an Erewhon-inspired beauty booster packed with superfoods! Oat milk, ceremonial matcha, sea moss, collagen, vanilla protein, lion's mane, MCT oil, and more blended into a creamy, gorgeous green smoothie. Served with coconut whip and chlorella for that signature look. Glowing skin in a glass!
Rate This Recipe!
Preparations
Prep Time:
10 minutes
Chill Time:
0 minutes
Total Time:
10 minutes
Cuisine:
American, Wellness
Course:
Drinks, Breakfast
Calories:
380 kcal (approx. per serving)
Servings:
1
Author:
Ronica Rupan
Ingredients
Ingredients
For the Smoothie:
- 1 cup organic oat milk
- 1 tablespoon MCT oil
- 2 tablespoons pure maple syrup (adjust to taste)
- 1 teaspoon lion's mane powder
- 2 tablespoons coconut cream
- 2 tablespoons sea moss (or sea moss gel)
- 2 tablespoons vanilla collagen powder
- 2 tablespoons vanilla protein powder
- ¼ teaspoon tocos (rice bran solubles)
- 2 teaspoons ceremonial grade matcha powder
- 1 teaspoon vanilla paste (or vanilla extract)
- ½ cup ice (or 1 frozen banana for extra creaminess)
For the Glass Decoration:
- Coconut whip (store-bought or homemade)
- ½ teaspoon chlorella powder, divided
Instructions
- Blend the Smoothie Base Add the oat milk, MCT oil, maple syrup, lion's mane powder, coconut cream, sea moss, vanilla collagen powder, vanilla protein powder, tocos, ceremonial grade matcha powder, and vanilla paste to a high-powered blender. Blend on medium speed for about 30 seconds until all the powders are incorporated and there are no clumps.
- Add Ice and Blend Until Smooth Add the ice (or frozen banana if you prefer extra creaminess and natural sweetness). Blend on high speed for 45-60 seconds until the smoothie is completely smooth, creamy, and frothy. The texture should be thick but pourable, like a milkshake. If it's too thick, add a splash more oat milk. If it's too thin, add a few more ice cubes and blend again.
- Decorate Your Glass Take your serving glass and use a spoon or pastry brush to spread coconut whip on the inside of the glass in swooshes or stripes. You want to create some texture so the chlorella sticks. Sprinkle about ¼ teaspoon of chlorella powder over the coconut whip, creating those gorgeous green streaks. Rotate the glass as you sprinkle for even coverage.
- Pour the Smoothie Slowly pour the blended smoothie into the decorated glass. Pour it right down the center so you don't disturb the beautiful chlorella design on the sides. Fill almost to the top, leaving room for the topping.
- Top and Garnish Add a generous dollop of coconut whip on top of the smoothie. Sprinkle the remaining ¼ teaspoon of chlorella powder over the coconut whip for that final touch of green. You can also add a light dusting of matcha powder if you want extra green color and flavor.
- Serve Immediately Serve immediately with a straw and enjoy! This smoothie is best consumed fresh while it's cold and frothy. The layers will stay separated for a few minutes, giving you that gorgeous marbled look.
Crispy Salmon Burger with Smoky Chipotle Lime Mayo
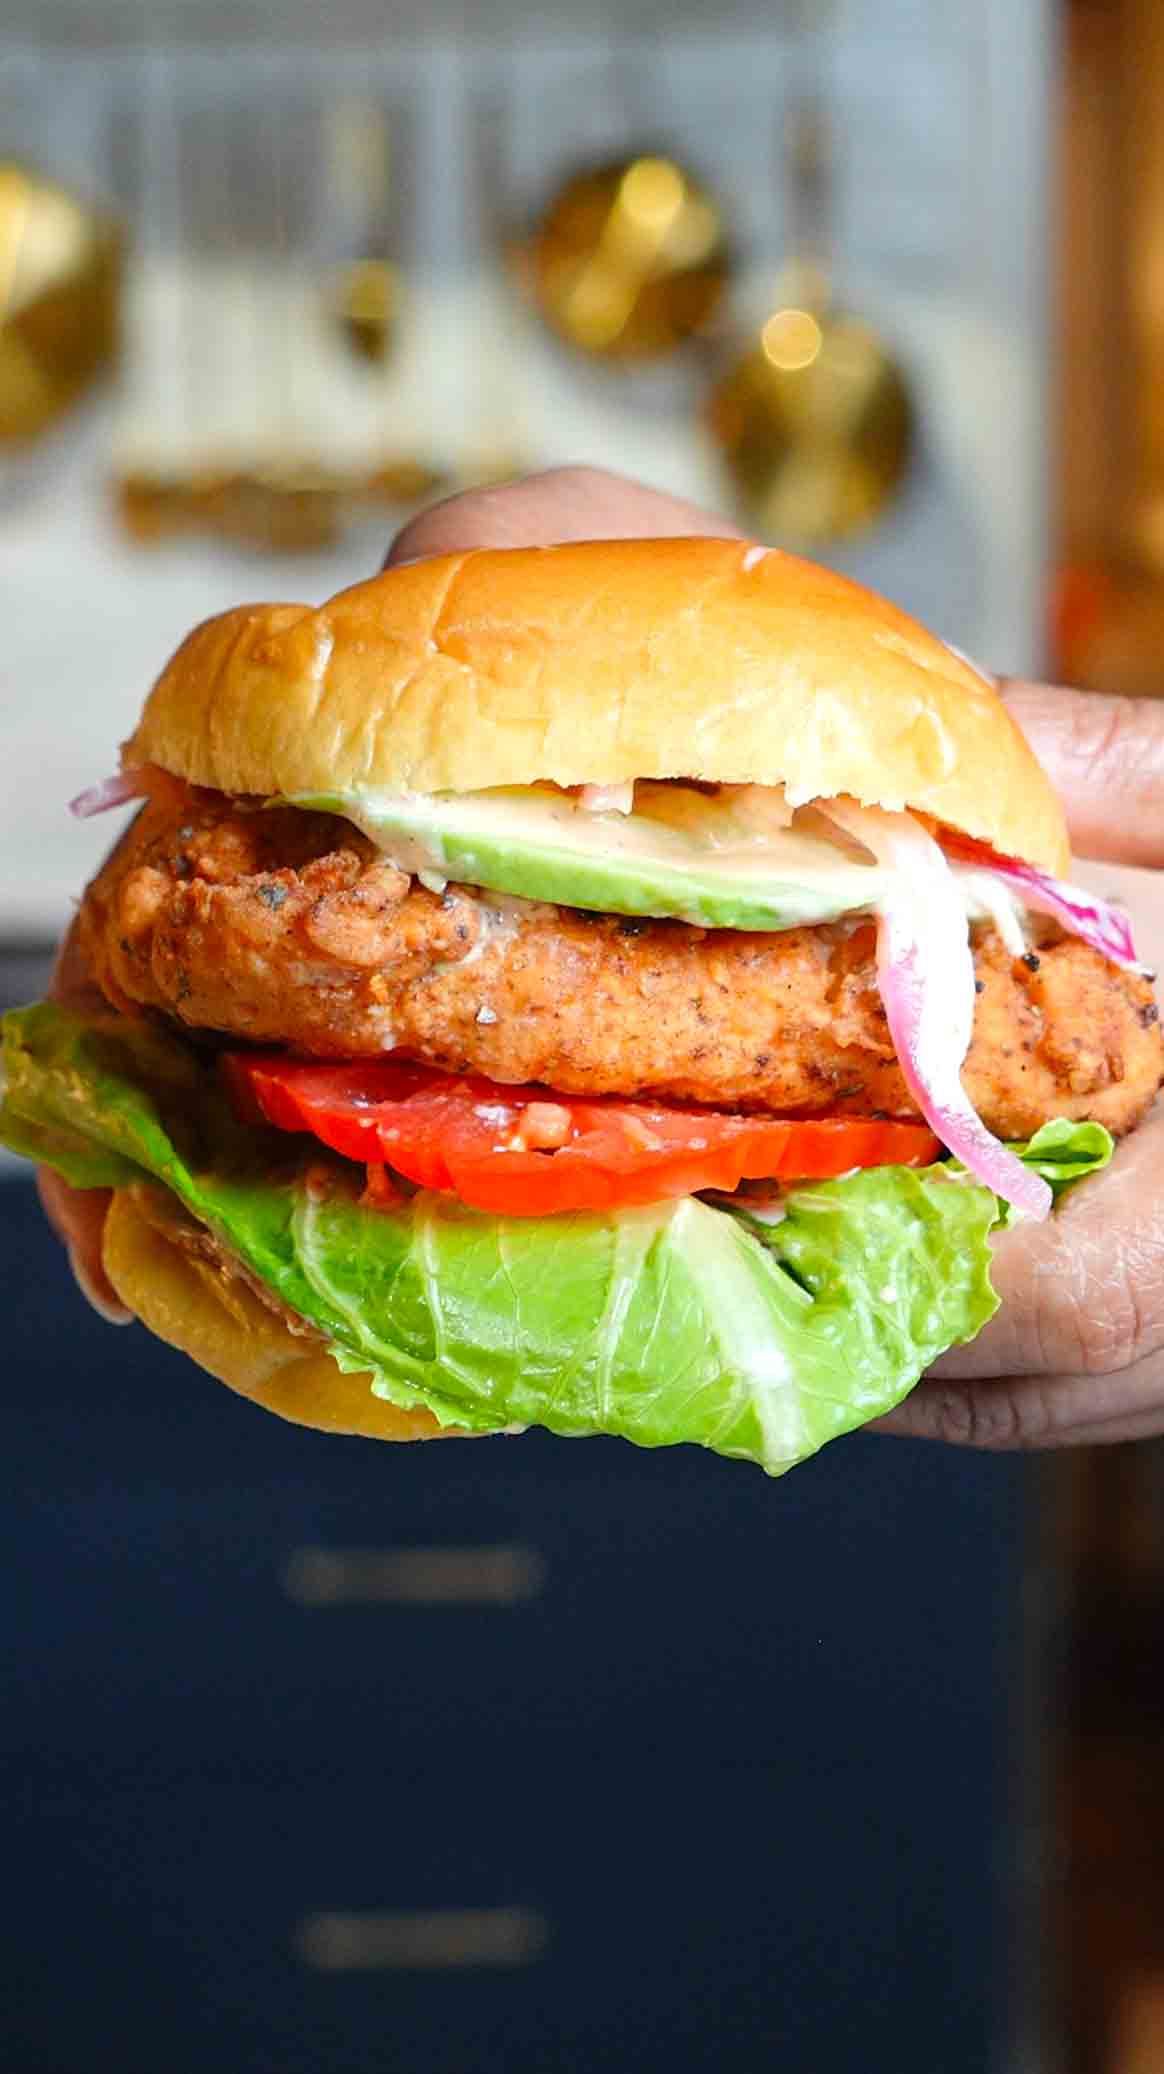
This crispy salmon burger with smoky chipotle lime mayo is an elevated take on fried fish sandwiches that's restaurant-quality but totally doable at home! Fresh salmon fillets get marinated in a tangy buttermilk and hot sauce mixture for at least 30 minutes, which does two amazing things: it tenderizes the fish and infuses it with flavor from the inside out. The buttermilk's acidity breaks down the proteins slightly so the salmon stays incredibly moist and tender even after frying, while the hot sauce adds a subtle kick that's not overwhelming but definitely present. After marinating, the salmon gets coated in a seasoned flour mixture that's absolutely loaded with Flora & Mana spices. Garlic of Eden brings that punchy garlic flavor, Creole Kick adds warmth and a subtle spicy complexity, and When Life Gives You Lemons gives a bright, zesty note that cuts through the richness. This isn't just plain flour, it's a flavor bomb that creates the most incredible crispy, golden crust when fried. The salmon gets deep-fried in hot oil at 375°F for 6-8 minutes until the coating is deeply golden, shatteringly crisp, and the fish inside is perfectly cooked through, flaky, and still moist. While it fries, you whip up the most incredible smoky chipotle lime mayo by mixing creamy Kewpie mayo (which is richer and tangier than regular mayo) with finely chopped chipotle peppers in adobo for smoky heat, fresh lime juice for brightness, and smoked paprika for an extra layer of smokiness. This sauce is absolute magic on the burger! Everything gets assembled on toasted brioche buns (which are slightly sweet and buttery and hold up beautifully to the juicy salmon), with crisp romaine lettuce, fresh sliced tomato, and that generous slather of smoky chipotle lime mayo. If you want to take it even further, add pickled red onions for tangy crunch or creamy avocado slices for richness. Each bite has crispy, well-seasoned coating, tender flaky salmon that's still moist inside, creamy smoky sauce, fresh vegetables, and that soft buttery bun. This is the kind of burger that makes you never want a regular fried fish sandwich again!
Frequently Asked Questions
Q: Can I bake the salmon instead of frying it?
A: Yes! For a lighter version, you can bake the coated salmon. Preheat your oven to 425°F, place the flour-coated salmon on a parchment-lined baking sheet, spray generously with cooking spray on all sides, and bake for 12-15 minutes until the coating is golden and the salmon is cooked through. It won't be quite as crispy as deep-fried, but it's still delicious and much easier! You can also air fry at 400°F for 10-12 minutes, flipping halfway.
Q: What if I don't have buttermilk?
A: Make your own! Add 1 tablespoon of white vinegar or lemon juice to 1 cup of regular milk, stir, and let it sit for 5-10 minutes until it curdles slightly. This creates the same tangy, acidic quality as buttermilk. You can also use plain yogurt thinned with a little milk, or even just use regular milk if you're in a pinch (though the flavor won't be quite as tangy).
Q: Can I use a different type of fish?
A: Absolutely! This recipe works beautifully with other firm, meaty fish like cod, halibut, mahi-mahi, or even thick tuna steaks. Adjust the frying time based on the thickness of the fish. Thinner fillets need less time (4-5 minutes), while very thick cuts might need 8-10 minutes. The key is the fish should flake easily with a fork when done.
Q: How spicy is the chipotle mayo?
A: It has a moderate, smoky heat that's noticeable but not overwhelming. Start with 1 chipotle pepper and taste, then add the second one if you want more heat. If you're sensitive to spice, use just ½ a pepper or rinse the seeds out before chopping (that's where most of the heat lives). You can also add a teaspoon of honey to the mayo to balance the heat with sweetness.
This crispy salmon burger with smoky chipotle lime mayo is restaurant-quality at home! Salmon marinated in buttermilk and hot sauce, coated in Flora & Mana seasoned flour (Garlic of Eden, Creole Kick, When Life Gives You Lemons), fried until golden and crispy, and served on toasted brioche with smoky chipotle lime mayo. Absolutely incredible!
Rate This Recipe!
Preparations
Prep Time:
10 minutes (plus 30 minutes marinating)
Chill Time:
10 minutes
Total Time:
50 minutes
Cuisine:
American
Course:
Main Course, Dinner
Calories:
680 kcal (approx. per burger)
Servings:
2
Author:
Ronica Rupan
Ingredients
Ingredients
For the Salmon:
- 1 cup buttermilk
- ½ cup hot sauce (like Frank's RedHot or Louisiana)
- Two 8-ounce skinless salmon fillets
- Neutral oil for frying, about 2½ cups
- 2 brioche buns, lightly toasted
- Romaine lettuce leaves
- Sliced tomato
- Optional: pickled red onions, sliced avocado
For the Seasoned Flour:
- 1½ cups all-purpose flour
- 1 tablespoon Flora & Mana Garlic of Eden
- 1 tablespoon Flora & Mana Creole Kick
- 1 tablespoon Flora & Mana When Life Gives You Lemons
- Pinch of kosher salt (optional)
For the Smoky Chipotle Lime Mayo:
- ½ cup Kewpie mayo (or regular mayo)
- 1-2 chipotle peppers in adobo, finely chopped
- Juice of ½ lime (about 1 tablespoon)
- ¼ teaspoon smoked paprika
Instructions
- Marinate the Salmon In a medium bowl, whisk together the buttermilk and hot sauce until well combined. Add the salmon fillets, making sure they're fully submerged and coated on all sides. Cover the bowl with plastic wrap and refrigerate for at least 30 minutes (or up to 2 hours for maximum flavor). This marinating time tenderizes the fish and infuses it with flavor.
- Prepare the Seasoned Flour While the salmon marinates, prepare your seasoned flour coating. In a shallow dish or bowl, stir together the all-purpose flour, Flora & Mana Garlic of Eden, Flora & Mana Creole Kick, and Flora & Mana When Life Gives You Lemons. Taste the mixture and add a pinch of salt if you'd like (the spice blends already have seasoning, so this is optional). Mix well so the spices are evenly distributed throughout the flour.
- Make the Smoky Chipotle Lime Mayo In a small bowl, mix together the Kewpie mayo, finely chopped chipotle peppers in adobo (start with 1 pepper, taste, and add the second if you want more heat), fresh lime juice, and smoked paprika. Stir until smooth and well combined. Taste and adjust seasoning if needed. Set aside in the fridge until ready to assemble.
- Heat the Oil Pour about 2½ cups of neutral oil into a medium-sized heavy-bottomed pot or deep skillet. The oil should be about 2-3 inches deep. Heat over medium-high heat until it reaches 375°F on a deep-fry or instant-read thermometer. This temperature is important! Too hot and the outside burns before the inside cooks. Too cool and the coating absorbs too much oil and gets greasy instead of crispy.
- Coat the Salmon Remove the marinated salmon from the buttermilk mixture, letting the excess drip off but keeping it moist. Working with one fillet at a time, place it in the seasoned flour and press gently to coat all sides completely, getting into every crevice. For extra crispy coating, do a double dip: after the first flour coating, dip the salmon back into the buttermilk marinade, then coat it in the flour again. This creates a thicker, crunchier crust!
- Fry the Salmon Carefully lower the flour-coated salmon into the hot oil using tongs or a slotted spoon. Don't drop it in or the oil will splash! Fry for 6-8 minutes, flipping halfway through if needed, until the coating is deeply golden brown and crispy and the salmon is cooked through. The salmon should feel light when you lift it with tongs and the coating should be crackling and golden. If you're frying both fillets, do them one at a time so the oil temperature doesn't drop too much.
- Drain and Rest Once the salmon is perfectly golden and cooked through, carefully remove it from the oil and place it on a wire rack set over a baking sheet or on a plate lined with paper towels. Let it rest for 2-3 minutes. This drains excess oil and lets the crust set up so it stays extra crispy.
- Toast the Buns While the salmon rests, lightly toast your brioche buns. You can do this in a toaster, under the broiler for 1-2 minutes, or in a dry skillet over medium heat. Toasting prevents the buns from getting soggy from the mayo and juices.
- Assemble the Burgers Spread a generous amount of the smoky chipotle lime mayo on both the top and bottom of each toasted brioche bun. On the bottom bun, layer a few leaves of crisp romaine lettuce, then add a slice or two of fresh tomato. Place the crispy fried salmon on top. If using, add pickled red onions for tangy crunch and/or sliced avocado for creaminess. Top with the other half of the bun.
- Serve Immediately Serve the burgers immediately while the salmon is still hot and crispy! These are best enjoyed fresh. Serve with fries, sweet potato fries, coleslaw, or a simple salad on the side.
Parmesan Onion Pizza Chips
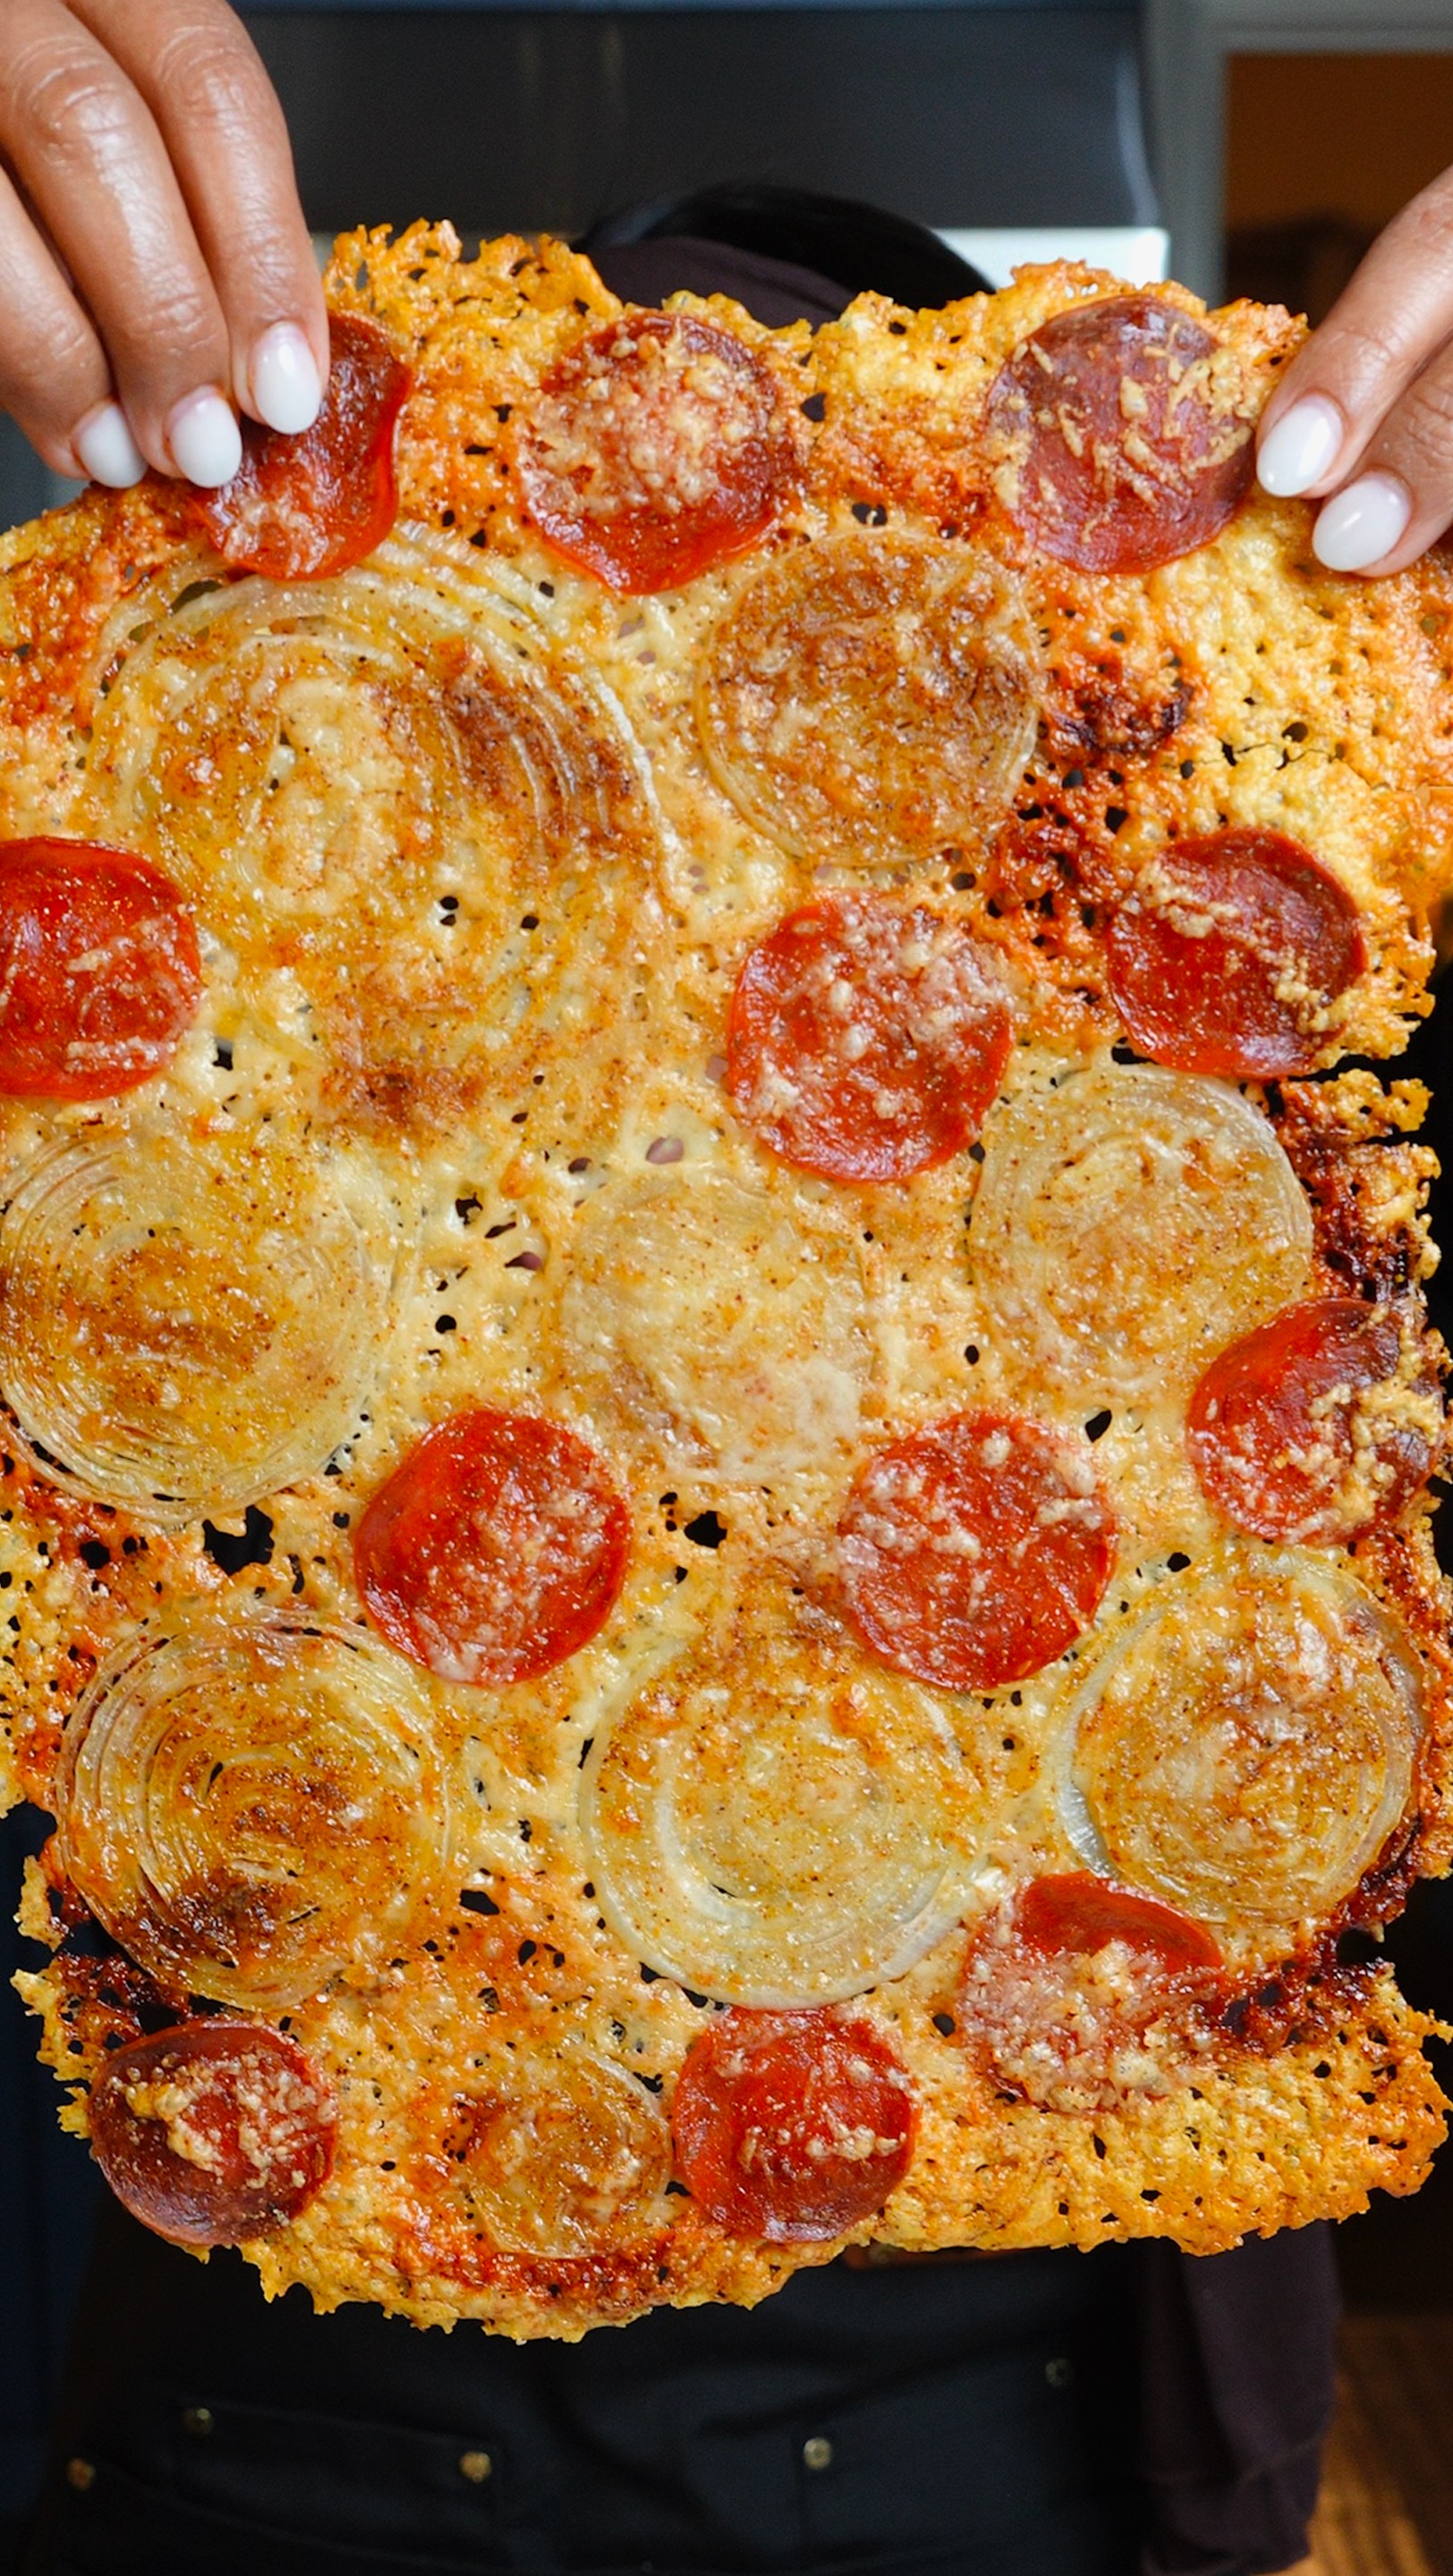
These Parmesan onion pizza chips are the most addictive, crispy, cheesy snack that tastes exactly like pizza but in chip form, and they're about to become your new favorite way to satisfy those pizza cravings! The genius of this recipe is in the technique: you spread shredded Parmesan cheese in a thin, even layer on a baking sheet, then top it with thinly sliced sweet onion rings, brush with olive oil, season with Italian seasoning and smoked paprika, add turkey pepperoni slices for that classic pizza flavor, and finish with more Parmesan on top. Everything bakes together at 400°F for just 12-15 minutes until the cheese melts, crisps up, and turns this gorgeous golden brown with lacy, crispy edges. The Parmesan acts as both the base and the glue that holds everything together, creating this incredible crispy, savory "crust" that's loaded with umami flavor. The sweet onions caramelize slightly as they bake, adding sweetness and a bit of tender texture that contrasts beautifully with the crispy cheese. The Italian seasoning and smoked paprika give you those classic pizza spice notes, while the turkey pepperoni adds savory, slightly spicy pizza flavor without all the grease of regular pepperoni. After baking, you let the chips cool on the baking sheet for just 2-3 minutes so they firm up and become perfectly crispy and easy to handle. Then comes the magic finishing touch: a drizzle of hot honey that adds sweetness with a kick of heat that takes these from good to absolutely irresistible. The combination of salty Parmesan, sweet caramelized onions, savory pepperoni, and that sweet-spicy hot honey is mind-blowing. Serve them with warm marinara sauce on the side for dipping and you've got the ultimate appetizer, snack, or party food that looks impressive but is incredibly easy to make. These are perfect for game day, movie night, entertaining, or anytime you want something that tastes indulgent but is actually lighter than regular pizza!
Frequently Asked Questions
Q: Can I use pre-shredded Parmesan from a bag?
A: For best results, use freshly shredded Parmesan from a block rather than the pre-shredded kind. Pre-shredded cheese has anti-caking agents (like cellulose or potato starch) that prevent it from melting and crisping up properly. Freshly shredded Parmesan melts beautifully and creates that lacy, crispy texture you want. It's worth the extra minute to shred your own! You can also use a mix of Parmesan and mozzarella if you want extra meltiness.
Q: How thin do the onion slices need to be?
A: The onions should be sliced about ⅛ inch thick, which is quite thin. This ensures they cook through and caramelize slightly in the time it takes for the cheese to crisp up. If they're too thick, they won't cook through and will be crunchy instead of tender. Use a sharp knife or a mandoline for the most even, thin slices. Sweet onions like Vidalia or Walla Walla work best because they caramelize beautifully.
Q: Can I make these ahead of time?
A: These are definitely best served fresh and crispy right out of the oven! However, you can prep everything ahead. Slice the onions and shred the cheese up to a day ahead and store them separately in the fridge. Assemble and bake right before serving. If you have leftovers, store them in an airtight container at room temperature and reheat in a 350°F oven for 3-5 minutes to re-crisp them. They won't be quite as crispy as fresh, but still tasty!
Q: What can I use instead of hot honey?
A: If you can't find hot honey or don't want the spicy kick, regular honey works beautifully! You could also use a balsamic glaze for a tangy-sweet finish, or skip the drizzle entirely and just serve with marinara. For a spicy version without buying hot honey, mix regular honey with a pinch of red pepper flakes or a few drops of your favorite hot sauce.
These Parmesan onion pizza chips are crispy, cheesy, and taste exactly like pizza! Shredded Parmesan baked with thinly sliced sweet onions, Italian seasoning, smoked paprika, and turkey pepperoni until golden and crispy. Drizzled with hot honey and served with warm marinara for dipping. The ultimate pizza-flavored snack!
Rate This Recipe!
Preparations
Prep Time:
10 minutes
Cook Time:
15 minutes
Total Time:
25 minutes
Cuisine:
Italian-American
Course:
Appetizer, Snack
Calories:
280 kcal (approx. per serving)
Servings:
4
Author:
Ronica Rupan
Ingredients
Ingredients
- 1½ cups plus 3 tablespoons shredded Parmesan cheese, divided
- 1 large sweet onion, peeled and sliced into ⅛-inch-thick rings
- 1 tablespoon olive oil
- ½ teaspoon Italian seasoning
- ½ teaspoon smoked paprika
- 12 slices turkey pepperoni
- ¼ cup hot honey
- ½ cup marinara sauce, warmed (for dipping)
Instructions
- Preheat the Oven Preheat your oven to 400°F (200°C). This high temperature is important for getting the cheese crispy and golden!
- Prepare the Baking Sheet Line a large baking sheet with parchment paper or a nonstick silicone baking mat. This is crucial so the cheese doesn't stick and you can easily remove the chips after baking.
- Create the Parmesan Base Spread 1½ cups of the shredded Parmesan cheese evenly over the prepared baking sheet in a thin, uniform layer. Try to keep the thickness consistent so everything crisps evenly. The cheese should cover most of the baking sheet but doesn't need to go all the way to the edges.
- Add the Onions and Seasonings Arrange the thinly sliced onion rings evenly over the Parmesan layer, trying to keep them in a single layer as much as possible. Brush the tops of the onions with the olive oil using a pastry brush. This helps them caramelize and adds flavor. Sprinkle the Italian seasoning and smoked paprika evenly over the top.
- Add Pepperoni and More Cheese Distribute the turkey pepperoni slices evenly over the onions. You want them spread out so every portion gets some pepperoni. Sprinkle the remaining 3 tablespoons of shredded Parmesan evenly over the top of everything.
- Bake Until Golden and Crispy Place the baking sheet in the preheated oven and bake for 12-15 minutes, checking at the 12-minute mark. The chips are done when the Parmesan is golden brown and crispy around the edges and the onions are tender and slightly caramelized. Watch carefully in the last few minutes to prevent burning!
- Cool Briefly Remove the baking sheet from the oven and let the chips cool on the baking sheet for 2-3 minutes. This cooling time is important! The chips will firm up and become crispy as they cool. If you try to remove them immediately, they'll be too soft and might fall apart.
- Drizzle and Serve Carefully remove the onion pizza chips from the baking sheet using a spatula and transfer to a serving plate. Drizzle generously with the hot honey in a zigzag pattern over the top. Serve immediately while still warm and crispy with a small bowl of warm marinara sauce on the side for dipping!
Cottage Cheese Stuffed Shells with Turkey Meat Sauce

These cottage cheese stuffed shells with turkey meat sauce are the ultimate comfort food that's actually lighter and healthier than traditional stuffed shells, and the best part is you don't even boil the pasta first! Jumbo pasta shells get stuffed with an incredible creamy cottage cheese filling made with Knudsen whole-milk cottage cheese, fontina, Pecorino Romano, eggs, fresh basil, garlic, oregano, and a touch of cornstarch that helps bind everything together. The cottage cheese creates this amazing creamy, slightly tangy filling that's high in protein and so much lighter than traditional ricotta-based fillings, but just as delicious and satisfying. The turkey meat sauce is savory, slightly sweet, and perfectly seasoned with ground turkey browned until golden, onions caramelized until soft and sweet, loads of garlic, a pinch of red pepper flakes for warmth, tomato puree, and a touch of sugar to balance the acidity. The key to this recipe is that the sauce needs to be thin and saucy, not thick, because the uncooked shells absorb all that liquid as they bake and that's how they cook to tender perfection without any pre-boiling. You stuff the raw shells with the cottage cheese filling using a piping bag or zip-top bag with the corner cut off (so much easier than using a spoon!), nestle them into a baking dish with sauce on the bottom, pour more sauce over the top to completely cover them, then cover with foil and bake for 45 minutes. The shells cook in that flavorful sauce, absorbing all the moisture and flavor, becoming perfectly al dente and tender. After 45 minutes, you uncover, sprinkle a generous amount of shredded fontina cheese all over the top, and bake uncovered for another 15 minutes until the cheese is melted and lightly browned and bubbly. A 25-minute rest after baking lets everything set up so the shells don't fall apart when you serve them. Fresh basil sprinkled over the top adds brightness and color. This is perfect for feeding a crowd, making ahead for busy weeknights, or freezing for later!
These cottage cheese stuffed shells with turkey meat sauce are lighter, easier, and absolutely delicious! Uncooked jumbo shells stuffed with creamy Knudsen cottage cheese filling, nestled in savory turkey meat sauce, and baked until tender. No boiling pasta required! Topped with melted fontina and fresh basil. Pure comfo
Rate This Recipe!
Preparations
Prep Time:
30 minutes
Cook Time:
1 hour 30 minutes
Total Time:
2 hours (plus 25 minutes cooling)
Cuisine:
Italian-American
Course:
Calories:
520 kcal (approx. per serving)
Servings:
6-8
Author:
Ronica Rupan
Ingredients
Ingredients
For the Turkey Meat Sauce:
- 2 tablespoons extra virgin olive oil
- 1 pound ground turkey
- 1 onion, chopped
- ½ teaspoon kosher salt
- ½ teaspoon black pepper
- 6 cloves garlic, minced
- ¼ teaspoon red pepper flakes
- 1 (28-ounce) can tomato puree
- 2½ to 3 cups water
- 1 teaspoon granulated sugar
For the Cottage Cheese Filling:
- 2 cups (16 oz) Knudsen whole-milk cottage cheese
- 4 ounces fontina cheese, shredded (1 cup)
- 2 ounces Pecorino Romano cheese, grated (1 cup)
- 2 large eggs
- 3 tablespoons fresh basil, chopped
- 1½ tablespoons cornstarch
- 2 cloves garlic, minced
- 1 teaspoon dried oregano
- ½ teaspoon kosher salt
For the Shells and Topping:
- 25 jumbo pasta shells, uncooked
- 8 ounces fontina cheese, shredded (2 cups)
- 1 tablespoon fresh basil, chopped (for garnish)
Instructions
- Make the Turkey Meat Sauce Heat the olive oil in a large saucepan over medium-high heat. Add the ground turkey and cook, breaking it up with a wooden spoon, until browned and cooked through with no pink remaining, about 8-10 minutes. Add the chopped onion, salt, and pepper and cook, stirring occasionally, until the onion is softened and lightly browned, about 10 minutes. Stir in the minced garlic and red pepper flakes and cook until fragrant, about 30 seconds. Add the tomato puree, 2½ cups of water, and sugar. Bring to a simmer, then reduce heat to medium-low and cook until the flavors have melded, about 5 minutes. The sauce should be saucy and thin, not thick. This is crucial for the shells to cook properly! Add more water if it seems too thick. Set aside.
- Make the Cottage Cheese Filling In a large bowl, stir together the Knudsen cottage cheese, 1 cup of shredded fontina, grated Pecorino Romano, eggs, chopped basil, cornstarch, minced garlic, dried oregano, and salt until thoroughly combined and smooth. Transfer the filling to a large piping bag or a gallon-size zip-top bag. If using a zip-top bag, seal it and cut about 1 inch off one corner to create a piping opening.
- Prepare and Stuff the Shells Adjust your oven rack to the middle position and preheat the oven to 400°F. Place the 25 uncooked jumbo shells open side up on the counter in front of you. Working one at a time, pipe the cottage cheese filling into each shell until it's about three-quarters full. Divide any remaining filling evenly among all the shells so they're nicely stuffed but not overflowing.
- Assemble the Dish Spread 1 cup of the turkey meat sauce over the bottom of a 13x9-inch baking dish. This creates a sauce cushion that prevents the shells from sticking. Transfer the stuffed shells, open side up, to the prepared dish, arranging them in neat rows. Pour the remaining sauce evenly over all the shells, making sure they're completely covered with sauce. This moisture is what cooks the pasta!
- Bake Covered Cover the dish tightly with aluminum foil and place it on a rimmed baking sheet (to catch any drips). Bake until the shells are tender when pierced with a knife and the sauce is boiling rapidly around the edges, about 45 minutes. You should see vigorous bubbling when you peek under the foil.
- Add Cheese and Finish Baking Remove the dish from the oven and carefully discard the foil (watch out for steam!). Sprinkle the remaining 2 cups of shredded fontina cheese evenly over the top of all the shells. Return to the oven, uncovered, and bake until the fontina is melted and lightly browned, about 15 minutes. The cheese should be bubbly and golden in spots.
- Rest and Serve Let the shells cool and rest for 25 minutes before serving. This is important! The sauce will thicken, the cheese will set, and the shells will be much easier to serve without falling apart. Sprinkle with fresh chopped basil right before serving. Use a large spoon to scoop out shells with plenty of sauce!
Thai Red Curry Turkey Meatball Bowl

This Thai red curry turkey meatball bowl is the perfect combination of bold Thai flavors, lean protein, and healthy vegetables all in one satisfying bowl! Ground turkey gets mixed with panko breadcrumbs, egg, fresh garlic, grated ginger, soy sauce, red curry paste, and seasonings to create these incredibly flavorful meatballs that are aromatic, slightly spicy, and so tender. The secret to amazing meatballs is in the seasoning, and these are packed with it! You roll them into 1-inch balls and sear them in a hot pan until they're beautifully browned on all sides with a slight crust. In the same pan, you build the most incredible Thai red curry sauce by sautéing red curry paste in oil for just 30 seconds to bloom those spices and release all their fragrant oils. Then you stir in creamy coconut milk, optional fish sauce for that authentic umami depth, brown sugar for a touch of sweetness that balances the heat, and salt. The meatballs go back into that gorgeous curry sauce and simmer for 10 minutes, absorbing all those flavors and finishing cooking until they're tender and juicy. In the last 5 minutes, frozen mixed vegetables go right into the sauce to cook through and soak up all that curry goodness. Everything gets served over fluffy jasmine rice, garnished with fresh cilantro or basil for brightness and lime wedges for squeezing over the top. Each bite has tender, flavorful meatballs, creamy coconut curry sauce, vegetables, and rice that soaks up all that sauce. It's comforting, satisfying, and tastes like your favorite Thai restaurant but made right at home in about 30 minutes!
Frequently Asked Questions
Q: Can I use ground chicken instead of turkey?
A: Absolutely! Ground chicken works just as well as turkey in this recipe. You could also use ground pork for a richer flavor, or even a mix of turkey and pork. For a leaner option, stick with turkey or chicken breast meat. The cooking time and method stay exactly the same regardless of which ground meat you choose.
Q: How spicy is this dish?
A: The spice level depends on your red curry paste! Most store-bought Thai red curry paste has a moderate heat level that's flavorful without being overwhelming. If you're sensitive to spice, start with just 1 teaspoon in the meatballs and use half the bottle of curry paste for the sauce, then taste and add more if you want. For more heat, add an extra teaspoon of curry paste or a pinch of red pepper flakes. The coconut milk and brown sugar help balance and mellow the heat.
Q: Can I make the meatballs ahead of time?
A: Yes! You can form the raw meatballs and refrigerate them on a plate covered with plastic wrap for up to 24 hours before cooking. You can also cook the meatballs completely, let them cool, and refrigerate for up to 3 days or freeze for up to 3 months. Reheat in the curry sauce when ready to serve. This makes meal prep super easy!
Q: What vegetables work best in this?
A: Any vegetables you like! Frozen mixed vegetables are convenient and cook quickly. Fresh options that work great include bell peppers, snap peas, green beans, broccoli florets, carrots, zucchini, or baby corn. Just adjust cooking time based on the vegetables. Harder veggies like carrots need 5-7 minutes, while softer ones like zucchini only need 3-4 minutes.
This Thai red curry turkey meatball bowl is bold, flavorful, and ready in 30 minutes! Tender turkey meatballs seasoned with ginger, garlic, and red curry paste, seared until golden, then simmered in creamy coconut curry sauce with vegetables. Served over jasmine rice with fresh herbs and lime!
Rate This Recipe!
Preparations
Prep Time:
15 minutes
Cook Time:
25 minutes
Total Time:
40 minutes
Cuisine:
Thai
Course:
Thai
Calories:
Main Course, Dinner
Servings:
4
Author:
Ronica Rupan
Ingredients
Ingredients
For the Meatballs:
- 1 pound ground turkey (85% lean, 15% fat)
- ⅓ cup panko breadcrumbs
- 1 large egg
- 2 cloves garlic, minced
- 1 teaspoon fresh ginger, grated
- 1 tablespoon soy sauce
- 1 teaspoon red curry paste
- ½ teaspoon kosher salt
- ½ teaspoon black pepper
- 1 tablespoon neutral oil for cooking
For the Curry Sauce:
- 1 tablespoon neutral oil
- 1.5 tablespoons Thai red curry paste ( adjust for heat)
- 1 can (13.5 oz) coconut milk
- 1 teaspoon fish sauce (optional, for depth of flavor)
- 1 teaspoon brown sugar
- ½ teaspoon kosher salt
- 1½ cups frozen mixed vegetables (or fresh vegetables of choice)
For Serving:
- 2 cups cooked jasmine rice
- Fresh cilantro or Thai basil, for garnish
- Lime wedges, for extra freshness
Instructions
- Make the Meatballs In a large mixing bowl, combine the ground turkey, panko breadcrumbs, egg, minced garlic, grated ginger, soy sauce, red curry paste, salt, and black pepper. Use your hands or a fork to mix everything together until just combined. Don't overmix or the meatballs will be tough! Roll the mixture into 1-inch meatballs (you should get about 16-20 meatballs). Place them on a plate as you go.
- Sear the Meatballs Heat 1 tablespoon of oil in a large skillet or pan over medium heat. Once the oil is shimmering, add the meatballs in a single layer, making sure they're not touching. Sear for 5-7 minutes total, turning occasionally with tongs, until browned on all sides. They don't need to be cooked through yet, just nicely browned. Remove the meatballs from the pan and set aside on a plate.
- Make the Curry Sauce In the same pan (don't wipe it out, those browned bits add flavor!), add 1 tablespoon of oil over medium heat. Add the Thai red curry paste and sauté for about 30 seconds, stirring constantly, until it's fragrant and the oils start to release. You should smell those spices blooming!
- Build the Sauce Stir in the coconut milk, fish sauce (if using), brown sugar, and salt. Whisk everything together until the curry paste is completely dissolved into the coconut milk and the sauce is smooth. Bring to a gentle simmer.
- Simmer the Meatballs Add the seared meatballs back to the pan, nestling them into the curry sauce. Let everything simmer together for 10 minutes, occasionally spooning sauce over the meatballs. The meatballs will finish cooking through and absorb all those delicious curry flavors.
- Add the Vegetables Stir in the frozen mixed vegetables (or your fresh vegetables of choice) and cook for the last 5 minutes, stirring occasionally, until the vegetables are heated through and tender. If using fresh vegetables, adjust cooking time as needed. Harder vegetables need longer, softer ones need less time.
- Assemble the Bowl Divide the cooked jasmine rice among 4 serving bowls. Spoon the curry meatballs and vegetables over the rice, making sure to get plenty of that gorgeous curry sauce in each bowl. Garnish with fresh cilantro or basil and add lime wedges on the side for squeezing over the top right before eating.
- Serve and Enjoy Serve immediately while everything is hot. Squeeze fresh lime juice over your bowl for extra brightness and dig in!
Aloe Mojito Mocktail (Skin-From-Within Wellness Drink)

This aloe mojito mocktail is a refreshing, wellness-focused drink that's like a spa treatment from the inside out! Fresh aloe vera gel blended with coconut water, lime, mint, and honey creates this incredibly hydrating, skin-loving beverage that tastes like a tropical mojito but is packed with benefits. Aloe vera has been used for centuries for its soothing, hydrating, and anti-inflammatory properties, and when consumed fresh, it can support digestion, hydration, and glowing skin from within. But here's what's crucial to understand before you make this: you need to properly prepare the aloe leaf to remove the yellow latex (called aloin), which is a bitter, laxative substance found between the leaf's outer rind and the inner gel. This yellow sap can cause cramping, diarrhea, and digestive upset if consumed, so removing it completely is non-negotiable! The process is simple but important: you cut the base of a fresh aloe leaf and stand it upright in a glass of water for 15 minutes, which allows that yellow latex to drain out naturally. Then you rinse the leaf thoroughly twice under running water to remove any residual yellow sap. Once cleaned, you carefully slice the leaf open lengthwise and scoop out only the clear, translucent inner gel. This is the good stuff that's safe to eat and full of benefits. You only need about 2 tablespoons of this clear gel for one drink, so a little goes a long way! The gel gets blended with coconut water and raw honey until completely smooth. In your glass, you muddle fresh mint leaves with lime juice to release those aromatic oils and create that classic mojito base. The smooth aloe blend gets poured over the muddled mint and lime, then you add ice for that refreshing chill. The result is this gorgeous, pale green mocktail that's hydrating, refreshing, slightly sweet from the honey, tangy from the lime, aromatic from the mint, and incredibly good for you. The raw aloe does have a naturally mild, slightly bitter, slippery texture, but the honey and lime balance it beautifully so it tastes like a treat, not a health tonic. This is perfect for hot summer days, post-workout hydration, when you want to support your skin from within, or anytime you want a refreshing mocktail that actually does something good for your body!
Frequently Asked Questions
Q: Why is it so important to remove the yellow latex from aloe?
A: The yellow or orange sap (called aloin or aloe latex) that oozes from the leaf when you cut it is a natural laxative that can cause serious digestive issues including cramping, diarrhea, electrolyte imbalances, and even kidney problems if consumed regularly or in large amounts. It's also incredibly bitter and will ruin the taste of your drink. This is why you MUST drain it completely by standing the cut leaf upright for 15 minutes, then rinse thoroughly twice. Only the clear, translucent inner gel is safe to consume. Never skip this step!
Q: Can I use store-bought aloe vera gel or juice instead?
A: Yes, but make sure it's specifically labeled as "food grade" or "drinkable" aloe vera. Many aloe products are for topical/skin use only and are NOT safe to consume. Look for cold-pressed, organic aloe vera juice or drinking gel at health food stores. If using pre-made aloe juice, skip the blending step and just add 2-3 tablespoons directly to your glass with the other ingredients. Fresh is best for maximum benefits, but quality store-bought is a convenient alternative
Q: How much aloe should I consume?
A: Less is more with aloe! Start with just 2 tablespoons of the clear inner gel per drink, which is about what this recipe calls for. Some people can tolerate up to ¼ cup per day, but start small to see how your body responds. Too much aloe can cause digestive upset even when properly prepared. You don't need a lot to get the benefits. Aloe is potent! Drink it 2-3 times per week max, not every day.
Q: Who should NOT drink aloe vera?
A: Pregnant or breastfeeding women should avoid consuming aloe vera as it can stimulate uterine contractions and may pass into breast milk. People with diabetes should consult their doctor as aloe can lower blood sugar. Those on blood thinners should avoid it as aloe can increase bleeding risk. Anyone with kidney problems, Crohn's disease, ulcerative colitis, or intestinal issues should avoid it. If you're on any medications, check with your doctor first as aloe can interact with many drugs. When in doubt, always consult a healthcare provider!
This aloe mojito mocktail is a refreshing wellness drink made with fresh aloe vera gel, coconut water, lime, mint, and honey! Properly prepared aloe (with the yellow latex completely removed) blended into a hydrating, skin-loving mocktail. Refreshing, healthy, and tastes amazing!
Rate This Recipe!
Preparations
Prep Time:
20 minutes (includes aloe draining time)
Total Time:
20 minutes
Cuisine:
Tropical, Wellness
Course:
Drinks
Calories:
85 kcal (approx. per serving)
Servings:
1
Author:
Ronica Rupan
Ingredients
Ingredients
For the Mocktail:
- 1 fresh aloe vera leaf (you'll only use about 2 tablespoons of the clear inner gel)
- Juice of 2 limes (about ¼ cup)
- 8-10 fresh mint leaves
- 1 tablespoon raw honey (or agave nectar)
- 1 cup coconut water
- Ice cubes
Instructions
IMPORTANT: Properly Preparing Fresh Aloe Vera
- Drain the Yellow Latex (Aloin) Using a sharp knife, cut about 1-2 inches off the base of your fresh aloe vera leaf. You'll notice a yellow or orange sap starting to ooze out. This is the latex (aloin) that MUST be removed. Stand the cut leaf upright in a tall glass or jar filled with a few inches of water, cut-side down. Let it sit for 15 minutes. You'll see the yellow liquid draining out into the water. This step is crucial for removing the bitter, laxative compound that can cause digestive upset.
- Rinse Thoroughly After draining, rinse the entire leaf under cool running water, rubbing the surface gently. Rinse it a second time to ensure all residual yellow sap is completely gone. The leaf should look clean with no yellow residue.
- Extract the Clear Inner Gel Lay the rinsed aloe leaf flat on a cutting board. Using a sharp knife, carefully slice off the spiky edges on both sides of the leaf. Then slice the leaf in half lengthwise so it opens like a book. You'll see the clear, translucent gel inside. Use a spoon to carefully scoop out ONLY the clear inner gel, leaving behind the green outer rind. You should have about 2-4 tablespoons of clear gel. Only use 2 tablespoons for this recipe. The gel will be slippery and jelly-like. This is normal!
Make the Aloe Mojito Mocktail:
- Blend the Aloe Base Add 2 tablespoons of the clear aloe vera gel, the raw honey, and the coconut water to a blender. Blend on high speed for 30-45 seconds until the mixture is completely smooth with no chunks of aloe remaining. The mixture should be pale and slightly frothy. Set aside.
- Muddle the Mint and Lime In your serving glass, add the fresh mint leaves and the juice of 2 limes. Using a muddler or the back of a wooden spoon, gently muddle (press and twist) the mint leaves with the lime juice for about 30 seconds. This releases the essential oils from the mint and creates that classic mojito aroma and flavor. You should smell the mint strongly!
- Combine and Assemble Pour the smooth aloe-coconut water blend over the muddled mint and lime in your glass. Fill the glass with ice cubes almost to the top.
- Stir and Serve Give everything a gentle stir with a spoon or straw to combine all the flavors. Garnish with an extra sprig of fresh mint and a lime wedge if desired. Serve immediately while cold and refreshing!
Hacks and Tips
- Always drain the yellow latex completely: This is the most important step! The yellow sap (aloin) between the outer leaf and inner gel is a powerful laxative that can cause cramping, diarrhea, and electrolyte imbalances. It's also incredibly bitter. Standing the cut leaf upright for the full 15 minutes and rinsing twice ensures all of it is removed. Only the clear inner gel is safe to consume. If you see any yellow or orange tinge in your gel, rinse more and scoop more carefully.
- Start with a small amount: If this is your first time consuming fresh aloe vera, start with just 1 tablespoon of gel instead of 2 to see how your body responds. Some people are more sensitive to aloe than others. You can always increase to 2 tablespoons next time if you tolerate it well. Don't consume aloe drinks more than 2-3 times per week.
- Use fresh aloe within 24 hours: Once you've extracted the clear gel from the leaf, use it right away for maximum benefits and freshness. If you have extra gel, you can store it in an airtight container in the fridge for up to 24 hours, but it's best fresh. Don't save it longer than that as it can start to lose potency and develop bacteria.
- Adjust sweetness to mask bitterness: Raw aloe has a naturally mild, slightly bitter, plant-like taste with a slippery texture. The honey and lime in this recipe balance that beautifully, but if you still find it too bitter, add another ½ tablespoon of honey. The sweetness helps make the drink more palatable while still keeping it healthy.
- Know when NOT to drink this: Pregnant or breastfeeding women, people with diabetes, those on blood thinners or diabetes medications, anyone with kidney issues or digestive disorders should avoid consuming aloe vera. When in doubt, always consult your doctor before adding aloe to your diet, especially if you're on any medications.
CinnaWaffles (Cinnamon Roll Waffles) – Three Ways
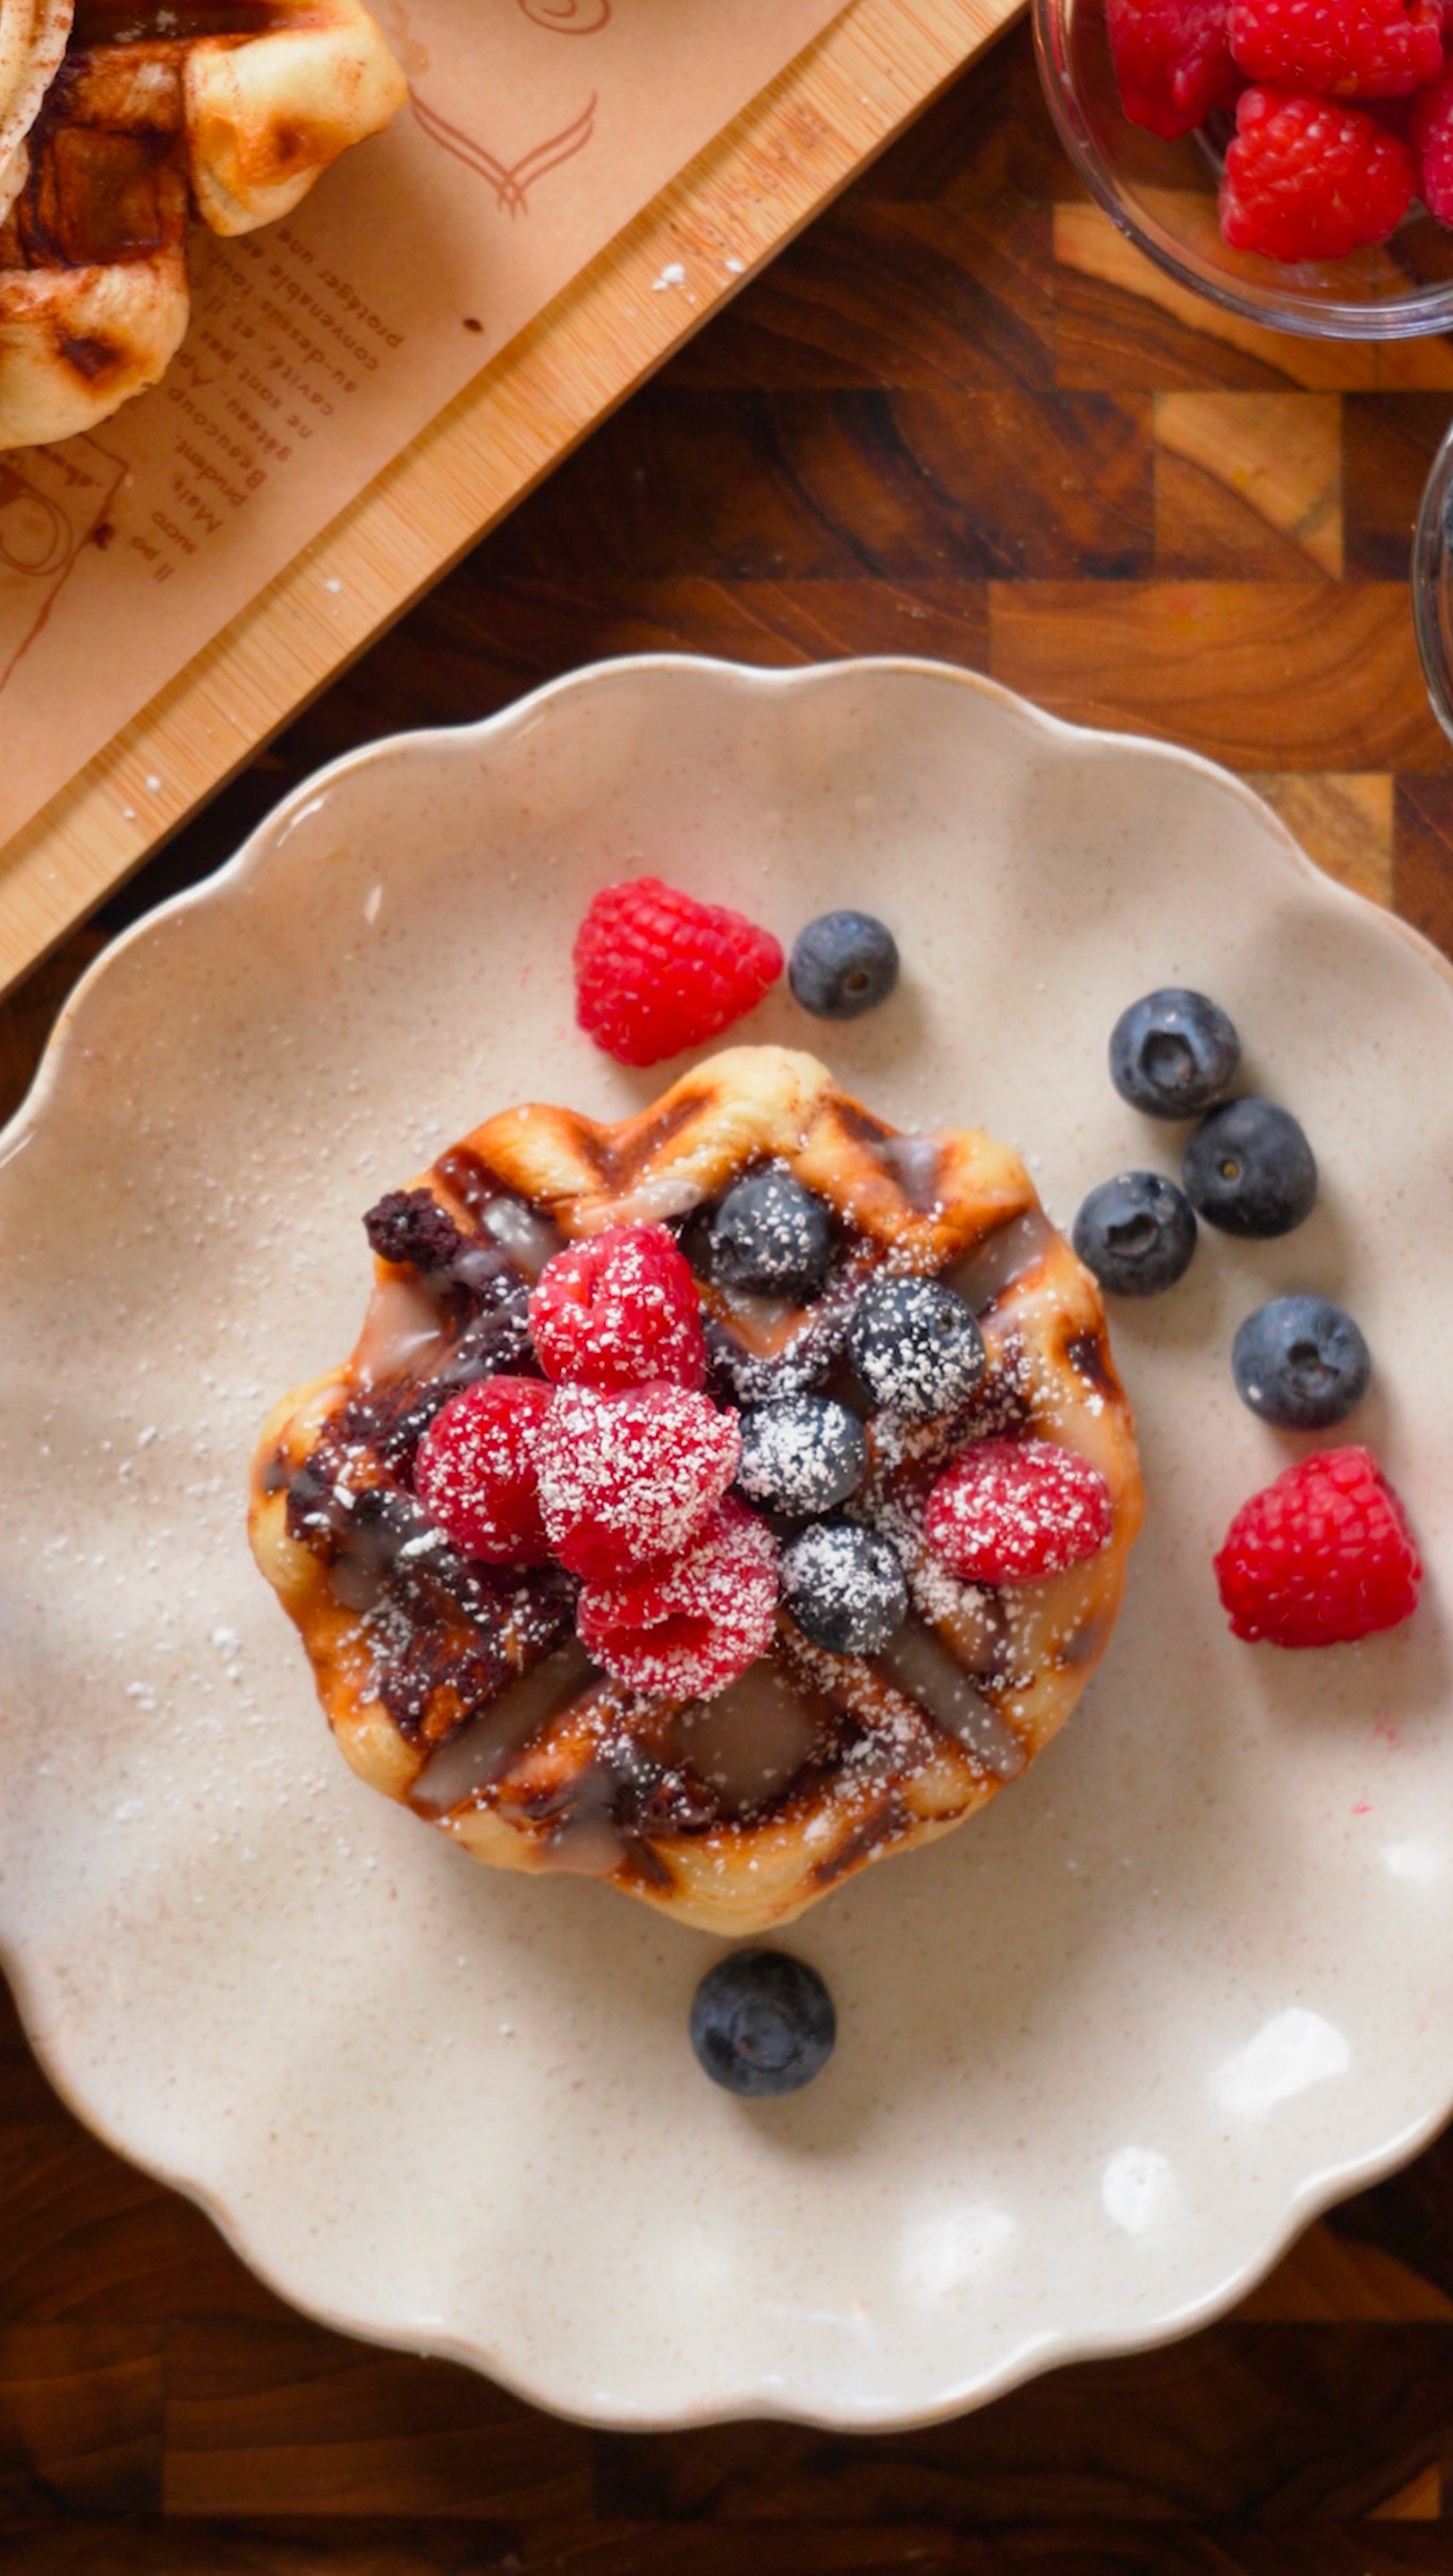
These CinnaWaffles are the ultimate breakfast hack that combines the best of cinnamon rolls and waffles into one incredible creation, and they're about to change your weekend mornings forever! The concept is genius in its simplicity: you take refrigerated cinnamon rolls (the kind that come in a can with packaged glaze), press them in a waffle maker, and in just 2-3 minutes you have these gorgeous golden brown waffles with crispy, caramelized edges and all those beautiful swirls of cinnamon throughout. The waffle maker transforms the dough into something with way more texture than a regular cinnamon roll. You get crispy edges that are almost candied from the sugar caramelizing, deep pockets that catch all your toppings, and a tender, fluffy center that still has that classic cinnamon roll flavor. But what makes these extra special is that you can top them three different ways to suit everyone's preferences! The cream cheese frosting version is classic and indulgent: homemade cream cheese frosting whipped until smooth and fluffy, spread over the warm waffle, and finished with a dusting of ground cinnamon. It's like a traditional frosted cinnamon roll but with that incredible waffle texture. The berry glaze version uses the glaze that comes packaged with the cinnamon rolls, warmed slightly until pourable, then drizzled over the waffle and topped with fresh mixed berries like blueberries, raspberries, and sliced strawberries, plus a dusting of powdered sugar. It's bright, fruity, and feels a little lighter and more refreshing. The cookie butter version is pure decadence: cookie butter (like Biscoff spread) gets warmed in the microwave until it's smooth and pourable, drizzled over the waffle, then topped with crumbled cookies for extra crunch and sweetness. Each version is completely different but equally delicious! These are perfect for brunch gatherings where you can set out all three toppings and let people choose their own adventure, lazy weekend mornings when you want something special without a lot of work, or anytime you want to feel like you're treating yourself to something from a fancy brunch spot but you're actually just using refrigerated dough and a waffle maker!
Frequently Asked Questions
Q: Do I need a special waffle maker for this?
A: No! Any standard waffle maker works perfectly. A Belgian-style waffle maker with deeper pockets is great because it holds more toppings, but a regular waffle maker works just fine too. Just make sure it's nonstick or well-sprayed with cooking spray so the cinnamon rolls don't stick. Avoid flip-style waffle makers as the dough might be too soft to flip properly.
Q: Can I use homemade cinnamon roll dough?
A: You can, but refrigerated canned cinnamon rolls work best for this recipe because they're the perfect thickness and consistency. Homemade dough might be too thick or too thin depending on how it's rolled, and it won't cook in the same amount of time. If you want to try it with homemade, make sure to roll your dough to about ½ inch thick and adjust cooking time as needed, checking frequently.
Q: What if my waffle maker doesn't have a temperature setting?
A: Most waffle makers have a light or dial that indicates when they're ready. If yours doesn't have temperature control, just preheat it fully until the ready light comes on, then cook the cinnamon roll for 2-3 minutes. Check it at 2 minutes by carefully lifting the lid. If it's golden brown with crispy edges, it's done. If it's still pale, give it another 30 seconds to 1 minute.
Q: Can I make these ahead of time?
A: The CinnaWaffles are definitely best served fresh and warm when the edges are still crispy! However, you can cook them ahead and reheat. Let them cool completely, store in an airtight container in the fridge for up to 2 days, then reheat in a toaster or toaster oven until crispy again. Add your toppings fresh after reheating. Don't add toppings before storing or they'll get soggy.
These CinnaWaffles transform refrigerated cinnamon rolls into crispy, golden waffles in just 3 minutes! Top them three ways: classic cream cheese frosting with cinnamon, berry glaze with fresh fruit, or warm cookie butter with crumbled cookies. The ultimate breakfast hack!
Rate This Recipe!
Preparations
Prep Time:
10 minutes
Cook Time:
18 minutes (for 8 waffles)
Total Time:
28 minutes
Cuisine:
American
Course:
Breakfast, Dessert
Calories:
320 kcal (approx. per waffle with cream cheese frosting)
Servings:
8 CinnaWaffles (serves 4-8 depending on appetites)
Author:
Ronica Rupan
Ingredients
Ingredients
For the CinnaWaffles:
- Cooking spray (for waffle maker)
- 1 (8-count) can refrigerated cinnamon rolls (reserve the packaged glaze)
For the Cream Cheese Frosting:
- 4 ounces (½ block) cream cheese, softened to room temperature
- ¼ cup (½ stick) unsalted butter, softened to room temperature
- ½ teaspoon vanilla paste (or vanilla extract)
- ¾ cup powdered sugar
- Ground cinnamon, for dusting
For the Berry Glaze Topping:
- Reserved glaze from cinnamon roll package
- ⅓ cup mixed fresh berries (blueberries, raspberries, or sliced strawberries)
- Powdered sugar, for dusting
For the Cookie Butter Topping:
- ¼ cup cookie butter (like Biscoff spread)
- 2-3 cookies (Biscoff, shortbread, or graham crackers), crumbled
Instructions
- Preheat the Waffle Maker Preheat your nonstick waffle maker to medium heat. This usually takes about 3-5 minutes. Once preheated, lightly coat both the top and bottom plates with cooking spray to prevent sticking.
- Make the CinnaWaffles Open the can of refrigerated cinnamon rolls and separate them. Set the packaged glaze aside for later. Place one cinnamon roll in the center of the preheated waffle maker. Close the lid gently but firmly, pressing down slightly. The dough will spread and fill the waffle maker as it cooks. Cook for 2-3 minutes until the waffle is golden brown with beautifully caramelized, crispy edges. The exact time depends on your waffle maker, so check at 2 minutes. Carefully remove the CinnaWaffle using a fork or silicone tongs and place on a wire rack or plate to cool for about 2 minutes before topping. This brief cooling lets the structure set so it stays crispy. Repeat with the remaining cinnamon rolls, re-spraying the waffle maker between each one.
- Make the Cream Cheese Frosting While the waffles are cooling, make your cream cheese frosting. In a medium bowl, beat the softened cream cheese and softened butter together with a hand mixer on medium speed for 1-2 minutes until completely smooth with no lumps. Add the vanilla paste and powdered sugar. Beat on low speed to incorporate (so the powdered sugar doesn't fly everywhere), then increase to medium speed and beat for about 2 minutes until light and fluffy. Set aside at room temperature.
- Prepare the Berry Glaze Topping Place the reserved glaze from the cinnamon roll package in a small bowl. Stir it with a spoon or small whisk until it's smooth and easy to drizzle. If it's too thick, you can warm it in the microwave for 5-10 seconds to loosen it up. Set aside.
- Prepare the Cookie Butter Topping Place the cookie butter in a small microwave-safe bowl. Microwave on HIGH for 15-20 seconds until slightly melted and pourable. Stir until smooth. If it's still too thick, microwave for another 10 seconds. Set aside.
- Assemble - Cream Cheese Version Take 2-3 of the cooled CinnaWaffles and spread a generous amount of the cream cheese frosting all over the top, making sure to get it into all the waffle pockets. Finish with a light dusting of ground cinnamon sprinkled over the frosting.
- Assemble - Berry Glaze Version Take 2-3 CinnaWaffles and drizzle the warmed glaze generously over the top. Scatter the mixed fresh berries all over, pressing them gently into the pockets. Finish with a light dusting of powdered sugar using a fine-mesh sieve.
- Assemble - Cookie Butter Version Take the remaining 2-3 CinnaWaffles and drizzle the warmed cookie butter all over the top, letting it pool in the waffle pockets. Sprinkle the crumbled cookies generously over the top for that extra crunch.
- Serve and Enjoy Serve the CinnaWaffles immediately while they're still warm and the edges are crispy! Set out all three varieties on a platter and let everyone choose their favorite, or make them all one style. Either way, they'll disappear fast!
Homemade Brown Sugar (2 Ingredients!)
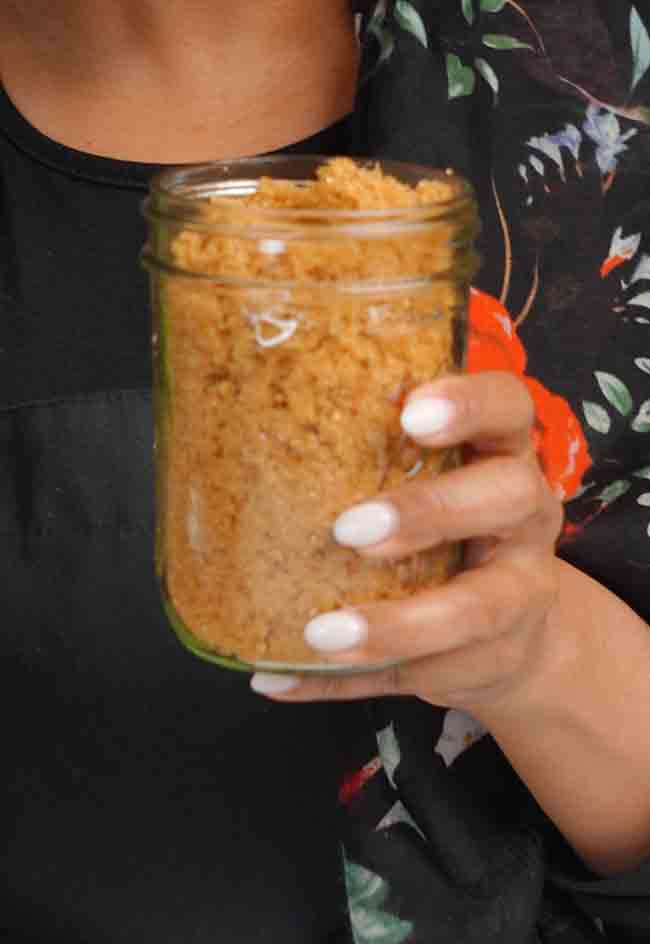
This homemade brown sugar is one of those kitchen game-changers that seems too simple to be true, but it absolutely works and will save you money and last-minute grocery store runs! With just two ingredients and less than 5 minutes, you can make your own brown sugar at home that tastes exactly like (or even better than) what you'd buy at the store. All you need is granulated sugar (cane sugar works beautifully) and molasses. That's it! Brown sugar is literally just white sugar mixed with molasses, and when you make it yourself you get to control exactly how light or dark you want it. For light brown sugar, use about 1-2 teaspoons of molasses per cup of sugar. For medium brown sugar (what most recipes call for), use 2-3 teaspoons. For dark brown sugar with that deep, rich molasses flavor that's perfect for gingerbread cookies, BBQ sauces, and baked beans, use 3-4 teaspoons or even up to a tablespoon. The process couldn't be easier: you combine the sugar and molasses in a bowl and mix them together with a fork or your hands until the molasses is completely distributed and every grain of sugar is evenly coated. The sugar will start out clumpy as you mix, but keep working it with your fingers or a fork to break up the clumps until it's loose and fluffy. Store it in an airtight container at room temperature and it will stay soft and fresh just like store-bought brown sugar. If it does harden over time (which happens to all brown sugar), just add a slice of bread or a damp paper towel to the container overnight and it will soften right back up! This is perfect for when you're in the middle of baking and realize you're out of brown sugar, when you need a specific shade of brown sugar that you don't have, or when you just want to save money by making your own pantry staples. Once you realize how easy this is, you'll never buy brown sugar again!
Frequently Asked Questions
Q: What's the difference between light and dark brown sugar?
A: The only difference is the amount of molasses! Light brown sugar has less molasses (1-2 teaspoons per cup of sugar) and has a more delicate, subtle flavor. Dark brown sugar has more molasses (3-4 teaspoons or up to 1 tablespoon per cup) and has a deeper, richer, more intense molasses flavor. Most recipes that just call for "brown sugar" mean light or medium brown sugar. Use dark brown sugar when you want that strong molasses flavor in things like gingerbread, BBQ sauce, baked beans, or rich chocolate desserts.
Q: Can I use regular white sugar instead of cane sugar?
A: Yes! Regular granulated white sugar works perfectly fine. Cane sugar is just pure cane sugar with no beet sugar, which some people prefer for flavor, but honestly for making brown sugar, regular white granulated sugar from any source works great. The molasses is what gives brown sugar its distinctive flavor, so the type of white sugar you start with makes very little difference in the final product.
Q: Where do I buy molasses?
A: Molasses is available in the baking aisle of most grocery stores, usually near the honey and corn syrup. Look for "unsulphured molasses" which has a cleaner, sweeter flavor than sulphured. There are also different types: mild/light molasses (the sweetest), dark molasses (more robust), and blackstrap molasses (very strong and bitter, not recommended for making brown sugar). For brown sugar, use mild or dark molasses, not blackstrap.
Q: How long does homemade brown sugar last?
A: Stored in an airtight container at room temperature, homemade brown sugar lasts indefinitely, just like store-bought! The only thing that happens over time is it might dry out and harden, but that's easily fixed by adding a slice of bread, an apple slice, or a damp paper towel to the container overnight to re-soften it. You can also add a terra cotta brown sugar disk (sold at kitchen stores) to keep it soft. The sugar itself never goes bad since sugar is a natural preservative
This homemade brown sugar uses just 2 ingredients and takes less than 5 minutes! Mix granulated sugar with molasses to create light, medium, or dark brown sugar at home. Control the darkness, save money, and never run out again!
Rate This Recipe!
Preparations
Prep Time:
5 minutes
Total Time:
5 minutes
Cuisine:
American
Course:
Baking, Pantry Staple
Calories:
16 kcal (approx. per teaspoon)
Servings:
Makes 1 cup brown sugar
Author:
Ronica Rupan
Ingredients
Ingredients
- 1 cup granulated sugar (cane sugar or regular white sugar)
- 2-3 teaspoons molasses (for medium brown sugar)*
*Adjust molasses amount based on desired darkness:
- Light brown sugar: 1-2 teaspoons molasses
- Medium brown sugar: 2-3 teaspoons molasses
- Dark brown sugar: 3-4 teaspoons molasses (or up to 1 tablespoon)
Instructions
- Measure Your Ingredients Measure out 1 cup of granulated sugar into a medium bowl. Add 2-3 teaspoons of molasses (or adjust based on how dark you want your brown sugar - see notes above for guidance on light vs. dark).
- Mix Thoroughly Using a fork or your clean hands, mix the sugar and molasses together thoroughly. At first it will seem clumpy and wet, but keep mixing! Work the mixture with your fingers or fork to break up any clumps and distribute the molasses evenly throughout all the sugar. This takes about 2-3 minutes of mixing. The brown sugar is ready when it's evenly colored with no white streaks and feels loose and fluffy, not clumpy.
- Store Properly Transfer your homemade brown sugar to an airtight container. A jar with a tight-fitting lid, a plastic container with a seal, or even a zip-top bag works great. Store at room temperature in your pantry alongside your other baking supplies. It will stay soft and fresh indefinitely!
- Use in Any Recipe Use your homemade brown sugar exactly as you would use store-bought brown sugar in any recipe. It works perfectly in cookies, cakes, sauces, marinades, and anywhere brown sugar is called for!
Caramelized Peach French Toast with Cinnamon Crumble
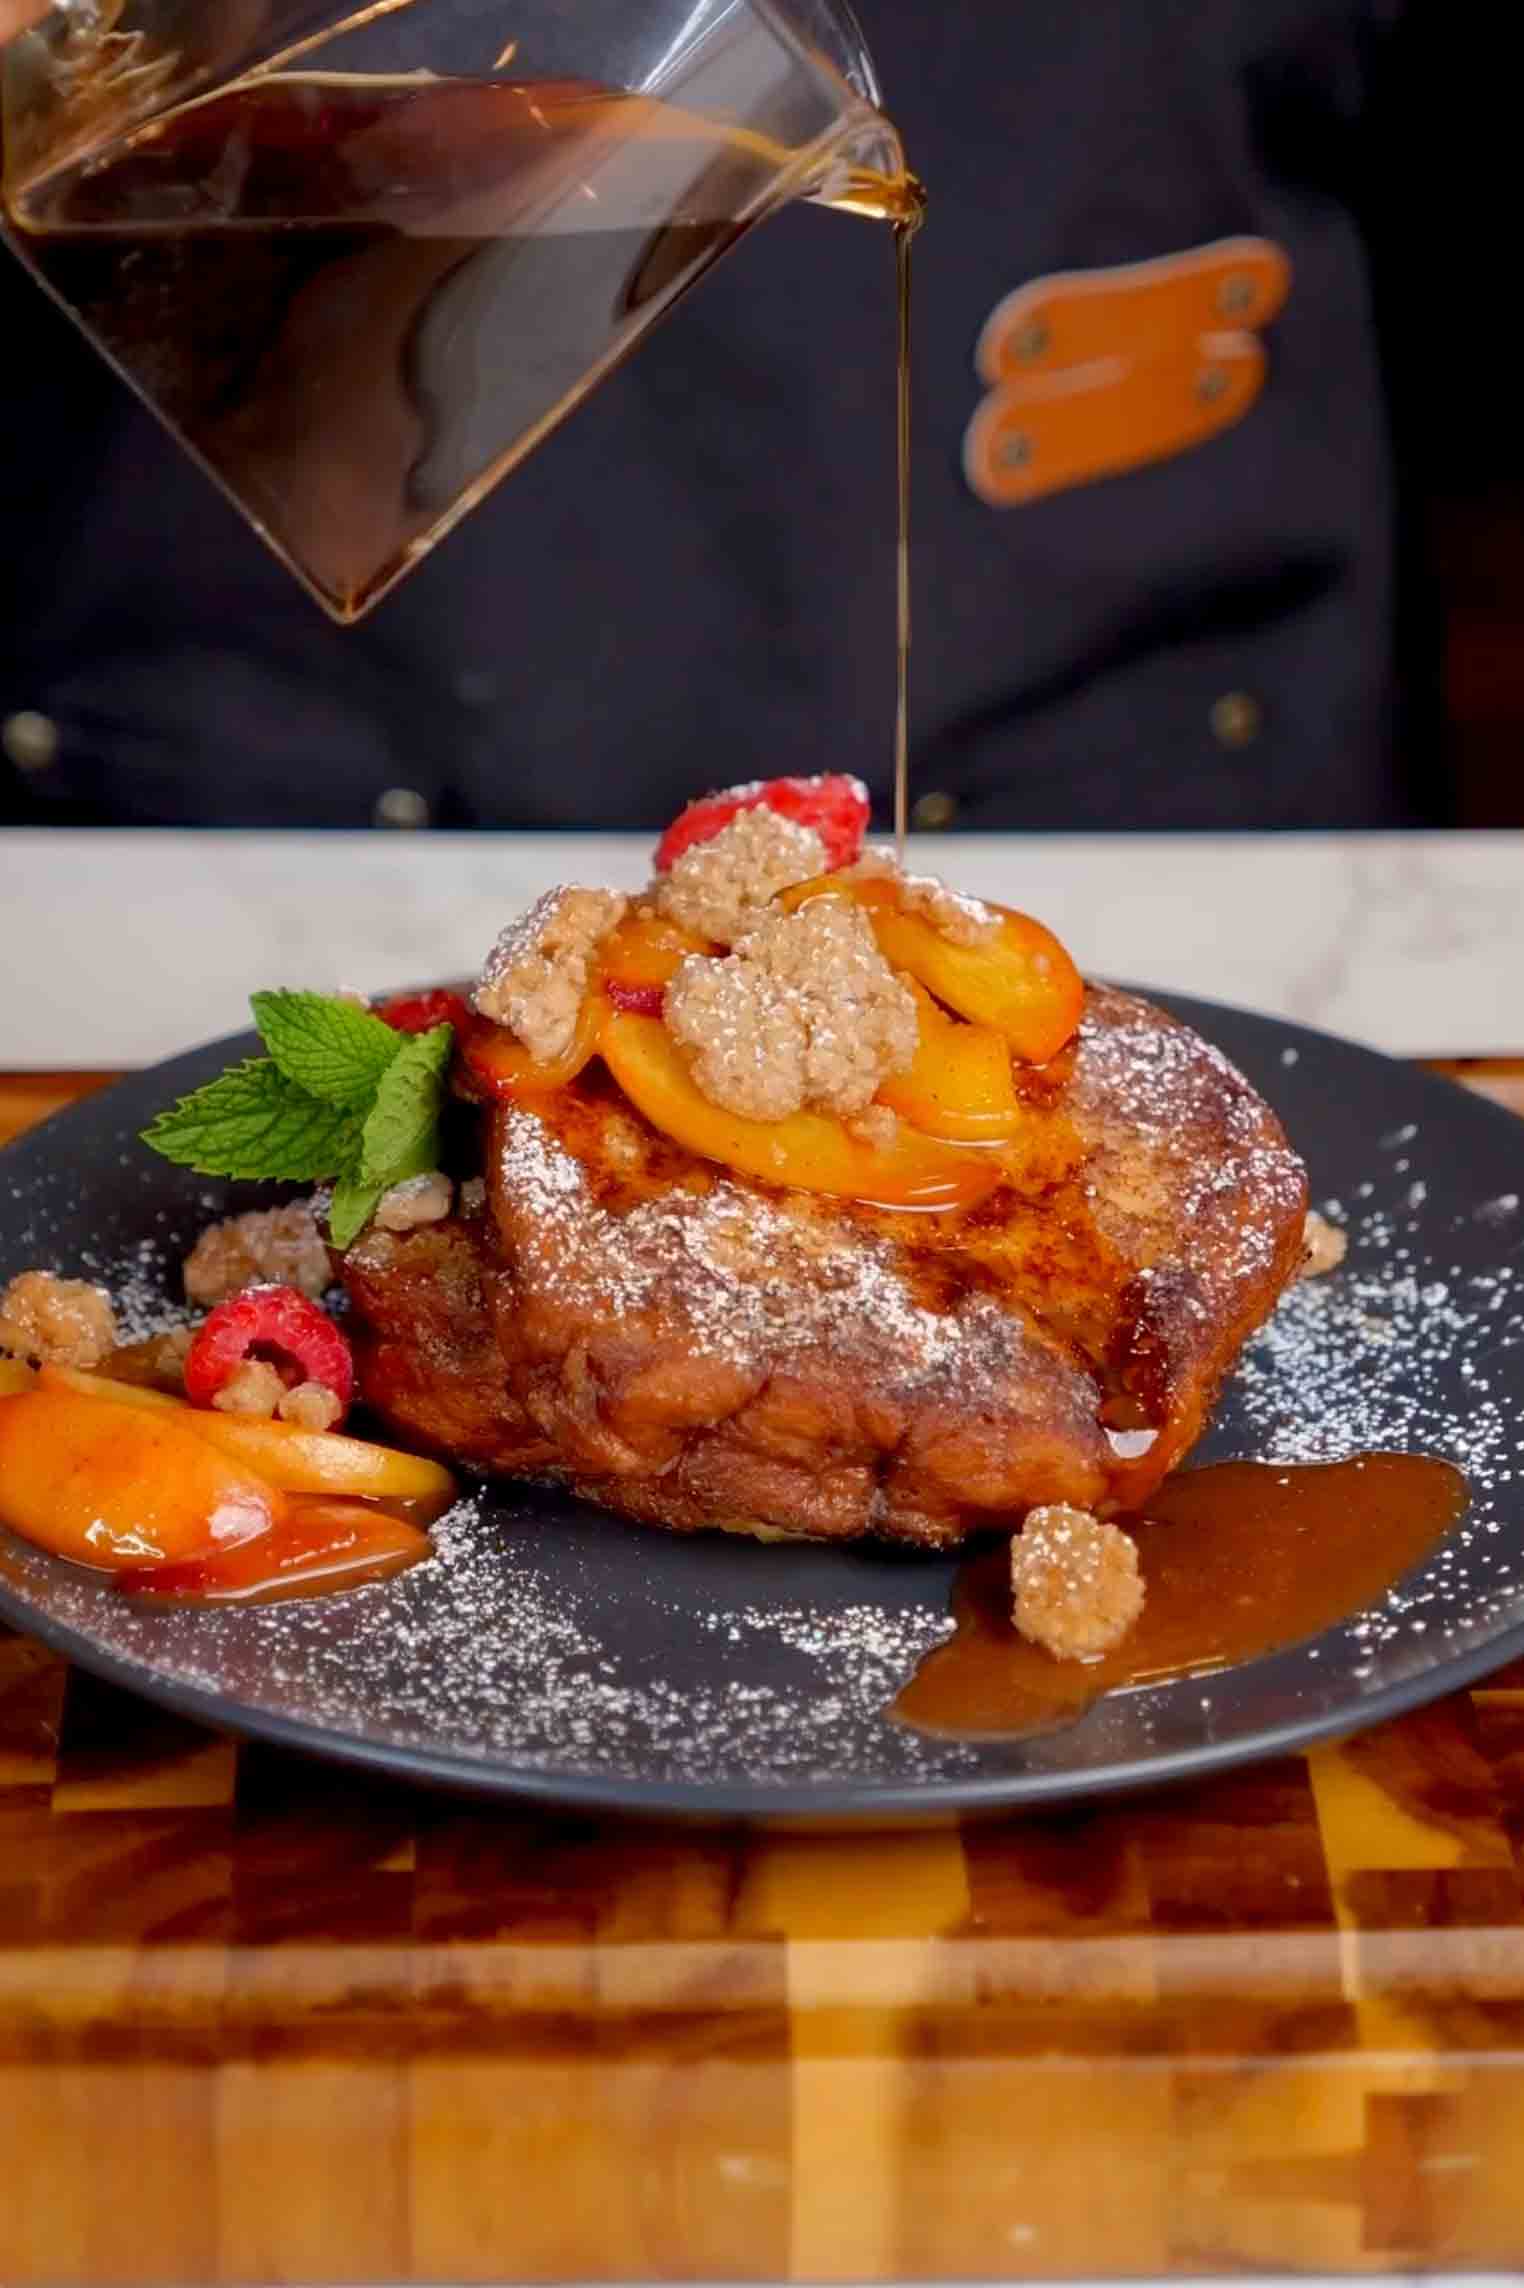
This caramelized peach French toast with cinnamon crumble is the ultimate weekend breakfast that feels like dessert but is totally acceptable to eat in the morning! It takes classic French toast to a whole new level with layers of incredible flavor and texture. You start with thick slices of brioche bread (or any other robust, slightly sweet bread) that get soaked in a rich custard mixture made with milk, eggs, warm spices like cinnamon and nutmeg, vanilla extract, and a pinch of salt. The bread soaks up all that custardy goodness and gets cooked in butter until it's golden brown and crispy on the outside while staying soft and creamy on the inside. While the French toast cooks, you make the most incredible cinnamon crumble by mixing melted butter with brown sugar, flour, cinnamon, and salt, then baking it until it's golden and crumbly. This adds the most satisfying crunchy texture that contrasts beautifully with everything else. The real showstopper is the caramelized peaches, which are cooked in butter and brown sugar with warm spices until they're soft, jammy, and caramelized with a gorgeous glaze. A squeeze of fresh lime juice at the end brightens everything up and balances the sweetness perfectly. When you plate this up, each piece of golden French toast gets topped with a generous spoonful of those warm, caramelized peaches, a handful of crumbly cinnamon streusel, a dusting of powdered sugar, a dollop of whipped cream, fresh raspberries for tartness and color, and a final drizzle of maple syrup that ties everything together. Every single bite has something different happening: crispy edges, soft custardy center, sweet caramelized fruit, crunchy streusel, tart berries, and creamy whipped cream. This is perfect for special occasion breakfasts, weekend brunch with friends, holiday mornings, or anytime you want to make breakfast feel like a celebration!
Frequently Asked Questions
Q: Can I use a different type of bread?
A: Yes! While brioche is recommended because it's rich, slightly sweet, and sturdy enough to soak up the custard without falling apart, you can use other robust breads. Challah is another excellent choice with a similar texture and richness. Thick-cut French bread or sourdough works well for a less sweet option. Texas toast or any thick-sliced white bread will do in a pinch. The key is using bread that's at least ½ inch thick and sturdy enough to hold up to the custard soak. Day-old bread actually works better than fresh because it soaks up more custard!
Q: Can I make components ahead of time?
A: Absolutely! The cinnamon crumble can be made up to 3 days ahead and stored in an airtight container at room temperature. The caramelized peaches can be made the night before and refrigerated, then gently reheated before serving. The custard mixture can be whisked together and refrigerated overnight. The only thing that needs to be done fresh is cooking the actual French toast, which only takes about 15 minutes. Having everything else prepped makes weekend breakfast so much easier!
Q: My French toast is soggy in the middle, what went wrong?
A: This usually means the heat was too high, so the outside cooked and browned before the inside could cook through. Make sure your heat is at medium-high, not high. The French toast should cook slowly enough that the custard in the center has time to set before the outside burns. If your slices are very thick (more than ¾ inch), you can finish them in a 350°F oven for 5 minutes after pan-frying to ensure the center cooks through without burning the outside.
Q: What if peaches aren't in season?
A: No problem! This recipe is versatile and works with lots of different fruits. Use fresh or frozen berries (strawberries, blueberries, blackberries), caramelized bananas, sautéed apples with cinnamon, or even caramelized pears. If using frozen fruit, thaw it first and drain excess liquid before caramelizing. You can also use canned peaches in a pinch, just drain them well and reduce the brown sugar slightly since canned fruit is already sweetened.
This caramelized peach French toast with cinnamon crumble is the ultimate weekend breakfast! Thick brioche slices soaked in spiced custard and cooked until golden, topped with butter-caramelized peaches, homemade cinnamon crumble, whipped cream, fresh raspberries, and maple syrup. Absolutely decadent!
Rate This Recipe!
Preparations
Prep Time:
20 minutes
Cook Time:
25 minutes
Total Time:
45 minutes
Cuisine:
American
Course:
Breakfast, Dessert
Calories:
580 kcal (approx. per serving)
Servings:
4 (2 slices each)
Author:
Ronica Rupan
Ingredients
Ingredients
For the French Toast:
- 8 slices (½-inch thick) brioche bread (or other robust bread)
- 1 cup milk
- 2 large eggs
- ½ teaspoon ground cinnamon
- ¼ teaspoon freshly ground nutmeg
- 1 teaspoon vanilla extract
- ¼ teaspoon kosher salt
- 3 tablespoons unsalted butter, divided
For the Cinnamon Crumble:
- ½ cup salted butter, melted
- ⅔ cup packed brown sugar
- 1 cup plus 2 tablespoons all-purpose flour
- ½ teaspoon ground cinnamon
- Pinch of kosher salt
For the Caramelized Peaches:
- 1 tablespoon unsalted butter
- 2 tablespoons brown sugar (from the ½ cup listed in main ingredients)
- 4 ripe peaches, peeled and sliced
- Freshly grated nutmeg (about ¼ teaspoon)
- ½ teaspoon ground cinnamon
- Juice of 1 lime
For Topping:
- Fresh raspberries
- Powdered sugar, for dusting
- Whipped cream
- Maple syrup, for drizzling
Instructions
- Make the Cinnamon Crumble Preheat your oven to 350°F (175°C). In a medium bowl, combine the melted butter, brown sugar, flour, cinnamon, and a pinch of salt. Mix until it comes together into a crumbly mixture that looks like wet sand. Spread the mixture in an even layer on a parchment-lined baking sheet, breaking it into small clumps as you spread. Bake for 8 minutes until golden brown and fragrant. Remove from the oven and let cool completely on the pan. It will crisp up as it cools. Break into smaller pieces and set aside.
- Caramelize the Peaches In a large skillet, melt 1 tablespoon of butter over medium-high heat. Add 2 tablespoons of brown sugar and stir until it starts to melt and bubble. Add the sliced peaches, freshly grated nutmeg, and ½ teaspoon cinnamon. Toss everything together and cook for 4-5 minutes, stirring occasionally, until the peaches are softened and caramelized in a gorgeous glossy sauce. Squeeze the juice of one lime over the peaches and cook for another 30 seconds to let the lime juice meld with the caramel. Remove from heat and set aside, keeping warm.
- Make the Custard Mixture In a shallow dish (a pie plate or wide bowl works great), whisk together the milk, eggs, ground cinnamon, freshly ground nutmeg, vanilla extract, and kosher salt until completely smooth and well combined.
- Soak the Bread Working with a few slices at a time, dip each slice of brioche into the custard mixture for about 10 seconds per side. You want the bread to be well-soaked but not falling apart. Transfer the soaked slices to a baking sheet where they can sit for a minute or two to absorb even more custard. This double-soak method ensures every bite is custardy and delicious!
- Cook the French Toast In a large non-stick skillet or griddle, melt 1 tablespoon of butter over medium-high heat. Once the butter is melted and foaming, add 2-3 soaked bread slices (don't overcrowd the pan). Cook for about 6 minutes per side until deep golden brown and crispy on the outside. The French toast should release easily from the pan when it's ready to flip. Transfer cooked slices to a covered platter to keep warm. Repeat with the remaining butter and bread slices, adding more butter to the pan as needed between batches.
- Plate and Serve Place 2 slices of French toast on each serving plate. Top each serving generously with the warm caramelized peaches and their syrup. Sprinkle a handful of the cinnamon crumble over the top. Dust with powdered sugar using a fine-mesh sieve. Add a generous dollop of whipped cream. Scatter fresh raspberries all around. Finish with a drizzle of maple syrup over everything. Serve immediately while hot!
Chai Latte Cinnamon Rolls

These chai latte cinnamon rolls are the most incredible fusion of classic cinnamon rolls and your favorite chai latte, and they're about to become your new obsession! Every single element of these rolls is infused with warm chai spices: cinnamon, cardamom, clove, ginger, nutmeg, and allspice. The dough itself is lightly spiced so you get that chai flavor baked right into every bite, not just in the filling. You start with a soft, pillowy enriched dough made with warm milk, instant yeast, eggs, butter, sugar, and that perfect blend of chai spices that makes your kitchen smell like a coffeehouse. After the first rise, you roll the dough out into a large rectangle and spread it with the most incredible chai-spiced filling made from melted butter, brown sugar, and a generous amount of all those warm spices. The brown sugar caramelizes as it bakes and creates these pockets of sweet, spiced goodness throughout the rolls. Once rolled up and sliced into rounds, the rolls get a second rise, then here's the magic touch: you pour heavy cream over the top before baking! The cream seeps down between the rolls and creates the most incredibly soft, tender texture and adds richness that's absolutely divine. They bake until golden brown and the center is cooked through, filling your home with the most intoxicating aroma. Once cooled slightly, you slather them with the most incredible chai-spiced cream cheese frosting that's tangy, sweet, and loaded with those same warm spices. The frosting melts into all the warm crevices and creates this gorgeous glaze that drips down the sides. Each bite has layers of soft, spiced dough, swirls of cinnamon-spiced filling, and that creamy, tangy frosting on top. These are perfect for weekend braking, special occasions, holiday mornings, or anytime you want to treat yourself and your loved ones to something truly extraordinary!
Frequently Asked Questions
Q: Can I make these the night before and bake in the morning?
A: Absolutely! This is perfect for making ahead. After cutting the rolls and placing them in the pan, cover tightly with plastic wrap and refrigerate overnight instead of doing the second rise. In the morning, take them out and let them sit at room temperature for 30-45 minutes while your oven preheats. They'll finish their rise as they warm up. Pour the heavy cream over, then bake as directed. You'll have fresh, warm cinnamon rolls without all the morning work!
Q: Why do you pour heavy cream over the rolls before baking?
A: This technique creates the most incredibly soft, tender, melt-in-your-mouth texture! The heavy cream seeps down between the rolls as they bake, keeping them moist and adding richness. It also helps create a slightly caramelized bottom and prevents the rolls from drying out. It's what separates good cinnamon rolls from extraordinary ones. Don't skip this step!
Q: My dough is too sticky, what should I do?
A: Cinnamon roll dough should be slightly sticky, which creates a softer final product. However, if it's so sticky you can't work with it at all, add flour 1 tablespoon at a time during the mixing, but don't add more than ½ cup total or your rolls will be dense and heavy. The dough should clear the sides of the bowl but might still stick slightly to the bottom. Remember, a slightly sticky dough makes softer rolls!
Q: Can I freeze these?
A: Yes! For unbaked rolls, freeze them after cutting and placing in the pan. Cover tightly with plastic wrap and foil, and freeze for up to 3 months. When ready to bake, thaw in the fridge overnight, let come to room temperature and rise for 30-45 minutes, pour cream over, and bake. For baked rolls, let them cool completely (don't frost), wrap tightly, and freeze for up to 3 months. Thaw, warm in a 300°F oven for 10 minutes, then frost.
These chai latte cinnamon rolls are soft, pillowy, and packed with warm chai spices! The dough, filling, and cream cheese frosting are all infused with cinnamon, cardamom, clove, ginger, nutmeg, and allspice. Heavy cream poured over before baking makes them incredibly tender. Pure comfort in every bite!
Rate This Recipe!
Preparations
Prep Time:
30 minutes (plus 1-2 hours rising time)
Cook Time:
30 minutes
Total Time:
3 hours
Cuisine:
American, Fusion
Course:
Dessert, Breakfast
Calories:
520 kcal (approx. per roll)
Servings:
15 rolls
Author:
Ronica Rupan
Ingredients
Ingredients
For the Dough:
- 1 cup warm milk (115°F)
- 2½ teaspoons instant dry yeast
- 2 large eggs, at room temperature
- ½ cup salted butter, softened
- 1 teaspoon kosher salt
- ½ teaspoon ground cinnamon
- ½ teaspoon ground cardamom
- ¼ teaspoon ground clove
- ¼ teaspoon ground ginger
- ¼ teaspoon ground nutmeg
- ¼ teaspoon ground allspice
- ½ cup granulated sugar
- 4 cups all-purpose flour
For the Filling:
- ¾ cup salted butter, melted
- 1½ cups packed brown sugar
- 1 tablespoon ground cinnamon
- 1 tablespoon ground cardamom
- 1 teaspoon ground clove
- 1 teaspoon ground ginger
- 1 teaspoon ground nutmeg
- 1 teaspoon ground allspice
For Baking:
- ½ cup heavy cream
For the Frosting:
- 8 ounces cream cheese, softened to room temperature
- ½ cup salted butter, softened to room temperature
- 2 cups powdered sugar
- 1 tablespoon vanilla extract
- ½ teaspoon ground cinnamon
- ½ teaspoon ground cardamom
- ¼ teaspoon ground clove
- ¼ teaspoon ground ginger
- ¼ teaspoon ground nutmeg
- ¼ teaspoon ground allspice
- Optional: 2 tablespoons milk (for thinner frosting)
Instructions
- Activate the Yeast and Mix the Dough Add the warm milk (make sure it's between 110-115°F, not too hot or it will kill the yeast) and instant yeast to the bowl of a stand mixer. Let sit for about 5 minutes until the yeast is foamy and activated. Add the room temperature eggs, softened butter, all the chai spices (cinnamon, cardamom, clove, ginger, nutmeg, allspice), salt, and sugar. Mix with the paddle attachment until combined. Add the flour and mix until all ingredients are just combined and there are no dry spots. Let the dough rest for 5 minutes. This allows the flour to hydrate.
- Knead the Dough Switch to the dough hook attachment and knead on medium speed for 6-7 minutes until the dough is smooth and elastic. The dough will be slightly sticky, which is perfect! If it's so sticky that it's not coming together at all, add flour 1 tablespoon at a time, but don't add more than ½ cup total or the rolls will be heavy. The dough should clear the sides of the bowl but might stick slightly to the bottom.
- First Rise Grease a large bowl with butter or oil. Shape the dough into a ball and place it in the greased bowl, turning once to coat all sides with oil. Cover the bowl with a clean kitchen towel or plastic wrap and place in a warm spot. Let rise for 30-60 minutes until doubled in size. The exact time depends on how warm your kitchen is.
- Make the Filling While the dough rises, make your filling. In a medium bowl, whisk together the melted butter, brown sugar, cinnamon, cardamom, clove, ginger, nutmeg, and allspice until well combined and smooth. Set aside at room temperature. If it gets too stiff to spread, warm it slightly in the microwave for 10-15 seconds.
- Make the Frosting In a stand mixer fitted with the paddle attachment (or using a hand mixer), beat the softened cream cheese and softened butter together on medium-high speed until smooth and creamy with no lumps, about 2-3 minutes. Add the powdered sugar and mix on low speed until incorporated, then increase to medium-high and beat until fluffy. Add the vanilla extract and all the chai spices (cinnamon, cardamom, clove, ginger, nutmeg, allspice) and beat until combined. If you want a thinner, more glaze-like frosting, add 2 tablespoons of milk and mix until smooth. Set aside at room temperature.
- Roll Out the Dough Once the dough has doubled in size, punch it down gently to release the air. Transfer to a lightly floured clean work surface. Using a rolling pin, roll the dough into a large rectangle about 24 inches long by 12 inches wide. It doesn't have to be perfect!
- Add the Filling Using a rubber spatula or the back of a spoon, spread the chai filling evenly all over the dough, going right to the edges. Make sure it's spread in an even layer. If the filling has stiffened up, warm it for 10-15 seconds in the microwave so it spreads easily.
- Roll and Cut Starting from one of the long sides (24-inch side), roll the dough up tightly into a long log, keeping the roll as tight and even as possible. When you reach the end, pinch the seam to seal it. Using a sharp knife or unflavored dental floss (the floss gives you cleaner cuts!), cut the log into 15 equal rounds, each about 1½ inches thick.
- Second Rise Grease a 9x13-inch baking pan. Arrange the rolls cut-side up in the pan in 5 rows of 3. They should be close together but not quite touching. Cover the pan with a kitchen towel and let rise in a warm spot for about 35 minutes until puffy and the rolls are touching each other.
- Preheat and Prepare for Baking About 15 minutes before the second rise is done, preheat your oven to 350°F (175°C). Once the rolls have risen, slowly and evenly pour the heavy cream all over the top of the rolls, making sure to get cream in between each roll. Use all ½ cup!
- Bake Bake for 25-30 minutes until the rolls are golden brown on top and cooked through in the center. The internal temperature should be about 190°F if you want to check with a thermometer. If the tops are browning too quickly, tent loosely with foil for the last 5-10 minutes of baking.
- Cool and Frost Remove from the oven and let the rolls cool in the pan for about 10-15 minutes. They should be warm but not piping hot when you frost them. Use a spatula or spoon to spread the chai cream cheese frosting generously all over the warm rolls. The frosting will melt slightly into all the crevices, which is perfect!
- Serve and Enjoy Serve the rolls warm. Pull them apart gently and watch that beautiful swirl pattern! These are best enjoyed fresh but can be stored covered at room temperature for up to 2 days or refrigerated for up to 5 days. Reheat gently in the microwave for 15-20 seconds before serving.
Horchata Milkshake

This horchata-inspired milkshake is the most delicious fusion of a classic Mexican horchata and a creamy American milkshake, and it's about to become your new favorite treat! Traditional horchata is a creamy, cinnamon-spiced rice milk drink that's incredibly refreshing and lightly sweet. This version takes all those beloved horchata flavors and transforms them into an indulgent, thick, creamy milkshake using vanilla or strawberry ice cream as the base. Vanilla gives you that classic horchata taste with pure cinnamon and rice milk flavors shining through, while strawberry adds a fun fruity twist that's like a strawberry horchata fusion. The shake itself is incredibly simple to make. You blend ice cream with rice milk (or almond milk if you prefer), ground cinnamon for that signature warm spice, vanilla extract for depth, and maple syrup (or agave or honey) for the perfect level of sweetness. Everything blends together into this thick, creamy, perfectly spiced milkshake that tastes like horchata met ice cream and they fell in love! But what really makes this special is the presentation. You start by rimming your chilled glass with a lime wedge, then dipping it into a cinnamon-sugar mixture so you get that sweet, spiced coating on the rim that adds texture and extra cinnamon flavor with every sip. The shake gets poured into that beautiful rimmed glass, topped with a generous swirl of whipped cream, and finished with a light dusting of cinnamon on top. Add a straw and optionally a cinnamon stick for stirring and extra visual appeal, and you have a drink that looks as good as it tastes! This is perfect for summer afternoons, dessert, entertaining, or anytime you want something that feels special and indulgent but comes together in just 5 minutes. Kids and adults alike will absolutely love it!
Frequently Asked Questions
Q: What is horchata and how does this taste like it?
A: Horchata is a traditional Mexican drink made from rice milk, cinnamon, vanilla, and sugar. It's creamy, lightly sweet, and has that distinctive warm cinnamon flavor. This horchata-inspired milkshake captures all those classic horchata flavors but in a thick, frozen, indulgent form thanks to the ice cream. The rice milk provides that authentic horchata base, the cinnamon and vanilla give you the signature spice and aroma, and the maple syrup adds the sweetness. It's like drinking a frozen horchata that's been transformed into a milkshake!
Q: Can I use regular milk instead of rice milk?
A: Yes, but using rice milk is what gives this shake its authentic horchata-inspired flavor! Rice milk has a slightly sweet, delicate flavor that's different from dairy milk or other plant-based milks. That said, if you can't find rice milk or prefer something else, almond milk is the best substitute and still gives you a creamy, slightly nutty flavor that works beautifully. Oat milk would also work well. Regular dairy milk will make it creamier and richer but it won't taste quite as much like traditional horchata.
Q: Can I make this without a blender?
A: A blender really is necessary to get that smooth, creamy milkshake texture that properly incorporates the ice cream with the liquid. If you don't have a blender, you could try using a food processor, though it might not get quite as smooth. An immersion blender in a tall container could work in a pinch. Without any blending equipment, you could let the ice cream soften significantly, then whisk it vigorously with the other ingredients, but it won't be as thick and creamy as a properly blended shake.
Q: How do I make this less sweet or more sweet?
A: The sweetness is completely customizable! Start with just 1 teaspoon of maple syrup, blend, taste, and add more if you want it sweeter. Remember that the ice cream is already sweetened, so you might not need much additional sweetener at all. For less sweetness, omit the maple syrup entirely and just rely on the natural sweetness of the ice cream. For more sweetness, increase the maple syrup to 2 tablespoons or add a couple of pitted dates to the blender for natural sweetness.
This horchata-inspired milkshake is creamy, dreamy, and tastes like the best of both worlds! Vanilla or strawberry ice cream blended with rice milk, cinnamon, vanilla, and maple syrup for a thick, indulgent shake with classic horchata flavors. Served in a cinnamon-sugar rimmed glass topped with whipped cream. Ready in 5 minutes!
Rate This Recipe!
Preparations
Prep Time:
5 minutes
Total Time:
5 minutes
Cuisine:
Mexican-American Fusion
Course:
Drinks, Dessert
Calories:
280 kcal (approx. per serving)
Servings:
2
Author:
Ronica Rupan
Ingredients
Ingredients
For the Milkshake:
- 2 large scoops vanilla or strawberry ice cream
- 1 cup rice milk (or almond milk)
- ½ teaspoon ground cinnamon
- ½ teaspoon vanilla extract
- 1 tablespoon maple syrup (or agave nectar or honey, adjust to taste)
For the Cinnamon-Sugar Rim:
- 2 tablespoons granulated sugar
- 1 teaspoon ground cinnamon
- 1 lime wedge
For Topping:
- Whipped cream
- Ground cinnamon, for dusting
- Optional: cinnamon sticks for garnish
Instructions
- Prepare the Cinnamon-Sugar Rim In a small shallow dish, mix together the granulated sugar and ground cinnamon until well combined. Take your serving glasses (chill them in the freezer for 10 minutes first if you have time) and rub the rim of each glass with the lime wedge, coating the entire rim with lime juice. Immediately dip the wet rim into the cinnamon-sugar mixture, turning and pressing gently so the sugar sticks all around the rim. Set the rimmed glasses aside while you make the shake. The lime juice helps the cinnamon-sugar stick and adds a subtle citrus note!
- Blend the Milkshake Add the ice cream, rice milk (or almond milk), ground cinnamon, vanilla extract, and maple syrup to a blender. Blend on high speed until everything is completely smooth, creamy, and well combined with no chunks of ice cream remaining. This usually takes about 30-45 seconds depending on your blender. If the shake is too thick to blend smoothly, add a splash more rice milk, 1 tablespoon at a time, until it reaches your desired consistency. If it's too thin, add a bit more ice cream.
- Pour and Garnish Carefully pour the horchata-inspired milkshake into your prepared cinnamon-sugar rimmed glasses, being careful not to disturb the sugar rim. Fill each glass almost to the top, leaving room for toppings. Top each shake with a generous swirl of whipped cream. Finish with a light dusting of ground cinnamon sprinkled over the whipped cream for that beautiful finishing touch and extra cinnamon aroma.
- Serve and Enjoy Add a straw to each glass and optionally tuck a cinnamon stick into the whipped cream for stirring and extra visual appeal. Serve immediately while cold and creamy. Enjoy every sip of this dreamy horchata-inspired shake!
Grilled Sockeye Salmon Tacos with Chimichurri and Pickled Onions
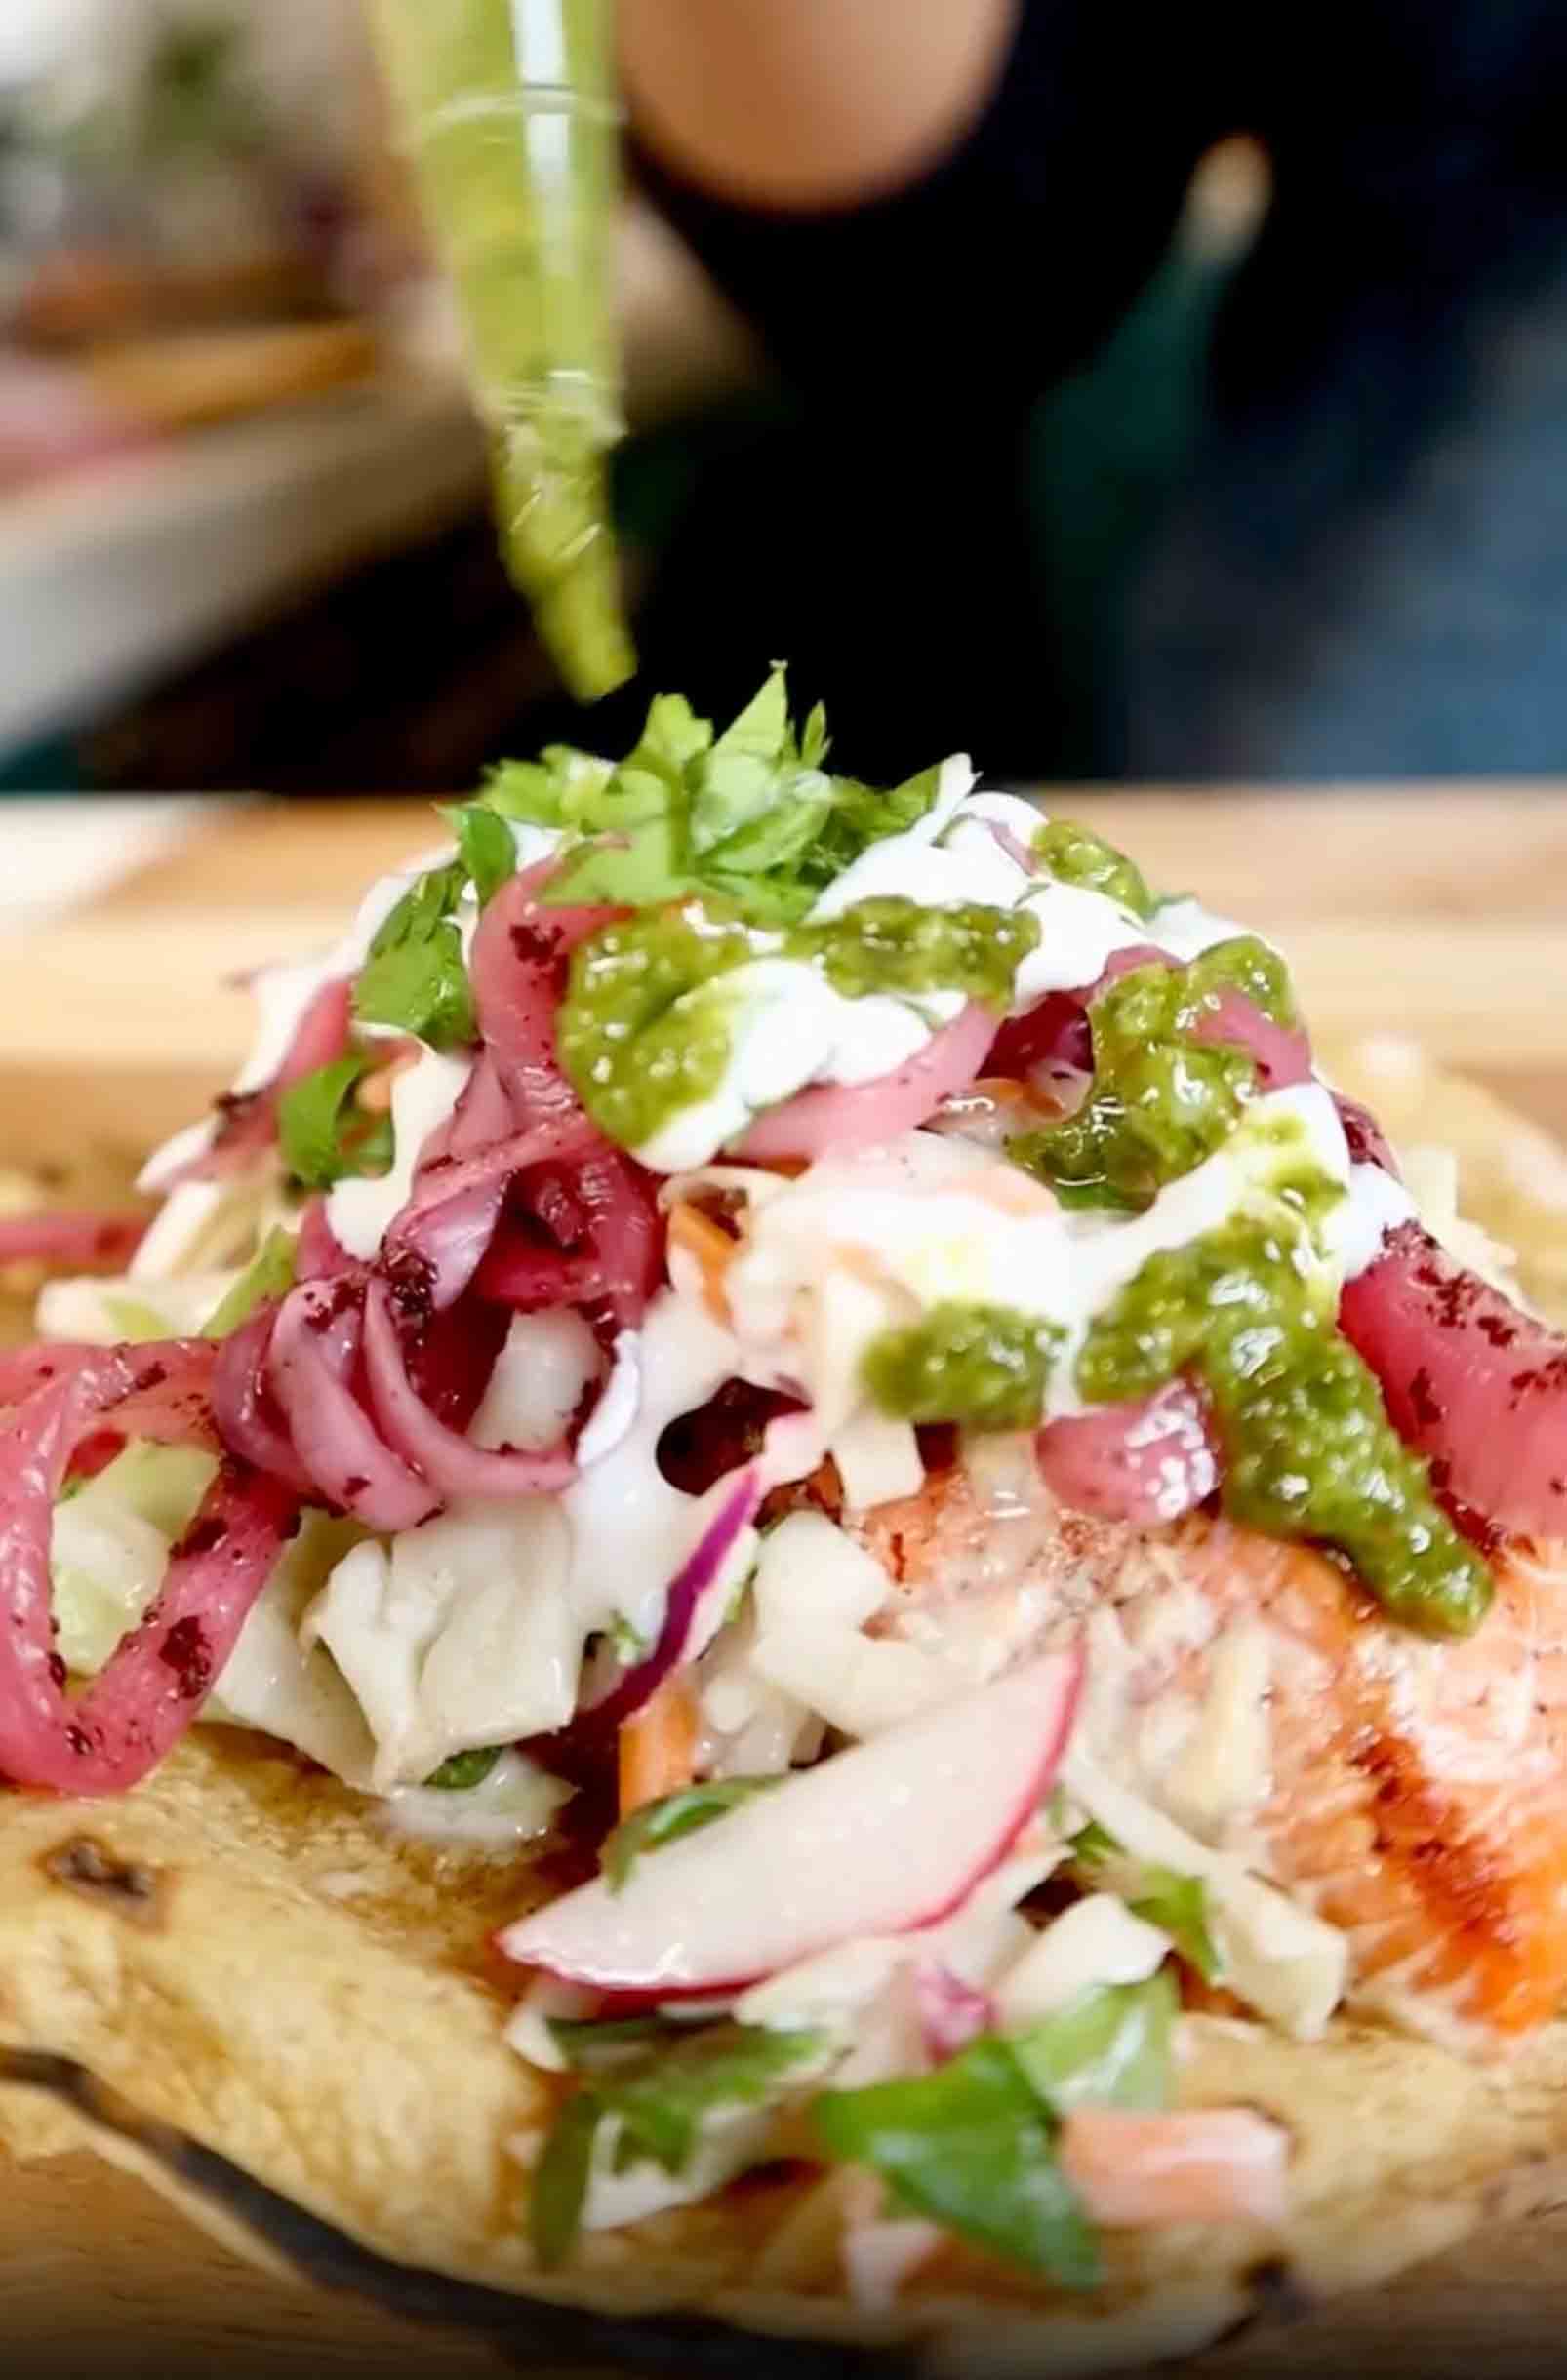
These grilled sockeye salmon tacos are fresh, vibrant, and absolutely packed with flavor from every single component! Sockeye salmon is the star here because it has a deeper, richer flavor than other salmon varieties and its firm texture holds up beautifully on the grill without falling apart. The salmon gets simply seasoned with salt and pepper, then grilled for 7-8 minutes per side until it has gorgeous char marks on the outside and stays moist and flaky on the inside. Once grilled, you remove the skin and break the salmon into chunks that are perfect for piling into tacos. But what really makes these tacos special is all the fresh, bright toppings that bring layers of flavor and texture. The taco slaw is a creamy, tangy mix of shredded cabbage and carrots tossed with fresh cilantro, homemade mayo, Mexican crema, a squeeze of lime juice, and warm spices like cumin for depth. It adds crunch and creaminess that balances the richness of the salmon perfectly. The chimichurri sauce is where things get really exciting! This bright green, garlicky, herby sauce is made with fresh cilantro and parsley, red wine vinegar for tang, dried oregano for that classic chimichurri flavor, garlic, and extra virgin olive oil. It's bold, punchy, and adds incredible freshness to every bite. And then there are the pickled onions, which add that essential tangy, slightly sweet crunch that cuts through all the richness. When you build these tacos, you start with warm corn or flour tortillas, add chunks of that perfectly grilled salmon, pile on the creamy crunchy slaw, scatter pickled onions all over, drizzle with that gorgeous green chimichurri, top with fresh cilantro, and finish with an extra drizzle of Mexican crema. Every bite has something different happening: rich salmon, crunchy slaw, tangy pickled onions, bright herbaceous chimichurri, and creamy Mexican crema all wrapped up in a soft tortilla. These are perfect for summer grilling, taco Tuesday, entertaining, or anytime you want tacos that feel fresh, light, and totally elevated!
Frequently Asked Questions
Q: Can I use a different type of salmon?
A: Yes! While sockeye salmon is recommended for its rich flavor and firm texture, you can use other salmon varieties. Coho (silver) salmon is a great alternative with a milder flavor and similar texture. King (Chinook) salmon is fattier and more buttery, which is delicious but can be pricier. Atlantic salmon works too and is usually the most affordable and widely available option. Just avoid canned salmon for this recipe since you want fresh, grillable fillets.
Q: What if I don't have a grill?
A: No problem! You can cook the salmon several other ways and it will still be delicious. Pan-sear it in a hot cast-iron skillet with a little oil, cooking 4-5 minutes per side until charred and cooked through. Broil it in the oven on high for 8-10 minutes, watching carefully. Or bake it at 400°F for 12-15 minutes until flaky. You won't get the same smoky char flavor as grilling, but the salmon will still be perfectly cooked and the other components will make up for it!.
Q: Can I make the slaw and chimichurri ahead of time?
A: Absolutely! The chimichurri can be made up to 3 days ahead and stored in an airtight container in the fridge. In fact, it tastes even better the next day after the flavors have had time to meld. The slaw can be made up to 4 hours ahead, but wait to add the lime juice until right before serving or it will make the cabbage too soft. The pickled onions can be made up to 2 weeks ahead and stored in their pickling liquid in the fridge. Having these components prepped makes assembly super quick when you're ready to eat!
Q: What's the best way to warm tortillas?
A: For the best texture and flavor, warm your tortillas directly over an open flame on a gas stove, flipping with tongs every few seconds until they're lightly charred and pliable. If you don't have a gas stove, heat them in a dry skillet over medium-high heat for about 30 seconds per side. You can also wrap a stack in foil and warm in a 350°F oven for 10 minutes, or wrap in a damp paper towel and microwave for 15-30 seconds. Keep them wrapped in a clean kitchen towel after warming to stay soft!
These grilled sockeye salmon tacos are fresh, vibrant, and absolutely delicious! Perfectly grilled salmon with beautiful char, topped with creamy tangy cabbage slaw, bright chimichurri sauce, pickled onions, and Mexican crema. Every bite is layers of flavor and texture. Perfect for summer grilling!
Rate This Recipe!
Preparations
Prep Time:
20 minutes
Cook Time:
16 minutes
Total Time:
36 minutes
Cuisine:
Mexican-inspired, Fusion
Course:
Main Course, Dinner
Calories:
420 kcal (approx. per serving, 2 tacos)
Servings:
4 (2 tacos each)
Author:
Ronica Rupan
Ingredients
Ingredients
For the Grilled Salmon:
- 1½ pounds sockeye salmon fillet, skin on
- Kosher salt, to taste
- Freshly ground black pepper, to taste
- 8 corn or flour tortillas
For the Taco Slaw:
- 2 cups shredded cabbage and carrot (pre-shredded coleslaw mix works great)
- ½ cup fresh cilantro, chopped
- 2 tablespoons mayonnaise (homemade or store-bought)
- 2 tablespoons Mexican crema (or sour cream)
- Pinch of kosher salt
- Freshly cracked black pepper, to taste
- ½ teaspoon ground cumin
- Juice of 1 lime
For the Chimichurri Sauce:
- 1 tablespoon red wine vinegar
- 1 teaspoon dried oregano
- 3 cloves garlic, peeled
- 5 tablespoons extra virgin olive oil
- ½ cup fresh cilantro
- ¼ cup fresh parsley
- Kosher salt, to taste
- Black pepper, to taste
For Assembly:
- Pickled red onions (see note)
- Fresh cilantro, for garnish
- Extra Mexican crema, for drizzling
Instructions
- Prep and Season the Salmon Pat the salmon fillet completely dry with paper towels. Season both sides generously with kosher salt and freshly ground black pepper. Let it sit at room temperature while you preheat your grill, about 10 minutes.
- Make the Chimichurri Sauce Add the red wine vinegar, dried oregano, peeled garlic cloves, extra virgin olive oil, fresh cilantro, and fresh parsley to a food processor. Season with a generous pinch of salt and black pepper. Pulse until everything is finely chopped and well combined but still has a bit of texture, not completely smooth. Taste and adjust seasoning with more salt, pepper, or vinegar if needed. Transfer to a bowl and set aside. The flavors will continue to develop as it sits.
- Make the Taco Slaw In a medium bowl, combine the shredded cabbage and carrot, chopped cilantro, mayonnaise, Mexican crema, a pinch of salt, freshly cracked black pepper, and cumin. Squeeze the juice of one lime over everything. Toss well until all the vegetables are evenly coated in the creamy dressing. Taste and adjust seasoning. Cover and refrigerate until ready to use.
- Grill the Salmon Preheat your grill to medium-high heat and oil the grates well to prevent sticking. Place the salmon skin-side down on the grill. Close the lid and grill for 7-8 minutes without moving it. The skin will get crispy and help prevent the salmon from sticking. Carefully flip the salmon using a wide spatula and grill for another 7-8 minutes on the second side until the salmon is cooked through and flakes easily with a fork. The internal temperature should reach 145°F. Remove from the grill and let rest for 2-3 minutes.
- Remove the Skin and Flake Once the salmon has rested, use a fork to gently lift and peel away the skin (it should come off easily). Discard the skin. Use the fork to break the salmon into large, chunky flakes. Set aside and keep warm.
- Warm the Tortillas While the salmon rests, warm your tortillas using your preferred method (see FAQ above). Keep them wrapped in a clean kitchen towel to stay warm and soft.
- Build the Tacos Lay out your warm tortillas. Add a generous portion of flaked grilled salmon to each tortilla. Top with a big scoop of the creamy taco slaw. Add a generous amount of pickled red onions. Drizzle the bright green chimichurri sauce over everything. Sprinkle with fresh cilantro leaves. Finish with an extra drizzle of Mexican crema for richness.
- Serve and Enjoy Serve the tacos immediately while everything is fresh and the salmon is still warm. Have extra chimichurri, crema, and lime wedges on the side for people to add more as they like!
Recipe Note: For the pickled onions, thinly slice one red onion and quick-pickle it in a mixture of ½ cup vinegar (white or apple cider), ½ cup water, 1 tablespoon sugar, and 1 teaspoon salt. Heat until the sugar dissolves, pour over the onions, and let sit for at least 30 minutes. They'll keep in the fridge for up to 2 weeks!
Thai Basil Chicken
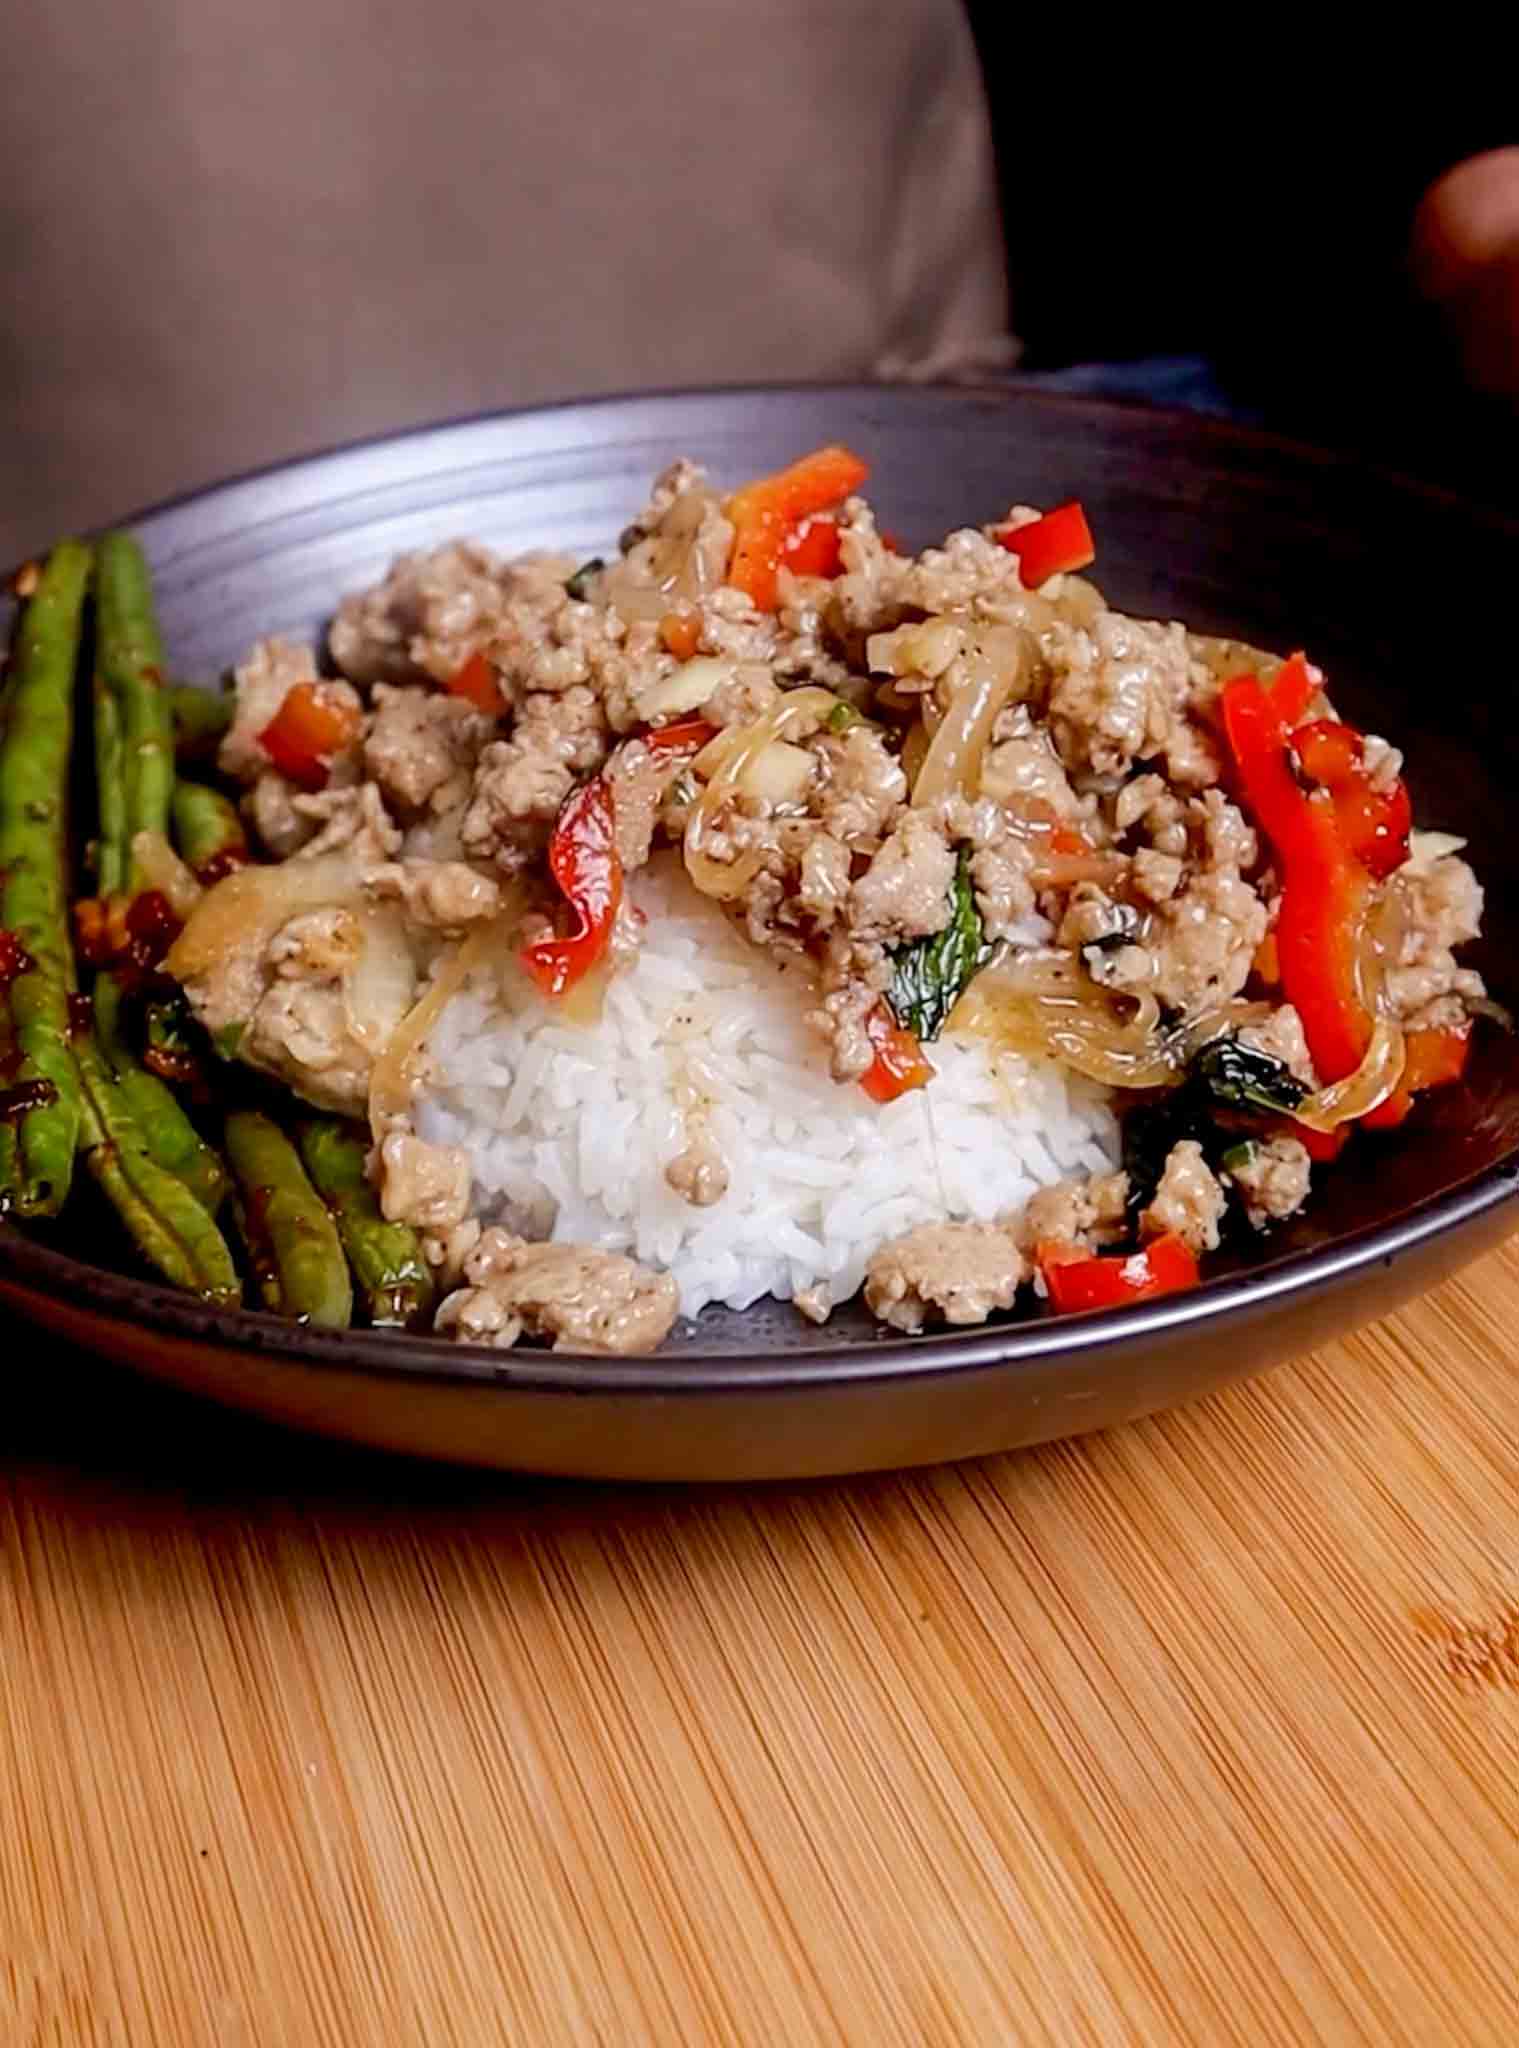
his Thai basil chicken, also known as Pad Krapow Gai, is one of the most beloved dishes in Thai cuisine, and once you make it at home you'll understand exactly why! It's the perfect combination of savory, spicy, and aromatic with ground chicken stir-fried at blazing high heat with loads of fresh garlic, fiery Thai chilies, and fragrant Thai basil that wilts into the dish at the last second, releasing its incredible anise-like flavor. The magic of this dish is in the technique and the balance of sauces. You start by marinating the ground chicken in vegetarian oyster sauce and soy sauce (or tamari or coconut aminos for gluten-free), which seasons it from the inside out and gives it incredible umami depth. While that marinates, you prep your Thai basil by washing the leaves and tearing them roughly, which releases their essential oils. The cooking happens fast and furious in a screaming hot wok with oil, minced Thai chilies, and a generous amount of minced garlic (yes, 12 cloves!) that fry until fragrant and golden. The seasoned chicken goes in next and gets broken up into small pieces as it cooks until no longer pink. Then you add thinly sliced onions, brown sugar for a touch of sweetness that balances the heat, and fish sauce which brings that authentic Thai funk and saltiness. The onions cook until tender and sweet, then sliced red bell pepper goes in for color and a slight crunch, followed by all that gorgeous Thai basil, black pepper, and white pepper. Everything cooks together for just one more minute so the basil wilts and releases its aroma but doesn't lose its vibrant color or flavor. The whole dish comes together in about 15 minutes from start to finish, which makes it perfect for busy weeknights when you want something that tastes exotic and special but doesn't require hours in the kitchen. Served over a bed of fluffy steamed jasmine rice with a crispy-edged fried egg on top and spicy garlic green beans on the side, this is the kind of meal that makes you feel like you're sitting in a street food stall in Bangkok!
Frequently Asked Questions
Q: What's the difference between Thai basil and regular basil?
A: Thai basil has a distinct anise-like flavor with hints of licorice and mint that's much more aromatic and slightly spicy compared to Italian sweet basil. It also has sturdier leaves that hold up better to high-heat cooking. Thai basil (also called holy basil or Grapow) is what gives Pad Krapow its signature flavor. You can find it at Asian grocery stores or well-stocked supermarkets. If you absolutely can't find it, Italian basil can be substituted, but the dish will taste noticeably different and won't have that authentic Thai flavor profile.
Q: Can I make this less spicy?
A: Absolutely! The heat level is completely customizable. The recipe calls for 5-6 Thai chilies which gives a good kick of heat. For milder spice, start with just 1-2 chilies and taste as you go, adding more if you want. You can also remove the seeds from the chilies before mincing, which reduces the heat significantly. For no heat at all, omit the chilies entirely and the dish will still be delicious and aromatic from all the garlic and basil. The black and white pepper add warmth but not the same kind of spicy heat as the chilies.
Q: Can I use chicken thighs instead of breast?
A: Yes! Ground chicken thigh actually works even better than breast because it has more fat and stays juicier during the high-heat cooking. If you can't find ground chicken at all, you can also buy boneless, skinless chicken thighs or breasts and mince them yourself in a food processor by pulsing until coarsely ground. Don't over-process or it will turn into a paste. You want a texture similar to ground beef with visible small pieces.
Q: How do I make this vegetarian?
A: To make this vegetarian or vegan, replace the ground chicken with 1.5 pounds of firm or extra-firm tofu that's been pressed to remove excess moisture and crumbled into small pieces. Make sure your oyster sauce is vegetarian (mushroom-based oyster sauce is widely available) and skip the fish sauce or replace it with more soy sauce plus a splash of lime juice for tang. The cooking method stays exactly the same. Other great plant-based options: Crumbled tempeh for a heartier texture and nuttier flavor Chopped mushrooms (shiitake, oyster, or cremini) for a meaty texture and umami depth Plant-based ground meat (like Beyond or Impossible) for the closest texture to ground chicken Eggplant, diced small and fried until golden, for a soft texture that soaks up the sauce beautifully Chickpeas, roughly mashed or pulsed in a food processor for a protein-packed option
This Thai basil chicken (Pad Krapow Gai) is bold, aromatic, and ready in 15 minutes! Ground chicken marinated in oyster and soy sauce, stir-fried with loads of garlic, Thai chilies, onions, bell pepper, and fresh Thai basil. Savory, spicy, and absolutely addictive served over jasmine rice with a fried egg!
Rate This Recipe!
Preparations
Prep Time:
10 minutes
Cook Time:
10 minutes
Total Time:
20 minutes
Cuisine:
Thai
Course:
Main Course, Dinner
Calories:
380 kcal (approx. per serving)
Servings:
4
Author:
Ronica Rupan
Ingredients
Ingredients
For the Chicken:
- 1.5 pounds chicken breast, ground or minced
- 2 tablespoons vegetarian oyster sauce
- 2 tablespoons soy sauce, tamari, or coconut aminos
- 3-4 tablespoons cooking oil (vegetable or peanut oil)
- 12 cloves garlic, minced
- 5-6 Thai chilies, minced (adjust to heat preference)
- 1 large onion, thinly sliced
- 1½ tablespoons fish sauce
- 1 tablespoon brown sugar
- 1 large red bell pepper, thinly sliced
- 2 cups fresh Thai basil leaves (holy basil or Grapow)
- ½ teaspoon black pepper
- 1 teaspoon white pepper
For Serving:
- Steamed jasmine rice
- Fried eggs (one per serving)
- Spicy garlic green beans (optional)
- Lime wedges (optional)
Instructions
- Marinate the Chicken In a mixing bowl, combine the ground chicken with the vegetarian oyster sauce and soy sauce (or tamari or coconut aminos). Mix well until the chicken is evenly coated. Set aside while you prep the other ingredients. This marinates the chicken and adds incredible flavor from the inside out.
- Prep the Thai Basil Wash the Thai basil leaves thoroughly and remove the stems. Tear or roughly chop the leaves into smaller pieces. This releases their essential oils and helps them wilt more evenly when added to the hot wok. Set aside.
- Heat the Wok and Fry Aromatics Heat a wok or large skillet over high heat until it's smoking hot. Add the cooking oil and swirl to coat the bottom. Immediately add the minced Thai chilies and minced garlic. Fry, stirring constantly, for about 2 minutes until the garlic is golden and incredibly fragrant. Don't let the garlic burn or it will turn bitter!
- Cook the Chicken Add the seasoned ground chicken to the wok. Use a spatula or wooden spoon to break it up into small pieces as it cooks. Stir-fry for about 5 minutes, breaking up any large clumps, until the chicken is no longer pink and is cooked through. Keep the heat high for that authentic wok flavor!
- Add Onions and Seasonings Add the thinly sliced onions, brown sugar, and fish sauce to the wok. Stir everything together and cook for about 3 minutes, stirring frequently, until the onions are tender and slightly caramelized and the sugar has melted into the sauce.
- Add Peppers and Basil Toss in the sliced red bell pepper, Thai basil leaves, black pepper, and white pepper. Stir-fry for just 1 additional minute until the basil wilts and releases its aroma and the peppers are slightly softened but still have a bit of crunch. Don't overcook the basil or it will lose its vibrant flavor and color!
- Finish and Serve Remove the wok from the heat immediately. Taste and adjust seasoning if needed with more fish sauce or soy sauce. Serve the Thai basil chicken immediately over steamed jasmine rice. Top each serving with a crispy-edged fried egg and serve with spicy garlic green beans on the side if desired. Add lime wedges for squeezing over the top for extra brightness!
Air Fryer Eggplant Parmesan Stacks
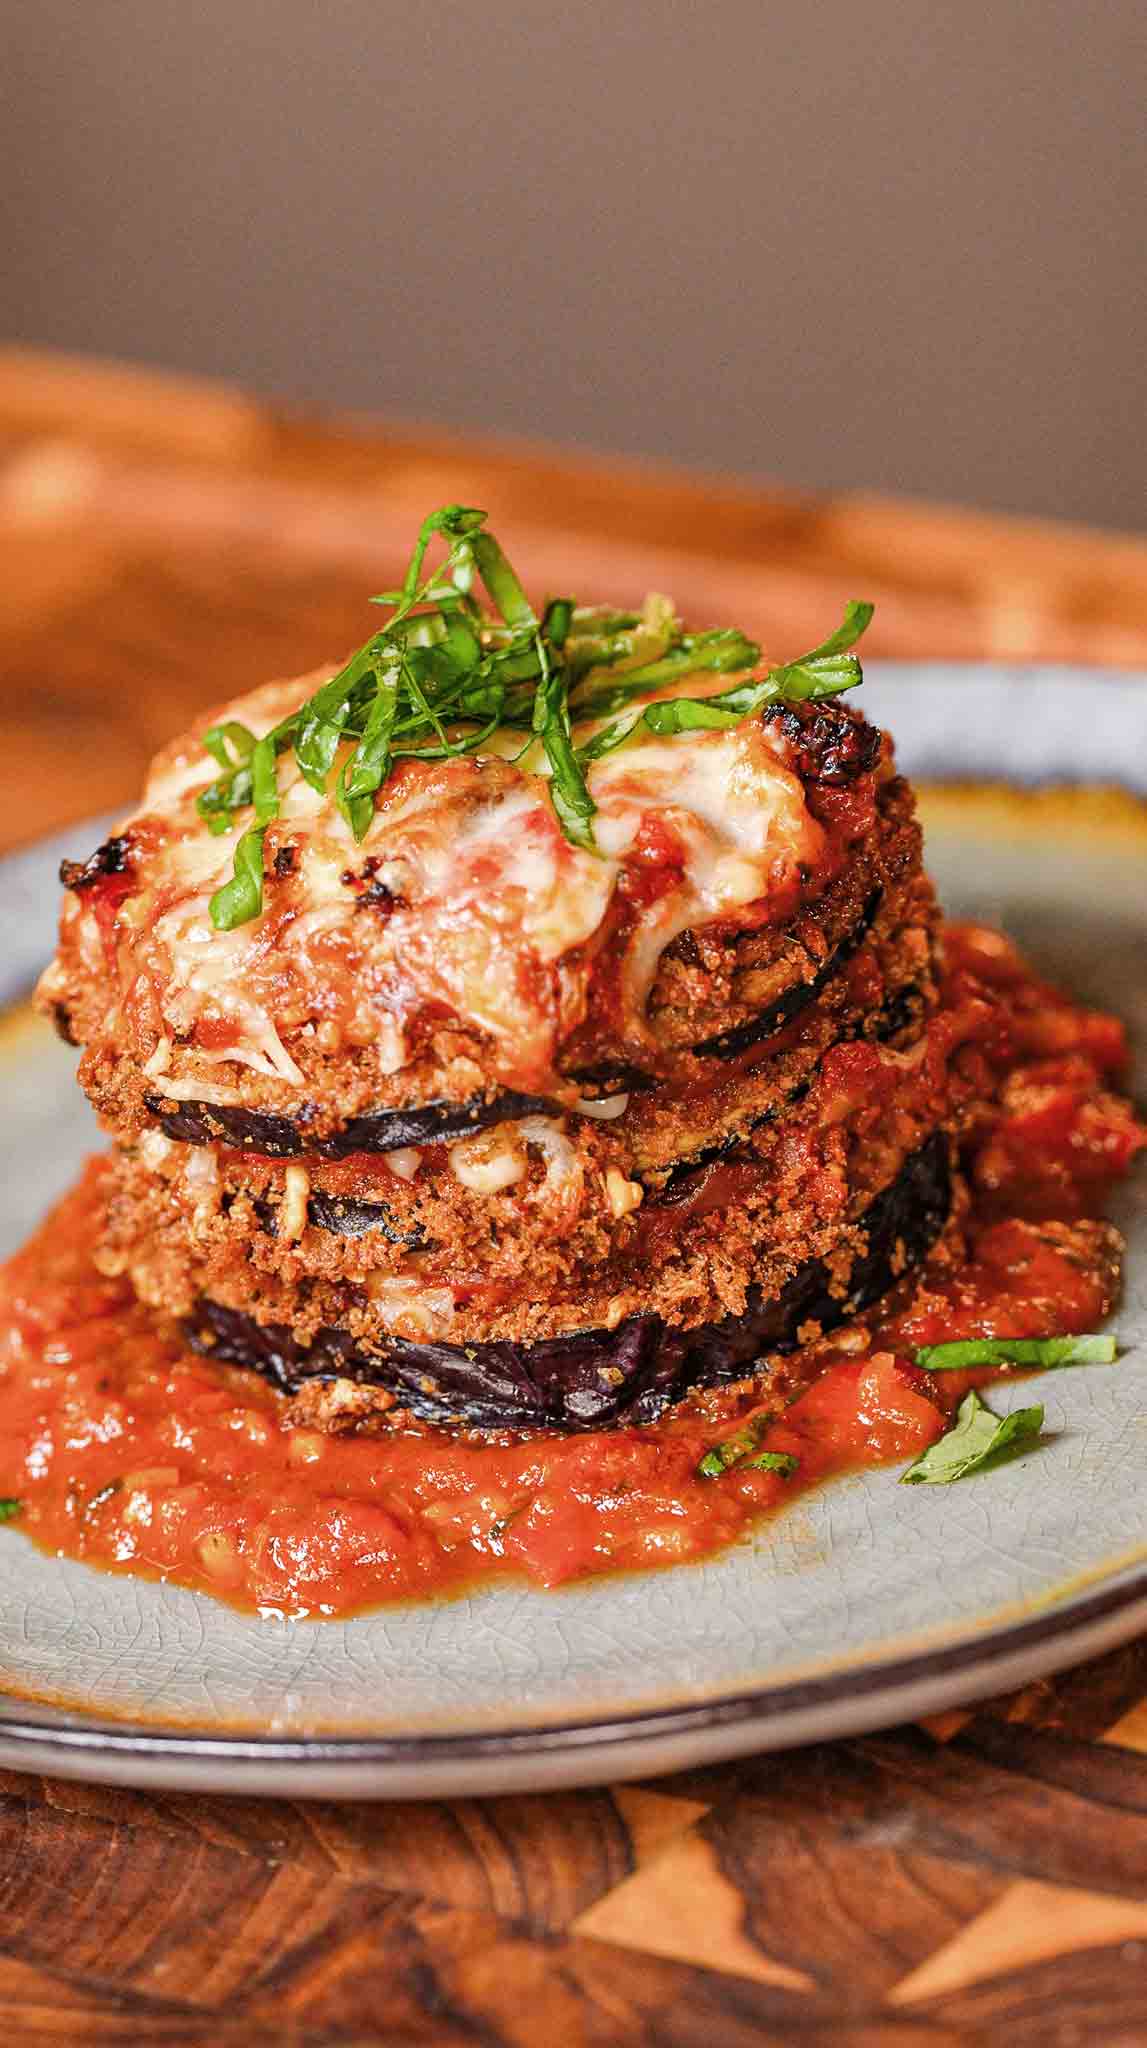
Get the Cosori Iconic Air Fryer: Love this recipe? Get the Cosori Iconic Air Fryer that makes it all possible! Shop here: https://get.aspr.app/SH1bkg New customers save 10% with code: NEWFAM10
These air fryer eggplant Parmesan stacks are an absolute showstopper that's so much lighter and easier than traditional eggplant Parm, and they're optimized specifically for the Cosori Iconic Air Fryer! Instead of being layered in a casserole dish, these are stacked into individual towers that look absolutely stunning on the plate. Each stack has three layers of tender eggplant rounds that are coated in a golden, crispy seasoned panko crust loaded with Parmesan, oregano, Italian seasoning, garlic powder, onion powder, smoked paprika, and red pepper flakes. The panko gets toasted in the microwave with olive oil before breading, which is the secret to getting that deep golden color and incredible crunch even though you're air frying instead of deep frying. The eggplant slices get salted and rested on a rack for at least 10 minutes to draw out moisture, which prevents them from being soggy and ensures they get crispy and tender. While the eggplant rests, you elevate jarred marinara sauce into something truly special by sautéing onion, red bell pepper, and fresh garlic until fragrant, then simmering it with sun-dried tomatoes, chili flakes, a pinch of sugar to balance acidity, and fresh basil at the end. This takes regular marinara from good to restaurant-quality in just 10 minutes! After breading, the eggplant rounds get air fried in batches at 350°F until the coating is deep golden and crispy. Then comes the fun part: you build four gorgeous stacks by layering the largest rounds with marinara, sun-dried tomatoes, and a mix of melty mozzarella and Parmesan, then repeating with two more layers. The whole stack goes back into the air fryer for just 5 minutes until the cheese is melted, bubbly, and spotty brown on top. Each individual stack gets plated with extra warm marinara spooned around it, a drizzle of good quality olive oil, fresh basil leaves, and a lemon wedge for brightness. It's elegant enough for entertaining but easy enough for a weeknight dinner, and so much lighter than traditional fried eggplant Parm!
These air fryer eggplant Parmesan stacks are lighter, easier, and absolutely stunning! Crispy panko-crusted eggplant rounds stacked into individual towers with elevated marinara, sun-dried tomatoes, mozzarella, and Parmesan. Air fried until golden and melty. Optimized for the Cosori Iconic Air Fryer and ready in just over an hour!
Rate This Recipe!
Preparations
Prep Time:
20 minutes
Chill Time:
45 minutes
Total Time:
1 hour 5 minutes
Cuisine:
Italian-American
Course:
580 kcal (approx. per stack)
Calories:
580 kcal (approx. per stack)
Servings:
4
Author:
Ronica Rupan
Ingredients
Ingredients
For the Eggplant:
- 1 large (1½-pound) Italian eggplant, peeled
- 1 teaspoon kosher salt, divided
For the Seasoned Panko Crust:
- 2 cups panko breadcrumbs
- ⅓ cup extra virgin olive oil
- 1 ounce Parmesan cheese, grated (½ cup)
- 1 tablespoon dried oregano
- 1 teaspoon Italian seasoning
- 1 teaspoon garlic powder
- 1 teaspoon onion powder
- ½ teaspoon smoked paprika
- ¾ teaspoon black pepper, divided
- ¼ teaspoon red pepper flakes
For the Egg Batter:
- 2 large eggs
- 2 tablespoons all-purpose flour
- ¼ teaspoon black pepper
For the Elevated Marinara Sauce:
- 2½ cups jarred marinara sauce
- ½ small onion, finely diced
- ½ red bell pepper, finely diced
- 3 cloves fresh garlic, finely minced
- ¼ cup sun-dried tomatoes, finely chopped (divided)
- 1 pinch red chili flakes
- 1 pinch sugar
- 2 tablespoons olive oil, for sautéing
- 2 tablespoons fresh basil, chopped
For the Cheese:
- 4 ounces whole-milk block mozzarella cheese, shredded (1 cup)
- 1 ounce Parmesan cheese, freshly grated
For Garnish:
- Fresh whole basil leaves
- 1 lemon, cut into wedges
- Good quality extra virgin olive oil, for drizzling
Instructions
- Prep and Salt the Eggplant Set a wire rack inside a rimmed baking sheet. Peel the eggplant and slice it crosswise into twelve ½-inch-thick rounds, trying to keep them all the same thickness. Sprinkle ¾ teaspoon of the salt over both sides of all the eggplant slices and arrange them in a single layer on the wire rack. Let them sit for at least 10 minutes to draw out moisture. You'll see beads of water forming on the surface. After 10 minutes, pat the slices completely dry with paper towels to remove all that moisture before breading.
- Make the Elevated Marinara Sauce While the eggplant is resting, heat 2 tablespoons of olive oil in a small saucepan over medium heat. Add the finely diced onion and red bell pepper and sauté for 3-4 minutes, stirring occasionally, until soft and translucent. Add the minced garlic and cook for another minute until fragrant. Add half of the chopped sun-dried tomatoes (reserve the other half for layering), the pinch of chili flakes, and the pinch of sugar. Stir everything together. Pour in the jarred marinara sauce and bring to a gentle simmer. Reduce heat to low and let everything simmer together for 10 minutes, stirring occasionally, so all those flavors can meld. Remove from heat and stir in the fresh chopped basil. Set aside and keep warm.
- Toast the Panko In a microwave-safe bowl, toss the panko breadcrumbs with the ⅓ cup olive oil and the remaining ¼ teaspoon salt until all the crumbs are evenly coated. Microwave the panko mixture until it turns golden brown, about 3-5 minutes total, stirring every 30 seconds to ensure even toasting. Watch it carefully as microwaves vary in power! Transfer the toasted panko to a shallow dish and let it cool for about 5 minutes. Once cooled, stir in the grated Parmesan, dried oregano, Italian seasoning, garlic powder, onion powder, smoked paprika, ½ teaspoon black pepper, and red pepper flakes until everything is well combined.
- Make the Egg Batter In a second shallow dish, whisk together the eggs, flour, and ¼ teaspoon black pepper until completely smooth with no lumps. The flour helps the coating adhere better to the eggplant.
- Bread the Eggplant Working with one eggplant round at a time, dip it into the egg batter, turning to coat both sides and letting any excess drip off. Transfer to the dish with the seasoned panko and press firmly on both sides and all around the edges, really pressing the crumbs in so they stick well. You want a substantial coating! Return the breaded round to the wire rack. Repeat with all remaining eggplant slices.
- Air Fry the Eggplant (First Batch) Arrange 6 of the breaded eggplant rounds in an even layer in your Cosori Iconic Air Fryer basket, making sure they're not overlapping. Air fry at 350°F for 15-18 minutes, carefully flipping them over with tongs or a spatula at the halfway point (around 7-9 minutes). The panko should be deep golden brown and crispy when done. Transfer the cooked rounds to a platter and repeat with the remaining 6 rounds.
- Build the Stacks Once all the eggplant is cooked, select the 4 largest rounds and place them on a clean cutting board. Spread about 2 tablespoons of the elevated marinara sauce over each one. Scatter a few pieces of the reserved sun-dried tomatoes over the sauce. Sprinkle each with a heaping tablespoon of shredded mozzarella and a little freshly grated Parmesan. Place another eggplant round on top of each stack and repeat the layering: sauce, sun-dried tomatoes, mozzarella, and Parmesan. Top each stack with a final eggplant round, more sauce, and the remaining mozzarella and Parmesan cheese divided evenly among the four stacks.
- Melt the Cheese Using a wide spatula, carefully transfer the assembled eggplant stacks to the air fryer basket. Air fry at 350°F for about 5 minutes until the mozzarella is completely melted, bubbly, and starting to get spotty brown on top. Watch them closely since the cheese can go from melted to burnt quickly!
- Plate and Serve Carefully transfer each stack to an individual serving plate using a spatula. Spoon some of the remaining warm elevated marinara sauce around the base of each stack. Drizzle a little good quality extra virgin olive oil over the top of each stack. Garnish with fresh whole basil leaves and add a lemon wedge to each plate. Serve immediately while hot and the cheese is still melty!
Rosemary Garlic Confit Focaccia
This rosemary garlic confit focaccia is the most incredible homemade bread you'll ever make, and it's so much easier than you think! Fluffy, pillowy focaccia with crispy golden edges, a tender crumb full of air pockets, and topped with the most luxurious rosemary garlic confit that infuses every bite with sweet, mellow roasted garlic and fragrant rosemary. The garlic confit is where you start, and it's pure magic. Whole peeled garlic cloves and fresh rosemary sprigs get covered completely in olive oil, sprinkled with salt, and baked at 400°F for just 20 minutes until the garlic is incredibly soft, sweet, and spreadable but not browned. This slow cooking in oil transforms harsh raw garlic into something mellow, buttery, and almost sweet. You'll want to make extra because it's amazing spread on everything! The focaccia dough is a simple no-knead recipe that uses just bread flour, warm water, instant yeast, a touch of honey for feeding the yeast, olive oil, and salt. Instead of traditional kneading, you do a series of gentle stretch and folds that develop the gluten without overworking the dough, giving you that signature open, airy crumb. After mixing, the dough rests for 15 minutes, gets folded, rests again, gets folded again, then goes through a 1½ hour first proof where it doubles in size and develops flavor. It gets transferred to an oiled pan, gently stretched, folded, flipped, then proofed again for another 1½ hours. Just before baking, you drizzle the top generously with that gorgeous garlic-infused oil from your confit, dimple the dough all over with your fingers (which creates those iconic focaccia wells that catch oil and toppings), then scatter the soft garlic cloves, fresh rosemary, halved cherry tomatoes, grated Parmesan, and flaky sea salt all over the top. It bakes at 430°F on the lowest oven rack for 18-22 minutes until it's deeply golden brown with crispy edges and a tender, fluffy interior. The smell while it's baking is absolutely intoxicating! After a brief rest, you have this stunning, bakery-quality focaccia that's perfect for serving with dinner, making sandwiches, dipping in soup, or honestly just tearing into warm with extra olive oil!
Frequently Asked Questions
Q: Can I make this without a stand mixer?
A: Absolutely! This is a no-knead focaccia that comes together entirely by hand. You just mix the ingredients in a bowl until there are no dry spots, then do gentle stretch and folds instead of kneading. It's actually easier than traditional bread recipes that require heavy kneading. All you need is a large bowl, your hands, and a little patience for the resting and proofing times. No special equipment necessary!
Q: What if I don't have instant yeast?
A: Instant yeast (also called rapid-rise or bread machine yeast) can be mixed directly into the flour. If you only have active dry yeast, you'll need to bloom it first. Mix the active dry yeast with the warm water and honey, let it sit for 5-10 minutes until foamy, then proceed with the recipe. Use the same amount (1½ teaspoons). The rise times might be slightly longer with active dry yeast, so just watch the dough and let it proof until doubled rather than going strictly by time.
Q: How do I store leftover focaccia and garlic confit?
A: The garlic confit can be stored in an airtight container in the refrigerator for up to 2 weeks, completely covered in the oil. Use the garlic-infused oil for cooking or drizzling on everything! For the focaccia, let it cool completely, then wrap tightly in plastic wrap or store in an airtight container at room temperature for 2-3 days. For longer storage, freeze it wrapped tightly for up to 3 months. Reheat in a 350°F oven for 5-10 minutes to refresh the crust. Don't refrigerate focaccia as it will dry out.
Q: Can I use all-purpose flour instead of bread flour?
A: Bread flour is really recommended for the best texture because it has more protein which creates more gluten, giving you those beautiful air pockets and chewy texture that makes focaccia special. That said, you can use all-purpose flour if that's all you have. The texture will be slightly less chewy and the crumb might be a bit denser, but it will still be delicious. If using all-purpose, you might need to reduce the water by 1-2 tablespoons since it absorbs less liquid than bread flour.
This rosemary garlic confit focaccia is fluffy, golden, and absolutely incredible! Homemade focaccia with crispy edges and a tender, airy crumb, topped with sweet roasted garlic confit, fresh rosemary, tomatoes, Parmesan, and flaky salt. Easier than you think with a simple no-knead dough and stretch-and-fold technique. Pure bread heaven!
Rate This Recipe!
Preparations
Prep Time:
30 minutes (plus 3 hours proofing time)
Cook Time:
22 minutes (plus 20 minutes for garlic confit)
Total Time:
4 hours 12 minutes
Cuisine:
Italian
Course:
Side Dish, Bread
Calories:
240 kcal (approx. per serving)
Servings:
12
Author:
Ronica Rupan
Ingredients
Ingredients
For the Rosemary Garlic Confit:
- 2 whole garlic bulbs, cloves peeled
- 3-4 sprigs fresh rosemary
- Olive oil (enough to completely cover the garlic, about 1-1½ cups)
- ½ teaspoon kosher salt
For the Focaccia:
- 4 cups (500g) bread flour
- 1¾ cups (420g) warm water (about 100-110°F)
- 1½ teaspoons instant rapid yeast
- 1 teaspoon honey (or maple syrup or sugar for vegan)
- 1 tablespoon extra virgin olive oil, plus more for the pan
- 2 teaspoons fine sea salt
For Topping:
- Reserved rosemary garlic confit
- Fresh rosemary sprigs
- Grated Parmesan cheese
- Cherry tomatoes, halved
- Flaky sea salt
Instructions
Make the Rosemary Garlic Confit:
- Roast the Garlic Preheat your oven to 400°F (205°C). Place the peeled garlic cloves and rosemary sprigs in a small oven-safe baking dish. Pour enough olive oil over them to completely cover the garlic. Sprinkle with the kosher salt. Bake for 20 minutes until the garlic is incredibly soft and tender but not browned. You should be able to easily pierce the cloves with a fork. Remove from the oven and let cool completely. Store in an airtight container in the fridge for up to 2 weeks, keeping the garlic completely submerged in the oil.
Make the Focaccia:
- Mix the Dough In a large bowl, combine the warm water, instant yeast, honey, 1 tablespoon of olive oil, and salt. Stir together. Add the bread flour and mix with a wooden spoon or your hands until there are no dry spots and everything is incorporated into a shaggy dough. The dough will be quite wet and sticky, which is perfect! Cover the bowl with a damp kitchen towel or plastic wrap and let rest for 15 minutes.
- First Stretch and Fold After 15 minutes, wet your hands to prevent sticking. Reach under one side of the dough, stretch it up, and fold it over to the opposite side. Rotate the bowl 90 degrees and repeat. Continue rotating and folding all the way around the dough (about 4-6 folds total) until you've formed a rough ball. The dough will tighten up and become smoother. Cover and rest for another 15 minutes.
- Second Stretch and Fold Wet your hands again and repeat the stretch and fold process, working your way around the dough to create a tighter ball. After the final fold, gently flip the dough over so the smooth side is facing up in the bowl. Cover and let proof for 1½ hours in a warm spot until the dough has doubled in size.
- Prepare the Pan Generously oil a 9x13-inch baking pan with olive oil. Line with parchment paper, then spread 2-3 tablespoons of olive oil all over the parchment, making sure to get into the corners. This oil is what creates that crispy bottom and edges!
- Transfer and Shape Gently tip the proofed dough out onto your oiled parchment-lined pan. With oiled hands, gently stretch and pat it into a rough rectangle. Fold the dough in thirds like a letter (bottom third up, top third down), then flip it over so the smooth side is facing up. Don't worry if it doesn't fill the pan yet. Cover the pan with a damp towel or plastic wrap.
- Second Proof Let the dough proof for another 1½ hours until it's puffy, pillowy, and nearly fills the pan. It should jiggle when you shake the pan gently.
- Preheat the Oven About 20 minutes before the second proof is done, preheat your oven to 430°F (220°C) with a rack positioned on the lowest level.
- Dimple and Top Drizzle the top of the dough generously with the garlic-infused oil from your confit. Using your fingers, press dimples all over the surface of the dough, going almost all the way down to the pan but being careful not to pop the large air bubbles. The dimples will fill with oil. Scatter the soft garlic confit cloves, fresh rosemary sprigs, halved cherry tomatoes, and grated Parmesan all over the top. Finish with a generous sprinkle of flaky sea salt.
- Bake Place the pan on the lowest oven rack and bake for 18-22 minutes until the focaccia is deeply golden brown on top and the edges are crispy. The exact time will depend on your oven, so start checking at 18 minutes. The bottom should also be golden when you peek underneath.
- Cool and Serve Remove from the oven and let cool in the pan for 5 minutes, then carefully transfer to a wire cooling rack to cool for at least 15-20 minutes before slicing. This cooling time allows the structure to set and keeps the bottom crispy. Optionally, drizzle with a little more olive oil right after baking for extra richness. Slice and serve warm or at room temperature!
Pan-Seared Omaha Steaks Top Sirloin Filet with Garlic Herb Butter
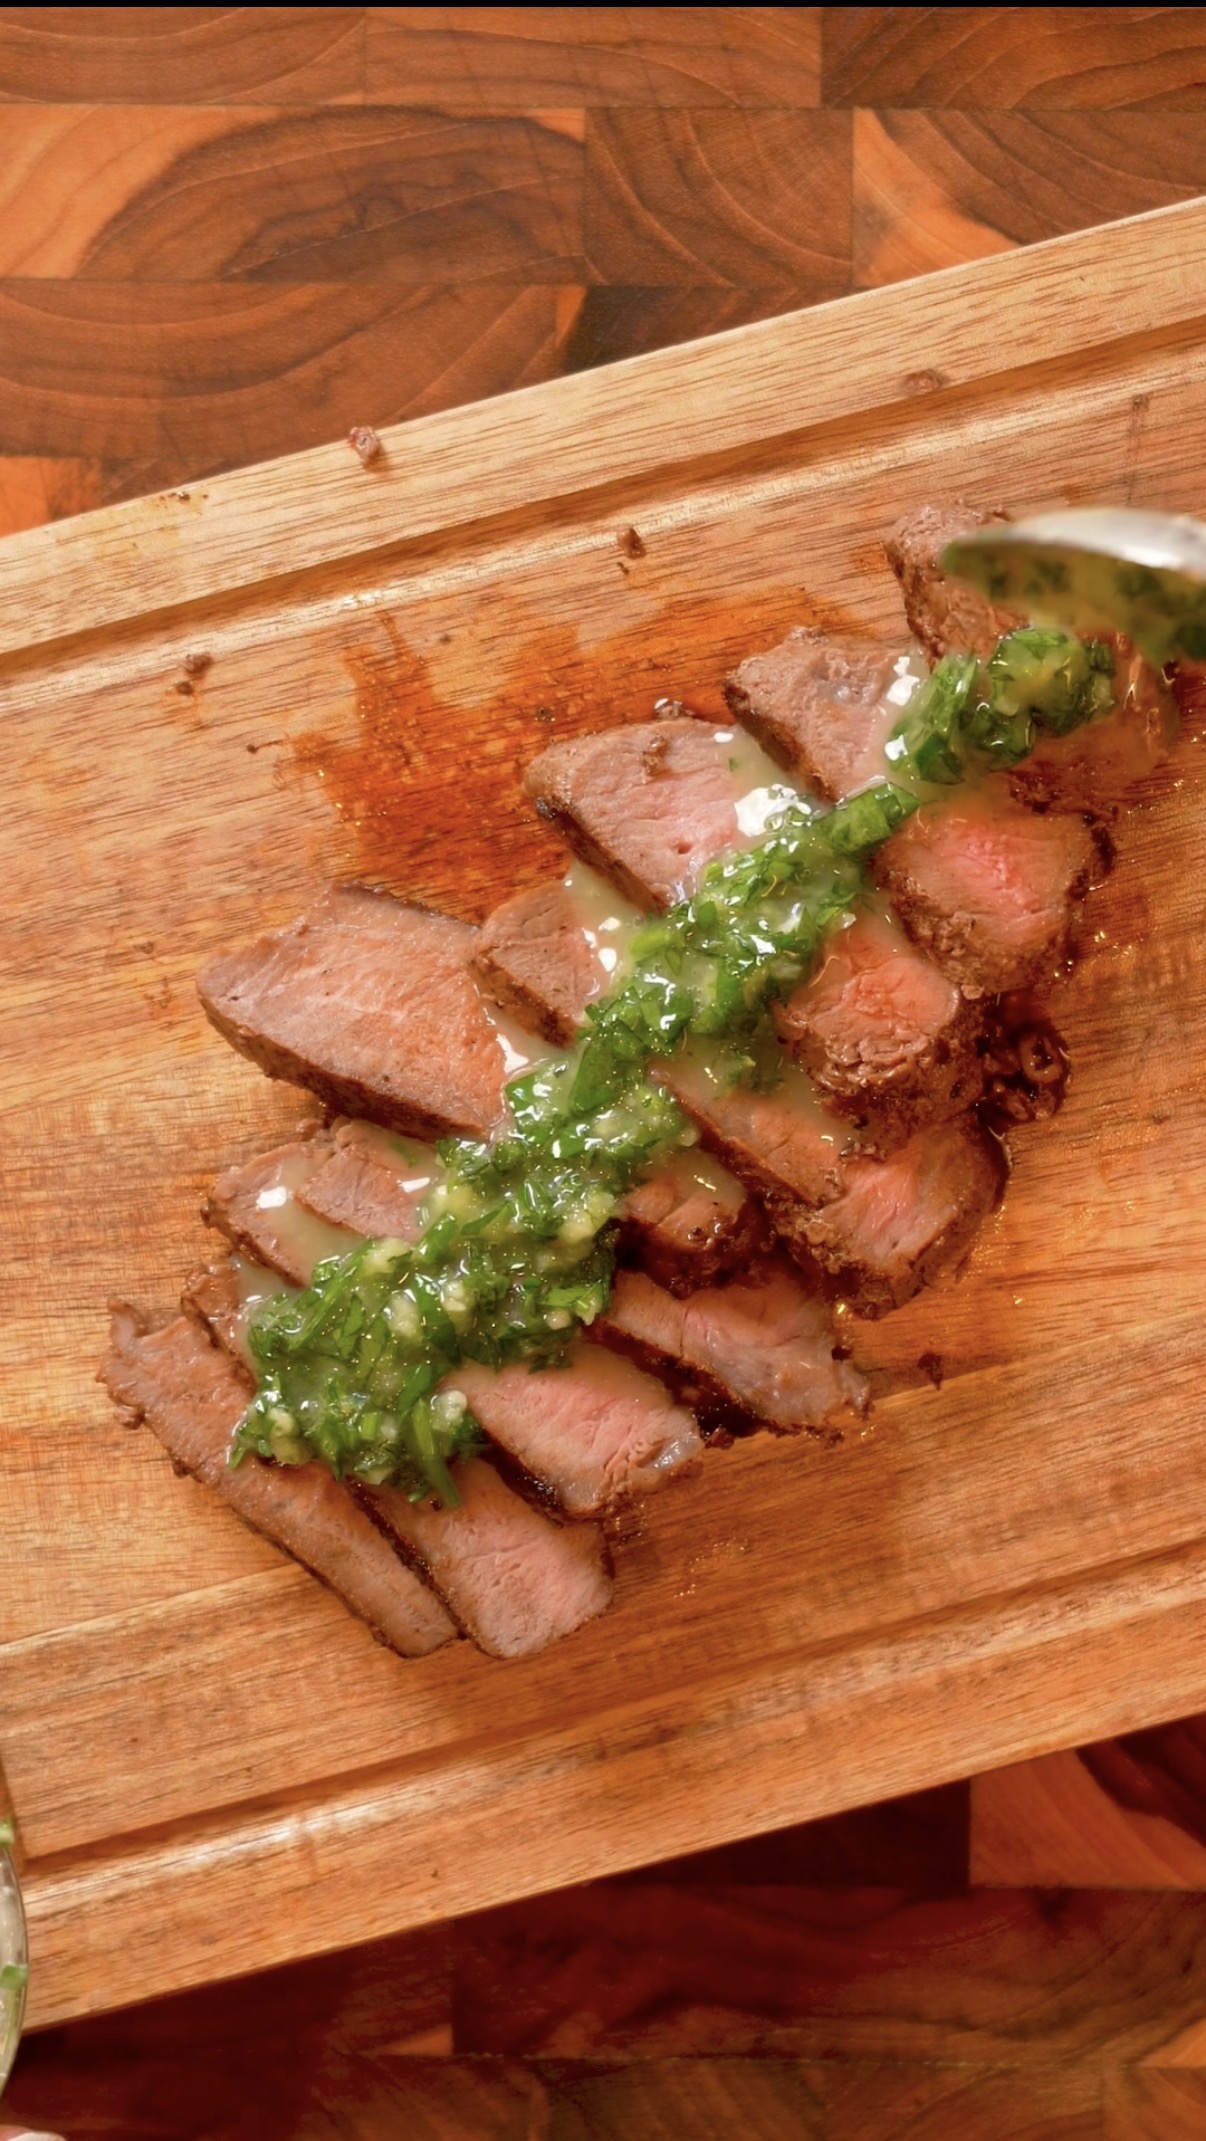
This pan-seared Omaha Steaks top sirloin filet with garlic herb butter is restaurant-quality steak made right in your own kitchen, and it's going to be the best steak you've ever cooked at home! Using premium Omaha Steaks Top Sirloin Filets means you're starting with exceptional quality beef that's perfectly portioned and incredibly tender, which sets you up for success from the start. The technique here is what transforms good steak into absolutely incredible steak. You start by patting the filets completely dry with paper towels (moisture is the enemy of a good sear!), then seasoning them generously with salt and black pepper on all sides. Letting them rest at room temperature for 15-20 minutes before cooking is crucial because cold steak hitting a hot pan cooks unevenly. While the steaks come to temperature, you make the most incredible garlic herb butter by mixing softened butter with fresh parsley, chives, thyme, and minced garlic. This compound butter is going to melt over the hot steak and create the most gorgeous, glossy, herb-flecked topping that adds richness and incredible flavor to every bite. The searing happens in a screaming hot cast-iron skillet with high-heat oil until you get that beautiful golden-brown crust on both sides, about 3-4 minutes per side for perfect medium-rare. Here's where the magic really happens: you add butter, smashed garlic cloves, and fresh rosemary sprigs to the pan, tilt it so the butter pools, and continuously baste the steaks with that aromatic garlic-rosemary butter for 1-2 minutes. This basting technique bastes the top of the steak in flavor while finishing the cooking gently, and it infuses every bite with the most incredible garlicky, herby, buttery richness. An instant-read thermometer inserted into the thickest part should read 130°F for perfect medium-rare. After resting for 5-10 minutes (this lets the juices redistribute so they don't all run out when you slice), you slice against the grain, fan the slices out on a plate, and top with a generous pat of that garlic herb butter that melts into every crevice. Serve with your favorite sides like roasted vegetables, mashed potatoes, or a simple salad, and you have a meal that's elegant enough for date night or special occasions but easy enough for a weeknight when you want to treat yourself!
This pan-seared Omaha Steaks top sirloin filet with garlic herb butter is restaurant-quality steak made at home! Premium filets seasoned simply, seared in a cast-iron skillet until perfectly crusted, then basted with garlic, rosemary, and butter. Topped with homemade garlic herb butter for the ultimate steakhouse experience in your own kitchen!
Rate This Recipe!
Preparations
Prep Time:
10 minutes (plus 15-20 minutes resting time)
Cook Time:
10 minutes
Total Time:
20 minutes (plus resting)
Cuisine:
American, Steakhouse
Course:
Main Course, Dinner
Calories:
Main Course, Dinner
Servings:
2
Author:
Ronica Rupan
Ingredients
Ingredients
For the Steak:
- 2 Omaha Steaks Top Sirloin Filets
- Kosher salt, for seasoning
- Freshly ground black pepper, for seasoning
- 1 tablespoon high-heat oil (avocado or vegetable oil)
- 2 tablespoons unsalted butter, for basting
- 2-3 sprigs fresh rosemary
- 3-4 cloves garlic, smashed
For the Garlic Herb Butter:
- 4 tablespoons (½ stick) unsalted butter, softened to room temperature
- 1 tablespoon fresh parsley, finely chopped
- 1 tablespoon fresh chives, finely chopped (or use more parsley)
- 1 teaspoon fresh thyme leaves (or ½ teaspoon dried thyme)
- 3-4 cloves garlic, minced
- Pinch of kosher salt
Instructions
- Prep the Steaks Remove the Omaha Steaks Top Sirloin Filets from the refrigerator. Pat them completely dry on all sides with paper towels. This is crucial for getting a good sear! Season both sides and the edges generously with kosher salt and freshly ground black pepper. Let the steaks rest at room temperature for 15-20 minutes while you prepare everything else. This ensures even cooking throughout.
- Make the Garlic Herb Butter In a small bowl, combine the softened butter, chopped parsley, chopped chives, fresh thyme leaves, minced garlic, and a pinch of salt. Use a fork to mash everything together until completely combined and the herbs are evenly distributed throughout the butter. Set aside at room temperature so it stays soft and spreadable.
- Heat Your Pan Place a cast-iron skillet over medium-high to high heat and let it get screaming hot, about 3-5 minutes. You want it so hot that when you add the oil, it shimmers immediately. Add the high-heat oil and swirl to coat the bottom of the pan.
- Sear the Steaks Carefully place the seasoned Omaha Steaks filets in the hot pan. Don't move them! Let them sear undisturbed for 3-4 minutes until a beautiful golden-brown crust forms on the bottom. Flip the steaks using tongs and sear for another 3-4 minutes on the second side. You're looking for that same gorgeous crust.
- Baste with Garlic, Rosemary, and Butter Add the 2 tablespoons of butter, smashed garlic cloves, and fresh rosemary sprigs to the pan alongside the steaks. As the butter melts, tilt the pan slightly toward you so the butter pools on one side. Using a large spoon, continuously baste the steaks by scooping up that melted garlic-rosemary butter and pouring it over the top of the steaks. Do this for 1-2 minutes, constantly basting. Insert an instant-read thermometer into the thickest part of one steak. When it reaches 130°F for medium-rare (or your desired temperature), remove from heat.
- Rest the Steaks Transfer the steaks to a cutting board and let them rest for 5-10 minutes. Don't skip this step! Loosely tent with foil if you want to keep them warm. The internal temperature will rise about 5°F during resting.
- Slice and Serve After resting, identify the direction of the grain (the lines running through the meat). Using a sharp knife, slice the steaks against the grain at a slight angle into ½-inch thick slices. Fan the slices out on serving plates. Top each steak with a generous pat of the garlic herb butter (it will melt beautifully over the hot meat). Serve immediately with your favorite sides and enjoy!
Air Fryer Spicy Creole Fried Chicken Sandwich
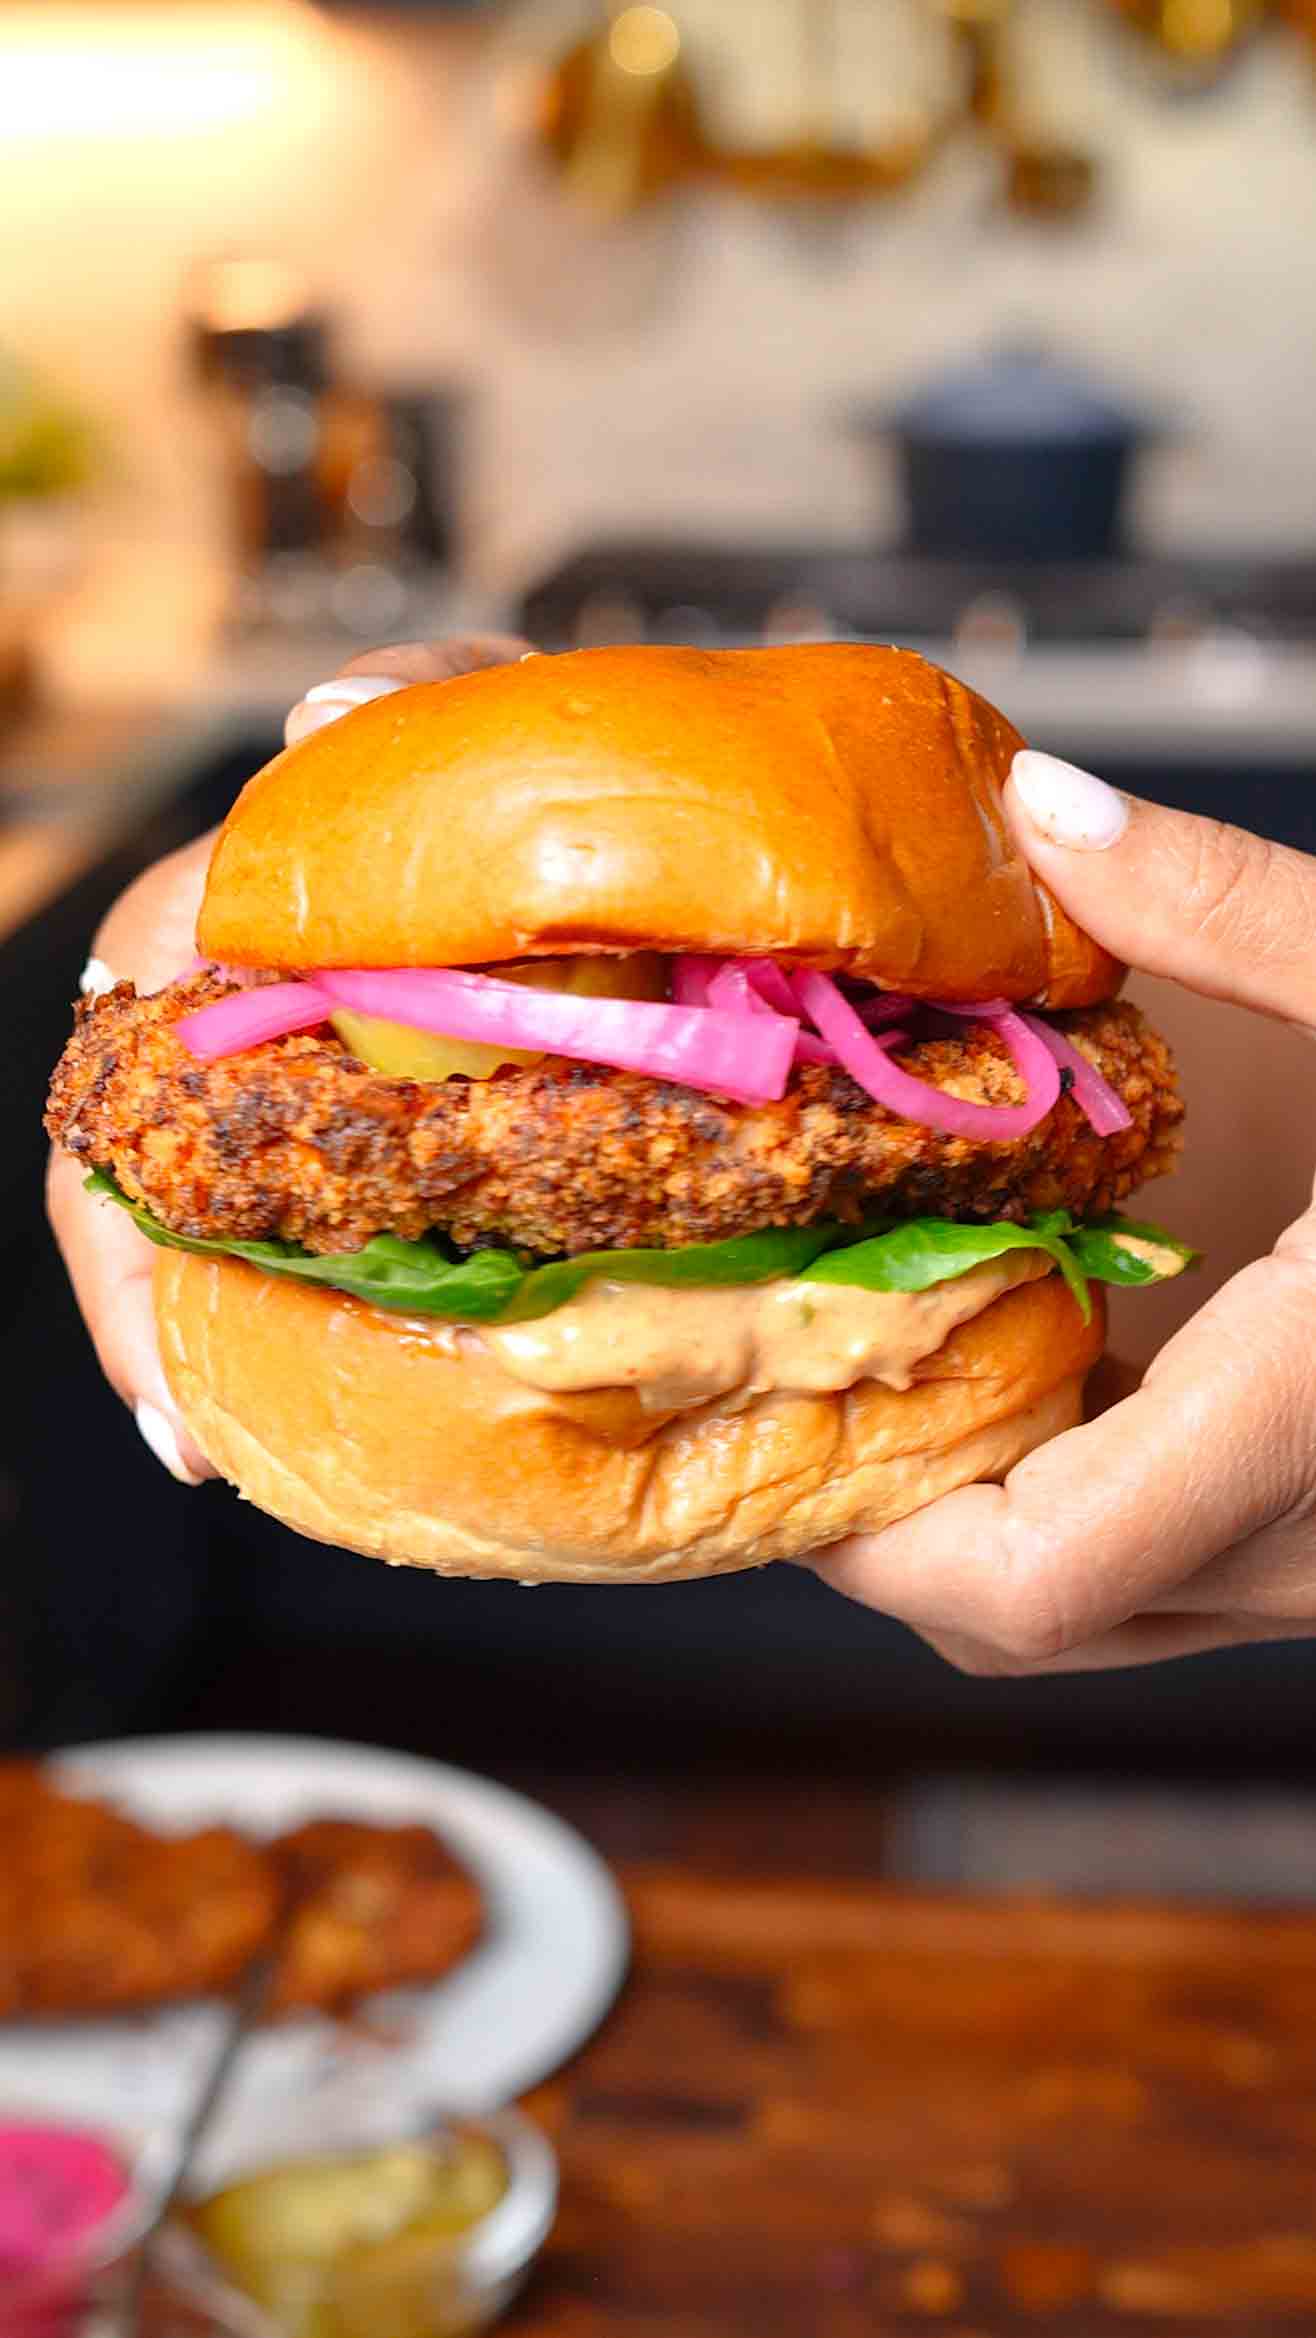
This air fryer spicy Creole fried chicken sandwich is everything you love about a classic fried chicken sandwich but made so much lighter and easier in the air fryer! Crispy, golden, perfectly seasoned chicken with layers of bold Creole spices, sandwiched between toasted buttery brioche buns with crunchy shredded lettuce, tangy dill pickles, and the most incredible creamy Creole garlic aioli that ties it all together. The genius of this recipe is in the technique. Instead of deep frying, you get that same satisfying crunch from panko breadcrumbs that are toasted in the microwave with avocado oil and seasoned with Creole spices, smoked paprika, and garlic powder until they're light golden brown. This pre-toasting step is what gives you that incredible crunch even though you're using the air fryer! The chicken gets pounded to an even thickness so every bite cooks perfectly, then seasoned generously with Creole spices before being dredged in a spiced egg mixture loaded with hot sauce, flour, and more Creole seasoning. The flour in the egg wash helps the panko adhere better and creates that satisfying coating. Each piece gets pressed firmly into the toasted panko until completely coated, then air fried at 400°F for just 12-16 minutes until the chicken is cooked through to 165°F and the exterior is golden brown and incredibly crispy. While the chicken cooks, you whip up the easiest Creole garlic aioli by mixing mayo with hot sauce, freshly grated garlic, Creole seasoning, lemon juice, and smoked paprika. It's creamy, tangy, garlicky, and has just enough heat to make your taste buds wake up. Assembly is simple but so satisfying: toasted brioche buns get spread with that gorgeous aioli on both sides, then you layer on the hot crispy chicken, pile on crunchy shredded iceberg lettuce, and add those essential tangy dill pickle slices. Every bite has crunch from the lettuce and panko, tang from the pickles and aioli, heat from the Creole spices and hot sauce, and that perfectly juicy chicken in the center. This is the sandwich that makes you realize air fryers are truly magic!
This air fryer spicy Creole fried chicken sandwich is crispy, juicy, and so much lighter than deep fried! Chicken breasts seasoned with Creole spices, coated in toasted panko, and air fried until golden and perfectly crispy. Served on toasted brioche with creamy Creole garlic aioli, crunchy lettuce, and tangy pickles. Ready in just 30 minutes!
Rate This Recipe!
Preparations
Prep Time:
15 minutes
Cook Time:
16 minutes
Total Time:
31 minutes
Cuisine:
American, Southern
Course:
Main Course, Dinner
Calories:
520 kcal (approx. per sandwich)
Servings:
4
Author:
Ronica Rupan
Ingredients
For the Creole Panko Crust:
- 1 cup panko breadcrumbs
- 2 tablespoons avocado oil
- 1 teaspoon Creole seasoning
- ½ teaspoon smoked paprika
- ½ teaspoon garlic powder
For the Chicken:
- 2 (8-ounce) boneless, skinless chicken breasts, trimmed
- 1 large egg
- 2 tablespoons hot sauce
- 1 tablespoon all-purpose flour
- 1 teaspoon Creole seasoning
- ½ teaspoon garlic powder
- ½ teaspoon smoked paprika
- ¼ teaspoon cayenne pepper
- Kosher salt, to taste
- Black pepper, to taste
- Avocado oil spray
For the Creole Garlic Aioli:
- ¼ cup mayonnaise
- 1 tablespoon hot sauce
- 2 cloves garlic, finely grated
- 1 teaspoon Creole seasoning
- 1 teaspoon fresh lemon juice
- ½ teaspoon smoked paprika
For Assembly:
- 4 brioche buns, split and toasted
- 2 cups shredded iceberg lettuce
- ½ cup dill pickle slices
Instructions
- Toast the Panko In a microwave-safe bowl, toss the panko breadcrumbs with the avocado oil, Creole seasoning, smoked paprika, and garlic powder until all the crumbs are evenly coated with oil and spices. Microwave on high, stirring every 30 seconds, for 1 to 3 minutes total until the panko is light golden brown and fragrant. Keep a close eye on it since microwaves vary in power. Transfer the toasted panko to a shallow dish and set aside to cool completely.
- Prepare the Egg Mixture In a second shallow dish, whisk together the egg, hot sauce, flour, Creole seasoning, garlic powder, smoked paprika, cayenne pepper, a generous pinch of salt, and black pepper until completely smooth and combined. The flour helps the coating stick better to the chicken.
- Prep the Chicken Place the chicken breasts on a cutting board. Cover with plastic wrap and use a meat mallet or the bottom of a heavy pan to pound them to an even thickness, about ½ to ¾ inch thick throughout. This ensures they cook evenly and quickly. Cut each breast in half crosswise so you have 4 pieces total. Pat them completely dry with paper towels (moisture is the enemy of crispy coating!). Season both sides of each piece generously with salt, pepper, and a light pinch of Creole seasoning.
- Bread the Chicken Working with one piece of chicken at a time, dip it into the egg mixture, turning to coat completely and letting any excess drip off. Transfer to the dish with the toasted panko and press firmly on both sides and all edges, really pressing the crumbs in so they adhere well. Make sure every surface is coated. Repeat with the remaining chicken pieces.
- Air Fry Lightly spray the basket of your air fryer with avocado oil spray to prevent sticking. Arrange the breaded chicken pieces in a single layer in the basket, making sure they're not touching or overlapping. Depending on the size of your air fryer, you may need to cook in two batches. Air fry at 400°F for 12 to 16 minutes, flipping the chicken pieces over carefully with tongs at the 6-8 minute mark (halfway through). The chicken is done when it's golden brown, crispy, and registers 165°F on an instant-read thermometer when inserted into the thickest part.
- Make the Creole Garlic Aioli While the chicken is cooking, make your aioli. In a small bowl, mix together the mayonnaise, hot sauce, finely grated garlic, Creole seasoning, fresh lemon juice, and smoked paprika. Stir until completely smooth and creamy. Taste and adjust the seasoning with more hot sauce, lemon juice, or Creole seasoning if you want. Set aside.
- Toast the Buns Split the brioche buns and toast them lightly in a toaster, toaster oven, or in a dry skillet until just golden. You want them warm and slightly crispy but still soft.
- Assemble the Sandwiches Spread the Creole garlic aioli generously on both the top and bottom of each toasted brioche bun. On the bottom bun, place one piece of hot crispy chicken. Top with a generous handful of shredded iceberg lettuce and several dill pickle slices. Place the top bun on and press down gently. Serve immediately while the chicken is hot and crispy!
Masala Chai

This masala chai is the most warming, aromatic, soul-soothing drink you'll ever wrap your hands around, and once you make it from scratch at home you'll never want the store-bought version again! This isn't your average chai latte from a syrup bottle at a coffee shop. This is the real deal, made with loose leaf black tea and whole spices that fill your entire kitchen with the most incredible aroma as they simmer. Every single spice in this recipe has been chosen intentionally. Green cardamom pods add that signature floral, citrusy warmth that's at the heart of every great chai. Cloves bring a deep, slightly sweet intensity. A cinnamon stick adds warmth and sweetness. Dried rose petals are the secret touch that adds a subtle floral elegance that makes this chai feel extra special and unique. Fennel seeds bring a hint of gentle anise-like sweetness that balances all the stronger spices. Star anise adds depth and a slightly licorice-like complexity. And a good smashed piece of fresh ginger brings that zingy, warming heat that you can feel all the way down. You start by simmering all the spices with water and loose leaf black tea until the mixture is deeply fragrant and the water turns a beautiful deep amber color. Then milk goes in and the whole thing comes to a boil again, which is that classic chai technique that creates a richer, creamier, more integrated flavor than just steeping tea in hot water. Off the heat, you stir in vanilla paste for a gorgeous floral sweetness and brown sugar that dissolves into warm caramel-like sweetness that ties everything together beautifully. You strain it into cups and top it with fresh whipped cream (use non-dairy for a vegan option) and a dusting of freshly grated nutmeg that adds this gorgeous warm, slightly sweet fragrance right when it reaches your nose before each sip. This chai is perfect for cold mornings, cozy evenings, when you need comfort, or anytime you want to treat yourself to something that feels like a warm hug in a cup!
Frequently Asked Questions
Q: Can I use tea bags instead of loose leaf tea?
A: Yes! If you don't have loose leaf black tea, 2-3 regular black tea bags work perfectly. Just add them to the saucepan with the water and spices the same way. Remove the bags when you remove from heat before straining. Loose leaf tea gives you a slightly more complex, robust flavor, but tea bags are a great convenient substitute. Any strong black tea works well here, like Assam, Darjeeling, or even English Breakfast. Avoid flavored teas since the spices already provide all the flavor you need!
Q: Can I make a big batch ahead of time?
A: Absolutely! You can make a big batch of chai concentrate ahead of time. Follow the recipe but reduce the milk to just ¼ cup and double all the spices and tea. Once strained and cooled, store the concentrate in an airtight jar in the fridge for up to 5 days. When you're ready to serve, heat equal parts concentrate and milk of choice in a saucepan until steaming, add your brown sugar and vanilla paste, and it's ready in minutes. This is perfect for meal prep or entertaining when you want to serve multiple people quickly without standing over the stove each time.
Q: What milk works best for masala chai?
A: Whole milk gives you the richest, creamiest, most traditional chai experience with a beautiful frothy top when it comes to a boil. For dairy-free options, oat milk is the absolute best substitute because it's naturally creamy and slightly sweet, creates a similar richness to whole milk, and froths beautifully. Coconut milk adds a lovely tropical creaminess that pairs really well with the spices. Almond milk works but is thinner and less creamy. Cashew milk is another great creamy option. Avoid rice milk as it's too thin and watery for chai. Whatever milk you choose, the full-fat version will always give you better results!
Q: Can I adjust the sweetness and spice level?
A: Of course! This recipe is completely customizable to your taste. For more sweetness, add an extra teaspoon of brown sugar or swap it for honey, maple syrup, or jaggery (traditional Indian unrefined sugar that adds incredible depth). For less sweetness, start with just 1 teaspoon of sugar and taste before adding more. For more spice and heat, add an extra piece of ginger or a small pinch of black pepper (a traditional chai ingredient that adds a gentle peppery warmth). For a milder chai, use fewer cardamom pods and reduce the ginger. The beauty of homemade chai is that you can make it exactly how you love it!
This masala chai is warming, aromatic, and made completely from scratch with whole spices! Loose leaf black tea simmered with cardamom, cloves, cinnamon, rose petals, fennel, star anise, and fresh ginger, then finished with milk, vanilla paste, and brown sugar. Topped with whipped cream and freshly grated nutmeg. The most comforting cup you'll ever make!
Rate This Recipe!
Preparations
Prep Time:
5 minutes
Cook Time:
10 minutes
Total Time:
15 minutes
Cuisine:
Indian
Course:
Drinks, Breakfast
Calories:
120 kcal (approx. per serving with whole milk)
Servings:
2
Author:
Ronica Rupan
Ingredients
Ingredients
For the Chai:
- 2 cups water
- 2-3 teaspoons loose leaf black tea (or 2-3 black tea bags)
- 3 green cardamom pods, crushed
- 2 whole cloves
- 1 cinnamon stick
- 1 teaspoon dried rose petals
- 1 teaspoon fennel seeds
- 1 whole star anise
- 1-inch piece fresh ginger, smashed
- 1 cup milk of choice (whole milk or oat milk recommended)
- ½ teaspoon vanilla paste
- 2 teaspoons brown sugar, plus more to taste
For Topping:
- Fresh whipped cream (use non-dairy for vegan option)
- Freshly grated nutmeg
Instructions
- Crush and Prep the Spices Before you start, crush the cardamom pods lightly with the flat side of a knife or the bottom of a mug. You just want to crack them open slightly so the seeds inside can release their flavor. Smash the fresh ginger with the flat side of your knife to break the fibers and release the oils. Having your spices prepped makes everything go smoothly.
- Simmer the Spices and Tea In a small saucepan, combine the water, loose leaf black tea, crushed cardamom pods, whole cloves, cinnamon stick, dried rose petals, fennel seeds, star anise, and smashed ginger. Place over medium-high heat and bring the mixture to a boil, stirring occasionally. Once boiling, reduce the heat slightly and let it simmer for 2-3 minutes so all those beautiful spices have time to infuse into the water. Your kitchen should smell absolutely incredible at this point!
- Add the Milk Pour in the milk of your choice and stir everything together. Increase the heat back to medium-high and bring the mixture to a boil once more, stirring occasionally and watching carefully so it doesn't boil over. This second boil with the milk is what creates that rich, integrated chai flavor where everything melds together beautifully. As soon as it comes to a rolling boil, remove the pan from the heat immediately.
- Sweeten and Flavor Add the vanilla paste and brown sugar to the hot chai. Stir well until the sugar is completely dissolved. Taste it at this point and add more brown sugar if you prefer it sweeter. The chai should be aromatic, warming, slightly sweet, and perfectly spiced.
- Strain and Serve Pour the chai through a fine mesh strainer into your cups to remove all the spices, tea leaves, and ginger pieces. Top each cup generously with fresh whipped cream (or non-dairy whipped cream for a vegan option). Finish with a light dusting of freshly grated nutmeg right over the top of the cream. Serve immediately while hot and enjoy!
Jerk Glazed Cauliflower with Spicy Honey and Jerk Mayo
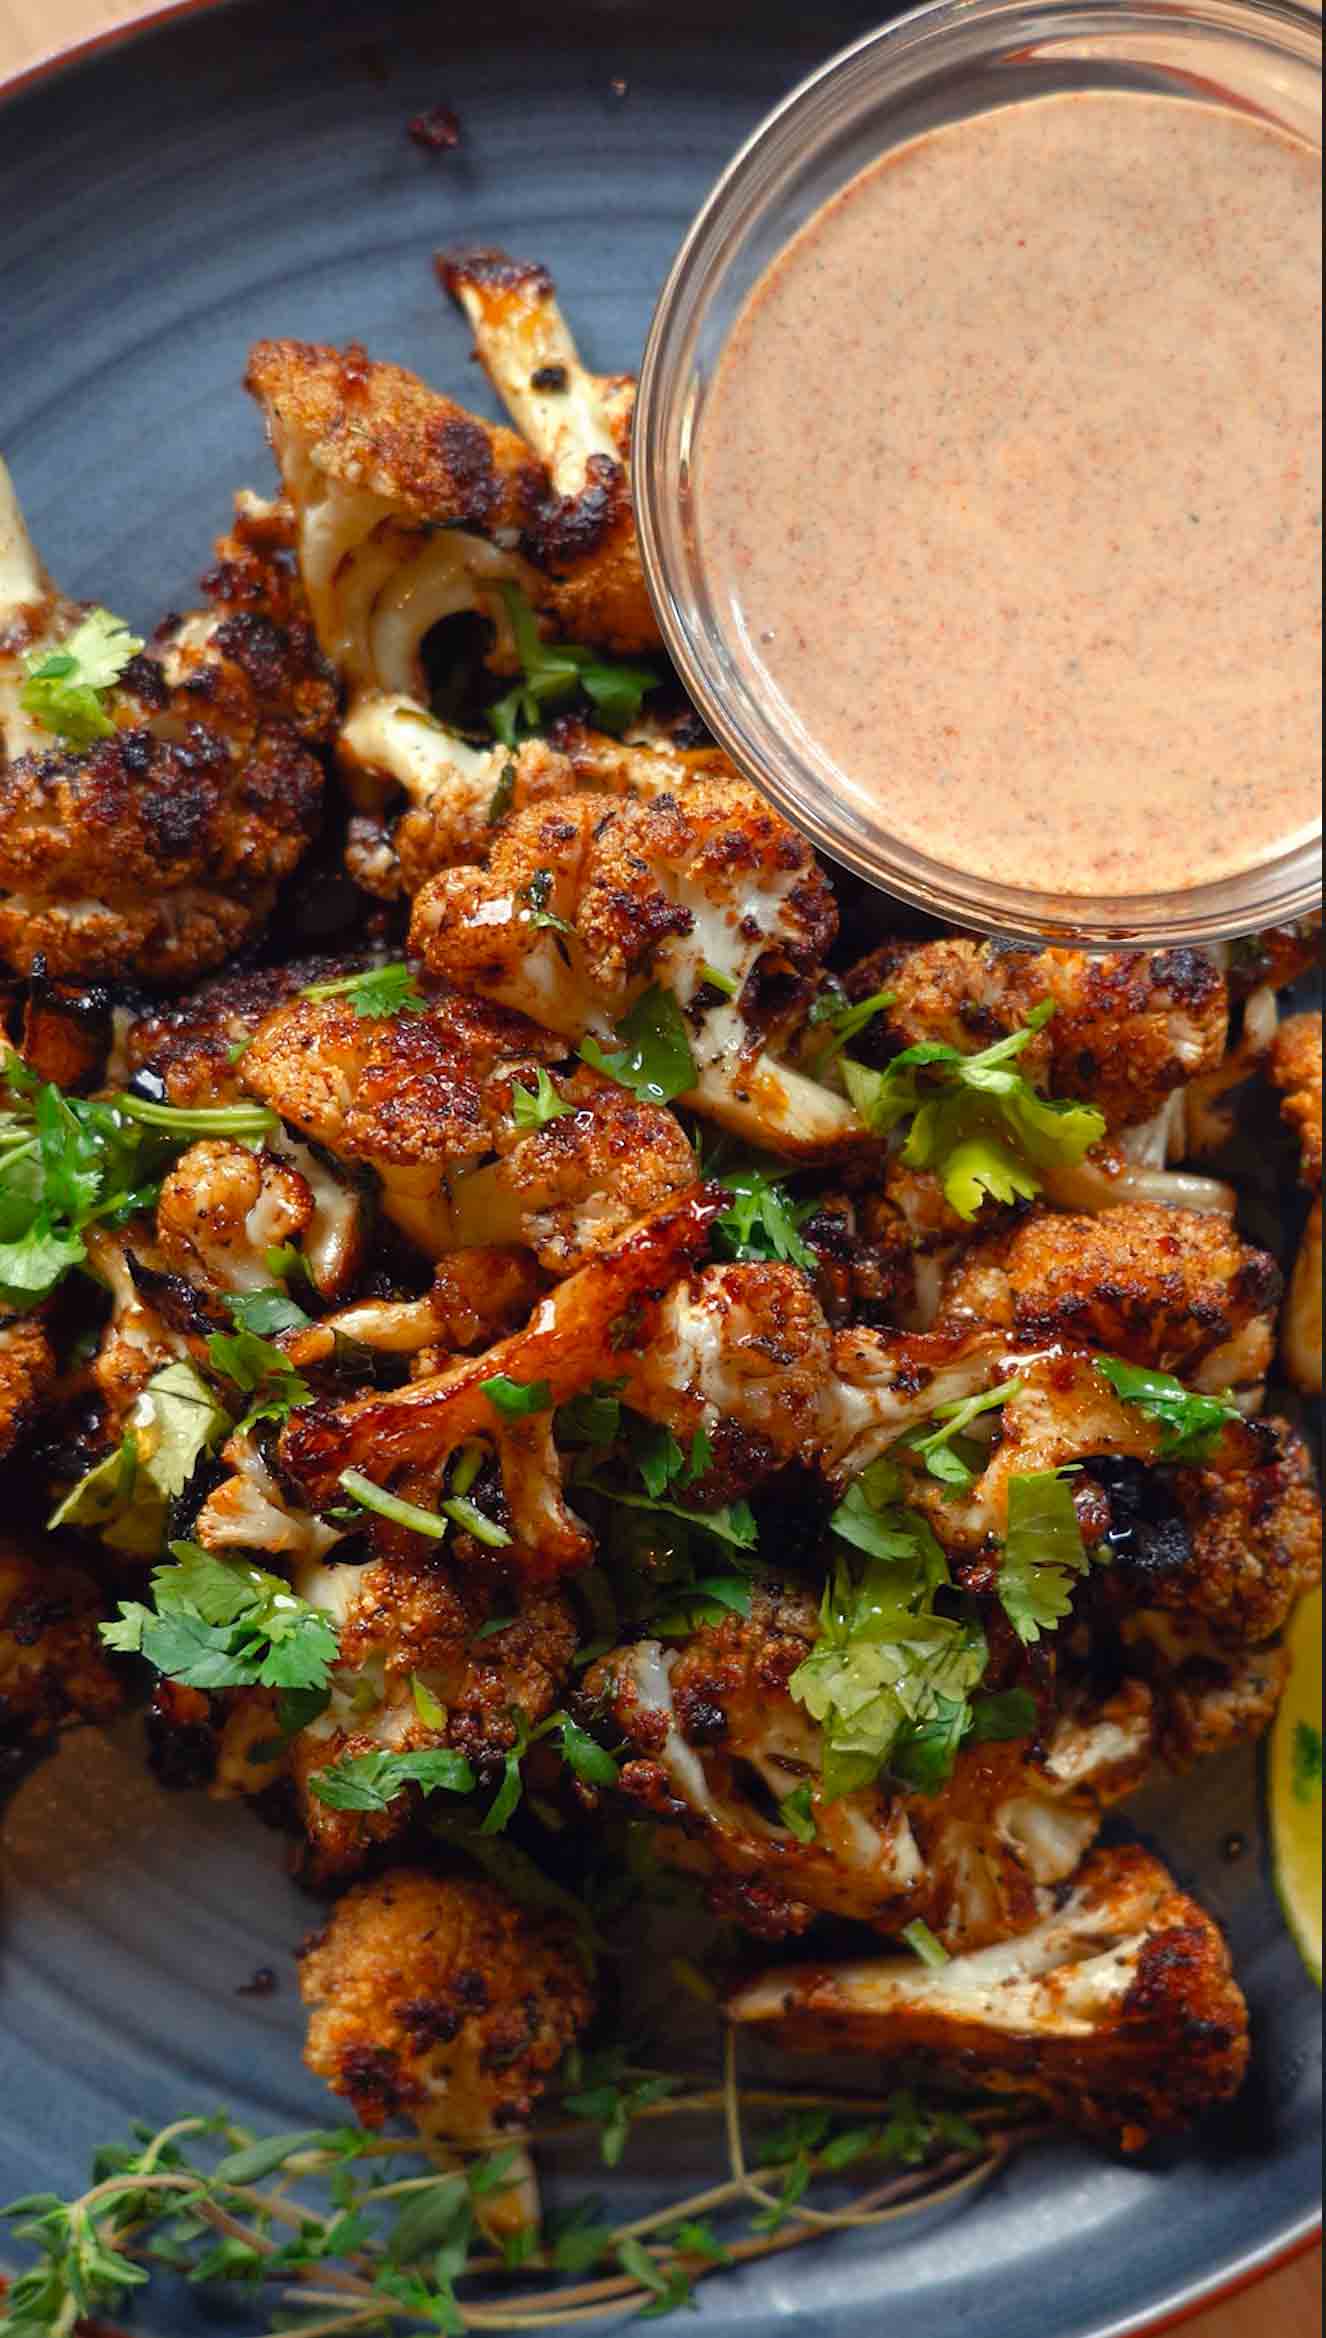
This jerk glazed cauliflower is about to become your new favorite way to eat vegetables, and even the meat lovers in your life won't be able to stop reaching for it! Crispy, caramelized cauliflower florets get seasoned with Flora and Mana's Jamaican Jerk Joy seasoning, smoked paprika, and fresh garlic before roasting at a high 450°F until they're deeply golden and slightly charred on the edges. That high heat is everything here because it caramelizes the natural sugars in the cauliflower and creates those irresistible crispy edges while keeping the inside tender. Once roasted to perfection, the cauliflower gets tossed in the most incredible spicy sweet glaze that's buttery, garlicky, and packed with layers of heat and sweetness. The glaze starts with butter and optional herb oil cubes (which add incredible depth if you have them), then you add more Jamaican Jerk Joy seasoning, fresh garlic, honey, thinly sliced habanero pepper, fresh thyme, and a squeeze of lemon juice. Everything simmers together until it's fragrant and slightly thickened into this gorgeous, glossy glaze that coats every single floret in bold, tropical flavor. The Jamaican Jerk Joy seasoning in both the roasting mix and the glaze means you get layers of jerk flavor that build with every bite. Tossing the hot roasted cauliflower in that warm glaze is one of the most satisfying moments in cooking because everything comes together so perfectly! To serve, you drizzle Taste of Sora hot honey over the top for extra floral heat, scatter fresh cilantro all over, and add lime wedges on the side for squeezing. The jerk mayo on the side (made with just mayo, lemon juice, jerk seasoning, and smoked paprika) is the perfect cool, creamy dip that balances all that spice and heat. Whether you serve this as an appetizer, a side dish, or the main event over rice, this jerk glazed cauliflower is bold, beautiful, and absolutely addictive!
Frequently Asked Questions
Q: How do I get the cauliflower really crispy?
A: There are three non-negotiable rules for perfectly crispy roasted cauliflower! First, wash and rinse your cauliflower but make sure to pat it completely dry with paper towels before seasoning. Any moisture will steam the cauliflower instead of roasting it, which means soggy instead of crispy. Second, don't crowd the baking sheet. The florets need space around them for hot air to circulate, so spread them in a single layer with a little gap between each piece. Use two baking sheets if needed. Third, roast at a high temperature (450°F) and don't open the oven too early. Flip halfway through for even browning on both sides. Following all three rules will give you perfectly crispy, caramelized edges every time!
Q: How spicy is this dish and can I adjust the heat?
A: With a whole habanero in the glaze and jerk seasoning in both the roasting mix and the glaze, this dish has a good amount of heat! Flora and Mana's Jamaican Jerk Joy seasoning is bold and flavorful with a warm spice level. For less heat, use just half a habanero or swap it for a milder pepper like jalapeño. You can also reduce the Jamaican Jerk Joy to 1 teaspoon in each component. For more heat, keep the habanero seeds in or add an extra one. The jerk mayo is cooling and creamy which helps balance the heat, and the honey adds sweetness that tames the spice. Adjust everything to your family's preference!
Q: What are herb oil cubes and where do I get them?
A: Herb oil cubes are frozen cubes of herbs blended with olive oil that you can pop straight into a pan from the freezer. They're incredibly convenient for adding fresh herb flavor without chopping, and they melt beautifully into sauces and glazes. You can find them in the frozen section of most grocery stores, often near the frozen herbs. If you can't find them, just use a tablespoon of good quality olive oil infused with fresh herbs, or add a teaspoon of any fresh chopped herbs directly to the glaze. They're optional in this recipe, so don't worry if you skip them entirely!
Q: Can I make this vegan?
A: Almost there already! To make this fully vegan, swap the butter in the glaze for vegan butter or just use extra olive oil. Replace the mayo in the jerk mayo with vegan mayo (there are some really great options available now). Use maple syrup instead of honey in the glaze and swap the hot honey drizzle for a drizzle of maple syrup mixed with a pinch of cayenne. Everything else in the recipe is already plant-based. The flavor will be just as bold and delicious, and you'll have a completely vegan dish that everyone at the table can enjoy!
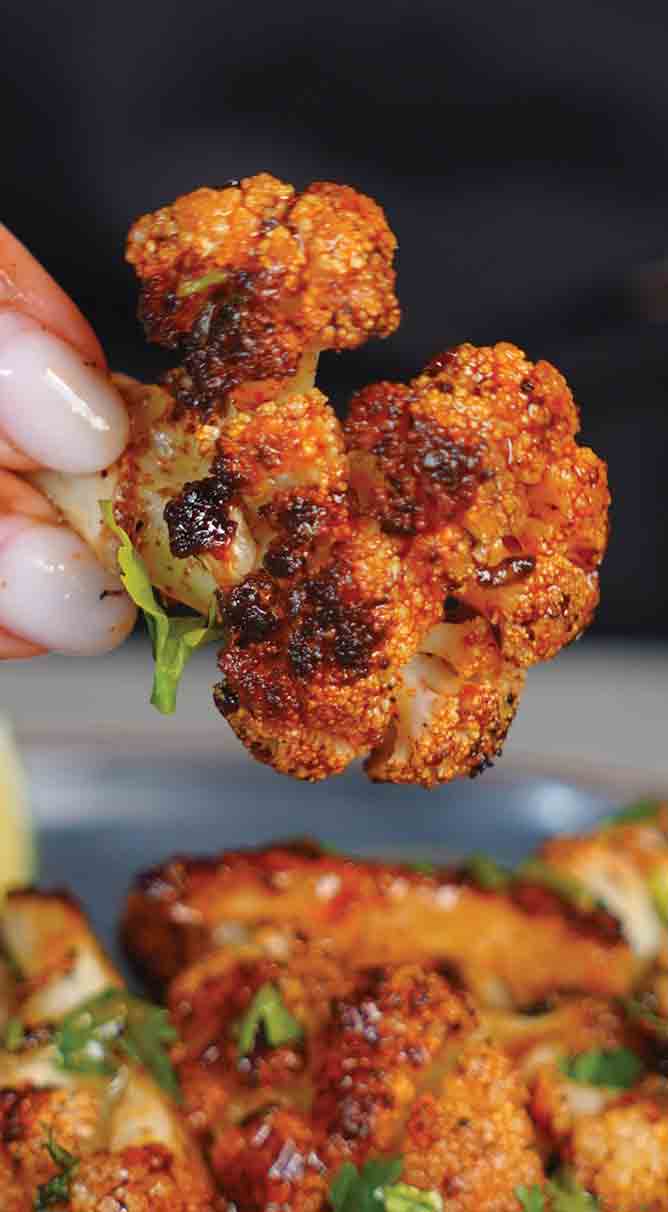
This jerk glazed cauliflower is crispy, caramelized, and packed with bold Caribbean flavor! Cauliflower roasted at 450°F with Flora and Mana's Jamaican Jerk Joy seasoning until golden and crispy, then tossed in a buttery spicy sweet honey glaze with habanero and fresh thyme. Drizzled with hot honey and served with creamy jerk mayo. Incredibly addictive!
Rate This Recipe!
Preparations
Prep Time:
10 minutes
Cook Time:
30 minutes
Total Time:
40 minutes
Cuisine:
Caribbean-inspired
Course:
Appetizer, Side Dish
Calories:
220 kcal (approx. per serving)
Servings:
4
Author:
Ronica Rupan
Ingredients
Ingredients
For the Roasted Cauliflower:
- 1 large head cauliflower, cut into bite-sized florets
- 1½ tablespoons Flora and Mana's Jamaican Jerk Joy seasoning
- 3 cloves garlic, minced
- 1 teaspoon smoked paprika
- ¼ cup olive oil
- Kosher salt, to taste
For the Spicy Sweet Glaze:
- 2 tablespoons unsalted butter
- Herb oil cubes, optional
- 3 cloves garlic, minced
- 3 tablespoons honey
- 1½ teaspoons Flora and Mana's Jamaican Jerk Joy seasoning
- 1 habanero pepper, finely sliced (adjust to heat preference)
- Juice of ½ lemon
- Few sprigs of fresh thyme
For the Jerk Mayo:
- 3 tablespoons mayonnaise
- Juice of ½ lemon
- 1-2 teaspoons wet or dry jerk seasoning
- 1 teaspoon smoked paprika
For Serving:
- Hot honey (for drizzling)
- Fresh cilantro, chopped
- Lime wedges
Instructions
- Preheat the Oven Preheat your oven to 450°F (230°C). This high temperature is key for getting that gorgeous caramelization and crispy edges on the cauliflower. Line a large baking sheet (or two if needed) with parchment paper.
- Prep the Cauliflower Cut the cauliflower into bite-sized florets, trying to keep them roughly the same size so they cook evenly. Rinse them under cold water, then spread them out on a clean kitchen towel or paper towels and pat them completely dry. This step is crucial! Any moisture left on the cauliflower will steam it instead of roasting it, which means soggy instead of crispy.
- Season the Cauliflower In a large bowl, toss the completely dry cauliflower florets with the Jamaican Jerk Joy seasoning, minced garlic, smoked paprika, and olive oil. Toss until every piece is evenly coated. Season with a pinch of salt to taste.
- Roast the Cauliflower Spread the seasoned cauliflower in a single layer on your prepared baking sheet, making sure the pieces aren't touching each other. Don't crowd the pan! If they're too close together, they'll steam instead of roast. Use a second baking sheet if needed. Roast for 25 minutes, flipping the pieces halfway through at the 12-minute mark, until the cauliflower is deeply golden brown with crispy, slightly charred edges. It should smell incredible!
- Make the Jerk Mayo While the cauliflower roasts, make your jerk mayo. In a small bowl, mix together the mayonnaise, lemon juice, jerk seasoning, and smoked paprika until completely combined and smooth. Taste and adjust the jerk seasoning to your preference. Cover and refrigerate until ready to serve.
- Make the Spicy Sweet Glaze About 5 minutes before the cauliflower is done, start your glaze. In a medium skillet over medium heat, melt the butter (and herb oil cubes if using). Add the minced garlic and sliced habanero pepper. Cook for about 1 minute, stirring, until fragrant. Add the honey, Jamaican Jerk Joy seasoning, lemon juice, and fresh thyme sprigs. Stir everything together and let it simmer for 3-4 minutes until the glaze is slightly thickened and incredibly fragrant. Remove the thyme sprigs.
- Toss in the Glaze Remove the roasted cauliflower from the oven. Immediately transfer the hot cauliflower into the skillet with the warm glaze. Toss everything together until every single floret is coated in that gorgeous, glossy, spicy sweet glaze.
- Serve Transfer the glazed cauliflower to a serving plate or bowl. Drizzle hot honey generously over the top. Scatter fresh chopped cilantro all over. Add lime wedges on the side for squeezing. Serve the jerk mayo on the side for dipping. Enjoy immediately while everything is hot and crispy!
Peach Cobbler Cookies
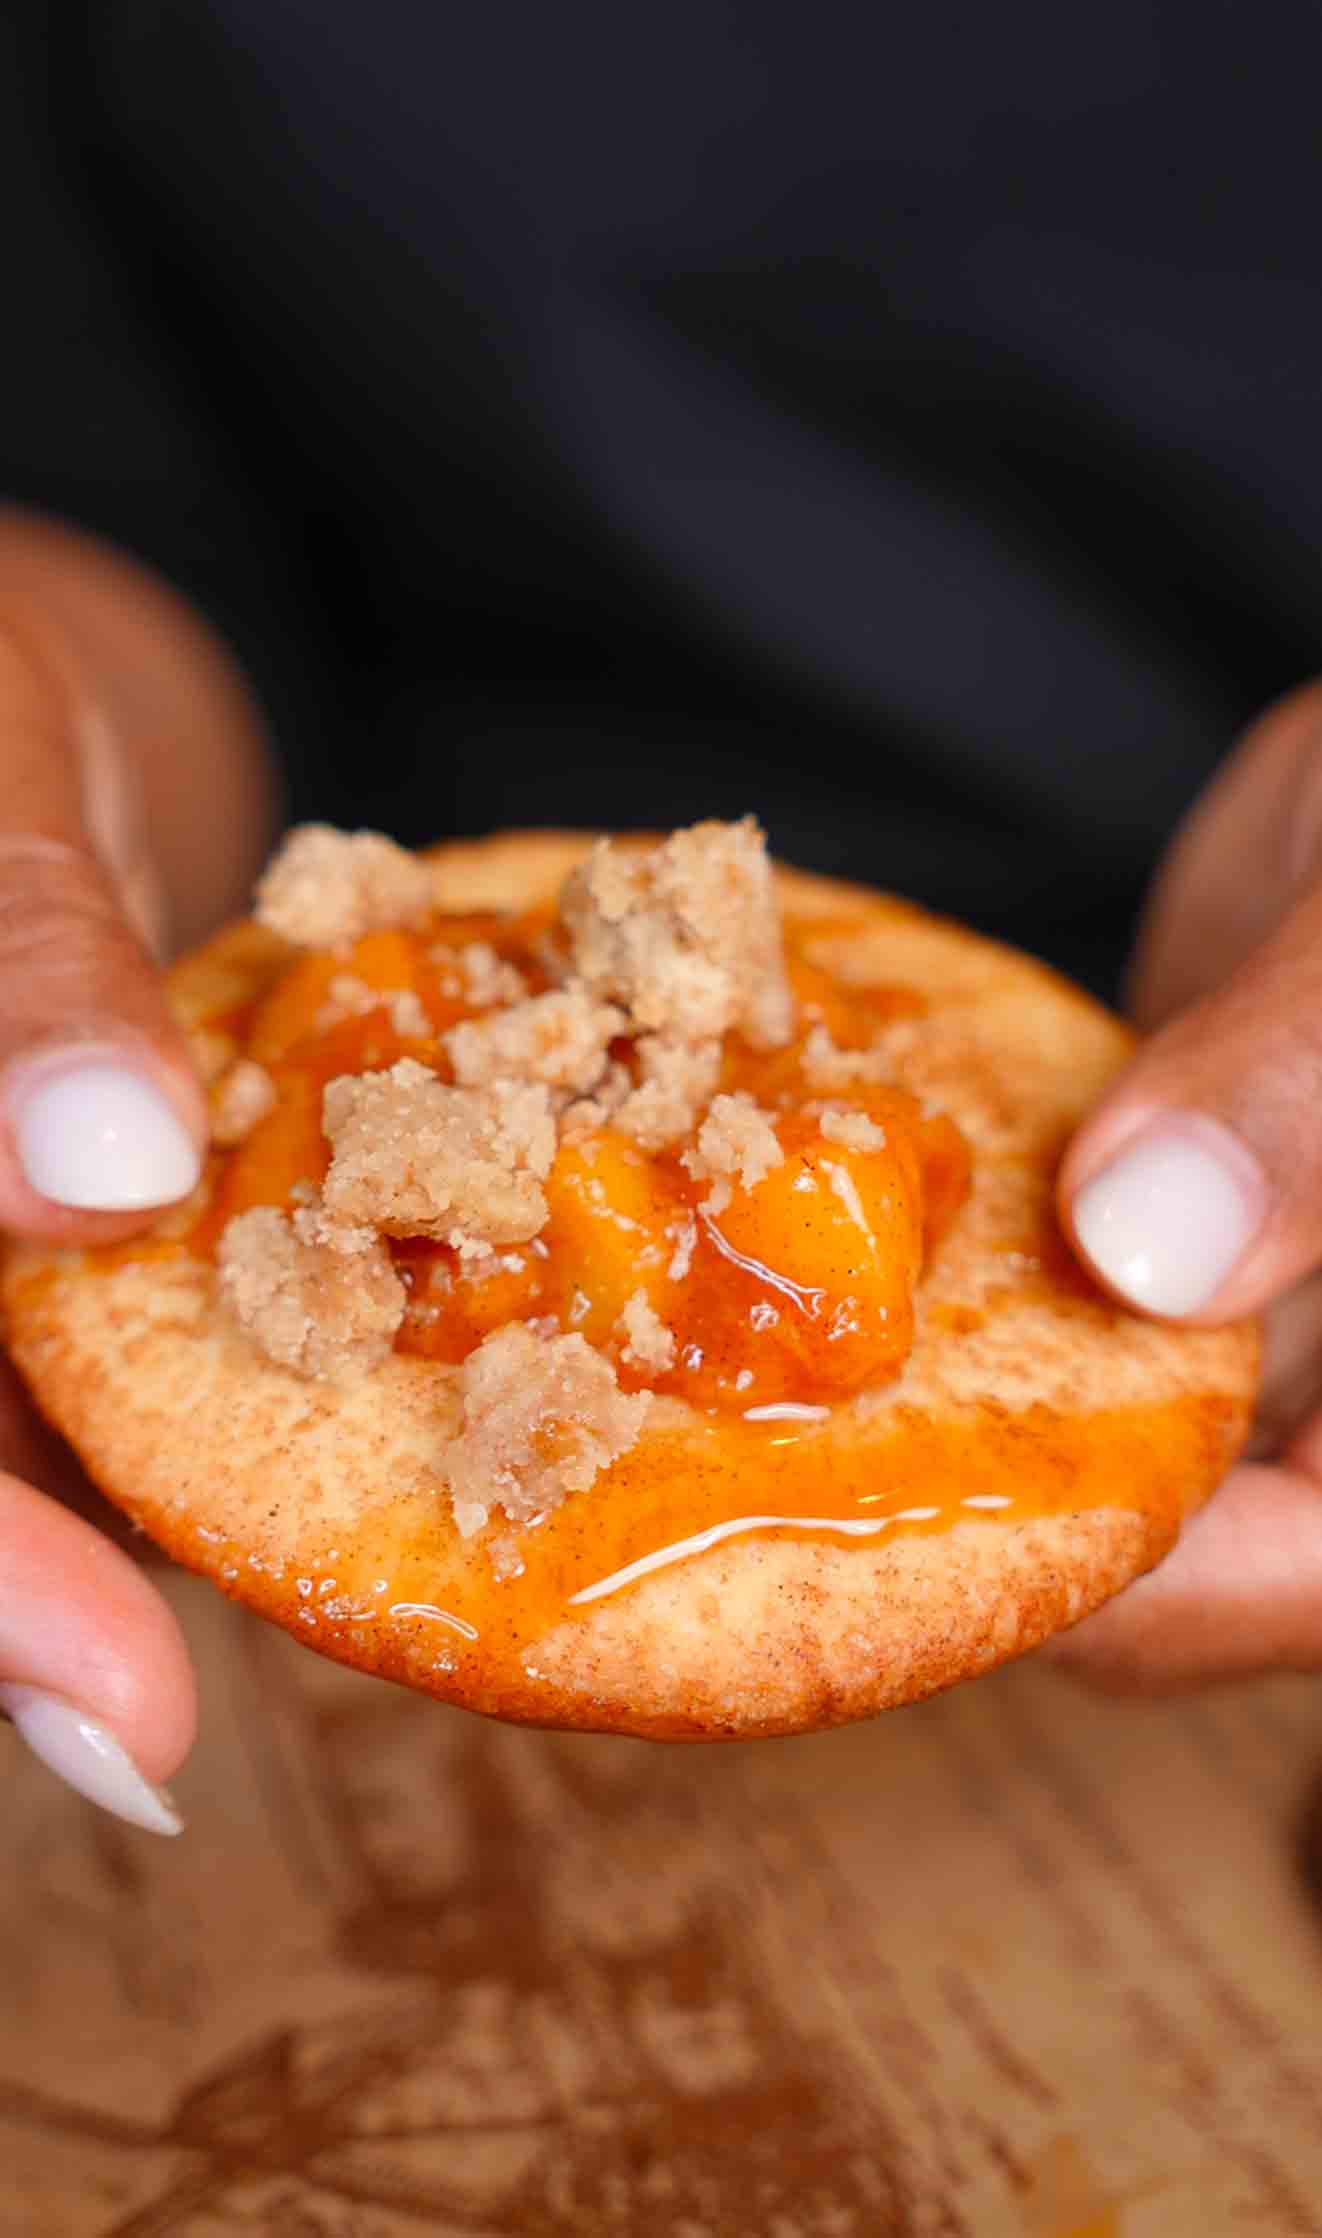
These peach cobbler cookies are the most genius dessert mashup that combines everything you love about classic peach cobbler into one incredible handheld cookie! Imagine a thick, buttery sugar cookie rolled in cinnamon turbinado sugar for a slightly crunchy, sparkly exterior, topped with a jammy homemade peach filling that's sweet, tangy, and warmly spiced, then finished with crumbly cinnamon streusel, a drizzle of rich brown sugar caramel sauce, and a pinch of flaky salt. Every single element is made from scratch and every single bite is pure heaven. The cookie base starts with softened butter creamed with granulated sugar until incredibly fluffy, then eggs and vanilla paste (not extract, the paste gives you those beautiful flecks and more intense flavor) get beaten in before the flour mixture goes in. The dough gets rolled into balls and coated in a cinnamon turbinado sugar mixture before baking, which creates this gorgeous, slightly crunchy, caramelized crust that's absolutely addictive. While the cookies bake and cool, you make the jammy peach filling by cooking fresh peaches with brown sugar, cinnamon, lemon juice, and vanilla paste until they're soft and syrupy, then thickening everything with a cornstarch slurry so it holds on top of the cookie without running everywhere. The cinnamon streusel is a simple mix of melted butter, brown sugar, flour, cinnamon, and salt that gets baked on a tray until it's golden and crumbly, perfect for sprinkling over the top. And the caramel sauce is a dreamy combination of brown sugar, butter, milk, and vanilla that comes together in minutes and adds this incredible buttery sweetness that ties every component together. Assembly is the most satisfying part: you place a generous spoonful of chilled peach filling right in the center of each cooled cookie, add a handful of crumbly streusel on top, drizzle that gorgeous caramel sauce over everything, and finish with a pinch of flaky salt that makes all the flavors pop. These cookies are perfect for summer when peaches are at their peak, but honestly they're so good you'll want to make them year-round with whatever peaches you can find!
Frequently Asked Questions
Q: Can I use canned or frozen peaches instead of fresh?
A: Yes! While fresh ripe peaches give you the best flavor and texture, canned and frozen peaches both work great when fresh aren't available. For canned peaches, drain them really well and pat dry with paper towels to remove excess syrup, then reduce the brown sugar to 2 tablespoons since canned peaches are already sweetened. For frozen peaches, thaw completely and drain any excess liquid before cooking. You may need to cook the filling a minute or two longer to evaporate the extra moisture. The filling might be slightly less vibrant in color but will still be absolutely delicious!
Q: Can I make the components ahead of time?
A: Absolutely, and I actually recommend it! These cookies have several components that all store beautifully separately. The caramel sauce can be made up to 2 weeks ahead and stored in a jar in the fridge (just warm it slightly before drizzling). The streusel keeps in an airtight container at room temperature for up to a week. The peach filling can be made 3 days ahead and refrigerated. The baked cookies keep well in an airtight container at room temperature for up to 4 days. Assemble everything right before serving for the best presentation and texture since the peach filling can make the cookies soft if they sit too long assembled.
Q: My caramel sauce isn't thickening, what went wrong?
A: A few things can affect caramel consistency. First, make sure you're cooking the sugar long enough to reach that amber color before adding the butter, which takes 8-12 minutes on medium heat. Don't stir the sugar while it's cooking or it can crystallize. If your caramel is too thin after cooling, put it back on the heat and simmer for a few more minutes. If it's too thick, whisk in a splash more milk. The caramel will also thicken considerably as it cools, so what looks thin when warm will be the perfect drizzling consistency once it's cooled for about 10 minutes. Store it in a jar and reheat gently when you're ready to use it.
Q: How do I keep the cookies from spreading too much during baking?
A: The key to thick, pillowy cookies that don't spread too flat is making sure your butter is properly softened but not melted or too warm. It should leave an indent when you press your finger into it but not be shiny or greasy looking. Properly creaming the butter and sugar for a full 2-3 minutes also helps. If your kitchen is warm and the dough feels soft and greasy, refrigerate it for 30 minutes before rolling and baking. Pressing the dough balls to exactly ⅓ inch thick before baking also helps control the spread and gives you that perfect thick cookie base that can hold all those gorgeous toppings.
These peach cobbler cookies are the ultimate summer dessert mashup! Thick, buttery sugar cookies rolled in cinnamon turbinado sugar, topped with jammy homemade peach filling, crumbly cinnamon streusel, rich caramel sauce, and flaky salt. Every single element is made from scratch and every bite is absolutely incredible!
Rate This Recipe!
Preparations
Prep Time:
30 minutes
Cook Time:
25 minutes
Total Time:
55 minutes (plus cooling and chilling time)
Cuisine:
American
Course:
Dessert
Calories:
380 kcal (approx. per assembled cookie)
Servings:
24 cookies
Author:
Ronica Rupan
Ingredients
Ingredients
For the Peach Filling:
- 3 ripe peaches, peeled and diced
- ¼ cup brown sugar
- 1 teaspoon ground cinnamon
- 1 teaspoon vanilla paste
- 1 teaspoon cornstarch mixed with 2 teaspoons water (slurry)
- Juice of ½ lemon
For the Cookie Dough:
- 3 cups all-purpose flour
- 1½ teaspoons baking powder
- 1 teaspoon kosher salt
- 1½ cups (3 sticks) unsalted butter, softened to room temperature
- 1½ cups granulated sugar
- 2 large eggs, at room temperature
- 1 tablespoon vanilla paste
For the Dough Rolling Mix:
- ½ cup turbinado sugar
- 2 teaspoons ground cinnamon
For the Cinnamon Streusel:
- ½ cup salted butter, melted
- ⅔ cup brown sugar
- 1 cup plus 2 tablespoons all-purpose flour
- ½ teaspoon ground cinnamon
- Pinch of kosher salt
For the Caramel Sauce:
- 1 cup brown sugar
- ½ cup unsalted butter
- ¼ cup milk
- 1 teaspoon vanilla paste
For Topping:
- Flaky sea salt
Instructions
- Make the Caramel Sauce In a medium saucepan, combine the brown sugar and butter over medium heat. Cook, stirring occasionally, until the butter melts and the sugar dissolves completely, about 3-4 minutes. Continue cooking, stirring frequently, until the mixture turns a deep amber color and smells like caramel, about 8-12 minutes. Watch it carefully as it can burn quickly! Remove from heat and carefully whisk in the milk (it will bubble up). Stir in the vanilla paste and a pinch of salt. Let cool for 10 minutes until slightly thickened, then transfer to a jar. It will thicken more as it cools.
- Make the Cinnamon Streusel Preheat your oven to 350°F (175°C). In a medium bowl, combine the melted butter, brown sugar, flour, cinnamon, and salt. Mix until the mixture comes together in clumps that look like wet sand. Spread the mixture in an even layer on a parchment-lined baking sheet, breaking it into small clumps as you go. Bake for 8 minutes until golden and fragrant. Remove from the oven and let cool completely on the pan. It will crisp up as it cools. Once cool, break into small crumbles and set aside.
- Make the Cookie Dough Increase the oven temperature to 375°F (190°C). Line two large baking sheets with parchment paper. In a medium bowl, whisk together the flour, baking powder, and salt. Set aside. In a large bowl using a hand mixer or stand mixer fitted with the paddle attachment, cream the softened butter and granulated sugar together on medium-high speed for 2-3 minutes until light and fluffy. Add the eggs one at a time, beating well after each addition. Add the vanilla paste and beat until combined. Reduce the mixer speed to low and add the flour mixture, mixing just until the dough comes together. Don't overmix!
- Roll and Bake the Cookies In a shallow bowl, mix together the turbinado sugar and cinnamon for rolling. Scoop the dough into 1-inch balls (about 1½ tablespoons each). Roll each ball in the cinnamon turbinado sugar mixture until completely coated. Place on the prepared baking sheets, spacing them about 2 inches apart. Use the palm of your hand or the bottom of a glass to press each ball down to about ⅓ inch thick. Bake for 9-11 minutes until the edges are just set and the centers look slightly underdone. They'll firm up as they cool! Let the cookies cool on the baking sheets for 5 minutes, then transfer to a wire rack to cool completely.
- Make the Peach Filling In a small saucepan over medium heat, combine the diced peaches, brown sugar, cinnamon, and lemon juice. Cook, stirring occasionally, for about 6 minutes until the peaches soften and release their juices. In a small bowl, mix the cornstarch and water together to create a slurry. Pour the slurry into the peach mixture and stir for about 1 minute until the filling thickens. Remove from heat and stir in the vanilla paste. Transfer to a bowl and refrigerate until completely chilled, at least 30 minutes. You want it cold so it doesn't make the cookies soggy.
- Assemble the Cookies Once all components are ready and the cookies are completely cool, it's time to assemble! Spoon a generous tablespoon of the chilled peach filling right into the center of each cookie, letting it mound up slightly. Sprinkle a generous pinch of the crumbly cinnamon streusel over the peach filling. Drizzle the caramel sauce over the top in a zigzag pattern (warm it slightly if it's too thick). Finish with a pinch of flaky sea salt over everything. Serve immediately for the best texture and presentation!
Biryani Arancini
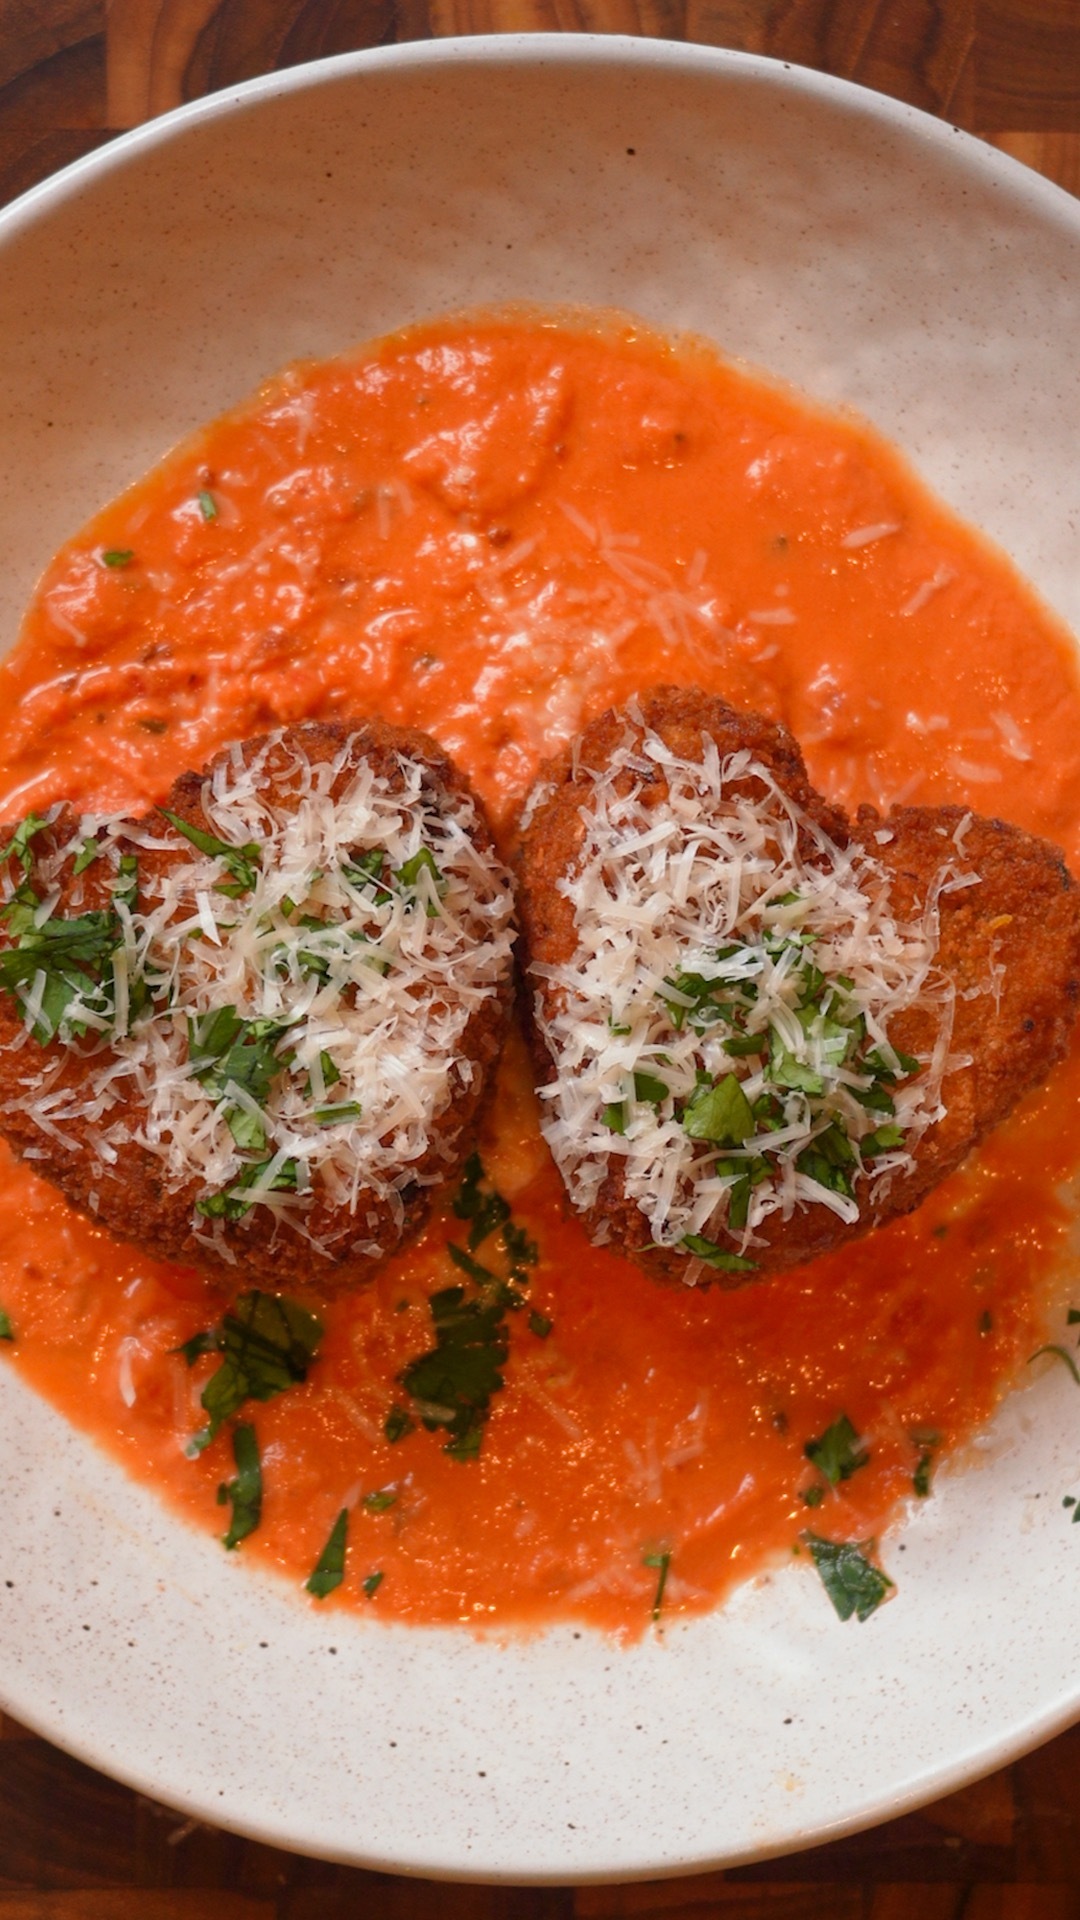
These biryani arancini are the most creative, delicious fusion recipe that combines the rich, aromatic flavors of Indian biryani with the crispy, golden comfort of Italian arancini, and the result is absolutely incredible! Each piece is packed with spiced basmati rice, tender shredded chicken, and warm aromatics like cumin, turmeric, garam masala, cardamom, and cinnamon, with a hidden pocket of melty cheese right in the center that gives you the most amazing surprise when you bite in. And the best part? They're shaped into hearts which makes them almost too cute to eat! The filling starts with ghee heated in a pan with cumin seeds until they sizzle and pop, releasing their fragrant oils. Then you build this incredible base with onion, Thai chili pepper, garlic, and ginger before adding the spice blend and cooking it until everything is fragrant and toasted. Crushed tomatoes and fresh curry leaves go in next and simmer until the mixture becomes thick and jammy with concentrated flavor. Shredded cooked chicken gets folded in along with the cooked basmati rice and fresh cilantro, and the whole thing gets seasoned and cooled completely before shaping. Once cooled, you take a spoonful of filling, flatten it in your palm, tuck a pinch of grated mozzarella or cheddar right in the center, then press it into a heart shape using a mold or just your hands. After a quick freeze for 10-15 minutes to firm everything up, each heart gets coated in seasoned flour, dipped in beaten egg, then rolled in breadcrumbs. For extra crispiness, you can double coat them, and trust me, the extra step is absolutely worth it! They fry in batches at 350°F for just 2 minutes per side until they're deep golden brown and incredibly crispy on the outside while staying warm and melty on the inside. Serve them hot with mint chutney, tamarind sauce, or cooling raita for dipping and watch them disappear in seconds. These are perfect for family gatherings, dinner parties, game day snacking, or whenever you want something that's going to seriously impress everyone at the table!
Frequently Asked Questions
Q: Can I make these vegetarian?
A: Absolutely! These arancini are super easy to make vegetarian. Replace the shredded chicken with crumbled paneer (about 1¼ cups), which soaks up all those gorgeous spices beautifully. You can also use a mix of finely chopped vegetables like peas, carrots, cauliflower, and potatoes, or use chickpeas for extra protein. For paneer, crumble it into small pieces and add it the same way you'd add the chicken. For vegetables, make sure they're cooked and any excess moisture is removed before mixing them into the rice so your filling doesn't become too wet. Everything else in the recipe stays exactly the same!
Q: Can I bake these instead of frying?
A: Yes! For a lighter version, you can bake them instead of frying. After breading, place the arancini on a parchment-lined baking sheet and spray generously with cooking spray or brush with oil on all sides. Bake at 400°F for 20-25 minutes, flipping carefully halfway through, until golden brown and crispy. They won't be quite as crispy as the fried version but they'll still be delicious. An air fryer also works great at 375°F for 12-15 minutes, shaking the basket halfway through. For air frying, make sure not to overcrowd the basket so the hot air can circulate around each piece.
Q: Why do I need to freeze the hearts before breading?
A: Freezing is essential for keeping the hearts from falling apart during the breading and frying process! The filling is soft and sticky, and without chilling, it's almost impossible to coat without the shape changing or the filling squishing out. Just 10-15 minutes in the freezer firms everything up enough to hold their shape beautifully through the breading station and into the hot oil. It also helps the cheese stay in the center instead of melting out during frying. If you have more time, you can freeze them for up to an hour which makes them even easier to handle.
Q: What can I serve these with?
A: The classic pairings are mint chutney, tamarind sauce, and cooling raita, all of which are incredible with these. Mint chutney adds fresh, herby brightness that cuts through the richness beautifully. Tamarind sauce adds sweet and tangy depth. Raita (yogurt with cucumber and herbs) provides a cooling contrast to the warm spices. You can also serve them with mango chutney for something sweeter, a simple yogurt dip with garlic and cumin, or even a spicy sriracha mayo for a fusion twist. Set out several dipping options and let everyone find their favorite combination!
These biryani arancini are the ultimate Indian-Italian fusion! Crispy, golden rice balls made with spiced basmati rice, tender shredded chicken, and warm biryani spices, shaped into adorable hearts and stuffed with melty cheese. Double coated in breadcrumbs and fried until golden. Serve with mint chutney or raita for the perfect bite!
Rate This Recipe!
Preparations
Prep Time:
45 minutes
Cook Time:
30 minutes
Total Time:
1 hour 30 minutes (including freezing and cooling time)
Cuisine:
Indian-Italian Fusion
Course:
Appetizer, Snack, Main Course
Calories:
280 kcal (approx. per piece)
Servings:
10 pieces
Author:
Ronica Rupan
Ingredients
Ingredients
For the Biryani Filling:
- 3 tablespoons ghee
- 1 tablespoon cumin seeds
- 1 onion, finely chopped
- 1 Thai chile pepper, finely chopped
- 1 tablespoon fresh garlic, finely chopped
- 1 tablespoon fresh ginger, finely chopped
- 1 teaspoon ground turmeric
- 1 teaspoon Kashmiri red chili powder
- 1 teaspoon garam masala
- ½ teaspoon ground cumin
- ½ teaspoon ground cinnamon
- ½ teaspoon ground cardamom
- 1 (14-ounce) can crushed tomatoes
- ½ cup water
- 1 tablespoon fresh curry leaves
- 1¼ cups shredded cooked chicken (or paneer/vegetables for vegetarian)
- Kosher salt, to taste
- 1½ cups cooked basmati rice
- ¼ cup fresh cilantro, chopped
For the Breading:
- ½ cup grated mozzarella or cheddar cheese
- 1 cup all-purpose flour
- Kosher salt, to taste
- Black pepper, to taste
- 2 large eggs, beaten
- 1 cup breadcrumbs
- Neutral cooking oil (vegetable oil), for deep frying
For Serving:
- Mint chutney
- Tamarind sauce
- Raita (yogurt dip)
Instructions
- Build the Biryani Base Heat a large pan over medium heat and add the ghee. Once melted and shimmering, add the cumin seeds and let them sizzle for about 30 seconds until fragrant and popping. Add the finely chopped onion and Thai chile pepper. Cook, stirring occasionally, for 4-5 minutes until the onion turns golden brown and caramelized.
- Add the Aromatics and Spices Stir in the chopped garlic, ginger, ground turmeric, Kashmiri red chili powder, garam masala, ground cumin, ground cinnamon, and ground cardamom. Cook, stirring constantly, for 1-2 minutes until everything is fragrant and the spices are toasted. This step blooms the spices and is crucial for developing deep, complex flavor.
- Simmer the Sauce Add the crushed tomatoes, water, and fresh curry leaves to the pan. Stir everything together and reduce the heat to medium-low. Let the mixture simmer, stirring occasionally, for 5-7 minutes until it thickens and becomes jammy and concentrated. The oil should start to separate slightly from the sauce around the edges which means the base is ready.
- Add Chicken and Rice Stir in the shredded cooked chicken and cook for 3-4 minutes, stirring occasionally, until it's well combined and heated through. Season generously with kosher salt to taste. Fold in the cooked basmati rice and chopped cilantro, stirring well until everything is evenly combined and the rice is coated in all those gorgeous spices. Remove from heat and spread the mixture onto a baking sheet or large plate to cool completely, about 15 minutes. The filling needs to be completely cool before shaping.
- Shape the Hearts Take about 2 tablespoons of the cooled biryani filling and flatten it in your palm into a small disc. Place about 1 tablespoon of grated mozzarella or cheddar cheese right in the center. Carefully fold the filling up and around the cheese, enclosing it completely so no cheese is visible. Press the filled ball into a heart-shaped mold if you have one. If you don't have a mold, shape into a ball first, then use your fingers to gently pinch the top to form a heart shape. Repeat with the remaining filling to make 10 hearts. Arrange them on a parchment-lined baking sheet and freeze for 10-15 minutes until firm enough to handle easily.
- Set Up the Breading Station While the hearts are in the freezer, set up three shallow bowls in a row. In the first bowl, add the flour seasoned with salt and pepper. In the second bowl, add the beaten eggs. In the third bowl, add the breadcrumbs seasoned with salt and pepper.
- Bread the Hearts Working with one heart at a time, coat it completely in the seasoned flour, shaking off any excess. Dip it into the beaten egg, letting any excess drip off. Roll it in the seasoned breadcrumbs, pressing gently so they adhere all over. For an extra-crispy coating (highly recommended!), dip the breaded heart back into the egg and roll in breadcrumbs one more time. Place the double-breaded hearts back on the baking sheet. Repeat with all remaining hearts.
- Fry Until Golden Pour about 3 inches of neutral oil into a deep frying pan or pot and heat over medium-high heat until it reaches 350°F (175°C). Use a thermometer to check the temperature. Working in batches of 3 (don't overcrowd!), carefully lower the hearts into the hot oil using a slotted spoon. Fry for about 2 minutes per side until they're deep golden brown and incredibly crispy all over. Remove with a slotted spoon and transfer to a paper towel-lined plate to drain. Repeat with remaining hearts, making sure the oil comes back up to temperature between batches.
- Serve Hot Arrange the hot, crispy biryani arancini hearts on a serving platter. Serve immediately with mint chutney, tamarind sauce, and cooling raita on the side for dipping. These are best enjoyed hot when the cheese in the center is still melty!
Marry Me Chocolate Cupcakes

These marry me chocolate cupcakes are so incredibly rich, moist, and deeply chocolatey that they just might make someone fall in love with you! The name says it all. Every element of this recipe has been carefully thought through to create the most extraordinary chocolate cupcake you've ever tasted. These aren't just regular chocolate cupcakes, they're next-level indulgent with layers of chocolate flavor built from three different sources: finely chopped bittersweet baking chocolate, Dutch-process cocoa powder, and instant espresso powder. The espresso doesn't make them taste like coffee at all, it just intensifies and deepens the chocolate flavor in the most incredible way. You start by pouring boiling water over the chopped chocolate, cocoa, and espresso powder and whisking until everything melts into this smooth, glossy, intensely chocolate mixture. This blooming technique draws out maximum flavor from both the chocolate and the cocoa. The batter uses both granulated sugar and light brown sugar for the perfect balance of sweetness and moisture, while sour cream adds tanginess and keeps everything incredibly tender and moist. The combination of vegetable oil and sour cream means these cupcakes stay soft and moist for days, unlike butter-based cupcakes that can dry out. A touch of white vinegar reacts with the baking soda to give these cupcakes a beautiful lift and tender crumb. Two whole eggs plus an extra yolk add richness and structure. Everything comes together into this thick, glossy batter that fills your cupcake pan about three-quarters full and bakes in just 16-18 minutes. The result is perfectly domed cupcakes with a tender, fudgy crumb that's deeply chocolatey in every single bite. Once cooled, you frost them with rich chocolate or vanilla buttercream and decorate with sprinkles and the most adorable little fondant bears that make them absolutely irresistible. These are perfect for birthdays, Valentine's Day, special occasions, or literally any day you want to make someone feel incredibly loved and special!
Frequently Asked Questions
Q: Why does this recipe use both oil and sour cream instead of butter?
A: This combination is the secret to the most incredibly moist cupcakes that stay soft for days! Oil is a liquid fat that stays fluid at room temperature, which keeps cupcakes tender and moist much longer than butter, which solidifies as it cools. Sour cream adds moisture, a subtle tangy flavor that balances the sweetness, and its acidity reacts with the baking soda to give the cupcakes a beautiful, tender crumb. Together they create a texture that's almost fudgy and incredibly soft, which is exactly what you want in a chocolate cupcake. Butter adds flavor, but for texture and moisture, oil and sour cream win every time!
Q: What is Dutch-process cocoa and can I substitute regular cocoa?
A: Dutch-process cocoa has been treated to neutralize its natural acidity, which gives it a darker color, smoother flavor, and more intense chocolate taste compared to natural cocoa powder. It's what gives these cupcakes that deep, rich chocolate color and complex flavor. You can substitute natural unsweetened cocoa powder if that's all you have, but the flavor and color will be slightly different, a bit lighter and more acidic. If you use natural cocoa, you might want to reduce the white vinegar to 1 teaspoon since natural cocoa is already more acidic. Dutch-process cocoa is worth finding at specialty stores or online for the best results!
Q: Can I make these cupcakes ahead of time?
A: Absolutely! The unfrosted cupcakes can be made 2 days ahead and stored in an airtight container at room temperature. They actually get even more moist the day after baking as everything settles. You can also freeze the unfrosted cupcakes for up to 3 months, just wrap them individually in plastic wrap and place in a freezer bag. Thaw at room temperature for a couple of hours before frosting. The buttercream frosting can be made up to a week ahead and stored in the fridge. Let it come to room temperature and give it a quick beat before using. Frost the cupcakes the day you want to serve them for the freshest presentation.
Q: Do I have to use fondant bears and sprinkles for decoration?
A: Of course not! The fondant bears and sprinkles are adorable and add to the marry me theme, but you can decorate these any way you love. Fresh strawberries or raspberries on top look elegant and add a fruity contrast to the rich chocolate. Chocolate shavings or curls are sophisticated and classic. A drizzle of caramel sauce or ganache adds extra indulgence. Edible flowers make them stunning for special occasions. Crushed cookies on top add crunch. Or keep it simple with just a beautiful swirl of buttercream! The cupcakes are the star, the decorations are just the finishing touch.
These marry me chocolate cupcakes are so good they'll make someone fall in love with you! Rich, moist, and deeply chocolatey with bittersweet chocolate, Dutch-process cocoa, and espresso powder for incredible depth of flavor. Incredibly tender from sour cream and oil, topped with chocolate or vanilla buttercream and the cutest fondant bears. Pure love in cupcake form!
Rate This Recipe!
Preparations
Prep Time:
20 minutes
Cook Time:
18 minutes
Total Time:
38 minutes (plus cooling time)
Cuisine:
American
Course:
Dessert
Calories:
320 kcal (approx. per cupcake without frosting)
Servings:
12 cupcakes
Author:
Ronica Rupan
Ingredients
Ingredients
For the Cupcakes:
- 5 ounces bittersweet baking chocolate, finely chopped
- ⅓ cup Dutch-process cocoa powder
- 1 teaspoon instant espresso powder
- ½ cup boiling water
- ¾ cup all-purpose flour, sifted
- ½ cup granulated sugar
- ½ cup packed light brown sugar
- ½ teaspoon fine salt
- ½ teaspoon baking soda
- ½ cup sour cream, at room temperature
- ¼ cup vegetable oil
- 2 large eggs plus 1 egg yolk, at room temperature
- 2 teaspoons white vinegar
- 2 teaspoons vanilla extract
For Decorating:
- Chocolate or vanilla buttercream frosting
- Sprinkles
- Fondant bears (optional but absolutely adorable!)
Instructions
- Bloom the Chocolate Place the finely chopped bittersweet chocolate, Dutch-process cocoa powder, and instant espresso powder in a large heatproof bowl. Pour the boiling water over the mixture and let it sit for 30 seconds, then gently whisk until everything is completely melted and smooth with no lumps. This blooming technique draws out maximum chocolate flavor. Set the mixture aside to cool slightly while you prep the remaining ingredients.
- Preheat and Prep Preheat your oven to 350°F (175°C). Line a 12-cup standard muffin tin with cupcake liners. If you want extra insurance against sticking, give the liners a light spray of cooking spray.
- Mix the Dry Ingredients In a medium bowl, whisk together the sifted all-purpose flour, granulated sugar, light brown sugar, fine salt, and baking soda until well combined. Make sure there are no lumps of brown sugar. Set aside.
- Add Wet Ingredients to Chocolate Into your slightly cooled chocolate mixture, add the sour cream, vegetable oil, eggs, egg yolk, white vinegar, and vanilla extract. Whisk everything together until smooth and well combined. The mixture should be glossy and uniform in color.
- Combine Wet and Dry Add the flour mixture to the chocolate mixture. Using a rubber spatula or wooden spoon, fold everything together gently until just smooth with no dry streaks remaining. Be careful not to overmix! A few gentle folds are all you need. Overmixing develops gluten which makes cupcakes tough instead of tender. The batter will be thick and glossy.
- Fill the Cupcake Pan Divide the batter evenly among the 12 lined cupcake cups, filling each one about three-quarters full. An ice cream scoop makes this really easy and keeps the portions even. Don't overfill or they'll overflow and lose their domed shape.
- Bake Place the pan in your preheated oven and bake for 16-18 minutes. The cupcakes are done when they're domed on top and a toothpick inserted into the center comes out clean or with just a few moist crumbs (not wet batter). Start checking at 16 minutes since every oven is different.
- Cool Completely Remove the cupcakes from the oven and let them cool in the pan for 5 minutes, then carefully transfer them to a wire cooling rack to cool completely. This is really important! Frosting warm cupcakes will cause the buttercream to melt and slide right off. Let them cool for at least an hour before frosting.
- Frost and Decorate Once completely cool, frost each cupcake generously with your chocolate or vanilla buttercream using a piping bag fitted with your favorite tip, or just spread it on with an offset spatula or the back of a spoon. Top with sprinkles and place a little fondant bear on top for the most adorable finishing touch. Now stand back and admire how cute they are before someone eats them all!
- Serve and Enjoy Serve immediately or store in an airtight container. These cupcakes are best enjoyed at room temperature so the buttercream is soft and the cupcake is tender. They will make someone very happy!
Salted Caramel Chocolate Brownies
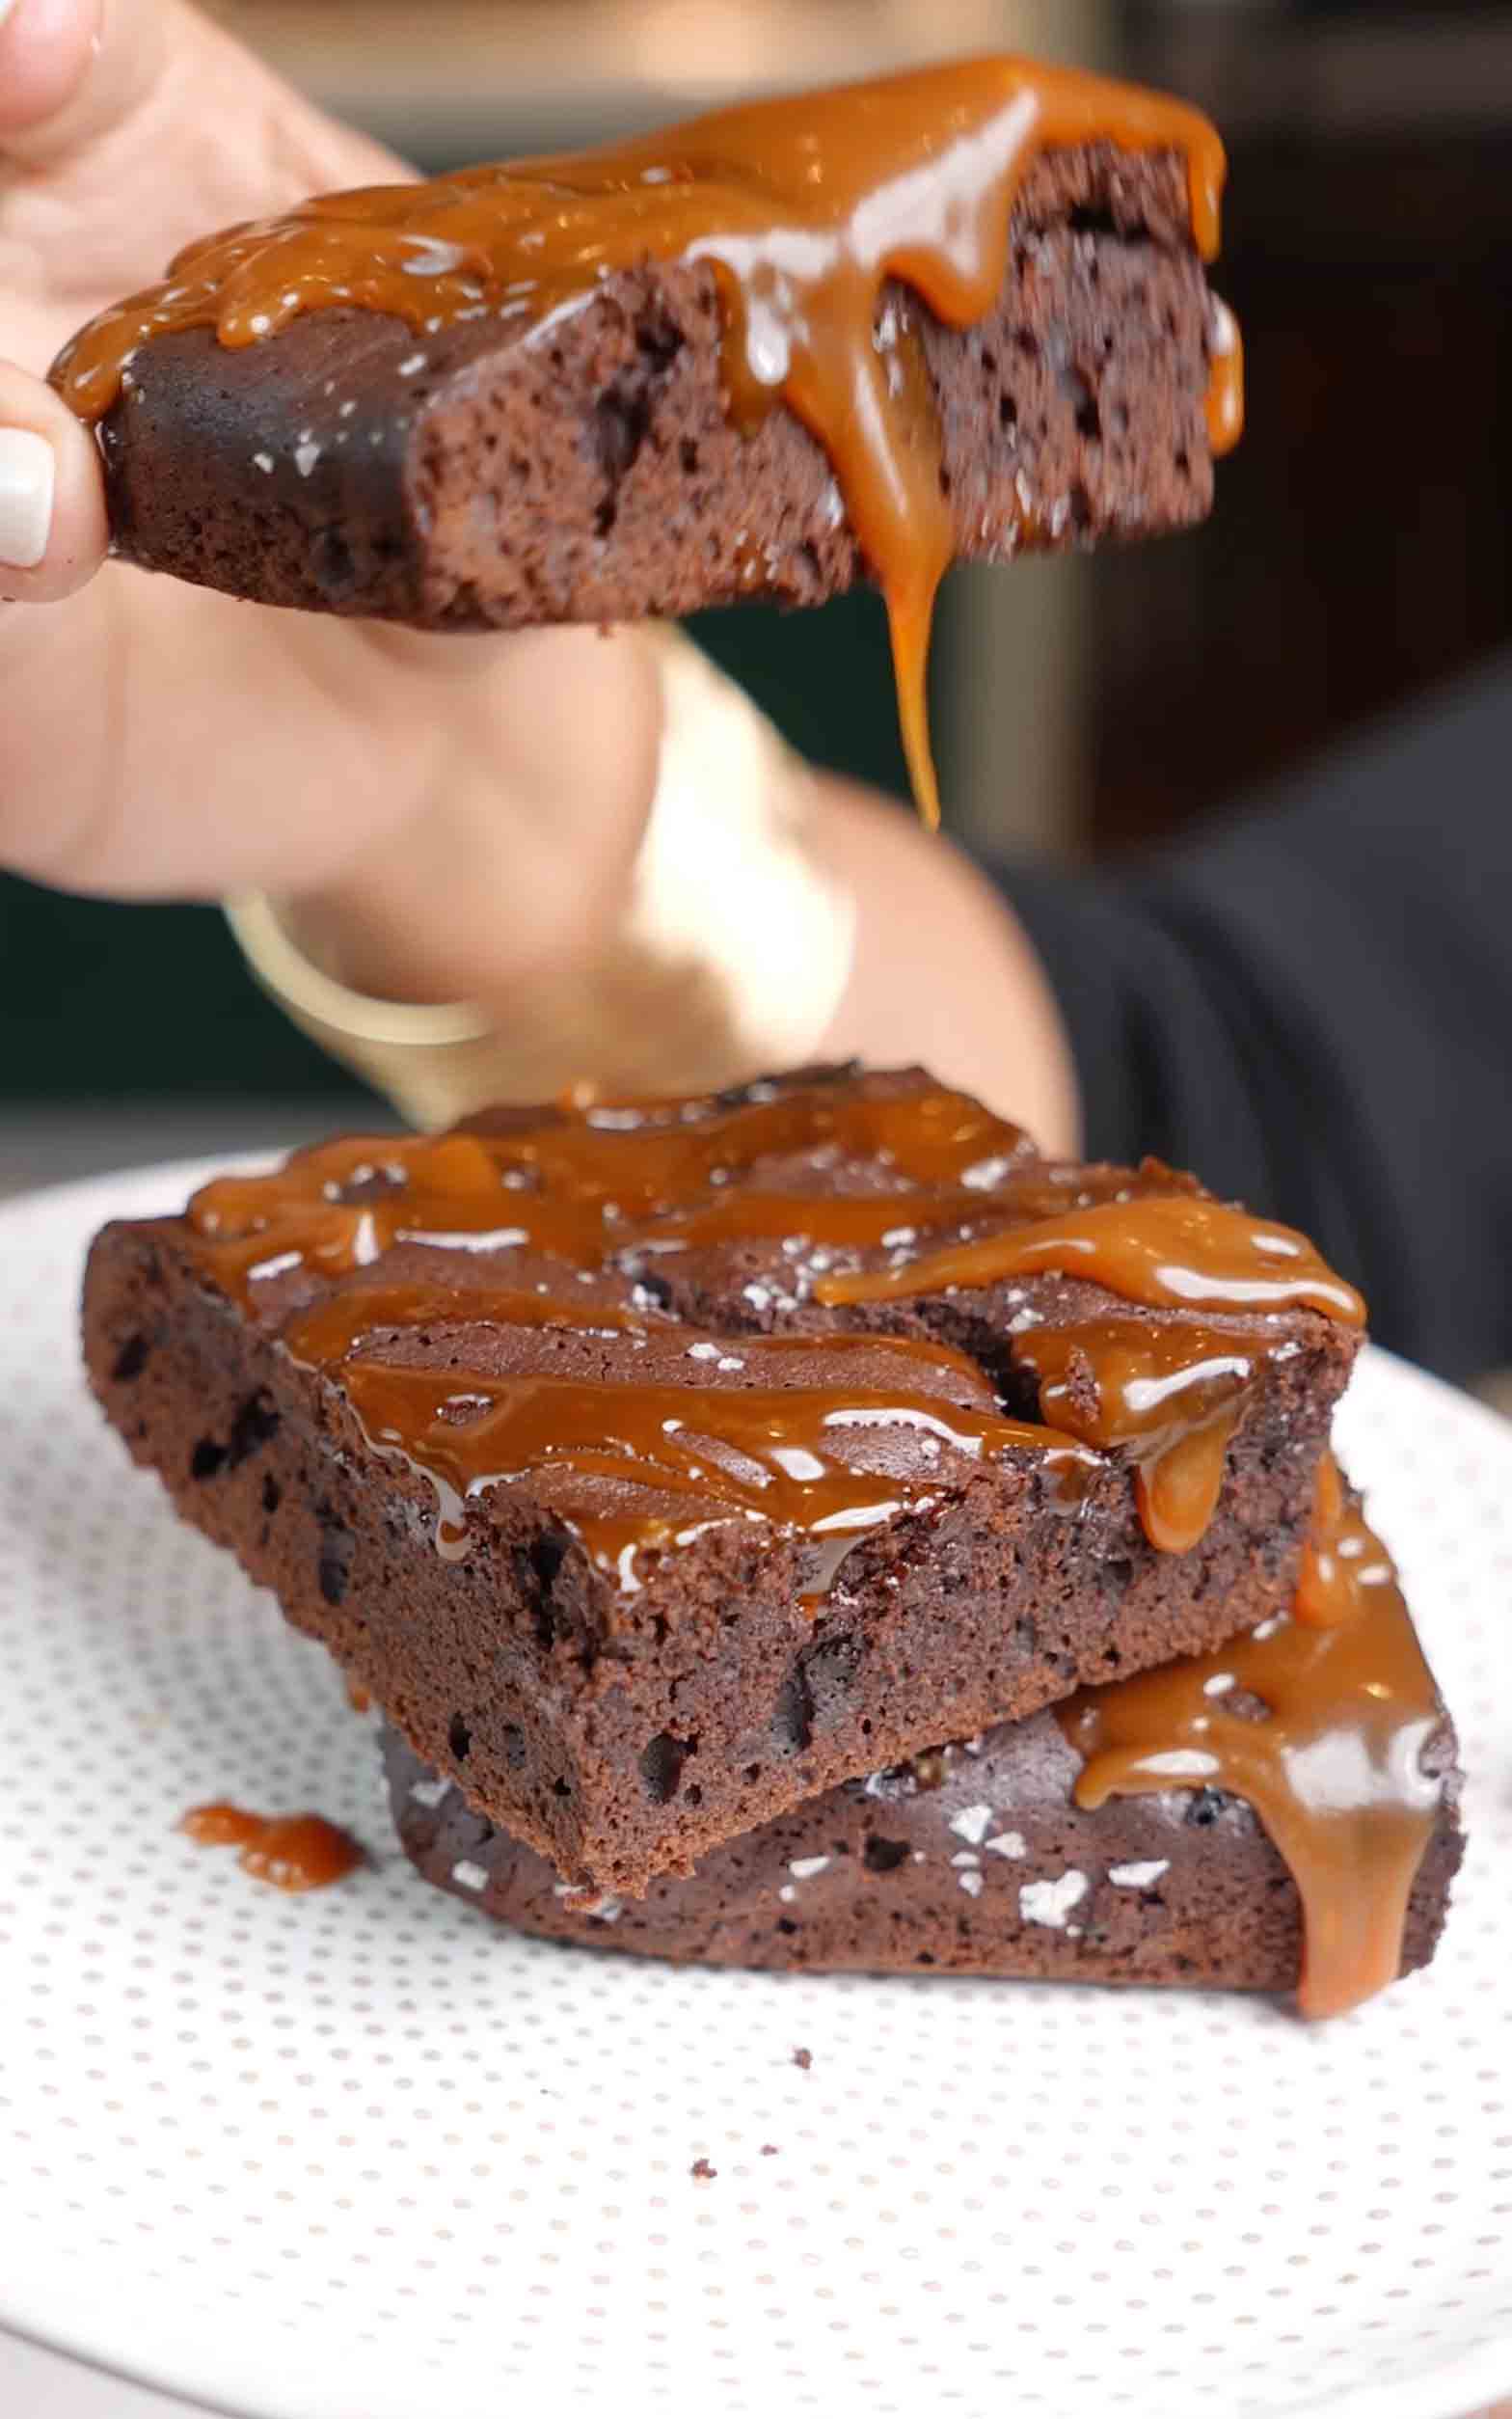
These salted caramel chocolate brownies are the most indulgent, deeply chocolatey brownies you'll ever make, and they're about to ruin all other brownies for you forever! These aren't your average box mix brownies. Every single element has been thought through to create maximum chocolate flavor and that perfect fudgy, dense texture that makes a truly exceptional brownie. It starts with browned butter, which adds this incredible nutty, caramel-like depth that you just can't get from regular melted butter. The hot browned butter gets poured directly over a mixture of good quality chopped semisweet chocolate, cocoa powder, and espresso powder, which melts everything together and creates this intensely rich chocolate base. The espresso powder doesn't make the brownies taste like coffee at all, it just amplifies and deepens the chocolate flavor in a way that's truly magical. You beat eggs with both cane sugar and dark brown sugar along with vanilla bean paste for a full 10 minutes until the mixture is thick, pale, and fluffy. This step creates that signature crinkly, shiny brownie top that everyone loves. The chocolate mixture gets folded in, then sifted flour and the remaining cocoa powder go in along with milk chocolate chips for extra pockets of melty chocolate throughout. Here's where the technique gets really interesting: you bake the brownies for 18 minutes, take the pan out, drop it on the counter a couple of times to slightly deflate them, sprinkle with flaky sea salt, then return them to the oven for another 18-20 minutes. This two-stage baking method creates an incredibly fudgy center while ensuring the edges are perfectly set. Once completely cool, you lift them out using the parchment overhang, drizzle generously with homemade salted caramel, and cut into 24 bars. The combination of rich, fudgy chocolate, flaky sea salt, and that golden, buttery salted caramel drizzle is absolutely next level. Serve them as is or with a scoop of vanilla ice cream or a cloud of whipped cream for the ultimate dessert experience!
Frequently Asked Questions
Q: Why do I need to drop the pan on the counter during baking?
A: This technique is the secret to getting that perfectly fudgy, dense brownie texture! When you drop the pan on the counter after the first 18 minutes of baking, you deflate any air bubbles that have built up in the batter. This prevents the brownies from becoming cakey and light, keeping them dense and fudgy in the center. It also helps create that beautiful crinkly, shiny top that's the hallmark of a truly exceptional brownie. It feels a little scary the first time you do it, but trust the process! One or two firm drops is all you need.
Q: Why beat the eggs and sugar for a full 10 minutes?
A: This technique is the secret to getting that perfectly fudgy, dense brownie texture! When you drop the pan on the counter after the first 18 minutes of baking, you deflate any air bubbles that have built up in the batter. This prevents the brownies from becoming cakey and light, keeping them dense and fudgy in the center. It also helps create that beautiful crinkly, shiny top that's the hallmark of a truly exceptional brownie. It feels a little scary the first time you do it, but trust the process! One or two firm drops is all you need.
Q: How do I know when the brownies are done?
A: These brownies are meant to be fudgy, so the standard toothpick test doesn't apply here! A wooden skewer inserted into the center should come out with some fudgy, moist crumbs clinging to it, not completely clean. If it comes out with wet, liquid batter, they need more time. If it comes out completely clean with no crumbs, they're overbaked and will be cakey instead of fudgy. The edges should look set and slightly pulled away from the sides of the pan while the center should still look slightly underdone. They'll firm up as they cool completely, so resist the urge to overbake!
Q: Can I skip the espresso powder?
A: You can, but I really recommend keeping it in! Espresso powder is a baker's secret weapon for chocolate desserts. It doesn't make your brownies taste like coffee at all, instead it intensifies and deepens the chocolate flavor in a way that's hard to achieve otherwise. If you absolutely can't have caffeine or don't have it on hand, you can leave it out and the brownies will still be delicious. Just know that with it, the chocolate flavor is noticeably richer and more complex. It's available at most grocery stores in the baking aisle or coffee section.
These salted caramel chocolate brownies are deeply fudgy, intensely chocolatey, and absolutely irresistible! Made with browned butter, chopped semisweet chocolate, espresso powder, and two types of sugar, baked using a two-stage method for the perfect fudgy center. Finished with flaky sea salt and homemade salted caramel drizzle. Pure brownie perfection!
Rate This Recipe!
Preparations
Prep Time:
25 minutes
Cook Time:
36-38 minutes
Total Time:
1 hour (plus cooling time)
Cuisine:
American
Course:
Dessert
Calories:
280 kcal (approx. per brownie)
Servings:
24 brownies
Author:
Ronica Rupan
Ingredients
Ingredients
For the Brownies:
- 1¼ cups unsalted butter (for browning)
- 8 ounces good-quality semisweet chocolate, chopped
- ¾ cup cocoa powder, divided (¼ cup + ½ cup)
- 1 tablespoon espresso powder
- 1¼ cups cane sugar
- ½ cup packed dark brown sugar
- 2 teaspoons vanilla bean paste
- 1 teaspoon kosher salt
- 6 large eggs
- 1 cup all-purpose flour
- ½ cup milk chocolate chips
- Flaky sea salt, for sprinkling
For Serving:
- Salted caramel sauce, for drizzling
- Vanilla ice cream or whipped cream (optional)
Instructions
- Preheat and Prep the Pan Preheat your oven to 350°F (180°C). Take softened butter and generously grease a 9x13-inch dark metal baking pan. Line the pan with parchment paper, leaving a generous overhang on all sides (this is how you'll lift the brownies out later). Grease the parchment paper with more softened butter. Set aside.
- Create the Chocolate Base Place the chopped semisweet chocolate, ¼ cup of the cocoa powder, and the espresso powder in a heatproof bowl or large measuring cup. Set aside.
- Brown the Butter In a small saucepan, melt the butter over medium heat. Continue cooking, stirring occasionally, until the butter foams, then the foam subsides, and small golden-brown bits start to appear on the bottom of the pan. The butter should smell nutty and caramel-like. This takes about 5-7 minutes total. Watch it carefully because it can go from perfectly browned to burnt quickly! As soon as it's golden and fragrant, immediately pour the hot browned butter directly over the chocolate mixture. Whisk vigorously until the chocolate is completely melted and the mixture is smooth and glossy. Set aside to cool slightly.
- Beat the Eggs and Sugars In a large bowl using a stand mixer or hand mixer on medium-high speed, beat together the cane sugar, dark brown sugar, vanilla bean paste, salt, and eggs for a full 10 minutes. Don't skip or rush this step! The mixture should become very thick, pale, and fluffy, almost triple in volume. When you lift the beaters, it should fall in thick ribbons that hold their shape on the surface for a few seconds. This is what creates that gorgeous shiny, crinkly brownie top.
- Combine Chocolate and Egg Mixtures Pour the slightly cooled chocolate and browned butter mixture into the egg and sugar mixture. Using your mixer on low speed or a spatula, fold and blend until completely smooth and well combined. Scrape down the sides of the bowl to make sure everything is incorporated.
- Add Flour and Chocolate Chips Sift the remaining ½ cup of cocoa powder and the all-purpose flour directly into the batter. Add the milk chocolate chips. Using a rubber spatula, gently fold everything together with big sweeping motions from the bottom of the bowl up until just combined with no dry streaks remaining. Don't overmix!
- Bake the First Round Pour the batter into your prepared pan and spread it into an even layer using an offset spatula. Bake for 18 minutes until the top starts to look slightly puffed and set around the edges.
- The Drop Technique Carefully remove the pan from the oven and place it on a flat, heatproof surface. Hold the pan about 3-4 inches above the surface and drop it firmly 1-2 times. You'll see the center deflate slightly. Immediately sprinkle flaky sea salt generously and evenly over the entire surface.
- Finish Baking Return the pan to the oven and bake for an additional 18-20 minutes. The brownies are done when a wooden skewer inserted into the center comes out with fudgy, moist crumbs (not wet batter, but definitely not clean). The edges should be set and the center should still look very slightly underdone.
- Cool Completely Transfer the pan to a wire cooling rack and let the brownies cool completely in the pan. This is crucial and takes about 1-2 hours. Don't rush it! If you cut into them while warm, they'll be too soft and won't hold their shape.
- Cut and Serve Once completely cool, use the parchment paper overhang to lift the entire slab of brownies out of the pan onto a cutting board. Drizzle generously with salted caramel sauce in a zigzag pattern over the top. Cut into 24 bars using a sharp knife, wiping the blade clean between cuts for the neatest edges. Serve as is or with a scoop of vanilla ice cream or a dollop of whipped cream!
Jerk Alfredo Chicken Pasta
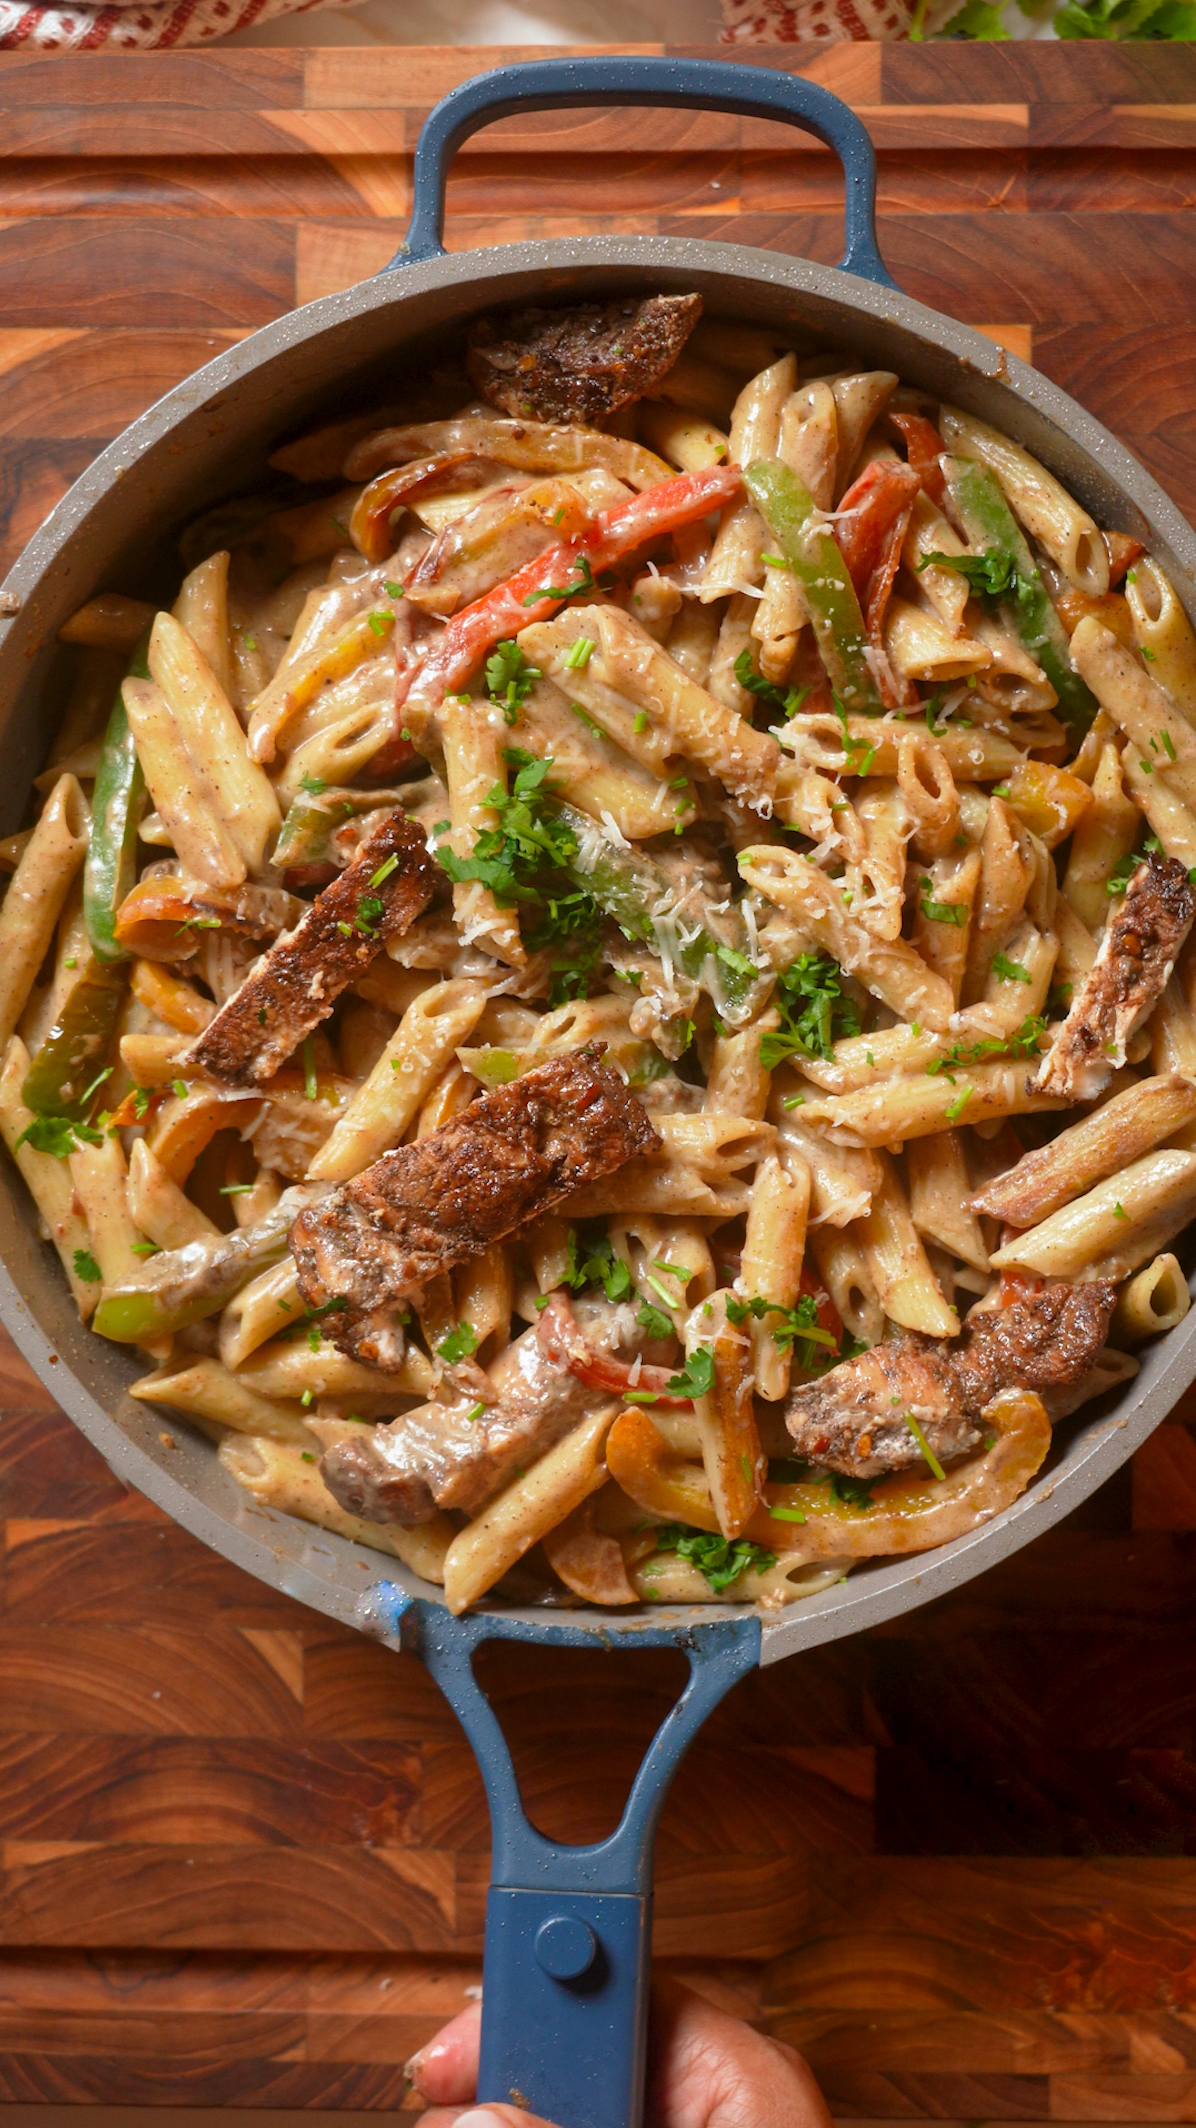
This jerk Alfredo chicken pasta is the fusion dish you never knew you needed, and it's about to become a permanent fixture in your weeknight dinner rotation! It combines the bold, smoky, spicy flavors of Caribbean jerk seasoning with a creamy, rich Alfredo-style sauce for this incredible mashup that's comforting and exciting all at the same time. The secret to this sauce is cottage cheese blended until completely smooth with milk, Parmesan, garlic, and both dry and wet jerk seasoning. It sounds unexpected but trust the process! Blended cottage cheese creates this incredibly creamy, protein-packed sauce base that's lighter than traditional heavy cream Alfredo but just as luxurious and rich. The cornstarch helps it thicken beautifully as it cooks, and the lime juice adds a bright, tangy finish that ties all the Caribbean flavors together. The chicken gets seasoned generously with both dry and wet jerk seasoning before being cooked in a hot skillet until golden brown and perfectly charred on the outside while staying juicy inside. Tri-color bell peppers (red, yellow, and green) get sautéed in the same pan until slightly softened but still crisp, adding sweetness, color, and freshness to the dish. The sauce gets blended until completely smooth and silky, then cooked in that same skillet until it's bubbly and thickened. Everything comes together when you add the penne pasta, sliced jerk chicken, and sautéed peppers to the sauce and toss until every piece of pasta is completely coated. If the sauce gets too thick, reserved starchy pasta water loosens it back to the perfect consistency. Finished with fresh cilantro and extra lime wedges for squeezing over the top, this pasta is bold, creamy, spicy, and bright all at once. Ready in just 30 minutes with minimal cleanup since everything cooks in the same skillet, it's the perfect weeknight dinner that feels anything but ordinary!
Frequently Asked Questions
Q: Why use cottage cheese instead of heavy cream for the Alfredo sauce?
A: Blended cottage cheese is a game changer for creamy pasta sauces! When blended completely smooth it creates a silky, luxurious sauce that's incredibly similar in texture to a heavy cream sauce but with way more protein and less fat. It also has a very mild flavor on its own which means all the jerk seasoning, garlic, Parmesan, and lime really shine through without being masked. The cornstarch helps it thicken and cling to the pasta just like a traditional Alfredo. If you're skeptical, just try it once and you'll be a convert!
Q: What's the difference between dry and wet jerk seasoning and can I use just one?
A: Dry jerk seasoning is a spice blend containing allspice, thyme, cayenne, garlic powder, and other spices that adds concentrated flavor and a slight crust when searing meat. For this recipe I use my own Flora & Mana Jamaica Jerk Joy blend, which is packed with authentic Caribbean spices and adds the most incredible depth and warmth to both the chicken and the sauce. Wet jerk seasoning is a marinade paste made with fresh herbs, scotch bonnet peppers, and aromatics that adds moisture and deeper, more complex flavor. I love using Walker's Wood wet jerk seasoning here because it has that authentic, bold Jamaican flavor that takes this dish to the next level. Using both gives you the best of both worlds: the depth and heat from the Walker's Wood wet seasoning and that beautiful spice crust from the Flora & Mana Jamaica Jerk Joy dry blend. If you can only find one, use whatever you have and adjust the amount to taste, but I highly recommend tracking down both for the full experience!
Q: Can I make this spicier or milder?
A: Absolutely! The beauty of this recipe is how customizable the heat level is. For more heat, increase the wet jerk seasoning in both the chicken and the sauce, add a pinch of cayenne to the sauce, or serve with hot sauce on the side. For a milder version, reduce the wet jerk seasoning to 1 teaspoon in each component and use a mild dry jerk blend. You can also add a splash more heavy cream or milk to the finished sauce to mellow out the heat. Taste as you go and adjust to your family's preference!
Q: Can I use a different pasta shape?
A: Yes! Penne is great because those tube shapes trap the creamy sauce inside, but any medium-sized pasta works beautifully. Rigatoni, fusilli, farfalle, or ziti would all be delicious and hold the sauce well. Avoid very thin pasta like spaghetti or angel hair since the chunky chicken and peppers work better with a heartier pasta shape that can stand up to all the toppings. Whatever you use, make sure to cook it al dente and save that pasta water!
This jerk Alfredo chicken pasta is the ultimate fusion dish ready in 30 minutes! Jerk-seasoned chicken and tri-color bell peppers tossed with penne in a creamy blended cottage cheese Alfredo sauce loaded with jerk seasoning, garlic, Parmesan, and lime. Bold, creamy, spicy, and absolutely addictive!
Rate This Recipe!
Preparations
Prep Time:
10 minutes
Cook Time:
20 minutes
Total Time:
30 minutes
Cuisine:
Caribbean-Italian Fusion
Course:
Main Course, Dinner, Pasta
Calories:
620 kcal (approx. per serving)
Servings:
4
Author:
Ronica Rupan
Ingredients
Ingredients
For the Jerk Alfredo Sauce:
For the Jerk Alfredo Sauce:
- 1 cup cottage cheese (4% whole milk)
- 1 cup milk
- ½ cup freshly grated Parmesan cheese
- 2 teaspoons cornstarch
- 4 cloves garlic
- 1 teaspoon Flora & Mana's Jamaica Jerk Joy dry jerk seasoning
- 2 teaspoons wet jerk seasoning, or to taste
- Juice of ½ lime
- ¼ teaspoon kosher salt
- ½ teaspoon black pepper
For the Pasta and Chicken:
- 1 pound penne pasta
- 1 pound chicken breast, butterflied or cut thin
- 1 teaspoon Flora & Mana's Jamaica Jerk Joy dry jerk seasoning (for chicken)
- 2 teaspoons wet jerk seasoning (for chicken, or to taste)
- 1 red bell pepper, diced
- 1 yellow bell pepper, diced
- 1 green bell pepper, diced
- 2 tablespoons olive oil, divided
- Kosher salt, to taste
For Garnish:
- Fresh cilantro, chopped
- Lime wedges, for serving
Instructions
- Cook the Pasta Bring a large pot of generously salted water to a boil. Add the penne and cook according to package directions until al dente. Before draining, use a measuring cup to scoop out about 1 cup of the starchy pasta water and set it aside. You'll need this later to adjust the sauce consistency. Drain the pasta and set aside.
- Season and Cook the Chicken While the pasta cooks, season the butterflied or thinly cut chicken breasts on both sides with the dry jerk seasoning and wet jerk seasoning, rubbing it in so every surface is well coated. Heat 1 tablespoon of olive oil in a large skillet over medium-high heat until shimmering. Add the chicken and cook for 3-4 minutes per side until golden brown with some charred spots and cooked through to an internal temperature of 165°F. Remove the chicken from the skillet and let it rest for a few minutes before slicing. Set aside.
- Sauté the Bell Peppers In the same skillet, add the remaining tablespoon of olive oil over medium-high heat. Add all three colors of diced bell peppers and sauté for 4-5 minutes, stirring occasionally, until slightly softened but still crisp with some color. You want them tender but not mushy. Remove from the skillet and set aside with the sliced chicken.
- Blend the Sauce Add the cottage cheese, milk, Parmesan cheese, cornstarch, whole garlic cloves, dry jerk seasoning, wet jerk seasoning, and lime juice to a blender or food processor. Blend on high speed for 30-60 seconds until the mixture is completely smooth and silky with absolutely no lumps. It should look like a creamy, pourable sauce.
- Cook the Sauce Pour the blended sauce into the same skillet over medium-low heat. Cook, stirring frequently, for about 5 minutes until the sauce is bubbly and has thickened enough to coat the back of a spoon. Season with salt and black pepper to taste. Keep the heat at medium-low so the sauce doesn't scorch on the bottom.
- Bring It All Together Add the cooked penne pasta, sliced jerk chicken, and sautéed bell peppers to the skillet with the sauce. Toss everything together using tongs until every piece of pasta is completely coated in that gorgeous creamy jerk sauce. If the sauce feels too thick, add the reserved pasta water 2-3 tablespoons at a time, tossing between each addition, until you reach your perfect consistency.
- Garnish and Serve Divide the pasta among four bowls or plates. Top each serving with a generous sprinkle of fresh chopped cilantro. Serve with extra lime wedges on the side so everyone can squeeze fresh lime juice over their pasta right before eating. That squeeze of lime at the end really brightens everything up!
30-Minute Baked Salmon Pinwheels
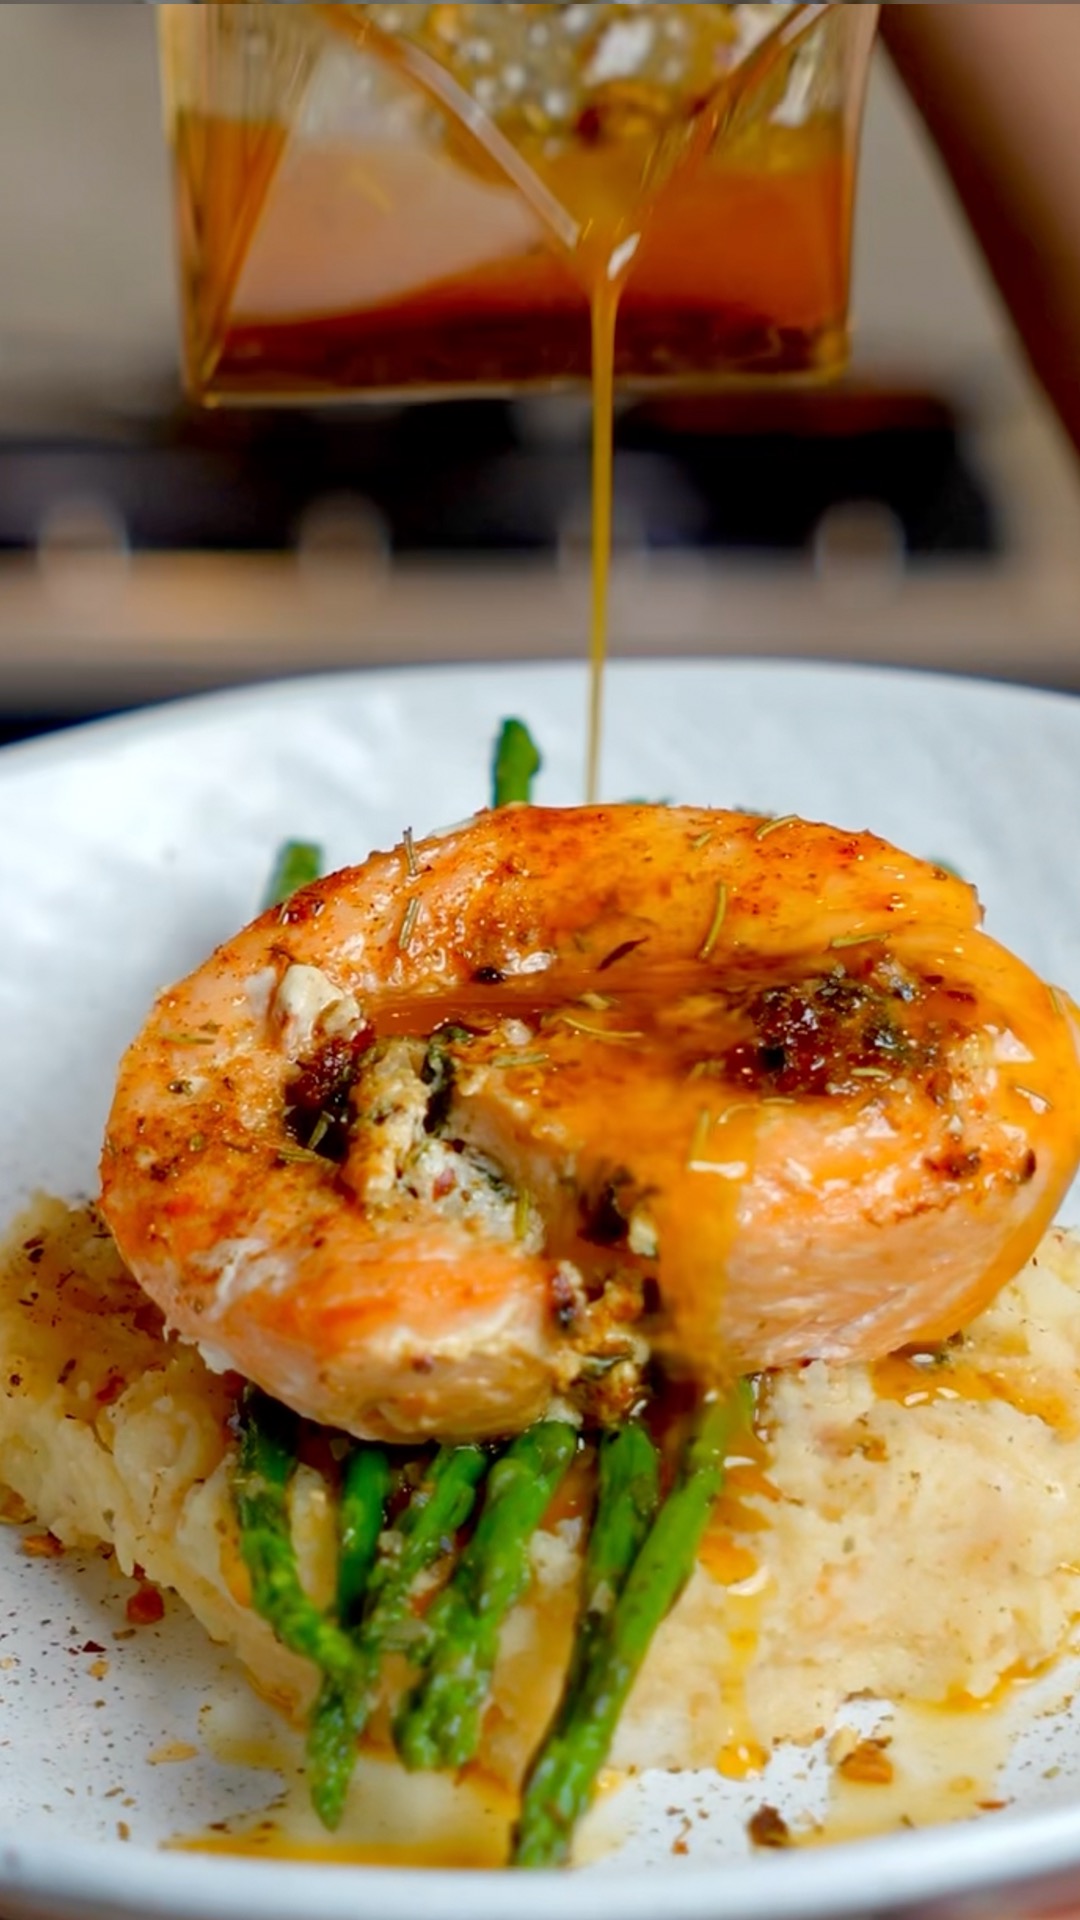
These baked salmon pinwheels are the ultimate weeknight dinner solution for busy parents who want something healthy, delicious, and impressive on the table fast! In just 30 minutes, you can have these gorgeous spiral pinwheels that look like they took hours to make but are actually so simple to pull together. It all starts with a quick sauté of onion, garlic, and fresh baby spinach, then mixed with softened cream cheese and chopped sun-dried tomatoes to create this incredibly rich, savory filling that's tangy, garlicky, and creamy all at once. You season the salmon generously with Creole seasoning, spread the filling all over, then roll it up tightly and slice into beautiful 1½-inch thick pinwheels that show off that stunning spiral of pink salmon and creamy green filling. Here's a genius tip: if your cream cheese mixture is too soft, pop the whole thing in the freezer for 10 minutes before rolling for cleaner, easier cuts! The pinwheels get arranged in a cast-iron skillet over a bed of fresh lemon slices, dotted with butter, and baked until the salmon firms up, then broiled for a gorgeous golden top. Finished with fresh parsley, these pinwheels are almost too pretty to eat! Serve with roasted vegetables, rice, or a simple salad for a complete meal the whole family will love.
Frequently Asked Questions
Q: How do I keep the pinwheels from falling apart when I slice them?
A: The key is making sure the salmon roll is tight and well secured before slicing! First, use the freezer trick: after spreading the filling on the salmon, pop it in the freezer for 10 minutes to firm up the cream cheese so it doesn't squish out when you roll and slice. Roll the salmon as tightly as possible without tearing it, and secure it really well with toothpicks or kitchen twine placed every inch or so along the roll. Use a very sharp knife to slice in one smooth motion rather than a sawing motion, which can cause the pinwheels to unravel. Chilling the roll in the freezer for another 10 minutes after rolling also helps it hold its shape when slicing.
Q: Can I use a different fish instead of salmon?
A: Salmon works best for this recipe because it's firm enough to roll without tearing, wide enough to create a good pinwheel, and has enough fat content to stay moist during baking. That said, other large, flat fish can work too. Halibut or cod fillets that are thick and wide could work if you can get them butterflied or pounded thin. Sea bass is another option. Avoid thin, delicate fish that would tear when rolling. The key is finding a fillet that's large enough to spread the filling and roll up. Ask your fishmonger to butterfly the fillet if needed.
Q: What can I serve with these pinwheels?
A: These salmon pinwheels are really versatile and pair beautifully with so many sides! Fluffy white or brown rice soaks up the buttery lemon juices beautifully. Roasted asparagus, broccoli, or green beans complement the flavors perfectly and keep everything healthy. Creamy mashed potatoes or cauliflower mash are great for a more comforting meal. A simple arugula salad with lemon vinaigrette adds a fresh, peppery contrast that cuts through the richness of the cream cheese filling. Crusty bread for soaking up all that lemony butter sauce is always a crowd pleaser too!.
These baked salmon pinwheels are healthy, impressive, and ready in just 30 minutes! Fresh salmon seasoned with Creole spice, rolled with a creamy spinach, garlic, and sun-dried tomato filling, sliced into pinwheels, and baked over lemon slices with butter until golden. A gorgeous weeknight dinner that looks fancy but couldn't be easier!
Rate This Recipe!
Preparations
Prep Time:
15 minutes
Cook Time:
18-20 minutes
Total Time:
30 minutes (plus optional 10 minutes freezing)
Cuisine:
American, Cajun-inspired
Course:
Main Course, Dinner
Calories:
420 kcal (approx. per serving)
Servings:
6
Author:
Ronica Rupan
Ingredients
Ingredients
For the Spinach Cream Cheese Filling:
- 1 tablespoon olive oil
- 1 small yellow onion, finely diced
- 4 cloves garlic, minced
- 5 ounces baby spinach
- 8 ounces cream cheese, softened to room temperature
- ¼ cup sun-dried tomatoes, chopped
- Kosher salt, to taste
- Freshly ground black pepper, to taste
For the Salmon:
- 2½ pounds fresh salmon, skin removed and patted dry
- 2 tablespoons Creole seasoning, plus more to taste
- 4 tablespoons unsalted butter, cut into 8 small pieces
- 2 lemons, thinly sliced into rounds
For Garnish:
- Fresh parsley, chopped
Instructions
- Preheat the Oven Preheat your oven to 350°F (175°C). While the oven heats up, get all your ingredients prepped and ready to go since this recipe moves quickly.
- Make the Spinach Filling Heat the olive oil in a skillet over medium heat. Once shimmering, add the finely diced onion and sauté for about 2 minutes, stirring occasionally, until softened and translucent. Add the minced garlic and fresh baby spinach to the pan. Cook for about 3 minutes, stirring regularly, until the spinach has completely wilted down. Season with salt and pepper. Transfer the mixture to a bowl and let it cool for about 5 minutes. You want it cool enough that it won't melt the cream cheese when you mix them together.
- Finish the Filling Once the spinach mixture has cooled slightly, add the softened cream cheese and chopped sun-dried tomatoes to the bowl. Mix everything together until completely combined and smooth. Taste and adjust seasoning with more salt and pepper if needed. The filling should be creamy, savory, and packed with flavor.
- Prep the Salmon Lay the salmon fillet flat on a clean cutting board, skin side down. If your salmon is very thick on one side, you can gently butterfly it (slice it horizontally almost all the way through and open it up like a book) to create a more even thickness for rolling. Pat the salmon completely dry with paper towels. Season both sides generously with the Creole seasoning. The seasoning on the underside is important since that will be the outside of your pinwheels!
- Spread the Filling and Roll Spread the cream cheese filling evenly over the top surface of the seasoned salmon, leaving about a ½-inch border on the far edge so the filling doesn't squeeze out when you roll. If the filling seems too soft or is sliding around, place the salmon with the filling spread on top in the freezer for 10 minutes to firm everything up. This makes rolling so much easier! Starting from the short end closest to you, roll the salmon up as tightly as possible without tearing it. Secure the roll with toothpicks or kitchen twine placed every inch or so to keep it together.
- Slice into Pinwheels Using a very sharp knife, slice the salmon roll into 1½-inch thick pinwheels in one smooth downward motion (avoid sawing back and forth). You should get about 6 beautiful pinwheels showing off that gorgeous spiral of pink salmon and creamy green filling. If the roll is soft and hard to slice cleanly, pop it back in the freezer for another 5-10 minutes.
- Arrange in the Pan Lay the lemon slices in an even layer on the bottom of a large cast-iron skillet or oven-safe baking dish. Arrange the salmon pinwheels upright (spiral-side facing up) on top of the lemon slices. Scatter the pieces of butter over the tops of the pinwheels. Sprinkle a little more Creole seasoning over the top.
- Bake and Broil Place the skillet in the preheated oven and bake for 15 minutes until the salmon turns a beautiful light pink and feels firm when gently pressed. Then switch your oven to broil on high and broil for 3-5 minutes, watching carefully, until the tops are golden brown and slightly caramelized. The butter will melt over the pinwheels and combine with the lemon juice released from the slices below, creating an incredible buttery lemon sauce.
- Garnish and Serve Remove the skillet from the oven and let it rest for 2-3 minutes. Sprinkle generously with freshly chopped parsley. Serve the pinwheels directly from the cast-iron skillet for maximum visual impact, spooning some of that incredible lemony butter sauce from the bottom of the pan over each serving!
Cookie Puff Pastry
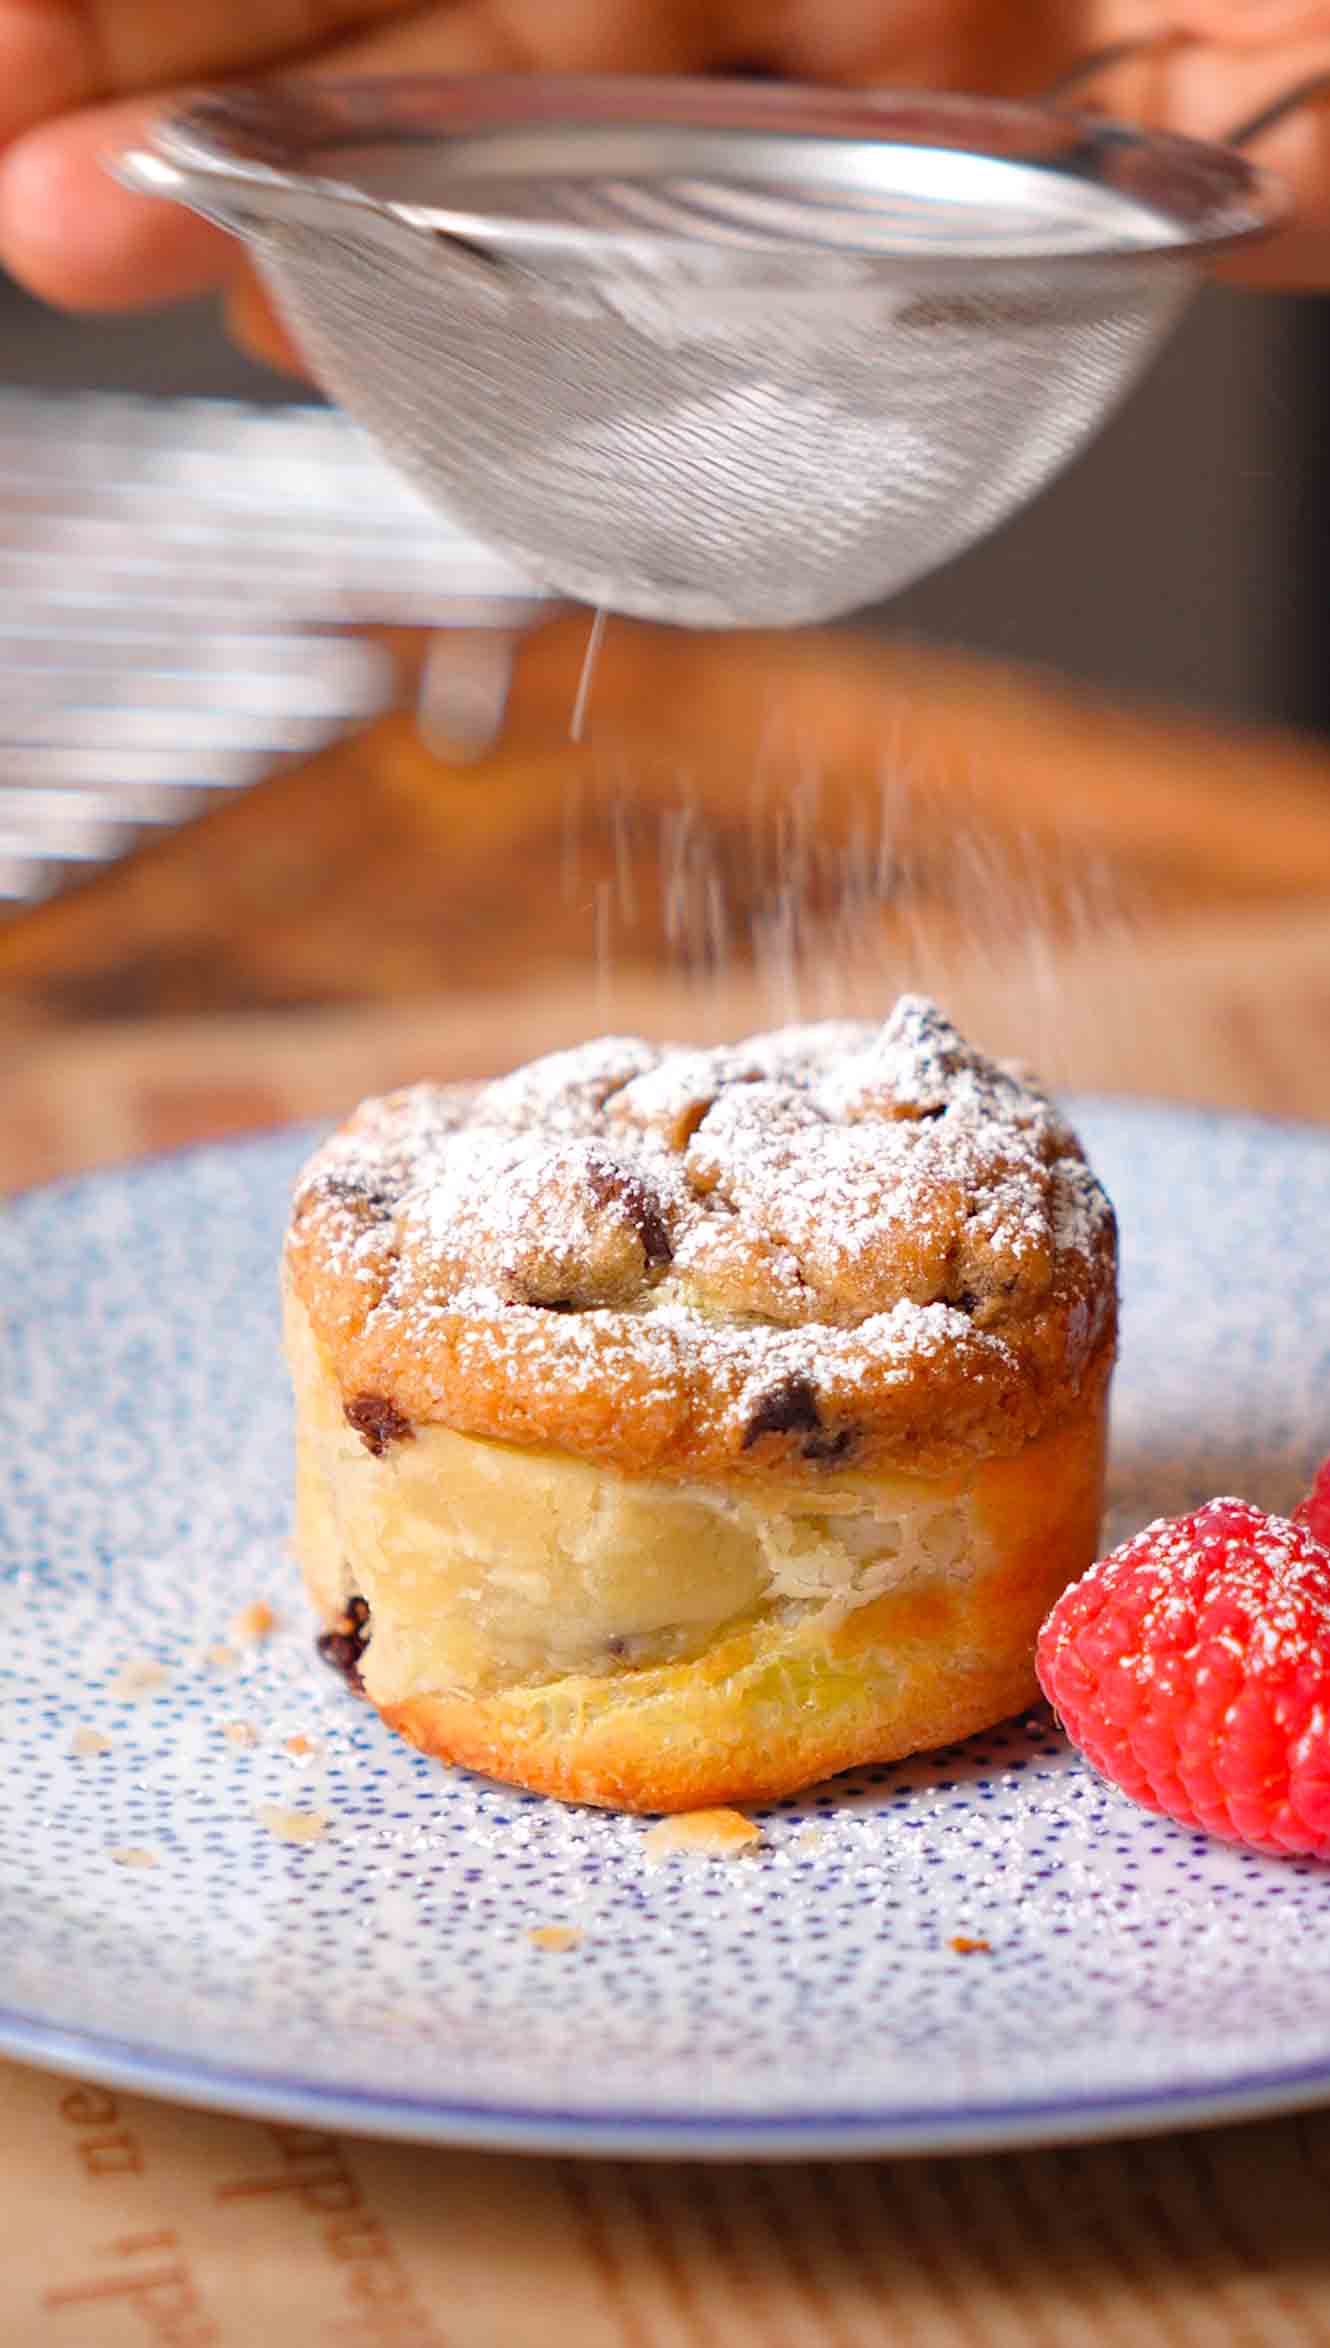
This Cookie Puff Pastry is what happens when cookie dough and puff pastry come together in the most delicious way. If you loved the crookie, you need to try this! Store-bought cookie dough gets flattened right onto a sheet of puff pastry, pressed in nice and snug, then sliced into strips and rolled up like little cinnamon rolls. Tucked into a buttered muffin tin, they bake up into gorgeous golden swirls with flaky, buttery layers and gooey cookie dough throughout. The secret to making sure the cookie dough is fully baked and not raw in the center is baking at a lower temperature of 325°F for a full 30 minutes. This gives the cookie dough time to cook through without burning the puff pastry. Topped with crumbled cookie pieces, chocolate chips, a pinch of flaky sea salt, and a dusting of powdered sugar, these are the ultimate sweet treat. They're flaky, they're buttery, they're loaded with cookie, and they absolutely deserve their own moment.
Frequently Asked Questions
Q: Why is the cookie dough raw in the middle?Lorem ipsum dolor sit amet?
A: Baking at too high a temperature can cause the puff pastry to brown quickly on the outside while the cookie dough inside stays underbaked. That's why we bake at 325°F for 30 minutes. The lower temperature gives the cookie dough enough time to bake all the way through without burning the puff pastry. Make sure your oven is properly preheated and avoid opening the door too often during baking.
Q: Can I use homemade cookie dough instead of store-bought?
A: Absolutely! Homemade cookie dough works great. Just make sure it's a dough that's firm enough to flatten and press onto the puff pastry without being too sticky. Chill your homemade dough for about 30 minutes before using so it's easier to work with.
Q: Can I make these ahead of time?
A: You can assemble them and keep them in the muffin tin covered in the fridge for up to 24 hours before baking. When ready, brush with egg wash, add your toppings, and bake as directed. You may need to add a couple extra minutes to the bake time since they're starting cold.
Q: How should I store leftovers?
A: Store leftovers in an airtight container at room temperature for up to 2 days or in the fridge for up to 4 days. To reheat, pop them in the oven or air fryer at 325°F for 5-7 minutes to get them crispy again. The microwave will work in a pinch but they won't be as flaky.
Cookie Puff Pastry is flaky puff pastry rolled up with cookie dough, baked in a buttered muffin tin until golden, and topped with cookie crumbles, chocolate chips, flaky sea salt, and powdered sugar. Think of it as the crookie's fancy cousin. Buttery, crispy, and absolutely irresistible.
Rate This Recipe!
Preparations
Prep Time:
15 minutes
Cook Time:
30 minutes
Total Time:
45 minutes
Cuisine:
American
Course:
Dessert, Snack
Calories:
Servings:
16
Author:
Ronica Rupan @Mymanabites
Ingredients
Ingredients:
Butter, for greasing muffin tins 2 frozen puff pastry sheets, thawed according to package directions 2 (16 oz) packages chocolate chip cookie dough, divided 1 large egg 1 tablespoon milk of choice Crumbled cookie pieces, for topping Chocolate chips, for topping Flaky sea salt, for topping Powdered sugar, for dusting
Instructions:
- Preheat oven to 325°F (163°C). Butter 2 standard muffin pans generously and set aside.
- Lightly roll out 1 puff pastry sheet on a piece of parchment paper with a rolling pin.
- Take three-quarters of 1 cookie dough package and divide the dough into medium-sized balls. Use your hands to press and flatten the balls, then scatter the pieces onto the puff pastry sheet. Press the cookie dough into the puff pastry so it sticks.
- Cut the puff pastry sheet in half lengthwise, then cut each strip in half. Cut each strip in half one more time to get 8 equal-sized strips.
- Roll up each strip like a cinnamon roll and place into a prepared muffin well. Repeat with the remaining strips.
- Repeat steps 2 to 5 with the remaining puff pastry sheet and cookie dough package.
- In a small bowl, whisk together the egg and milk until well combined.
- Using a pastry brush, brush the tops of each cookie puff pastry with egg wash. Top each one with crumbled cookie pieces, a few chocolate chips, and a pinch of flaky sea salt.
- Bake for 30 minutes, until the tops are golden brown and the cookie dough is fully baked through.
- Allow to cool in the pan for 5 to 10 minutes, then remove to a plate and dust with powdered sugar.
- Serve warm, and enjoy!
Red Velvet Cookies with Cream Cheese Frosting

These red velvet cookies with cream cheese frosting are absolutely stunning and so much fun to make! They're chewy, vibrant, deeply chocolatey, and incredibly moist with the most beautiful bright red color that makes them look like they came straight from a bakery. What makes these cookies extra special is the combination of softened butter and olive oil in the dough, which creates a texture that's tender and chewy at the same time while staying incredibly moist even days after baking. The olive oil adds a subtle richness that you can't quite put your finger on but makes all the difference in how soft and luxurious these cookies feel. The dough comes together with all-purpose flour, unsweetened cocoa powder for that classic red velvet chocolate flavor, baking soda for lift, butter and olive oil creamed with sugar until light and fluffy, an egg, vanilla, and red food coloring that gives them that gorgeous jewel-toned color. The dough will seem slightly crumbly at first, but that's completely normal, just use your hands to bring it together and it'll come together beautifully. You roll the dough into balls, flatten them slightly, and bake for just 10-11 minutes until they're puffed with set edges but still soft in the center. While the cookies cool completely, you whip up the most incredible cream cheese frosting with softened cream cheese, butter, powdered sugar, vanilla, and a pinch of salt. It's tangy, sweet, silky smooth, and the absolute perfect complement to the chocolate-y red velvet cookie. You spread a generous layer on each cooled cookie and if you want to make them extra pretty, add sprinkles before the frosting sets! These cookies are perfect for gifting, baking for someone special, bringing to parties, or just treating yourself because you deserve it. They stay fresh for up to 5 days, which makes them great for making ahead!
Frequently Asked Questions
Q: Why does this recipe use both butter and olive oil?
A: The combination of butter and olive oil creates the most incredible cookie texture! Butter adds flavor and helps the cookies spread properly, while the olive oil keeps them incredibly moist and tender even days after baking. All-butter cookies can sometimes dry out faster, but the olive oil acts as a liquid fat that stays soft at room temperature. It also adds a subtle richness that makes these cookies taste more complex and luxurious. Don't worry, you won't taste the olive oil at all, it just makes the texture exceptional!
Q: My dough seems too crumbly, is that normal?
A: Yes, totally normal! Red velvet cookie dough is naturally drier and more crumbly than regular cookie dough because of the cocoa powder and the ratio of fats. When the recipe says the dough will be slightly crumbly, it means it won't look like a smooth, cohesive dough when you first mix it. Just use your hands to squeeze and press the dough together, the warmth from your hands helps the fats bind everything. If it's still not coming together, add ½ teaspoon of milk at a time until it just holds when squeezed. Don't add too much or the cookies will spread too much during baking.
Q: Can I make these without red food coloring?
A: Absolutely! The red food coloring is purely for the visual effect and doesn't affect the flavor at all. Without it, these would just be delicious chocolate cookies! Here are some natural alternatives to try: Beet powder: About 1-2 tablespoons gives a beautiful pinkish-red hue. It's the most popular natural substitute and adds a very subtle earthy sweetness that actually complements the chocolate nicely. Beet juice: Use 2-3 tablespoons in place of the liquid food coloring. It may slightly thin your dough, so add an extra tablespoon of flour to compensate. Pomegranate powder: About 1 tablespoon gives a deep reddish-pink color with a slight tartness that pairs beautifully with chocolate. Hibiscus powder: About 1-2 teaspoons gives a gorgeous deep red-purple color and a very subtle floral, tart flavor. Keep in mind that natural colorings won't give you that same vibrant true red as food coloring, but they create beautiful, rich tones that look stunning. If you do want to use food coloring, gel food coloring gives a more intense color with less product. Start with 1 teaspoon of gel and add more for a deeper red.
These red velvet cookies are chewy, vibrant, and absolutely gorgeous! Made with butter, olive oil, cocoa powder, and red food coloring for that classic red velvet flavor and stunning color, then topped with tangy, silky cream cheese frosting. Bakery-quality cookies ready in 30 minutes!
Rate This Recipe!
Preparations
Prep Time:
20 minutes
Cook Time:
11 minutes
Total Time:
31 minutes (plus cooling time)
Cuisine:
American
Course:
Dessert
Calories:
180 kcal (approx. per cookie with frosting)
Servings:
24 cookies
Author:
Ronica Rupan
Ingredients
Ingredients
For the Red Velvet Cookies:
- 2 cups (240g) all-purpose flour
- ¼ cup (24g) unsweetened cocoa powder
- 1 teaspoon baking soda
- ½ teaspoon kosher salt
- ¼ cup unsalted butter, softened to room temperature
- ¼ cup extra virgin olive oil
- 1 cup (200g) granulated sugar
- 1 large egg, at room temperature
- 2 teaspoons vanilla extract
- 1 tablespoon red food coloring
For the Cream Cheese Frosting:
- 4 ounces (113g) full-fat cream cheese, softened to room temperature
- ¼ cup (57g) unsalted butter, softened to room temperature
- 1¾ cups (210g) powdered sugar
- 1 teaspoon vanilla extract
- Pinch of kosher salt
- Optional: sprinkles for decorating
Instructions
- Preheat and Prep Preheat your oven to 350°F (177°C). Line a large baking sheet with parchment paper or a silicone baking mat and set it aside. If you have two baking sheets, line both so you can bake in batches more efficiently.
- Mix the Dry Ingredients In a medium bowl, whisk together the all-purpose flour, cocoa powder, baking soda, and salt until well combined with no cocoa clumps. Set aside.
- Cream the Butter, Oil, and Sugar In a large mixing bowl using a hand mixer or stand mixer fitted with the paddle attachment, beat the softened butter, olive oil, and granulated sugar together on medium-high speed for 2-3 minutes until the mixture is light, fluffy, and well combined. Scrape down the sides of the bowl as needed.
- Add the Remaining Wet Ingredients Add the egg to the butter mixture and mix on medium speed until combined. Add the vanilla extract and red food coloring. Mix until everything is evenly combined and the color is distributed throughout the batter with no streaks. Scrape down the sides of the bowl to make sure the color is completely even.
- Combine Wet and Dry With the mixer on low speed, gradually add the dry flour mixture to the wet mixture in two or three additions, mixing between each. Mix until the dough just starts to come together. The dough will look slightly crumbly and not fully cohesive at this point, but that's completely normal! Use your hands to squeeze and press the dough together until it holds. It should be firm enough to roll into balls without crumbling apart.
- Shape the Cookies Using a medium cookie scoop or tablespoon, scoop about 1½ tablespoons of dough for each cookie. Roll each portion between your palms to form a smooth ball. Place the balls on your prepared baking sheet, spacing them about 2 inches apart. Using the palm of your hand or the bottom of a glass, gently flatten each ball slightly. They don't need to be super flat, just slightly pressed down.
- Bake Bake for 10-11 minutes until the cookies are puffed up and the edges look set. The centers might still look slightly underdone, but that's perfect! They'll firm up as they cool. Don't overbake or they'll dry out. Let the cookies cool on the baking sheet for 5 minutes (they need this time to set), then carefully transfer them to a wire rack to cool completely before frosting. Don't frost warm cookies or the frosting will melt!
- Make the Cream Cheese Frosting In a large bowl using a hand mixer or stand mixer, beat the softened cream cheese and softened butter together on high speed for about 2 minutes until they're completely smooth, creamy, and well combined with no lumps. Reduce the mixer speed to low and carefully add the powdered sugar (add it slowly so it doesn't puff up everywhere!), vanilla extract, and pinch of salt. Once the powdered sugar is incorporated, increase the speed to medium-high and beat for another 2 minutes until the frosting is silky smooth and fluffy.
- Frost the Cookies Once the cookies are completely cool, use a small offset spatula or the back of a spoon to spread a generous layer of cream cheese frosting on top of each cookie. Be generous! If you want to add sprinkles, do it now before the frosting sets.
- Serve and Store These cookies are ready to eat immediately! Store them in an airtight container at room temperature for up to 5 days, or freeze unfrosted cookies for up to 3 months. Thaw at room temperature before frosting and serving.
Crookie (Croissant Cookie)

This crookie is the ultimate dessert fusion that's taken Paris by storm, and once you try it, you'll understand exactly why! A crookie combines the flaky, buttery layers of a croissant with rich, gooey chocolate chip cookie dough for this incredible hybrid that's crispy on the outside, soft and melty on the inside, and absolutely irresistible. The concept is genius in its simplicity: you take a croissant, slice it in half horizontally, stuff it with homemade chocolate chip cookie dough on both the inside and top, then bake it until the croissant gets golden and crispy while the cookie dough bakes into this warm, melty chocolate heaven. The croissant provides that incredible buttery, flaky texture, while the cookie dough adds sweetness, chocolatey richness, and that soft, gooey center everyone loves. This recipe includes instructions for making the most incredible chocolate chip cookie dough from scratch with a blend of bittersweet and milk chocolate, bread flour and all-purpose flour for the perfect chewy texture, and both cane sugar and brown sugar for complex sweetness and moisture. You cream the butter and sugars until incredibly fluffy, add vanilla and eggs, then fold in the flour mixture and loads of chopped chocolate. The dough chills for 4 hours which is crucial for developing flavor and preventing the cookies from spreading too much. When you're ready to make crookies, you let the dough come to room temperature, slice your croissant, stuff it generously with cookie dough inside and on top, then bake at 350°F for just 10-12 minutes. What comes out of the oven is pure magic: a golden, flaky croissant shell with warm, melty cookie dough oozing out, all those chocolate chunks getting soft and gooey. A light dusting of powdered sugar on top adds a touch of elegance and extra sweetness. These are best served warm when the cookie dough is still soft and the croissant is crispy. They're perfect for impressing guests, treating yourself to something special, or making that viral Paris trend right in your own kitchen!
Frequently Asked Questions
Q: Can I use store-bought cookie dough?
A: Yes! If you're short on time or want a shortcut, you can absolutely use store-bought refrigerated cookie dough. You'll need about 1-2 cups depending on how many crookies you're making. Just make sure to use a good quality dough, preferably one with chocolate chunks rather than chips for the best texture. The homemade dough in this recipe is exceptional and worth the effort if you have time, but store-bought works in a pinch for a quick treat.
Q: Do I need to use fresh croissants or can they be a day old?
A: Fresh croissants work best because they're flakier and more tender, but day-old croissants actually work great too! Slightly stale croissants can be easier to slice without squishing, and they'll crisp up beautifully in the oven. If your croissants are more than a day old and starting to get hard, you can refresh them by wrapping in foil and warming in a 300°F oven for 5 minutes before assembling. Avoid croissants that are more than 2-3 days old as they'll be too dry.
Q: Why does the cookie dough need to chill for 4 hours?
A: Chilling the dough serves several important purposes: it allows the flour to fully hydrate which improves texture, it solidifies the butter which prevents excessive spreading during baking, and most importantly, it develops the flavor as the ingredients have time to meld together. If you're really pressed for time, you can get away with chilling for 2 hours minimum, but 4 hours or even overnight gives you the best results. The dough can be made up to 3 days ahead and kept refrigerated.
Q: Can I freeze the cookie dough?
A: Absolutely! The cookie dough freezes beautifully for up to 3 months. After chilling, portion it into balls or flatten into discs, wrap well in plastic wrap, and freeze in a freezer bag. You can use the frozen dough directly for crookies (just let it sit at room temp for 15-20 minutes to soften slightly before stuffing), or thaw it overnight in the fridge. This makes it super convenient to have cookie dough ready whenever a crookie craving hits!
This crookie is the viral Paris dessert fusion you need to try! A flaky croissant stuffed with homemade chocolate chip cookie dough, baked until golden and gooey, then dusted with powdered sugar. The perfect combination of buttery croissant layers and warm, melty chocolate cookies. Pure dessert heaven!
Rate This Recipe!
Preparations
Prep Time:
30 minutes (plus 4 hours chilling time)
Cook Time:
12 minutes
Total Time:
4 hours 42 minutes
Cuisine:
French-American Fusion
Course:
Dessert
Calories:
520 kcal (approx. per crookie)
Servings:
8-10 crookies (depending on croissant size)
Author:
Ronica Rupan
Ingredients
Ingredients
For the Chocolate Chip Cookie Dough:
- 1½ cups bittersweet chocolate (60% cacao), chopped into ½-inch pieces
- ½ cup milk chocolate, chopped into ½-inch pieces
- ¾ cup cane sugar
- ¾ cup packed light brown sugar
- 1 cup unbleached bread flour, sifted
- 1 cup unbleached all-purpose flour, sifted
- 1 teaspoon baking soda
- ½ teaspoon kosher salt
- 2 large eggs, at room temperature
- 1 teaspoon vanilla paste (or vanilla extract)
- ½ teaspoon vanilla extract
- 2 sticks (1 cup) unsalted butter, at room temperature
For the Crookies:
- 8-10 croissants (fresh or day-old)
- Powdered sugar, for dusting
Instructions
Make the Cookie Dough:
- Prep Your Ingredients Make sure all your ingredients are at room temperature before starting. Take the butter and eggs out of the fridge at least 30-60 minutes before you begin. This is crucial for proper creaming. Preheat your oven to 350°F (175°C) if you plan to bake cookies separately, or skip this if you're only making crookies.
- Cream the Butter and Sugars In a large bowl using a hand mixer, or in a stand mixer fitted with the paddle attachment, cream together the softened butter, cane sugar, and brown sugar on medium-high speed for 10-12 minutes. Don't rush this step! The mixture should become very light, fluffy, and pale in color, almost doubled in volume. This incorporates air which makes your cookies (and crookies) tender.
- Add Vanilla and Eggs Add the vanilla paste and vanilla extract to the butter mixture and beat until combined. Add the eggs one at a time, beating well after each addition and scraping down the sides of the bowl as needed. The mixture should be smooth and well combined.
- Combine the Dry Ingredients In a separate large bowl, whisk together the sifted bread flour, sifted all-purpose flour, baking soda, and salt. Add the chopped bittersweet chocolate and milk chocolate pieces and toss to coat them in the flour mixture. This helps prevent the chocolate from sinking to the bottom.
- Mix the Dough Add the dry ingredient mixture to the butter mixture. Mix on low speed just until the flour starts to disappear, about 30 seconds. Stop the mixer and finish mixing by hand with a wooden spoon or spatula, folding until just combined. Don't overmix or your cookies will be tough. A few streaks of flour are okay.
- Chill the Dough Cover the bowl with plastic wrap and refrigerate for at least 4 hours, or up to 3 days. This chilling time is essential for developing flavor and preventing excessive spreading.
- Bring Dough to Room Temperature When you're ready to make crookies (or cookies), remove the dough from the fridge and let it sit at room temperature for about 1 hour until it's soft enough to scoop easily but still cold.
Assemble and Bake the Crookies:
- Preheat the Oven Preheat your oven to 350°F (175°C). Line a baking sheet with parchment paper.
- Prepare the Croissants Take each croissant and use a serrated knife to carefully slice it in half horizontally, like you're making a sandwich. Try to keep the layers intact as much as possible.
- Stuff with Cookie Dough Scoop about 2-3 tablespoons of cookie dough and press it onto the bottom half of the croissant, spreading it out to cover most of the surface. Add another 1-2 tablespoons of cookie dough on top of the croissant before you close it up. Place the top half of the croissant back on, pressing down very gently. The cookie dough will be visible and that's perfect!
- Bake Place the stuffed croissants on your prepared baking sheet, spacing them about 2 inches apart. Bake for 10-12 minutes until the croissant is golden brown and crispy, and the cookie dough is baked through but still soft. The edges of the cookie dough might peek out and get slightly crispy, which is delicious!
- Dust and Serve Remove from the oven and let cool on the baking sheet for 2-3 minutes. Transfer to a serving plate and dust generously with powdered sugar using a fine-mesh sieve. Serve warm while the cookie dough is still gooey and the croissant is crispy!
Caribbean Chicken Stew
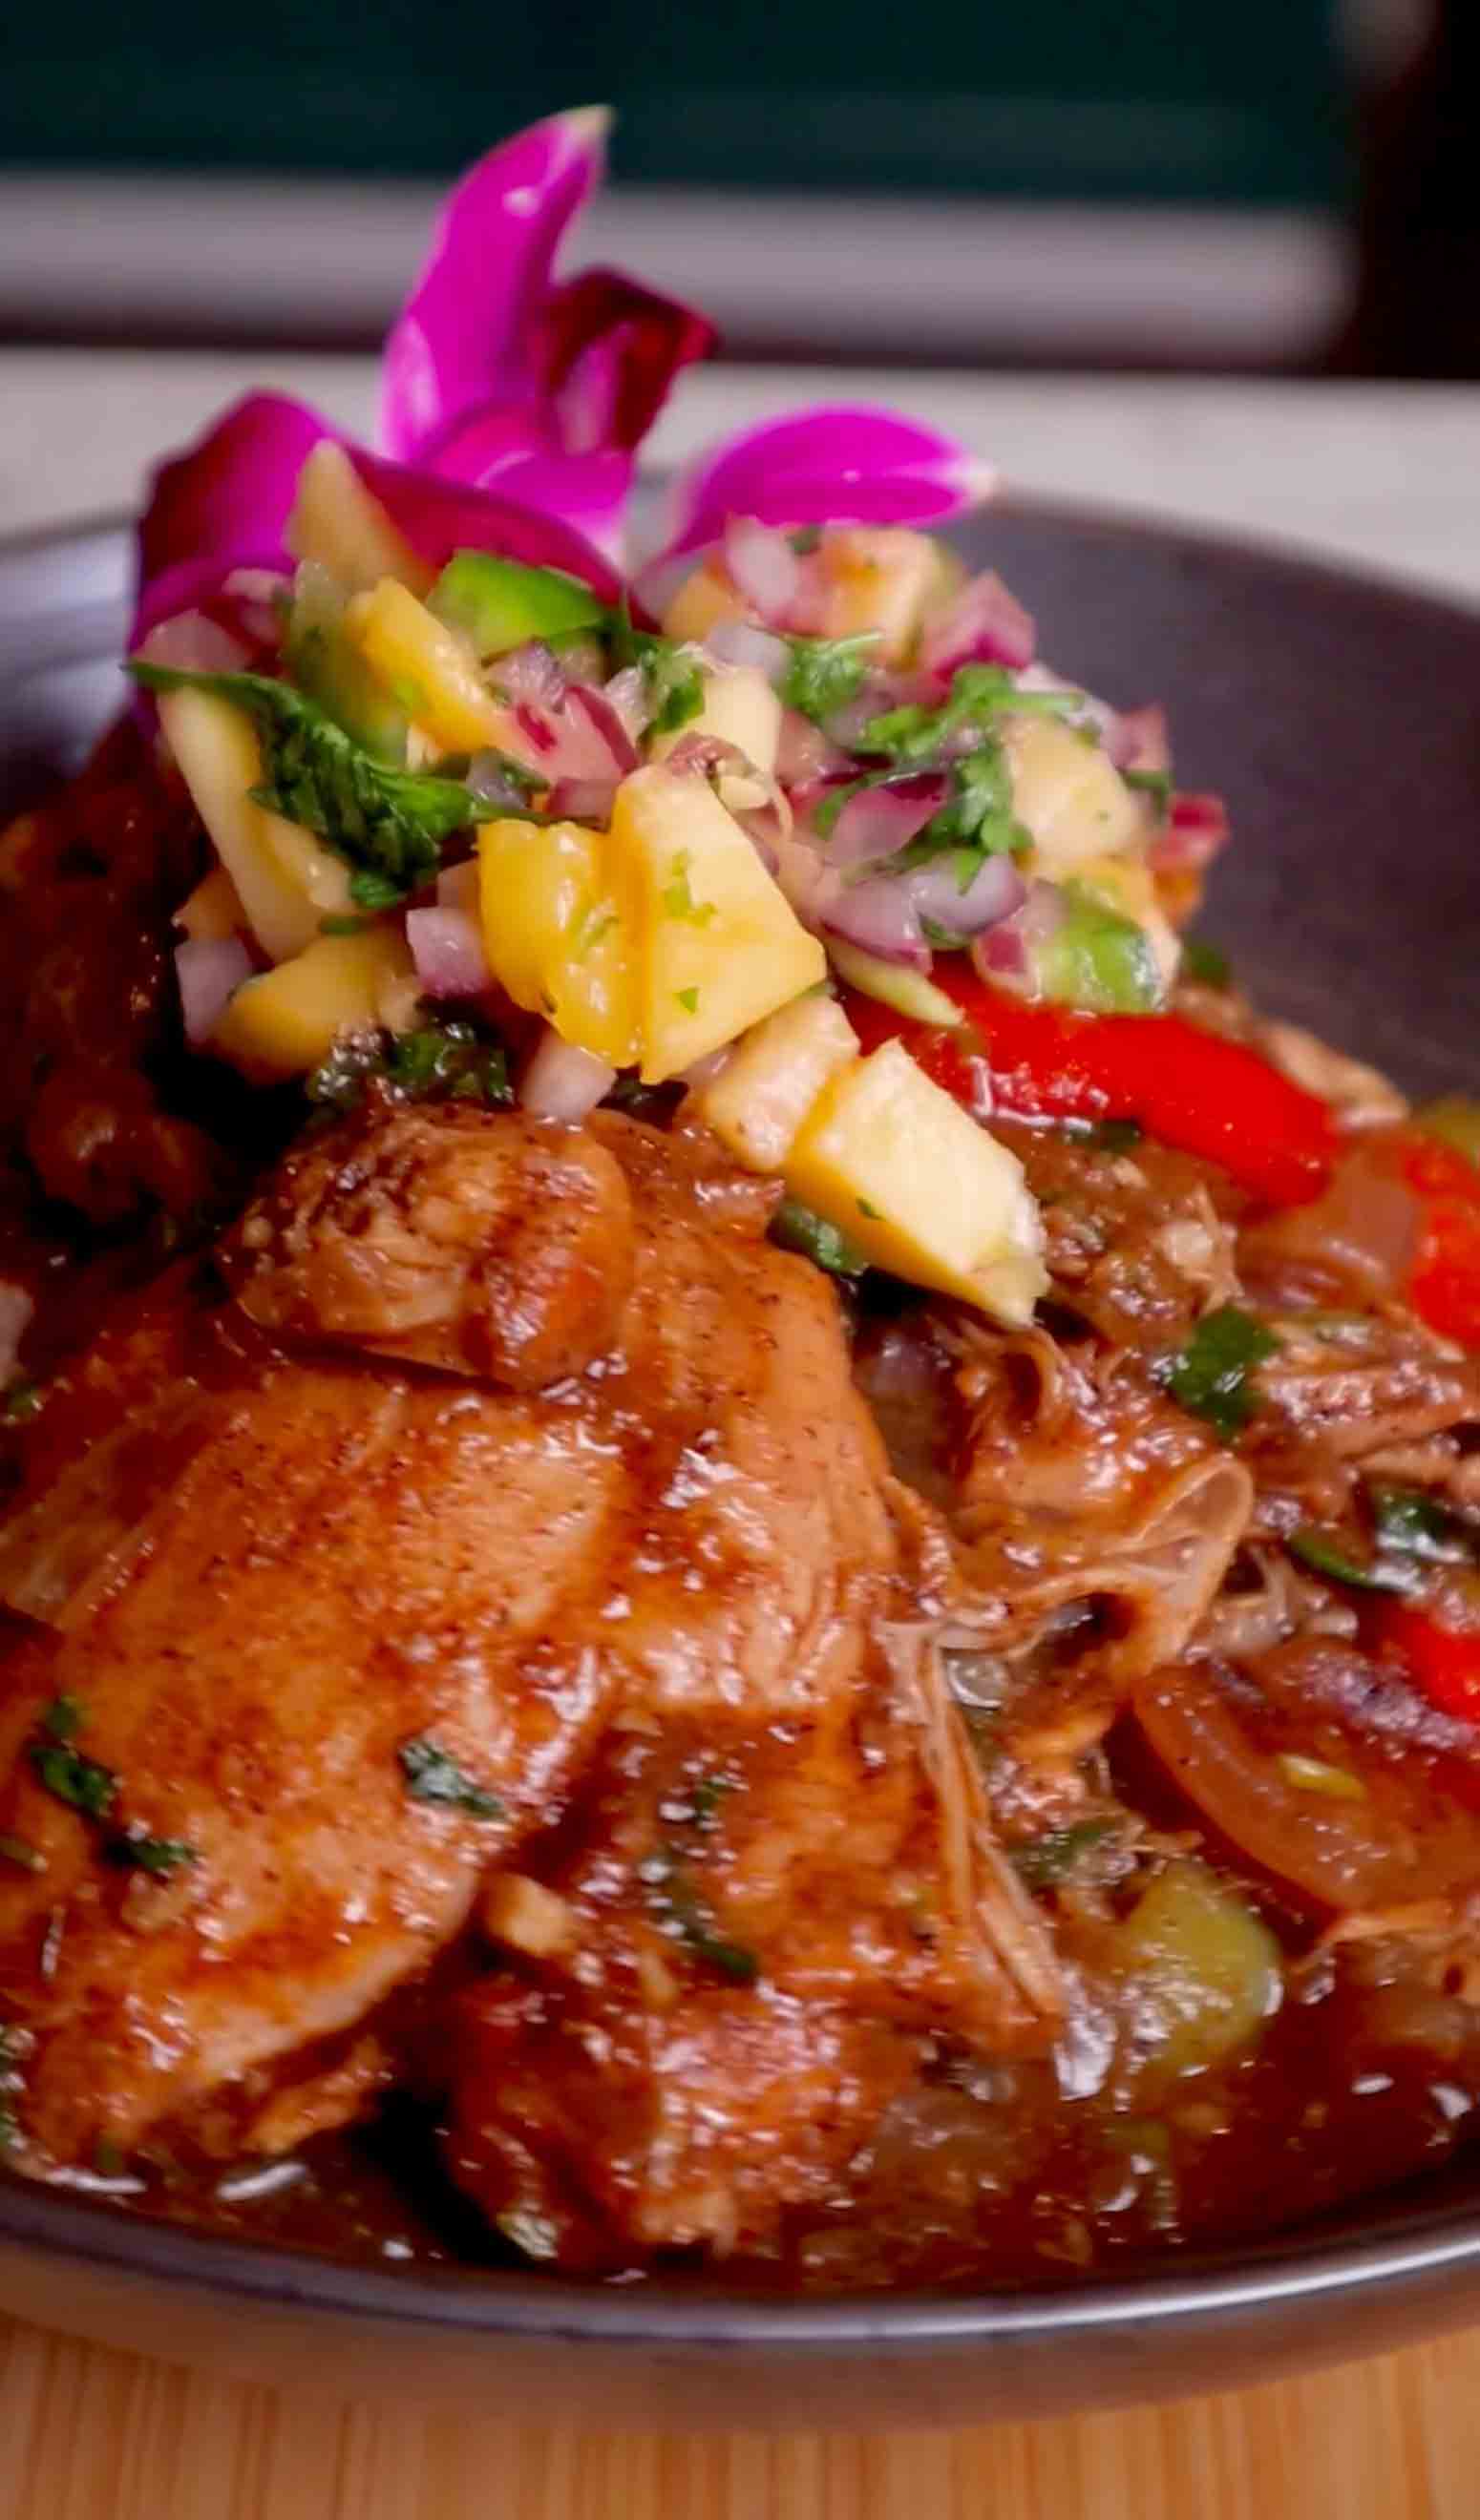
This Caribbean chicken stew is pure comfort in a bowl with the most incredible blend of sweet, savory, and spicy flavors that'll transport you straight to the islands! Chicken thighs with the skin on get marinated in a bold spice blend of cayenne, allspice, brown sugar, smoked paprika, cinnamon, cumin, and fresh lime juice that creates this amazing crust when seared. The skin-on thighs are crucial here because they stay incredibly juicy during the long simmer and the rendered fat adds so much richness to the stew. After marinating for at least 30 minutes (though an hour is even better), you sear the chicken in a hot pan until the skin is golden and crispy, locking in all those flavors. Then you remove the chicken and use that same flavorful pan to cook your aromatics: red and green bell peppers, red onion, loads of minced garlic, and freshly grated ginger. The vegetables get caramelized in all those delicious browned bits left from the chicken. Then comes the magic: you add diced mango, optional habanero for heat, more warming spices like cinnamon and allspice, brown sugar for depth, and fresh thyme stems. Everything gets deglazed with sweet pineapple juice that creates this incredible fruity, slightly tangy base for your stew. The chicken goes back in, the whole thing gets covered, and it simmers low and slow for 40-50 minutes until the chicken is fall-off-the-bone tender and the sauce has reduced into this thick, glossy, deeply flavorful gravy. The combination of tropical fruits, warming spices, and tender chicken is absolutely incredible. Right before serving, you stir in fresh cilantro and green onions for brightness. The stew gets ladled over fluffy cilantro-lime rice and topped with a fresh mango chutney made with diced mango, jalapeño, red onion, lime juice, and cilantro that adds a bright, tangy, slightly spicy contrast to the rich stew. Every bite is layers of flavor: sweet from the mango and pineapple, savory from the chicken and aromatics, warming from the cinnamon and allspice, spicy from the habanero, and fresh from all those herbs. It's the kind of meal that makes you close your eyes and savor every spoonful!
Frequently Asked Questions
Q: Can I use boneless, skinless chicken thighs?
A: You can, but bone-in, skin-on thighs are really recommended for this recipe. The bones add so much flavor to the stew as it simmers, and the skin renders out fat that enriches the sauce while also getting crispy during the searing step. If you use boneless, skinless thighs, reduce the cooking time to about 25-30 minutes instead of 40-50 minutes since they'll cook faster. The stew will still be delicious but won't have quite the same depth of flavor and richness. You could also use chicken drumsticks or a mix of bone-in dark meat pieces.
Q: How spicy is this stew?
A: The spice level depends on whether you use the habanero and how much you add. The marinade has cayenne which adds warmth but isn't too spicy on its own. If you include a whole habanero, the stew will have significant heat. For milder heat, use just half a habanero, or leave it whole without cutting it so it infuses flavor without as much spice, then remove it before serving. For no heat at all, skip the habanero entirely. The mango chutney with jalapeño adds a milder, fresher heat that's more controllable. You can always start mild and let people add hot sauce at the table!
Q: Can I make this ahead of time?
A: Absolutely! This stew actually tastes even better the next day after all the flavors have had time to meld together. Make it up to 2 days ahead, let it cool completely, then store in an airtight container in the fridge. Reheat gently on the stovetop over medium-low heat, stirring occasionally and adding a splash of water or chicken broth if it's thickened too much. The mango chutney is also best made a few hours ahead so the flavors can marry. Make the rice fresh when you're ready to serve for the best texture.
Q: What can I serve this with besides rice?
A: While cilantro-lime rice is traditional and absolutely delicious, this stew is versatile! You could serve it over coconut rice for extra tropical flavor, quinoa for a healthier option, mashed sweet potatoes or regular mashed potatoes, or even with crusty bread for soaking up that amazing sauce. Fried plantains on the side would be incredibly authentic. You could also serve it over rice and peas (rice cooked with kidney beans and coconut milk), which is a classic Caribbean pairing.
Rate This Recipe!
Preparations
Prep Time:
20 minutes (plus 30-60 minutes marinating)
Cook Time:
1 hour
Total Time:
1 hour 20 minutes (plus marinating)
Cuisine:
Caribbean
Course:
Main Course, Dinner
Calories:
480 kcal (approx. per serving)
Servings:
5-6
Author:
Ronica Rupan
Ingredients
Ingredients
For the Chicken Marinade:
- 5-6 bone-in, skin-on chicken thighs
- ¼ teaspoon cayenne pepper
- ½ teaspoon kosher salt
- ½ teaspoon ground allspice (pimento)
- 1 tablespoon brown sugar
- 1 teaspoon onion powder
- 1 teaspoon garlic powder
- 1 teaspoon smoked paprika
- ¼ teaspoon ground cinnamon
- ½ teaspoon ground cumin
- ½ teaspoon black pepper
- Juice of ½ lime
- 1 head garlic, cloves minced (about 8-10 cloves)
For the Stew:
- 2 tablespoons olive oil
- 1 red bell pepper, cut into 1-inch pieces
- 1 green bell pepper, cut into 1-inch pieces
- 1 red onion, cut into 1-inch pieces
- 1 head garlic, cloves minced (about 8-10 cloves)
- 1 thumb-sized piece fresh ginger, grated
- 1 ripe mango, peeled and diced
- 1 habanero pepper, whole or halved (optional, for heat)
- 1 tablespoon brown sugar
- 1 teaspoon kosher salt (adjust to taste)
- 1 teaspoon ground cinnamon
- 1 teaspoon ground allspice
- ½ teaspoon smoked paprika
- 3 sprigs fresh thyme
- 2 cups pineapple juice
For Garnish:
- Chopped green onions
- Chopped fresh cilantro
For the Mango Chutney:
- 1 ripe mango, diced
- 1 jalapeño, seeded and finely chopped
- ½ small red onion, finely chopped
- Juice of 1 lime
- Large handful fresh cilantro, chopped
- Kosher salt, to taste
For Serving:
- Cilantro-lime rice
Instructions
- Marinate the Chicken In a large bowl, combine the cayenne, salt, allspice, brown sugar, onion powder, garlic powder, smoked paprika, cinnamon, cumin, black pepper, lime juice, and minced garlic. Mix everything together to create a paste. Add the chicken thighs and use your hands to rub the marinade all over each piece, making sure to get under the skin as well. Cover the bowl with plastic wrap or transfer to a zip-top bag and refrigerate for at least 30 minutes, but up to 2 hours is even better for maximum flavor.
- Prep Your Vegetables While the chicken is marinating, chop your red and green bell peppers, red onion, and mango into 1-inch pieces. Mince the head of garlic and grate the ginger. Set everything aside so it's ready to go.
- Sear the Chicken Heat the olive oil in a large, deep skillet or Dutch oven over medium-high heat. Once the oil is shimmering and hot, add the marinated chicken thighs skin-side down in a single layer. Don't move them! Let them sear undisturbed for about 7 minutes until the skin is golden brown and crispy. Flip the chicken and sear for another 7 minutes on the other side. The chicken won't be fully cooked yet, that's okay. Remove the chicken from the pan and set it aside on a plate.
- Cook the Aromatics and Vegetables In the same pan with all those flavorful drippings, add the chopped bell peppers and red onion. Cook over medium-high heat, stirring occasionally, for 5-7 minutes until the vegetables are softened and starting to caramelize. Add the minced garlic and grated ginger and cook for another minute until fragrant.
- Build the Stew Base Add the diced mango, habanero pepper (if using), brown sugar, salt, cinnamon, allspice, smoked paprika, and fresh thyme sprigs to the pan. Stir everything together and cook for about 2 minutes to toast the spices and let the sugar start to caramelize. Pour in the pineapple juice and use a wooden spoon to scrape up any browned bits from the bottom of the pan. Those bits are packed with flavor!
- Simmer the Stew Return the seared chicken thighs to the pan, nestling them into the vegetables and sauce. The liquid should come about halfway up the chicken. Bring everything to a simmer, then reduce the heat to medium-low. Cover the pan with a lid and let it cook for 40-50 minutes, checking occasionally to make sure there's still liquid in the pan. Add a splash of water or more pineapple juice if it's getting too dry. The chicken is done when it's fall-off-the-bone tender and the sauce has thickened into a rich gravy.
- Make the Mango Chutney While the stew is simmering, make your mango chutney. In a medium bowl, combine the diced mango, chopped jalapeño, chopped red onion, lime juice, chopped cilantro, and a pinch of salt. Stir everything together and let it sit at room temperature so the flavors can meld. Taste and adjust with more lime juice or salt if needed.
- Finish and Garnish Once the chicken is tender, remove the thyme stems from the stew and discard them. Taste the sauce and adjust the seasoning with more salt if needed. Stir in the chopped cilantro and green onions right before serving.
- Serve Ladle the Caribbean chicken stew over bowls of fluffy cilantro-lime rice. Top each serving with a generous spoonful of the fresh mango chutney. Serve hot and enjoy!
Hawaiian Teriyaki Chicken Sliders with Homemade Buns
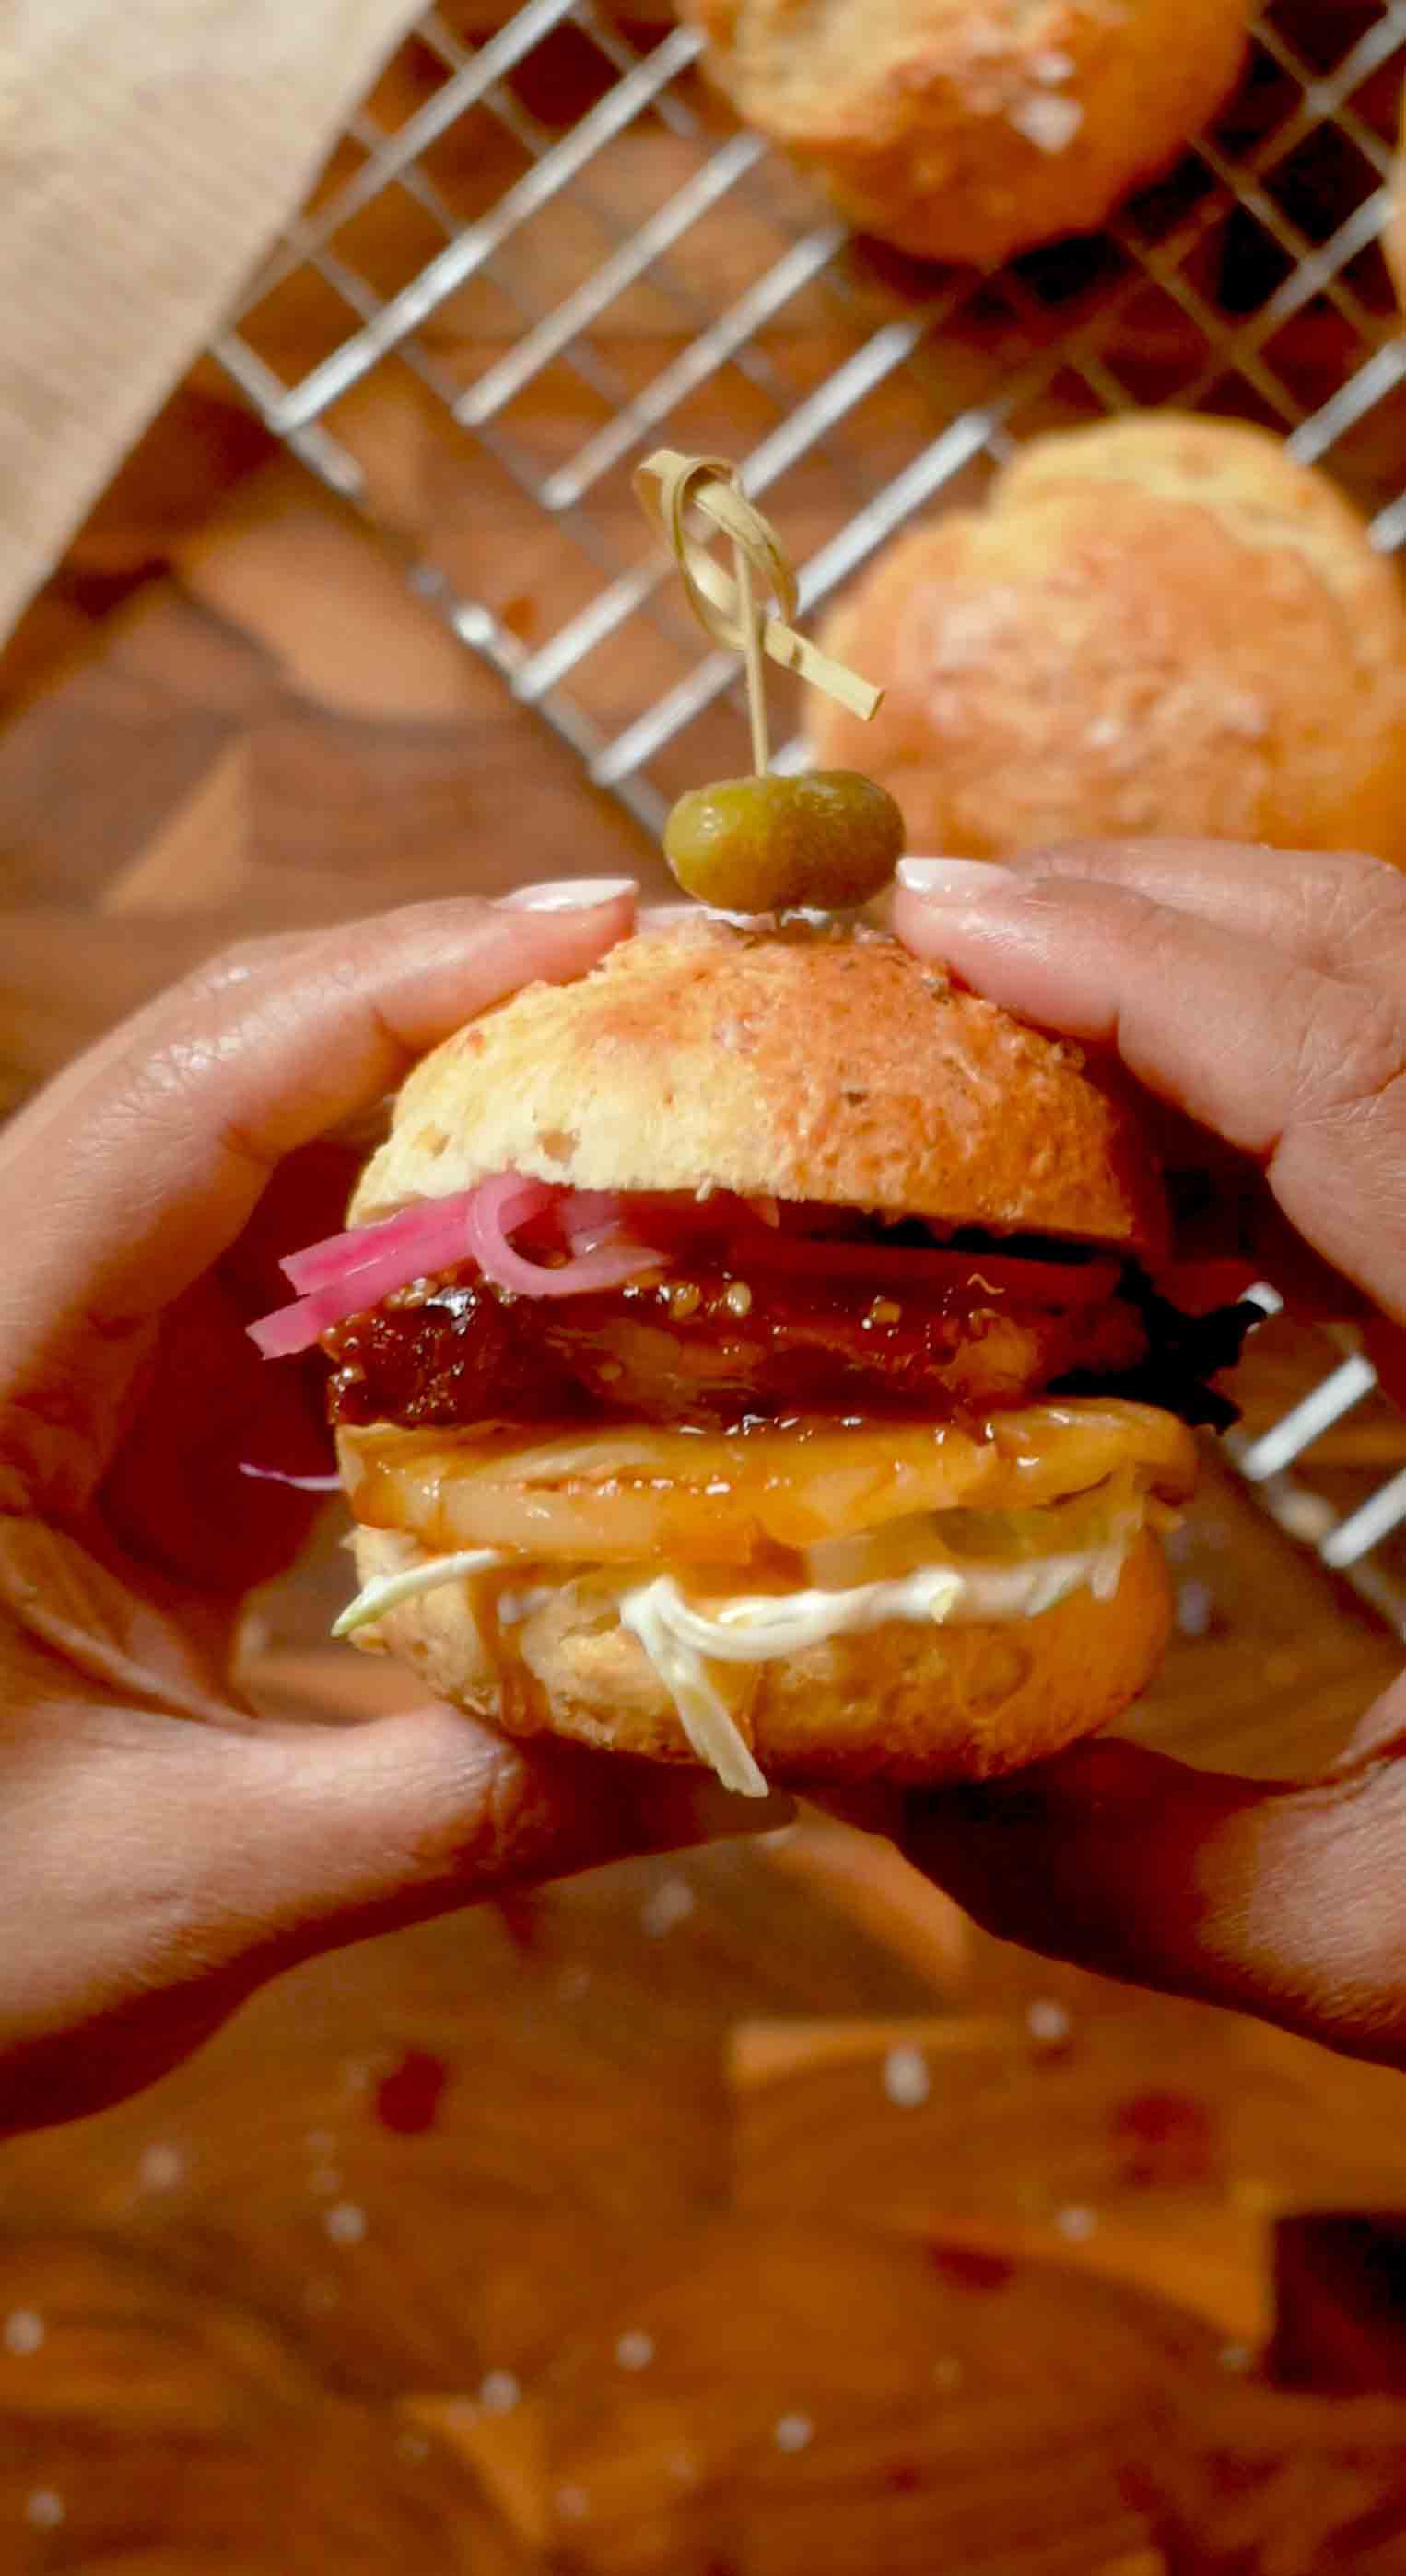
These Hawaiian teriyaki chicken sliders are the ultimate game day snack that brings together sweet, savory, and tropical flavors in one perfect little bite! What makes these sliders extra special is the homemade buns made with just two main ingredients: cottage cheese and Bob's Red Mill Self-Rising Flour. No yeast, no rising time, no complicated bread-making steps. You just blend the cottage cheese until smooth, mix it with the self-rising flour, a touch of sugar for sweetness, and salt, then shape into rolls and bake. In about 25 minutes, you have the softest, fluffiest slider buns that are slightly sweet and absolutely perfect for these Hawaiian-inspired sliders. The Bob's Red Mill Self-Rising Flour is key here because it already has the leavening agents mixed in, so your buns rise beautifully without any waiting around. While the buns bake, you make the most incredible homemade teriyaki sauce with soy sauce, mirin (or a honey and water substitute if you don't have it), brown sugar, fresh garlic, and grated ginger. It's so much better than bottled sauce and takes just minutes to whisk together. You cook bite-sized pieces of chicken thighs or breasts in a hot skillet until they're golden, then pour the teriyaki sauce over and let it simmer until it thickens into this glossy, sticky coating that clings to every piece. Fresh pineapple rings get grilled in a hot pan until they're caramelized and sweet with beautiful char marks that add smoky depth. Then comes the fun part: assembling! You slice your homemade buns, spread them with mayo or sriracha mayo if you want a kick, add crisp lettuce or tangy cabbage slaw, pile on that sticky teriyaki chicken, top with a piece of grilled pineapple, and close it up. Every bite has tender chicken, sweet caramelized pineapple, fresh crunch from the slaw, and that perfectly soft homemade bun holding it all together. These sliders are perfect for game day parties, potlucks, casual dinners, or anytime you want something that looks impressive but is actually super easy to make. The homemade buns take these from good to absolutely incredible!
Frequently Asked Questions
Q: Can I make the buns ahead of time?
A: Yes! The buns can be made 1-2 days ahead and stored in an airtight container at room temperature. They stay soft and fresh for a couple of days. You can also freeze them for up to 3 months. To freeze, let them cool completely, then wrap individually in plastic wrap and place in a freezer bag. Thaw at room temperature for a few hours before using, or warm in a 300°F oven for 5-10 minutes. The teriyaki chicken can also be made 1-2 days ahead and stored in the fridge, then reheated gently before assembling.
Q: Why do I need to blend the cottage cheese?
A: Blending the cottage cheese until completely smooth is what makes these buns so soft and tender. The curds in unblended cottage cheese would create lumps in your dough and an uneven texture in the finished buns. When blended smooth, the cottage cheese acts like buttermilk or yogurt, adding moisture, protein, and tenderness without any cottage cheese flavor or texture in the final product. It takes less than a minute and makes all the difference!
Q: What can I use instead of mirin?
A: Mirin is a sweet Japanese rice wine that adds both sweetness and depth to teriyaki sauce. If you don't have it, the recipe includes a substitute: mix 2 tablespoons honey with 2 tablespoons water. This mimics mirin's sweetness and liquid content. You could also use 3 tablespoons of sake or white wine mixed with 1 tablespoon of sugar, or even just use an extra tablespoon of brown sugar dissolved in 3 tablespoons of water. The flavor will be slightly different but still delicious.
Q: Can I use ground chicken instead?
A: Yes, ground chicken works! Brown 1½ pounds of ground chicken in a skillet, breaking it up as it cooks, then drain any excess fat. Add the teriyaki sauce and cornstarch slurry and simmer until thickened. The texture will be different from chunks of chicken thigh, more like a sloppy joe filling, but it's still tasty and makes the sliders easier to eat. You could also use ground turkey, ground beef, or even crumbled firm tofu for a vegetarian option.
These Hawaiian teriyaki chicken sliders feature homemade buns made with just cottage cheese and Bob's Red Mill Self-Rising Flour! No yeast needed. Sweet teriyaki chicken, grilled pineapple, and crisp slaw piled on soft, fluffy buns. Perfect for game day or any gathering!
Rate This Recipe!
Preparations
Prep Time:
20 minutes
Cook Time:
30 minutes
Total Time:
50 minutes
Cuisine:
Hawaiian, Asian Fusion
Course:
Appetizer, Main Course, Dinner
Calories:
340 kcal (approx. per slider)
Servings:
8-10 sliders
Author:
Ronica Rupan
Ingredients
Ingredients
For the Sweet Slider Buns:
- 1½ cups cottage cheese (any fat content works)
- 1⅔ cups Bob's Red Mill Self-Rising Flour
- ¾ teaspoon kosher salt
- 2 tablespoons granulated sugar or honey
- 1 large egg (for egg wash)
- 1 teaspoon water
- ⅛ teaspoon kosher salt (for egg wash)
For the Teriyaki Chicken:
- 1½ pounds boneless, skinless chicken thighs or breasts
- ½ cup soy sauce
- ¼ cup mirin (or substitute with 2 tablespoons honey + 2 tablespoons water)
- 2 tablespoons brown sugar
- 2 cloves garlic, minced
- 1 teaspoon fresh ginger, grated
- 1 tablespoon cornstarch + 2 tablespoons water (for thickening)
- 1 tablespoon vegetable oil
For the Toppings:
- 1 fresh pineapple, sliced into ½-inch rings (or 1 can pineapple rings, drained)
- Lettuce leaves or cabbage slaw
- Optional: sliced cucumber, mayonnaise, sriracha mayo
Instructions
- Preheat and Prep Preheat your oven to 375°F (190°C). Line a baking sheet with parchment paper and set it aside. This will be for your slider buns.
- Blend the Cottage Cheese Add the cottage cheese to a food processor or high-speed blender. Blend on high for 30-60 seconds until it's completely smooth with no lumps or curds visible. It should look like thick, smooth yogurt. Set aside.
- Make the Slider Bun Dough In a large mixing bowl, stir together the Bob's Red Mill Self-Rising Flour, salt, and sugar until well combined. Pour in the blended cottage cheese and stir with a wooden spoon or spatula until the mixture just starts to come together into a shaggy dough. If needed, use your hands to gently knead it a few times right in the bowl until it forms a cohesive dough. Don't overmix, just bring it together.
- Shape the Slider Buns Lightly oil your hands to prevent sticking. Divide the dough into 8-10 equal portions (about 2-3 tablespoons each). Roll each portion between your palms to form a smooth round ball, then gently flatten slightly into a slider bun shape. Place the shaped buns on your prepared baking sheet, spacing them about 2 inches apart so they have room to expand.
- Apply Egg Wash and Bake In a small bowl, whisk together the egg, 1 teaspoon of water, and ⅛ teaspoon of salt until well combined. Using a pastry brush, gently brush the egg wash over the top of each bun. This will give them a beautiful golden color and slight shine. Bake for 20-25 minutes until the buns are golden brown on top and sound hollow when tapped on the bottom. Remove from the oven, transfer to a wire rack, and let cool completely before slicing. Once cool, use a serrated knife to carefully slice each bun in half horizontally.
- Make the Teriyaki Sauce While the buns are baking, make your teriyaki sauce. In a medium bowl, whisk together the soy sauce, mirin (or honey and water substitute), brown sugar, minced garlic, and grated ginger until the sugar is dissolved. Set this aside. In a separate small bowl, mix the cornstarch with 2 tablespoons of water to create a slurry. This will thicken your sauce later. Set aside.
- Cook the Teriyaki Chicken Cut your chicken into bite-sized pieces or thin strips, about 1-inch chunks. Heat the vegetable oil in a large skillet over medium-high heat. Once the oil is shimmering, add the chicken pieces in a single layer. Cook without moving them for 2-3 minutes until the bottom is golden brown, then flip and cook for another 3-4 minutes until the chicken is cooked through and no longer pink inside. Pour the teriyaki sauce mixture over the chicken and bring it to a simmer. Let it bubble for about 1 minute, then stir in the cornstarch slurry. Continue cooking, stirring constantly, for 1-2 minutes until the sauce thickens and coats the chicken in a glossy glaze. Remove from heat and set aside.
- Grill the Pineapple Heat a grill pan or regular skillet over medium-high heat. If you're using canned pineapple, pat the rings dry with paper towels first. Place the pineapple rings in the hot pan and cook for 2-3 minutes per side without moving them until you get nice caramelized grill marks and the natural sugars start to caramelize. The pineapple should be golden brown with some charred spots. Remove from heat and cut the rings into smaller pieces if needed to fit your sliders. Set aside.
- Assemble the Sliders Now for the fun part! Take the bottom half of each slider bun. If you want extra creaminess and a little kick, spread a thin layer of mayo or sriracha mayo on the bun. Add a small handful of crisp lettuce or tangy cabbage slaw. Pile on a generous portion of the sticky teriyaki chicken. Top with a piece or two of the grilled pineapple. Place the top bun over everything. If the sliders are tall and you want them to stay together, secure with a toothpick through the middle.
- Serve and Enjoy Arrange the assembled sliders on a large wooden board or serving platter. Serve immediately while the chicken is still warm and the buns are soft. These are best enjoyed fresh, but leftovers can be stored separately and reheated!
Salt and Vinegar Tater Tots
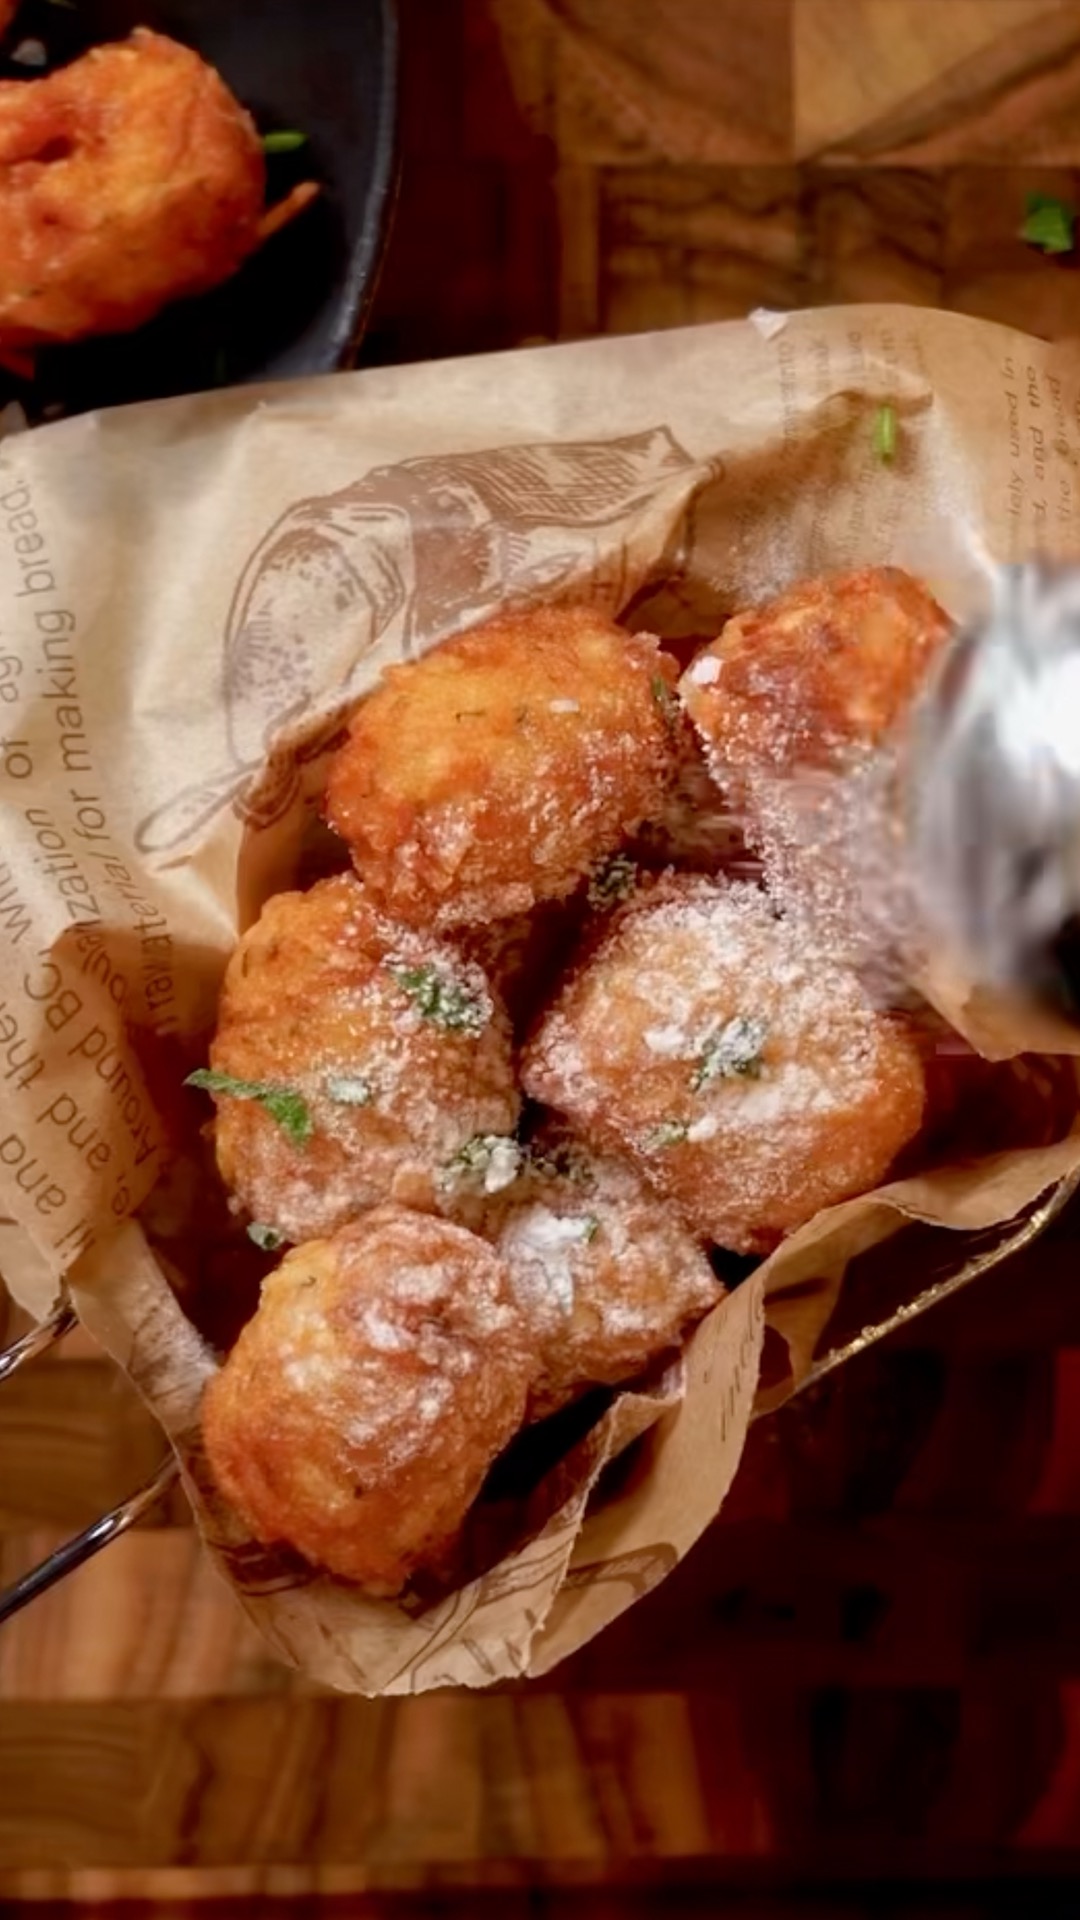
These homemade salt and vinegar tater tots are about to become your new favorite snack, and once you try them, you'll never want to go back to the frozen store-bought kind! They're crispy and golden on the outside, fluffy and tender on the inside, and packed with that addictive tangy vinegar flavor that makes them absolutely irresistible. The process is easier than you think: you start with russet potatoes that get boiled until fork-tender, then cooled and shredded on a box grater. The shredded potatoes get mixed with a flavorful blend of paprika, onion powder, garlic powder, and dried dill, along with cornstarch to help bind everything together and melted butter for richness. The cornstarch is the secret to getting that perfect crispy exterior when you fry them. You form the mixture into small tot shapes (about 1½ tablespoons each), then freeze them for an hour so they firm up and hold their shape during frying. This freezing step is crucial, don't skip it or your tots will fall apart in the oil! Once they're frozen solid, you fry them in batches in hot oil until they're golden brown and incredibly crispy. The moment they come out of the oil, you hit them with the finishing touches: fresh chopped parsley and chives for color and freshness, flaky sea salt for that satisfying crunch, and the star of the show, white vinegar powder that gives you that intense tangy flavor without making the tots soggy like liquid vinegar would. The result is these amazing little bites that have all the nostalgic appeal of tater tots but taste so much better than anything from a bag. They're perfect as an after-school snack for kids, a lunchbox addition that'll make you the coolest parent, a party appetizer, or a side dish for burgers and sandwiches. Serve them hot and fresh with ketchup, ranch, or just eat them plain because they're that good!
Frequently Asked Questions
Q: What is white vinegar powder and where can I find it?
A: White vinegar powder is dehydrated vinegar that's been turned into a powder form. It gives you that intense tangy vinegar flavor without adding moisture, which is perfect for keeping fried foods crispy. You can find it at specialty spice stores, online through Amazon or spice retailers, or sometimes in the international or bulk spice section of grocery stores. If you can't find vinegar powder, you can substitute with citric acid (which is more sour) or malt vinegar powder. In a pinch, you could lightly spray the hot tots with white vinegar and immediately sprinkle with salt, but the powder gives the best results and keeps them crispier.
Q: Can I bake these instead of frying?
A: Yes! For a healthier version, you can bake them instead of frying. After freezing, arrange the tots on a parchment-lined baking sheet, spray them generously with cooking spray or brush with oil, and bake at 425°F for about 25-30 minutes, flipping halfway through, until golden brown and crispy. They won't be quite as crispy as the fried version, but they'll still be delicious and much lighter. You can also use an air fryer at 400°F for 15-18 minutes, shaking the basket halfway through.
Q: Why do I need to freeze the tots before frying?
A: Freezing is essential for keeping the tots from falling apart when they hit the hot oil. The frozen exterior helps them hold their shape while the inside cooks through. If you try to fry them without freezing first, they'll likely crumble and fall apart in the oil, making a mess and giving you sad, broken tots instead of perfect crispy ones. The hour in the freezer also makes them much easier to handle and move around. If you're making these ahead, you can freeze them for several hours or even overnight.
Q: Can I make these ahead of time?
A: Absolutely! These are perfect for meal prep. After forming the tots, you can freeze them on a baking sheet until solid, then transfer to a freezer bag or airtight container and keep frozen for up to 3 months. Fry them straight from frozen, adding an extra minute or two to the cooking time. You can also fry them completely, let them cool, then reheat in a 400°F oven or air fryer for 5-7 minutes until crispy again. The vinegar powder should be added right before serving for the best flavor.
These homemade salt and vinegar tater tots are crispy, fluffy, and incredibly addictive! Boiled russet potatoes get shredded, seasoned with paprika, garlic, and dill, formed into tots, frozen, then fried until golden and crispy. Finished with fresh herbs, flaky salt, and tangy vinegar powder. So much better than store-bought!
Rate This Recipe!
Preparations
Prep Time:
20 minutes
Cook Time:
15 minutes
Total Time:
1 hour 35 minutes (including freezing time)
Cuisine:
American
Course:
Appetizer, Snack, Side Dish
Calories:
85 kcal (approx. per serving, 4 tots)
Servings:
28 tater tots (about 7 servings)
Author:
Ronica Rupan
Ingredients
Ingredients
For the Tots:
- 2 pounds russet potatoes, washed and peeled
- 1½ teaspoons kosher salt
- 1 teaspoon paprika
- ½ teaspoon onion powder
- 1 teaspoon garlic powder
- 2 tablespoons cornstarch
- 1 tablespoon unsalted butter, melted
- ½ teaspoon dried dill
- 3 cups vegetable oil, for frying
For the Topping:
- 2 tablespoons fresh parsley, chopped
- 2 tablespoons fresh chives, chopped
- Flaky sea salt, to taste
- 1 tablespoon white vinegar powder
Instructions
- Boil the Potatoes Cut your peeled potatoes into thirds so they cook more evenly. Fill a large pot with water, add a generous pinch of salt, and bring to a boil over high heat. Add the potato pieces and cook for 6-7 minutes until they're fork-tender. You want them cooked through but not mushy or falling apart. Drain the potatoes in a colander and spread them out on a baking sheet or large plate to cool completely. This is important, if they're still warm when you shred them, they'll turn gummy.
- Shred the Potatoes Once the potatoes are completely cool, use a box grater (the large holes work best) to shred them. Transfer the shredded potatoes to a large mixing bowl. You can also use a food processor with the shredding attachment if you prefer, which is faster and easier on your arms!
- Season and Mix Add the kosher salt, paprika, onion powder, garlic powder, cornstarch, melted butter, and dried dill to the bowl with the shredded potatoes. Using your hands or a large spoon, mix everything together until it's well combined and the potatoes are evenly coated with the seasonings. The mixture should hold together when you squeeze it.
- Form the Tots Using about 1½ tablespoons of the potato mixture for each tot, form them into small cylindrical shapes, about 1½ inches long and ¾ inch wide. Pack them tightly so they hold together. Place the formed tots on a parchment-lined baking sheet as you go. You should get about 28 tots from this mixture. Transfer the baking sheet to the freezer and freeze for at least 1 hour, or until the tots are completely firm and solid. This step is crucial for keeping them from falling apart during frying.
- Heat the Oil When you're ready to fry, pour the vegetable oil into a deep skillet or heavy-bottomed pot (the oil should be at least 2 inches deep). Heat the oil over medium-high heat until it reaches 350°F (175°C). Use a thermometer to check the temperature, it's important to get it right. If the oil is too cool, the tots will absorb too much oil and be greasy. If it's too hot, they'll burn on the outside before cooking through.
- Fry in Batches Working in batches of 6-8 tots at a time (don't overcrowd the pan or the temperature will drop), carefully lower the frozen tots into the hot oil using a slotted spoon or spider strainer. Fry for 3-4 minutes, turning them occasionally with a slotted spoon, until they're deep golden brown and crispy all over. The exact time will depend on how frozen they are and your oil temperature.
- Drain Use a slotted spoon to carefully remove the fried tots from the oil and transfer them to a plate lined with paper towels to drain excess oil. Let them sit for about 30 seconds to a minute. Repeat with the remaining tots, making sure the oil comes back up to 350°F between batches.
- Season and Serve While the tots are still hot, transfer them to a serving platter. Immediately sprinkle with the chopped fresh parsley, chopped chives, flaky sea salt, and the white vinegar powder. Toss gently to coat. The heat from the tots will help the seasonings stick. Serve right away while they're hot and at their crispiest!
Cracked Latte (Coffee or Matcha)

This cracked latte is the viral drink trend you need to try, and it's as stunning to look at as it is delicious to drink! The concept is so fun and creative: you coat the inside of a clear cup with melted chocolate, freeze it until it's set and solid, then fill it with ice, milk, and either espresso or matcha. When you gently squeeze the cup, the chocolate shell cracks into these beautiful shards that mix into your drink as you stir, creating this amazing marbled effect and adding pockets of rich chocolate throughout. For the coffee version, you use dark or milk chocolate that pairs perfectly with bold espresso shots. The bittersweet chocolate complements the coffee so well, creating this mocha-like experience that's not too sweet. For the matcha version, you use white chocolate which has a sweeter, creamier flavor that balances out the earthy, slightly bitter matcha beautifully. Both versions are incredibly refreshing served over ice, and you can customize the sweetness with your favorite syrup or sweetener. The process is really simple: melt your chocolate, swirl it around inside a clear plastic cup to coat the sides, freeze it for about 10 minutes, then build your drink with ice, sweetener, milk, and either freshly brewed espresso or whisked matcha. The magic moment is when you squeeze the cup and hear that satisfying crack as the chocolate shell breaks into pieces. As you stir, those chocolate shards get mixed throughout the drink, melting slightly and creating this gorgeous visual effect with every sip having a different ratio of chocolate, milk, and coffee or matcha. It's like drinking art! These lattes are perfect for impressing guests, treating yourself to something special, or creating that café experience at home. They look so fancy and complicated but honestly take less than 15 minutes to make once you have your ingredients ready!
Frequently Asked Questions
Q: What kind of cup should I use?
A: You need a clear plastic cup so you can see the chocolate coating and the cracking effect. Regular disposable plastic cups work great, or you can use reusable clear plastic tumblers. Glass cups won't work as well because they're too rigid to squeeze and crack the chocolate. The cup should be straight-sided or slightly tapered for the best chocolate coating. Standard 16-ounce clear plastic cups are perfect for this recipe..
Q: Can I use chocolate chips instead of bar chocolate
A: Yes, chocolate chips work fine and are actually more convenient! Use about ½ cup of chocolate chips to equal ⅓ cup melted chocolate. Keep in mind that chocolate chips often contain stabilizers that make them hold their shape when baking, so they might not melt quite as smoothly as bar chocolate. If your melted chips are too thick, add a tiny bit of coconut oil (about ½ teaspoon) to thin them out and make coating easier. High-quality chocolate bars will give you the smoothest, most professional-looking coating.
Q: My chocolate is too thick to coat the cup properly, what should I do?
A: If your melted chocolate is too thick and clumpy, you can thin it out by stirring in a little bit of coconut oil, about ½ to 1 teaspoon at a time, until it reaches a coating consistency. The chocolate should be fluid enough to swirl and coat the cup easily but not so thin that it all drips to the bottom. Make sure you're melting it properly in short 30-second bursts and stirring well between each burst. Overheating chocolate can make it seize up and become grainy and thick.
Q: Can I make the chocolate-coated cups ahead of time?
A: Absolutely! Once the chocolate shell is set in the freezer, you can keep the coated cups in the freezer for up to a week if they're well-covered or sealed in a freezer bag. This makes them perfect for entertaining or meal prep. When you're ready to use them, just take a cup straight from the freezer and build your drink. The frozen chocolate shell will stay solid long enough for you to assemble and enjoy your drink. Just make sure they're covered so they don't pick up any freezer odors.
This cracked latte is the viral drink you need to try! Coat a clear cup with melted chocolate (dark for coffee, white for matcha), freeze until set, then fill with ice, milk, and either espresso or matcha. Squeeze to crack the chocolate shell, creating beautiful shards that mix throughout. Stunning, delicious, and ready in 15 minutes!
Rate This Recipe!
Preparations
Prep Time:
5 minutes
Cook Time:
10 minutes
Total Time:
15 minutes
Cuisine:
American
Course:
Drinks
Calories:
280 kcal (approx. per serving, coffee version)
Servings:
1
Author:
Ronica Rupan
Ingredients
Ingredients
For the Coffee Version:
- ⅓ cup dark or milk chocolate, chopped (or ½ cup chocolate chips)
- 1 cup milk of choice
- 2 shots espresso (about ¼ cup), freshly brewed
- 1 tablespoon syrup or sweetener of choice (vanilla, caramel, or simple syrup)
- Ice cubes
For the Matcha Version:
- ⅓ cup white chocolate, chopped (or ½ cup white chocolate chips)
- 1 cup milk of choice
- 1 teaspoon matcha powder
- 1 tablespoon syrup or sweetener of choice (vanilla or simple syrup)
- Ice cubes
Instructions
- Melt the Chocolate Place your chocolate (dark/milk for coffee version, or white for matcha version) in a microwave-safe bowl. Microwave in 30-second increments, stirring thoroughly between each burst, until the chocolate is completely melted and smooth. This usually takes 1-2 minutes total. Don't rush this step or overheat the chocolate, which can cause it to seize up and become grainy. If the chocolate seems too thick, stir in ½ teaspoon of coconut oil to thin it slightly.
- Coat the Cup Pour the melted chocolate into a clear plastic cup. Tilt and rotate the cup slowly, coating the inside walls completely with chocolate. Let any excess chocolate drip back into the bowl. You want a relatively thin but complete coating on the sides of the cup. Don't worry if it's not perfectly even, the imperfections add to the charm! Place the chocolate-coated cup in the freezer for about 10 minutes until the chocolate is completely set and hard to the touch.
- Prepare Your Coffee or Matcha While the chocolate is setting, prepare your drink base. For coffee: Brew 2 shots of espresso using an espresso machine, Moka pot, or strong coffee. Let it cool slightly. For matcha: In a small bowl, whisk the matcha powder with 2 tablespoons of hot water until smooth and no lumps remain. You can use a small whisk or a matcha whisk. Add your sweetener to the matcha or espresso and stir to combine.
- Assemble the Drink Remove your chocolate-coated cup from the freezer. Fill it all the way to the top with ice cubes. Pour in your sweetener first (if you didn't already mix it with the espresso or matcha). Add the milk of your choice, pouring slowly. Finally, pour in the espresso or matcha mixture. The layers will naturally start to mix.
- Crack and Stir Here's the fun part! Gently squeeze the sides of the cup with both hands. You'll hear and feel the chocolate shell crack into beautiful shards. Give the drink a good stir with a straw or spoon, mixing the chocolate pieces throughout the drink. Watch as the chocolate creates this gorgeous marbled effect and adds pockets of sweetness to every sip.
- Enjoy Serve immediately and enjoy your beautiful, delicious cracked latte while it's cold and the chocolate shards are still solid!
Croffles (Croissant Waffles)
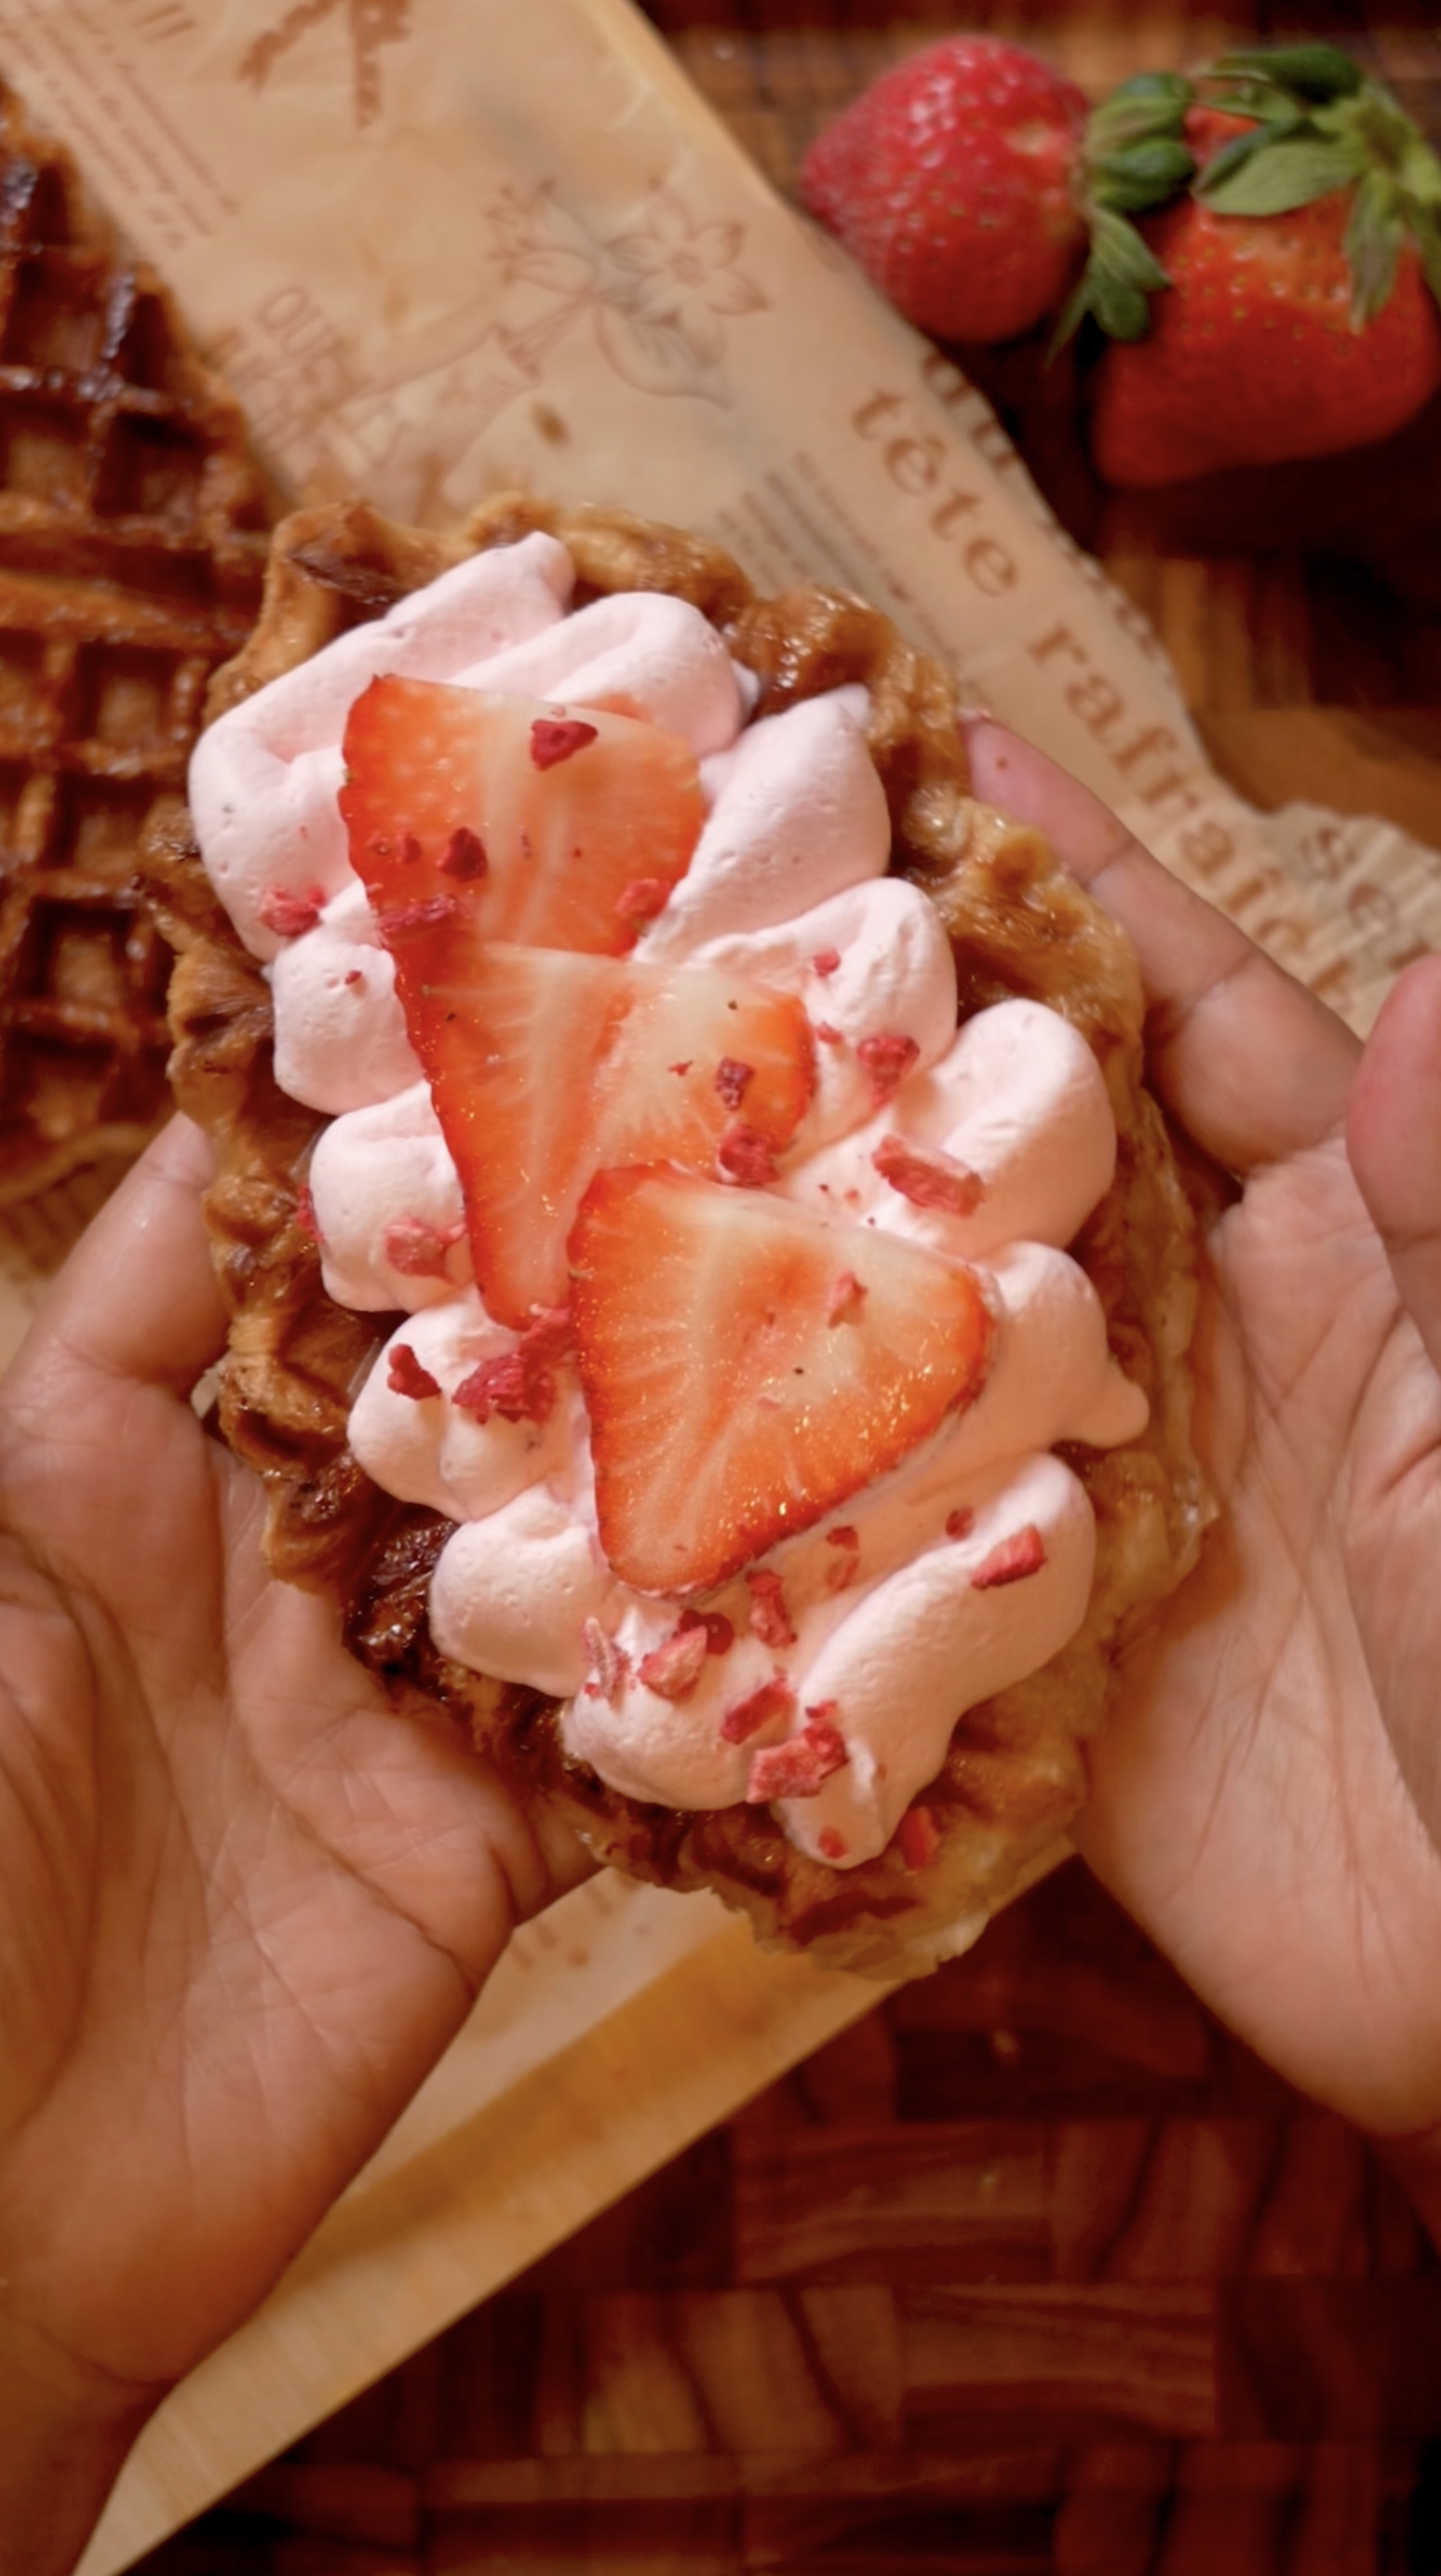
These croffles are the viral Korean dessert trend that took the internet by storm, and for good reason! They're crispy, flaky, buttery, and absolutely addictive. If you've never heard of croffles, they're basically croissants pressed in a waffle maker, which transforms those delicate buttery layers into the most incredible crispy, crunchy texture while keeping all that flaky goodness inside. The genius is in the simplicity: you take frozen croissant dough (the kind you can buy at the grocery store), let it thaw, sprinkle it with a little sugar, then press it in your waffle maker until it's golden brown and crispy. What comes out is this amazing hybrid that has all the buttery richness of a croissant but with these deep waffle pockets that are perfect for holding toppings. The sugar caramelizes slightly on the outside, creating this sweet, crispy shell while the inside stays tender and layered. The best part is that croffles are a completely blank canvas for whatever toppings you're craving. You can go classic with fresh strawberries and whipped cream, indulgent with crushed cookies and chocolate drizzle, trendy with boba pearls and sweetened condensed milk, or keep it simple with just a dusting of powdered sugar and maple syrup. They're perfect for weekend brunch, dessert, afternoon snacks, or honestly anytime you want something that feels special but takes almost zero effort. The whole process from start to finish takes about 25 minutes, and most of that is just letting the croissants thaw. These are so good warm and fresh from the waffle maker when they're at their crispiest, but honestly, they're still amazing even if they cool down a bit. Make them once and I guarantee they'll become your new obsession!
Frequently Asked Questions
Q: Can I use homemade croissant dough instead of frozen?
A: Absolutely! If you're ambitious enough to make homemade croissant dough from scratch, it will work beautifully and taste even better. You can also use refrigerated crescent roll dough if that's all you have, though it won't be quite as flaky or buttery as actual croissant dough. Store-bought frozen croissants are recommended because they're convenient, already perfectly portioned, and have all those buttery layers that make croffles so special. Brands that make all-butter croissants will give you the best results and richest flavor.
Q: What if I don't have a waffle maker?
A: A waffle maker is really what creates that signature croffle texture with all the crispy pockets, but if you don't have one, you can try using a panini press or even a regular skillet. For a skillet method, press the croissant dough flat in a buttered pan over medium heat, weigh it down with another heavy pan on top, and cook until golden and crispy on both sides (about 3-4 minutes per side). It won't have the waffle grid pattern or deep pockets, but it will still be crispy and delicious. You could also bake them in the oven at 375°F for about 12-15 minutes until golden and crispy.
Q: How do I keep them crispy?
A: Croffles are crispiest when they're fresh and warm right out of the waffle maker. If you need to make several, place the finished croffles on a wire rack (not a plate) so air can circulate around them and they don't get soggy from trapped steam. You can keep them warm in a 200°F oven on a baking sheet while you finish the rest. Don't stack them or cover them while they're still warm. If they do soften up, you can re-crisp them by popping them back in the waffle maker for 30 seconds or in a toaster oven for a minute or two.
Q: Can I make these ahead of time?
A: Croffles are really best eaten fresh when they're warm and crispy, but if you need to prep ahead, you can make them, let them cool completely, then store in an airtight container for up to 2 days. Reheat them in the waffle maker, toaster oven, or regular oven at 350°F for a few minutes until they crisp back up. You can also freeze cooked croffles for up to a month. Reheat from frozen in the toaster oven or oven until crispy and warmed through. The texture won't be quite as perfect as fresh, but they'll still be delicious!
These croffles are the viral Korean dessert that combines croissants and waffles! Frozen croissant dough sprinkled with sugar and pressed in a waffle maker until crispy, flaky, and golden. Top with fresh fruit and whipped cream, crushed cookies, boba and condensed milk, or anything you love. Ready in 25 minutes!
Rate This Recipe!
Preparations
Prep Time:
5 minutes
Cook Time:
20 minutes
Total Time:
25 minutes
Cuisine:
Korean-inspired
Course:
Dessert, Breakfast
Calories:
280 kcal (approx. per croffle without toppings)
Servings:
4
Author:
Ronica Rupan
Ingredients
Ingredients
For the Croffles:
- Butter or cooking spray, for greasing the waffle maker
- 4 frozen croissants (from 1 package), thawed completely
- 2 tablespoons granulated sugar or brown sugar
Optional Toppings (choose your favorites):
- Fresh strawberries and whipped cream
- Crushed chocolate cookies
- Boba pearls and sweetened condensed milk
- Chocolate sauce, caramel sauce, or maple syrup
- Powdered sugar
- Ice cream
- Fresh berries
- Nutella or peanut butter
Instructions
- Preheat Your Waffle Maker Plug in your waffle maker and preheat it to medium heat. A standard-size waffle maker with a 7-inch grid works perfectly, but any size will do. Once it's heated up, lightly grease it with butter or cooking spray. Don't skip this step or your croffle might stick!
- Prepare the Croissant Dough Make sure your frozen croissants are completely thawed. If they're still cold or firm, let them sit at room temperature for about 30-45 minutes until they're soft and pliable. Separate the croissants into individual portions. You can gently roll or flatten each one slightly with your hands to help it fit better in the waffle maker and ensure even cooking, but don't roll them too thin or you'll lose those beautiful flaky layers.
- Add the Sugar Sprinkle about ½ tablespoon of sugar over both sides of each croissant. You can use granulated sugar for a classic sweet crunch or brown sugar for a deeper, caramelized flavor. The sugar will caramelize as it cooks, creating that amazing crispy, slightly sweet exterior.
- Cook in the Waffle Maker Place one piece of sugared croissant dough right in the center of your preheated waffle maker. Close the lid gently but firmly. You might need to press down a little to help the croissant flatten and fill the waffle grids. Cook for 2-3 minutes, keeping an eye on it. The croffle is ready when it's golden brown, crispy on the outside, and those layers are all visible and flaky. Cooking time might vary depending on your waffle maker, so check after 2 minutes and add more time if needed.
- Let It Set Carefully remove the croffle from the waffle maker using tongs or a fork (be careful, it's hot!). Transfer it to a wire rack or plate and let it sit for 1-2 minutes. This cooling time helps the croffle set and get even crispier. Resist the urge to stack them or they'll steam and get soggy.
- Repeat with Remaining Dough Repeat the cooking process with the remaining croissant pieces, re-greasing the waffle maker lightly between each one if needed. You should end up with 4 beautiful, crispy croffles.
- Add Your Toppings Now comes the fun part! Top your warm croffles with whatever you're craving. Fresh strawberries and a cloud of whipped cream is classic and delicious. Crushed chocolate cookies with a drizzle of chocolate sauce is decadent. Boba pearls with sweetened condensed milk drizzled over top is trendy and amazing. Or keep it simple with just maple syrup and butter. There's no wrong way to do this!
- Serve Warm Serve your croffles immediately while they're still warm and crispy. They're best eaten fresh, but leftovers can be stored and reheated.
Strawberry Cream
Ingredients:
- ½ cup heavy cream
- 1 tbsp powdered sugar (adjust to taste)
- 2 tbsp strawberries (blended into a smooth puree)
- Optional: fresh strawberry slices + freeze-dried strawberry crumbles for topping
Instructions:
- Blend strawberries into a smooth puree. Strain if you want it extra silky.
- In a mixing bowl, whip heavy cream + powdered sugar until soft peaks form.
- Gently fold in the strawberry puree until well combined.
- Spoon over Croffles and finish with fresh strawberries and a sprinkle of freeze-dried strawberry bits
Turmeric Crush Smoothie
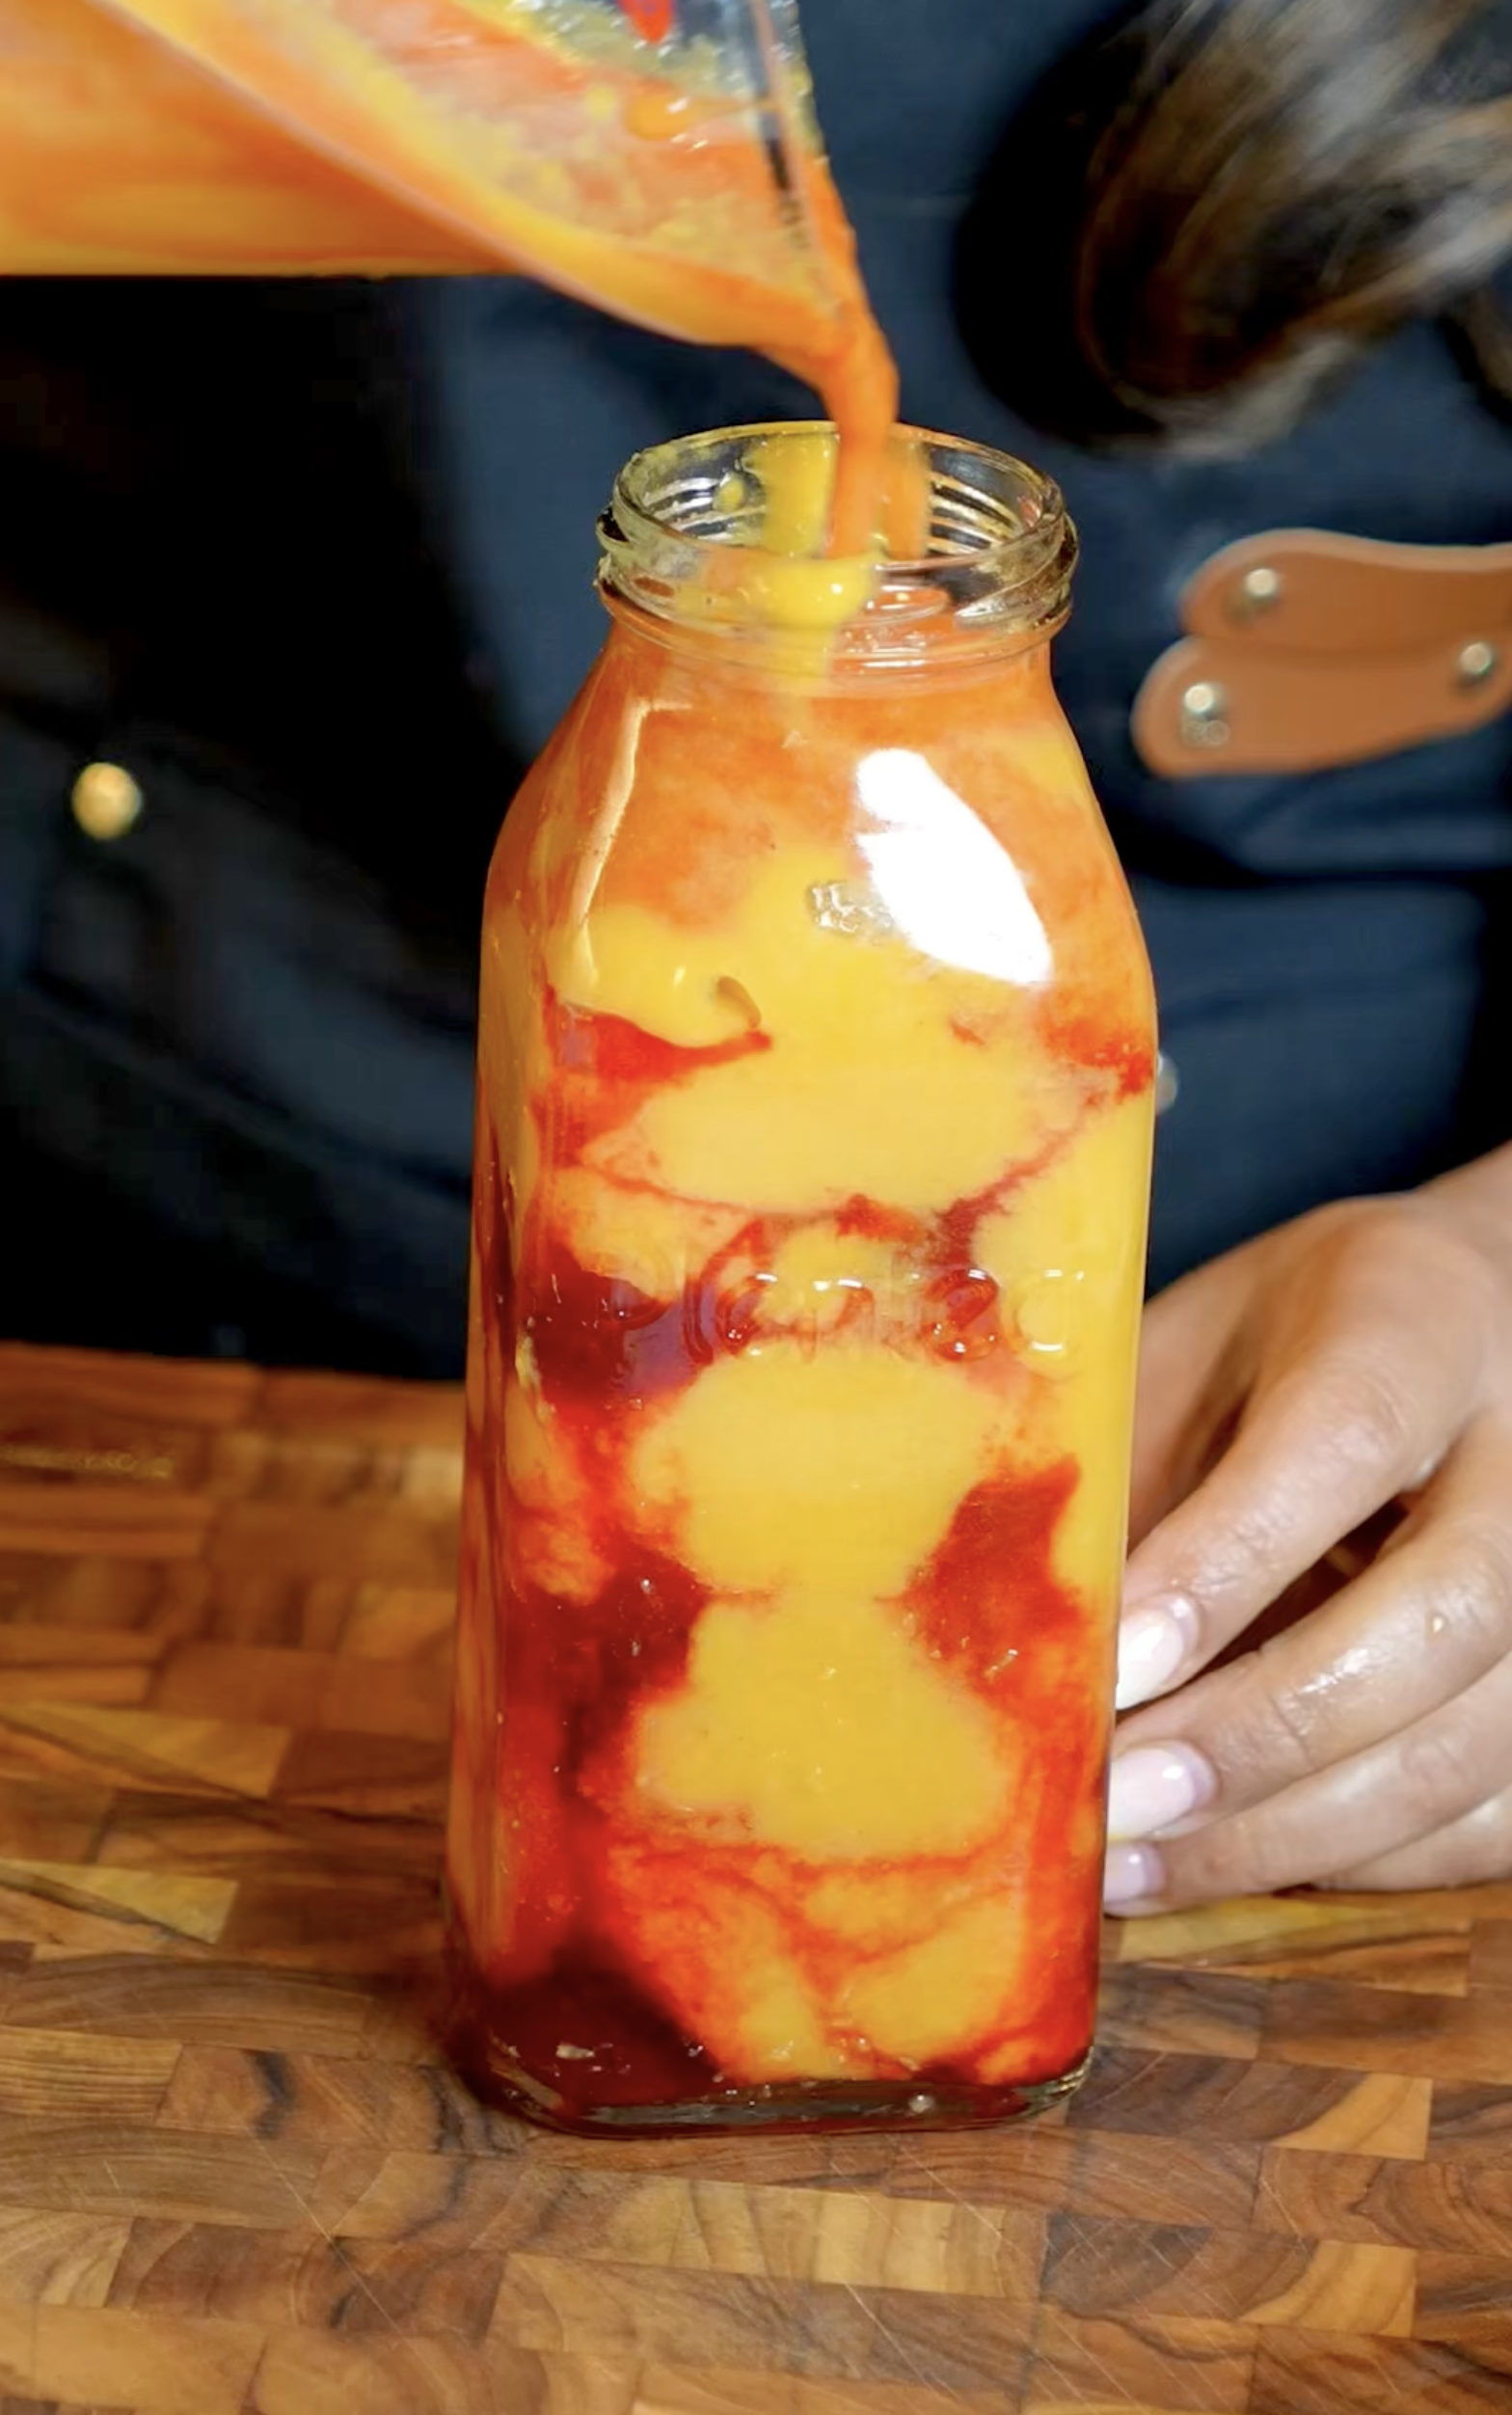
This turmeric crush smoothie is a vibrant, tropical powerhouse that's as gorgeous to look at as it is delicious to drink! It's thick, creamy, and bursting with bright tropical flavors from frozen pineapple and mango, with a warm, earthy undertone from fresh turmeric and ginger that gives it incredible depth without being overpowering. This smoothie is packed with so many amazing ingredients that could support your wellness from the inside out. Fresh turmeric may help with inflammation and has been used in traditional medicine for centuries, while ginger could support digestion and add that lovely warming kick. Camu camu powder is a superfruit that's loaded with vitamin C, and the carrot juice adds natural sweetness along with beta-carotene. The combination of frozen pineapple and mango creates this incredibly smooth, tropical base that's naturally sweet and tangy at the same time. Fresh lemon juice adds brightness and helps balance out the earthiness of the turmeric, while the carrot and orange juices round everything out with their natural sweetness. If you like your smoothies on the sweeter side, a couple of tablespoons of honey brings everything together beautifully. The real showstopper move here is the beet juice swirl. Before you pour in your smoothie, you coat the inside of your glass with a little beet juice, which creates this stunning deep red swirl against the gorgeous golden-orange smoothie. It's such a simple trick but it makes your smoothie look absolutely stunning and adds a tiny hint of earthy sweetness. This smoothie is perfect for a quick energizing breakfast, an afternoon pick-me-up, or anytime you want something that's both delicious and nourishing. It comes together in under 5 minutes and makes one serving, but you can easily double or triple the recipe if you're making it for the whole family!
Frequently Asked Questions
Q: Can I use ground turmeric and ginger instead of fresh?
A: You can in a pinch, but fresh turmeric and ginger give you a much brighter, more vibrant flavor and color that really makes this smoothie special. Fresh turmeric has a slightly more complex, peppery flavor compared to the milder ground version. If you need to substitute, use about ½ teaspoon of ground turmeric and ¼ teaspoon of ground ginger in place of the fresh knobs. The smoothie will still taste great, it just won't have quite the same punch of fresh flavor or that deep golden color. If you can find fresh turmeric at your grocery store (usually near the ginger in the produce section), it's definitely worth grabbing!
Q: What is camu camu powder and can I skip it?
A: Camu camu is a superfruit berry that's incredibly high in vitamin C, even more than oranges! It adds a slight tartness to the smoothie and a subtle fruity flavor. You can absolutely skip it if you can't find it or don't want to use it. The smoothie will still be delicious with all the other tropical fruits and turmeric. If you want to substitute, you could add an extra tablespoon of lemon juice for tartness, or swap it for acai powder or maca powder if you're looking for another superfruit boost. Camu camu powder is available at health food stores and online if you want to give it a try!
Q: Can I make this smoothie the night before?
A: Smoothies are honestly best made fresh right before you drink them for the best taste and texture. That said, if you need to prep ahead, you can portion out all your ingredients into a container or freezer bag the night before (keep the beet juice separate). In the morning, just dump everything into the blender and blend. This makes your morning routine super quick and easy. If you absolutely must blend it ahead of time, store it in an airtight container in the fridge for up to 12 hours, but give it a good shake before drinking since it will separate. The color and some nutrients may change slightly over time.
Q: How do I get the beet juice swirl effect?
A: It's easier than it looks! Before you pour in your smoothie, take about 1 teaspoon of beet juice and pour it into your tall glass. Then tilt the glass and rotate it slowly, coating the inside walls with the beet juice in a swirl pattern. You don't need to cover the entire inside, just create some streaks and swirls. Then pour your smoothie in slowly and the golden smoothie will contrast against the deep red beet juice swirl for a stunning effect. If you want a more dramatic swirl, you can use a spoon to gently drag the beet juice up through the smoothie after pouring.
This turmeric crush smoothie is a vibrant tropical powerhouse! Frozen pineapple and mango blended with fresh turmeric, ginger, carrot juice, and camu camu powder for a thick, creamy smoothie that's as beautiful as it is nourishing. Finished with a gorgeous beet juice swirl. Quick, refreshing, and packed with goodness!
Rate This Recipe!
Preparations
Prep Time:
5 minutes
Total Time:
5 minutes
Cuisine:
American
Course:
Breakfast, Drinks
Calories:
220 kcal (approx. per serving, with honey)
Servings:
1
Author:
Ronica Rupan
Ingredients
Ingredients
For the Smoothie:
- 1¼ cups frozen pineapple chunks
- 1¼ cups frozen mango chunks
- ¼ cup carrot juice
- ¼ cup orange juice
- 2 tablespoons fresh lemon juice
- 1 knob fresh ginger (about 1 inch), peeled
- 1 knob fresh turmeric (about 1 inch), peeled
- 2 scoops camu camu powder
- 2 tablespoons honey (optional, for sweetness)
For the Swirl:
- 1 teaspoon beet juice
Instructions
- Prep Your Ingredients Peel your fresh ginger and turmeric knobs. If your frozen fruit has any large chunks, you can break them up a bit before adding to the blender. Measure out all your juices and have everything ready to go.
- Add Everything to the Blender Add the frozen pineapple, frozen mango, carrot juice, orange juice, fresh lemon juice, peeled ginger, peeled turmeric, and camu camu powder to a high-speed blender. If you're using honey for sweetness, add it now too. The frozen fruit goes in first so it sits at the bottom and helps everything blend more easily.
- Blend Until Smooth Blend on high speed for about 1-2 minutes until the smoothie is completely smooth and thick with no chunks remaining. If it's not blending smoothly, stop the blender and use a spatula or blender wand to scrape down the sides, then continue blending. If it's too thick, add a splash more orange juice or carrot juice to help it move. You want it thick and creamy, not watery!
- Create the Beet Juice Swirl Before pouring in your smoothie, pour about 1 teaspoon of beet juice into your tall glass. Tilt the glass and slowly rotate it, coating the inside walls with the beet juice in a beautiful swirl pattern. This creates that stunning contrast against the golden smoothie.
- Pour and Serve Slowly pour the smoothie into your prepared glass over the beet juice swirl. Serve immediately and enjoy right away while it's cold and thick! This recipe makes one generous serving but can easily be doubled or tripled if you're making it for others.
Fresh Pasta

This fresh pasta recipe is the easiest, most beginner-friendly homemade pasta you'll ever make, and it requires just three simple ingredients that you probably already have in your kitchen! No fancy equipment, no pasta machine, no rolling pin needed. Just flour, warm water, and a bit of olive oil come together to create a tender, rustic pasta dough that's incredibly forgiving and perfect for anyone intimidated by making pasta from scratch. You mix everything together right in a bowl with your hands until it forms a rough, shaggy dough, then knead it for just 2 minutes until it becomes smooth and not sticky. The dough is really forgiving, so if it's too dry, you add a tiny bit more water, and if it's too sticky, you add a touch more flour. After a quick 15-minute rest covered with a damp towel, the dough is ready to use. Here's where it gets really fun and easy: instead of rolling and cutting the pasta into perfect shapes, you simply use kitchen shears to snip small pieces of dough directly into simmering salted water! This creates these rustic, irregular little pasta pieces that are incredibly charming and have great texture. They're kind of like tiny gnocchi or hand-torn pasta. Oil your scissors so the dough doesn't stick, and snip away, making sure the pieces don't clump together in the water. After just 5-6 minutes of cooking, most of the pasta will float to the top, which means it's done. Drain it and toss it with whatever sauce you love, from simple butter and Parmesan to marinara, pesto, or cream sauce. The beauty of this pasta is its simplicity and how quickly it comes together. No special skills required, no expensive ingredients, and you can have fresh homemade pasta on the table in about 30 minutes start to finish. It's perfect for weeknight dinners, teaching kids how to make pasta, or anytime you want that homemade touch without the fuss!
Frequently Asked Questions
Q: Why doesn't this recipe use eggs like traditional pasta?
A: This is an eggless pasta dough that's common in many Italian regional styles and perfect for beginners! Eggless pasta is lighter, more affordable, vegan-friendly, and actually easier to work with since it's more forgiving. The texture is slightly different from egg pasta, a bit more toothsome and rustic, but it's delicious and holds sauce beautifully. If you prefer traditional egg pasta, you'd need a different recipe with eggs and would typically need to roll it thin, but this version is intentionally simple and accessible for anyone to make without special equipment or experience.
Q: Can I roll this dough out and cut it into different shapes?
A: Absolutely! While the recipe calls for snipping the dough with scissors for super easy, rustic pieces, you can definitely roll it out if you prefer. Dust your work surface and rolling pin with flour, roll the dough to about ⅛ inch thickness, then cut it into whatever shapes you like: fettuccine, pappardelle, lasagna sheets, or use cookie cutters for fun shapes. You can also roll small pieces into ropes and cut them into gnocchi-like pieces. The scissors method is just the easiest and quickest way that requires zero special equipment, but the dough is versatile enough to be shaped however you want!
Q: How do I know when the pasta is done cooking?
A: Fresh pasta cooks much faster than dried pasta, usually in just 5-6 minutes. The best indicator is that most of the pasta pieces will float to the surface of the water when they're done. They should be tender but still have a slight bite (al dente). You can fish out a piece and taste it to check. If it's still tough or tastes floury, give it another minute or two. Fresh pasta should be tender and slightly chewy, not mushy. Don't walk away while it's cooking because it can go from perfect to overcooked quickly!
Q: Can I make this dough ahead of time?
A: Yes! The dough can be made up to 1 day ahead, which is perfect for meal prep or if you want to get a head start on dinner. After kneading, wrap the dough tightly in plastic wrap and refrigerate it. When you're ready to use it, let it sit at room temperature for about 20-30 minutes to take the chill off and make it easier to work with. Cold dough is stiffer and harder to cut or shape. You can also freeze the dough for up to 3 months. Thaw it overnight in the fridge, then bring to room temperature before using.
: This fresh pasta is the easiest homemade pasta you'll ever make! Just three ingredients (flour, water, and olive oil) mixed and kneaded for 2 minutes, rested briefly, then snipped with kitchen shears directly into simmering water. No pasta machine or rolling needed. Tender, rustic, and ready in 30 minutes!
Rate This Recipe!
Preparations
Prep Time:
20 minutes (including resting time)
Cook Time:
6 minutes
Total Time:
26 minutes
Cuisine:
Italian
Course:
Main Course, Pasta
Calories:
240 kcal (approx. per serving, plain pasta without sauce)
Servings:
4
Author:
Ronica Rupan
Ingredients
ngredients
For the Pasta Dough:
- 2 cups all-purpose flour, plus more for dusting and adjusting
- ½ cup warm water, plus more if needed
- 2 tablespoons olive oil
- Pinch of kosher salt (optional, for the dough)
For Cooking:
- 1 teaspoon kosher salt, for the pasta water
- Olive oil, for coating the scissors
Instructions
- Make the Dough In a large mixing bowl, combine the flour, warm water, and olive oil. Use your hands to mix everything together, squeezing and pressing the mixture until it starts to come together into a rough, shaggy dough. Don't worry if it looks messy at first, it will come together as you knead.
- Knead the Dough Right there in the bowl, start kneading the dough by pushing it away from you with the heel of your hand, then folding it back over itself. Keep kneading for about 2 minutes until the dough becomes smooth and is no longer sticky to the touch. If the dough feels too dry and won't come together, add more warm water ½ teaspoon at a time and knead it in. If it's too sticky and sticking to your hands, sprinkle in more flour 1 teaspoon at a time until it reaches the right consistency. The dough should be smooth, soft, and just slightly tacky but not sticky.
- Rest the Dough Cover the bowl with a damp kitchen towel or plastic wrap and let the dough rest at room temperature for at least 15 minutes. This resting time allows the gluten to relax, making the dough easier to work with and giving you more tender pasta. You can let it rest for up to an hour if needed.
- Prepare to Cook While the dough is resting (or when you're ready to cook), bring a medium pot of water to a gentle simmer over medium-high heat. Add 1 teaspoon of kosher salt to the water. You want it at a simmer, not a rolling boil, so the pasta pieces don't bounce around too much and stick together.
- Prep Your Scissors Lightly coat a pair of clean kitchen shears or scissors with olive oil. This prevents the dough from sticking to the blades as you cut. Keep a small dish of oil nearby so you can re-oil the scissors as needed.
- Cut and Cook the Pasta Working in batches, take a small handful of dough (about the size of a golf ball) and hold it over the simmering water. Use your oiled scissors to snip off small pieces of dough, about ½ inch in size, directly into the water. Let the pieces fall into different spots in the pot so they don't stick to each other. If they seem to be sticking together, give them a gentle stir with a wooden spoon. You can dust the dough with a bit of flour if it's too sticky to cut cleanly. Continue snipping pieces until you've used about a third of the dough, then let that batch cook.
- Cook Until Done Let the pasta cook for 5-6 minutes, stirring occasionally to prevent sticking. The pasta is ready when most of the pieces float to the surface of the water and they're tender with a slight chew when you taste one. Don't overcook or they'll get mushy.
- Drain and Serve Using a slotted spoon or spider strainer, scoop out the cooked pasta and transfer it to a large bowl. You can also drain it through a colander, but save a cup of the pasta cooking water in case you need it to thin out your sauce. Repeat the cutting and cooking process with the remaining dough in batches. Toss the hot pasta immediately with your favorite sauce and serve while it's fresh and warm for the best taste and texture!
Garlic Lemon Chicken

This garlic lemon chicken platter is a complete one-pan meal that's bursting with bright, fresh flavors and comes together in about 45 minutes! Juicy chicken thighs get seasoned with an incredible spice blend of paprika, onion powder, garlic powder, lemon pepper, and chili powder, then marinated briefly in olive oil and fresh lemon juice so they soak up all that flavor. The chicken gets pan-seared in butter until it's golden brown and crispy on the outside while staying incredibly tender and juicy on the inside. While the chicken cooks, you quickly blanch fresh green beans until they're crisp-tender and bright green. Once the chicken is done, you use that same flavorful pan (don't you dare wash it, all those browned bits are liquid gold!) to cook the green beans with loads of minced garlic and fresh thyme until they're perfectly tender and coated in all that garlicky goodness. Then you deglaze the pan with chicken stock and more fresh lemon juice, creating this light, tangy sauce that ties everything together. The cooked chicken gets added back to nestle among the green beans, and everything gets finished with a sprinkle of red pepper flakes for heat, tons of fresh parsley and cilantro for brightness, and extra lemon slices for garnish. The result is this gorgeous platter of golden chicken thighs surrounded by garlicky green beans in a lemony pan sauce that's light, fresh, and absolutely packed with flavor. It's healthy, satisfying, and feels restaurant-quality but is actually so easy to make at home. The best part is it all happens in one pan, so cleanup is a breeze. Serve this with rice, crusty bread, or roasted potatoes to soak up all that delicious sauce, and you've got a complete meal that'll have everyone coming back for seconds!
Frequently Asked Questions
Q: Can I use chicken breasts instead of thighs?
A: Yes, you can use boneless, skinless chicken breasts, but you'll need to adjust the cooking time since breasts are leaner and cook faster. Pound the breasts to an even thickness (about ¾ inch) so they cook evenly. Cook for about 6-7 minutes per side instead of 8-10 minutes, and use a meat thermometer to check that they've reached 165°F internal temperature. Keep in mind that breasts can dry out more easily than thighs, so watch them carefully and don't overcook. Chicken thighs are really the best choice here because they stay juicier and have more flavor, but breasts will work if that's your preference.
Q: Can I use frozen green beans?
A: Fresh green beans work best for this recipe because they have better texture and flavor, but you can use frozen in a pinch. If using frozen, there's no need to blanch them first since they're already partially cooked. Just thaw them completely and pat them very dry with paper towels to remove excess moisture. Add them directly to the pan with the garlic and thyme, and they'll need about 5-7 minutes to cook through and heat up. The texture won't be quite as crisp as fresh, but they'll still be delicious and make the recipe more convenient.
Q: What can I serve this with?
A: This chicken and green bean platter is pretty much a complete meal on its own, but it's even better with something to soak up that delicious lemony pan sauce! Fluffy white rice, quinoa, or couscous are perfect. Creamy mashed potatoes or roasted baby potatoes are amazing too. Crusty bread or garlic bread for dipping in the sauce is always a hit. You could also serve it over pasta or cauliflower rice for a low-carb option. A simple side salad with a light vinaigrette complements the richness of the chicken nicely.
Q: How do I know when the chicken is done?
A: The most reliable way to check if chicken is done is to use an instant-read meat thermometer inserted into the thickest part of the thigh. It should read 165°F when fully cooked. Visually, the chicken should be golden brown on the outside, and when you cut into it, the juices should run clear with no pink remaining. If you don't have a thermometer, you can make a small cut in the thickest part to check that it's no longer pink inside. The cooking time will vary depending on the size and thickness of your chicken thighs, so checking the temperature is your best bet for perfectly cooked chicken every time.
This garlic lemon chicken platter is a complete one-pan meal! Juicy chicken thighs seasoned with paprika, garlic, and lemon pepper, pan-seared until golden, then served with garlicky green beans in a bright lemon sauce. Finished with fresh herbs and red pepper flakes. Healthy, flavorful, and ready in 45 minutes!
Rate This Recipe!
Preparations
Prep Time:
25 minutes (including marinating)
Cook Time:
25 minutes
Total Time:
50 minutes
Cuisine:
Mediterranean-inspired
Course:
Main Course, Dinner
Calories:
380 kcal (approx. per serving)
Servings:
5
Author:
Ronica Rupan
Ingredients
Ingredients
For the Chicken:
- 5 boneless, skinless chicken thighs
- 2 tablespoons olive oil
- 1 teaspoon paprika
- 1 teaspoon onion powder
- 1 teaspoon garlic powder
- 1 teaspoon lemon pepper seasoning
- ½ teaspoon chili powder
- ¼ teaspoon kosher salt
- Freshly ground black pepper, to taste
- Juice of ½ lemon
For the Green Beans and Sauce:
- 1 pound fresh green beans, trimmed
- 2 tablespoons unsalted butter
- 6 cloves garlic, minced
- 1 sprig fresh thyme
- ½ cup chicken stock
- Juice of ½ lemon
- ¼ teaspoon crushed red pepper flakes (optional)
- ½ cup fresh parsley, chopped
- ½ cup fresh cilantro, chopped
- Lemon slices, for garnish
Instructions
- Season and Marinate the Chicken In a small bowl, mix together the olive oil, paprika, onion powder, garlic powder, lemon pepper, chili powder, salt, black pepper, and the juice of half a lemon until well combined. Place the chicken thighs in a large bowl or shallow dish and pour the spice mixture over them. Use your hands to rub the marinade all over each piece of chicken, making sure they're completely coated. Cover and let the chicken marinate at room temperature for 20 minutes while you prepare the green beans. This allows the flavors to penetrate the meat.
- Blanch the Green Beans While the chicken is marinating, bring a large pot of salted water to a boil. Add the trimmed green beans and cook for exactly 4 minutes. They should be bright green and crisp-tender, not fully cooked yet. Drain them immediately and rinse under cold water to stop the cooking process. Set aside.
- Cook the Chicken Melt the butter in a large skillet over medium heat. Once the butter is melted and the foam has subsided, arrange the marinated chicken thighs in a single layer in the pan, making sure not to crowd them. Cook without moving them for 8-10 minutes until the bottom is golden brown and crispy. Flip the chicken thighs over and cook for another 8-10 minutes on the second side. The chicken is done when it's golden brown on both sides and an instant-read thermometer inserted into the thickest part reads 165°F. If the chicken is browning too quickly before it's cooked through, reduce the heat to medium-low. The cooking time will vary depending on the thickness of your chicken thighs. Once fully cooked, transfer the chicken to a clean plate and set aside.
- Cook the Garlic and Green Beans In the same skillet (don't wipe it out, you want all those flavorful browned bits!), reduce the heat to medium-low. Add the minced garlic and fresh thyme sprig. Stir for about 30 seconds until the garlic is fragrant but not browned. Add the pre-cooked green beans to the pan and toss everything together. Cook for 4-5 minutes, stirring regularly, until the green beans are heated through and cooked to your desired tenderness.
- Make the Pan Sauce Pour in the chicken stock and the juice from the remaining half lemon. Use a wooden spoon to scrape up all those delicious browned bits from the bottom of the pan. Let the liquid simmer for 2-3 minutes, stirring occasionally, until it reduces slightly and thickens into a light sauce.
- Combine and Finish Push the green beans to one side of the pan to make room. Add the cooked chicken thighs back to the pan, nestling them among the green beans. Let everything reheat together for about 2 minutes. Sprinkle the red pepper flakes over everything if you're using them. Remove the thyme sprig and discard it. Scatter the fresh chopped parsley and cilantro over the entire dish.
- Serve Transfer the chicken and green beans to a large serving platter, making sure to drizzle all that garlicky lemon sauce from the pan over the top. Garnish with fresh lemon slices. Serve immediately while everything is hot and the chicken is at its juiciest!
Peppermint Brownie Pudding

This peppermint brownie pudding is the ultimate cold-weather dessert that's going to become your new favorite way to end a meal! It's deeply chocolatey, incredibly rich, and has this amazing texture that's somewhere between a molten brownie and a silky pudding. The center stays spoon-soft and almost molten while the edges bake up fudgy and brownie-like, giving you the best of both worlds in every serving. The secret is baking it gently in a water bath, which creates steam and keeps everything moist and luxurious instead of dry and cakey. You start by beating eggs and sugar together for a full 5-10 minutes until the mixture is thick, pale, and falls in ribbons from the beaters. This aeration is what gives the pudding its incredible texture. Then you fold in high-quality cocoa powder and flour (don't skimp on the cocoa here, it makes all the difference!), add vanilla paste for depth, and just a touch of peppermint extract that adds festive flavor without overpowering all that gorgeous chocolate. Melted butter gets streamed in at the end to make everything rich and smooth. The batter goes into a buttered baking dish that sits in a larger pan filled with hot water, and it bakes for exactly one hour. When it comes out, the center will look very underbaked and jiggly, which is exactly what you want! As it cools for 15-20 minutes, it will sink slightly and set into that perfect spoonable texture. While it's baking, you whip up the easiest peppermint whipped cream with cold heavy cream, powdered sugar, and more peppermint extract. When you're ready to serve, you scoop this warm, gooey, chocolatey pudding into bowls, top it with a generous cloud of that fluffy peppermint whipped cream, and finish with crushed candy canes for crunch and extra peppermint flavor. If you want to go all out, add a scoop of vanilla ice cream on the side. Every spoonful is warm, cozy, deeply chocolatey with just the right amount of refreshing peppermint. It's perfect for holiday gatherings, winter dinner parties, or anytime you want a dessert that feels special and comforting at the same time!
Frequently Asked Questions
Q: Why does this need to be baked in a water bath?
A: The water bath (also called a bain-marie) is essential for getting that perfect pudding-like texture! The steam from the hot water creates gentle, even heat that surrounds the baking dish and prevents the edges from overcooking while the center stays molten and soft. Without the water bath, you'd end up with something more like a regular brownie with firm edges and a dry texture instead of that silky, spoonable pudding consistency we're going for. It's the same technique used for making cheesecakes and custards. Make sure the water comes about halfway up the sides of your baking dish for best results.
Q: The center looks really underbaked when I take it out, is that normal?
A: Yes, absolutely! The center is supposed to look very jiggly and underbaked when you pull it from the oven after exactly one hour. A toothpick inserted two inches from the edge should come out about three-quarters clean, but the center will still look wet. This is exactly what you want! As the pudding cools for 15-20 minutes, it will continue to set and firm up slightly, but it should still be soft and spoonable in the middle. If you bake it until the center looks done, it will be overcooked and lose that molten pudding texture. Trust the process and the timing, even though it looks underdone!
Q: Can I make this ahead of time?
A: This dessert is really best served warm on the day it's made for that perfect molten texture. However, you can bake it a few hours ahead and reheat it gently in a 300°F oven for about 10-15 minutes before serving. The peppermint whipped cream can be made up to 4 hours ahead and kept covered in the fridge. If you have leftovers (which is rare!), they're delicious cold straight from the fridge the next day, kind of like eating fudgy brownies. You can also reheat individual portions in the microwave for 20-30 seconds to get that warm, gooey texture back.
Q: Can I adjust the peppermint flavor?
A: Absolutely! The recipe uses a relatively mild amount of peppermint extract so the chocolate can still shine. If you love peppermint and want it more prominent, you can increase the extract in both the pudding and the whipped cream to ¾ teaspoon each. If you're sensitive to peppermint or want something more subtle, reduce it to ¼ teaspoon in each component. You can also skip the peppermint entirely and just make a classic chocolate brownie pudding with vanilla whipped cream, which is equally delicious. Taste your batter before baking (it's safe since you'll be cooking it) and adjust to your preference.
This peppermint brownie pudding is the ultimate cold-weather dessert! Deeply chocolatey and rich with a spoon-soft molten center and fudgy brownie-like edges. Baked in a water bath for incredible texture, finished with fluffy peppermint whipped cream and crushed candy canes. Warm, cozy, and absolutely decadent!
Rate This Recipe!
Preparations
Prep Time:
15 minutes
Cook Time:
60 minutes
Total Time:
75 minutes
Cuisine:
American
Course:
Dessert
Calories:
520 kcal (approx. per serving)
Servings:
8
Author:
Ronica Rupan
Ingredients
Ingredients
For the Pudding:
- ¾ cup high-quality cocoa powder (use the best you can find)
- ½ cup all-purpose flour
- ½ pound (2 sticks) unsalted butter, plus more for greasing
- 4 extra-large eggs, at room temperature
- 2 cups granulated sugar
- 1 tablespoon vanilla paste (or vanilla extract)
- ½ teaspoon peppermint extract
- Hot water, for the water bath
For the Peppermint Whipped Cream:
- 1 cup heavy cream, very cold
- 2 tablespoons powdered sugar
- ½ teaspoon peppermint extract
For Garnish:
- Crushed peppermint candies or candy canes
- Vanilla ice cream, for serving (optional)
Instructions
- Prep Your Oven and Pan Preheat your oven to 325°F (160°C). Take a 2-quart rectangular baking dish (about 9 x 13 x 2 inches works perfectly) and generously grease it with butter, making sure to get into all the corners. Set it aside. Also, put a kettle of water on to boil for your water bath later.
- Sift the Dry Ingredients In a medium bowl, sift together the cocoa powder and flour. Sifting removes any lumps and aerates the mixture for a smoother pudding. Set this aside while you work on the wet ingredients.
- Melt the Butter Melt the butter in a small saucepan over low heat, stirring occasionally. Once it's completely melted, remove it from the heat and let it cool for about 5 minutes. You want it liquid but not hot when you add it to the batter.
- Beat the Eggs and Sugar This is the most important step! In the bowl of a stand mixer fitted with the paddle attachment (or in a large bowl using a hand mixer), beat the eggs and granulated sugar together on medium-high speed for 5-10 minutes. Don't rush this step! The mixture should become very thick, pale yellow in color, and tripled in volume. When you lift the beaters, the mixture should fall in thick ribbons that hold their shape on the surface for a few seconds before disappearing. This creates the structure for your pudding.
- Add Flavorings Reduce your mixer speed to low. Add the vanilla paste and peppermint extract, and beat for just about 10 seconds until they're incorporated. Don't overmix at this stage.
- Fold in the Cocoa Mixture With the mixer still on low speed, add your sifted cocoa powder and flour mixture. Beat for only about 15 seconds, just until you don't see any more dry streaks. Stop the mixer and scrape down the sides of the bowl to make sure everything is incorporated. Don't overmix or you'll deflate all those air bubbles you worked so hard to create!
- Stream in the Butter Turn the mixer back on to low speed. Slowly pour in the cooled melted butter in a thin, steady stream while the mixer is running. Beat for about 20 seconds total, stopping halfway through to scrape down the sides of the bowl with a spatula. Mix just until the butter is incorporated and the batter is smooth and glossy.
- Set Up the Water Bath Pour the batter into your prepared greased baking dish and spread it out evenly. Place this dish inside a larger, deeper baking pan or roasting pan. Carefully pour hot water from your kettle into the larger pan until the water comes about halfway up the sides of the smaller baking dish. Be very careful not to splash any water into your pudding batter!
- Bake Carefully transfer the whole setup to your preheated oven. Bake for exactly 1 hour without opening the oven door. After an hour, test by inserting a toothpick about 2 inches in from the edge, it should come out about three-quarters clean with some moist crumbs. The very center will still look very jiggly and underbaked, and that's perfect! Remove from the oven and carefully take the pudding dish out of the water bath. Let it cool on a wire rack for 15-20 minutes. The pudding will sink slightly in the center as it cools, which is totally normal.
- Make the Peppermint Whipped Cream While the pudding is baking, make your whipped cream. In a large bowl using a hand mixer or in a stand mixer fitted with the whisk attachment, beat the very cold heavy cream on medium speed for about 1 minute until it starts to thicken up. Add the powdered sugar and peppermint extract. Increase the speed to medium-high and continue beating for 2-3 minutes until soft peaks form. When you lift the beaters, the peaks should hold their shape but the tips should gently fold over. Don't overbeat or you'll end up with butter! Cover the bowl and pop it in the fridge until you're ready to serve.
- Serve Warm Scoop the warm pudding into individual serving bowls. The center should be soft and molten while the edges are more fudgy. Top each serving with a generous dollop of the cold peppermint whipped cream. Sprinkle crushed peppermint candies over the top for crunch and extra peppermint flavor. If you want to go all out, add a scoop of vanilla ice cream on the side!
- Dig In Serve immediately while the pudding is still warm and the contrast between the hot chocolate pudding, cold whipped cream, and crunchy candy is at its best. Enjoy every spoonful!
Chicken Pho

Cozy up with a bowl of chicken pho that's as nourishing as it is flavorful and absolutely perfect for cold weather! This Vietnamese classic features tender shredded chicken swimming in a fragrant, deeply aromatic broth that's been simmered with warming spices like star anise, cinnamon, cardamom, fennel, and coriander. The magic starts by searing onions and ginger in olive oil until they're golden and caramelized, which creates this incredible rich, sweet base that permeates the entire broth. Then you add chicken leg quarters (or a whole chicken if you prefer), water, brown sugar for a touch of sweetness, fish sauce for that essential umami depth, and a spice bag filled with all those beautiful whole spices. Everything simmers together for about an hour, and as it does, your kitchen fills with the most amazing aroma. The chicken becomes fall-apart tender and the broth develops layers and layers of complex flavor from all those spices melding together. While the broth simmers, you cook delicate rice noodles until they're just tender, rinse them in cold water to stop the cooking, and toss them with a little olive oil so they don't stick together. Once the chicken is done, you shred it and strain the broth to remove all the aromatics and spices, leaving you with this crystal-clear, golden, incredibly flavorful liquid. The fun part is assembling your bowls and making it your own! You divide the noodles among bowls, top with shredded chicken, then ladle that piping hot, aromatic broth over everything. The real magic happens with the garnishes and condiments: fresh cilantro, sliced green onions, Thai basil leaves, crunchy bean sprouts, and a big squeeze of lime add brightness and texture. For condiments, you've got hoisin sauce for sweetness, sriracha for heat, and homemade chili oil made with olive oil, chili flakes, garlic, and sesame seeds that adds this incredible spicy, garlicky kick. A final drizzle of robust olive oil on top adds richness and brings everything together. Every spoonful is this perfect balance of savory broth, tender chicken, silky noodles, fresh herbs, and whatever combination of condiments you love. It's soul-warming, deeply satisfying, and tastes like you spent all day making it even though it comes together in about an hour and twenty minutes!
Frequently Asked Questions
Q: Can I use chicken breasts instead of leg quarters?
A: You can, but chicken leg quarters (or thighs with bones) are really recommended for pho because they create a much richer, more flavorful broth. The bones, skin, and slightly higher fat content in dark meat add body and depth that you just don't get from chicken breasts. If you must use breasts, use bone-in, skin-on breasts if possible, and reduce the simmering time to about 30-35 minutes so they don't dry out. Check for doneness at 165°F internal temperature. The broth won't be quite as rich, but it will still be tasty. For the best of both worlds, use a mix of dark and white meat, or use a whole chicken cut into pieces.
Q: What can I substitute for fish sauce?
A: Fish sauce is really essential to authentic pho flavor, it provides that savory, umami depth that's hard to replicate. If you can't use fish sauce due to dietary restrictions, you can try soy sauce or tamari as a substitute, but use about half the amount called for and add more to taste since soy sauce is saltier. For a vegetarian option, try mushroom-based seasoning sauce or a combination of soy sauce with a bit of miso paste dissolved in water. Another option is to add dried mushrooms to your spice bag for extra umami. The flavor won't be exactly the same, but it will still be delicious and savory.
Q: Can I make the broth ahead of time?
A: Absolutely! The broth actually tastes even better the next day after all the flavors have had time to meld. You can make it up to 3 days ahead and store it in the refrigerator, or freeze it for up to 3 months. When you're ready to use it, reheat the broth gently on the stovetop until it's piping hot. Store the shredded chicken separately and add it when you're assembling the bowls. Cook the noodles fresh right before serving for the best texture. This makes pho perfect for meal prep or entertaining since you can do most of the work ahead and just assemble when you're ready to eat!
Q: How do I know when the broth is done?
A: The broth is ready when the chicken is completely tender and falling off the bone (this usually takes 45-60 minutes), and the broth has a deep, golden color and rich, aromatic smell. You should be able to taste all those warm spices without any one flavor overpowering the others. The broth should be clear, not cloudy (skimming off the foam and impurities as it simmers helps with this). Taste it and adjust the seasoning, you might need to add more fish sauce for saltiness and umami, more brown sugar for sweetness, or more salt. The broth should be well-seasoned because it needs to flavor the noodles and chicken, so don't be shy with the seasoning!
This chicken pho is nourishing, flavorful, and perfect for cold weather! Tender chicken simmered in a fragrant broth with star anise, cinnamon, ginger, and warming spices, served over rice noodles with fresh herbs, bean sprouts, lime, and homemade chili oil. Soul-warming comfort in a bowl, ready in about an hour and twenty minutes!
Rate This Recipe!
Preparations
Prep Time:
20 minutes
Cook Time:
1 hour
Total Time:
1 hour 20 minutes
Cuisine:
Vietnamese
Course:
Main Course, Dinner, Soup
Calories:
420 kcal (approx. per serving)
Servings:
4
Author:
Ronica Rupan
Ingredients
Ingredients
For the Broth:
- 3 chicken leg quarters (or 1 whole chicken, about 3-4 pounds)
- 10 cups water
- 2 large onions, peeled and halved
- 4 ounces fresh ginger, peeled and sliced
- ⅓ cup brown sugar
- 2 tablespoons fish sauce, plus more to taste
- 2 teaspoons kosher salt, plus more to taste
- 1-2 tablespoons extra virgin olive oil (for searing)
For the Spice Bag:
- 1 tablespoon fennel seeds
- 1 tablespoon coriander seeds
- 4 whole star anise
- 1 cinnamon stick
- 5 cardamom pods
For the Noodles:
- 12-16 ounces rice noodles (pho noodles or rice stick noodles)
- 1 teaspoon extra virgin olive oil
For the Garnishes:
- Fresh cilantro, roughly chopped
- Green onions, thinly sliced
- Fresh Thai basil leaves
- Bean sprouts
- Lime wedges
For the Condiments:
- Hoisin sauce
- Sriracha
- Homemade Chili Oil (see below)
- Extra virgin olive oil, for drizzling
For the Homemade Chili Oil:
- ½ cup extra virgin olive oil
- 2 tablespoons red chili flakes
- 1 teaspoon minced garlic
- 1 teaspoon sesame seeds (optional)
- ½ teaspoon kosher salt
Instructions
- Sear the Aromatics Heat 1-2 tablespoons of olive oil in a large pot or Dutch oven over medium heat. Add the halved onions and sliced ginger, placing them cut-side down. Sear for about 5-7 minutes, turning occasionally, until they're golden brown and fragrant. This caramelization creates a rich, sweet foundation for your broth that adds incredible depth of flavor.
- Build and Simmer the Broth Add the chicken leg quarters, 10 cups of water, brown sugar, fish sauce, kosher salt, and the spice bag (tie all the whole spices in a piece of cheesecloth or a muslin bag, or just add them loose if you don't mind straining later) to the pot with the seared aromatics. Bring everything to a boil over high heat, then immediately reduce the heat to low so it's at a gentle simmer. Cook uncovered for 45-60 minutes, skimming off any foam or impurities that rise to the surface with a ladle or spoon. The chicken is done when it's completely tender and easily pulls away from the bone. Remove the chicken from the broth and set it aside to cool slightly. Once cool enough to handle, shred the meat and discard the bones and skin.
- Prepare the Rice Noodles While the broth is simmering, bring a large pot of water to a boil. Add the rice noodles and cook according to package directions (usually about 45 seconds to 2 minutes depending on thickness). They should be tender but still have a slight chew. Drain immediately and rinse under cold running water to stop the cooking and remove excess starch. Toss the noodles with 1 teaspoon of olive oil to keep them silky and prevent them from sticking together. Set aside.
- Make the Homemade Chili Oil In a small saucepan, heat the olive oil over low heat until it's warm but not smoking. Add the chili flakes, minced garlic, sesame seeds if using, and salt. Stir gently and let everything infuse for about 2-3 minutes, stirring occasionally, until the mixture is very aromatic and the garlic is fragrant but not browned. Remove from heat immediately and let it cool. The oil will continue to infuse as it cools. Transfer to a small bowl for serving.
- Strain and Season the Broth Once the chicken is removed and shredded, strain the broth through a fine-mesh sieve to remove all the aromatics, spices, and any solids. You want a clear, golden broth. Taste the broth and adjust the seasoning as needed, adding more fish sauce for umami and saltiness, more brown sugar for sweetness, or more salt. The broth should be well-seasoned and flavorful since it needs to flavor everything in the bowl.
- Assemble the Pho Bowls Divide the cooked rice noodles among 4 large soup bowls. Top each portion of noodles with a generous amount of shredded chicken. Ladle the piping hot broth over the noodles and chicken, filling each bowl about three-quarters full. The hot broth will warm everything through.
- Add Garnishes and Serve Top each bowl with fresh cilantro, sliced green onions, Thai basil leaves, and bean sprouts. Add a squeeze of fresh lime juice and a drizzle of olive oil over each bowl. Serve immediately with small bowls of hoisin sauce, sriracha, and the homemade chili oil on the side so everyone can customize their bowl to their taste. Enjoy while hot!
Banana Coffee Cake Muffins

These banana coffee cake muffins are the ultimate breakfast treat that combines two beloved classics into one incredible muffin! Imagine moist, tender banana muffins loaded with warm spices like cinnamon, nutmeg, and cardamom, layered with a buttery, cinnamon-spiced crumble topping that's both on top and hidden inside for a surprise burst of sweetness in the middle. The muffin batter starts with really ripe bananas (the more brown spots, the better!) that get mashed and mixed with softened butter, sugar, eggs, vanilla, and buttermilk for incredible moisture and tang. The buttermilk is key here, it reacts with the baking powder to make these muffins extra fluffy and gives them that slight tangy flavor that balances the sweetness perfectly. The crumble topping is made with cold butter, flour, both dark brown sugar and cane sugar for depth, plus that gorgeous spice blend of cinnamon, nutmeg, and cardamom. When you mix it all together, it forms these big, buttery clumps that bake into the most amazing crunchy-sweet topping. Here's where it gets really good: instead of just topping the muffins with crumble, you layer it! You put a spoonful of batter in each muffin cup, add a layer of crumble, then more batter, and finish with another generous layer of crumble on top. When they bake, you get pockets of that sweet, spiced crumble throughout, and a thick, crunchy topping that's almost like streusel. After about 28-30 minutes in the oven, they come out beautifully domed with golden, crispy tops. If you want to make them extra special (and honestly, why wouldn't you?), you can drizzle them with a simple powdered sugar glaze once they've cooled. These muffins are perfect for weekend breakfast, brunch gatherings, using up those overripe bananas on your counter, or making ahead for easy grab-and-go breakfasts all week. They're best eaten within 2-3 days but also freeze beautifully!
Frequently Asked Questions
Q: How ripe should my bananas be?
A: The riper, the better! You want bananas that are heavily spotted with brown or even completely brown on the outside. Overripe bananas are sweeter, more flavorful, and mash more easily into a smooth consistency. If your bananas aren't ripe enough, the muffins won't have as much banana flavor and the texture will be a bit off. If you need to speed up ripening, you can put them in a paper bag for a day or two, or bake unpeeled bananas at 300°F for 15-20 minutes until the skins are black (let them cool before peeling and using). In a pinch, you can microwave unpeeled bananas for 30 seconds to soften them, but this won't develop the same sweetness as natural ripening.
Q: Can I make these without buttermilk?
A: Yes! If you don't have buttermilk, you can easily make a substitute. Mix 1 cup of regular milk with 1 tablespoon of lemon juice or white vinegar, stir it together, and let it sit for 5-10 minutes until it curdles slightly. This creates the same tangy flavor and acidity that buttermilk provides, which reacts with the baking powder to make the muffins fluffy and tender. You can also use plain yogurt thinned out with a little milk (about ¾ cup yogurt mixed with ¼ cup milk) for a similar effect. The buttermilk really does make a difference in both flavor and texture, so I recommend using it or a substitute rather than just regular milk.
Q: My crumble topping is too wet and sticky, what should I do?
A: The crumble should look like wet sand with some bigger clumps, not a paste or dough. If it seems too wet and sticky, add more flour 1 tablespoon at a time, mixing after each addition, until it reaches that perfect crumbly texture. The temperature of your butter matters too, it should be cold, not softened. If your butter was too warm or if your kitchen is hot, the mixture can get too wet. You can also pop the bowl of crumble in the fridge for 10-15 minutes to firm it up before using. On the flip side, if your crumble is too dry and won't clump at all, add a tiny bit more cold butter (1 tablespoon at a time) and mix until it comes together.
Q: Can I freeze these muffins?
A: Absolutely! These muffins freeze beautifully for up to 3 months. Let them cool completely first, then wrap each muffin individually in plastic wrap or aluminum foil, and place them all in a freezer-safe zip-top bag or airtight container. When you're ready to eat them, let them thaw at room temperature for about an hour, or microwave individual muffins for 30-45 seconds until warmed through. You can also freeze the muffins before glazing them, then make the glaze fresh when you're ready to serve. For meal prep, I like to bake a double batch, freeze half, and have easy breakfasts ready to go for weeks!
These banana coffee cake muffins combine two classics into one! Moist, spiced banana muffins with warm cinnamon, nutmeg, and cardamom, layered with buttery crumble both inside and on top. Finished with an optional sweet glaze for the ultimate breakfast treat ready in under 40 minutes!
Rate This Recipe!
Preparations
Prep Time:
15 minutes
Cook Time:
30 minutes
Total Time:
45 minutes
Cuisine:
American
Course:
Breakfast, Dessert
Calories:
340 kcal (approx. per muffin)
Servings:
12 muffins
Author:
Ronica Rupan
Ingredients
Ingredients
For the Crumble Topping:
- ½ cup cold unsalted butter (8 tablespoons), cubed
- 1 cup all-purpose flour (plus more by the tablespoon if needed)
- ½ cup packed dark brown sugar
- ½ cup cane sugar
- 1 teaspoon ground cinnamon
- ½ teaspoon ground nutmeg
- ½ teaspoon ground cardamom
For the Cake:
- 2 cups all-purpose flour
- 3 teaspoons baking powder
- 1 teaspoon ground cinnamon
- ½ teaspoon ground nutmeg
- ½ teaspoon ground cardamom
- 1 teaspoon kosher salt
- 3 really ripe bananas, peeled and mashed (about 1½ cups)
- ½ cup unsalted butter, softened
- ½ cup cane sugar
- 2 large eggs
- 1 teaspoon vanilla extract
- 1 cup buttermilk
For the Glaze (Optional):
- ¼ cup powdered sugar
- 1-2 teaspoons milk
Instructions
- Preheat and Prep Preheat your oven to 350°F (175°C). Generously grease a 12-cup muffin tin with butter or cooking spray, or line with paper liners. If you're using paper liners, give them a light spray too so the muffins release easily.
- Make the Crumble Topping In a medium bowl, combine the cold cubed butter, flour, dark brown sugar, cane sugar, cinnamon, nutmeg, and cardamom. Using your fingers or a pastry cutter, work the ingredients together until the mixture looks like wet sand with some bigger clumps throughout. It should be crumbly, not paste-like. If it seems too wet and sticky, add more flour 1 tablespoon at a time. Set the crumble aside in the fridge while you make the batter.
- Mix the Dry Ingredients In a large bowl, whisk together the flour, baking powder, cinnamon, nutmeg, cardamom, and salt until everything is evenly distributed. Set aside.
- Cream the Butter and Sugar In a separate large mixing bowl (or using a stand mixer), cream together the softened butter and cane sugar on medium speed for about 2-3 minutes until light and fluffy. This incorporates air and makes your muffins tender. Add the eggs one at a time, beating well after each addition. Mix in the vanilla extract and the mashed bananas, beating until everything is well combined. The mixture might look a little curdled at this point, but that's totally normal!
- Combine the Wet and Dry Add about one-third of the dry flour mixture to the banana mixture and gently fold it in with a spatula. Add half of the buttermilk and fold again. Continue alternating, adding another third of the dry ingredients, then the remaining buttermilk, and finally the last third of the dry ingredients. Fold gently just until you don't see any more streaks of flour. Don't overmix or your muffins will be tough and dense! A few small lumps are fine.
- Layer and Assemble Spoon about 1 tablespoon of batter into the bottom of each muffin cup. Sprinkle a generous tablespoon of the crumble mixture over the batter in each cup. Add another tablespoon or two of batter on top of the crumble to fill each cup about two-thirds full. Finish by topping each muffin generously with more crumble, using up all of it and pressing it down very gently so it sticks.
- Bake Place the muffin tin in your preheated oven and bake for 28-30 minutes. The muffins are done when they're golden brown on top, spring back lightly when touched, and a toothpick inserted into the center comes out clean or with just a few moist crumbs (not wet batter). Let the muffins cool in the pan for about 5 minutes, then transfer them to a wire rack to cool completely.
- Make the Optional Glaze If you're using the glaze, wait until the muffins are completely cool. In a small bowl, whisk together the powdered sugar and milk until smooth. Start with 1 teaspoon of milk and add more if needed to reach a drizzling consistency. Using a spoon or a small zip-top bag with the corner snipped off, drizzle the glaze over the cooled muffins in a zigzag pattern.
- Serve and Enjoy These muffins are delicious served at room temperature or slightly warmed. Store leftovers in an airtight container at room temperature for up to 3 days, or freeze for up to 3 months.
Crispy Fish Sandwich with Creamy Tartar Sauce
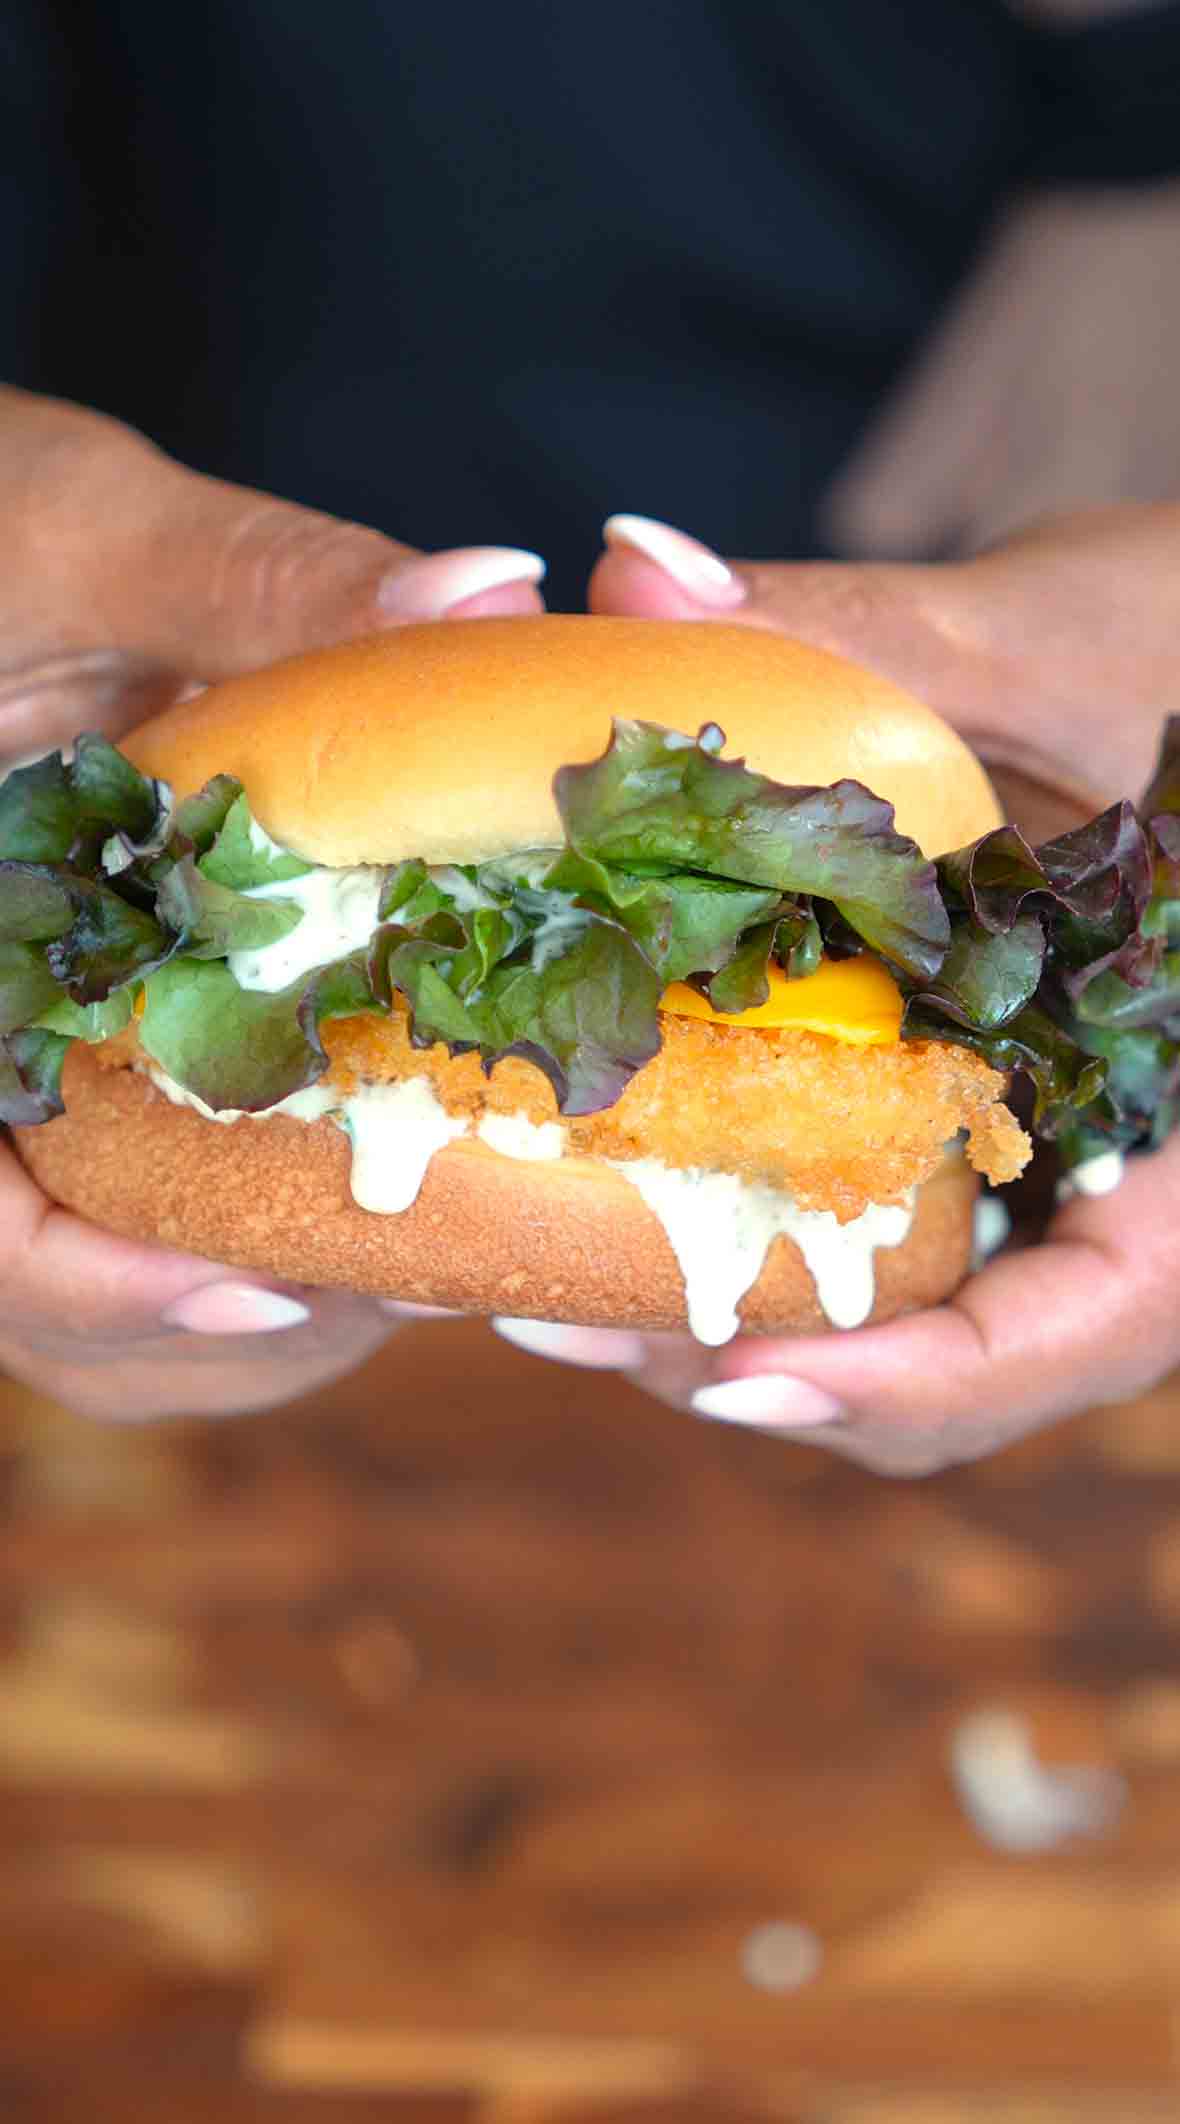
This crispy fish sandwich is a homemade take on the classic fish sandwich that's so much better than anything you'll get at a fast food drive-through! Growing up, this was my favorite sandwich, but let me show you how to make it even better at home. You start with fresh white fish fillets like cod or pollock, coat them in seasoned flour with garlic powder and paprika, dip them in egg wash, then give them a final coating of crunchy panko breadcrumbs. When you fry them up, they turn golden brown on the outside with a satisfying crunch, while staying incredibly flaky and tender on the inside. While the fish is frying, you whip up a quick homemade tartar sauce that's so much better than store-bought. It's a simple mix of mayo, tangy dill relish, fresh lemon juice, Dijon mustard for a little kick, and chopped capers if you want that extra briny pop. The tartar sauce is creamy, tangy, and the perfect complement to the crispy fish. Everything gets piled onto soft, fluffy brioche buns that you've lightly toasted until they're warm and just a touch golden. You spread tartar sauce on both the top and bottom buns (yes, more sauce is always better!), add a slice of American cheese if you want that classic melty touch, lay down your crispy fish fillet, top it with some crisp shredded lettuce or butter lettuce leaves for freshness, and finish with even more tartar sauce on top. The result is this incredible combination of textures and flavors: crunchy coating, tender flaky fish, creamy tangy sauce, soft pillowy bun, and that fresh lettuce crunch. It's light, satisfying, and tastes like a restaurant-quality fish sandwich you made in your own kitchen. Perfect for a quick weeknight dinner, Friday night tradition, or anytime you're craving that nostalgic fish sandwich flavor but want something fresher and better. Serve it with fries or coleslaw and you've got the ultimate meal!
Frequently Asked Questions
Q: What's the best fish to use for fish sandwiches?
A: Cod and pollock are the classic choices because they're mild, flaky, and hold up well to breading and frying. Cod is slightly more tender and delicate, while pollock is a bit firmer and often more affordable. Other great options include haddock, tilapia, or catfish. Look for fresh or properly frozen fillets that are about 4 ounces each and roughly the same size as your buns. Avoid very thin fillets as they can overcook easily, and stay away from oily fish like salmon or mackerel, which are too strong in flavor for this style of sandwich. The best fish for this recipe is white, mild, and flaky when cooked.
Q: Can I bake the fish instead of frying it?
A: Yes! For a lighter version, you can bake the breaded fish instead of frying. Preheat your oven to 425°F and place the breaded fish fillets on a wire rack set over a baking sheet (this helps them crisp up on all sides). Spray the tops lightly with cooking spray or brush with a little oil. Bake for 12-15 minutes, flipping once halfway through, until the fish is cooked through and the coating is golden and crispy. The texture won't be quite as crunchy as deep-fried, but it's still delicious and much healthier. You can also use an air fryer at 400°F for 10-12 minutes, flipping halfway through.
Q: Can I make the tartar sauce ahead of time?
A: Absolutely! Tartar sauce actually tastes better when it's had time to sit and let all the flavors meld together. You can make it up to 3 days ahead and store it in an airtight container in the refrigerator. Just give it a good stir before using since the ingredients might separate slightly as it sits. If you want to meal prep, you can also bread the fish up to 4 hours ahead. Place the breaded fillets on a plate lined with parchment paper, cover loosely with plastic wrap, and refrigerate until you're ready to fry. This actually helps the coating stick better!
Q: What can I use instead of brioche buns?
A: While soft brioche buns are amazing for their buttery, pillowy texture, you can use whatever burger buns you prefer or have on hand. Regular hamburger buns, potato buns, or sesame seed buns all work great. For a healthier option, try whole wheat buns or even lettuce wraps if you're going low-carb. English muffins also make a surprisingly good substitute and give you that nook-and-cranny texture that holds sauce really well. Just make sure whatever you use is lightly toasted so it doesn't get soggy from the tartar sauce. Toasting creates a little barrier that keeps the bun from absorbing too much moisture.
This crispy fish sandwich is a homemade upgrade on the classic! Fresh cod or pollock coated in seasoned panko and fried until golden and flaky, served on toasted brioche buns with creamy homemade tartar sauce, melted cheese, and crisp lettuce. Light, satisfying, and so much better than takeout. Ready in 35 minutes!
Rate This Recipe!
Preparations
Prep Time:
20 minutes
Cook Time:
15 minutes
Total Time:
35 minutes
Cuisine:
American
Course:
Main Course, Dinner
Calories:
480 kcal (approx. per serving)
Servings:
2
Author:
Ronica Rupan
Ingredients
Ingredients
For the Fish:
- 2 white fish fillets (cod or pollock), about 4 ounces each
- ½ cup all-purpose flour
- ½ teaspoon garlic powder
- ½ teaspoon paprika
- Kosher salt, to taste
- Black pepper, to taste
- 1 large egg
- 1 tablespoon water
- 1 cup panko breadcrumbs
- Vegetable oil, for frying
For the Tartar Sauce:
- ⅓ cup mayonnaise
- 1 tablespoon dill relish
- 1 teaspoon fresh lemon juice
- ½ teaspoon Dijon mustard
- ½ teaspoon chopped capers (optional)
- Kosher salt, to taste
- Black pepper, to taste
For Assembly:
- 2 brioche hamburger buns, split
- 2 slices American cheese (optional)
- Shredded lettuce or butter lettuce leaves (optional)
Instructions
- Make the Tartar Sauce In a small bowl, mix together the mayonnaise, dill relish, lemon juice, Dijon mustard, and chopped capers if you're using them. Season with a pinch of salt and pepper. Stir everything together until well combined and smooth. Cover and refrigerate until you're ready to use it. The flavors will get even better as it sits!
- Set Up Your Breading Station Pat the fish fillets completely dry with paper towels. If the fillets are much larger than your buns, cut them to fit. Set up three shallow bowls or plates in a row. In the first bowl, mix together the flour, garlic powder, paprika, salt, and pepper. In the second bowl, whisk together the egg and water until well combined. In the third bowl, add the panko breadcrumbs.
- Bread the Fish Working with one fillet at a time, dredge it in the seasoned flour mixture, coating both sides and shaking off any excess. Dip it into the egg wash, letting any excess drip off. Finally, press it into the panko breadcrumbs, coating both sides thoroughly and pressing gently so the breadcrumbs really stick. Place the breaded fillet on a clean plate and repeat with the second fillet.
- Fry the Fish Pour about ½ inch of vegetable oil into a large skillet and heat over medium heat until the oil is shimmering (around 350°F if you have a thermometer). To test if it's ready, drop in a breadcrumb and it should sizzle immediately. Carefully place the breaded fish fillets in the hot oil, being careful not to crowd the pan. Fry for 3-4 minutes on the first side until golden brown, then carefully flip and fry for another 3-4 minutes on the second side. The fish should be cooked through, flaky, and the coating should be crispy and golden brown all over. Transfer the cooked fish to a paper towel-lined plate to drain any excess oil.
- Toast the Buns While the fish is draining, lightly toast your brioche buns. You can do this in a toaster, in the oven, or in a dry skillet cut-side down for about 1-2 minutes until they're warm and just lightly golden. Don't toast them too dark or they'll be crunchy instead of soft.
- Build the Sandwiches Spread a generous amount of tartar sauce on both the top and bottom halves of each toasted bun. On the bottom bun, place a slice of American cheese if you're using it (the heat from the fish will melt it slightly). Add the crispy fish fillet on top of the cheese. If you're using lettuce, add a handful of shredded lettuce or a few butter lettuce leaves on top of the fish. Spread a little more tartar sauce on top of the lettuce for good measure. Place the top bun on and press down gently.
- Serve Immediately Serve the sandwiches right away while the fish is hot and crispy and the cheese is melty. These are best enjoyed fresh! Serve with fries, coleslaw, or your favorite sides.
Giant Fusilli Pasta with Creamy Gochujang Sauce
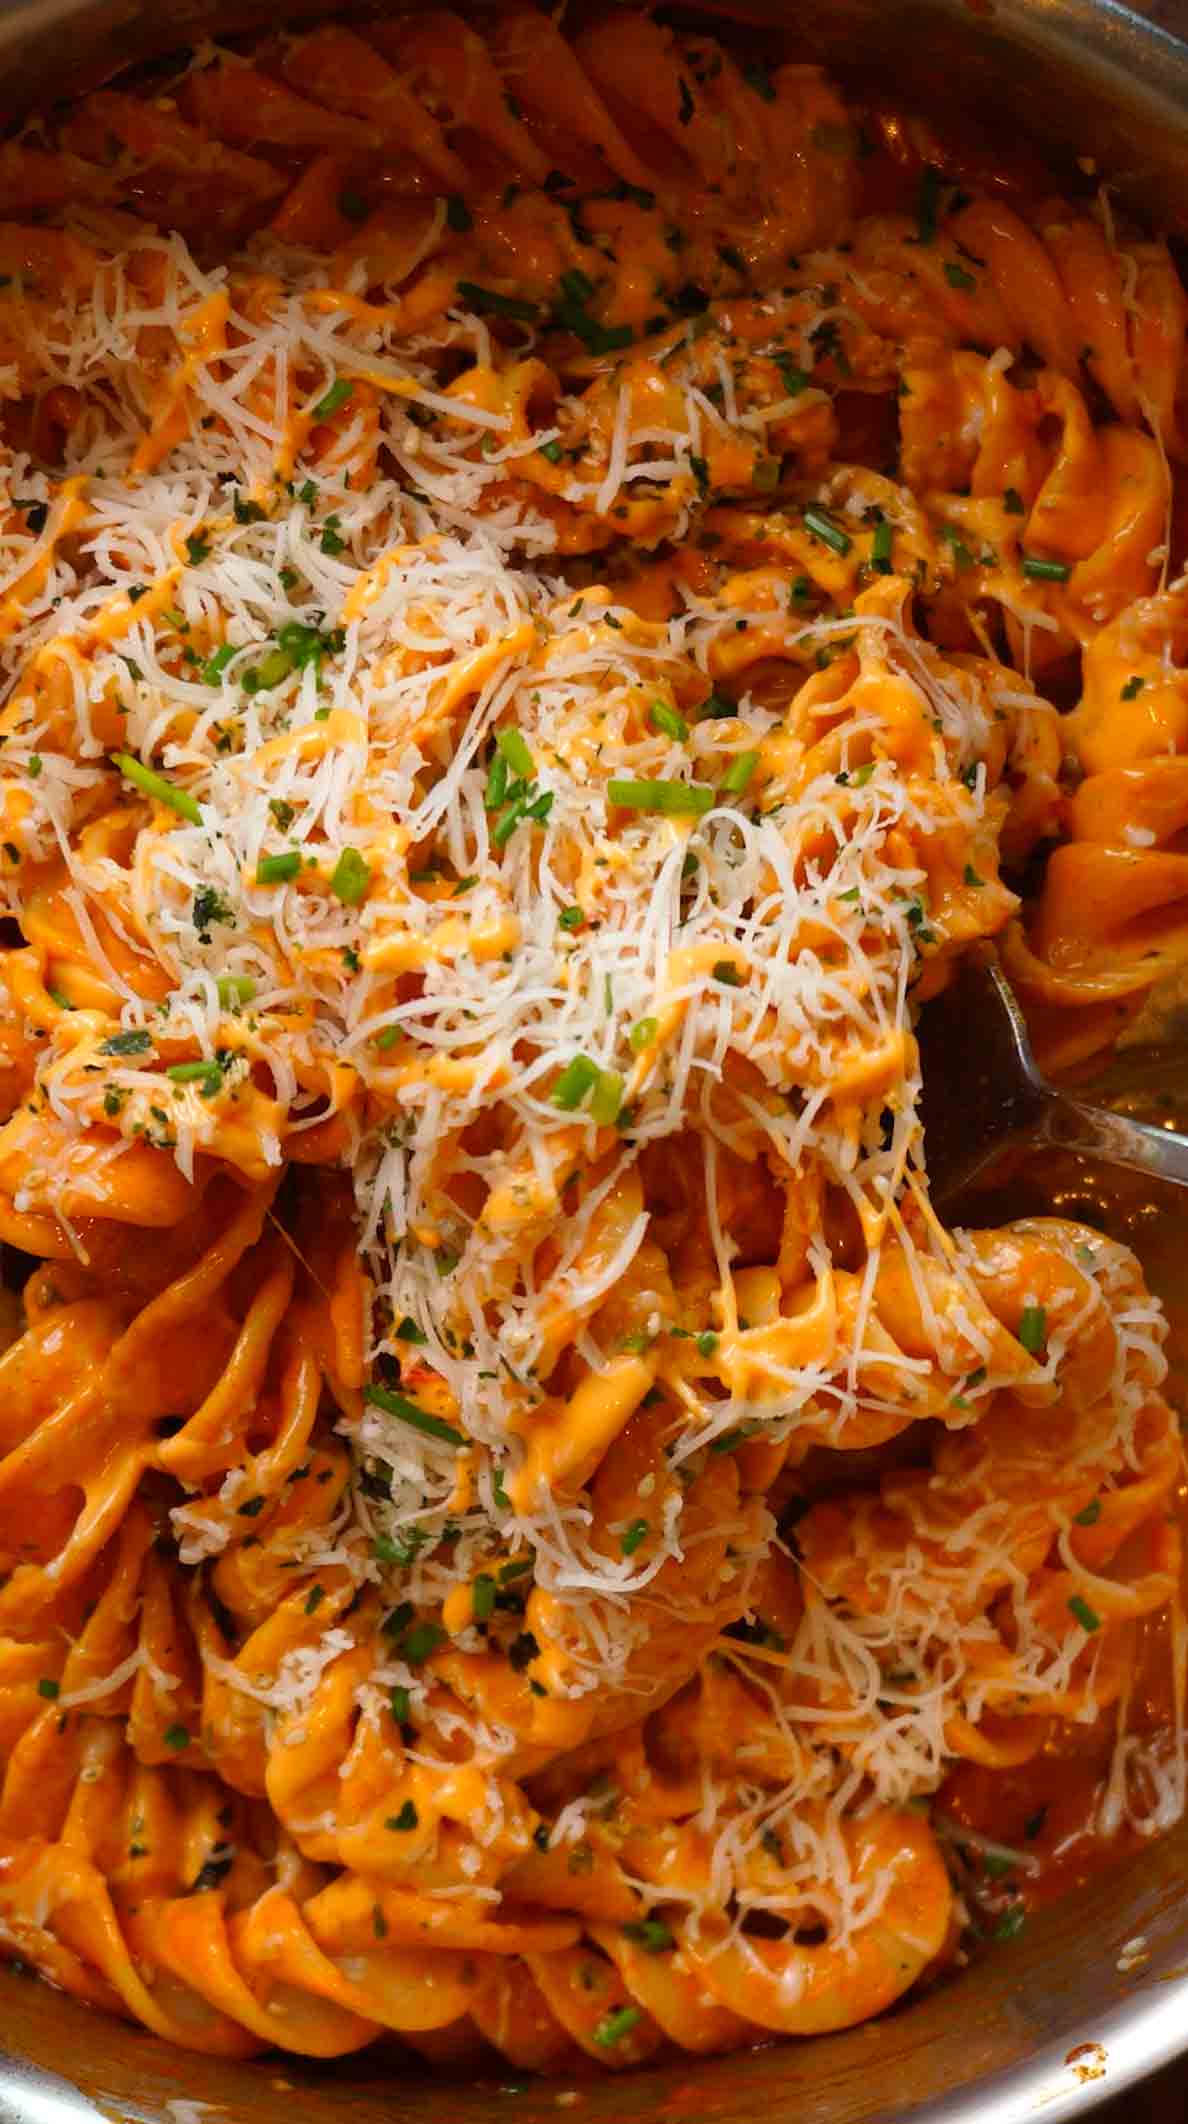
This giant fusilli pasta with creamy gochujang sauce is fun to eat and packed with incredible flavor! If you've never seen giant fusilli (also called colonne pompeii), they're these oversized spiral pasta tubes that look like giant corkscrews and are absolutely stunning on the plate. They're thick, chewy, and have all those ridges and curves that catch sauce like a dream. The sauce is where this dish really shines, it's a creamy, spicy, garlicky masterpiece that combines Korean gochujang paste with Italian cream and Parmesan for this amazing fusion that's both comforting and exciting. You start by blooming chili flakes and minced garlic in olive oil until they're super fragrant, then you add gochujang paste and cook it down until it deepens in color and flavor, which caramelizes the sugars and mellows out any harsh raw taste. Deglazing with starchy pasta water helps emulsify everything, then you add heavy cream and freshly grated Parmesan cheese to create this silky, luxurious sauce that's perfectly balanced between spicy, savory, creamy, and just a touch tangy from the fermented gochujang. The giant fusilli get tossed in this gorgeous peachy-orange sauce until every spiral is completely coated. When you plate it up, you garnish with extra Parmesan, fresh chives for brightness, furikake (that amazing Japanese rice seasoning with seaweed and sesame) for umami and crunch, and a drizzle of spicy mayo that adds even more creaminess and a kick of heat. Every bite is this perfect combination of chewy pasta, creamy spicy sauce, and all those amazing toppings. It's the kind of dish that looks impressive enough for a dinner party but comes together in about 20 minutes. The giant pasta makes it fun and Instagram-worthy, but honestly, you could us
Frequently Asked Questions
Q: Where can I find giant fusilli pasta?
A: Giant fusilli, also called colonne pompeii, can be found at specialty Italian markets, gourmet grocery stores like Whole Foods or Eataly, or online through Amazon or pasta specialty websites. Brands like De Cecco and Rustichella d'Abruzzo make them. If you can't find giant fusilli specifically, you can use other large pasta shapes like rigatoni, paccheri, or even regular fusilli. The sauce will work with any pasta shape, you'll just miss out on that fun, dramatic presentation that the giant spirals give you. Regular fusilli will cook faster (about 8-10 minutes instead of 10-12), so adjust your timing accordingly.
Q: Can I adjust the spice level?
A: Absolutely! Gochujang varies in heat level depending on the brand, so taste as you go. If you want it milder, start with 2 tablespoons of gochujang instead of 3 and taste the sauce before adding more. You can also reduce or omit the chili flakes. For more heat, increase the gochujang to 4 tablespoons, add extra chili flakes, or drizzle more spicy mayo on top. Keep in mind that the cream and Parmesan mellow out the heat quite a bit, so even with 3 tablespoons of gochujang, this dish has a nice warmth but isn't overwhelmingly spicy. The spice builds as you eat, so what seems mild at first might have more kick after a few bites!
Q: What can I substitute for gochujang?
A: Gochujang is what makes this dish special with its unique fermented, slightly sweet, spicy flavor, so I really recommend trying to find it if you can. It's available at most Asian grocery stores, many regular supermarkets in the international aisle, and online. That said, if you absolutely can't get it, you could substitute with a combination of miso paste (for that fermented umami flavor) plus sriracha or sambal oelek (for heat) plus a tiny bit of honey (for sweetness). Use about 2 tablespoons miso, 1 tablespoon sriracha, and 1 teaspoon honey. The flavor won't be exactly the same, but it will still be delicious and give you that spicy, savory, slightly sweet profile.
Q: Can I make this dairy-free or vegan?
A: Yes! For a dairy-free version, substitute the heavy cream with full-fat coconut cream or cashew cream (both work beautifully and stay creamy). Instead of Parmesan, use nutritional yeast (about ¼ cup) for that cheesy, umami flavor, or use vegan Parmesan if you can find it. Make sure your gochujang is vegan (most are, but some brands add fish or other ingredients, so check the label). For the spicy mayo garnish, use vegan mayo. The sauce might be slightly thinner without real Parmesan since it helps thicken things up, so you may need to simmer it a bit longer or use a bit less pasta water to get the right consistency.
This giant fusilli pasta with creamy gochujang sauce is fun to eat and absolutely delicious! Oversized spiral pasta coated in a creamy, spicy sauce made with gochujang, garlic, chili flakes, heavy cream, and Parmesan. Topped with fresh chives, furikake, and spicy mayo for the perfect fusion dish ready in 20 minutes!
Rate This Recipe!
Preparations
Prep Time:
5 minutes
Cook Time:
15 minutes
Total Time:
20 minutes
Cuisine:
Korean-Italian Fusion
Course:
Main Course, Dinner, Pasta
Calories:
580 kcal (approx. per serving)
Servings:
3
Author:
Ronica Rupan
Ingredients
Ingredients
For the Pasta:
- 3 servings giant fusilli pasta (colonne pompeii), about 10 noodles
- Kosher salt, for pasta water
For the Sauce:
- 2 tablespoons olive oil
- 1 teaspoon red chili flakes
- 3 cloves garlic, minced
- 3 tablespoons gochujang paste
- ¾ cup reserved pasta water (plus more as needed)
- 1 cup heavy cream
- ½ cup freshly grated Parmesan cheese, plus more for serving
- Kosher salt, to taste
For Garnish:
- Fresh chives, chopped
- Furikake (Japanese rice seasoning)
- Spicy mayo, for drizzling
Instructions
- Cook the Pasta Bring a large pot of generously salted water to a rolling boil. Add the giant fusilli pasta and cook according to package directions until al dente, usually about 10-12 minutes. The pasta should be tender but still have a slight bite to it. Before draining, use a measuring cup or ladle to reserve about 1½ cups of the starchy pasta cooking water. Drain the pasta and set it aside.
- Bloom the Aromatics While the pasta is cooking, heat the olive oil in a large, deep skillet or pan over medium heat. Once the oil is shimmering, add the red chili flakes and minced garlic. Cook, stirring frequently, for about 2 minutes until the garlic is fragrant and just starting to turn golden. Don't let the garlic brown or burn or it will taste bitter.
- Cook the Gochujang Add the gochujang paste to the pan with the garlic and chili flakes. Stir everything together and cook, stirring frequently, for about 3 minutes. You want to cook the gochujang until it darkens slightly in color and becomes more fragrant. This caramelizes the sugars in the paste and deepens the flavor while mellowing out any harsh raw taste.
- Build the Sauce Pour ¾ cup of the reserved pasta water into the pan to deglaze, scraping up any browned bits from the bottom. Stir well to incorporate the gochujang with the pasta water. Add the heavy cream and the grated Parmesan cheese. Stir everything together until the cheese is melted and the sauce is smooth and creamy. If the sauce seems too thick, add more pasta water a few tablespoons at a time until you reach your desired consistency. The sauce should be creamy and coat the back of a spoon but still be pourable.
- Toss the Pasta Turn off the heat under the pan. Add the cooked giant fusilli to the sauce and use tongs or two large spoons to toss everything together, making sure every spiral of pasta is evenly coated with that beautiful creamy gochujang sauce. The pasta water and cheese will help the sauce cling to all those ridges and curves.
- Plate and Garnish Divide the pasta among serving plates or bowls, making sure to get plenty of sauce with each serving. Top with extra freshly grated Parmesan cheese, a generous sprinkle of chopped fresh chives, a good pinch of furikake for that umami boost and sesame crunch, and finish with a drizzle of spicy mayo in a zigzag pattern across the top.
- Serve Immediately Serve the pasta right away while it's hot and the sauce is creamy. Enjoy every chewy, saucy, spicy bite!
Butter Chicken

This butter chicken is hands down one of the most comforting, flavor-packed dishes you'll ever make, and it's so much better than takeout! Rich, creamy, and loaded with warm spices, this iconic Indian dish features tender chicken thighs marinated in yogurt with garlic, ginger, lemon juice, and a blend of aromatic spices like garam masala, turmeric, cumin, and chili powder. The yogurt tenderizes the chicken while infusing it with flavor, and marinating for at least 30 minutes (or even overnight) makes all the difference. The chicken gets baked until juicy, then broiled at the end to get those beautiful charred edges that add smoky depth to every bite. While the chicken is in the oven, you build the most incredible sauce by blooming whole spices like cumin seeds, cinnamon stick, cloves, star anise, and curry leaves in ghee until they're fragrant and aromatic. Then you sauté onions until golden, add fresh ginger and garlic along with ground spices and tomato paste, and let everything cook together until the raw smell disappears and the ghee starts separating from the mixture. Canned diced tomatoes go in next and the whole thing simmers low and slow for 20-30 minutes until the sauce is thick, rich, and deeply flavored. After removing the whole spices, you blend everything until silky smooth and luxuriously creamy. The charred chicken gets added back in along with heavy cream, and it all simmers together so the chicken can soak up that incredible sauce. The result is tender, flavorful chicken swimming in a velvety tomato-based curry that's perfectly balanced between tangy, spicy, savory, and just a touch sweet. Garnished with fresh cilantro and a drizzle of cream, it's absolutely restaurant-quality. The best part? You can easily make this vegetarian by swapping the chicken for paneer cubes or mixed vegetables like cauliflower, bell peppers, and potatoes. Serve it over fluffy basmati rice with warm naan for scooping, and you've got a meal that'll have everyone asking for seconds!
Frequently Asked Questions
Q: Can I use chicken breasts instead of thighs?
A: You can, but I really recommend sticking with thighs for this recipe. Chicken thighs are more forgiving, stay juicier during cooking, and have more flavor because of their higher fat content. Breasts tend to dry out more easily, especially with the high heat needed for that charred finish. If you must use breasts, keep a very close eye on them and reduce the baking time to about 15 minutes before broiling, then check the internal temperature (you want 165°F). You might also want to marinate them a bit longer to help keep them tender. But honestly, thighs are the way to go for the most authentic, tender, restaurant-style butter chicken.
Q: What can I substitute for ghee?
A: Ghee adds an authentic, nutty richness to butter chicken that's hard to replicate, but if you don't have it, you can use regular unsalted butter. The flavor will be slightly different but still delicious. For a dairy-free or vegan version, use coconut oil or a neutral vegetable oil, though you'll lose some of that signature buttery flavor. You can also make your own ghee by melting butter over low heat and skimming off the milk solids, it's pretty easy! Store-bought ghee is available at most grocery stores these days, usually in the Indian foods section or near the oils and butters.
Q: How do I make this vegetarian or vegan?
A: This recipe is super easy to adapt! For vegetarian butter chicken, replace the chicken with paneer cubes (about 1 pound), mixed vegetables like cauliflower florets, bell peppers, and potatoes, or even chickpeas. Marinate them the same way (the yogurt marinade works great on paneer and veggies), then roast until golden and slightly charred. For vegan butter chicken, use coconut yogurt or cashew yogurt for the marinade, coconut oil instead of ghee, and full-fat coconut milk instead of heavy cream. The sauce will be slightly different but still incredibly rich and delicious. Make sure to use vegetables that can stand up to roasting without getting mushy, like cauliflower, bell peppers, zucchini, and firm tofu.
Q: Can I make this in advance?
A: Absolutely! Butter chicken actually tastes even better the next day after all the flavors have had time to meld together. You can make the entire dish up to 2 days ahead, let it cool completely, then store it in an airtight container in the fridge. Reheat gently on the stovetop over medium-low heat, stirring occasionally and adding a splash of cream or water if it's thickened too much. You can also prep components ahead: marinate the chicken up to 24 hours in advance, make the sauce base (everything before adding the cream and chicken) up to 3 days ahead, or freeze the sauce for up to 3 months. This makes it perfect for meal prep or entertaining since you can do most of the work ahead of time and just finish it off when you're ready to eat.
This butter chicken is rich, creamy, and loaded with warm spices! Chicken thighs marinated in yogurt and spices, baked until charred, then simmered in a velvety tomato-cream sauce made with ghee, whole spices, ginger, garlic, and heavy cream. Way better than takeout, easily made vegetarian with paneer or veggies, and perfect with rice and naan!
Rate This Recipe!
Preparations
Prep Time:
20 minutes (plus 30 minutes marinating time)
Cook Time:
60 minutes
Total Time:
1 hour 20 minutes (plus marinating)
Cuisine:
Indian
Course:
Main Course, Dinner
Calories:
520 kcal (approx. per serving)
Servings:
6
Author:
Ronica Rupan
Ingredients
Ingredients
For the Marinade:
- 5-6 boneless, skinless chicken thighs, cut into bite-sized pieces (or 1 pound paneer/mixed vegetables for vegetarian)
- 1 cup plain full-fat yogurt
- 6 cloves garlic, minced
- Juice of 1 lemon
- 1½-inch piece fresh ginger, minced
- 2 green chilies, minced
- 1 teaspoon garam masala
- 1 teaspoon ground turmeric
- 1 teaspoon ground cumin
- 1 teaspoon red chili powder
- 1 teaspoon kosher salt
For the Curry:
- 3 tablespoons ghee
- 1 large onion, sliced
- 1 star anise
- 5-6 fresh curry leaves
- 1 cinnamon stick
- 6 whole cloves
- ½ teaspoon cumin seeds
- 6 cloves garlic, minced
- 1-inch piece fresh ginger, minced
- 1 teaspoon ground cumin
- 1 teaspoon garam masala
- 1 teaspoon ground coriander
- 2 tablespoons tomato paste
- 1 (14.5-ounce) can diced tomatoes
- 2 teaspoons red chili powder
- 1½ teaspoons kosher salt, or to taste
- 1 cup heavy cream
For Garnish:
- Fresh cilantro, chopped
- Heavy cream, for drizzling
Instructions
- Marinate the Chicken In a large bowl, combine the yogurt, minced garlic, lemon juice, minced ginger, minced green chilies, garam masala, turmeric, ground cumin, red chili powder, and salt. Mix everything together until well combined. Add the bite-sized chicken pieces and toss until every piece is completely coated in the marinade. Cover the bowl with plastic wrap or transfer everything to a zip-top bag and refrigerate for at least 30 minutes. For the best flavor and most tender chicken, marinate for 2-4 hours or even overnight if you have time.
- Roast the Chicken When you're ready to cook, preheat your oven to 400°F (200°C). Place a wire rack on top of a rimmed baking sheet (this allows the liquid to drip off and helps the chicken char better). Arrange the marinated chicken pieces on the wire rack in a single layer, spacing them out so they're not touching. Roast in the preheated oven for 20 minutes until the chicken is cooked through. Then switch your oven to broil and broil for the last 4-5 minutes, watching carefully, until you get some nice charred spots on the chicken. Remove from the oven and set aside.
- Bloom the Whole Spices While the chicken is roasting, start on your sauce. Heat the ghee in a large, deep pan or Dutch oven over medium heat. Once the ghee is shimmering, add the cumin seeds, cinnamon stick, whole cloves, curry leaves, and star anise. Let them sizzle and pop for about 30 seconds to 1 minute until they're super aromatic and fragrant. This blooming process releases all the essential oils in the spices.
- Cook the Aromatics Add the sliced onions to the pan and cook, stirring occasionally, for 4-5 minutes until they're softened and starting to turn golden brown. Add the minced ginger, minced garlic, ground cumin, garam masala, ground coriander, and tomato paste. Stir everything together and cook for 2-3 minutes, stirring frequently, until the raw smell disappears and you can see the ghee starting to separate from the mixture around the edges. This step builds incredible depth of flavor.
- Simmer the Tomato Base Pour in the can of diced tomatoes with all their juices, the red chili powder, and salt. Stir everything together, then reduce the heat to low. Let the mixture simmer gently, uncovered, for 20-30 minutes, stirring occasionally. You want it to reduce and thicken up considerably. The tomatoes should break down and the sauce should be thick and rich, not watery.
- Blend the Sauce After the sauce has simmered and thickened, carefully fish out and discard the cinnamon stick and star anise (they've done their job). Using an immersion blender, blend the sauce right in the pan until it's completely smooth and silky. If you don't have an immersion blender, carefully transfer the hot sauce in batches to a regular blender, blend until smooth (be careful with hot liquids, they expand!), then return the sauce to the pan.
- Finish the Curry Add the charred chicken pieces and the heavy cream to the blended sauce. Stir everything together gently. Let it simmer over medium-low heat for about 10 minutes so the chicken can absorb the flavors and the sauce can thicken up a bit more. Taste and adjust the seasoning, adding more salt, garam masala, or chili powder if needed.
- Garnish and Serve Transfer the butter chicken to a serving bowl or serve it straight from the pan. Garnish generously with chopped fresh cilantro and a beautiful drizzle of heavy cream on top. Serve hot with fluffy basmati rice and warm naan bread for the ultimate experience!
Pumpkin Crumb Donuts

These pumpkin crumb donuts are the ultimate fall treat that'll make your kitchen smell absolutely incredible! Imagine soft, cakey donuts packed with real pumpkin puree and warm pumpkin spice, topped with a buttery spiced crumble that gets all golden and crispy in the oven, then finished with a sweet vanilla glaze that drips down the sides. They're baked, not fried, which makes them so much easier to make at home and honestly a bit lighter than traditional donuts. The donut batter itself is beautifully moist from the pumpkin puree and gets its sweetness from a combo of granulated and brown sugar, which adds depth and that slight molasses flavor. You mix the dry ingredients separately from the wet, then fold everything together gently to keep the donuts tender and not tough. The batter is thick and pipeable, perfect for filling donut pans without making a mess. Before baking, you top each donut with this amazing spiced crumble made from melted butter, brown sugar, flour, pumpkin spice, and a pinch of salt. It bakes right on top and creates this sweet, crunchy contrast to the soft donut underneath. After just 12 minutes in the oven, they come out perfectly domed and golden. Once they cool slightly, you drizzle them with a simple vanilla glaze made from powdered sugar, milk, and vanilla that sets into a beautiful shiny coating. These donuts are perfect for weekend breakfast, brunch gatherings, fall parties, or anytime you're craving something cozy and pumpkin-spiced. They're best eaten fresh on the day you make them, but they'll keep for a couple days in an airtight container. Serve them with coffee or apple cider for the ultimate autumn morning!
Frequently Asked Questions
Q: Can I use canned pumpkin puree or do I need fresh?
A: Canned pumpkin puree works perfectly for this recipe and is actually what I recommend! Make sure you're buying pure pumpkin puree, not pumpkin pie filling which has added sugar and spices. Look for a can that just says "100% pure pumpkin" in the ingredients. If you want to use fresh pumpkin, you'll need to roast it, scoop out the flesh, and puree it until completely smooth, then measure out 1½ cups. Fresh pumpkin can be more watery than canned, so you might need to strain it through cheesecloth first or your donuts could be too wet. Canned is honestly more consistent and convenient, so I stick with that!
Q: I don't have donut pans, can I make these another way?
A: Yes! If you don't have donut pans, you can make these as muffins instead. Use a standard 12-cup muffin tin, fill each cup about 2/3 full with batter, top with the crumble, and bake for 15-18 minutes instead of 12 (start checking at 15 minutes with a toothpick). They won't be donut-shaped but they'll taste just as delicious. You could also use a mini bundt pan if you have one, which would give you a similar ring shape. Just adjust the baking time accordingly and check for doneness with a toothpick. The toothpick should come out clean or with just a few moist crumbs attached.
Q: Can I make the batter ahead of time?
A: I don't recommend making the batter too far in advance because the leavening agents (baking powder and baking soda) start working as soon as they come in contact with the wet ingredients. If you let the batter sit for hours, your donuts won't rise as well and could be dense. That said, you can prep your dry ingredients and wet ingredients separately the night before, store them covered at room temperature and in the fridge respectively, then mix them together right before baking. The crumble can absolutely be made a day ahead and stored covered at room temperature. The donuts themselves are best baked fresh, but they'll keep in an airtight container for 2-3 days.
Q: My donuts came out dry, what went wrong?
A: The most common reason for dry donuts is overbaking. Since these are small and bake quickly, even an extra 2-3 minutes can dry them out. Start checking at 10 minutes and pull them out as soon as a toothpick inserted in the thickest part comes out clean or with just a couple moist crumbs. They'll continue to cook slightly as they cool. Another issue could be overmixing the batter, which develops the gluten in the flour and makes them tough and dry instead of tender and cakey. When you combine the wet and dry ingredients, fold gently just until you don't see any more dry flour streaks. A few lumps are totally fine! Also make sure you're measuring your flour correctly by spooning it into the measuring cup and leveling it off, not packing it down, which can lead to using too much flour.
These baked pumpkin crumb donuts are the ultimate fall treat! Soft, cakey donuts packed with pumpkin puree and warm spices, topped with a buttery spiced crumble and finished with sweet vanilla glaze. Easy to make at home, no frying needed, ready in about 30 minutes!
Rate This Recipe!
Preparations
Prep Time:
15 minutes
Cook Time:
12 minutes
Total Time:
27 minutes
Cuisine:
American
Course:
Dessert, Breakfast
Calories:
320 kcal (approx. per donut)
Servings:
12
Author:
Ronica Rupan
Ingredients
Ingredients
For the Pumpkin Donuts:
- 1¾ cups all-purpose flour
- 2 teaspoons pumpkin spice
- ½ teaspoon baking powder
- ¼ teaspoon baking soda
- ¼ teaspoon kosher salt
- 1½ cups pumpkin puree (pure pumpkin, not pumpkin pie filling)
- ½ cup granulated sugar
- ½ cup firmly packed light brown sugar
- ¼ cup vegetable oil
- 1 large egg
- 2 teaspoons vanilla extract
For the Spice Crumble:
- ¼ cup salted butter, melted
- ⅓ cup brown sugar
- ½ cup plus 1 tablespoon all-purpose flour
- ¼ teaspoon pumpkin spice
- Pinch of kosher salt
For the Vanilla Glaze:
- 1 cup powdered sugar
- 1 tablespoon milk
- ½ teaspoon vanilla extract
Instructions
- Preheat and Prep Preheat your oven to 350°F (175°C). Generously grease two 6-well donut pans with butter or cooking spray, making sure to get into all the corners and the center posts. You can also dust them lightly with flour after greasing for extra insurance against sticking.
- Make the Spice Crumble In a medium bowl, mix together the melted butter, brown sugar, flour, pumpkin spice, and a pinch of kosher salt. Stir until everything is combined and the mixture looks like wet, clumpy sand. Spread the crumble mixture onto a parchment-lined tray or plate and set it aside while you make the donut batter.
- Mix the Dry Ingredients In a large mixing bowl, sift together the flour, pumpkin spice, baking powder, baking soda, and salt. Sifting helps get rid of any lumps and aerates the flour for lighter donuts. If you don't have a sifter, just whisk everything together really well.
- Mix the Wet Ingredients In another large bowl, whisk together the pumpkin puree, granulated sugar, brown sugar, vegetable oil, egg, and vanilla extract until everything is smooth and well combined. The mixture should be thick but pourable.
- Combine Wet and Dry Pour the wet ingredients into the bowl with the dry ingredients. Using a rubber spatula, gently fold everything together just until you don't see any more streaks of dry flour. Don't overmix! The batter will be quite thick, almost like a thick cake batter. A few small lumps are totally fine and actually preferable to overmixing.
- Fill the Donut Pans Transfer the batter to a piping bag or a large zip-top bag with one corner snipped off (about a ½-inch opening). This makes filling the donut pans so much easier and neater than spooning. Pipe the batter evenly into each well of your prepared donut pans, filling them about halfway to two-thirds full. Don't fill them all the way or they'll overflow and lose their donut shape. Generously sprinkle the spice crumble over the top of each unbaked donut, pressing it down very gently so it sticks.
- Bake Place the donut pans in your preheated oven and bake for about 12 minutes. The donuts are done when they spring back lightly when touched and a toothpick inserted into the thickest part comes out clean or with just a few moist crumbs. Don't overbake or they'll be dry! Let the donuts cool in the pans for about 5 minutes (they need this time to set up), then carefully turn them out onto a wire cooling rack to cool completely.
- Make the Glaze While the donuts are cooling, make your glaze. In a small bowl, whisk together the powdered sugar, milk, and vanilla extract until the mixture is smooth with no lumps. If it's too thick, add a tiny bit more milk (just a few drops at a time). If it's too thin, add a bit more powdered sugar. You want it to be thick enough to coat the donuts but thin enough to drizzle.
- Glaze the Donuts Once the donuts are completely cool, drizzle the glaze over the top of each one using a spoon or transfer the glaze to a small zip-top bag with a tiny corner snipped off for more control. You can also dip the tops of the donuts directly into the glaze if you want full coverage. Let the glaze set for about 10 minutes before serving.
- Serve and Enjoy These donuts are best enjoyed fresh on the day they're made, but you can store them in an airtight container at room temperature for up to 2-3 days.
NO-BAKE UPSIDE-DOWN MANGO CHEESECAKE
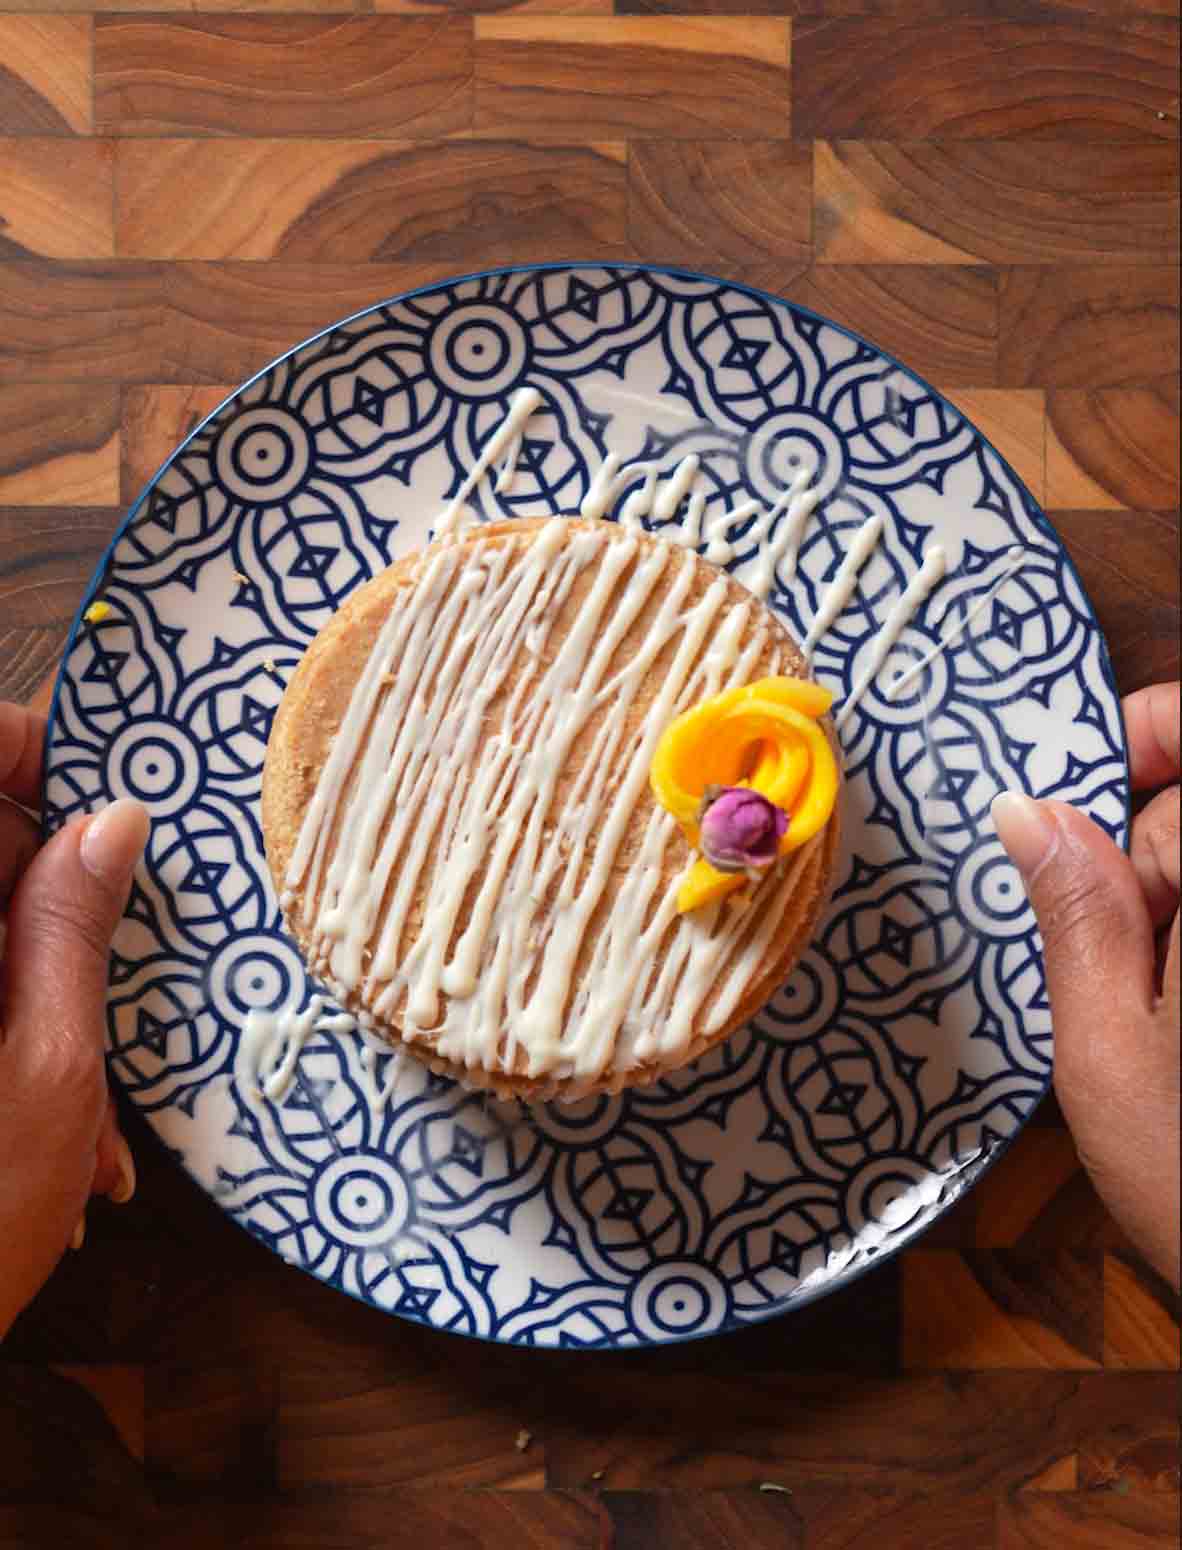
This no-bake upside-down mango cheesecake is about to blow your mind with how stunning and delicious it is! Imagine a buttery graham cracker crust that ends up on top instead of the bottom, a silky smooth cream cheese filling that's light and airy from folded whipped cream, and a layer of homemade mango jam hidden right in the middle that bursts with sweet, tangy tropical flavor. The whole thing gets assembled upside down in individual springform pans, so when you flip them over to serve, that beautiful golden crust is sitting right on top like a little crown. No oven needed for this one, which makes it perfect for summer when you don't want to heat up your kitchen! You start by making your own mango jam from scratch, cooking down fresh ripe mango with sugar and a squeeze of lime juice until it's thick, jammy, and intensely fruity. While that's chilling, you blitz graham crackers with melted butter to create a crust that you press into the bottom of your springform pans (but remember, it'll end up on top when you flip them!). The cheesecake filling is made by beating softened cream cheese until it's super smooth, then mixing in powdered sugar and vanilla. Here's where it gets really special, you whip heavy cream to soft peaks and fold it into the cream cheese mixture, which makes the filling incredibly light and mousse-like instead of dense and heavy. You pipe or spoon the filling into your pans in layers, hiding that gorgeous mango jam right in the center so every bite has a surprise pop of fruit. After at least 4 hours in the fridge (overnight is even better), the cheesecakes are firm and ready to unmold. A quick dip in warm water loosens them up, then you flip them onto plates to reveal that crust sitting perfectly on top. Each mini cheesecake gets topped with a mango rose made from thin mango slices rolled up to look like actual flower petals, it's so pretty and easier than it looks! A drizzle of melted white chocolate adds the final touch. These individual cheesecakes are perfect for dinner parties, special occasions, or when you want to impress someone with a dessert that looks like it came from a fancy bakery but was actually super easy to make.
Frequently Asked Questions
Q: Can I make this in one large pan instead of individual ones?
A: Yes! You can absolutely make this in one 9-inch springform pan instead of four 4-inch pans. Use the full amount of crust mixture pressed into the bottom and up the sides. Layer in half the cheesecake filling, add all the mango jam in the center (spreading it out a bit but not all the way to the edges), then top with the remaining filling. The chill time will be the same, at least 4 hours or overnight. When unmolding, you'll still dip it in warm water to loosen, then flip it onto a large serving plate. The only downside is that individual portions are easier to serve and look more elegant for entertaining, but a large cheesecake works great for family gatherings!
Q: My cream cheese has lumps even after beating, what did I do wrong?
A: The key is making sure your cream cheese is fully softened before you start beating it. Cold cream cheese straight from the fridge will always have lumps no matter how long you beat it. Take the cream cheese blocks out and let them sit at room temperature for at least 30-45 minutes before using, they should be soft enough that you can easily press your finger into them. If you forgot to soften them and need to speed things up, you can microwave them for 10-15 seconds at a time (unwrapped), but be careful not to melt them or they'll get oily. Another tip is to cut the cream cheese into chunks before beating, which helps it smooth out faster. If you already have lumps, push the mixture through a fine mesh sieve before folding in the whipped cream.
Q: Can I use frozen mango for the jam?
A: Yes, frozen mango works great for the jam! Just thaw it completely first and drain any excess liquid before cooking it with the sugar. Frozen mango sometimes releases more water than fresh, so you might need to cook it a bit longer (an extra 2-3 minutes) to get it to that thick, jammy consistency you want. The flavor will be just as delicious. You can also use canned mango in a pinch, just make sure to drain it really well and pat it dry with paper towels before cooking. Fresh ripe mango gives you the best flavor and texture, but frozen is a solid backup, especially in winter when fresh mangoes aren't as good.
Q: How do I make the mango roses without them falling apart?
A: The trick to perfect mango roses is using a ripe but firm mango and slicing it really thin and evenly. If the mango is too soft, the slices will be mushy and won't hold their shape. If it's too firm, they'll be stiff and hard to roll. Cut the mango cheeks off, then slice them lengthwise into thin, even strips about 1/8 inch thick. Lay the slices in a row slightly overlapping each other, then gently roll from one end to create the rose shape. The overlapping is important because it gives you those petal layers. If your first attempt falls apart, don't worry, just unroll and try again! You can also secure the bottom with a toothpick while you're working with it, then remove it before placing on the cheesecake. Practice makes perfect, and even imperfect roses still look beautiful and taste amazing!
This no-bake upside-down mango cheesecake is stunning and delicious! A buttery graham cracker crust on top, light and creamy cheesecake filling, and homemade mango jam hidden inside. Assembled in individual springform pans and flipped to reveal the crust on top, then decorated with mango roses and white chocolate. No oven needed!
Rate This Recipe!
Preparations
Prep Time:
35 minutes
Cook Time:
15 minutes
Total Time:
50 minutes (plus 4 hours chill time)
Cuisine:
American, Tropical Fusion
Course:
Dessert
Calories:
680 kcal (approx. per serving)
Servings:
4
Author:
Ronica Rupan
Ingredients
Ingredients
For the Mango Jam:
- 2 cups chopped ripe mango (about 2 medium mangoes)
- ¾ cup granulated sugar
- 1 teaspoon lime juice
For the Crust:
- 24 graham cracker sheets
- ¾ cup unsalted butter, melted
For the Cheesecake Filling:
- 3 (8-ounce) blocks cream cheese, softened to room temperature
- ¾ cup powdered sugar
- 1 teaspoon vanilla extract
- 1 cup heavy whipping cream, cold
For the Topping:
- 1 ripe mango, peeled and thinly sliced
- ¼ cup white chocolate chips, melted
Instructions
- Make the Mango Jam Add the chopped mango and granulated sugar to a 2½-quart nonstick saucepan. Cook over medium heat, stirring often to prevent sticking, until the mango softens and starts breaking down, about 6-7 minutes. Use a fork or potato masher to gently mash the mixture until it's mostly smooth with some small chunks remaining. Stir in the lime juice. Continue cooking, stirring often, until the mixture is thick, jammy, and coats the back of a spoon, another 4-5 minutes. Transfer the jam to a bowl and pop it in the fridge to chill for 30 minutes while you prepare everything else.
- Make the Graham Cracker Crust While the jam is chilling, add the graham crackers to a food processor and pulse 5-6 times until they're fine crumbs with no large pieces. Pour in the melted butter and pulse another 3-4 times until the mixture looks like wet sand and holds together when you squeeze it. Set aside.
- Prep the Pans Place 4 (4-inch) nonstick springform pans on a baking sheet for easy transport. Spoon ½ cup of the crust mixture into each pan. Using the bottom of a flat cup or glass, press the crust firmly and evenly into the bottom and up the sides of each pan. Really pack it down so it holds together well. Pop the pans in the fridge while you make the filling.
- Make the Cheesecake Filling In a large glass bowl (10-12 inches works best), beat the softened cream cheese with an electric mixer on medium speed until it's completely smooth with no lumps, about 1-2 minutes. Scrape down the sides of the bowl. Add the powdered sugar and vanilla extract, then beat again until everything is combined and fluffy, another 1-2 minutes. In a separate clean bowl, beat the cold heavy whipping cream with clean beaters on high speed until soft peaks form (when you lift the beaters, the peaks should hold their shape but the tips should gently fold over), about 2-3 minutes. Don't overbeat or you'll end up with butter! Gently fold the whipped cream into the cream cheese mixture using a spatula, making big sweeping motions from the bottom up until everything is combined and light and fluffy. Be gentle so you don't deflate all that air you just whipped in.
- Assemble the Cheesecakes Take your chilled pans out of the fridge. Spoon or pipe the cheesecake filling into each pan, filling them about halfway (roughly ¼ cup of filling per pan). Use the back of a spoon to create a small well in the center of each. Add 1½ tablespoons of the chilled mango jam right into the center well of each cheesecake. Top with more cheesecake filling (about another ¼ cup per pan) to completely cover the jam. Use a small offset spatula or the back of a spoon to smooth the tops so they're nice and even. Cover each pan with plastic wrap and refrigerate for at least 4 hours, but overnight is even better if you have the time. The cheesecakes need this time to firm up properly.
- Unmold the Cheesecakes When you're ready to serve, fill a bowl with warm (not hot) water. Dip each springform pan into the water for about 2 minutes, which will slightly soften the butter in the crust and make it easier to release. Carefully release the springform ring from each pan. Place a serving plate upside down on top of each cheesecake, then flip everything over in one confident motion so the cheesecake is now right-side up on the plate with the crust on top!
- Create Mango Roses and Finish Peel your ripe mango and slice off the two cheeks. Cut each cheek lengthwise into very thin, even strips (about 1/8 inch thick). Lay several slices in a row with them slightly overlapping each other. Starting from one end, gently roll the mango slices to form a rose shape, adjusting the petals as needed to make it look full and pretty. Place one mango rose on top of each cheesecake. Melt the white chocolate chips in the microwave in 15-second bursts, stirring between each burst until smooth. Drizzle the melted white chocolate over each cheesecake in a pretty pattern.
- Serve and Enjoy Serve immediately, or keep refrigerated until ready to serve. These are best enjoyed within 24 hours of unmolding!
Creamy Roasted Cauliflower Soup
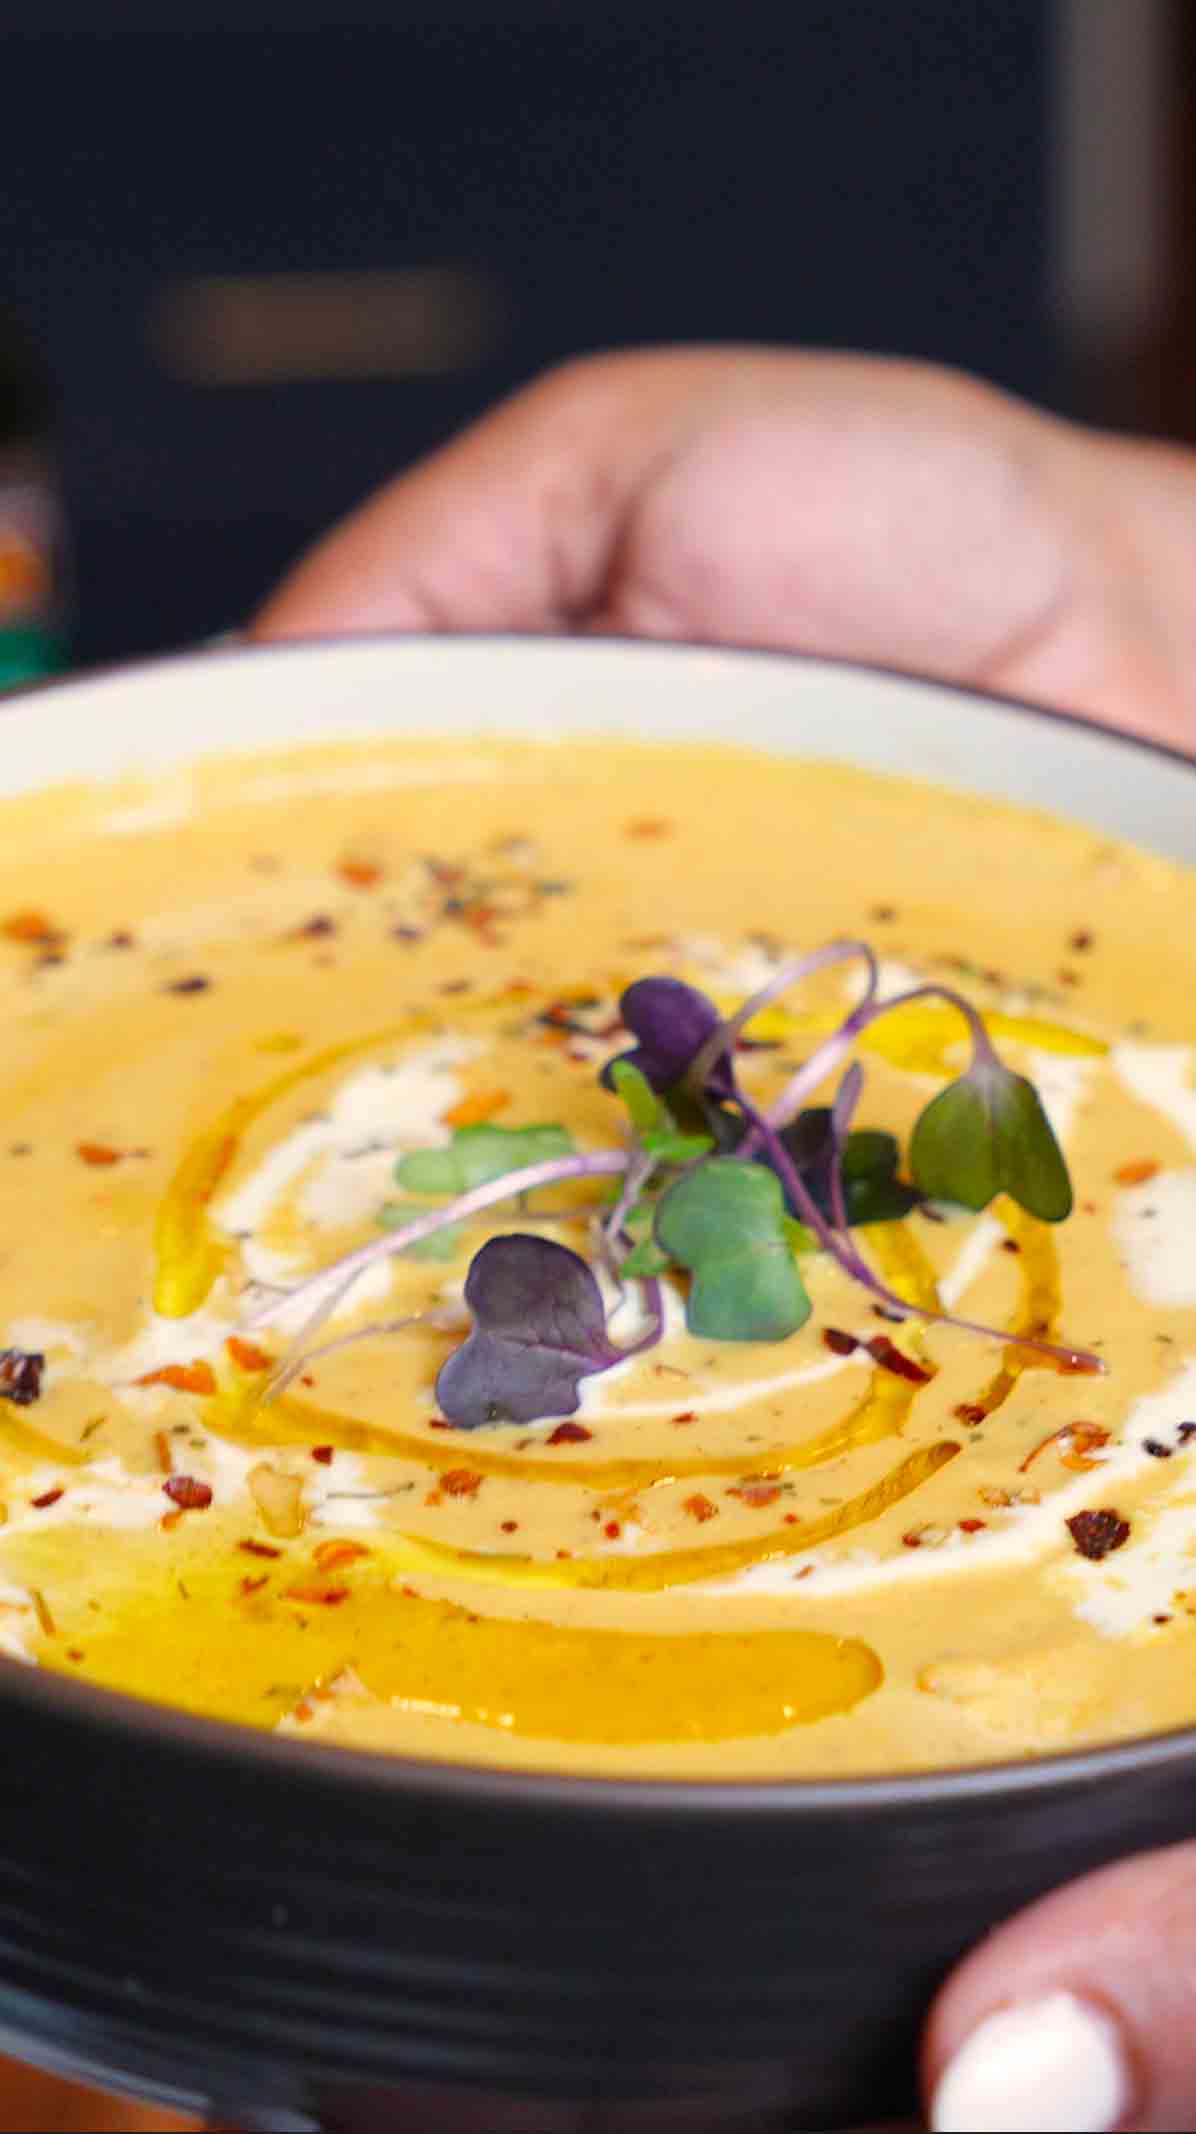
Warm, creamy, and perfectly garlicky, this roasted cauliflower soup is your ultimate winter comfort food that's about to become your new cold-weather obsession! This isn't just any cauliflower soup, roasting the cauliflower first transforms it into something magical with deep, caramelized flavors and natural sweetness that you just can't get from boiling. You start by roasting a whole head of garlic until it's soft, golden, and sweet, then roast cauliflower florets tossed in olive oil until they're caramelized and slightly crispy on the edges. While everything's roasting, you build a flavorful base by sautéing onions, carrots, and celery in more olive oil until they're tender and fragrant. The magic happens when you combine the roasted cauliflower and those sweet, mellow roasted garlic cloves with vegetable broth and let everything simmer together so the flavors can meld. Then you blend it all up with milk until it's silky smooth and incredibly creamy, no heavy cream needed! A touch of smoked paprika adds warmth and depth, while a squeeze of fresh lemon juice at the end brightens everything up and balances the richness. The soup is naturally vegetarian and can easily be made vegan by using plant-based milk. When you serve it, you drizzle a little extra olive oil on top which adds this gorgeous richness and brings all the flavors together. Every spoonful is velvety, comforting, and packed with that deep roasted flavor. It's the kind of soup that feels fancy enough for entertaining but easy enough for a cozy weeknight dinner. Serve it with crusty bread for dipping and you've got the perfect meal for cold days!
Frequently Asked Questions
Q: Can I make this soup vegan?
A: Absolutely! This soup is already vegetarian and super easy to make vegan. Just swap the regular milk for any plant-based milk you like. Unsweetened almond milk, oat milk, or cashew milk all work beautifully and create that same creamy texture. Oat milk is especially good because it's naturally creamy and slightly sweet, which complements the roasted cauliflower perfectly. Make sure your vegetable broth is also vegan (most are, but always check the label). Everything else in the recipe is already plant-based, so those two simple swaps and you've got a completely vegan soup that's just as delicious and creamy as the original.
Q: Do I have to roast the garlic separately or can I just add raw garlic?
A: Roasting the garlic is really worth the extra time! When you roast a whole head of garlic, the cloves become incredibly soft, sweet, and mellow with almost no sharp bite at all. This adds so much depth and richness to the soup without any harsh garlic flavor. Raw garlic would be much more pungent and could overpower the delicate roasted cauliflower. That said, if you're really short on time, you can sauté 4-5 minced garlic cloves with the onions, carrots, and celery. The soup will still taste good, just different, with a sharper garlic flavor instead of that sweet, caramelized richness you get from roasting. If you go this route, start with less garlic and taste as you go since raw garlic is much stronger.
Q: My soup is too thick after blending, how do I fix it?
A: This happens sometimes, especially if your cauliflower was particularly large or if some of the liquid evaporated during simmering. It's an easy fix! Just thin it out by adding more vegetable broth or milk, about ¼ cup at a time, stirring and checking the consistency after each addition until it reaches the texture you want. Some people like their soup thick and stewlike, while others prefer it thinner and more brothlike, so adjust to your preference. If you're reheating leftovers and they've thickened up in the fridge (which is totally normal), do the same thing, just add a splash of broth or milk while reheating and stir until it's back to the consistency you like.
This creamy roasted cauliflower soup is pure winter comfort! Cauliflower and garlic roasted in olive oil until caramelized, then blended with sautéed vegetables, broth, and milk for a silky, satisfying soup. Naturally vegetarian, full of deep roasted flavors, and ready in just over an hour.
Rate This Recipe!
Preparations
Prep Time:
15 minutes
Cook Time:
55 minutes
Total Time:
1 hour 10 minutes
Cuisine:
American, Comfort Food
Course:
Soup, Main Course, Dinner
Calories:
240 kcal (approx. per serving)
Servings:
4
Author:
Ronica Rupan
Ingredients
Ingredients
For the Soup:
- 1 large head cauliflower (about 2 pounds), cut into bite-sized florets
- 1 whole head garlic
- 2½ tablespoons extra virgin olive oil, divided
- 2 small carrots, chopped
- 2 stalks celery, chopped
- 2 small yellow onions, diced
- 1 teaspoon smoked paprika
- 1 teaspoon all-purpose seasoning
- 4 cups vegetable broth
- 2 cups milk of choice
- 1 tablespoon fresh lemon juice (optional but recommended)
- Kosher salt, to taste
- Freshly ground black pepper, to taste
For Serving:
- Extra virgin olive oil, for drizzling
- Fresh lemon wedges (optional)
Instructions
- Get the Oven Ready Preheat your oven to 400°F (200°C). Line a large baking sheet with parchment paper or a silicone baking mat for easy cleanup.
- Prep and Roast the Garlic Take your whole head of garlic and slice about ¼ inch off the top to expose all the cloves inside. Drizzle 1 teaspoon of olive oil all over the exposed cloves, letting it seep down into all the gaps. Wrap the entire head tightly in aluminum foil and place it on the prepared baking sheet. Roast for 45 minutes until the cloves are soft, golden, and sweet. Once done, let it cool for a few minutes before handling.
- Roast the Cauliflower While the garlic is roasting, toss your cauliflower florets with 1 tablespoon of olive oil, a good pinch of salt, and some freshly ground black pepper in a large bowl. Make sure every piece is coated. Spread the cauliflower in an even layer on the baking sheet next to the garlic (or use a second sheet if needed). Roast for 30 minutes, flipping the pieces halfway through so they get nice and caramelized on all sides. You want them golden brown with some crispy edges.
- Start the Soup Base In a large pot or Dutch oven, heat the remaining 1½ tablespoons of olive oil over medium heat. Once it's shimmering, add the diced onions and sauté for about 5 minutes, stirring occasionally, until they're soft and translucent. Toss in the chopped carrots and celery, and cook for another 3 minutes until they start to soften. Sprinkle in the smoked paprika, all-purpose seasoning, and another pinch of salt. Stir everything together and let those spices bloom for about 30 seconds.
- Simmer Everything Together Pour in the vegetable broth and bring the whole thing to a gentle simmer. Add your beautiful roasted cauliflower to the pot. Now for the garlic, carefully unwrap the roasted head and squeeze out those soft, golden cloves right into the pot (you can also use a butter knife to pop them out if that's easier). Let everything simmer together for about 10 minutes so all the flavors can get to know each other.
- Blend Until Silky Take the pot off the heat and pour in your milk of choice. Now grab your immersion blender and blend everything right in the pot until it's completely smooth and creamy. If you don't have an immersion blender, carefully transfer the soup in batches to a regular blender (let it cool slightly first and don't fill the blender more than halfway since hot liquids expand). Blend until silky smooth, then pour it back into the pot. Put the pot back on medium heat and stir in that tablespoon of lemon juice if you're using it. It really brightens everything up!
- Taste and Adjust Give your soup a taste and season with more salt and pepper if needed. Remember, the flavors should be balanced, rich and savory from the roasted veggies, slightly sweet from the garlic and cauliflower, and bright from the lemon.
- Serve It Up Ladle the soup into bowls and drizzle each serving with a little extra olive oil. That finishing drizzle adds such a gorgeous richness and brings everything together. Add an extra squeeze of lemon juice if you want more brightness. Serve hot with crusty bread!
Viral Oven Shawarma Focaccia Sandwich
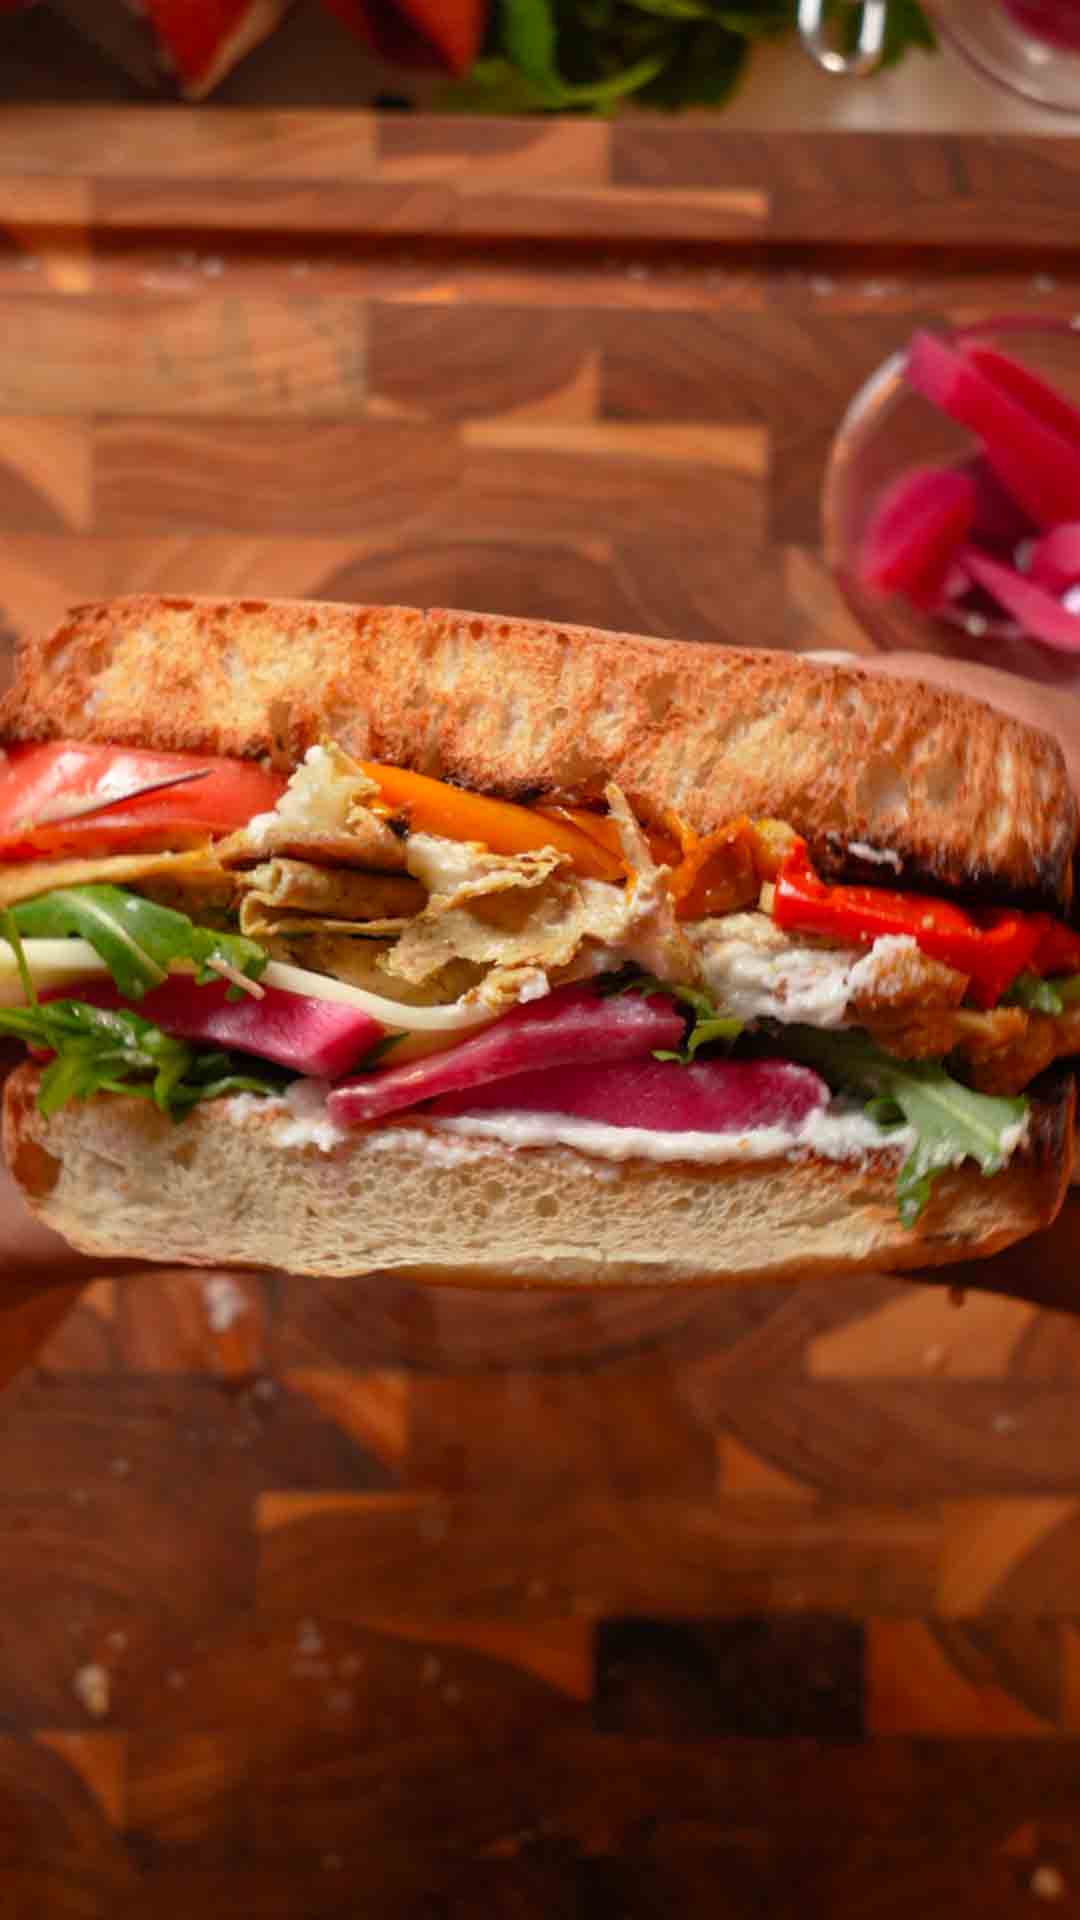
This viral oven-baked shawarma focaccia sandwich brings together spiced chicken, crisp vegetables, and creamy sauces in an easy, home-friendly recipe that's taken social media by storm! Instead of needing a vertical rotisserie spit like traditional shawarma, this genius method uses your regular oven to create those same incredible flavors and textures. Boneless, skinless chicken thighs get pulsed in a food processor with Greek yogurt, garlic, and a blend of warm Middle Eastern spices like cumin, paprika, coriander, turmeric, cinnamon, and a touch of cayenne for heat. The mixture gets spread thin between parchment paper, then folded accordion-style into these compact rolls that bake up juicy and flavorful with crispy edges that mimic that charred exterior you get from a shawarma spit. While the chicken bakes alongside some colorful mini sweet peppers, you toast thick slices of focaccia bread until golden and slightly crispy. Then comes the fun part, building these loaded sandwiches! Each focaccia half gets slathered with creamy garlic sauce (toum), then piled high with torn shawarma chicken, fresh diced tomatoes, cucumbers, tangy pickles, vibrant pink pickled turnips, and thinly sliced red onions. A slice of mozzarella goes on top and gets torched (or broiled) until melted and bubbly, then you add fresh peppery arugula, a drizzle of nutty tahini, and a big squeeze of fresh lemon juice. The top half gets its own layer of garlic sauce before you press it all together and slice it diagonally to reveal those beautiful layers. Every bite is a perfect combination of spiced, juicy chicken, creamy sauces, crunchy vegetables, tangy pickles, melted cheese, and fresh herbs all tucked into pillowy focaccia bread. It's everything you love about shawarma wraps but in sandwich form, and it's way easier to make at home than you'd think. Perfect for dinner, meal prep, or impressing guests with your shawarma skills without needing any special equipment!
Frequently Asked Questions
Q: Can I use chicken breasts instead of thighs?
A: You can, but chicken thighs are strongly recommended for this recipe because they have more fat and stay incredibly juicy even when spread thin and baked. Chicken breasts tend to dry out more easily, especially when flattened to ¼ inch thickness. If you must use breasts, add an extra tablespoon of Greek yogurt to the mixture to help keep them moist, and watch the baking time carefully. Start checking at 18 minutes instead of 20, and pull them out as soon as they hit 165°F internally. The thighs are more forgiving and give you that authentic shawarma texture and flavor that's slightly fatty and super tender.
Q: What is toum and where can I find it?
A: Toum is a traditional Lebanese garlic sauce that's incredibly creamy, fluffy, and intensely garlicky. It's made by emulsifying garlic, lemon juice, and oil (similar to making mayonnaise but with way more garlic). You can find prepared toum at Middle Eastern grocery stores, some specialty food stores, or online. If you can't find toum, you can substitute with garlic mayonnaise (mix ½ cup mayo with 2-3 minced garlic cloves and a squeeze of lemon juice) or garlic aioli. Store-bought garlic sauce works too. The flavor won't be quite as authentic or as garlicky as real toum, but it will still be delicious. If you want to make homemade toum, there are lots of recipes online, but be warned, it requires patience and a food processor or immersion blender.
Q: Do I have to use a kitchen torch for the cheese?
A: No, the kitchen torch is optional and just makes it faster and easier to melt the cheese without heating up your whole oven again. If you don't have a torch, you can absolutely use your oven broiler instead. Just place the assembled sandwiches (before adding the arugula, tahini, and lemon) on a baking sheet and broil for 1-2 minutes, watching very carefully so the cheese melts but the bread doesn't burn. You can also skip melting the cheese entirely and just let the heat from the chicken melt it slightly, though it won't be as gooey and bubbly. Another option is to place the cheese on the hot chicken right after it comes out of the oven, and the residual heat will melt it.
This viral oven-baked shawarma focaccia sandwich is taking social media by storm! Spiced chicken thighs baked accordion-style until juicy, then piled onto toasted focaccia with garlic sauce, tahini, melted mozzarella, fresh vegetables, and tangy pickled toppings. All the classic shawarma flavors in an easy, home-friendly sandwich ready in just over an hour.
Rate This Recipe!
Preparations
Prep Time:
20 minutes
Cook Time:
45 minutes
Total Time:
65 minutes
Cuisine:
Middle Eastern, Lebanese
Course:
Main Course, Dinner, Sandwich
Calories:
720 kcal (approx. per serving)
Servings:
Author:
Ronica Rupan
Ingredients
Ingredients
For the Shawarma:
- 2 pounds boneless, skinless chicken thighs
- 2 tablespoons plain whole-milk Greek yogurt
- 4 cloves garlic
- 2 teaspoons ground cumin
- 2 teaspoons paprika
- 1 teaspoon kosher salt
- 1 teaspoon ground coriander
- ½ teaspoon ground turmeric
- ½ teaspoon ground cinnamon
- ¼ teaspoon cayenne pepper (optional)
- ½ teaspoon black pepper
- 4 multicolored miniature sweet peppers
For the Sandwiches:
- 4 (6 x 4-inch) pieces focaccia bread (from 1 16-ounce loaf), split horizontally
- 1 cup prepared garlic sauce (toum or garlic mayonnaise)
- 1 cup diced tomatoes
- 1 cup diced peeled cucumbers
- ½ cup sliced pickles
- ½ cup sliced pickled turnips
- ½ cup thinly sliced red onion
- 4 slices mozzarella cheese
- 1 cup fresh arugula leaves
- ¼ cup tahini
- 1 lemon, cut into 8 wedges
Instructions
- Get Your Oven Ready Preheat your oven to 400°F (200°C). Grab a large baking sheet and line it with parchment paper, then set it aside.
- Blend the Shawarma Chicken Toss the chicken thighs into your food processor along with the yogurt, garlic, cumin, paprika, salt, coriander, turmeric, cinnamon, cayenne (if you're using it), and black pepper. Pulse everything about 15-20 times until it looks like ground meat and all the spices are mixed in really well. You want a thick, paste-like texture. Scoop it all out into a large bowl.
- Create the Accordion Rolls Divide your chicken mixture into 4 equal portions. Take one portion and plop it in the middle of a 12 x 16-inch piece of parchment paper. Cover it with another piece of parchment the same size. Now use a rolling pin or just your hands to press and spread the chicken into a thin rectangle, about ¼ inch thick, getting it as close to the edges as you can. Once it's nice and thin, start from one of the short ends and fold the whole thing (with both sheets of parchment) accordion-style into 2-3 flat folds. It should look like a compact layered package. Do this same thing with your other 3 portions.
- Bake Everything Arrange your 4 chicken packages and those cute little peppers on your prepared baking sheet. Slide it into the oven and bake for 20-25 minutes. The chicken should be cooked through and golden. To check, carefully open up one package and stick a thermometer in the thickest part, you want it to read 165°F. Once it's done, take it out and let everything rest for 5 minutes.
- Toast Your Bread While the chicken's resting, split your focaccia pieces in half horizontally and lay them cut-side up on a baking sheet. Pop them in the 400°F oven (or use a toaster oven) for 3-5 minutes until they're lightly golden and crispy. Set them aside.
- Shred the Chicken Carefully unwrap each chicken package and toss the parchment. Now tear or slice that beautiful chicken into bite-sized pieces. It should pull apart easily and have some nice crispy bits on the edges.
- Start Building Spread about 2 tablespoons of that garlicky sauce on each bottom focaccia piece. Now start layering, add a quarter of your chicken, then ¼ cup tomatoes, ¼ cup cucumbers, 2 tablespoons pickles, 2 tablespoons of those pink pickled turnips, and 2 tablespoons red onion. Top each one with a slice of mozzarella.
- Get That Cheese Melty If you've got a kitchen torch, torch that cheese until it's melted, bubbly, and maybe a little golden, about 30-60 seconds per sandwich. No torch? No problem. Just stick them under your broiler for 1-2 minutes, but stay right there and watch them so nothing burns.
- Finish It Off Once your cheese is perfectly melted, add ¼ cup of arugula to each sandwich. Drizzle a tablespoon of tahini over the greens. Grab those lemon wedges and squeeze 2 wedges worth of juice over each sandwich.
- Close It Up and Serve Spread 2 tablespoons of garlic sauce on each top piece of focaccia. Place them on top of your loaded sandwiches, sauce side down. Press down firmly to squish everything together. Grab a sharp knife and cut each sandwich diagonally so you can see all those gorgeous layers. Serve right away with extra lemon wedges on the side!
Cheesy Turkish Pide with Spiced Beef

These cheesy Turkish-style pides are shaped like boats, stuffed with spiced beef, sautéed aromatics, and gooey melted cheese for a savory, satisfying meal with bold flavor and a crispy golden crust. If you've never had pide before, think of it as Turkish pizza, but so much better! The dough gets shaped into an oval boat with the edges folded over melted cheese to create a stuffed crust that's golden, crispy, and incredibly cheesy. The filling is made with ground beef that's been cooked with a paste of onions, bell peppers, tomatoes, and garlic all blitzed together in a food processor until they practically melt into the meat. Then it's seasoned with warm spices like cumin, paprika, and a hint of cinnamon that give it that authentic Middle Eastern flavor. The tomato paste adds richness and helps bind everything together. What makes this recipe so genius is using store-bought refrigerated pizza dough, which saves you hours of work but still gives you that perfect chewy, crispy crust. The dough gets rolled into ovals, the edges get stuffed with mozzarella or traditional Turkish kasar cheese if you can find it, then you fold and pinch the ends to create those signature pointed boat tips. The spiced beef filling goes right in the center, gets topped with even more cheese, and the whole thing is brushed with beaten egg for that beautiful golden shine. After about 15 minutes in a hot oven, you've got restaurant-quality Turkish pide with a crust that's golden and crispy on the outside, soft and chewy on the inside, and oozing with melted cheese. The beef is perfectly spiced, savory, and slightly sweet from the vegetables and cinnamon. Garnish with fresh parsley and red chili flakes for a pop of color and a little heat. It's perfect for dinner, entertaining, or when you want something that feels special but comes together in about 35 minutes. Serve it with a simple side salad or some yogurt sauce for dipping.
Frequently Asked Questions
Q: Can I use homemade pizza dough instead of store-bought?
A: Absolutely! Homemade pizza dough will work beautifully and might even taste better than store-bought. You'll need about 1 pound of dough total, which you can divide into 2 equal portions (8 ounces each). Make sure your homemade dough has gone through its first rise and is at room temperature before you start rolling it out. Cold dough from the fridge will be too stiff and will spring back when you try to shape it, so let it sit at room temperature for about 30-45 minutes before rolling. If you're making dough from scratch, any basic pizza dough recipe will work perfectly. The key is rolling it thin enough (about ¼ inch thick) so it cooks through properly and gets crispy on the bottom while staying soft and chewy inside
Q: What can I substitute for Turkish kasar cheese?
A: Turkish kasar cheese is a semi-hard, mild cheese similar to mozzarella but with a slightly sharper, more complex flavor. If you can't find it at your local Middle Eastern market, mozzarella is the best substitute and what I use most often since it melts beautifully and has that stretchy, gooey texture. You can also use a combination of mozzarella and white cheddar for more flavor, or try provolone, Monterey Jack, or even fontina. For a more authentic flavor, mix mozzarella with a little bit of feta cheese (about ¼ cup crumbled feta mixed with 1¾ cups mozzarella). The feta adds that tangy, salty flavor that's more traditional to Turkish cuisine. Just avoid using pre-shredded cheese if possible, freshly shredded melts better and doesn't have the anti-caking agents that can make it grainy.
. Q: Can I make these vegetarian
A: Yes! You can easily make a vegetarian version by swapping the ground beef for plant-based ground meat, lentils, or a mixture of sautéed mushrooms and spinach. If using lentils, cook 1 cup of dried brown or green lentils until tender, then use them in place of the beef and cook with the vegetable paste and spices the same way. For a mushroom version, finely chop about 12 ounces of mushrooms and cook them down with the vegetable paste until all the liquid has evaporated, then add the spices. You can also do a cheese and vegetable version by skipping the meat entirely and using the sautéed vegetable paste mixed with crumbled feta, spinach, and extra cheese. Any of these versions will be delicious and just as satisfying as the beef version.
These cheesy Turkish-style pides are shaped like boats, stuffed with spiced beef, sautéed aromatics, and gooey melted cheese. Using refrigerated pizza dough makes them easy, while warm spices and a cheese-stuffed crust make them absolutely delicious.
Rate This Recipe!
Preparations
Prep Time:
15 minutes
Cook Time:
20 minutes
Total Time:
35 minutes
Cuisine:
Turkish, Middle Eastern
Course:
Main Course, Dinner
Calories:
680 kcal (approx. per serving)
Servings:
2
Author:
Ronica Rupan
Ingredients
Ingredients
For the Spiced Beef Filling:
- 1 medium yellow onion, quartered
- 1 small green bell pepper, stemmed and deseeded
- 1 small tomato
- 3 cloves garlic
- 1 tablespoon olive oil
- 1 pound ground beef
- 2 tablespoons tomato paste
- 1 teaspoon ground cumin
- 1 teaspoon paprika
- 1 teaspoon kosher salt, plus more to taste
- ½ teaspoon ground cinnamon
- ½ teaspoon freshly ground black pepper
For the Pide:
- All-purpose flour, for dusting
- 2 (8-ounce) refrigerated pizza dough balls, at room temperature
- 2 cups shredded mozzarella or Turkish kasar cheese, divided
- 1 large egg, beaten
For Garnish:
- Chopped fresh parsley
- Red chili flakes (optional)
Instructions
- Make the Vegetable Paste and Start Cooking Add the quartered onion, bell pepper, tomato, and garlic cloves to a food processor. Process on high speed for about 30 seconds until everything is finely minced and forms a smooth, chunky paste. Scrape down the sides if needed to ensure everything is evenly processed.
- Cook the Filling Heat the olive oil in a large nonstick skillet over medium heat until shimmering. Add the vegetable paste and cook, stirring often, for 2-3 minutes until most of the moisture has evaporated and the mixture is fragrant. Add the ground beef, tomato paste, cumin, paprika, salt, cinnamon, and black pepper. Stir everything together to combine well. Cook, breaking up the meat with a wooden spoon and stirring occasionally, until the beef is fully cooked through and browned and the mixture is thick and fragrant, about 7-8 minutes. Remove from heat.
- Preheat the Oven While the beef is cooking, preheat your oven to 425°F (220°C). Line a large baking sheet with parchment paper.
- Roll Out the Dough While the filling finishes cooking, lightly flour a clean work surface. Working with one dough ball at a time, roll it out into a large oval shape about ¼ inch thick and roughly 10-12 inches long. The oval doesn't have to be perfect, just aim for an elongated shape rather than a circle.
- Create the Stuffed Crust Sprinkle ¾ cup of the shredded cheese evenly over the outer 1½ inches of the dough oval, leaving the center clear. This cheese will create your stuffed crust. Fold the edges of the dough over the cheese and press firmly to seal, creating a rope-like border all around the oval. Make sure the cheese is completely enclosed so it doesn't leak out during baking.
- Shape the Boat To form the traditional boat shape, gently pinch and twist both narrow ends of the oval together, pulling them slightly upward to create pointed tips like the ends of a canoe. The sides should remain slightly open with raised edges to hold the filling. Repeat this entire process with the second dough ball.
- Fill the Pides Divide the beef mixture evenly between the 2 shaped doughs, spreading it over the centers and keeping it within the raised crust borders. You can use the filling while it's still warm if you're working quickly. Sprinkle the remaining ½ cup of shredded cheese evenly over the beef filling on both pides.
- Brush with Egg Wash Transfer both pides to the prepared parchment-lined baking sheet. Using a pastry brush, brush the exposed crust edges generously with the beaten egg. This will give you that beautiful golden, shiny finish.
- Bake Place the baking sheet in the preheated oven and bake for 12-15 minutes, rotating the baking sheet from front to back halfway through for even baking. The pides are done when the crust is golden brown, the cheese is melted and bubbly, and the bottom is crispy.
- Cool and Garnish Remove the pides from the oven and let them cool for 2-3 minutes on the baking sheet. This allows the cheese to set slightly and makes them easier to slice. Garnish with chopped fresh parsley and a sprinkle of red chili flakes if you like some heat.
- Serve Slice each pide into 3-4 pieces and serve warm while the cheese is still gooey and melted.
Navy Bean Hummus with Roasted Jerk Vegetables

This navy bean hummus with roasted jerk vegetables is a flavor-packed twist on classic hummus that's creamy, protein-rich, and absolutely delicious! Instead of chickpeas, I'm using navy beans which create an incredibly smooth, silky texture that's even creamier than traditional hummus. The hummus is made with tahini (I use homemade but store-bought works great), fresh garlic, lemon juice, and a blend of warm spices like cumin, sumac, and smoked paprika that give it depth and complexity. What really takes this over the top are the roasted jerk vegetables, zucchini, red onion, and sweet peppers tossed in jerk seasoning and roasted until caramelized and slightly charred. The sweet, spicy jerk flavors pair perfectly with the creamy, tangy hummus. I'm also showing you how to make crispy homemade pita chips seasoned with smoked paprika and garlic that are way better than store-bought. Everything comes together in under 30 minutes for an appetizer, snack, or light meal that's naturally vegan, plant-based, and packed with protein and fiber. The combination of creamy hummus, spicy-sweet roasted vegetables, and crunchy pita chips creates this amazing contrast of textures and flavors. It's perfect for entertaining, meal prep, or just when you want something healthy and satisfying that feels indulgent.
Frequently Asked Questions
Q: Can I use canned navy beans instead of cooking my own?
A: Absolutely! Canned navy beans work perfectly for this recipe and save you tons of time. Use one 15-ounce can of navy beans, drained and rinsed well. If you want extra creamy hummus, you can even peel the skins off the beans after draining them, though this is optional and time-consuming. The recipe calls for 1½ cups cooked beans, which is roughly one standard can. If you do cook your own beans from dried, make sure they're cooked until very soft and tender, as this will give you the smoothest, creamiest hummus. Undercooked beans will result in grainy hummus no matter how much you blend them.
Q: What can I substitute for tahini?
A: Tahini is really the key to authentic hummus flavor, but if you don't have it or can't find it, you have a few options. You can use sunflower seed butter or almond butter for a similar creamy, nutty flavor, though the taste will be slightly different. Use the same amount (2 tablespoons) and your hummus will still be delicious. Another option is to make a quick tahini substitute by blending 3 tablespoons of sesame seeds with 1 tablespoon of olive oil until smooth and creamy. If you're allergic to sesame, the nut or seed butter route is your best bet. Keep in mind that without tahini, your hummus won't have that classic Middle Eastern flavor, but it will still be creamy and tasty.
Q: Can I roast the vegetables and make the pita chips in the oven at the same time?
A: Yes, you can! Since both the pita chips and the jerk vegetables roast at 425°F, you can absolutely cook them together to save time. Just use two separate baking sheets. Put the vegetables on one sheet and the pita chips on another. The pita chips will be done in 5-7 minutes, so pull them out first and let the vegetables continue roasting for another 3-5 minutes until they're caramelized and tender. If you're using an air fryer, you'll need to do them in batches since most air fryers aren't big enough to fit everything at once. Do the pita chips first, then the vegetables, or vice versa.
Q: How do I store leftovers and how long will they keep?
A: Store the hummus, roasted vegetables, and pita chips separately for best results. The hummus will keep in an airtight container in the refrigerator for up to 5 days. Before serving leftover hummus, let it come to room temperature and give it a good stir, you may need to add a teaspoon or two of water to loosen it up since it thickens in the fridge. The roasted vegetables will keep for 3-4 days in the fridge and can be enjoyed cold, at room temperature, or reheated. The pita chips will stay crispy for 2-3 days if stored in an airtight container at room temperature. If they lose their crispness, you can re-crisp them in a 350°F oven or air fryer for 2-3 minutes. Don't store the pita chips in the fridge or they'll get soggy.
This navy bean hummus with roasted jerk vegetables is a creamy, protein-packed twist on classic hummus! Smooth navy bean hummus gets topped with caramelized jerk-seasoned vegetables and served with crispy homemade pita chips. It's naturally vegan, ready in 30 minutes, and perfect for snacking or entertaining.
Rate This Recipe!
Preparations
Prep Time:
15 minutes
Cook Time:
10 minutes
Total Time:
25 minutes
Cuisine:
Middle Eastern, Caribbean Fusion
Course:
Appetizer, Snack, Side Dish
Calories:
320 kcal (approx. per serving with pita chips and vegetables)
Servings:
4
Author:
Ronica Rupan
Ingredients
Ingredients
For the Navy Bean Hummus:
- 1½ cups cooked navy beans (or 1 15-ounce can, drained and rinsed)
- 2 tablespoons tahini (homemade or store-bought)
- 2 cloves garlic, minced
- Juice of ½ lemon
- ½ teaspoon ground cumin
- ½ teaspoon sumac
- ½ teaspoon smoked paprika
- ¼ teaspoon sea salt
- Water, as needed for consistency
For the Pita Chips:
- 3 large pita breads
- 3 tablespoons olive oil
- 1 teaspoon smoked paprika
- ½ teaspoon garlic granules
- Pinch of salt
For the Roasted Jerk Vegetables:
- ¼ cup zucchini, chopped ¼ inch thick
- ¼ cup red onion, chopped ¼ inch thick
- ¼ cup sweet peppers, chopped ¼ inch thick
- 1 tablespoon jerk seasoning
- 1 tablespoon olive oil
For Garnish:
- Olive oil, for drizzling
- Fresh parsley, chopped
Instructions
- Preheat the Oven or Air Fryer Preheat your oven to 425°F (220°C) or preheat your air fryer to 425°F. If using the oven, line two baking sheets with parchment paper, one for the pita chips and one for the vegetables.
- Make the Hummus Add the navy beans to a food processor along with the minced garlic, lemon juice, tahini, cumin, smoked paprika, sumac, and sea salt. Process the ingredients on high speed for 1-2 minutes until completely smooth, scraping down the sides of the food processor as needed. If the hummus is too thick, add water 1 teaspoon at a time and blend until you reach your desired creamy, spreadable consistency.
- Taste and Adjust Seasoning Taste the hummus and adjust the seasoning as needed. You can add additional lemon juice for more tanginess, extra salt, or more garlic if you like it really garlicky. Transfer the hummus to a serving bowl and set aside.
- Prepare the Pita Chips Cut the pita breads into triangle shapes (cut each pita into 8 wedges). Place the pita triangles in a large bowl and drizzle with the olive oil. Sprinkle with smoked paprika, garlic granules, and a pinch of salt. Toss everything together with your hands until all the pita pieces are evenly coated.
- Bake the Pita Chips Arrange the seasoned pita triangles in a single layer on the prepared baking sheet (or in the air fryer basket in a single layer). Bake in the preheated oven for 5-7 minutes, or air fry for 5-7 minutes, until golden brown and crispy. Keep a close eye on them as they can burn quickly. Remove from the oven or air fryer and set aside to cool.
- Prepare the Jerk Vegetables In a medium bowl, combine the chopped zucchini, red onion, and sweet peppers. Drizzle with olive oil and sprinkle with jerk seasoning. Toss everything together until the vegetables are evenly coated with the oil and seasoning.
- Roast the Vegetables Spread the seasoned vegetables in a single layer on the second prepared baking sheet (or in the air fryer basket). Roast in the preheated oven for 10 minutes, or air fry for 10 minutes, stirring halfway through, until the vegetables are tender, caramelized, and slightly charred at the edges.
- Assemble and Serve Spread the hummus in a shallow serving bowl or plate, creating a well in the center. Top with the roasted jerk vegetables in the center. Drizzle with olive oil and garnish with freshly chopped parsley. Serve immediately with the crispy pita chips on the side.
Japanese Yogurt Cheesecake (Classic + Strawberry Cheesecake)
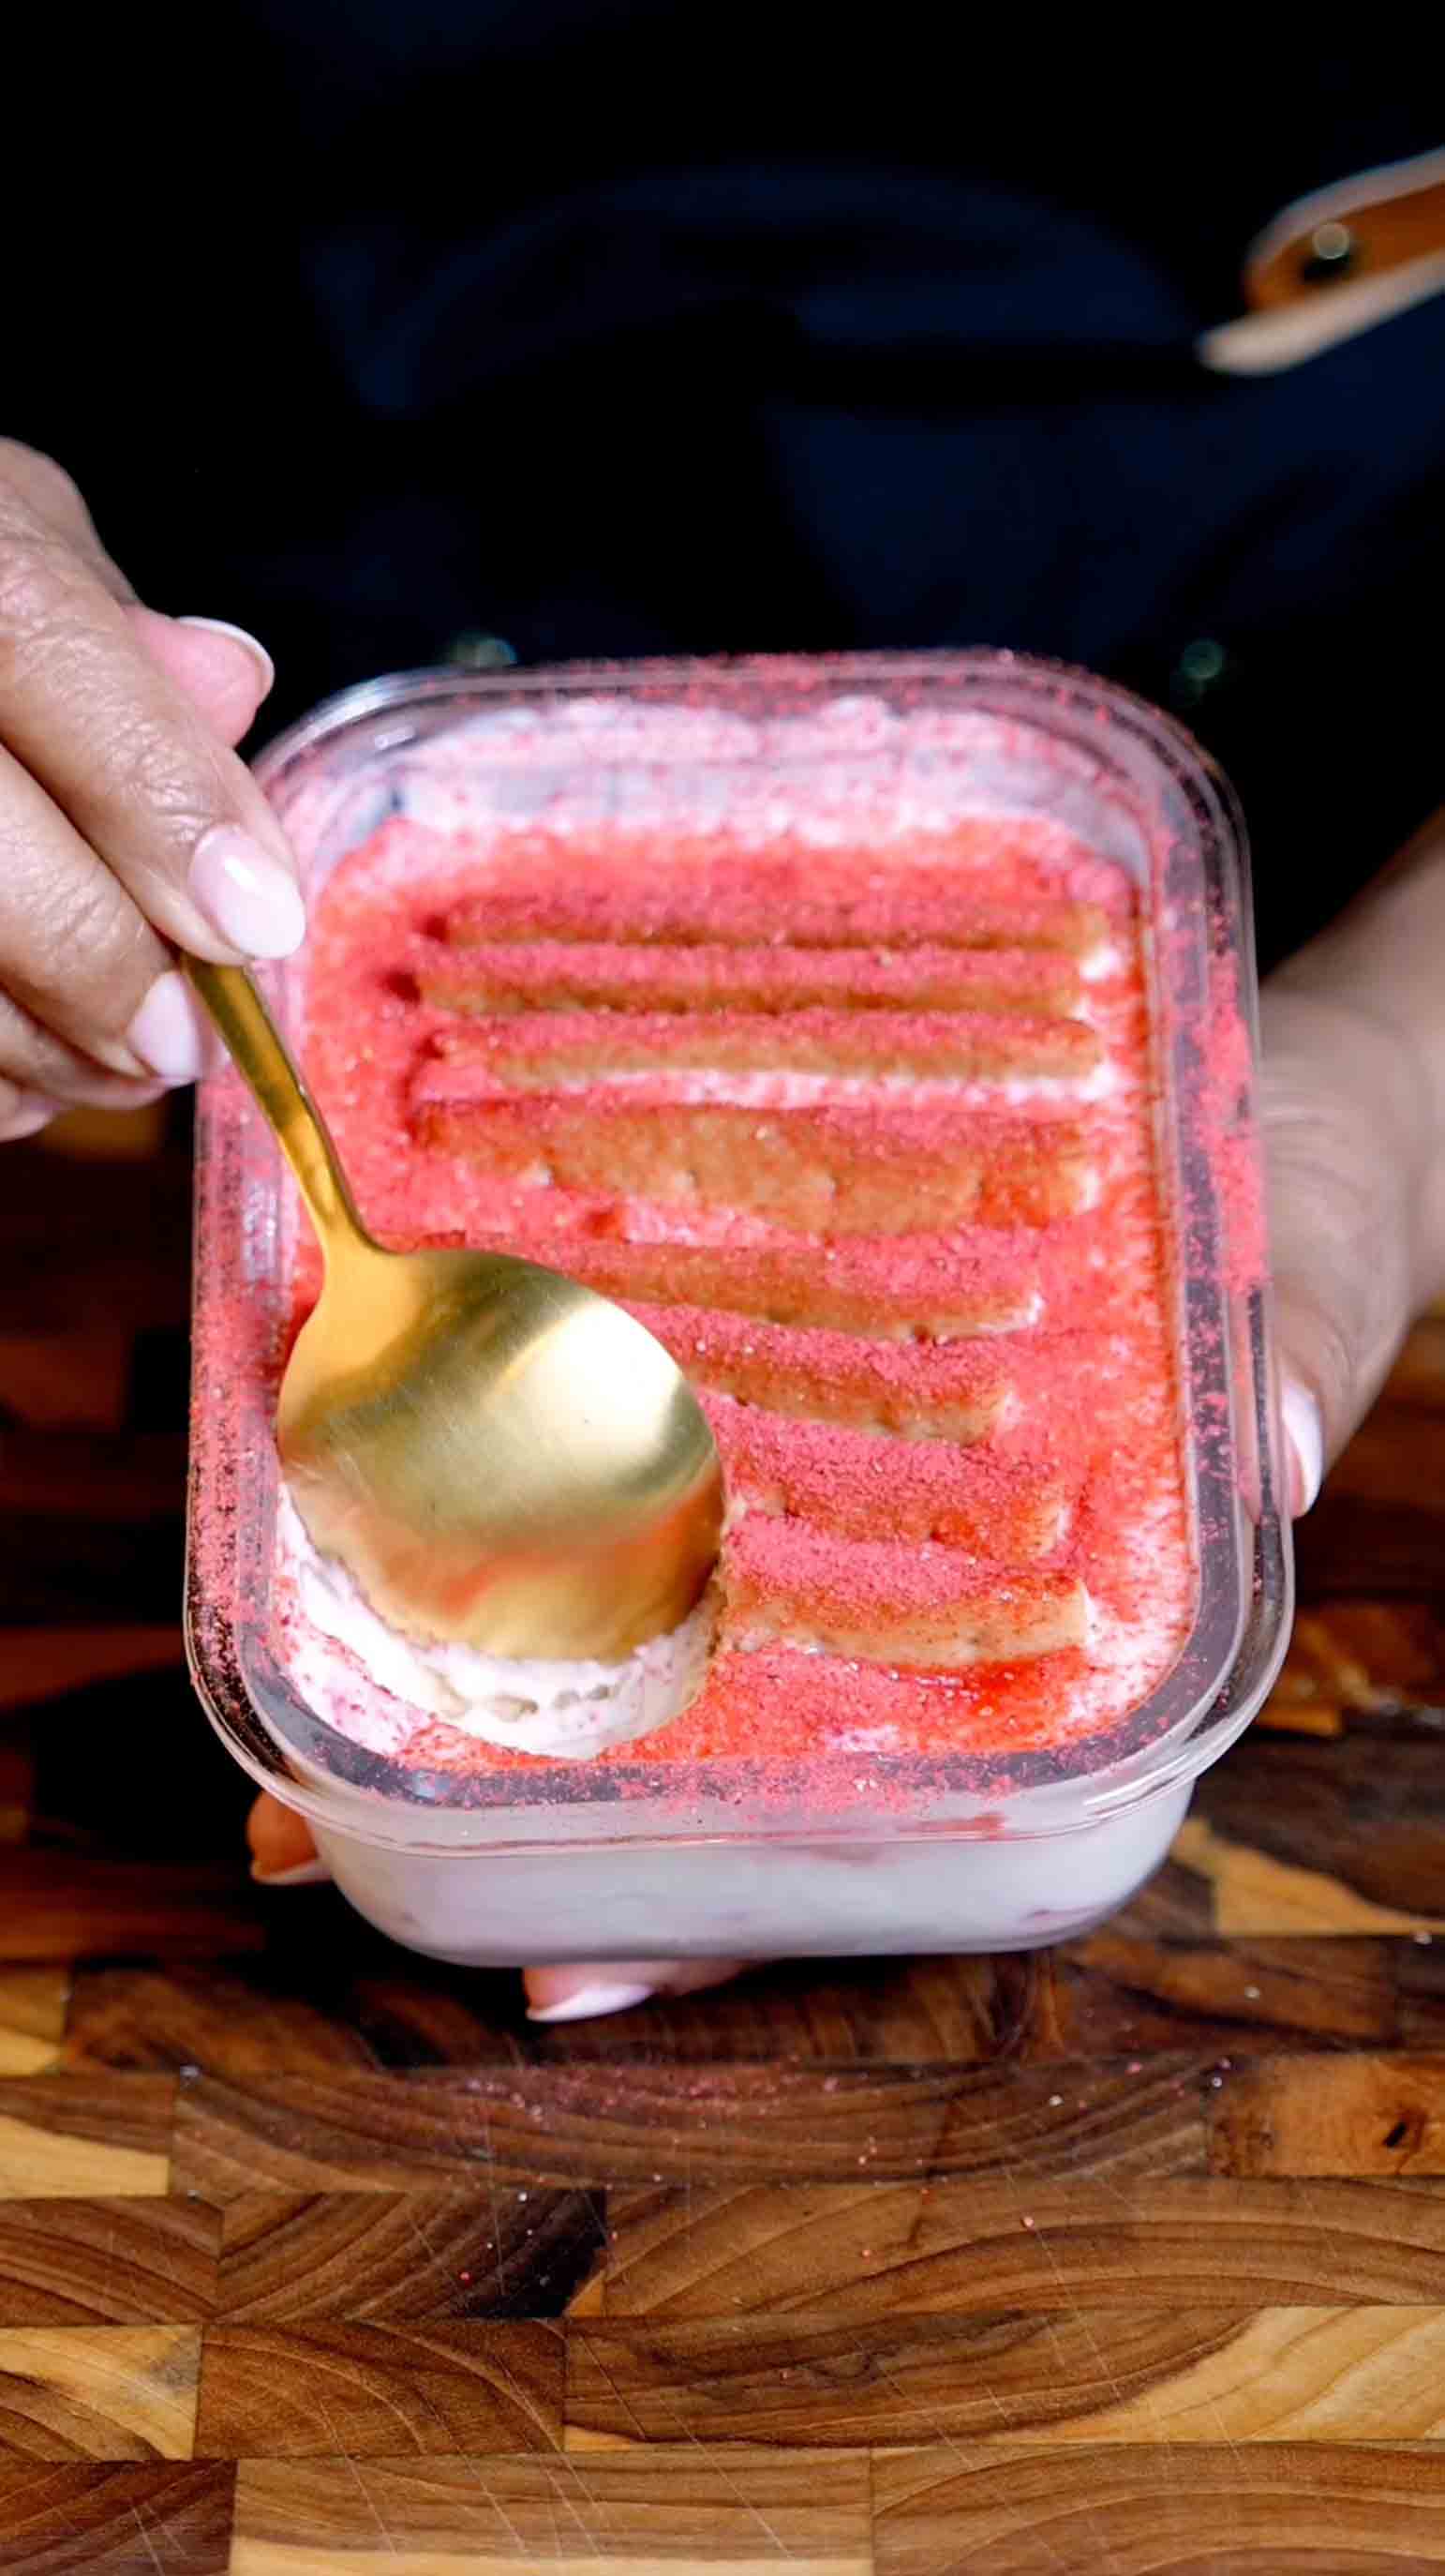
This viral Japanese yogurt cheesecake took social media by storm, and for good reason! The classic version uses just 2 simple ingredients, Greek yogurt and Biscoff cookies, to create a creamy, no-bake dessert that tastes like actual cheesecake. The magic happens in the fridge as the cookies absorb moisture from the yogurt and transform into a soft, cake-like texture while the yogurt firms up into something that resembles rare cheesecake or panna cotta. It's light, protein-packed, and way easier than making traditional cheesecake. I also created my own twist to taste like strawberry cheesecake! This version uses Greek yogurt sweetened with honey and mixed with fresh chopped strawberries, layered with graham crackers, and finished with a dusting of freeze-dried strawberries for that beautiful pink pop. It's creamy, fruity, naturally sweetened, and tastes like you're eating actual strawberry cheesecake, but it's so much lighter and easier! Both versions are perfect for when you want something sweet but don't want to turn on the oven. The best part is you can make several at once in individual containers and have dessert ready all week long.
Frequently Asked Questions
Q: Can I use regular yogurt instead of Greek yogurt?
A: Greek yogurt works best because it's much thicker and has less moisture, which gives you that firm, cheesecake-like texture when it sets. Regular yogurt has more liquid and won't firm up the same way, so your dessert will be looser and more pudding-like rather than having that sliceable cheesecake consistency. If you only have regular yogurt, you can try straining it through cheesecloth for a few hours to remove excess liquid and make it thicker, but Greek yogurt is really the way to go for the best results. Full-fat or 2% Greek yogurt will give you the richest, creamiest texture. Low-fat or 0% will still work but won't be quite as indulgent and cheesecake-like.
Q: What other cookies can I use besides Biscoff?
A: You can use graham crackers (which work beautifully in both versions), Oreos for a cookies and cream version, vanilla wafers, digestive biscuits, or any drier, crunchier cookie that will absorb moisture well and soften into that cake-like texture. The key is using cookies that aren't already soft or chewy, like chocolate chip cookies or soft-baked cookies, because they won't transform the same way. Harder, crisper cookies work best because they need that moisture from the yogurt to soften. Biscoff cookies are especially popular because they have that caramelized cookie butter flavor that tastes amazing with the tangy yogurt, but feel free to experiment with your favorites!
Q: How long does this need to chill and can I speed it up?
A: This needs at least 6 hours in the refrigerator for the cookies to soften properly and the yogurt to firm up, but overnight (or 12 hours) is even better for the best texture and flavor. The longer it sits, the softer and more cake-like the cookies become. Unfortunately, you can't really speed up this process in the freezer because freezing will change the texture of the yogurt and make it icy instead of creamy. This is one of those desserts where patience really pays off! If you're in a rush, you could try it after 4 hours, but the cookies won't be quite as soft and cake-like. I recommend making these the night before you want to serve them so they have plenty of time to transform in the fridge.
Q: Can I use frozen strawberries for the strawberry version?
A: Fresh strawberries work best because they have the perfect moisture content and won't water down your yogurt. If you need to use frozen strawberries, make sure to thaw them completely first, then drain them really well and pat them dry with paper towels to remove as much excess liquid as possible. Frozen berries release a lot of water when they thaw, and if you add them to the yogurt without draining them, your mixture will be too watery and won't set properly. You might end up with a runny, soup-like consistency instead of that thick, creamy cheesecake texture. If your thawed berries are still releasing a lot of juice, you can even squeeze them gently in a clean kitchen towel to get out extra moisture before chopping and mixing them in.
This 2-ingredient viral Japanese cheesecake uses Greek yogurt and Biscoff cookies to create a creamy, no-bake dessert that's lighter than traditional cheesecake but just as satisfying. The cookies soften in the fridge while the yogurt firms up, it's pure magic! The strawberry version adds honey, fresh strawberries, graham crackers, and freeze-dried strawberry dust for a fruity twist that tastes like real strawberry cheesecake.
Rate This Recipe!
Preparations
Prep Time:
7 minutes
Chill Time:
6 hours (or overnight)
Total Time:
6 hours 7 minutes
Cuisine:
Japanese-Inspired, Fusion
Course:
Dessert
Calories:
280 kcal (approx. per serving for classic version)
Servings:
2 (1 per version)
Author:
Ronica Rupan
Ingredients
Ingredients
For the Classic Biscoff Version:
- 1½ cups plain Greek yogurt (full-fat or 2% works best)
- 12 to 14 Biscoff cookies
Optional Toppings:
- Honey, for drizzling
- Fresh berries
- Caramel sauce
For the Strawberry Cheesecake Version:
- 1½ cups plain Greek yogurt (full-fat or 2% works best)
- 2 tablespoons honey
- ½ teaspoon vanilla extract
- ½ cup fresh strawberries, chopped small
- 3 to 4 graham cracker sheets, broken into pieces
- 2 tablespoons freeze-dried strawberries, crushed into powder
Instructions
For the Classic Biscoff Version:
- Assemble the Base Spoon the Greek yogurt into an 8-ounce glass container or jar, smoothing it out evenly with the back of a spoon to create an even layer.
- Add the Cookies Press the Biscoff cookies upright into the yogurt, spacing them about ½ inch apart throughout the container. Push them down gently so only about ¼ inch of each cookie sticks out above the yogurt surface. You can also place a few cookies around the edges for a pretty presentation.
- Chill Cover the container tightly with plastic wrap or a lid and refrigerate for at least 6 hours or overnight until the cookies have completely softened and transformed into a cake-like texture and the yogurt has firmed up.
- Serve Serve straight from the container with a spoon, or run a knife around the edges and flip onto a plate for a more dramatic presentation. Top with a drizzle of honey, fresh berries, or caramel sauce if desired.
For the Strawberry Cheesecake Version:
- Mix the Strawberry Yogurt In a medium bowl, mix together the Greek yogurt, vanilla, honey, and chopped fresh strawberries until well combined and the strawberries are evenly distributed throughout.
- Assemble in Container Spoon the strawberry yogurt mixture into an 8-ounce glass container or jar, smoothing the top with the back of a spoon.
- Add the Graham Crackers Press the graham cracker pieces upright into the strawberry yogurt mixture, spacing them about ½ inch apart. Push them down gently so only about ¼ inch sticks out above the surface, similar to the classic version.
- Chill Cover the container tightly with plastic wrap or a lid and refrigerate for at least 6 hours or overnight until the graham crackers have softened completely and the yogurt has firmed up.
- Add Topping and Serve Before serving, dust the top generously with crushed freeze-dried strawberries for that beautiful pink color and extra strawberry flavor. Serve straight from the container or run a knife around the edges and flip onto a plate.
Firecracker Salmon Skewers
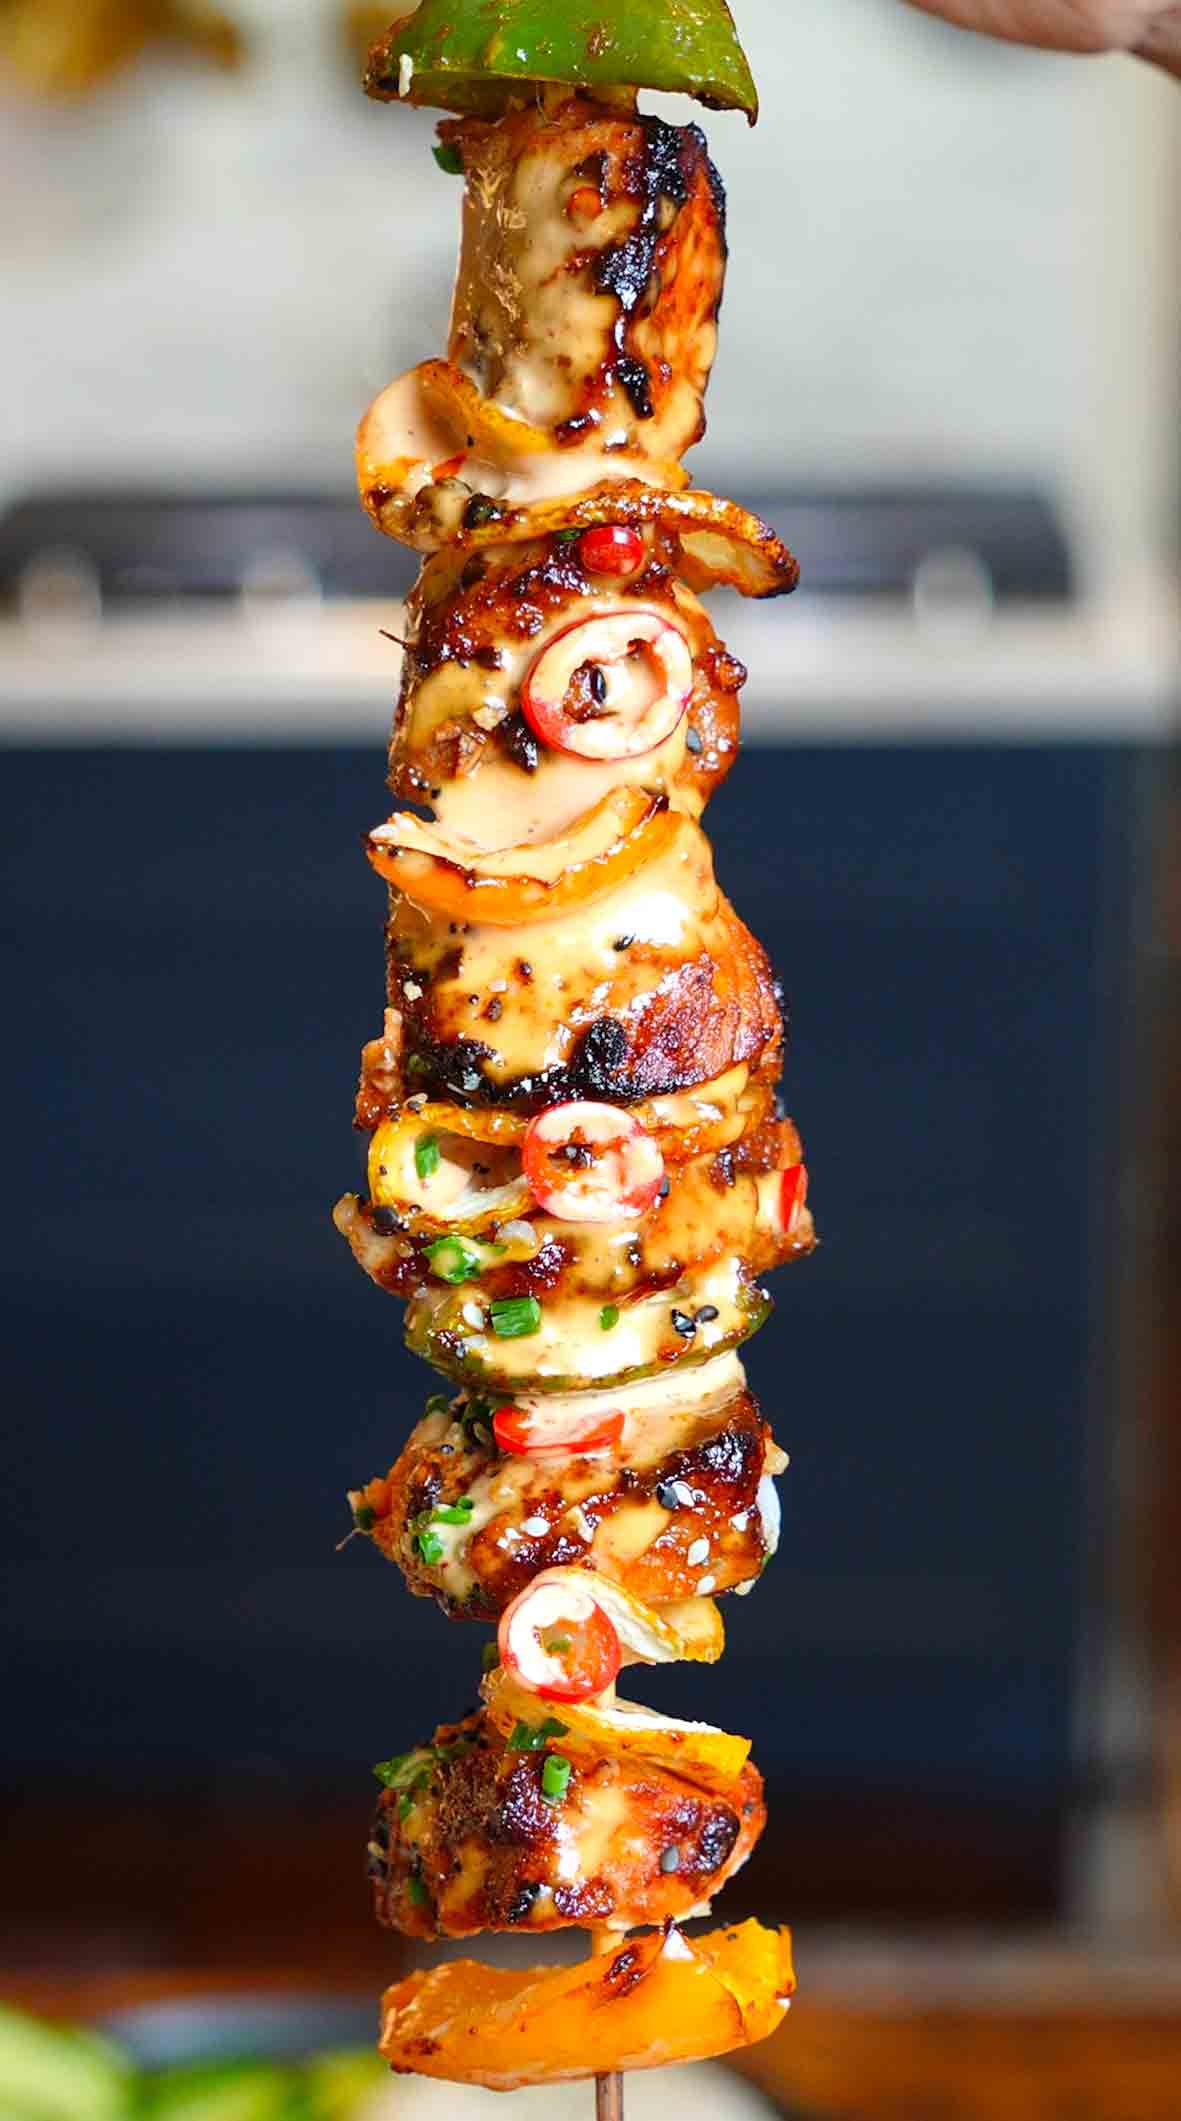
These firecracker salmon skewers are a quick, flavor-packed meal loaded with sweet heat, zesty citrus, and vibrant veggies that come together in just 30 minutes. Imagine tender cubes of salmon marinated in a bold firecracker sauce made with soy sauce, brown sugar, chili paste, sriracha, fresh ginger, and garlic, creating that perfect balance of sweet, spicy, and savory. The salmon gets threaded onto skewers with colorful bell peppers and thin lemon rounds that caramelize beautifully in the air fryer, adding brightness and a subtle citrus flavor to every bite. The air fryer cooks the skewers to perfection in about 12-15 minutes, giving you salmon that's tender and flaky on the inside with lightly charred edges that have all that caramelized marinade flavor. While the skewers cook, you whip up a creamy chili drizzle that's the perfect cooling contrast to the spicy salmon. It's made with mayo, sweet chili sauce, sriracha, and fresh lemon juice for a sauce that's creamy, tangy, and just spicy enough. Everything gets served over fluffy jasmine rice with crisp cucumber slices, then drizzled generously with that creamy chili sauce and topped with toasted sesame seeds and fresh chives. It's a complete meal that looks restaurant-quality but comes together so easily on a busy weeknight. The combination of textures and flavors is incredible: spicy-sweet salmon, crunchy peppers, charred lemon, cool cucumber, creamy sauce, and nutty sesame seeds all in one bite. Plus, the air fryer means no heating up your whole kitchen, and cleanup is a breeze.
Frequently Asked Questions
Q: Can I grill these instead of using an air fryer?
A: Absolutely! These skewers are perfect for grilling. Preheat your grill to medium-high heat (around 400°F) and lightly oil the grates to prevent sticking. Grill the skewers for 3-4 minutes per side, turning them once or twice, until the salmon is cooked through and has nice grill marks. The total cooking time will be about 8-10 minutes. Keep a close eye on them since salmon can go from perfectly cooked to overdone pretty quickly. If using wooden skewers on the grill, make sure to soak them for at least 30 minutes (longer is even better) to prevent burning. You can also wrap the exposed ends of the skewers in foil for extra protection. The grill will give you that amazing smoky char that pairs beautifully with the sweet and spicy marinade.
Q: What if I don't have an air fryer or grill?
A: No problem! You can bake these in the oven. Preheat your oven to 425°F (220°C) and line a baking sheet with parchment paper or aluminum foil. Arrange the skewers in a single layer on the prepared baking sheet, making sure they're not touching. Bake for 12-15 minutes, flipping once halfway through, until the salmon is cooked through and flakes easily with a fork. For extra char, you can broil the skewers for the last 2-3 minutes of cooking, but watch them carefully to prevent burning. The oven method works great and still gives you delicious, flavorful salmon with caramelized edges.
Q: Can I make these ahead of time?
A: Yes! You can prep these skewers ahead to make weeknight dinners even easier. Marinate the salmon in the firecracker sauce for up to 2 hours in the refrigerator (don't go longer or the acid and salt can start to break down the fish and make it mushy). You can also assemble the skewers up to 4 hours ahead, cover them tightly with plastic wrap, and refrigerate until ready to cook. The creamy chili drizzle can be made up to 3 days in advance and stored in an airtight container in the fridge. Just give it a good stir before serving since it may separate slightly. I don't recommend cooking the skewers ahead and reheating them, as salmon can dry out and lose its tender texture when reheated.
Q: What's the best way to cut the salmon for skewers?
A: The key is cutting the salmon into uniform 1½-inch cubes so they cook evenly. Start with a boneless, skinless salmon fillet and use a sharp knife to cut it into even pieces. Try to make the cubes as similar in size as possible. If some pieces are thicker than others, they'll cook unevenly and you might end up with some overcooked and some undercooked salmon. When threading the salmon onto skewers, don't pack the pieces too tightly together. Leave a tiny bit of space between each piece to allow the heat to circulate and cook the salmon evenly on all sides. If you're having trouble getting clean cuts, try chilling the salmon in the freezer for about 10-15 minutes first. This firms it up and makes it much easier to cut cleanly.
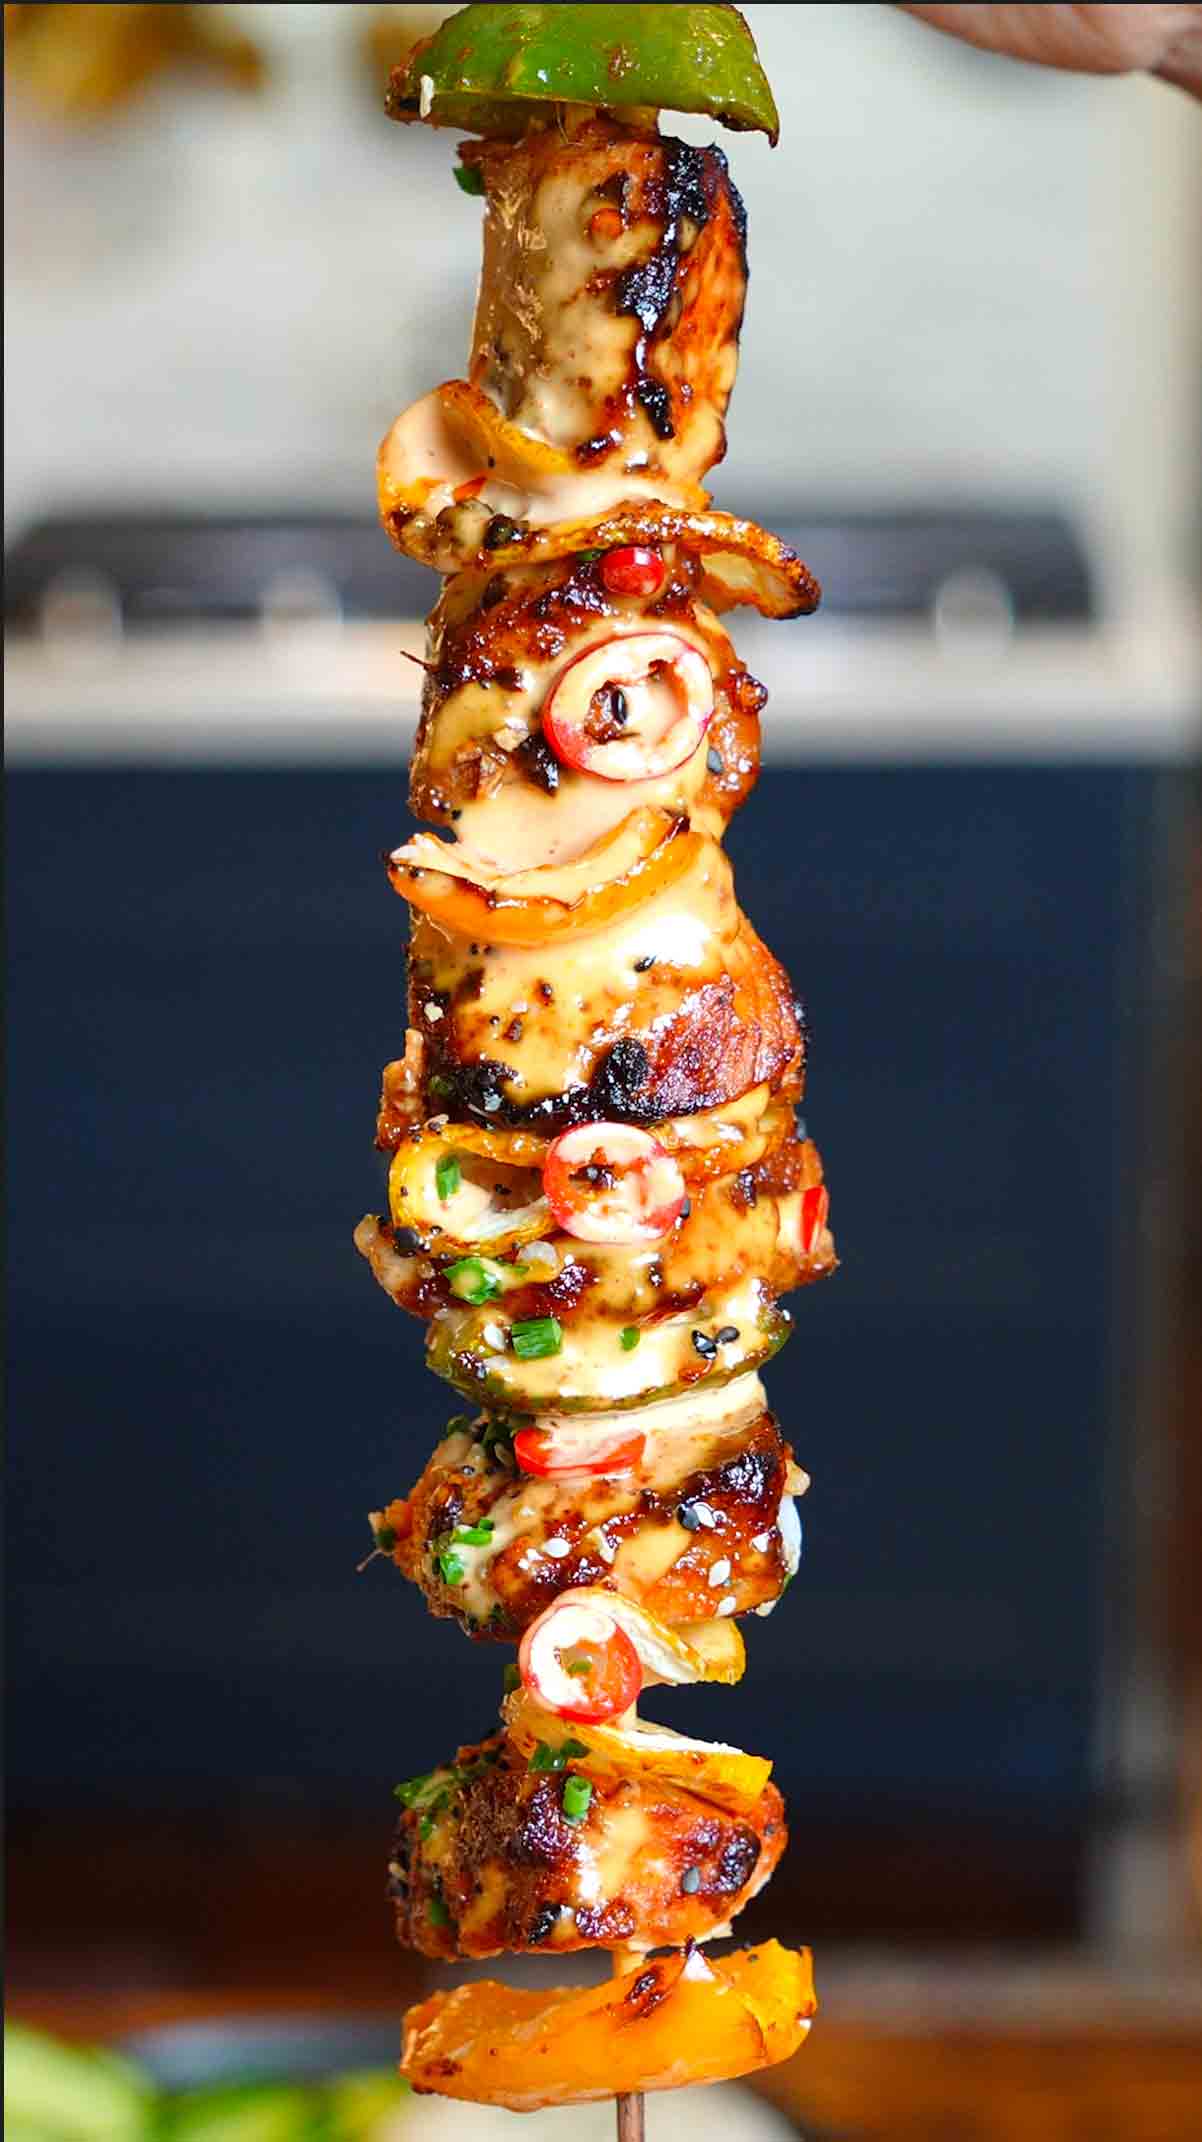
These firecracker salmon skewers are loaded with sweet heat, zesty citrus, and vibrant veggies. Marinated salmon cubes get threaded with bell peppers and lemon rounds, air-fried until tender with charred edges, then served over jasmine rice with cucumber and a creamy chili drizzle. Ready in just 30 minutes!
Rate This Recipe!
Preparations
Prep Time:
15 minutes
Cook Time:
15 minutes
Total Time:
30 minutes
Cuisine:
Asian-Inspired, Fusion
Course:
Main Course, Dinner
Calories:
380 kcal (approx. per serving)
Servings:
4
Author:
Ronica Rupan
Ingredients
Ingredients
For the Firecracker Marinade: 2 tablespoons low-sodium soy sauce 1 tablespoon brown sugar 1 tablespoon chili paste (such as sambal oelek) 1 tablespoon sriracha 1 teaspoon grated fresh ginger 3 cloves garlic, minced
For the Salmon Skewers: 1 pound boneless, skinless salmon, cut into 1½-inch cubes 1 orange bell pepper, cut into 1½-inch pieces 1 green bell pepper, cut into 1½-inch pieces 1 lemon, thinly sliced into rounds, seeds removed 4 wooden skewers
For the Creamy Chili Drizzle: ¼ cup mayonnaise 1 tablespoon sweet chili sauce 1 teaspoon sriracha Juice of ½ lemon 1-2 teaspoons water, as needed
For Serving: 2 cups cooked jasmine rice ½ large cucumber, thinly sliced 1 tablespoon toasted white sesame seeds 1 tablespoon finely chopped fresh chives
Instructions
- Soak the Skewers Place 4 wooden skewers in a shallow dish or pan filled with water and let them soak for at least 10 minutes. This prevents them from burning during cooking.
- Make the Firecracker Marinade In a medium glass bowl, whisk together the soy sauce, brown sugar, chili paste, sriracha, grated ginger, and minced garlic until the sugar is dissolved and everything is fully combined. The marinade should be smooth and well-blended.
- Marinate the Salmon Add the salmon cubes to the marinade in the bowl. Using a silicone spatula, gently toss the salmon to coat each piece evenly with the marinade. Be careful not to break up the salmon cubes. Let the salmon marinate at room temperature for 10 minutes, allowing the flavors to penetrate the fish.
- Assemble the Skewers Thread the marinated salmon, bell pepper pieces, and lemon rounds alternately onto the 4 soaked skewers. Aim for 4-5 salmon pieces per skewer, spacing them with peppers and lemon in between for color and flavor. Don't pack the ingredients too tightly, leave a little space between each piece for even cooking.
- Air Fry the Skewers Preheat your air fryer to 400°F (200°C). Once preheated, arrange the skewers in a single layer in the air fryer basket, making sure they're not overlapping. Cook for 12-15 minutes, flipping the skewers halfway through the cooking time, until the salmon is cooked through, flakes easily with a fork, and has lightly charred edges.
- Make the Creamy Chili Drizzle While the skewers are cooking, prepare the sauce. In a small glass bowl, whisk together the mayonnaise, sweet chili sauce, sriracha, and lemon juice until smooth and creamy. If the sauce is too thick, add 1-2 teaspoons of water to reach your desired drizzling consistency.
- Plate and Serve Divide the cooked jasmine rice evenly among 4 plates. Arrange the thinly sliced cucumber on each plate. Place the cooked skewers on top of the rice. Drizzle generously with the creamy chili sauce, making sure each skewer gets plenty of sauce. Sprinkle evenly with the toasted sesame seeds and chopped fresh chives.
- Enjoy Serve immediately while the skewers are hot and the rice is warm.
Creamy Alfredo Lasagna Soup
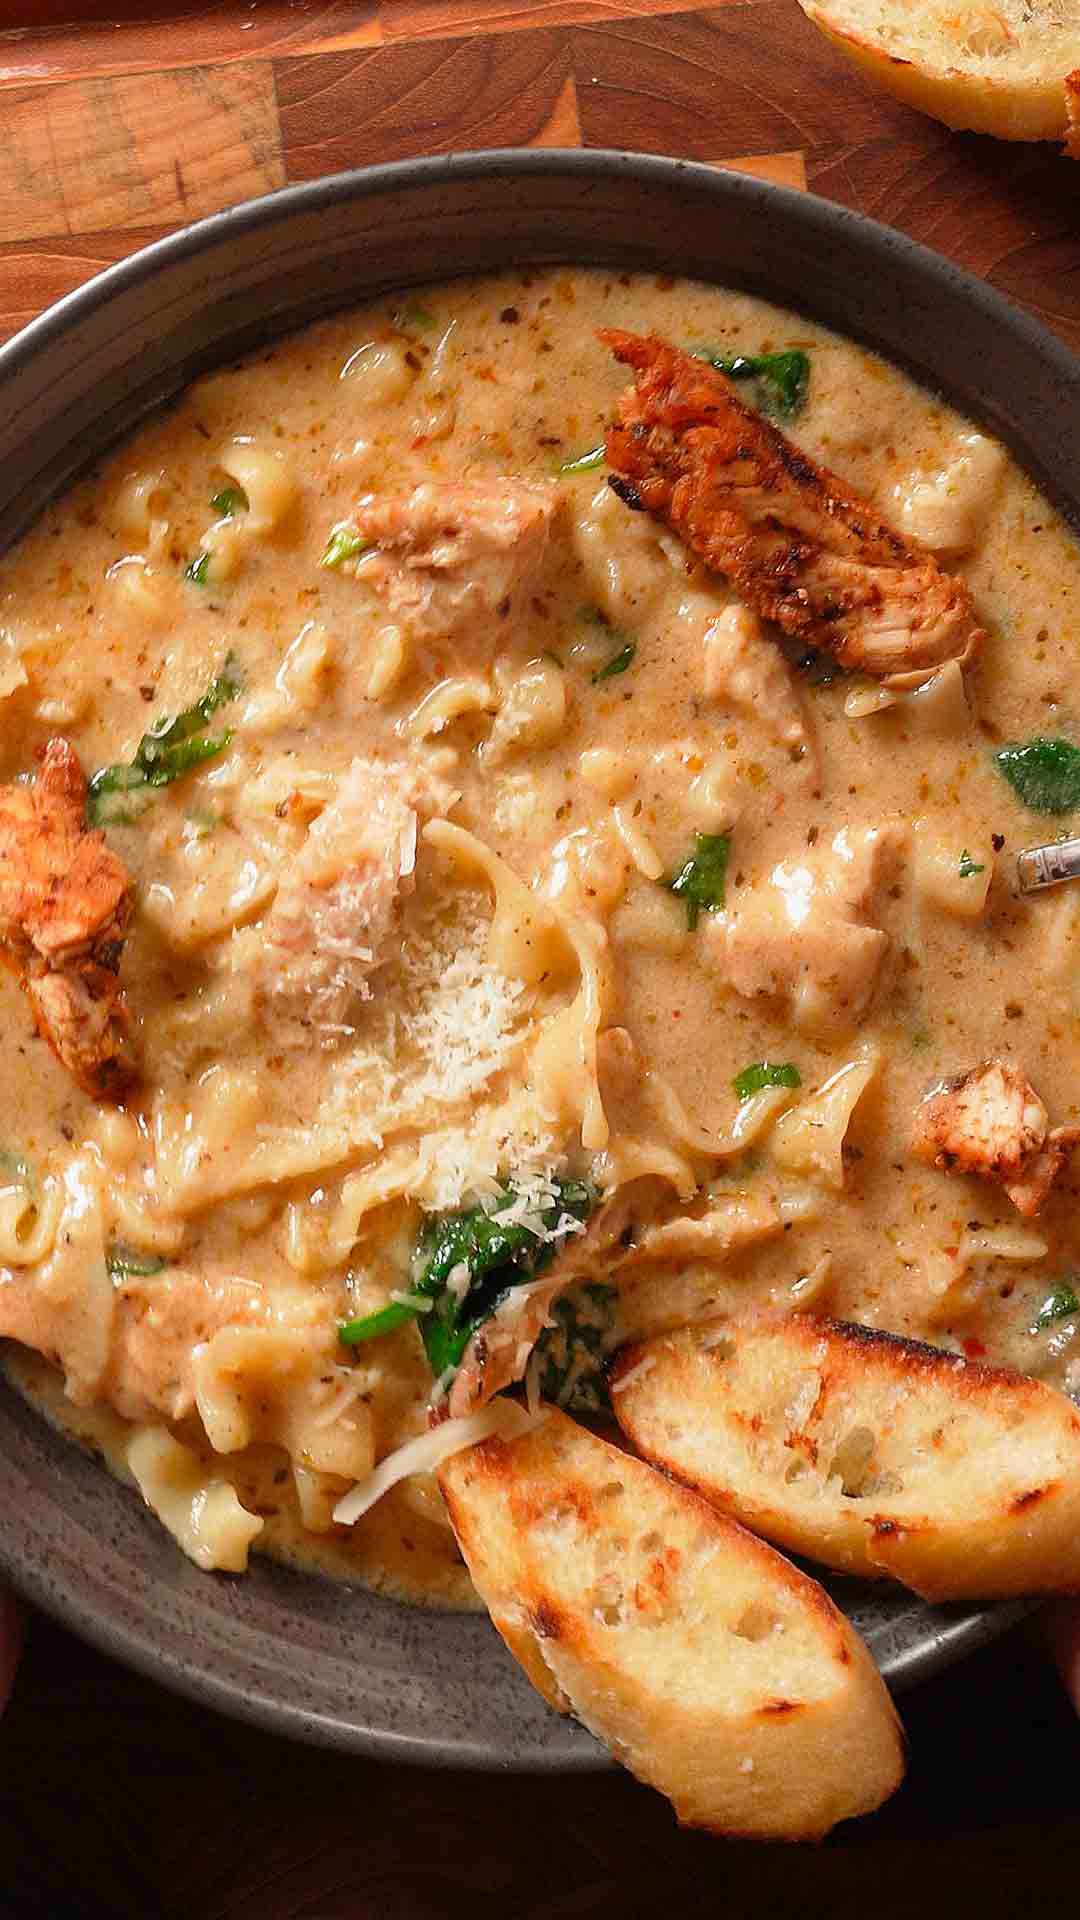
This creamy Alfredo lasagna soup delivers everything you love about classic lasagna in cozy, spoonable form. Imagine tender, seasoned chicken cooked until golden, then simmered with pasta in a rich, garlicky broth that gets ultra-creamy from whole milk, Greek yogurt, and plenty of melted Parmesan and mozzarella cheese. The chicken gets coated in Italian seasoning, smoked paprika, and garlic powder before being pan-seared to lock in all that flavor, then it's chopped into bite-sized pieces and added back to the soup. The broth is built right in the same pot where you cooked the chicken, so you're getting all those delicious browned bits that add so much depth. Fresh baby spinach wilts right into the hot soup, and a generous handful of fresh parsley and basil bring brightness and that classic Italian flavor. The pasta (I love using mafaldine for this because those ruffled edges catch all the creamy sauce, but any pasta shape works) cooks directly in the broth, which makes it extra flavorful and helps thicken the soup naturally. The Greek yogurt adds tanginess and creaminess without making it too heavy, and tempering it first prevents any curdling. It's hearty enough to be a complete meal, comforting enough for cold nights, and weeknight-friendly because it comes together in about 45 minutes. Serve it with crusty bread or garlic bread for dipping, and you've got a dinner that tastes like you spent hours in the kitchen.
Frequently Asked Questions
Q: Can I use chicken thighs instead of breasts?
A: Absolutely! Chicken thighs are a great substitute and will actually make the soup even more flavorful and juicy since they have more fat and stay tender during cooking. Use 1 pound of boneless, skinless chicken thighs and follow the same cooking method, but check for doneness at around 6-7 minutes per side instead of 5-6 minutes. The internal temperature should still reach 165°F. Thighs are more forgiving and less likely to dry out, so they're perfect if you're worried about overcooking. Just make sure to trim any excess fat before seasoning and cooking them.
Q: Why do I need to temper the Greek yogurt?
A: Tempering is essential to prevent the yogurt from curdling or separating when you add it to the hot soup. If you add cold yogurt directly to a hot liquid, the sudden temperature change can cause the proteins in the yogurt to seize up and create a grainy, separated texture instead of smooth and creamy. By whisking a small amount of the hot broth into the yogurt first, you gradually raise its temperature so it can be smoothly incorporated into the soup without breaking. This technique takes just 30 seconds but makes a huge difference in the final texture. If you skip this step and the yogurt does curdle, the soup will still taste fine but won't look as appetizing or have that silky-smooth consistency.
Q: Can I use a different type of pasta?
A: Yes! While mafaldine (those beautiful ruffled ribbon noodles) is recommended because the edges catch the creamy sauce so well, you can use any pasta shape you have on hand. Broken lasagna noodles work great and keep it true to the lasagna theme. Penne, rigatoni, fusilli, or farfalle all work beautifully. Smaller shapes like ditalini or small shells are perfect if you want more of a traditional soup experience. Just keep in mind that different pasta shapes have different cooking times, so check the package directions and adjust accordingly. Start checking for doneness a minute or two before the package time since the pasta will continue cooking slightly in the hot soup even after you reduce the heat.
Q: How do I store and reheat leftovers?
A: Store leftover soup in an airtight container in the refrigerator for up to 3-4 days. The soup will thicken considerably as it sits because the pasta continues to absorb liquid. When reheating, add extra broth or milk (start with ½ cup and add more as needed) to thin it back to your desired consistency. Reheat gently on the stovetop over medium-low heat, stirring frequently, until warmed through. You can also microwave individual portions in 1-minute intervals, stirring between each interval. The soup can get a bit grainy if reheated too quickly or at too high a temperature, so low and slow is best. I don't recommend freezing this soup because the dairy and pasta don't freeze well and can separate or become mushy when thawed.
This creamy Alfredo lasagna soup combines seasoned chicken, tender pasta, and fresh herbs in a rich, garlicky broth made ultra-creamy with milk, Greek yogurt, Parmesan, and mozzarella. Finished with spinach and basil, it's everything you love about lasagna in cozy, spoonable form, ready in just 45 minutes.
Rate This Recipe!
Preparations
Prep Time:
15 minutes
Cook Time:
30 minutes
Total Time:
45 minutes
Cuisine:
Italian-American, Fusion
Course:
Main Course, Soup, Dinner
Calories:
420 kcal (approx. per serving)
Servings:
6
Author:
Ronica Rupan
Ingredients
Ingredients
For the Chicken: 1 teaspoon dried Italian seasoning 1 teaspoon smoked paprika 1 teaspoon garlic powder 1 teaspoon kosher salt ½ teaspoon freshly ground black pepper 2 tablespoons olive oil, divided 1 pound boneless, skinless chicken breasts (about 2 large breasts)
For the Soup: 3 tablespoons unsalted butter 1 small onion, finely chopped 1 tablespoon minced garlic 4 cups bone broth (chicken or turkey) 1 cup whole milk 1 ½ teaspoons dried Italian seasoning 1 teaspoon chili powder ½ teaspoon dried oregano ½ teaspoon kosher salt, plus more to taste ½ teaspoon freshly ground black pepper, plus more to taste Dash of ground nutmeg 8 ounces dried mafaldine pasta 1 cup plain Greek yogurt (whole-milk or 2 percent) ⅓ cup grated Parmesan cheese, plus more for garnish ⅓ cup shredded mozzarella cheese 2 cups fresh baby spinach (optional) 2 tablespoons finely chopped fresh parsley, plus more for garnish 2 tablespoons chopped fresh basil, plus more for garnish
Instructions
- Season the Chicken In a small bowl, whisk together the Italian seasoning, smoked paprika, garlic powder, salt, black pepper, and 1 tablespoon of the olive oil until well combined. Place the chicken breasts in a large bowl and pour the seasoning mixture over them. Toss and rub the chicken until evenly coated on all sides with the spice mixture.
- Cook the Chicken Heat the remaining 1 tablespoon of olive oil in a large pot or Dutch oven over medium heat until shimmering, about 1 minute. Add the seasoned chicken breasts to the pot and cook, turning occasionally, for 5-6 minutes per side, until golden brown and a thermometer inserted into the thickest portion registers 165°F. Transfer the cooked chicken to a plate and let it cool slightly for about 5 minutes. Once cool enough to handle, chop the chicken into bite-sized chunks. Set aside.
- Start the Soup Base Add the butter to the same pot (do not wipe the pot clean, those browned bits add flavor!) and melt it over medium heat. Add the finely chopped onion and cook, stirring occasionally, for 3-4 minutes until softened and translucent. Add the minced garlic and cook, stirring often, for about 1 minute until fragrant and slightly golden.
- Build the Broth Pour in the bone broth and whole milk, stirring to combine and scrape up any browned bits from the bottom of the pot. Add the Italian seasoning, chili powder, dried oregano, salt, black pepper, and a dash of nutmeg. Stir everything together until well combined. Bring the mixture to a gentle simmer over medium-low heat.
- Cook the Pasta Add the dried mafaldine pasta to the simmering broth mixture in the pot. Cook over medium-low heat, stirring occasionally to prevent sticking, for about 8 minutes or until the pasta is al dente (tender but still slightly firm to the bite). Reduce the heat to low.
- Temper the Yogurt In a small heatproof bowl, whisk together the Greek yogurt and 2 tablespoons of the hot broth mixture from the pot until smooth and well combined. This tempering process prevents the yogurt from curdling. Slowly stir the tempered yogurt mixture into the soup, mixing gently to incorporate.
- Add the Cheese Stir the grated Parmesan cheese and shredded mozzarella cheese into the soup mixture in the pot. Cook over low heat, stirring constantly, until the cheeses are completely melted and the soup is smooth and creamy, about 4 minutes. The soup will continue to thicken as it stands.
- Finish the Soup Stir in the chopped cooked chicken. If using spinach, add it now and stir constantly until wilted, about 2 minutes. Stir in the chopped fresh parsley and basil. Taste the soup and adjust the seasoning with additional salt and pepper as desired.
- Serve Divide the soup evenly among 6 bowls. Garnish each serving with additional grated Parmesan cheese, fresh parsley, and fresh basil. Serve immediately while hot.
Cottage Cheese Breakfast Wrap
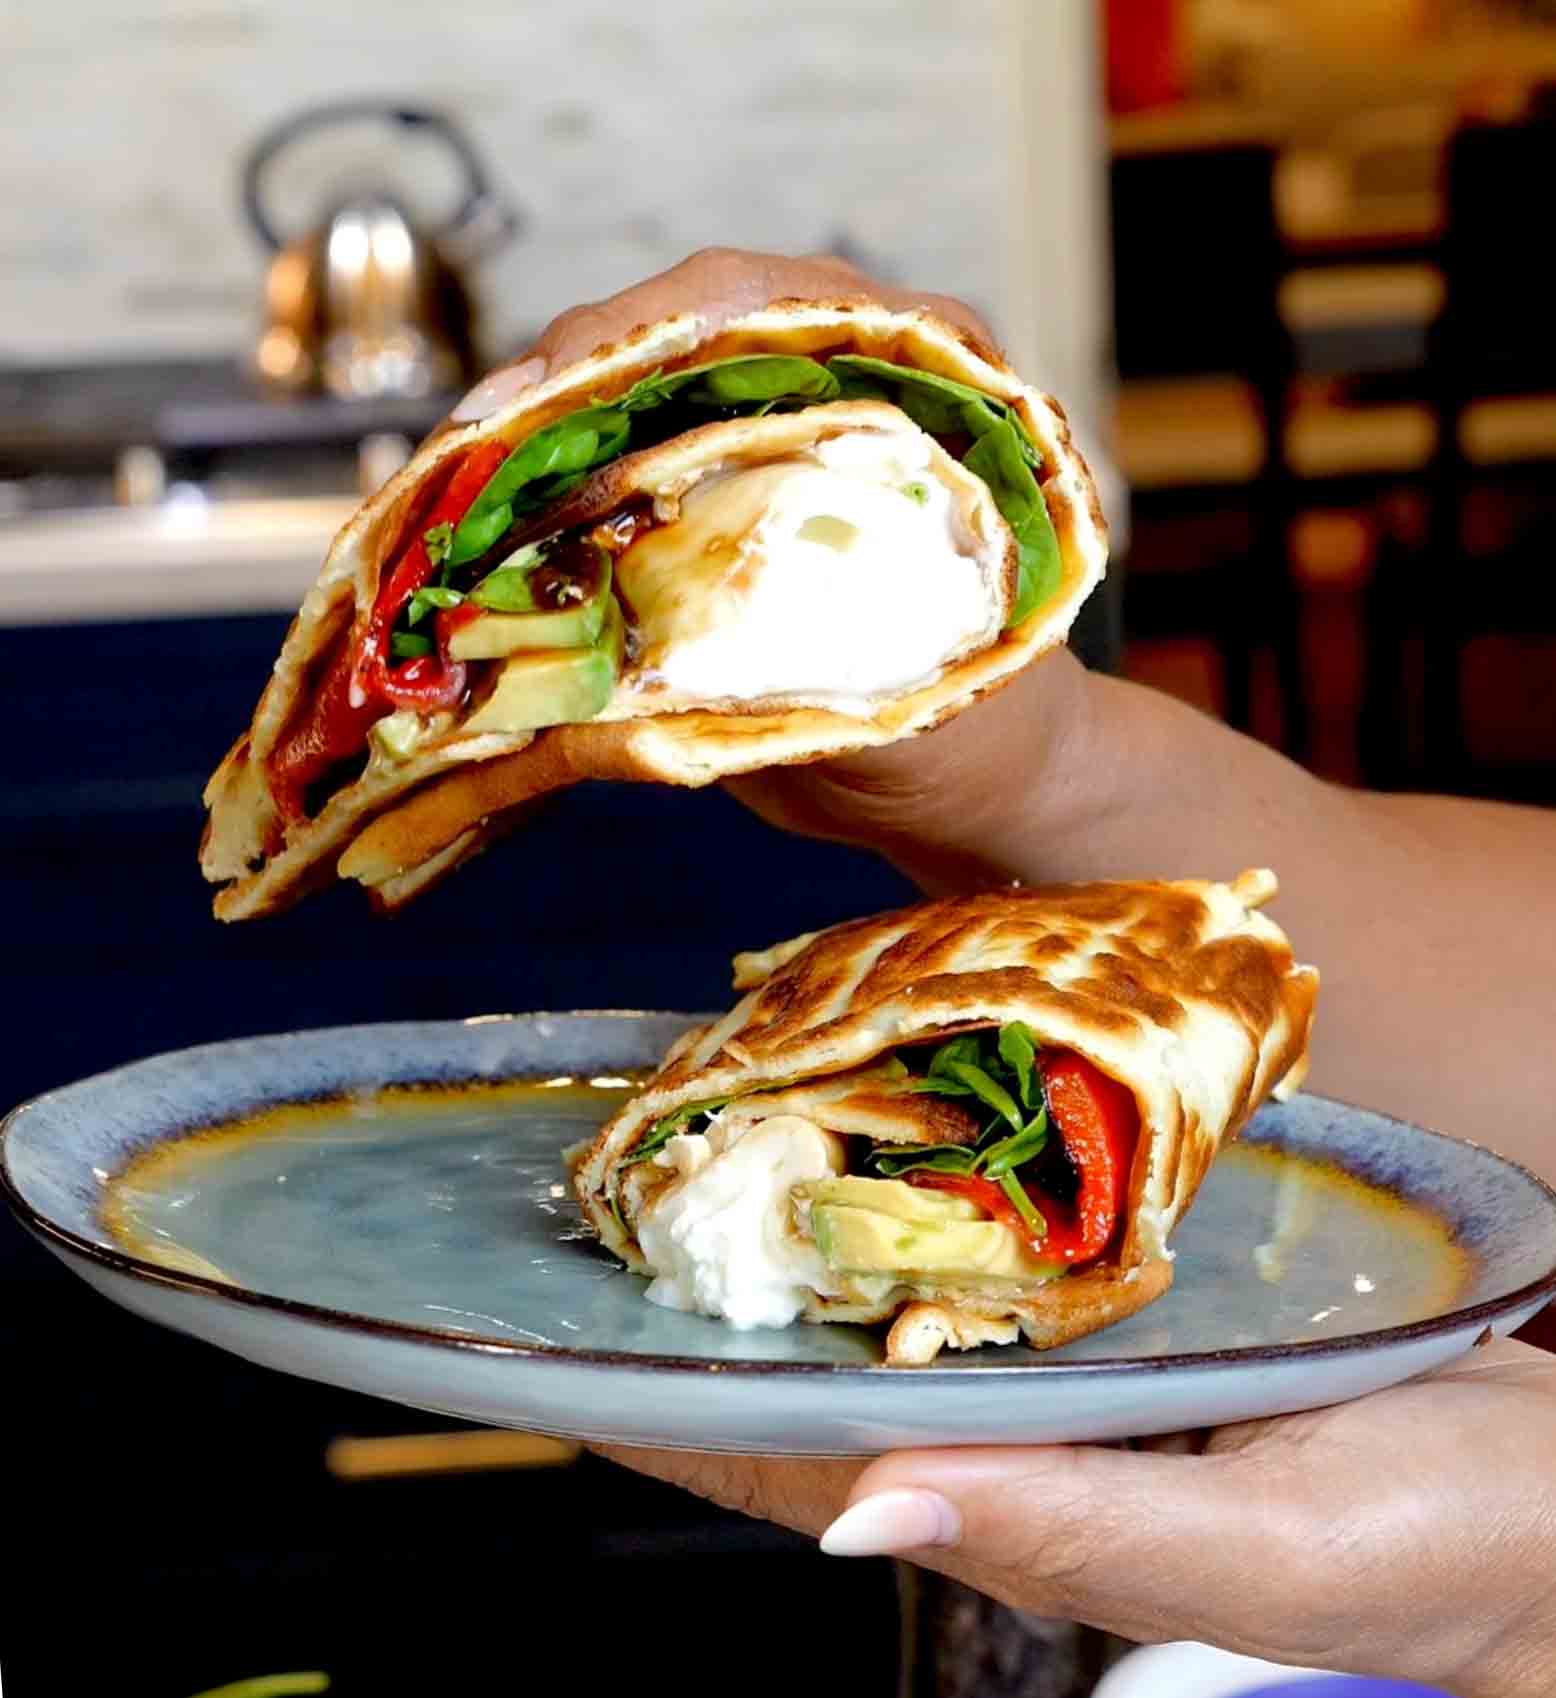
Let me show you how to make the viral cottage cheese wrap and give you a few tips so it comes out perfect every time. This creamy, protein-packed breakfast is perfect for busy mornings when you need something filling that'll keep you going. The base is made with cottage cheese and eggs, blended until smooth and baked into a flexible wrap that you can fill with all your favorite ingredients. The key is working with it while it's still warm so it folds without cracking. You can prep these ahead and customize the fillings based on what you have in the fridge. It's become one of my go-to breakfasts because it's high in protein, naturally gluten-free, and honestly just too good not to share.
Frequently Asked Questions
Q: Can I make these ahead of time?
A: Absolutely! You can bake the wraps ahead and store them in the fridge for up to 3 days. Keep them in an airtight container with parchment paper between each wrap to prevent sticking. When you're ready to use them, reheat gently in the microwave for 15-20 seconds or in a dry skillet over low heat for about 30 seconds per side. The key is warming them just enough to make them pliable again so they don't crack when you fold them. Add your fillings after reheating for the freshest taste and texture. This makes them perfect for meal prep on Sunday to have easy, high-protein breakfasts all week long.
Q: Why is my wrap cracking when I fold it?
A: This is the most common issue with cottage cheese wraps, and it all comes down to temperature and technique. You need to fold the wrap while it's still warm from the oven—ideally within 2-3 minutes of taking it out. As it cools, it loses flexibility and becomes more brittle, which causes cracking. If your wrap has cooled down too much, don't worry! Just pop it in the microwave for 10-15 seconds to warm it up again, or heat it in a dry skillet for 20-30 seconds per side. Work quickly once it's warm, and fold gently but confidently. Also, make sure you blended the mixture completely smooth with no lumps, as any chunks can create weak spots that crack. If you're still having trouble, try making the wrap slightly thicker by using a smaller baking dish.
Q: Can I freeze these?
A: Yes, the baked wraps freeze beautifully for up to 1 month! Let them cool completely after baking, then stack them with parchment paper between each wrap to prevent sticking. Place the stack in a freezer-safe bag or airtight container and freeze. When you're ready to use one, thaw it overnight in the fridge or defrost in the microwave for 30-45 seconds. Once thawed, warm it gently (microwave for 15-20 seconds or in a skillet) before adding your fillings. I don't recommend freezing them with fillings already inside, as fresh vegetables can get soggy when thawed. Freeze just the wraps and add fresh fillings after reheating for the best results.
Q: What other fillings can I use?
A: The possibilities are endless! For a breakfast option, try scrambled eggs, sautéed mushrooms, spinach, cherry tomatoes, feta cheese, or leftover breakfast potatoes. For lunch, go with turkey or chicken slices, hummus, cucumbers, shredded carrots, and mixed greens. You can make it Mediterranean with olives, sun-dried tomatoes, artichokes, and tzatziki. Or go Mexican-inspired with black beans, salsa, avocado, and a little cheese. Sweet fillings work too—try almond butter, sliced bananas, and a drizzle of honey, or cream cheese with berries. The wrap itself is pretty neutral in flavor (just slightly savory from the Italian seasoning), so it adapts well to whatever flavor profile you're craving. Just avoid super wet fillings that might make the wrap soggy.
A viral cottage cheese wrap that's creamy, protein-packed, and perfect for busy mornings. Blend cottage cheese with eggs, bake until set, then fill with fresh veggies and fold while warm for the perfect breakfast wrap.
Rate This Recipe!
Preparations
Prep Time:
5 minutes
Cook Time:
30 minutes
Total Time:
35 minutes
Cuisine:
American, Fusion
Course:
Breakfast
Calories:
280 kcal (approx. per wrap, without fillings)
Servings:
1 large wrap (or 2 smaller wraps)
Author:
Ronica Rupan
Ingredients
Ingredients
For the Wrap: 1 cup cottage cheese 2 large eggs 1/8 teaspoon kosher salt 1/4 teaspoon Italian seasoning
Filling Ideas: Fresh mozzarella slices Handful of arugula Jarred roasted red peppers, sliced Thinly sliced cucumber Sliced avocado Kosher salt, to taste Black pepper, to taste Balsamic glaze Chopped fresh basil
Instructions
- Preheat and Prep the Pan Preheat your oven to 350°F (175°C). Line an 8x8-inch or similar-sized baking dish with parchment paper, making sure it comes up the sides. Lightly spray the parchment with cooking oil to prevent sticking. This step is crucial—don't skip the parchment or your wrap will stick to the pan.
- Blend the Wrap Mixture In a blender or food processor, combine the cottage cheese, eggs, salt, and Italian seasoning. Blend on high speed for 30-60 seconds until the mixture is completely smooth and creamy with absolutely no lumps remaining. You should see no curds from the cottage cheese—it should look like a thick, smooth batter. This smooth texture is what creates a flexible wrap that won't crack.
- Pour and Spread Pour the blended mixture into your prepared baking dish. Use a spatula to spread it evenly into all corners and edges, making sure the thickness is uniform throughout. Tap the pan gently on the counter a few times to release any air bubbles.
- Bake Until Set Place the baking dish in the preheated oven and bake for 30 minutes, or until the wrap is just set in the center and lightly golden around the edges. It should feel firm to the touch but still have a little give—not rubbery or overdone. The edges might puff up slightly, which is normal.
- Add the Fillings Remove from the oven and work quickly while the wrap is still warm. Top one half of the baked wrap with your desired fillings: layer on the fresh mozzarella slices, arugula, sliced roasted red peppers, cucumber slices, and avocado. Season everything with a pinch of salt and freshly cracked black pepper. Drizzle with balsamic glaze and sprinkle with freshly chopped basil.
- Fold and Serve While the wrap is still warm (this is critical!), carefully fold it in half over the fillings using a spatula to help lift it, or roll it up burrito-style if you prefer. The warmth makes it pliable and easy to fold without cracking. Slice the wrap in half with a sharp knife and serve immediately while it's still warm and the cheese is melty.
3 Quick Salad Dressings
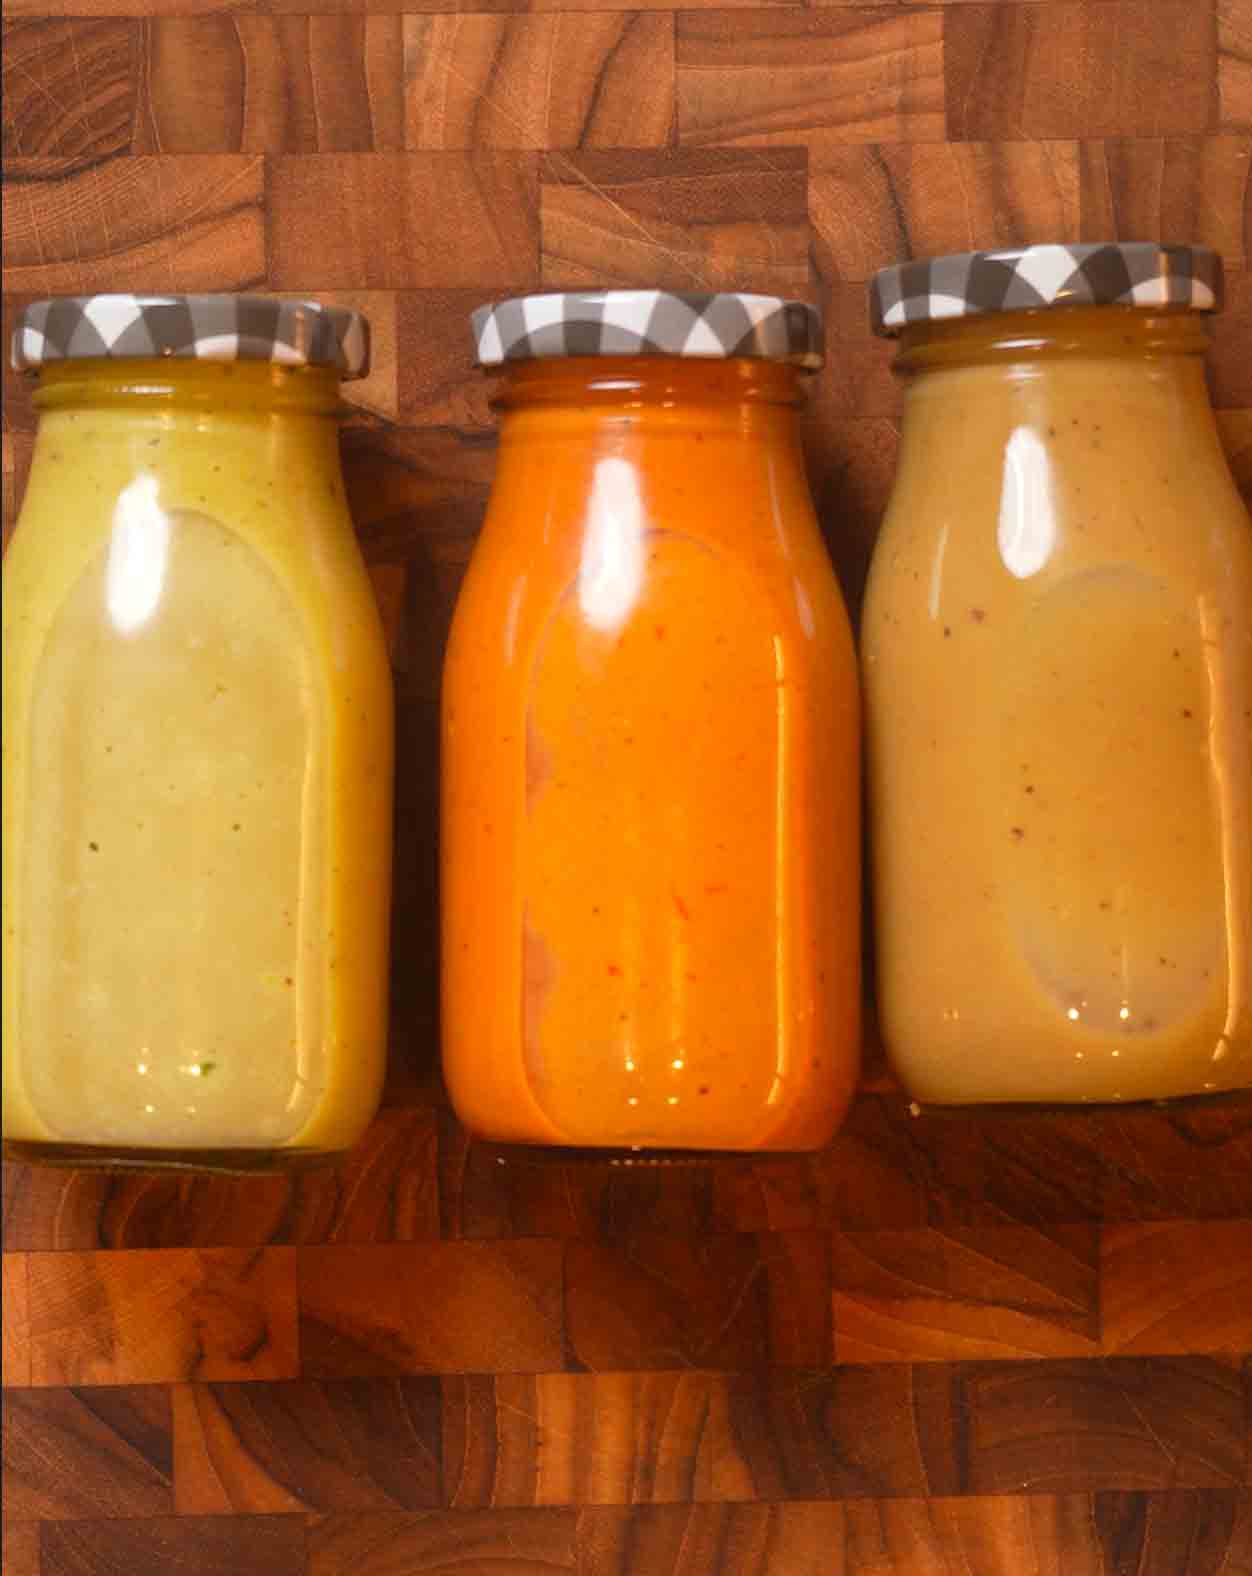
Store-bought salad dressings are loaded with inflammatory seed oils and preservatives, but these three homemade vinaigrettes take less than 5 minutes to make and are way better for you. Each one is packed with healthy fats from quality olive oil and antioxidants, with zero seed oils or junk ingredients. The Balsamic Vinaigrette is bold, sweet, and tangy, perfect for elevating salads and roasted veggies. The Lemon Vinaigrette is bright, zesty, and refreshing with a citrusy pop that wakes up any salad. And my favorite, the Chipotle Vinaigrette, is smoky and bold with just the right amount of heat, ideal for Southwest-inspired salads or grilled vegetables. Once you taste how much better these homemade dressings are, you'll never go back to store-bought
Frequently Asked Questions
Can I make these dressings ahead of time?
Absolutely! All three vinaigrettes are perfect for meal prep and actually taste even better after sitting for a few hours because the flavors have time to meld together. Store them in airtight jars or containers in the fridge for up to a week. They may separate as they sit (this is totally normal since there are no emulsifiers like in store-bought versions), so just give them a good shake or whisk before drizzling over your salad. I like to make a batch of each on Sunday so I have variety throughout the week without any extra effort.
Do I need a blender for these recipes?
Only the chipotle vinaigrette requires a blender to get that smooth, creamy consistency and to fully break down the chipotle peppers. For the balsamic and lemon vinaigrettes, you have options! You can whisk them together in a bowl if you want to feel fancy, or my favorite lazy method, just throw everything in a jar with a tight-fitting lid and shake it like crazy for 30 seconds. Both methods work great, so use whatever's easiest for you. The jar method also doubles as storage, which means one less dish to wash.
How can I customize these dressings to my taste?
These recipes are super flexible! For sweetness, start with half the honey called for and add more until it tastes right to you, some people like their dressings tangier, others prefer them sweeter. You can also play with the oil-to-acid ratio: add more olive oil if you want a milder, less tangy dressing, or add a splash more vinegar or lemon juice if you like that bright, punchy flavor. For the chipotle version, adjust the heat level by using more or less chipotle peppers, start with 2 tablespoons if you're sensitive to spice, or go up to 4 tablespoons if you want serious kick. Don't be afraid to taste as you go and make it your own!
What are the best ways to use each dressing?
Each vinaigrette has its own personality! The balsamic is rich and versatile, it's amazing on mixed greens with roasted vegetables, grilled chicken, or even drizzled over fresh mozzarella and tomatoes. The lemon vinaigrette is bright and fresh, perfect for lighter salads with cucumbers, tomatoes, and herbs, or as a marinade for grilled fish and chicken. It's also great on grain salads like quinoa or couscous. The chipotle vinaigrette is bold and smoky, so it shines on Southwest-inspired dishes, think taco salads, burrito bowls, grilled corn, black bean salads, or as a marinade for shrimp or steak. You can also use any of these as a quick marinade for proteins or a finishing drizzle on roasted veggies!
Skip the store-bought dressings with their seed oils and preservatives! These three easy vinaigrettes take less than 5 minutes and are packed with healthy fats and zero junk. Balsamic is sweet and tangy, lemon is bright and zesty, and chipotle is smoky with a kick. Way better than anything you'll find at the store.
Rate This Recipe!
Preparations
Prep Time:
5 minutes
Total Time:
5 minutes
Cuisine:
American
Course:
Sauce
Calories:
Approximately 90 kcal per serving
Servings:
6-8 (per dressing)
Author:
Ronica Rupan
Ingredients
Balsamic Vinaigrette
Ingredients:
¼ cup balsamic vinegar
1 teaspoon honey or maple syrup
1 garlic clove, grated
2 teaspoons Dijon mustard
½ teaspoon sea salt
Freshly ground black pepper
6 tablespoons extra virgin olive oil
Instructions:
1. Combine the base ingredients.
In a small bowl, whisk together balsamic vinegar, honey, grated garlic, Dijon mustard, salt, and pepper until well combined.
2. Emulsify with olive oil.
Slowly drizzle in the olive oil while whisking continuously to create a smooth, creamy emulsion.
3. Alternative jar method.
You can also combine all ingredients in a jar with a tight-fitting lid and shake vigorously until well combined.
Lemon Vinaigrette
Ingredients:
¼ cup fresh lemon juice
1 small garlic clove, grated
1 teaspoon Dijon mustard
¼ teaspoon sea salt (more to taste)
Freshly ground black pepper
½ teaspoon honey or maple syrup (optional)
¼ to ⅓ cup extra virgin olive oil
½ teaspoon fresh or dried thyme (optional)
Instructions:
1. Mix the base.
In a small bowl, whisk together lemon juice, grated garlic, Dijon mustard, salt, pepper, and honey if using.
2. Add the oil.
Drizzle in the olive oil while whisking to create a silky emulsion. Start with ¼ cup and add more if you want a less tangy dressing.
3. Adjust to taste.
Taste and adjust the oil quantity to balance the tanginess. You can also shake all ingredients in a jar until combined.
Chipotle Vinaigrette
Ingredients:
¼ cup red wine vinegar
2½ tablespoons honey (adjust to taste)
½ tablespoon salt (adjust to taste)
4 tablespoons water
3 tablespoons chipotle peppers in adobo sauce (adjust to taste)
½ teaspoon black pepper
¼ teaspoon oregano
½ cup extra virgin olive oil
Instructions:
1. Blend the base.
In a blender, combine red wine vinegar, honey, salt, water, chipotle peppers, black pepper, and oregano. Blend until completely smooth.
2. Emulsify with oil.
With the blender running on low, slowly stream in the olive oil to emulsify the dressing into a creamy consistency.
3. Taste and adjust.
Taste the dressing and adjust seasoning as needed—add more honey for sweetness, salt for balance, or chipotle for extra heat.
Anti-Inflammatory Coconut Coffee Creamer
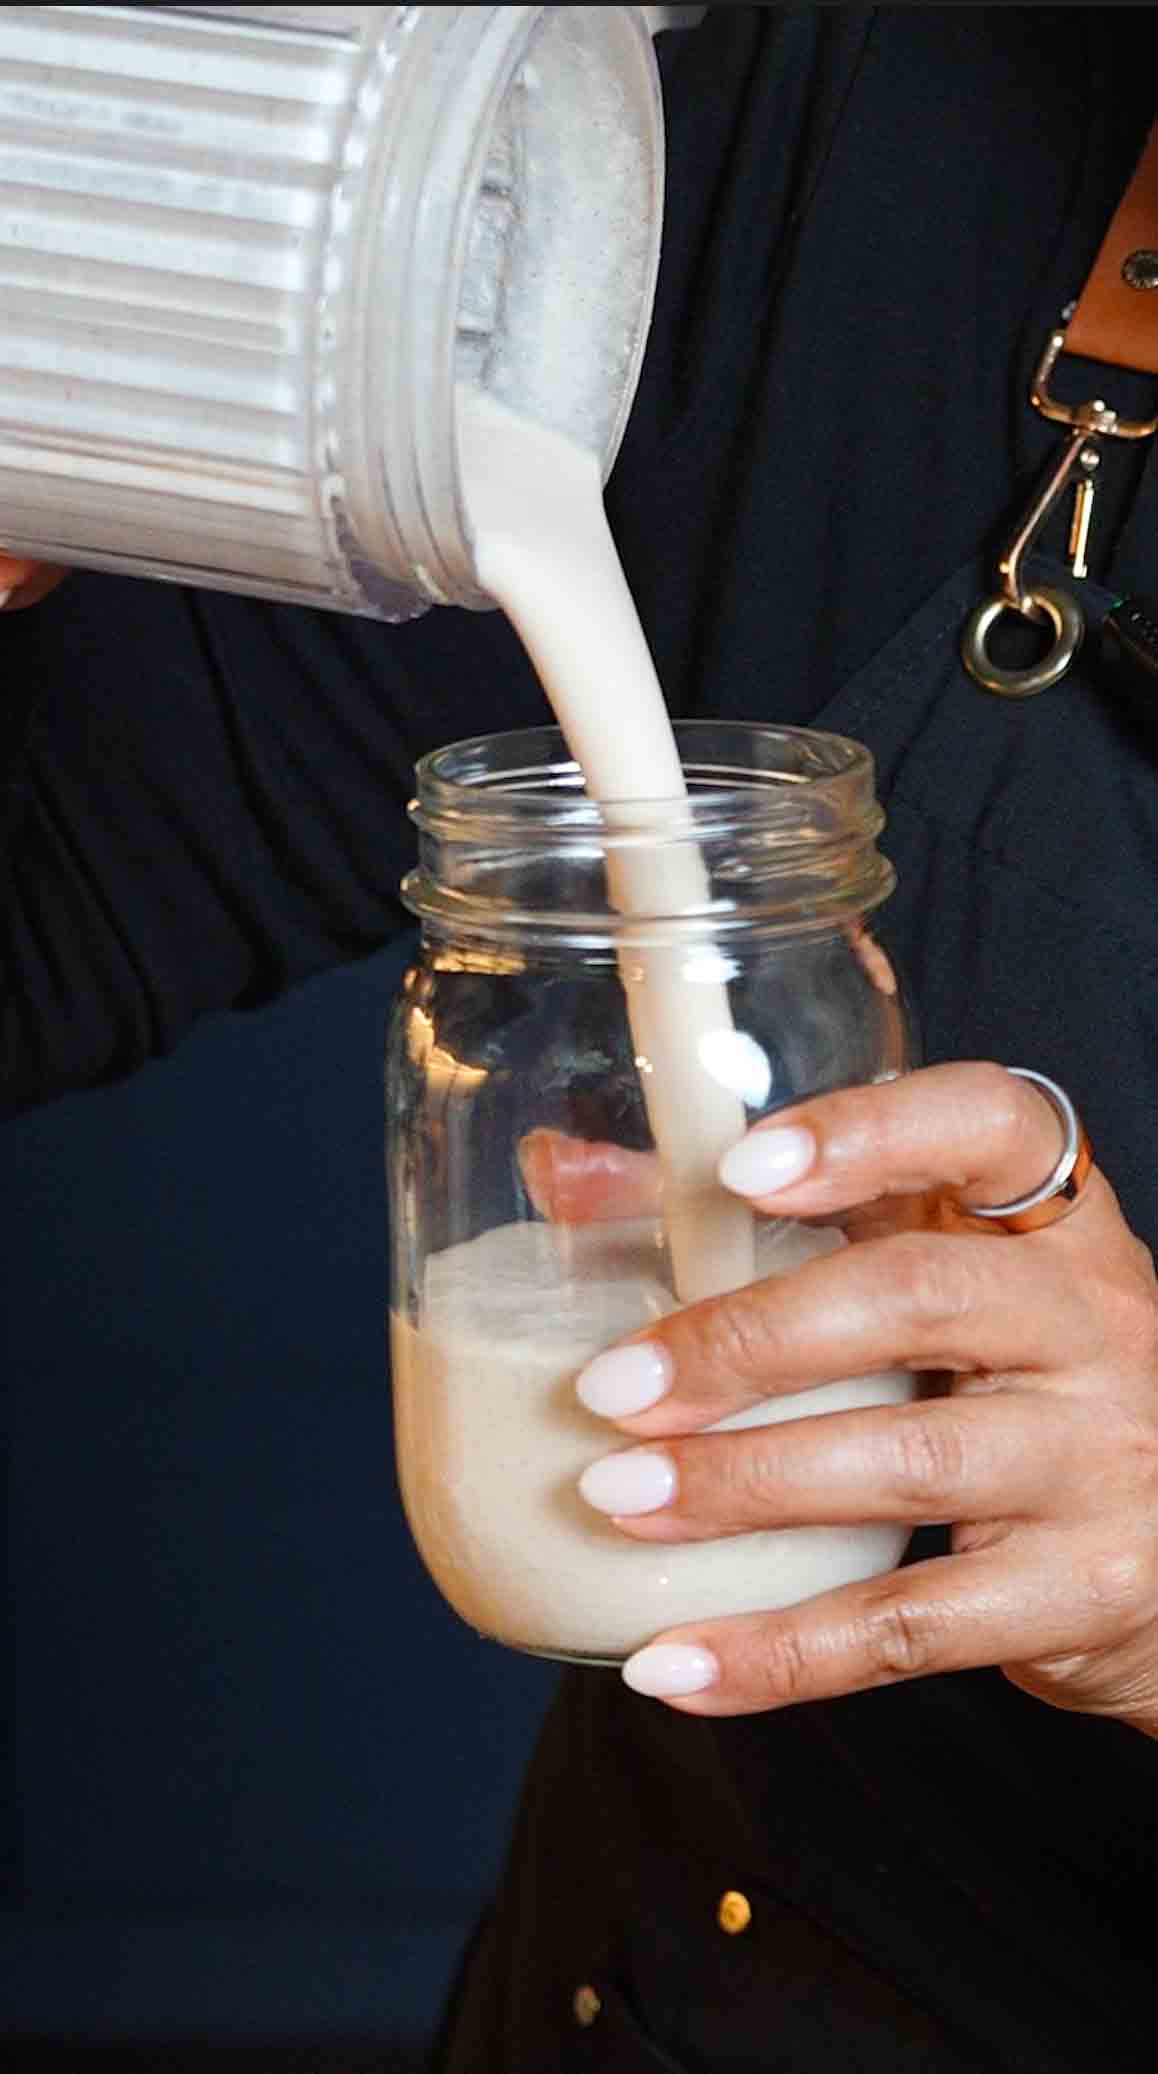
This Anti-Inflammatory Coconut Coffee Creamer is a game-changer if you've been buying store-bought creamers filled with inflammatory seed oils, artificial additives, and refined sugars! Most commercial creamers contain soybean oil and other inflammatory ingredients that don't do your body any favors, but this homemade version uses only real, whole food ingredients that actually support your health. The base is full-fat coconut milk, which provides healthy fats that keep you full, focused, and energized throughout your morning. Cinnamon and cardamom aren't just for flavor, they're both packed with anti-inflammatory properties that may help reduce inflammation in your body over time. A touch of pure maple syrup adds natural sweetness without the refined sugars found in store-bought versions, and vanilla extract brings warmth and depth. The best part? It takes just 5 minutes to blend everything together, and one batch lasts you the whole week in the fridge. Just shake it before using since natural separation is totally normal, then pour 2-3 tablespoons into your hot or iced coffee and enjoy that creamy, naturally sweet, perfectly spiced flavor. It's so much better than anything you'll find at the store, and your body will thank you for making the switch. Once you try homemade coffee creamer with real ingredients, you'll never want to go back to the inflammatory seed oil versions!
Frequently Asked Questions
Q: Why can't I use oat milk for this recipe?
A: While oat milk is great for many things, it's not ideal for an anti-inflammatory approach because many commercial oat milks contain inflammatory seed oils (like rapeseed oil or sunflower oil) and added sugars. Oats themselves can also be higher in carbs and may cause blood sugar spikes in some people. For this anti-inflammatory creamer, stick with full-fat coconut milk which provides healthy medium-chain triglycerides (MCTs) that support energy and focus, keep you full throughout the morning, and support the anti-inflammatory goals of this recipe.
Q: Should I use dates or maple syrup as the sweetener?
A: Both work, but they have different benefits! Dates are less processed and contain fiber, minerals, and natural sugars, making them a whole food option. However, they need to be blended very well to avoid chunks, and they can make the creamer slightly thicker and darker in color. Maple syrup blends smoother, creates a more pourable consistency, and has a cleaner, lighter flavor that doesn't overpower your coffee. If you have a high-speed blender like a Vitamix, dates work great (use 3-4 pitted Medjool dates). If you have a regular blender, maple syrup is your best bet for the smoothest texture.
Q: Why does my creamer separate in the jar?
A: Natural separation is completely normal and actually a good sign that you're using real ingredients! Store-bought creamers use emulsifiers and stabilizers to keep everything mixed, but your homemade version doesn't have any of those additives. The coconut fat naturally separates from the liquid when it sits, especially if your fridge is cold. This doesn't mean it's gone bad! Simply shake the jar vigorously for 10-15 seconds before each use to re-emulsify everything. You can also give it a quick stir with a spoon right in your coffee mug. The separation doesn't affect taste or quality at all.
Q: How long does homemade coffee creamer really last in the fridge?
A: Homemade coconut coffee creamer will last up to 7 days in the refrigerator when stored in a clean, airtight glass jar or container. Always use a clean spoon when scooping to avoid introducing bacteria. You'll know it's gone bad if it develops an off smell, tastes sour, or shows any signs of mold (though this is rare within a week). For best results, use it within 5-7 days. If you want to make a bigger batch, you can freeze it in ice cube trays, then pop out cubes and store them in a freezer bag for up to 3 months. Just thaw individual cubes as needed!
This Anti-Inflammatory Coconut Coffee Creamer is made with real ingredients and no inflammatory seed oils! Full-fat coconut milk provides healthy fats, while cinnamon and cardamom add anti-inflammatory properties. Sweetened with pure maple syrup and flavored with vanilla, it's creamy, naturally sweet, and so much better than store-bought. Blend it in 5 minutes, store for a week, and enjoy in your hot or iced coffee!
Rate This Recipe!
Preparations
Prep Time:
5 minutes
Total Time:
5 minutes
Cuisine:
American
Course:
Drinks, Breakfast
Calories:
110-125 kcal (approx. per serving, 2-3 tablespoons)
Servings:
7 servings (makes about 1¾ cups)
Author:
Ronica Rupan
Ingredients
Ingredients
- 1 can (13.5 ounces) full-fat coconut milk (or milk of choice - see notes)
- 2-3 tablespoons pure maple syrup (or 3-4 Medjool dates, pitted)
- 1 teaspoon ground cinnamon
- ½ teaspoon ground cardamom
- 1 teaspoon pure vanilla extract
- Pinch of sea salt
Instructions
1. Add All Ingredients to Blender
Open the can of full-fat coconut milk and pour the entire contents into a high-speed blender. Add the maple syrup (start with 2 tablespoons and adjust later), ground cinnamon, ground cardamom, vanilla extract, and a pinch of sea salt. If using dates instead of maple syrup, make sure they're soft and pitted, then add 3-4 of them to the blender.
2. Blend Until Smooth
Blend on high speed for 1-2 minutes until the mixture is completely smooth, creamy, and no spices are visible. If you're using dates, blend for the full 2 minutes to ensure they're completely broken down with no chunks remaining. The creamer should be silky smooth and uniform in color.
3. Taste and Adjust
Stop the blender and taste the creamer. If you want it sweeter, add another tablespoon of maple syrup (or another date) and blend for 30 more seconds. If you want a stronger spice flavor, add a bit more cinnamon or cardamom to your preference. Remember that the flavors will mellow slightly when mixed with coffee.
4. Check Consistency
The creamer should be pourable but creamy. If it's too thick (this can happen with certain brands of coconut milk), add 1-2 tablespoons of water and blend again for 15-20 seconds until you reach your desired consistency.
5. Store in a Jar
Pour the creamer through a funnel into a clean glass jar or airtight container. A mason jar works perfectly! Seal with a tight-fitting lid. The creamer will keep in the refrigerator for up to 7 days.
6. Shake Before Each Use
Natural separation will occur as the creamer sits in the fridge, this is totally normal! Before each use, shake the jar vigorously for 10-15 seconds to re-combine everything. You can also give it a quick stir with a spoon.
7. Add to Your Coffee
Add 2-3 tablespoons of the creamer to your hot or iced coffee and stir well. Start with 2 tablespoons and add more based on how creamy you like your coffee. Enjoy your delicious, anti-inflammatory coffee!
Banana Wellness Smoothie

This Banana Wellness Smoothie is packed with anti-inflammatory ingredients and superfoods that support your immune system, digestion, and overall health! It's the kind of smoothie that makes you feel good from the inside out. Fresh turmeric and ginger are the stars here, bringing powerful anti-inflammatory properties that can help reduce inflammation in the body, support joint health, and boost your immune system. The bright yellow-orange color comes from the turmeric, which contains curcumin, a compound known for its incredible health benefits. Sea moss adds minerals and nutrients that support thyroid function, gut health, and glowing skin. Frozen pineapple brings natural sweetness, vitamin C, and the enzyme bromelain which aids digestion and also has anti-inflammatory properties. The banana makes everything creamy and naturally sweet while adding potassium and fiber. A touch of honey balances the earthy flavors of turmeric and ginger with natural sweetness. All of this gets blended with your milk of choice into a thick, creamy, golden smoothie that tastes like a tropical treat but is actually a wellness powerhouse. It's perfect for starting your morning on a healthy note, as a post-workout recovery drink, or anytime you want to give your body a boost of nutrients. The combination of tropical fruits with the warming spices creates a flavor that's both refreshing and comforting at the same time!
Frequently Asked Questions
Q: Can I use ground turmeric and ginger instead of fresh?
A: Absolutely! Fresh turmeric and ginger have the most potent flavor and nutrients, but ground spices work great too. The recipe already provides conversions: use 1 teaspoon ground turmeric instead of 1 tablespoon fresh, and ⅓ teaspoon ground ginger instead of 1 teaspoon fresh. Ground spices are more concentrated than fresh, which is why you use less. Just make sure your ground spices are relatively fresh (not sitting in your cabinet for years) for the best flavor and health benefits. If using ground turmeric, be aware it can stain, so rinse your blender immediately after use!
Q: What does sea moss do and can I skip it?
A: Sea moss is a nutrient-dense seaweed that's rich in minerals like iodine, calcium, magnesium, and potassium. It supports thyroid function, promotes healthy digestion, may boost immunity, and contributes to healthy skin and hair. You can definitely skip it if you don't have it, the smoothie will still be delicious and healthy! If you want to substitute, you could use 1 tablespoon of chia seeds or flax seeds which also provide omega-3s and minerals, though they won't have the exact same benefits as sea moss. Sea moss gel can be found at health food stores or online.
Q: My smoothie is too thick or too thin. How do I fix it?
A: Smoothie consistency is easy to adjust! If it's too thick and your blender is struggling, add more milk 2 tablespoons at a time and blend again until you reach your desired consistency. If it's too thin and you want it thicker like a smoothie bowl, add more frozen pineapple (a handful at a time), add a few ice cubes, use less milk (start with ¾ cup instead of 1 cup), or use a frozen banana instead of fresh. Remember that the smoothie will thicken slightly as it sits because the banana and sea moss naturally thicken liquids.
Q: Will this smoothie stain my blender or hands yellow?
A: Yes, turmeric is famous for staining! Fresh or ground turmeric can temporarily stain your blender, hands, cutting board, and countertops a bright yellow-orange color. To prevent and remove stains: Rinse your blender immediately after making the smoothie, don't let it sit. Blend warm soapy water in your blender for 30 seconds for easy cleaning. Wear gloves when handling fresh turmeric to avoid staining your hands. If you do get stains on your hands, scrub with lemon juice or baking soda paste. For stubborn blender stains, make a paste of baking soda and water, let it sit for 10 minutes, then scrub. Here's a bonus tip: place stained plastic containers, blenders, or cutting boards in direct sunlight for a few hours, the UV rays naturally break down turmeric stains and help fade them! The good news is that turmeric stains fade over time and aren't permanent!
This Banana Wellness Smoothie is a golden, creamy powerhouse packed with anti-inflammatory ingredients! Fresh turmeric and ginger, sea moss, frozen pineapple, and banana blend together for a tropical smoothie that supports your immune system, reduces inflammation, and promotes overall wellness. It's delicious, nutritious, and makes you feel amazing from the inside out!
Rate This Recipe!
Preparations
Prep Time:
5 minutes
Total Time:
5 minutes
Cuisine:
Tropical, Wellness
Course:
Drinks, Breakfast
Calories:
220 kcal (approx. per smoothie)
Servings:
1
Author:
Ronica Rupan
Ingredients
Ingredients
- 1 cup milk of choice (almond, oat, coconut, whole milk, or any milk you prefer)
- 1 cup frozen pineapple chunks
- 1 banana (fresh or frozen)
- 1 tablespoon fresh turmeric, peeled and roughly chopped (or 1 teaspoon ground turmeric)
- 1 teaspoon fresh ginger, peeled and roughly chopped (or ⅓ teaspoon ground ginger)
- 2 tablespoons sea moss gel
- 1-2 teaspoons honey (adjust to taste)
- Optional: ice cubes for a thicker, colder smoothie
Instructions
1. Prep Your Ingredients
If using fresh turmeric and ginger, peel them first using a spoon or vegetable peeler, then roughly chop them into small pieces so they blend more easily. Peel the banana if using fresh.
2. Add to Blender
Add all the ingredients to your blender in this order for best blending: milk first (liquids help the blades move), then frozen pineapple, banana, fresh turmeric, fresh ginger, sea moss gel, and honey. This layering helps everything blend smoothly.
3. Blend Until Smooth
Blend on high speed for 60 seconds, or until the mixture transforms into a completely smooth, creamy, golden smoothie with no chunks of turmeric or ginger remaining. If you're using a less powerful blender, you may need to blend for up to 90 seconds. Stop and scrape down the sides if needed.
4. Check Consistency
Check the thickness. If it's too thick, add a splash more milk and blend for another 10 seconds. If it's too thin, add more frozen pineapple or a few ice cubes and blend again.
5. Taste and Adjust
Taste the smoothie. If you want it sweeter, add another teaspoon of honey and blend briefly. If you want more spice, add a bit more ginger.
6. Serve Immediately
Pour into a glass and enjoy immediately while fresh and cold. The beautiful golden color comes from the turmeric and looks as healthy as it tastes!
Strawberry Glaze Skin Smoothie (Erewhon Copycat)

This Hailey Bieber Strawberry Glaze Skin Smoothie is the famous $20 Erewhon smoothie that went viral, and now you can make it at home for a fraction of the cost! This recipe comes from an ex-Erewhon employee who knows exactly how to recreate that signature pink, Instagram-worthy smoothie that's packed with skin-loving ingredients. The magic starts with the strawberry glaze, a beautiful pink mixture made from fresh strawberries, simple syrup, water, and a touch of beet juice for that vibrant color that gets swirled inside your glass before you pour in the smoothie. The smoothie itself is thick, creamy, and loaded with ingredients that support glowing skin and overall wellness: almond milk as the base, frozen strawberries for antioxidants and vitamin C, creamy avocado for healthy fats that make your skin glow, banana for natural sweetness and potassium, collagen powder to support skin elasticity and reduce fine lines, dates for natural sweetness and fiber, sea moss which is packed with minerals and supports skin health, maple syrup and stevia for extra sweetness, all blended until perfectly smooth and thick like a milkshake. The presentation is key: you swipe coconut whipped cream inside the glass in a circular motion, pour in some of that gorgeous pink glaze, then top with the thick strawberry smoothie for those beautiful layered swirls. The result is a smoothie that not only looks absolutely stunning but actually tastes incredible and gives your body nutrients that support healthy, glowing skin from the inside out. It's basically a beauty treatment you can drink, and now you don't have to spend $20 at Erewhon to enjoy it!
Frequently Asked Questions
Q: What is sea moss and where can I find it?
A: Sea moss (also called Irish moss) is a type of red algae that's incredibly nutrient-dense, packed with minerals like iodine, calcium, magnesium, and zinc that support skin health, thyroid function, and overall wellness. You can find sea moss gel at health food stores like Whole Foods, Sprouts, or online. It comes in gel form (easiest to use in smoothies), dried form (you'd need to soak and blend it yourself), or as a powder. If you can't find sea moss or don't want to buy it, you can substitute with chia seeds (1 tablespoon) which also provide omega-3s and minerals, or simply omit it. The smoothie will still be delicious and nutritious without it!
Q: Can I make this without collagen powder?
A: Yes! Collagen powder is included for its skin benefits (supports elasticity, reduces wrinkles, and promotes healthy hair and nails), but the smoothie works without it. If you skip the collagen, you could add an extra tablespoon of chia seeds or hemp seeds for protein and omega-3s, use a scoop of vanilla protein powder for protein without the collagen benefits, or just leave it out entirely. The texture and taste will be the same, you just won't get those specific collagen benefits. If you're vegan, there are plant-based collagen boosters available, though true collagen comes from animal sources.
Q: The glaze settled at the bottom and didn't swirl. What did I do wrong?
A: The swirling effect takes a little technique! Here's how to get those perfect Instagram-worthy swirls: First, make sure you swipe coconut whipped cream on the inside of the glass in circular motions before adding anything. Pour the strawberry glaze into the glass gently, it should be thin enough to flow but not watery. Make the smoothie thick (add less liquid or more frozen fruit) so it pours slowly and doesn't immediately mix with the glaze. Pour the smoothie very slowly and gently down the side of the glass or over the back of a spoon so it layers on top of the glaze rather than mixing in. The contrast between the thick smoothie and thin glaze creates those swirls. If they mix together, it still tastes delicious, just give it a gentle stir and enjoy!
Q: How do I make simple syrup?
A: Simple syrup is super easy! Combine equal parts water and sugar in a small saucepan (for this recipe, use ¼ cup water and ¼ cup sugar). Heat over medium heat, stirring until the sugar completely dissolves, about 3-4 minutes. Don't let it boil. Remove from heat and let it cool completely before using. Store leftover simple syrup in a jar in the refrigerator for up to 2 weeks and use it for cocktails, mocktails, iced coffee, or other smoothies. You can also buy pre-made simple syrup at most grocery stores in the cocktail section.
This Hailey Bieber Strawberry Glaze Skin Smoothie is the viral $20 Erewhon drink you can make at home! A gorgeous pink strawberry glaze gets swirled in your glass with coconut whipped cream, then topped with a thick, creamy smoothie packed with skin-loving ingredients like collagen, sea moss, avocado, strawberries, and banana. It's as beautiful as it is delicious, and supports glowing skin with every sip!
Rate This Recipe!
Preparations
Prep Time:
10 minutes
Total Time:
10 minutes
Cuisine:
American
Course:
Drinks, Breakfast
Calories:
350 kcal (approx. per smoothie)
Servings:
1
Author:
Ronica Rupan
Ingredients
Ingredients
For the Strawberry Glaze:
- 2-3 organic strawberries, hulled
- 2 tablespoons simple syrup
- ½ cup water
- 1 teaspoon beet juice (for color)
For the Smoothie:
- 8 ounces almond milk (or milk of choice)
- 1 cup frozen organic strawberries
- ½ ripe avocado
- ½ banana (fresh or frozen)
- 1 tablespoon collagen powder
- 2 Medjool dates, pitted
- 1 tablespoon sea moss gel
- 1 tablespoon pure maple syrup
- 1 dropper liquid stevia (or to taste)
For Assembly:
- Coconut whipped cream (store-bought or homemade)
Instructions
1. Make the Strawberry Glaze
Add the strawberries, simple syrup, water, and beet juice to a blender. Blend on high speed until completely smooth and vibrant pink, about 30 seconds. Pour the glaze into a small glass or container and set aside. You'll use this for swirling in your glass.
2. Prepare Your Glass
Take your serving glass and use a spoon to swipe coconut whipped cream around the inside of the glass in circular motions, creating white swirls on the glass. This is what creates that signature Erewhon look! Place the prepared glass in the freezer while you make the smoothie so the whipped cream sets.
3. Make the Smoothie
Add the almond milk, frozen strawberries, avocado, banana, collagen powder, pitted dates, sea moss gel, maple syrup, and stevia to your blender. Blend on high speed for 45-60 seconds until completely smooth, thick, and creamy. The smoothie should be thick enough to hold its shape when poured, almost like soft-serve. If it's too thin, add more frozen strawberries or a few ice cubes and blend again.
4. Assemble the Drink
Remove your prepared glass from the freezer. Pour about 2-3 tablespoons of the strawberry glaze into the bottom of the glass. Slowly and gently pour the thick smoothie into the glass over the glaze. Pour it down the side of the glass or over the back of a spoon so it layers nicely without immediately mixing with the glaze. The pink glaze will create beautiful swirls throughout.
5. Serve Immediately
Top with an extra dollop of coconut whipped cream if desired. Serve immediately with a straw and enjoy your $20 smoothie that you made for just a few dollars! Take a picture before drinking because it's too pretty not to share.
Chicken Tikka Masala Sliders

These Chicken Tikka Masala Sliders are the perfect fusion of Indian flavors and American comfort food that everyone will love! Tender chicken thighs get marinated in a flavorful mixture of yogurt, lemon juice, and warm spices like garam masala, cumin, coriander, and turmeric, then broiled until charred and juicy. The real star is the homemade tikka masala sauce, a rich, creamy, aromatic sauce made with butter, onions, garlic, ginger, and a blend of Indian spices that gets simmered with diced tomatoes, cream, and tomato paste until it's thick and luxurious. But what makes these sliders special is the presentation: soft, sweet King's Hawaiian rolls get sliced, spread with tikka masala sauce, then layered with the chopped chicken, red onions, optional tamarind chutney for tang, cheddar and mozzarella cheese, and brushed with garlic butter before baking until the cheese is melted and bubbly. The cilantro-lime aioli on the side adds a fresh, zesty element that cuts through the richness. Each slider is a perfect little bite of tender spiced chicken, creamy masala sauce, melted cheese, and buttery soft roll that's absolutely addictive. They're perfect for game day, parties, potlucks, or anytime you want to serve something that looks impressive and tastes incredible. Make a double batch because these disappear fast!
Frequently Asked Questions
Q: Can I use chicken breasts instead of thighs?
A: Yes, but chicken thighs are ideal for this recipe because they stay juicier and have more flavor. If you use chicken breasts, watch the cooking time carefully since they can dry out faster. Cut them into 1-inch chunks as directed and reduce the broiling time to 5-6 minutes per side. Check that the internal temperature reaches 165°F for food safety. You could also use a mix of both breasts and thighs for variety.
Q: Can I make the masala sauce ahead of time?
A: Absolutely! The masala sauce can be made 2-3 days ahead and stored in an airtight container in the refrigerator, which actually allows the flavors to develop even more. You can also freeze it for up to 3 months. The chicken can be marinated and cooked 1 day ahead. When ready to assemble, reheat the sauce gently on the stove or microwave, then proceed with assembling the sliders. The aioli and garlic butter can also be made ahead and refrigerated. This makes entertaining so much easier!
Q: Can I make these vegetarian?
A: Yes! Replace the chicken with paneer (Indian cheese) cut into 1-inch cubes, or use cauliflower florets, firm tofu, or chickpeas. For paneer or tofu, marinate the same way and broil until golden. For cauliflower, toss with the marinade and roast at 425°F for 20-25 minutes until charred. For chickpeas, drain and pat dry, toss with spices (skip the yogurt marinade), and roast until crispy. Everything else stays the same. The vegetarian version is just as delicious!
These Chicken Tikka Masala Sliders are the ultimate fusion food! Marinated chicken thighs get broiled until charred, then chopped and layered on sweet Hawaiian rolls with homemade tikka masala sauce, red onions, cheddar and mozzarella cheese, and garlic butter. Baked until the cheese melts and served with cilantro-lime aioli, they're the perfect bite-sized version of your favorite Indian dish. Perfect for parties or game day!
Rate This Recipe!
Preparations
Prep Time:
30 minutes
Marinating Time:
1 hour
Cook Time:
25 minutes
Total Time:
1 hour 55 minutes
Cuisine:
Indian-American Fusion
Course:
Appetizer, Main Course, Dinner
Calories:
380 kcal (approx. per slider)
Servings:
12 sliders
Author:
Ronica Rupan
Ingredients
Ingredients
For the Chicken Marinade:
- 1 pound chicken thighs, cut into 1-inch chunks
- ¼ cup plain yogurt
- 3 tablespoons fresh lemon juice
- 1 tablespoon olive oil
- 1½ teaspoons kosher salt
- 1 tablespoon garlic paste (or 3 cloves minced)
- 1 teaspoon ginger paste
- 1 teaspoon Flora & Mana's Tandoori Heaven spice blend
- 1 teaspoon chili powder
- 1 teaspoon ground coriander
- 1 teaspoon ground cumin
- 1 teaspoon paprika
- ½ teaspoon curry powder
- ½ teaspoon garam masala
- ¼ teaspoon turmeric
For the Tikka Masala Sauce:
- 3 tablespoons unsalted butter
- ½ red onion, chopped
- 3 cloves garlic, minced
- 1 teaspoon fresh ginger, grated
- 1 teaspoon ground coriander
- 1 teaspoon sugar
- ½ teaspoon kosher salt
- ½ teaspoon chili powder
- ½ teaspoon curry powder
- ½ teaspoon garam masala
- ½ teaspoon ground cumin
- ½ teaspoon smoked paprika
- ½ teaspoon turmeric
- ¼ teaspoon cayenne pepper (optional, for heat)
- ½ (14.5-ounce) can diced tomatoes with juice
- 2 tablespoons water
- ½ cup heavy cream
- 1 tablespoon tomato paste
For the Cilantro-Lime Aioli:
- ½ cup mayonnaise
- ⅓ cup fresh cilantro, chopped
- 2 tablespoons fresh lime juice
- 2 cloves garlic, minced
- ½ teaspoon ground cumin
- ⅛ teaspoon kosher salt
For the Garlic Butter:
- 2 tablespoons unsalted butter, melted
- 1 clove garlic, minced
- 1 teaspoon fresh cilantro, chopped
- Pinch of garlic powder
For Assembly:
- 1 (12-count) package King's Hawaiian Rolls
- ¼ red onion, thinly sliced
- 2 tablespoons tamarind chutney (optional)
- 6 slices cheddar cheese
- ½ cup shredded mozzarella cheese
Instructions
1. Marinate the Chicken
In a large bowl, combine the yogurt, lemon juice, olive oil, salt, garlic paste, ginger paste, Tandoori Heaven spice blend, chili powder, coriander, cumin, paprika, curry powder, garam masala, and turmeric. Whisk until smooth. Add the chicken chunks and toss to coat completely. Cover and refrigerate for at least 1 hour, or up to 24 hours for maximum flavor.
2. Make the Tikka Masala Sauce
In a large skillet or saucepan, melt the butter over medium heat. Add the chopped red onion and sauté for 3-4 minutes until soft and translucent. Add the minced garlic, grated ginger, and all the spices (coriander, sugar, salt, chili powder, curry powder, garam masala, cumin, smoked paprika, turmeric, and cayenne if using). Cook for about 1 minute, stirring constantly, until fragrant. Add the diced tomatoes with their juice and water. Bring to a simmer and cook for 4 minutes, stirring occasionally. Stir in the heavy cream and tomato paste. Simmer for another 5 minutes until the sauce thickens slightly. Use an immersion blender to blend the sauce until smooth, or transfer to a regular blender in batches. Set aside.
3. Cook the Chicken
Preheat your broiler to high. Line a baking sheet with foil and place a wire rack on top. Arrange the marinated chicken chunks on the wire rack in a single layer, leaving space between pieces. Broil for 7 minutes per side, or until the chicken is charred in spots and cooked through to an internal temperature of 165°F. Remove from the oven and let rest for 10 minutes, then chop into smaller pieces.
4. Make the Aioli
In a small bowl, mix together the mayonnaise, chopped cilantro, lime juice, minced garlic, cumin, and salt. Stir until well combined. Cover and refrigerate until ready to serve.
5. Make the Garlic Butter
In a small bowl, combine the melted butter, minced garlic, chopped cilantro, and garlic powder. Mix well and set aside.
6. Preheat the Oven
Preheat your oven to 350°F (180°C).
7. Assemble the Sliders
Slice the entire package of King's Hawaiian Rolls in half horizontally so you have one large top piece and one large bottom piece. Place the bottom half on a parchment-lined baking sheet. Spread a generous layer of the tikka masala sauce on both the top and bottom halves of the rolls. On the bottom half, layer the thinly sliced red onions, chopped chicken, tamarind chutney if using, cheddar cheese slices, and shredded mozzarella cheese. Place the top half of the rolls over the filling. Brush the top generously with the garlic butter mixture.
8. Bake
Bake for 5-7 minutes, or until the cheese is melted and bubbly. Keep an eye on it so the tops don't burn.
9. Serve
Remove from the oven and let cool for 2-3 minutes. Slice into individual sliders using a sharp knife. Serve warm with the cilantro-lime aioli on the side for dipping or drizzling. Enjoy!
Mini Salmon Wellingtons
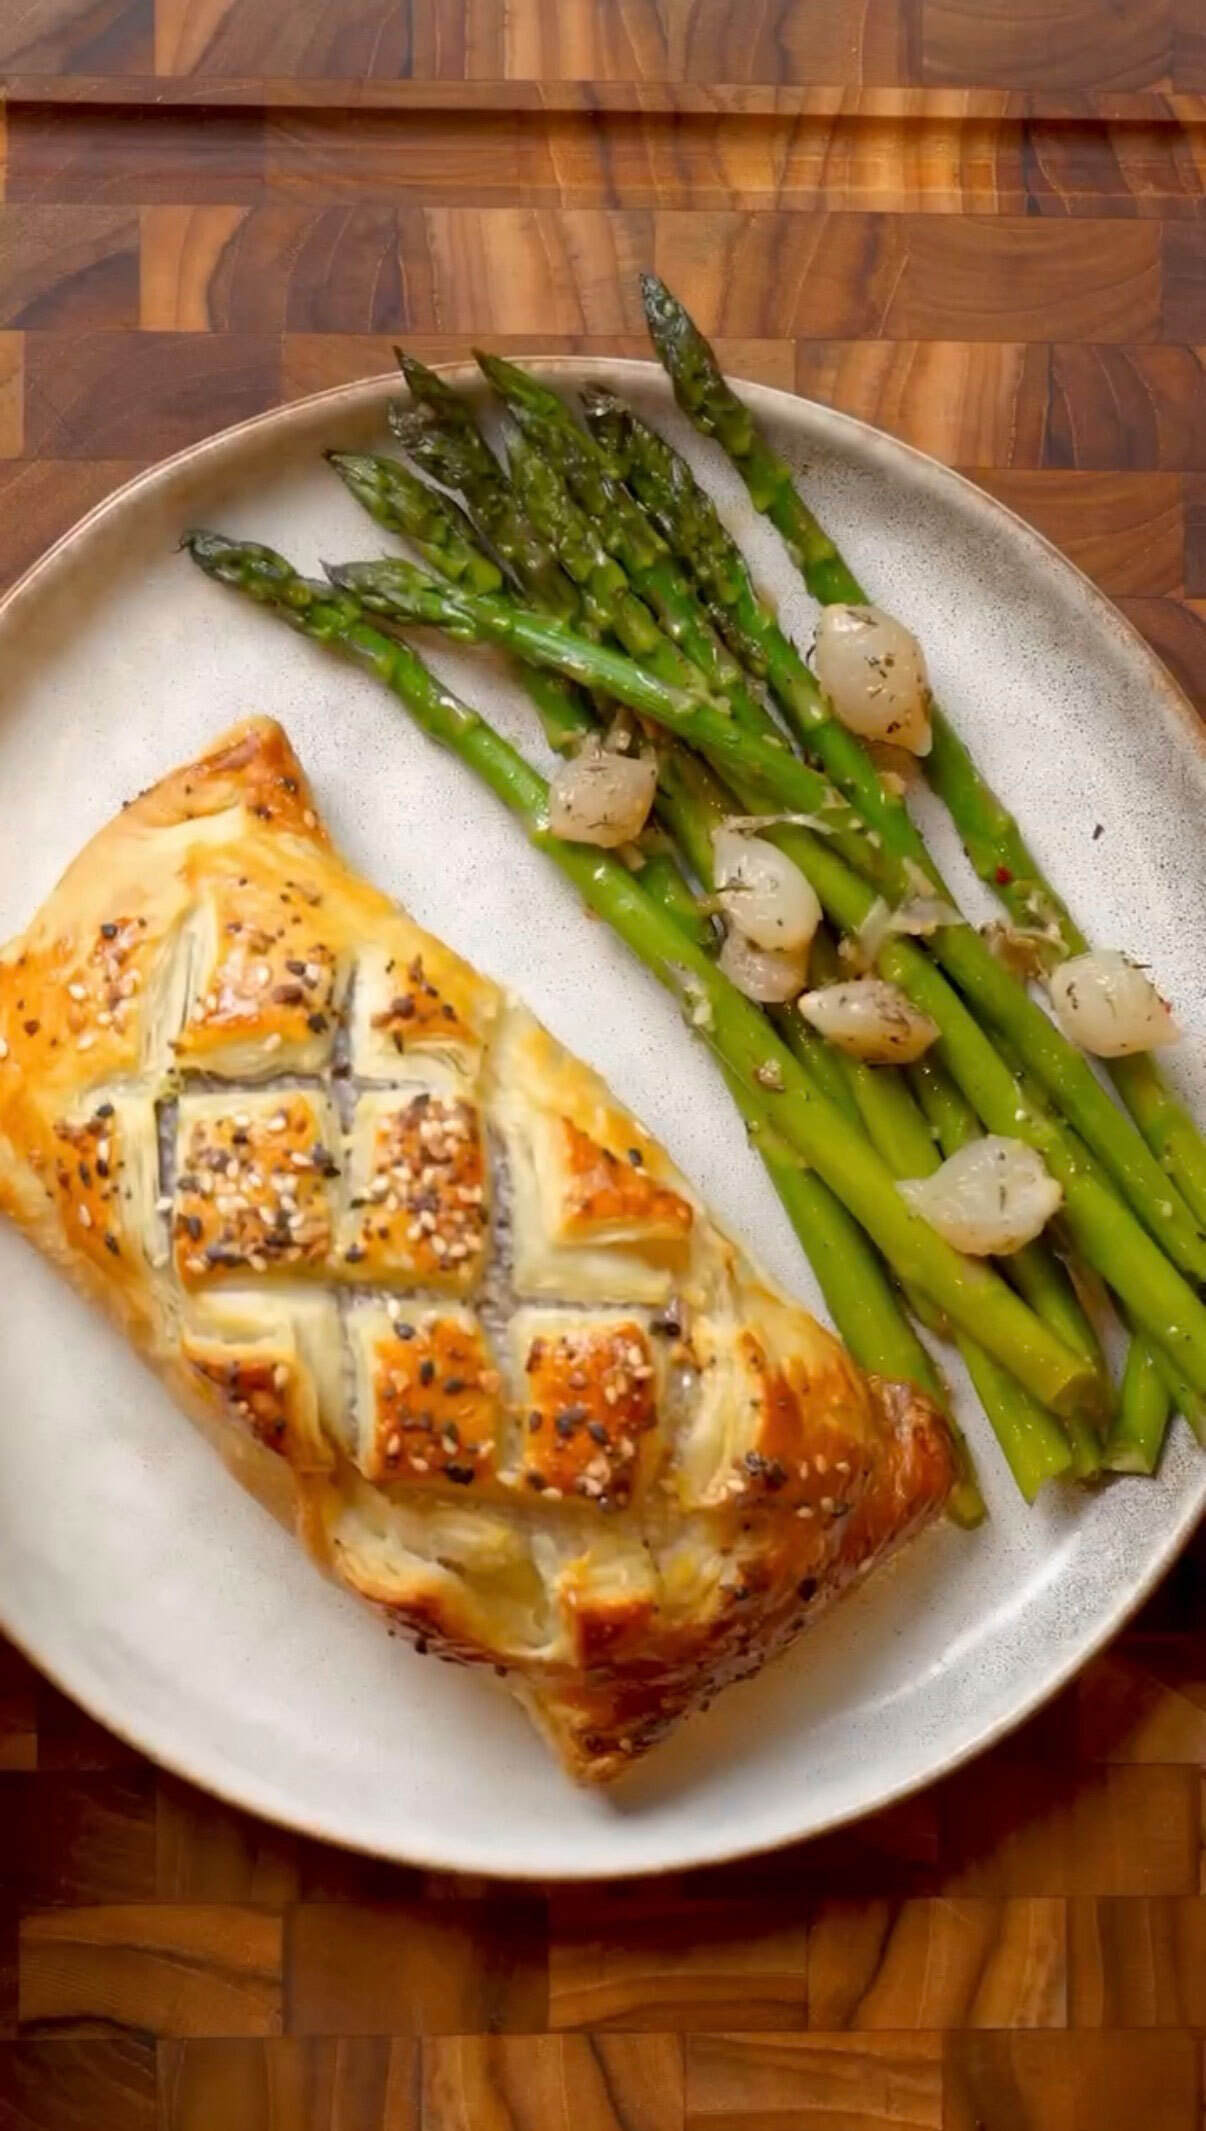
These Mini Salmon Wellingtons are an elegant, show-stopping dish that's surprisingly easy to make at home! If you've ever been intimidated by classic Beef Wellington, these individual salmon versions are much more approachable while still delivering that wow factor. Each one is a perfect little package of flaky, buttery puff pastry wrapped around tender, seasoned salmon and a creamy spinach filling that's loaded with cream cheese, Parmesan, garlic, and panko breadcrumbs for texture. The salmon gets seasoned with "When Life Gives You Lemons" seasoning from my Flora & Mana spice line, which adds bright, citrusy notes that pair beautifully with the richness of the pastry and cream cheese. The spinach filling is sautéed with red onion and garlic until wilted and flavorful, then mixed with cream cheese that melts into the spinach creating this luxurious, creamy layer between the salmon and pastry. The panko breadcrumbs add a subtle crunch and help absorb any moisture so your pastry stays crispy. Once assembled, each little Wellington gets brushed with egg wash for that gorgeous golden color and can be topped with everything bagel seasoning for extra flavor and visual appeal. After 20-25 minutes in the oven, the puff pastry is golden and flaky, the salmon is perfectly cooked and tender, and the filling is hot and creamy. These are perfect for dinner parties, special occasions, date nights, or anytime you want to serve something that looks impressive but doesn't require hours in the kitchen. Serve them with roasted vegetables, a simple salad, or creamy mashed potatoes for an unforgettable meal!
Frequently Asked Questions
Q: Can I make these ahead of time?
A: Yes! These are perfect for make-ahead entertaining. You can assemble the Wellingtons completely (through step 5, before the egg wash), place them on a parchment-lined baking sheet, cover tightly with plastic wrap, and refrigerate for up to 24 hours before baking. You can also freeze them unbaked for up to 1 month, just place them on a baking sheet to freeze solid first, then transfer to a freezer bag. When ready to bake, brush frozen Wellingtons with egg wash and bake straight from frozen, adding 5-10 extra minutes to the baking time. If baking from refrigerated, bring them to room temperature for 15 minutes first, then brush with egg wash and bake as directed. The egg wash and everything bagel seasoning should be added right before baking, not during assembly.
Q: What if my puff pastry is soggy or not crispy?
A: Soggy puff pastry is usually caused by too much moisture! Here's how to prevent it: Make sure to squeeze out excess moisture from the cooked spinach before mixing it with the other filling ingredients, use panko breadcrumbs in the filling (they absorb moisture and help keep the pastry crisp), don't overfill the pastry, a thin layer of filling is better than too much, make sure your puff pastry is fully thawed but still cold when you work with it (if it gets too warm, pop it back in the fridge for 10 minutes), seal the edges really well so no filling leaks out during baking, and bake on the middle rack at 400°F which is hot enough to crisp the pastry quickly. Also, let them cool for just 2-3 minutes before serving so the steam can escape rather than making the pastry soggy.
Q: Can I use frozen spinach instead of fresh?
A: Absolutely! Frozen spinach actually works great for this recipe. You'll need about 10 ounces of frozen spinach (one standard package). Thaw it completely, then squeeze out as much liquid as possible, this is crucial! Frozen spinach holds a lot of water, and if you don't squeeze it dry, your filling will be too wet and make the pastry soggy. The easiest way is to thaw it in the microwave, then wrap it in a clean kitchen towel or paper towels and squeeze firmly until no more water comes out. Skip the sautéing step for the spinach itself (you'll still sauté the onion and garlic), and just mix the squeezed-dry spinach with the sautéed onion-garlic mixture, then proceed with adding the cream cheese, Parmesan, and breadcrumbs.
Q: How do I know when the salmon is cooked properly?
A: The salmon should reach an internal temperature of 145°F for FDA recommendations, though many people prefer salmon cooked to 125-135°F for a medium-rare to medium doneness. Since the salmon is wrapped in pastry, you can't easily check the temperature during cooking, so here are some guidelines: Cut your salmon portions to about 1 inch thick for even cooking, bake at 400°F for 20-25 minutes (the pastry should be golden brown), and if you're nervous, you can insert an instant-read thermometer through the pastry into the center of the salmon after 20 minutes. The salmon will also continue to cook slightly from residual heat after you remove it from the oven. If you prefer your salmon well-done at 145°F, bake for the full 25 minutes. For medium doneness around 130-135°F, aim for 20-22 minutes.
These Mini Salmon Wellingtons are elegant, impressive, and surprisingly easy! Flaky puff pastry wraps around tender salmon and a creamy spinach filling with cream cheese, Parmesan, garlic, and panko breadcrumbs. Brushed with egg wash and baked until golden, they're the perfect show-stopping dish for dinner parties or special occasions. Each bite delivers buttery pastry, perfectly cooked salmon, and that luxurious creamy filling!
Rate This Recipe!
Preparations
Prep Time:
25 minutes
Cook Time:
25 minutes
Total Time:
50 minutes
Cuisine:
French-inspired, American
Course:
Main Course, Dinner, Appetizer
Calories:
420 kcal (approx. per Wellington)
Servings:
4 Mini Wellingtons
Author:
Ronica Rupan
Ingredients
Ingredients
For the Spinach Filling:
- ½ red onion, finely diced
- 3 garlic cloves, minced
- 10 ounces fresh spinach (or one 10 oz package frozen, thawed and squeezed dry)
- 4 ounces cream cheese, softened to room temperature
- ½ cup shredded Parmesan cheese
- ½ cup panko breadcrumbs
- 1 teaspoon "When Life Gives You Lemons" seasoning (Flora & Mana)
- Salt, to taste
For the Salmon:
- 1 pound salmon fillet, skin removed, cut into 4 equal portions
- 1 teaspoon "When Life Gives You Lemons" seasoning (Flora & Mana)
- Salt, to taste
For Assembly:
- 1 sheet puff pastry, thawed according to package directions
- 1 large egg, beaten (for egg wash)
- Everything bagel seasoning, for garnish (optional)
Instructions
1. Preheat the Oven
Preheat your oven to 400°F (200°C). Line a baking sheet with parchment paper and set aside.
2. Sauté the Aromatics
Heat a large skillet over medium heat with a drizzle of olive oil. Add the finely diced red onion and cook for 3-4 minutes until softened and translucent. Add the minced garlic and cook for another 30-60 seconds until fragrant. Don't let the garlic burn.
3. Cook the Spinach
Add the fresh spinach to the skillet in batches if needed (it will wilt down significantly). Cook, stirring frequently, until all the spinach is completely wilted and any liquid has evaporated, about 3-4 minutes. Season with 1 teaspoon of "When Life Gives You Lemons" seasoning and salt to taste. If there's excess liquid in the pan, drain it off or let it evaporate completely. Remove the skillet from heat.
4. Make the Filling
Add the softened cream cheese to the hot spinach mixture and stir until it melts and combines with the spinach. Stir in the shredded Parmesan cheese and panko breadcrumbs until everything is well mixed. The mixture should be creamy but thick enough to hold its shape. Taste and adjust seasoning if needed. Let the filling cool slightly while you prepare the salmon.
5. Season the Salmon
Pat the salmon portions completely dry with paper towels. Season all sides of each salmon piece with the remaining 1 teaspoon of "When Life Gives You Lemons" seasoning and a pinch of salt. Set aside.
6. Prepare the Puff Pastry
On a lightly floured surface, roll out the thawed puff pastry sheet slightly to smooth out any creases. Cut the pastry into 4 equal squares, each large enough to wrap around your salmon portions with some overlap. The exact size will depend on your salmon portions, but aim for squares that are about 6-7 inches.
7. Assemble the Wellingtons
Place one square of puff pastry on your work surface. Spoon about 2-3 tablespoons of the spinach filling into the center of the pastry square, spreading it into a rectangle roughly the size of your salmon portion. Place one piece of seasoned salmon on top of the spinach filling.
8. Wrap the Pastry
Fold the puff pastry up and over the salmon and filling, wrapping it like a package. You can fold the sides up and over like an envelope, or gather the corners in the center. Press the edges firmly to seal, making sure there are no gaps where filling can leak out. If the pastry isn't sticking, brush a little water on the edges to help seal. Place seam-side down on the prepared baking sheet. Repeat with the remaining pastry squares, filling, and salmon.
9. Score and Decorate
Using a sharp knife, make 2-3 light diagonal scores on the top of each Wellington. Don't cut all the way through, just score the surface for decoration. These scores also help steam escape during baking.
10. Apply Egg Wash
In a small bowl, beat the egg until smooth. Using a pastry brush, brush the entire surface of each Wellington with the egg wash. This creates that beautiful golden color. If desired, sprinkle everything bagel seasoning over the top of each Wellington for extra flavor and visual appeal.
11. Bake
Place the baking sheet in the preheated 400°F oven and bake for 20-25 minutes, until the puff pastry is deep golden brown and crispy, and the salmon is cooked through. The pastry should be puffed and flaky. If you want to check the salmon temperature, insert an instant-read thermometer through the pastry into the center of the salmon, it should read at least 145°F for fully cooked salmon.
12. Cool and Serve
Remove from the oven and let the Wellingtons cool for 2-3 minutes before serving. This allows the filling to set slightly and makes them easier to handle. Transfer to serving plates and serve immediately while warm. Enjoy with your favorite sides!
Homemade Garlic Naan

This Homemade Garlic Naan is the buttery, fluffy, restaurant-quality bread you've been dreaming about! If you've ever wondered how Indian restaurants get their naan so perfectly soft, golden, and garlicky with those gorgeous charred spots, this recipe is your answer. The dough is made with a combination of flour, yeast, yogurt, and milk that creates an incredibly soft, pillowy texture, while fresh grated garlic mixed right into the dough infuses every bite with that signature garlic flavor. After the dough rises until doubled in size, you divide it into six portions, roll them into large ovals, and cook them in a hot cast iron skillet (no tandoor oven needed!) until they puff up with beautiful bubbles and get those authentic charred spots. The real magic happens with the garlic butter that gets brushed on while the naan is still hot, a heavenly mixture of melted butter, minced garlic, and fresh cilantro that soaks into the warm bread and makes every bite incredibly rich and flavorful. The result is naan that's golden on the outside, soft and fluffy on the inside, loaded with garlic, and brushed with so much butter that it practically melts in your mouth. It's the perfect companion to any curry, dal, tikka masala, butter chicken, or really any dish that needs something to scoop up all that delicious sauce. Once you make naan at home and realize how easy it is, you'll never want to buy the store-bought version again!
Frequently Asked Questions
Q: Can I make the dough ahead of time?
A: Yes! This dough is perfect for make-ahead. After the first rise, punch down the dough, divide it into 6 balls, and place them in an airtight container or wrap them individually in plastic wrap. Refrigerate for up to 24 hours or freeze for up to 3 months. If refrigerated, let the dough balls come to room temperature for 20-30 minutes before rolling and cooking. If frozen, thaw overnight in the fridge, then bring to room temperature. You can also make the garlic butter ahead and store it in the fridge for up to a week. This makes weeknight dinners so much easier!
Q: I don't have a cast iron skillet. What else can I use?
A: A cast iron skillet is ideal because it gets very hot and holds heat well, creating those authentic charred spots, but you have other options! A heavy-bottomed stainless steel skillet works great, just make sure to preheat it well. A nonstick skillet will work in a pinch but won't give you as much char. You can also use a flat griddle or tawa (Indian flat pan). Some people even use their outdoor grill, just place the rolled naan directly on the grates over medium-high heat for 1-2 minutes per side. Whatever you use, make sure it's preheated properly so the naan puffs up and cooks quickly without drying out.
Q: My naan didn't puff up. What did I do wrong?
A: Don't worry, this is common! Here are the usual culprits: Your skillet wasn't hot enough, it needs to be medium-high to high heat so the naan cooks quickly and traps steam inside to puff. You rolled the naan too thin, aim for about ¼ inch thick, too thin and it won't puff. Your yeast wasn't active, always check that your yeast blooms properly in the warm water (it should get foamy after 5 minutes). The water was too hot and killed the yeast, lukewarm means about 100-110°F, not hot. You didn't let the dough rise long enough, it should double in size. Even if your naan doesn't puff perfectly, it will still taste delicious! The puffing is more about aesthetics than flavor.
Q: Can I bake these in the oven instead of on the stovetop?
A: Yes, though you won't get quite the same charred, authentic texture! Preheat your oven to its highest temperature (usually 500-550°F) with a pizza stone or baking sheet inside for at least 30 minutes. Roll out your naan, brush with oil, and place directly on the hot stone or baking sheet. Bake for 2-3 minutes until puffed and golden with some charred spots, then flip and bake for another 1-2 minutes. Brush with garlic butter immediately when you remove them. You can also broil them for the last 30-60 seconds to get more char, but watch carefully! The stovetop method is easier and more authentic, but the oven works if you prefer it.
This Homemade Garlic Naan is buttery, fluffy, and tastes just like your favorite Indian restaurant! The dough is made with yogurt, milk, and fresh garlic, then cooked in a hot skillet until golden with charred spots. Brushed with rich garlic butter and fresh cilantro while still hot, it's the perfect companion to any curry or dal. No tandoor oven needed, just a cast iron skillet!
Rate This Recipe!
Preparations
Prep Time:
20 minutes
Rising Time:
50 minutes to 1 hour
Cook Time
15 minutes (for 6 naan)
Total Time:
1 hour 25 minutes to 1 hour 35 minutes
Cuisine:
Indian
Course:
Side Dish, Bread
Calories:
280 kcal (approx. per naan)
Servings:
6 naan
Author:
Ronica Rupan
Ingredients
Ingredients
For the Naan Dough:
- 2½ cups all-purpose flour, plus 1½ tablespoons more for kneading
- ¾ teaspoon kosher salt
- ¾ cup lukewarm water (about 100-110°F)
- 2¼ teaspoons granulated sugar
- 1½ teaspoons active dry yeast
- ¼ cup lukewarm milk (about 100-110°F)
- 1½ tablespoons plain yogurt (full-fat works best)
- 3 tablespoons vegetable oil, plus more for brushing
- 2-3 large garlic cloves, finely grated
For the Garlic Butter:
- 3 tablespoons unsalted butter, melted
- 2 tablespoons fresh cilantro, chopped
- 3-4 cloves garlic, minced
Instructions
1. Prepare the Flour Mixture
In a large bowl, whisk together 2½ cups of flour and the salt until well combined. Set this aside while you prepare the wet ingredients.
2. Activate the Yeast
In the bowl of a stand mixer (or a large mixing bowl if kneading by hand), combine the lukewarm water, sugar, and active dry yeast. Stir gently to dissolve the sugar. Let this mixture sit undisturbed for 5 minutes. The yeast should bloom and become foamy on top. If it doesn't foam, your yeast is dead or your water was too hot, and you'll need to start over with fresh yeast.
3. Mix the Dough
Once the yeast is foamy, add the lukewarm milk, plain yogurt, 3 tablespoons of vegetable oil, and the finely grated garlic to the yeast mixture. Stir to combine. Add the flour mixture to the wet ingredients. If using a stand mixer, attach the dough hook and mix on low speed. The dough will be very sticky at first. Gradually add the remaining 1½ tablespoons of flour, a little at a time, until the dough is sticky but manageable and pulls away from the sides of the bowl. It should still be slightly tacky to the touch.
4. Knead the Dough
Knead the dough in the stand mixer on medium-low speed for 1-2 minutes, or knead by hand on a lightly floured surface for 3-4 minutes, until the dough is smooth and elastic. If the dough is still too sticky, add 1-2 more tablespoons of flour, but don't add too much or your naan will be tough. The dough should be soft and slightly sticky.
5. First Rise
Lightly grease a large bowl with oil or cooking spray. Transfer the dough to the greased bowl and turn it to coat all sides with oil. Cover the bowl tightly with plastic wrap or a damp kitchen towel. Place in a warm spot (like near a warm oven or in a turned-off oven with the light on) and let rise for 45-60 minutes, or until the dough has doubled in size. Check at 45 minutes since this smaller batch may rise faster.
6. Divide the Dough
Once the dough has doubled, punch it down to release the air. Transfer it to a lightly floured surface. Divide the dough into 6 equal portions and roll each portion into a smooth ball. Place the dough balls on a floured surface, cover with a damp towel, and let them rest for 10 minutes. This resting time makes them easier to roll out.
7. Make the Garlic Butter
While the dough balls rest, make your garlic butter. In a small bowl, combine the melted butter, chopped cilantro, and minced garlic. Stir well and set aside. Keep it warm so the butter stays melted.
8. Heat the Skillet
Place a cast iron skillet or heavy-bottomed pan over medium-high heat. Let it preheat for at least 3-5 minutes. You want the skillet very hot so the naan cooks quickly and develops those charred spots.
9. Roll Out the Naan
Working with one dough ball at a time (keep the others covered), roll it out on a lightly floured surface into an oval shape about 10-11 inches long and about ¼ inch thick. The shape doesn't have to be perfect, rustic is authentic! Brush one side lightly with vegetable oil.
10. Cook the Naan
Place the naan oiled-side down in the hot skillet. Within 30-60 seconds, you should see bubbles forming on the surface. Let it cook for 2-3 minutes until the bottom has golden brown spots and some charred marks. Don't move it around, let it sit and develop char.
11. Flip and Brush
Flip the naan to the other side. Immediately brush the cooked top with some of the garlic butter mixture while the second side cooks. Cook for another 2-3 minutes until the second side also has charred spots and is cooked through. The naan should puff up slightly in spots.
12. Finish and Keep Warm
Remove the naan from the skillet and brush the second side generously with more garlic butter. Place the finished naan on a plate and cover with a clean kitchen towel to keep warm and soft while you cook the remaining naan. Repeat the rolling and cooking process with the remaining dough balls.
13. Serve
Stack the warm, buttery naan on a serving platter and serve immediately with your favorite curry, dal, tikka masala, or any dish that needs delicious bread for scooping. Enjoy while warm!
Creole Chicken Alfredo Garlic Bread

This Creole Chicken Alfredo Garlic Bread is the kind of recipe that disappears in minutes and has everyone asking you for the recipe! It's basically everything delicious combined into one incredible dish: a crispy, buttery French baguette slathered with homemade herb garlic butter, topped with creamy homemade Alfredo sauce, perfectly seasoned Creole chicken, and melted mozzarella cheese that gets bubbly and golden under the broiler. The chicken gets marinated in Creole Kick Carnival and Garlic of Eden seasonings from my Flora & Mana spice line, which bring bold, savory, slightly spicy flavors with hints of garlic, herbs, and that classic Creole kick. Once the chicken is cooked until golden and juicy, it gets sliced and layered on top of the garlic bread base. The Alfredo sauce is made from scratch in the same skillet where you cooked the chicken, so it picks up all those delicious browned bits and flavors, creating this rich, creamy, garlicky sauce made with heavy cream, butter, Parmesan cheese, and fresh garlic. The herb butter that goes on the baguette is a game-changer too, softened butter mixed with fresh garlic and parsley that gets spread generously on the bread and baked until golden and fragrant. Once everything is assembled and topped with shredded mozzarella, it bakes until the cheese is melted and bubbly, then gets a quick broil for that crispy, slightly charred top. The result is this incredible combination of crispy, buttery bread, creamy Alfredo sauce, flavorful chicken, and gooey melted cheese that's perfect as an appetizer, party food, game day snack, or even a fun dinner. Fair warning: you might want to double this recipe because it goes fast!
This Creole Chicken Alfredo Garlic Bread is the ultimate crowd-pleaser! Crispy French baguette gets slathered with homemade herb garlic butter, topped with creamy Alfredo sauce, Creole-seasoned chicken, and melted mozzarella. Baked until bubbly and broiled for crispy cheese on top, it's the perfect combination of garlic bread and chicken Alfredo in every bite. Make a double batch because it disappears fast!
Rate This Recipe!
Preparations
Prep Time:
15 minutes
Cook Time:
25 minutes
Total Time:
40 minutes
Cuisine:
Creole, American
Course:
Appetizer, Main Course, Dinner
Calories:
420 kcal (approx. per serving)
Servings:
4-6
Author:
Ronica Rupan
Ingredients
Ingredients
For the Chicken:
- 2 butterflied chicken breasts (about 1-1½ pounds total)
- 2 teaspoons Creole Kick Carnival seasoning, divided ( www.Floraandmana.com )
- 2 teaspoons Garlic of Eden seasoning, divided ( www.Floraandmana.com )
- 4 tablespoons olive oil, divided
For the Herb Butter:
- ½ cup unsalted butter, softened to room temperature
- 3 cloves garlic, minced
- 2 tablespoons fresh parsley, chopped
For the Alfredo Sauce:
- 2 tablespoons unsalted butter
- 1 cup heavy cream
- 3 cloves garlic, minced
- ¼ cup grated Parmesan cheese
For Assembly:
- 1 large French baguette, halved lengthwise
- 1 cup shredded mozzarella cheese
- Fresh parsley, chopped, for garnish
Instructions
1. Marinate and Season the Chicken
In a small bowl, mix together 1 teaspoon of Creole Kick Carnival seasoning, 1 teaspoon of Garlic of Eden seasoning, and 2 tablespoons of olive oil. Place the butterflied chicken breasts in a shallow dish and coat them completely with the seasoning mixture, massaging it into both sides. Let the chicken marinate for 10 minutes at room temperature while you prepare the other components. This allows the flavors to penetrate the meat.
2. Cook the Chicken
Heat the remaining 2 tablespoons of olive oil in a large skillet over medium heat. Once the oil is hot and shimmering, add the marinated chicken breasts. Cook for 6-7 minutes on the first side without moving them, until they develop a nice golden-brown crust. Flip and cook for another 6-7 minutes on the second side. The chicken is done when the internal temperature reaches 165°F and the juices run clear. Transfer the chicken to a cutting board and let it rest for 5 minutes, then slice into strips. Don't wash the skillet, you'll use those flavorful browned bits for the Alfredo sauce!
3. Make the Herb Butter
While the chicken cooks, combine the softened butter, minced garlic, and chopped fresh parsley in a small bowl. Mix together with a fork until everything is evenly combined and the garlic and parsley are distributed throughout the butter. Set aside at room temperature so it stays soft and spreadable.
4. Toast the Baguette
Preheat your oven to 375°F (190°C). Slice the French baguette in half lengthwise so you have two long pieces. Place them cut-side up on a large baking sheet. Spread the herb butter generously over both cut sides of the baguette, making sure to cover all the surface area. Bake for 5-7 minutes until the bread is lightly toasted and golden brown around the edges. The butter should be melted and the garlic fragrant. Remove from the oven and set aside.
5. Make the Alfredo Sauce
Reduce the heat under your chicken skillet to low (don't clean it out, those browned bits add flavor!). Add 2 tablespoons of butter to the skillet and let it melt. Pour in the heavy cream and add the minced garlic. Stir everything together, scraping up any browned bits from the bottom of the pan. Let the mixture simmer gently for about 5 minutes, stirring occasionally, until it thickens enough to coat the back of a spoon. The sauce should reduce by about one-third. Whisk in the grated Parmesan cheese until it's completely melted and the sauce is smooth and creamy. Remove from heat.
6. Assemble the Garlic Bread
Place the toasted baguette halves on your baking sheet. Spoon the creamy Alfredo sauce over both baguette halves, spreading it evenly but not too thick, you want a nice coating that doesn't make the bread soggy. Layer the sliced Creole chicken evenly over the Alfredo sauce on both halves. Sprinkle the shredded mozzarella cheese generously over the top, covering all the chicken and sauce.
7. Bake Until Bubbly
Place the assembled garlic bread back in the 375°F oven. Bake for 10 minutes until the cheese is melted and starting to bubble. You'll see the edges getting golden and the cheese should be completely melted.
8. Broil for Crispiness
After baking, turn your oven to broil on high. Move the baking sheet to the top rack, about 6 inches from the broiler. Broil for 2-3 minutes, watching carefully, until the cheese gets golden brown spots and slightly crispy on top. Don't walk away during broiling as it can go from perfect to burnt very quickly!
9. Garnish and Serve
Remove from the oven immediately. Sprinkle fresh chopped parsley over the top for color and freshness. Let it cool for just 1-2 minutes, then slice into pieces using a sharp serrated knife. Serve immediately while hot and crispy. Watch it disappear!
Soup Dumpling Lasagna

This Viral Soup Dumpling Lasagna is the TikTok trend that's actually worth the hype! If you love soup dumplings but hate all the folding and pleating, this genius recipe gives you all the flavors of xiao long bao in a fraction of the time. Instead of individually wrapping dozens of dumplings, you layer seasoned ground turkey filling with wonton wrappers right in individual ramekins, like you're making the world's cutest lasagnas. The filling is packed with classic dumpling flavors: savory ground turkey mixed with finely chopped napa cabbage for texture and moisture, fresh ginger and garlic for aromatic punch, and a combo of sesame oil, tamari, oyster sauce, and mirin that creates that umami-rich, slightly sweet flavor you'd find in traditional dumplings. The magic happens when you pour a little water into each ramekin before steaming, this water gets absorbed by the wonton wrappers and turkey as everything steams together, creating that signature soupy, brothy quality that makes soup dumplings so special. After 20 minutes of steaming, the wonton wrappers become tender and silky, the turkey is perfectly cooked and juicy, and each bite delivers that incredible combination of savory filling and delicate wrapper in one spoonful. Top with sliced green onions for freshness and chili oil for heat, and you've got individual portions that are perfect for serving at dinner parties, meal prep, or just treating yourself to something special. It's like eating a soup dumpling without all the tedious folding work, and honestly, it might be even better because you get more filling and broth in every bite!
Frequently Asked Questions
Q: Can I make this vegetarian or vegan?
A: Absolutely! This recipe adapts beautifully to vegetarian and vegan diets. For the filling, replace the ground turkey with finely crumbled firm or extra-firm tofu (make sure to press it really well to remove excess moisture first, or your filling will be too wet), or use your favorite plant-based ground meat like Beyond Meat or Impossible. You could also use a mixture of finely chopped mushrooms (shiitake work great!) mixed with crumbled tofu for extra umami flavor and texture. For the sauces, make sure to use a vegetarian oyster sauce (made from mushrooms instead of oysters, brands like Lee Kum Kee make a vegetarian version), or substitute with hoisin sauce or extra tamari. Everything else in the recipe is already plant-based! The vegetarian version is just as flavorful and satisfying, you still get that amazing dumpling experience without the meat.
Q: What if I don't have ramekins? Can I use something else?
A: Yes! You can use any small, oven-safe or steamer-safe dishes. Small ceramic bowls (about 4-6 oz), silicone muffin cups (the large ones), small Mason jars, or even heatproof teacups work great. You could also make one large version in a bigger baking dish, just increase the steaming time to 30-35 minutes and make sure the turkey is cooked through in the center. The individual ramekins are nice for portion control and presentation, but the recipe is very flexible. Just make sure whatever vessel you use can handle steam and heat, and fits in your steaming pot with room for water around it.
Q: My wonton wrappers tore when I was layering. What am I doing wrong?
A: Wonton wrappers are delicate! Here are some tips: Let them come to room temperature before using, cold wrappers are more brittle and tear easily. Keep unused wrappers covered with a damp towel while you work so they don't dry out. Press gently when layering, don't push down hard or they'll tear. If a wrapper does tear, just patch it with another piece, it won't matter once it's cooked. Make sure you're using fresh wonton wrappers, not ones that have been in your fridge for weeks and dried out. Round wrappers work best for fitting in ramekins, but square ones work fine too, you just fold them to fit. The steaming process is very forgiving, even slightly torn wrappers will steam together and taste delicious!
Q: Can I make these ahead of time and reheat them?
A: Yes, but they're definitely best fresh! You can assemble the ramekins completely (through step 4, adding the water and topping with the final wrapper), cover them tightly with plastic wrap, and refrigerate for up to 24 hours before steaming. When ready to cook, steam directly from the fridge, just add an extra 5 minutes to the steaming time. After cooking, these are best enjoyed immediately while hot, but leftovers can be stored in the fridge for 1-2 days and reheated gently in the microwave for 1-2 minutes. The texture won't be quite as perfect as fresh, the wrappers may get a bit softer and the filling slightly drier, but they'll still taste great. You could also freeze them uncooked, wrap each ramekin in plastic wrap and foil, freeze for up to 1 month, then steam from frozen for 30-35 minutes.
Rate This Recipe!
Preparations
Prep Time:
15 minutes
Cook Time:
20 minutes
Total Time:
35 minutes
Cuisine:
Asian-inspired, Chinese
Course:
Appetizer, Main Course, Dinner
Calories:
280 kcal (approx. per ramekin)
Servings:
4 ramekins
Author:
Ronica Rupan
Ingredients
Ingredients
For the Filling:
- ¾ pound ground turkey
- 1 cup napa cabbage, finely chopped
- 3 green onions, finely sliced (plus more for garnish)
- 1 tablespoon fresh ginger, minced
- 5 cloves garlic, minced
- 2 tablespoons sesame oil
- 2 tablespoons tamari sauce (or soy sauce)
- 1 tablespoon vegetable oyster sauce
- 1 tablespoon mirin (rice wine)
For Assembly:
- 1 package round wonton wrappers
- 8-12 tablespoons water (about 2-3 tablespoons per ramekin)
For Garnish:
- Chili oil, for drizzling
- Green onions, sliced
- Optional: sesame seeds, cilantro
Instructions
1. Make the Filling
In a large mixing bowl, combine the ground turkey, finely chopped napa cabbage, sliced green onions, minced ginger, minced garlic, sesame oil, tamari sauce, vegetable oyster sauce, and mirin. Use your hands or a fork to mix everything together thoroughly until all the seasonings are evenly distributed throughout the meat and vegetables. The mixture should be well combined and slightly sticky. Make sure the cabbage is chopped very fine so it cooks through during steaming.
2. Start Layering the First Layer
Grab four 4-ounce ramekins and place them on your work surface. Add about 2 tablespoons of the turkey mixture to the bottom of each ramekin, spreading it evenly across the bottom and pressing it down gently to create a flat layer. Place one round wonton wrapper on top of the filling, pressing it down gently so it adheres to the meat. The wrapper should cover most of the filling.
3. Continue Layering
Add another 2 tablespoons of the turkey filling on top of the wonton wrapper, spreading it evenly. Place another wonton wrapper on top, pressing gently. Continue this alternating pattern, filling then wrapper, filling then wrapper, until your ramekins are layered almost to the top. You should be able to fit about 3-4 layers of filling and wrappers depending on how generously you pack each layer. Leave just a little room at the top for the final wrapper and water.
4. Add Water and Top
Once your ramekins are layered almost to the rim, pour 2-3 tablespoons of water into each ramekin, pouring it gently over the top layer of filling. This water is crucial, it creates the steam that cooks the filling and gives you that signature "soup dumpling" brothy quality. Top each ramekin with one final wonton wrapper to seal everything in, pressing the edges gently against the sides of the ramekin.
5. Prepare for Steaming
Place the filled ramekins into a large pot or Dutch oven that's wide enough to fit all four ramekins with a little space between them. Carefully pour water into the pot (not into the ramekins!) until it comes about halfway up the sides of the ramekins. The ramekins should be sitting in the water bath. Cover the pot with a tight-fitting lid.
6. Steam
Place the pot over medium-high heat and bring the water to a boil. Once boiling, reduce the heat to medium to maintain a steady simmer. Steam for 20 minutes without lifting the lid. The turkey should be fully cooked through (internal temperature of 165°F), and the wonton wrappers should be tender, translucent, and soft.
7. Check for Doneness
After 20 minutes, carefully lift the lid (watch out for the steam!). To test for doneness, insert an instant-read thermometer into the center of one ramekin. The turkey should reach an internal temperature of 165°F to be safe to eat. The meat should be fully cooked with no pink remaining, and the wonton wrappers should be soft and tender. If the internal temperature hasn't reached 165°F, cover and steam for an additional 3-5 minutes, then check again. Food safety is important, so don't skip this step!
8. Remove and Garnish
Carefully remove the ramekins from the pot using tongs, a towel, or silicone oven mitts. They will be extremely hot, so be careful! Let them cool for 1-2 minutes. Garnish each ramekin with freshly sliced green onions and a generous drizzle of chili oil. You can also add sesame seeds or fresh cilantro if desired.
9. Serve
Serve the soup dumpling lasagnas warm, straight from the ramekin with a spoon. Each person gets their own individual portion. Break through the layers with your spoon to get filling, wrapper, and that delicious soupy broth in every bite. Enjoy immediately while hot!
Homemade Oat Flour
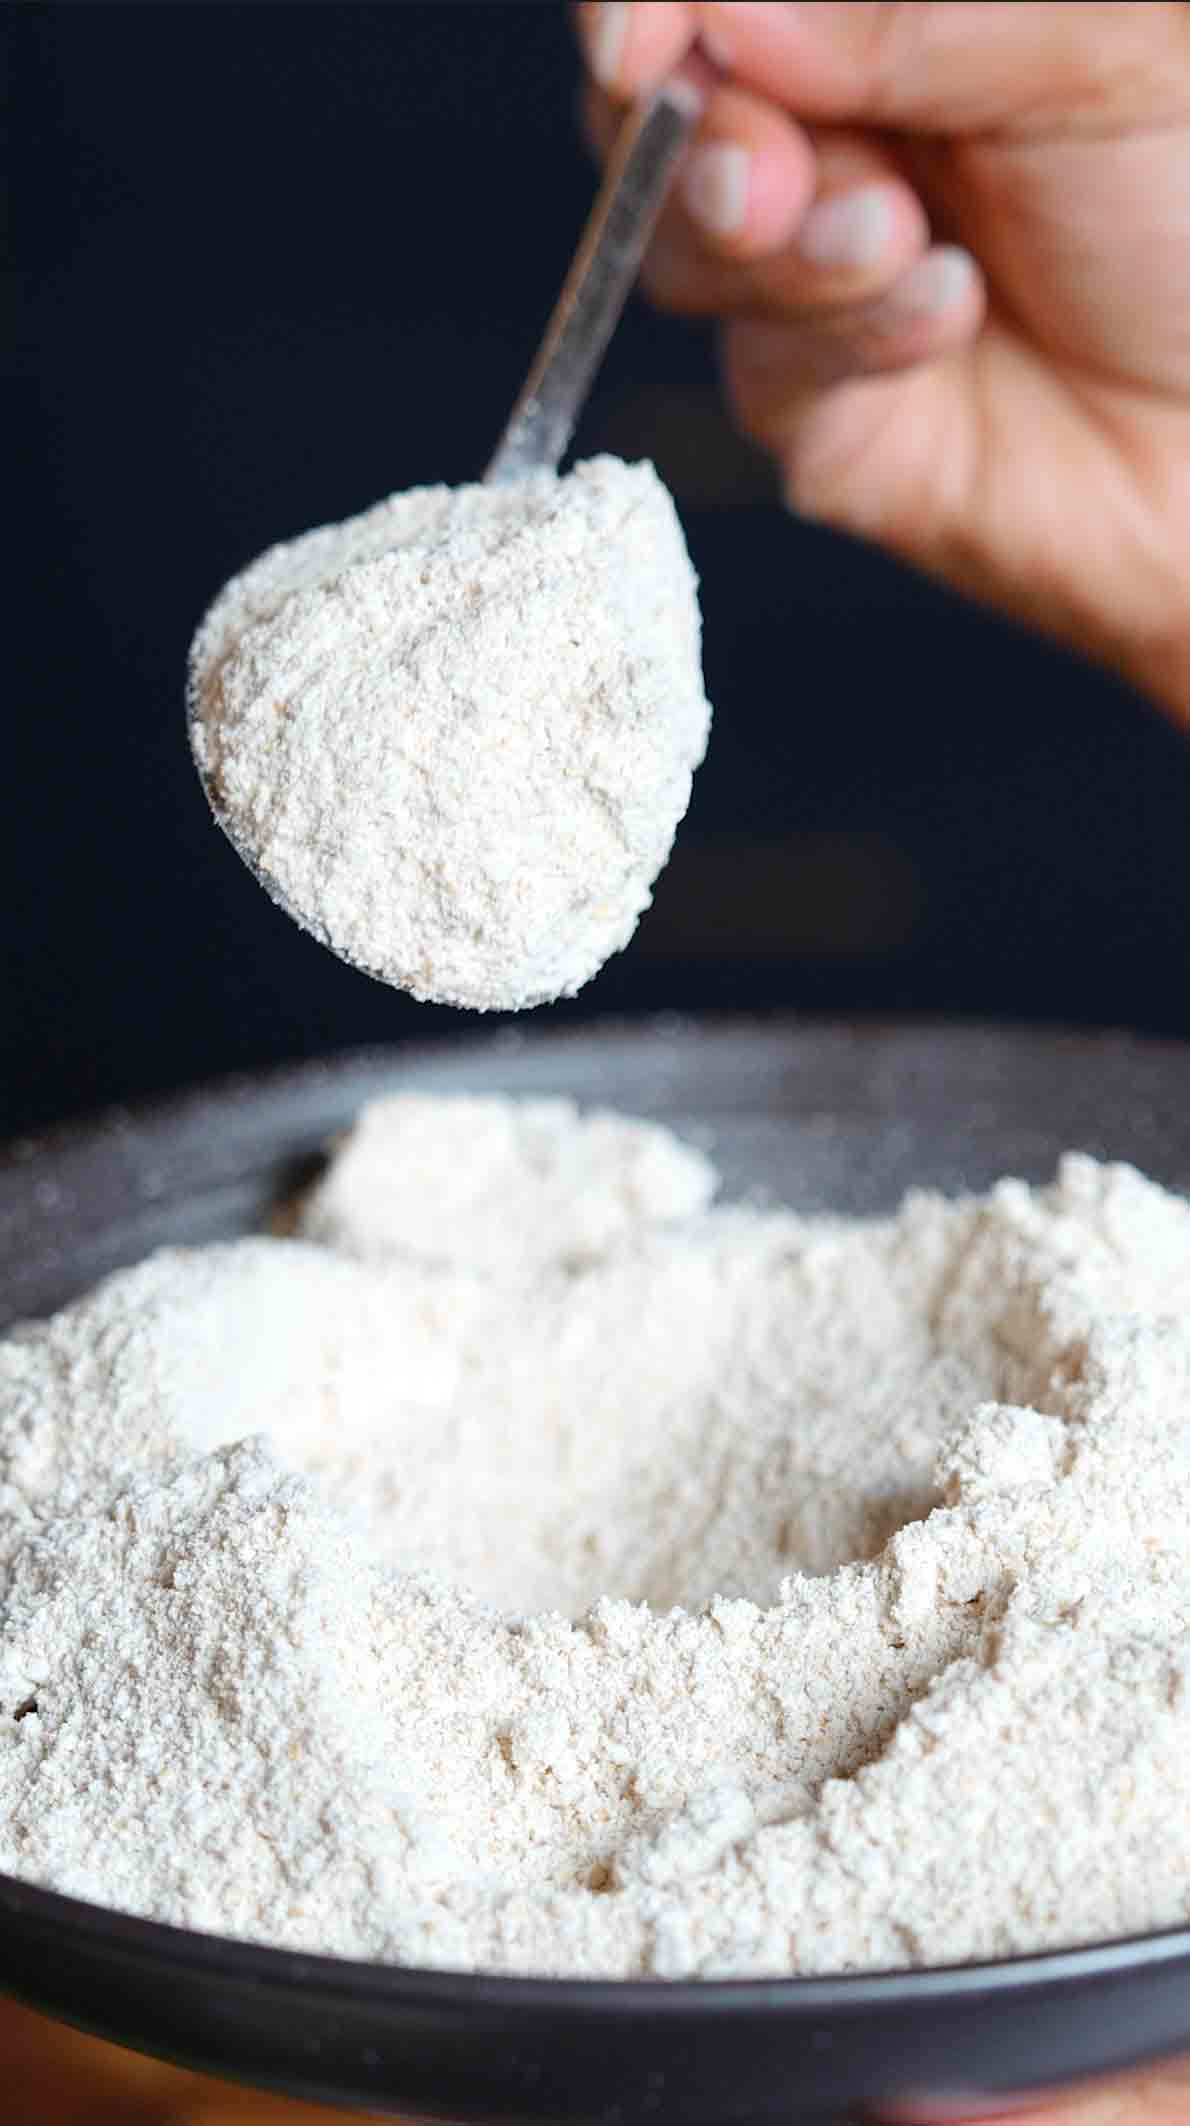
This Homemade Oat Flour is one of those kitchen hacks that'll save you money and a trip to the store! Did you know that if you take regular rolled oats and blend them in a blender or food processor for just ten to twenty seconds, you've just made yourself oat flour? It's that simple! No special equipment needed, no fancy ingredients, just oats and a few seconds of blending. Oat flour is naturally gluten-free when you use certified gluten-free oats, making it perfect for anyone with gluten sensitivities or celiac disease who still wants to bake delicious treats. It's also way cheaper than buying pre-made oat flour at the store, you're basically paying for the convenience of someone else blending oats for you. You can use homemade oat flour in any baking recipe that specifically calls for oat flour, like muffins, pancakes, cookies, scones, fruit crumbles, quick breads, and so much more. It adds a subtle nutty, slightly sweet flavor and creates baked goods that are tender and moist. The texture is finer than regular oats but still has that wholesome quality that makes everything taste homemade and wholesome. Keep a batch in your pantry in an airtight container and you'll always have it on hand when a recipe calls for it, no last-minute store runs required. This is one of those simple kitchen staples that once you start making yourself, you'll wonder why you ever bought it pre-made!
Frequently Asked Questions
Q: Can I use oat flour as a direct 1:1 substitute for all-purpose flour in any recipe?
A: No, oat flour cannot be used as a 1:1 substitute for all-purpose flour or gluten-free flour blends in recipes that weren't specifically designed for oat flour. Oat flour behaves very differently because it lacks gluten, which means it doesn't provide the same structure and rise that wheat flour does. If you substitute oat flour directly for all-purpose flour in a regular cake or bread recipe, your baked goods will likely be dense, crumbly, and won't rise properly. Oat flour works best in recipes specifically written for it, or in recipes where you're only replacing a portion of the flour (like 25-30% of the total flour can be oat flour). For best results, use oat flour in recipes that call for it specifically, like oat flour muffins, pancakes, or cookies.
Q: Is oat flour really gluten-free, or do I need special oats?
A: Oats themselves are naturally gluten-free, but they're often processed in facilities that also handle wheat, barley, and rye, which means regular oats can be contaminated with gluten through cross-contact. If you need truly gluten-free oat flour (for celiac disease or severe gluten sensitivity), you must use Certified Gluten-Free oats like Bob's Red Mill Gluten Free Oats or other certified brands that are processed in dedicated gluten-free facilities. These will have a label that says "Certified Gluten Free" on the package. If you don't have celiac disease or aren't strictly avoiding gluten, regular oats work fine for making oat flour. Just check the label and buy certified GF oats if you need them!
Q: How much oat flour do I get from whole oats, and how do I measure it?
A: Generally, 2 cups of whole rolled oats will yield approximately 1½ cups of oat flour after blending, though this can vary slightly depending on how finely you grind them and how you measure. Here's the best way to measure oat flour: After blending, use a spoon to scoop the flour into your measuring cup, then level it off with a knife. Don't pack it down or shake the cup, as this will give you more flour than the recipe intends and can make your baked goods dense. If a recipe calls for 1 cup of oat flour, start with about 1⅓ cups of whole oats. It's always better to make a little extra so you have enough!
Q: How long does homemade oat flour stay fresh, and how should I store it?
A: Homemade oat flour stays fresh for about 3 months when stored properly in an airtight container in a cool, dry place like your pantry. For even longer storage (up to 6 months), keep it in the refrigerator, or freeze it for up to a year. Because oat flour contains the natural oils from the oats, it can go rancid if stored too long at room temperature, especially in warm climates. You'll know it's gone bad if it smells stale or off. Store it in a glass jar, airtight plastic container, or sealed bag with as much air removed as possible. Label it with the date you made it so you can keep track. If you only bake occasionally, make smaller batches (1 cup of oats at a time) so it stays fresh!
This Homemade Oat Flour takes just 2 minutes to make! Blend rolled oats in a food processor or blender for 10-20 seconds and you've got fresh oat flour that's gluten-free, cheaper than store-bought, and perfect for any baking recipe. Use it in muffins, cookies, pancakes, scones, and more. It's one of those kitchen hacks that'll save you money and trips to the store!
Rate This Recipe!
Preparations
Prep Time:
2 minutes
Total Time:
2 minutes
Cuisine:
American
Course:
Kitchen Essentials, Baking
Calories:
N/A (depends on usage)
Servings:
Makes about 1½ cups oat flour (from 2 cups oats)
Author:
Ronica Rupan
Ingredients
Instructions
1. Add Oats to Food Processor or Blender
Place 2 cups of whole rolled oats into your food processor or high-speed blender. Make sure the container is dry and the oats are at room temperature.
2. Blend Until Fine
Blend or process the oats on high speed for 10-20 seconds, until they become a fine, powdery flour. Stop the machine halfway through to scrape down the sides and stir the oats around if needed, then continue blending. The oats should transform from flakes into a flour that looks and feels like whole wheat flour, fine and powdery but not as silky as all-purpose flour.
3. Check Consistency
Stop and check the texture. If there are still large oat pieces, blend for another 5-10 seconds. You want it to be as fine as possible for baking, but a few tiny pieces are okay.
4. Use or Store
Use the oat flour immediately in any recipe that calls for oat flour, or transfer it to an airtight container. Store in a cool, dry place for up to 3 months, in the refrigerator for up to 6 months, or in the freezer for up to 1 year.
Sleepy Girl Mocktail
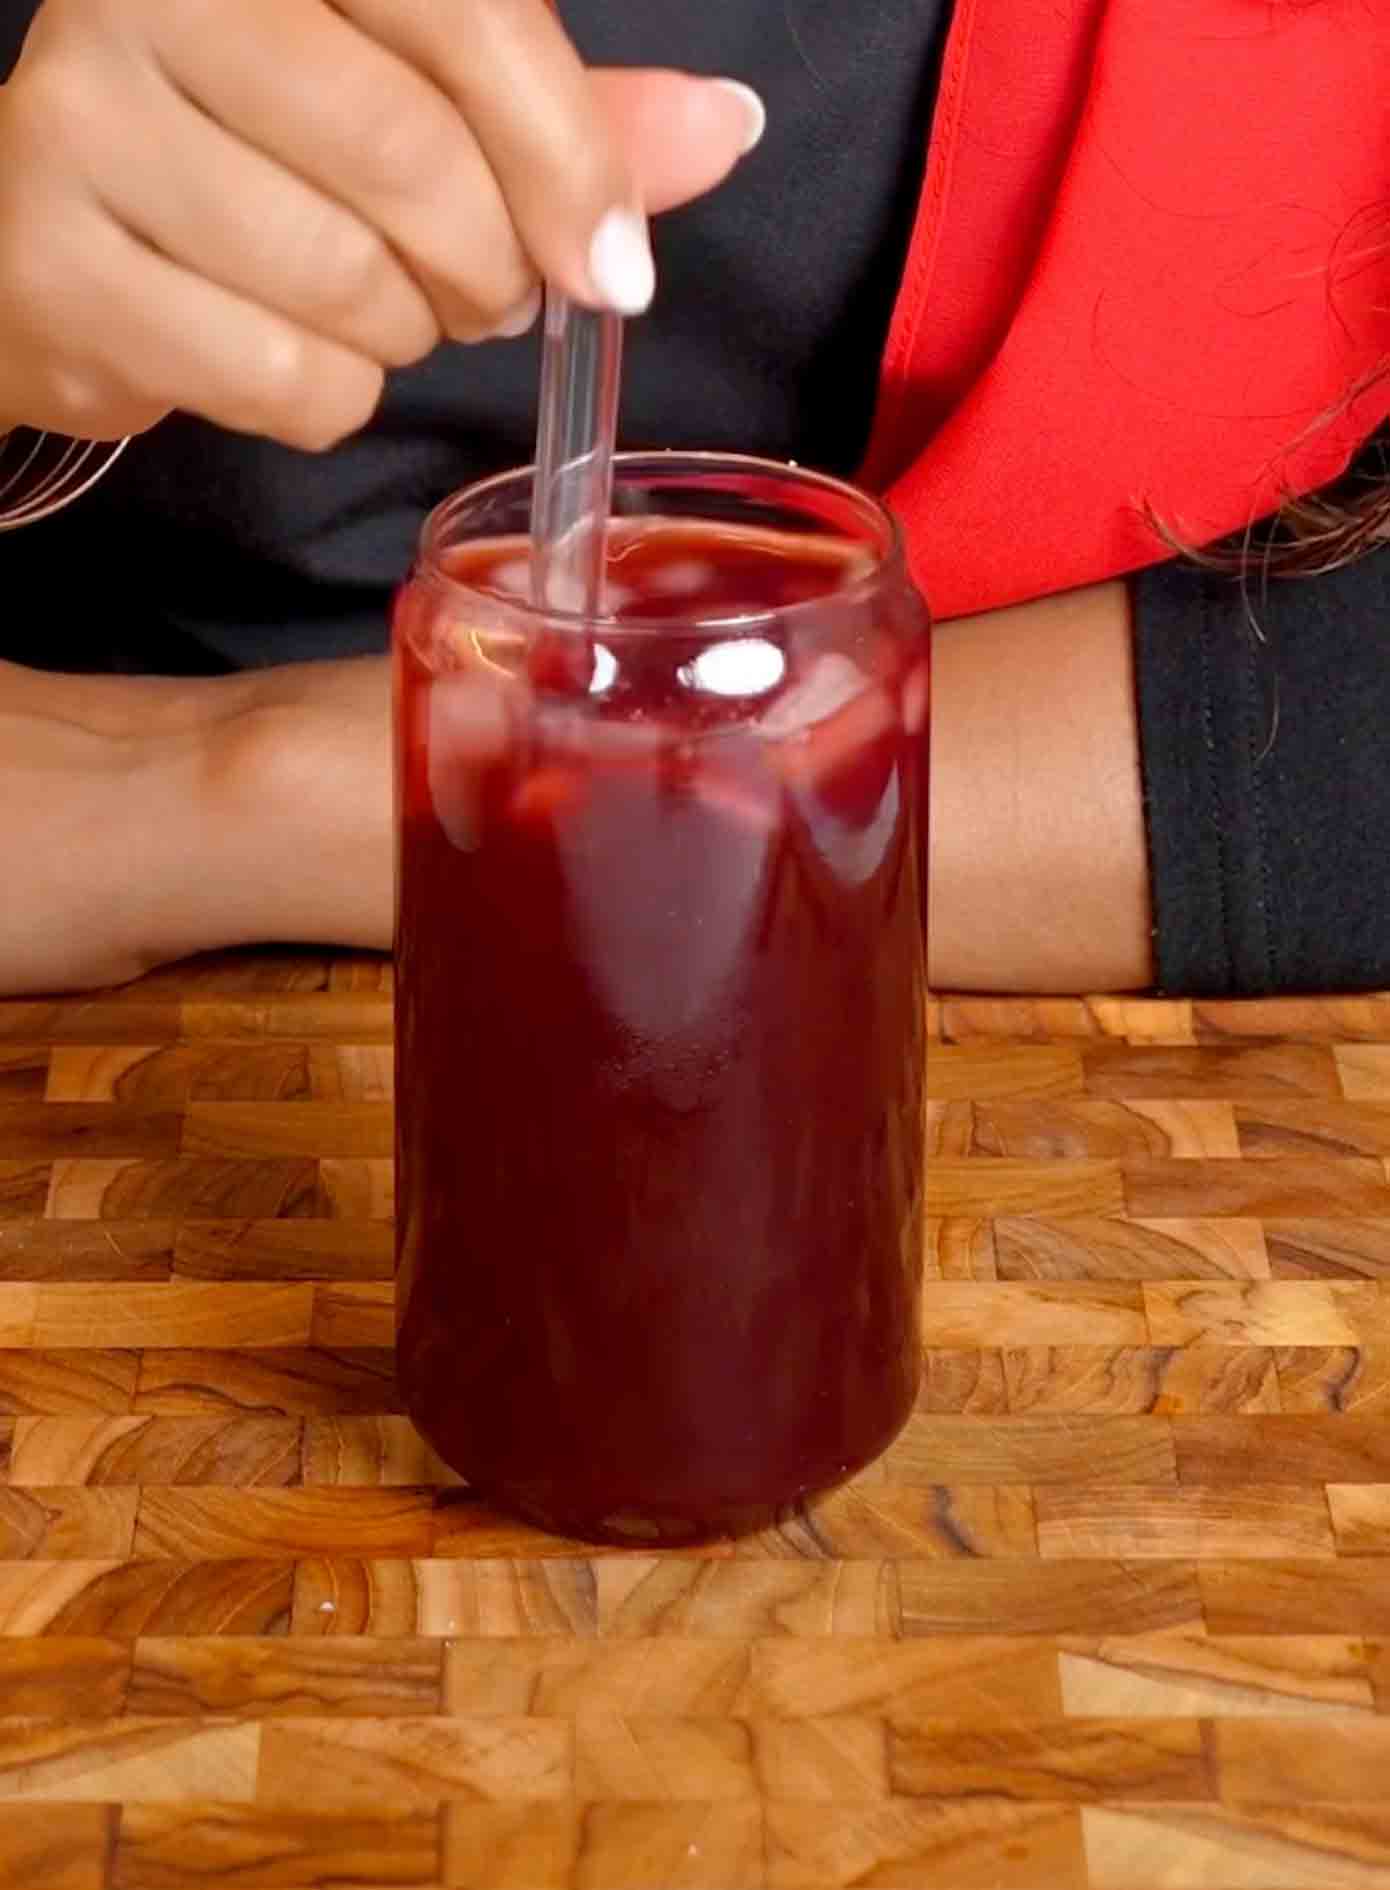
This Sleepy Girl Mocktail is the viral drink that's actually backed by science to help you sleep better! It's a simple combination of tart cherry juice, which naturally contains melatonin to help you fall asleep faster and has anti-inflammatory properties that can reduce muscle soreness, magnesium glycinate supplement that supports relaxation and deeper sleep by calming your nervous system and easing anxiety, prebiotic soda that feeds the good bacteria in your gut for better digestion and overall wellness, and a squeeze of fresh lemon for vitamin C and a refreshing citrus kick. The beauty of this mocktail is that it tastes delicious, like a fruity, fizzy drink you'd want to sip anyway, but it's actually working behind the scenes to prepare your body for better sleep. The tart cherry juice provides natural melatonin without the grogginess of supplements, the magnesium helps your muscles relax and your mind calm down after a long day, the prebiotic soda supports your gut health which is increasingly linked to better sleep quality, and the lemon adds brightness while helping your body detoxify. It's perfect for anyone who doesn't drink, struggles with falling asleep or staying asleep, wants a healthier nighttime routine instead of scrolling on their phone, or just loves a delicious mocktail that happens to have incredible benefits. Make this about 30-60 minutes before bed, sip it slowly while you wind down, and let all those sleep-supporting ingredients do their job!
Frequently Asked Questions
Q: Does this mocktail really help you sleep, or is it just a trend?
A: There's actually real science behind this! Tart cherry juice is one of the few natural food sources of melatonin, the hormone that regulates your sleep-wake cycle. Studies have shown that drinking tart cherry juice can increase sleep time and improve sleep quality. Magnesium glycinate is known for its calming effects on the nervous system and can help reduce anxiety and promote deeper sleep. The gut-brain connection is real, so the prebiotics support your overall wellness which can indirectly affect sleep quality. That said, this isn't a magic cure for serious sleep disorders, it's more of a gentle, natural sleep support. Results vary by person, but many people report falling asleep faster and feeling more relaxed after making this part of their nighttime routine for a week or two.
Q: What type of magnesium should I use, and how much?
A: Magnesium glycinate is the best form to use for sleep because it's highly absorbable and less likely to cause digestive issues compared to other forms like magnesium citrate or oxide. The typical dose for sleep support is 200-400mg taken about 30-60 minutes before bed, but you should follow the dosage recommended on your supplement bottle or by your healthcare provider. You can use magnesium powder that dissolves in liquid (which mixes right into the mocktail) or take a magnesium capsule separately while drinking the mocktail. If you're new to magnesium supplementation, start with a lower dose to see how your body responds. And as always, check with your doctor before starting any new supplement, especially if you're on medications or have health conditions.
Q: When should I drink this for the best results?
A: For optimal sleep benefits, drink this Sleepy Girl Mocktail about 30-60 minutes before you plan to go to bed. This gives the tart cherry juice time to start working and the magnesium time to be absorbed and begin its calming effects. Don't drink it too early in the evening (like right after dinner) or you might miss the peak benefits when you're actually trying to fall asleep. Make it part of your wind-down routine, drink it while you're doing relaxing activities like reading, gentle stretching, or taking a warm bath, not while you're watching intense TV or scrolling on your phone. Consistency is key, many people find that the sleep benefits compound over time when they drink this regularly for at least a week or two. And avoid drinking it right before bed if you have a small bladder, since you don't want to wake up needing to use the bathroom!
Q: Can I make this without the prebiotic soda? What can I substitute?
A: Absolutely! While prebiotic soda adds gut health benefits and fizz, it's not essential. You can substitute with plain sparkling water or club soda for the fizz without the prebiotics, kombucha which has probiotics and a bit of fizz (though it has a tiny amount of naturally occurring sugar), regular still water if you don't care about carbonation, or coconut water for added electrolytes. You could also use any flavored sparkling water you like. The main sleep-supporting ingredients are the tart cherry juice and magnesium, so the soda is more of a bonus for gut health and making it taste more like a fun mocktail. If you do use plain sparkling water, you might want to add a tiny splash of another juice or a bit of honey for flavor since you'll lose the sweetness from the prebiotic soda.
This Sleepy Girl Mocktail is the viral drink that helps you sleep better! Tart cherry juice provides natural melatonin, magnesium supplement supports relaxation and deeper sleep, prebiotic soda feeds good gut bacteria, and fresh lemon adds vitamin C and brightness. It tastes like a delicious fruity mocktail but actually helps you fall asleep faster and sleep more soundly. Perfect for winding down 30-60 minutes before bed!
Rate This Recipe!
Preparations
Prep Time:
3 minutes
Total Time:
3 minutes
Cuisine:
American
Course:
Drinks
Calories:
80 kcal (approx. per serving)
Servings:
1
Author:
Ronica Rupan
Ingredients
Ingredients
- ½ cup tart cherry juice (unsweetened or lightly sweetened)
- 1 serving magnesium glycinate supplement (200-400mg, powder or taken separately as capsule)
- ¾ cup prebiotic soda (any flavor, or substitute with sparkling water)
- Juice of ½ lemon (about 1 tablespoon)
- Ice cubes
- Optional: fresh mint or lemon wheel for garnish
Instructions
1. Fill Your Glass
Fill a tall glass with ice cubes. The more ice you use, the colder and more refreshing your mocktail will be.
2. Add Tart Cherry Juice
Pour ½ cup of tart cherry juice over the ice. Look for 100% tart cherry juice or a lightly sweetened version, not cherry juice cocktail which has added sugar.
3. Add Magnesium
If you're using magnesium glycinate powder, stir it directly into the glass until it dissolves completely. If you're using capsules, take them separately while drinking the mocktail.
4. Pour in Prebiotic Soda
Slowly pour ¾ cup of your favorite prebiotic soda over the tart cherry juice. Pour gently so it doesn't fizz over. Any flavor works, but raspberry, strawberry, or lemon flavors pair especially well with tart cherry.
5. Add Lemon
Squeeze the juice of half a lemon into the glass. This adds brightness, vitamin C, and helps balance the tartness of the cherry juice with the sweetness of the soda.
6. Stir Gently
Give everything a gentle stir to combine all the ingredients. Don't stir too vigorously or you'll lose all the bubbles from the soda.
7. Garnish and Enjoy
If you want to make it pretty, garnish with a sprig of fresh mint or a lemon wheel on the rim. Sip slowly about 30-60 minutes before bed as part of your wind-down routine. Enjoy and sleep well!
Strawberries & Cream Yogurt Protein Smoothie

This Strawberries & Cream Yogurt Protein Smoothie is creamy, naturally sweet, and packed with over 30 grams of protein that keeps you full and fueled for hours! If you're looking for a smoothie that tastes indulgent but is actually incredibly good for you, this is it. The base is thick, tangy Greek yogurt that's loaded with protein and probiotics to support gut health, blended with fresh or frozen strawberries for natural sweetness and vitamin C. Instead of added sugar, soft Medjool dates provide that creamy sweetness along with fiber and natural energy. A scoop of probiotic collagen powder boosts the protein even more while supporting skin elasticity, joint health, and gut function with beneficial probiotics. Chia seeds add fiber, omega-3 fatty acids, and a subtle nutritional boost without changing the texture much, especially if you soak them first for a smoother blend. Vanilla paste brings warmth and that classic strawberries-and-cream flavor that makes this taste like dessert. The texture is thick and creamy, almost like a milkshake, but you can adjust it with more or less water depending on whether you want it drinkable or spoonable like a smoothie bowl. The optional coconut cream swirl on the inside of the glass is a game-changer, it looks gorgeous, adds extra creaminess, and makes you feel like you're drinking something from a fancy café. This smoothie is naturally gluten-free, can easily be made dairy-free by swapping the Greek yogurt for coconut yogurt, and it's the kind of breakfast or snack that actually keeps you satisfied instead of leaving you hungry an hour later. It's perfect for busy mornings when you need something quick but nourishing, post-workout fuel to help your muscles recover, or anytime you want something sweet that won't spike your blood sugar thanks to all that protein and fiber!
Frequently Asked Questions
Q: Can I make this without collagen powder?
A: Yes! While the collagen powder adds about 20g of protein and may help support skin, hair, and joint health, you can make this smoothie without it. If you skip the collagen, you'll have about 15-18g of protein from the Greek yogurt alone, which is still pretty good. To keep the protein content high, you could substitute with a scoop of vanilla protein powder (whey, pea, or plant-based all work), add an extra ¼ cup of Greek yogurt, or stir in 2 tablespoons of hemp seeds which add protein and healthy fats. The smoothie will still be delicious and nutritious without the collagen, you just won't get those specific collagen benefits for skin elasticity and joint support.
Q: My smoothie is too thick and won't blend properly. What should I do?
A: This is a common issue with high-protein, thick smoothies! Here's how to fix it: First, stop the blender and use a tamper (if you have one) to push the ingredients down toward the blades while blending. If you don't have a tamper, stop the blender, open it, and use a spatula to scrape down the sides and stir everything toward the center, then blend again. Add more liquid, start with 2 tablespoons of water at a time until it reaches your desired consistency and blends smoothly. You can also add a few ice cubes which helps the blades catch the ingredients. For future smoothies, add your liquids first (yogurt and water), then the solid ingredients on top, this helps with blending. A high-speed blender like a Vitamix or Ninja works best for thick smoothies like this.
Q: How long will this smoothie stay fresh if I want to make it ahead?
A: This smoothie is best enjoyed fresh right after blending, but you can store it in the refrigerator for up to 24 hours in an airtight container or mason jar. The texture and flavor are optimal within the first 4-6 hours. After sitting, it will thicken up considerably and may separate slightly, just give it a good shake or stir before drinking. If it's too thick after refrigerating, add a splash of water and shake well. The chia seeds will continue to absorb liquid and swell, making the smoothie thicker over time. For the best texture, I recommend making it fresh when you're ready to drink it. If you want to meal prep, prepare smoothie packs with all the dry ingredients and frozen strawberries in bags, then just add yogurt, water, and blend when ready!
Q: Can I use regular yogurt instead of Greek yogurt?
A: You can, but the results will be different! Greek yogurt is strained to remove most of the whey, which makes it much thicker and higher in protein (about 15-20g per ¾ cup) compared to regular yogurt (about 6-8g per ¾ cup). If you use regular yogurt, your smoothie will be thinner and less creamy, and you'll lose about half the protein content. To compensate, you could use less water (maybe 3-4 tablespoons instead of 6), add an extra scoop of protein powder to boost protein, or use skyr (Icelandic yogurt) which is similar to Greek yogurt in thickness and protein. If you only have regular yogurt on hand, go ahead and use it, just know the texture will be more like a traditional smoothie rather than that thick, milkshake-like consistency!
This Strawberries & Cream Yogurt Protein Smoothie is creamy, naturally sweet, and packed with over 30 grams of protein! Greek yogurt, fresh strawberries, Medjool dates, and collagen powder blend together for a smoothie that tastes like a milkshake but supports gut health, skin health, and keeps you full for hours. The chia seeds add fiber and omega-3s, while the optional coconut cream swirl makes it feel extra special. It's the perfect high-protein breakfast or post-workout snack!
Rate This Recipe!
Preparations
Prep Time:
5 minutes
Total Time:
5 minutes
Cuisine:
American
Course:
Breakfast, Drinks, Snack
Calories:
320 kcal (approx. per serving)
Servings:
1
Author:
Ronica Rupan
Ingredients
Ingredients
- ¾ cup nonfat Greek yogurt (or full-fat for extra creaminess)
- 6 tablespoons water (adjust for desired consistency)
- ¾ cup fresh or frozen strawberries
- 2 soft Medjool dates, pitted
- 1 teaspoon vanilla paste (or pure vanilla extract)
- 1 scoop probiotic collagen powder (unflavored or vanilla, about 20g protein)
- 2 teaspoons chia seeds
- 1-2 ice cubes (optional, for a colder, thicker smoothie)
- Coconut cream (optional, for swiping the inside of the glass)
Instructions
1. Soak the Chia Seeds (Optional)
If you prefer a smoother texture without any little chia seed bits, soak the chia seeds in 2 tablespoons of water for 5-10 minutes before blending. They'll plump up and blend more seamlessly into the smoothie. If you don't mind the texture or are short on time, you can skip this step and add them directly to the blender.
2. Add Ingredients to Blender
Add the Greek yogurt, water, strawberries (fresh or frozen both work great), pitted Medjool dates, vanilla paste, probiotic collagen powder, and chia seeds (soaked or unsoaked) to a high-speed blender.
3. Blend Until Smooth
Blend on high speed for 30-45 seconds until completely smooth and creamy. The dates should be fully broken down and the mixture should be uniformly pink with no chunks. If you're using frozen strawberries, you may need to blend a bit longer, stopping to scrape down the sides if needed.
4. Adjust Consistency
Taste and adjust! If the smoothie is too thick, add a splash more water (1-2 tablespoons at a time) and blend again. If it's too thin, add another handful of strawberries or a few ice cubes and blend. If you want it sweeter, add one more date or a drizzle of honey.
5. Add Ice (Optional)
If you want your smoothie extra cold and thick, add 1-2 ice cubes and blend again for 10-15 seconds. This is especially good if you're using fresh strawberries instead of frozen.
6. Prep Your Glass (Optional)
For that gorgeous presentation, take a spoonful of coconut cream and use the back of the spoon to swipe it around the inside of your glass in a circular motion, creating beautiful white streaks. This step is totally optional but makes it look so pretty!
7. Serve Immediately
Pour the smoothie into your prepared glass (or a regular glass if you skipped the coconut cream swirl). The smoothie should be thick, creamy, and a beautiful pink color. Serve immediately with a straw or spoon and enjoy! This is best consumed right away while it's cold and fresh.
Quick & Easy Pickled Red Onions
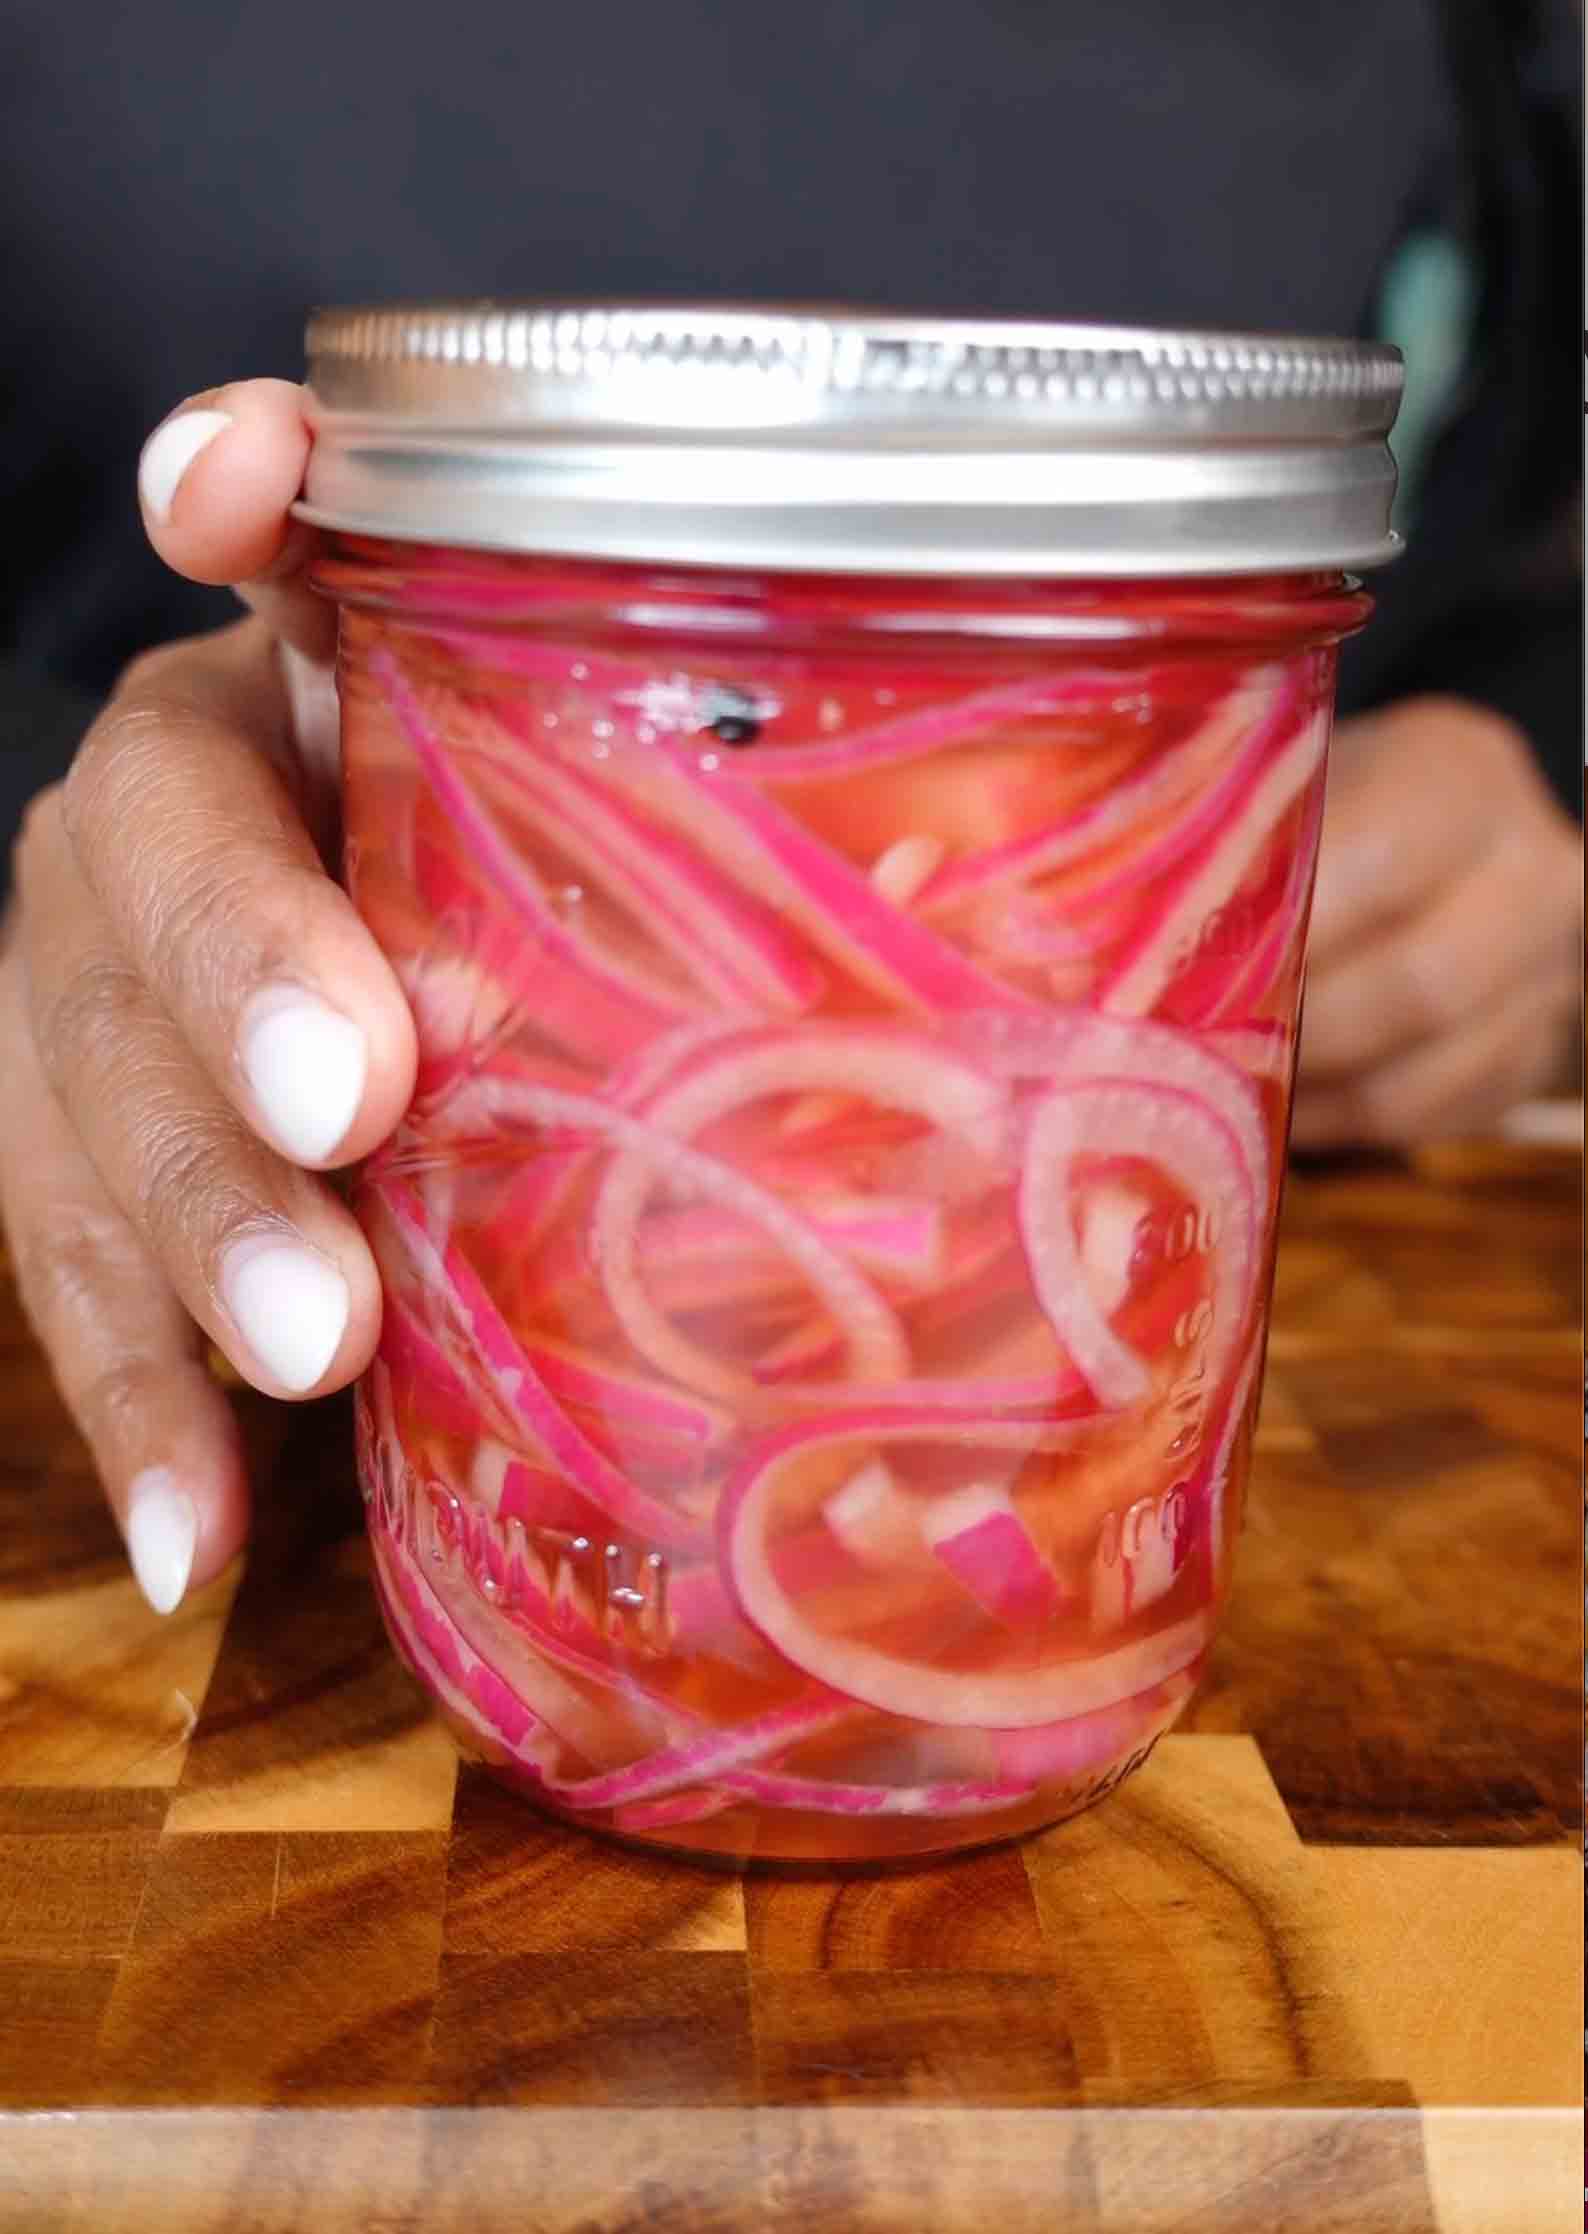
These Quick & Easy Pickled Red Onions are tangy, crunchy, and about to become your new secret weapon in the kitchen! If you've never made pickled onions before, you're in for a treat because they're incredibly simple to make but add so much flavor to everything they touch. Thinly sliced red onions get packed into a jar and covered with a hot brine made from vinegar, water, sugar, and salt that transforms them from sharp and pungent to tangy, slightly sweet, and absolutely delicious. The vinegar gives them that classic pickle tang, the sugar balances the acidity with a touch of sweetness, and the salt enhances all the flavors while helping preserve them. Whole garlic cloves and peppercorns add aromatic depth and a subtle bite that makes these pickled onions more complex than your average quick pickle. The magic happens as they sit, the hot brine softens the onions and turns them this gorgeous bright pink color, while infusing every slice with flavor. After just an hour in the fridge, they're ready to eat, though they get even better after sitting overnight as the flavors develop and meld together. These pickled onions are incredibly versatile, pile them on tacos for acidity and crunch, layer them on sandwiches and burgers to cut through rich meats and cheese, toss them into salads for brightness, use them as a topping for grain bowls, nachos, or avocado toast, or honestly just eat them straight from the jar because they're that good. The best part? They last for two weeks in the fridge, so you can make a batch and have this flavor bomb ready to go anytime you need to elevate a meal. Once you start making these, you'll wonder how you ever lived without them!
Frequently Asked Questions
Q: Can I use white or yellow onions instead of red onions?
A: You can absolutely use white or yellow onions, and they'll pickle just as well! However, red onions are the most popular choice for pickled onions because they turn this gorgeous bright pink color when pickled, they're slightly sweeter and milder than white or yellow onions, and they look beautiful on plates with their vibrant color. White onions will stay white and have a sharper, more pungent flavor. Yellow onions will turn a brownish color and have a stronger onion flavor. If you want the classic look and mildest flavor, stick with red onions. But if you only have white or yellow on hand, go ahead and use them, they'll still be delicious!
Q: Do these need to be processed in a water bath for canning, or can I just store them in the fridge?
A: These are "quick pickles" or "refrigerator pickles," which means they're meant to be stored in the refrigerator and consumed within 2 weeks, not shelf-stable canned pickles. You do NOT need to process them in a water bath canner. Just let them cool, seal the jar, and pop them in the fridge. This is what makes them "quick and easy"! If you want to make shelf-stable pickled onions that can sit in your pantry for months, you'd need to use a proper canning recipe with the right vinegar-to-water ratio and process them in a boiling water bath. But for these, refrigeration is all you need, and honestly, they taste so good you'll finish them long before 2 weeks anyway!
Q: My pickled onions taste too sharp and vinegary. What did I do wrong?
A: Don't worry, this is an easy fix! If they taste too sharp and vinegary, there are a few adjustments you can make: (1) Add more sugar, start with an extra tablespoon and taste. Sugar balances the acidity. (2) Let them sit longer, quick pickles mellow out significantly after 24-48 hours in the fridge as the flavors balance. (3) Rinse them before using, if they're already made and too acidic, drain some of the brine and rinse the onions under cold water before adding them to your dish. (4) For next time, use a mix of half red wine vinegar and half apple cider vinegar, or reduce the vinegar to ¾ cup and increase the water to 1¼ cups for a milder brine. Everyone's taste is different, so feel free to adjust the sugar and vinegar ratios to your preference!
Q: Can I add other vegetables to pickle with the onions?
A: Absolutely! Quick pickling works beautifully with many vegetables. You can add thinly sliced jalapeños or other peppers for a spicy kick, sliced carrots (cut them extra thin or shave them with a vegetable peeler), thinly sliced radishes for color and crunch, cucumber slices, cauliflower florets (blanch them first for 2 minutes), or even thinly sliced beets (though they'll turn everything pink!). Just make sure whatever you add is cut thin enough to pickle quickly. If you're adding vegetables that are denser than onions (like carrots or cauliflower), you might want to blanch them for 1-2 minutes first so they soften slightly. The brine ratio in this recipe works for most vegetables, so feel free to get creative and make your own custom quick pickle mix!
These Quick & Easy Pickled Red Onions are tangy, crunchy, and incredibly versatile! Thinly sliced red onions get pickled in a simple brine of vinegar, water, sugar, and salt with garlic and peppercorns for extra flavor. They're ready in just an hour and add a bright, acidic crunch to sandwiches, tacos, salads, burgers, or anything that needs a flavor boost. Once you start making these, you'll always keep a jar in your fridge!
Rate This Recipe!
Preparations
Prep Time:
10 minutes
Cook Time:
5 minutes
Pickling Time
1 hour
Total Time:
1 hour 15 minutes
Cuisine:
American
Course:
Side Dish, Condiment
Calories:
15 kcal (approx. per serving)
Servings:
About 2 cups (one 16 oz jar)
Author:
Ronica Rupan
Ingredients
Ingredients
- 2 medium red onions, thinly sliced
- 1 cup water
- 1 cup red wine vinegar (or apple cider vinegar, or a combination)
- 2 teaspoons kosher salt
- 2 tablespoons granulated sugar
- 3-4 whole garlic cloves, peeled
- 1 teaspoon whole black peppercorns
Instructions
1. Prep Your Onions
Peel and slice your red onions as thin as possible, ideally using a mandoline or a very sharp knife. Aim for slices that are almost paper-thin, about ⅛ inch thick or thinner. Separate the slices into rings. Transfer the onion rings to a clean 16-ounce (pint-sized) mason jar or heat-safe container. Pack them in fairly tight, but don't crush them. The jar should be about three-quarters full of onions.
2. Prepare the Brine
In a medium saucepan, combine the water, red wine vinegar (or apple cider vinegar, or a mix of both), kosher salt, and sugar. Place the pot over medium-high heat.
3. Bring to a Boil
Heat the mixture, stirring occasionally, until it comes to a boil and the sugar and salt are completely dissolved. This should take about 3-5 minutes. You'll know the sugar and salt have dissolved when the liquid is clear with no visible granules.
4. Add Aromatics
Once the brine is boiling and the sugar has dissolved, add the whole garlic cloves and peppercorns directly to the pot. Let them steep in the hot brine for about 1 minute to release their flavors.
5. Pour Over Onions
Carefully pour the hot brine over the sliced onions in the jar, making sure to include the garlic cloves and peppercorns. The hot liquid should completely cover the onions. If it doesn't quite cover them, add a little more vinegar or water (in equal parts) until they're submerged. Use a spoon to gently press the onions down if needed.
6. Cool to Room Temperature
Let the jar sit uncovered on the counter until it cools to room temperature, about 30-45 minutes. You'll notice the onions starting to turn a beautiful bright pink color as they pickle. The raw sharpness will begin to mellow out.
7. Seal and Refrigerate
Once the mixture has cooled completely, seal the jar with a tight-fitting lid. Place it in the refrigerator.
8. Rest and Enjoy
Let the onions pickle in the fridge for at least 1 hour before using them. This gives the flavors time to develop. For the best flavor, let them sit overnight if you have time. After an hour, they're ready to use! Serve on sandwiches, tacos, salads, burgers, grain bowls, or eat them straight from the jar.
Serving Suggestions
- On Tacos: Pile them high on fish tacos, carnitas, or any taco for brightness and crunch
- Sandwiches & Burgers: Layer them on sandwiches, burgers, or bánh mì
- Salads: Toss them into green salads, grain bowls, or potato salad
- As a Garnish: Top avocado toast, deviled eggs, hummus, or charcuterie boards
- With Proteins: Serve alongside grilled chicken, steak, or salmon
- Straight from the Jar: Honestly, they're delicious on their own as a snack!
Viral Cloud Smoothie
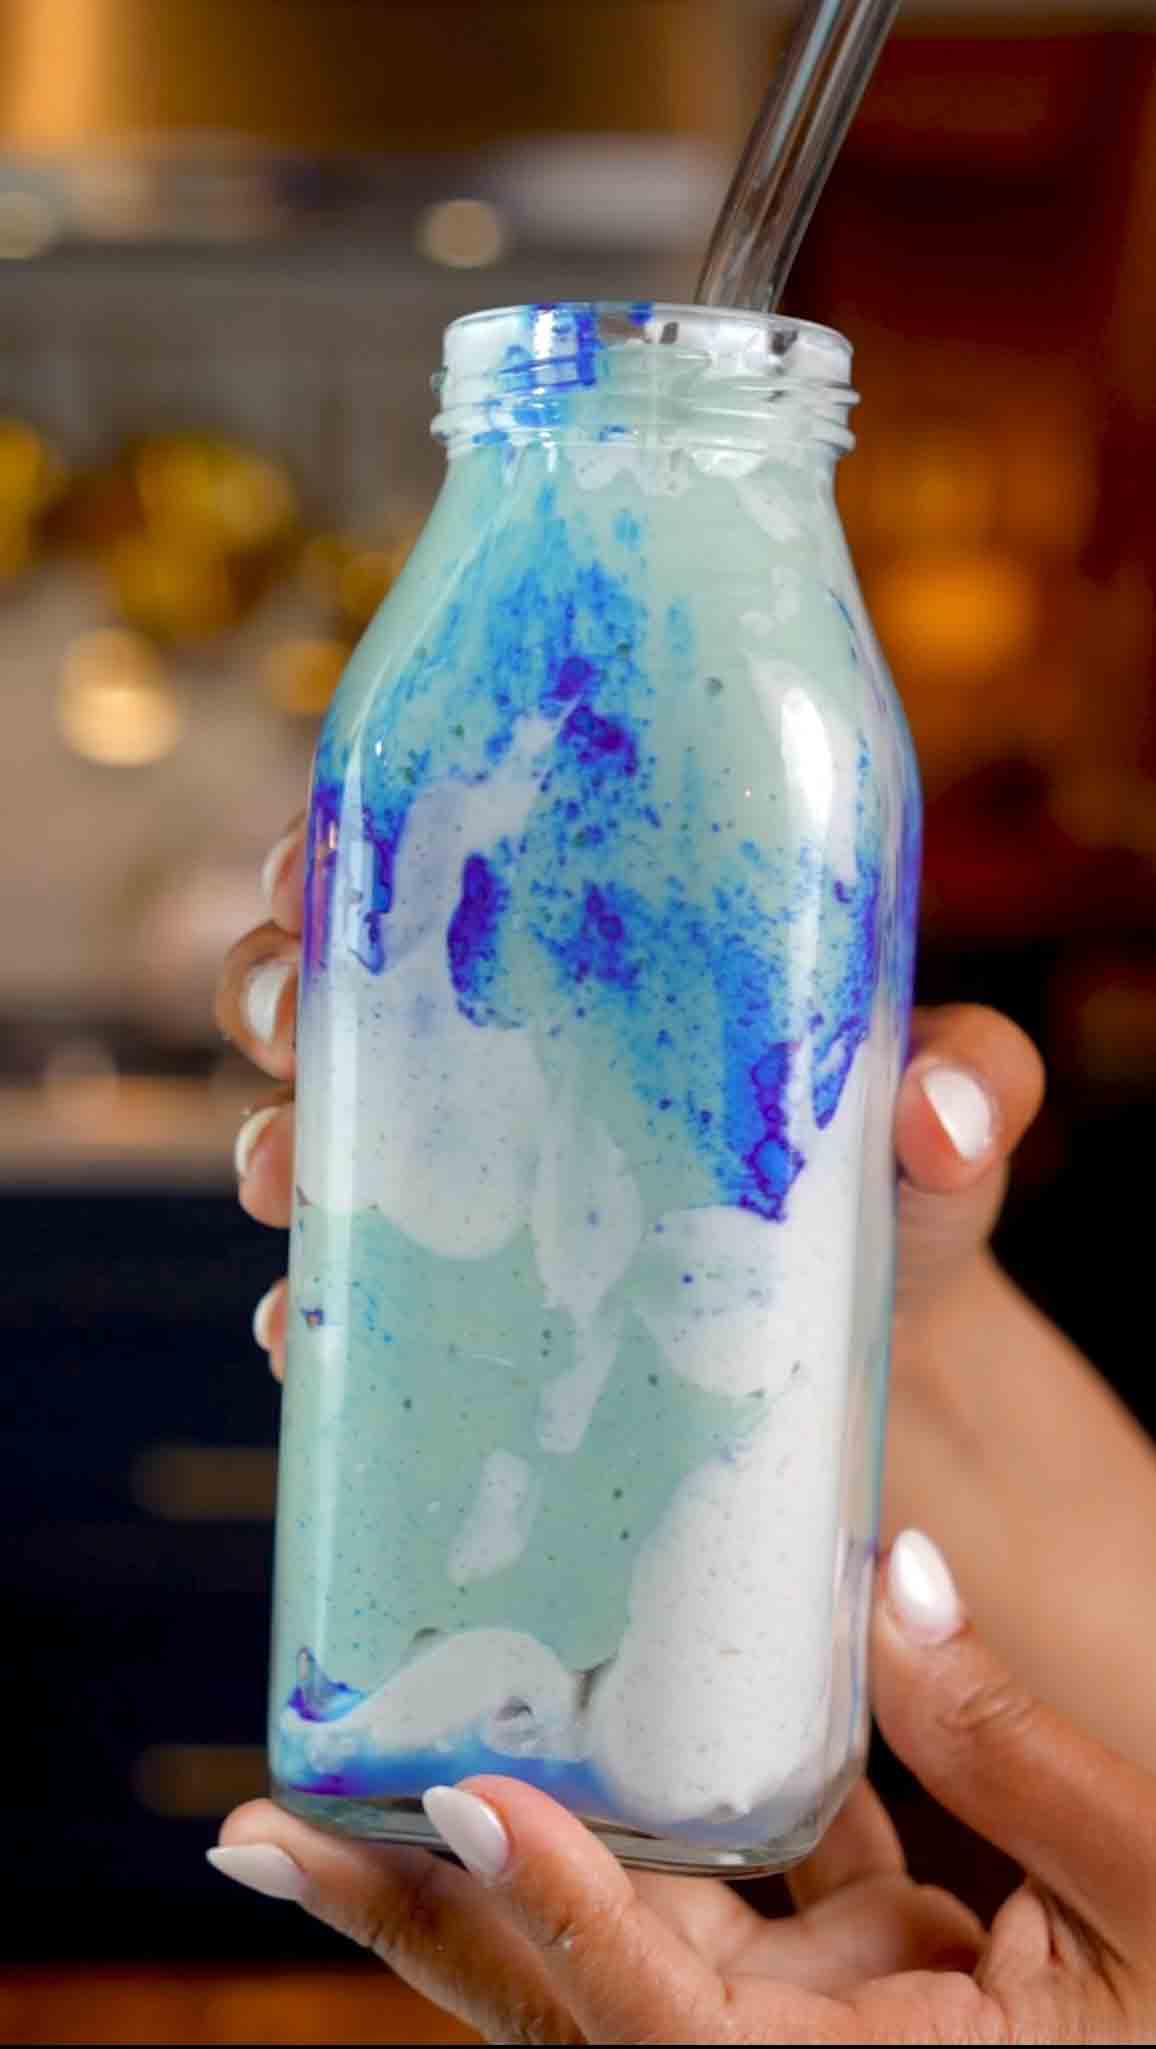
This Blue Spirulina Cloud Smoothie is a homemade version of Erewhon's famous $20 Cloud Smoothie, but you can recreate it at home for a fraction of the cost using just a few simple ingredients! The star of this smoothie is blue spirulina, a stunning natural ingredient that gives you that vibrant, eye-catching blue color while being packed with incredible health benefits. Blue spirulina is rich in antioxidants, helps boost energy levels naturally, and supports immune health, making this smoothie as good for you as it is beautiful. The base is a creamy blend of plant milk, frozen banana for natural sweetness and that thick milkshake texture, tropical frozen pineapple for brightness, and a touch of avocado that adds healthy fats and makes everything silky smooth without any avocado taste. Optional add-ins like almond butter and collagen powder boost the protein and healthy fats even more. But what makes this smoothie truly special is the presentation, you whip refrigerated coconut cream until it's light and fluffy, then swirl it inside the glass and dust it with more blue spirulina before pouring in the smoothie. The result is this gorgeous layered effect with white coconut cream swirls throughout the blue smoothie that looks absolutely stunning. Top it with more whipped coconut cream and you have a smoothie that looks like it came from an expensive juice bar but costs just a few dollars to make at home. It's naturally vegan, dairy-free, refreshing, and tastes like a tropical vacation in a glass!
Frequently Asked Questions
Q: What's the difference between blue spirulina and regular green spirulina?
A: Blue spirulina (also called phycocyanin) is an extract from regular spirulina that isolates just the blue pigment. It has a much milder, slightly sweet taste compared to green spirulina, which can be quite earthy and strong. Blue spirulina is what gives this smoothie that stunning vibrant blue color without the "algae" taste that some people don't like about green spirulina. It still contains many of the same antioxidants and health benefits, but it's more expensive because it's an extract. If you can't find blue spirulina, you could use regular green spirulina, but your smoothie will be green instead of blue and have a stronger flavor.
Q: Can I make this without a high-speed blender?
A: Yes, but you may need to make some adjustments! If you have a regular blender, make sure to blend longer (90 seconds to 2 minutes) to get everything completely smooth, especially the frozen fruit and avocado. You can also help your blender by letting the frozen fruit thaw for 5-10 minutes before blending, or by adding the liquid and fresh ingredients first, blending those, then adding the frozen ingredients. If your blender really struggles, you can use fresh banana and pineapple instead of frozen and add more ice, though the texture won't be quite as thick and creamy. A blender like a NutriBullet, Ninja, or Vitamix works best for this recipe.
Q: My coconut cream didn't whip up fluffy. What went wrong?
A: This is a common issue! Here are the main reasons: (1) The coconut cream wasn't cold enough - it needs to be refrigerated overnight, and some people even chill the bowl and beaters too. (2) You used light coconut milk instead of full-fat - you need the high-fat version for it to whip. (3) You accidentally used the liquid part instead of the solid cream that separates at the top - make sure to scoop out only the thick, solidified cream. (4) You didn't whip it long enough - it can take 5-7 minutes of vigorous whisking to get it fluffy. If your coconut cream still won't whip, you can use regular whipped cream (not vegan) or store-bought coconut whipped cream as a substitute.
Q: Is this smoothie really that similar to the Erewhon Cloud Smoothie?
A: Yes! This homemade version captures the essence of the viral Erewhon Cloud Smoothie with that gorgeous blue color from blue spirulina, creamy tropical flavors, and the signature whipped coconut cream swirl presentation. The Erewhon version costs around $20 and contains similar ingredients like blue spirulina, plant milk, coconut cream, and tropical fruits. By making it at home, you get the same beautiful look and health benefits for just a few dollars. You can customize the sweetness and add-ins to your preference. While we can't know Erewhon's exact proprietary recipe, this version gives you that same Instagram-worthy, nutrient-packed smoothie experience without the hefty price tag!
Rate This Recipe!
Preparations
Prep Time:
10 minutes
Chill Time:
Overnight (for coconut cream)
Total Time:
10 minutes (plus overnight chill)
Cuisine:
American
Course:
Breakfast, Drinks
Calories:
320 kcal (approx. per serving)
Servings:
1
Author:
Ronica Rupan
Ingredients
Ingredients
For the Smoothie:
- 1 cup plant milk of choice (coconut, almond, oat, or cashew)
- ½ cup crushed ice
- 1 cup frozen banana slices (about 1 small banana)
- 1 cup frozen pineapple chunks
- ¼ of a small avocado (about 2 tablespoons)
- 1 teaspoon almond butter (optional, for creaminess)
- 2 tablespoons collagen powder (optional, for protein)
- 1 teaspoon blue spirulina powder
- ½ teaspoon vanilla bean paste (or vanilla extract)
- Sweetener of choice to taste (sugar, honey, maple syrup, or stevia)
For the Whipped Coconut Cream:
- ½ cup coconut cream, refrigerated overnight (see notes)
- 1-2 tablespoons sweetener of choice (powdered sugar, honey, or maple syrup)
- ½ teaspoon blue spirulina powder, for dusting inside the glass
Instructions
1. Chill the Coconut Cream (Do This Ahead)
Place a can of full-fat coconut milk or coconut cream in the refrigerator overnight. The cream will separate and solidify at the top. You need this solidified cream for whipping, so don't skip this step!
2. Make the Whipped Coconut Cream
Open the chilled can of coconut cream and scoop out ½ cup of the solidified cream (save the liquid for smoothies or other recipes). Place the coconut cream in a mixing bowl. Add your sweetener of choice. Using a hand mixer or whisk, beat vigorously for about 5 minutes until the mixture becomes light, fluffy, and holds soft peaks. It should look like whipped cream! Set aside 2 tablespoons of the whipped coconut cream in a small bowl for topping. Keep the rest for the glass preparation.
3. Prepare the Serving Glass
Take your serving glass and use a spoon to add about 2 tablespoons of the whipped coconut cream to the bottom and sides of the glass, creating swirls. This is what gives you those beautiful white streaks throughout the blue smoothie! Sprinkle ½ teaspoon of blue spirulina powder inside the glass over the coconut cream. Set the prepared glass aside.
4. Blend the Smoothie
In a high-speed blender, add the plant milk, crushed ice, almond butter (if using), frozen banana slices, frozen pineapple chunks, avocado, collagen powder (if using), 1 teaspoon blue spirulina powder, and vanilla bean paste. Add sweetener to taste, starting with 1-2 tablespoons and adjusting based on how sweet your banana is. Blend on high speed for 45-60 seconds until all ingredients are thoroughly combined and the mixture is completely smooth and creamy with a vibrant blue color.
5. Assemble the Smoothie
Pour the blended blue smoothie into your prepared glass. You'll see those gorgeous white coconut cream swirls throughout as you pour. The blue spirulina you dusted inside will create even more visual interest.
6. Top and Serve
Top the smoothie with the reserved 2 tablespoons of whipped coconut cream, creating a fluffy cloud on top. You can also add an extra tiny pinch of blue spirulina on top for garnish if you want. Serve immediately with a straw and enjoy your homemade version of that $20 smoothie!
Brown Butter Sage Butternut Squash Mac & Cheese
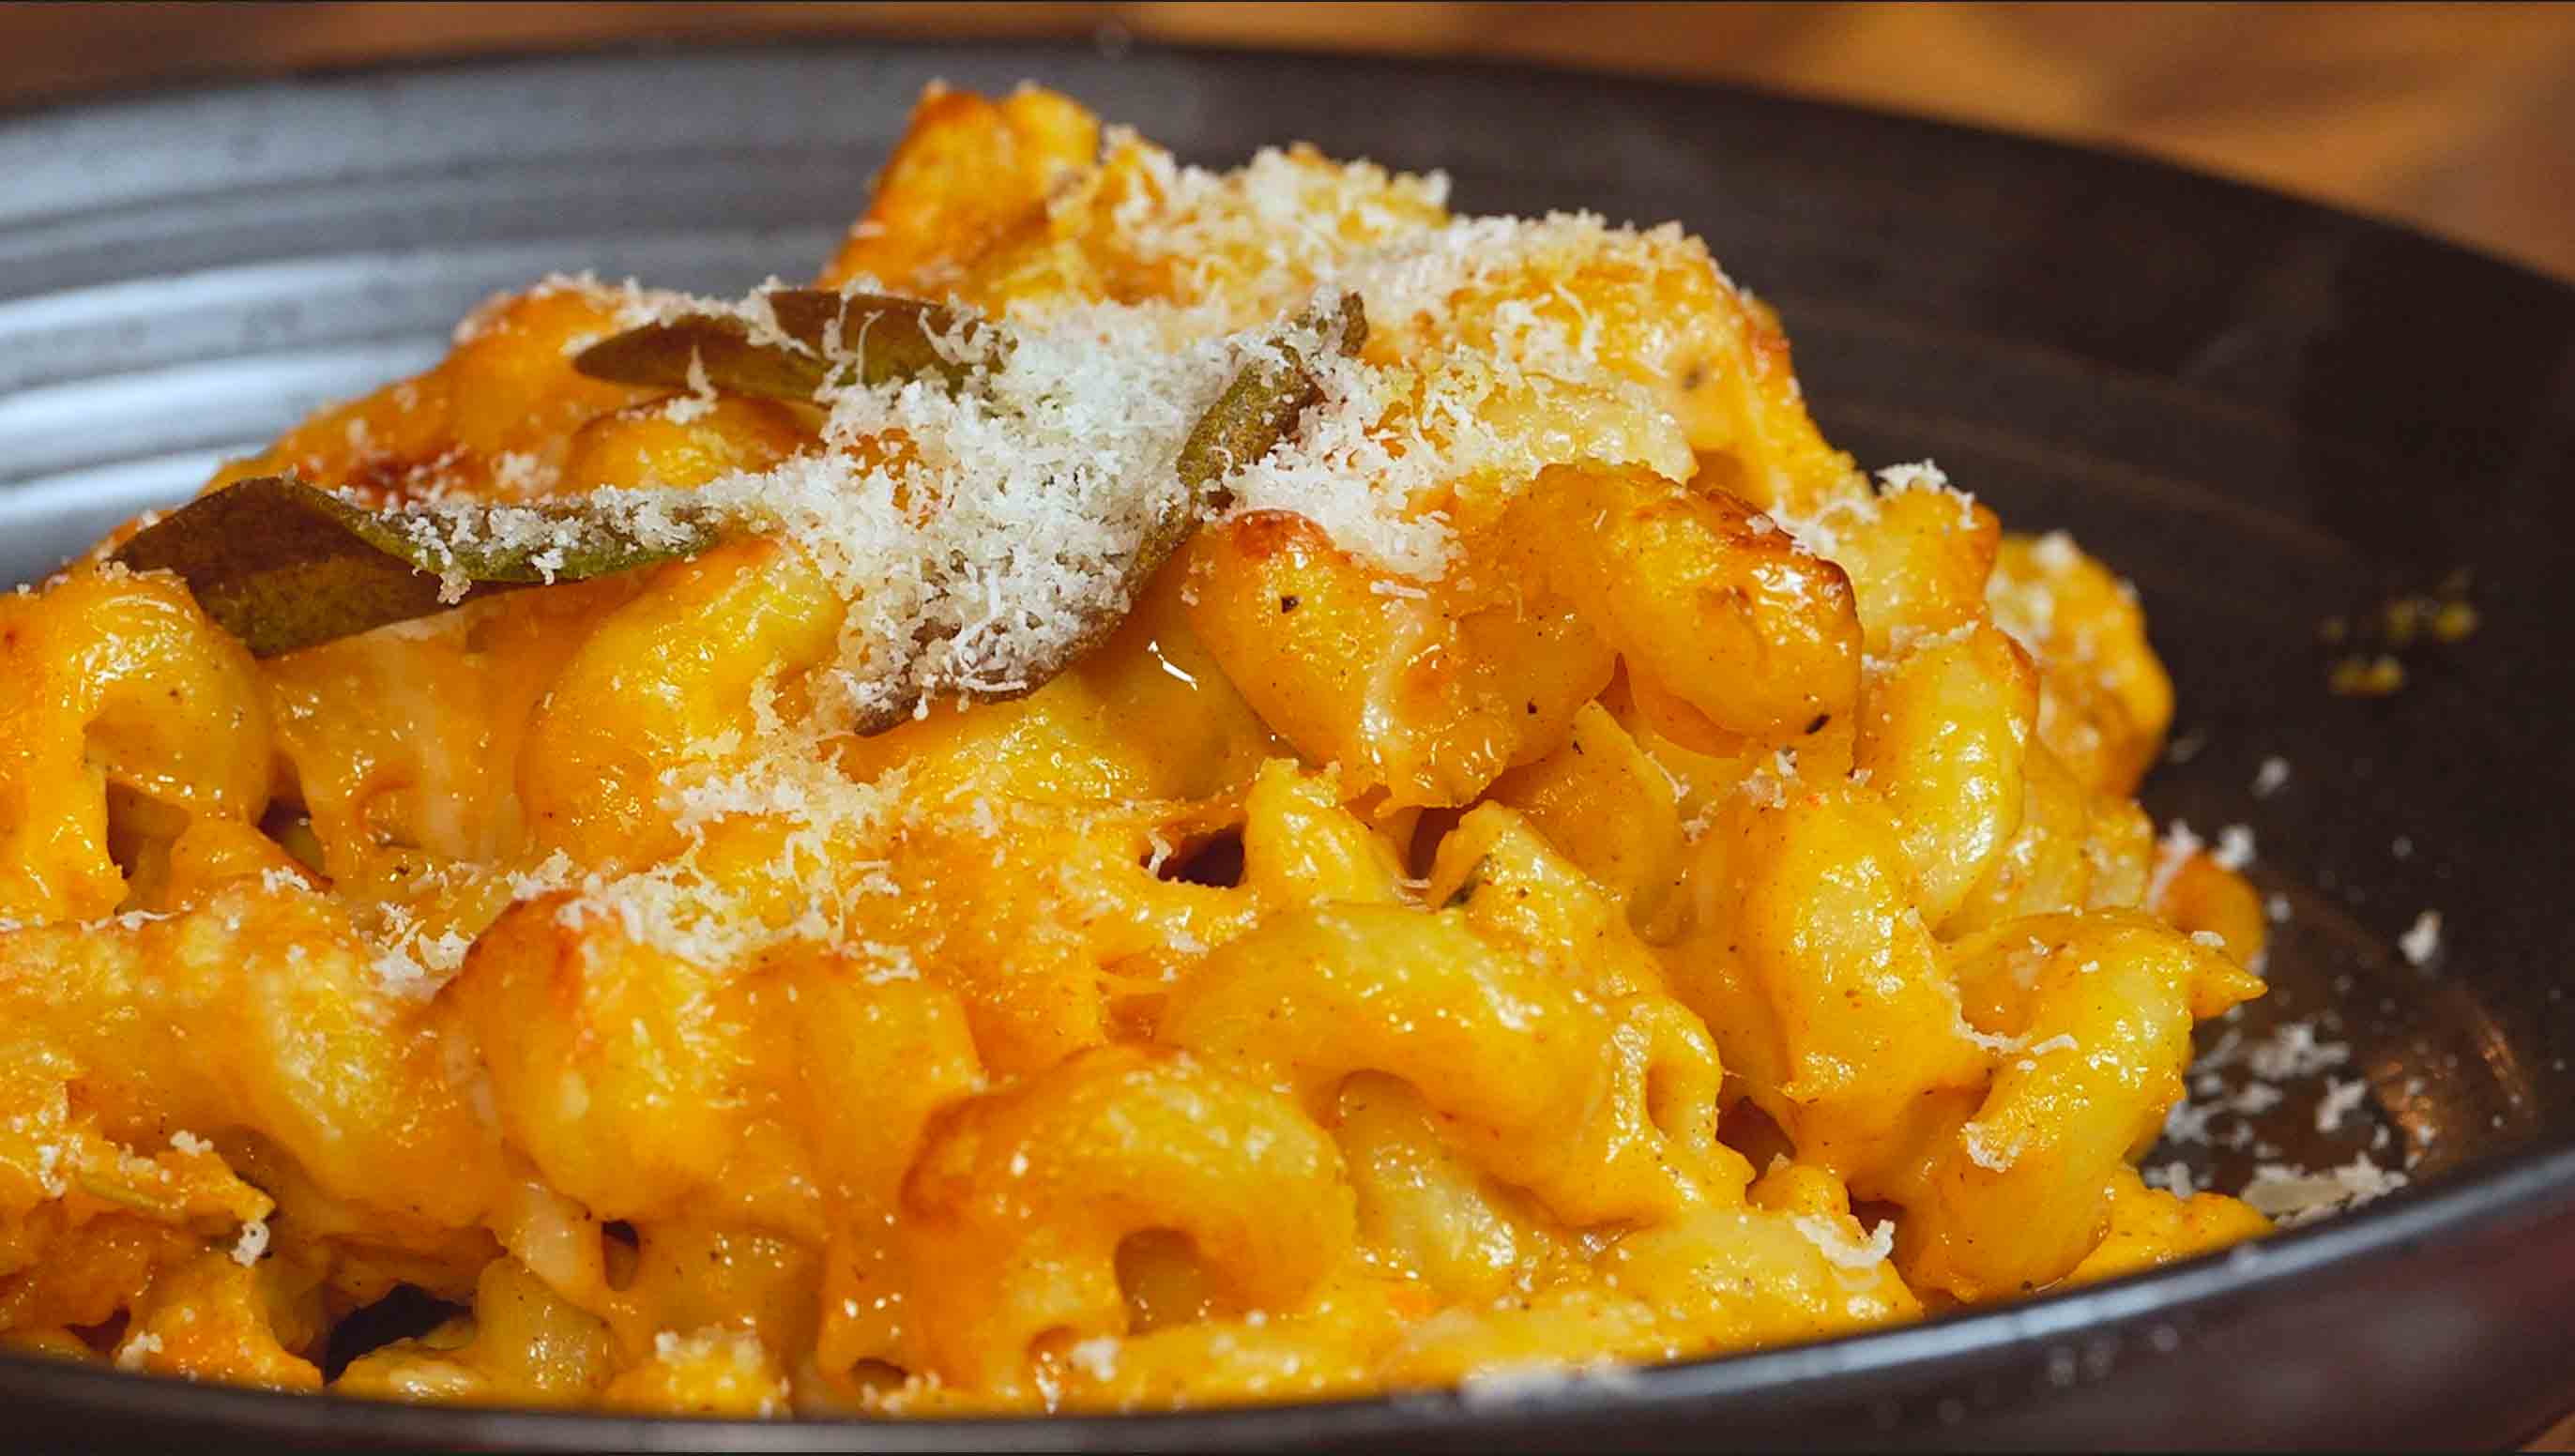
This Brown Butter Sage Butternut Squash Mac & Cheese is pure comfort food elevated to something truly special! It's everything you love about classic mac and cheese but with layers of fall flavors that make it feel sophisticated and cozy at the same time. The base starts with roasted butternut squash that gets caramelized in the oven with fresh sage and thyme until it's sweet and tender. Most of the squash gets pureed into the cheese sauce for this gorgeous orange color and natural sweetness that balances the rich, savory cheese, while some cubes are reserved to fold in at the end for texture and those caramelized edges. The real magic happens with the brown butter sage, you cook butter until it turns golden and nutty, then crisp up fresh sage leaves in it for the most incredible aromatic flavor that infuses the entire sauce. That brown butter becomes the base of your roux, then gets mixed with milk, cream, and a trio of cheeses: sharp white cheddar for tang, Gruyere for nuttiness, and Parmesan for that salty umami kick. The sauce is silky smooth, packed with flavor from Dijon mustard, smoked paprika, and a touch of nutmeg that brings everything together. Once it's all mixed with pasta and topped with more cheese, it bakes until bubbly and golden with crispy edges. The crispy sage leaves get scattered on top as a garnish that's not just pretty but adds this incredible texture and flavor. This is the kind of mac and cheese you make for Thanksgiving, dinner parties, or when you want to impress yourself with how good homemade comfort food can be!
Frequently Asked Questions
Q: Can I make this mac and cheese ahead of time?
A: Absolutely! This is a perfect make-ahead dish. You can assemble the entire mac and cheese (through step 10, adding the cheese topping), cover it tightly with plastic wrap or foil, and refrigerate for up to 24 hours before baking. When you're ready to bake, remove it from the fridge and let it sit at room temperature for 20-30 minutes while your oven preheats. Add an extra 10-15 minutes to the covered baking time since you're starting with a cold dish. You can also freeze it unbaked for up to 3 months - just thaw it overnight in the refrigerator before baking as directed.
Q: Can I skip the brown butter step and just use regular melted butter?
A: You can, but I really don't recommend it! The brown butter is what takes this mac and cheese from good to absolutely incredible. That nutty, toasted flavor adds so much depth and complexity that you can't get from regular butter. It only takes an extra 2-3 minutes and makes a huge difference. If you're short on time, you could skip crisping the sage leaves, but definitely don't skip browning the butter itself. The aromatic, nutty flavor is what makes this recipe special and pairs perfectly with the butternut squash and sage.
Q: What if I don't have Gruyere or can't find it at my store?
You can use smoked Gouda for a deeper, smokier flavor that pairs beautifully with the butternut squash. Fontina is another excellent choice - it melts beautifully and has a mild, buttery flavor. In a pinch, you can use all sharp white cheddar (so 2½ cups total cheddar instead of the mix), though the flavor will be a bit sharper and less complex. Just make sure whatever cheese you use, you're grating it fresh from a block - pre-shredded cheese won't melt as smoothly.
Q: My cheese sauce turned out grainy instead of smooth. What did I do wrong and how can I fix it?
A: Grainy cheese sauce usually happens for one of three reasons: (1) The heat was too high when you added the cheese - always reduce to low heat before adding cheese so it melts gently, (2) You used pre-shredded cheese which contains anti-caking agents that prevent smooth melting - always grate from a block, or (3) The sauce got too hot after adding the cheese - once the cheese is in, you just want to stir until melted, not continue cooking it. If your sauce does turn grainy, try whisking in a tablespoon of cream or milk while the sauce is still warm - sometimes this can bring it back together. For next time, remember: low heat, freshly grated cheese, and remove from heat as soon as it's melted!
This Brown Butter Sage Butternut Squash Mac & Cheese is pure comfort food elevated! Roasted butternut squash gets blended into a creamy cheese sauce with nutty brown butter and crispy sage, then mixed with pasta and topped with more cheese. It's rich, cozy, and packed with fall flavors. The combination of sharp cheddar, Gruyere, and Parmesan with sweet squash and aromatic sage makes this the ultimate mac and cheese for special occasions or when you want something extra delicious!
Rate This Recipe!
Preparations
Prep Time:
15 minutes
Cook Time:
35 minutes
Total Time:
50 minutes
Cuisine:
American
Course:
Main Course, Side Dish
Calories:
480 kcal (approx. per serving)
Servings:
6-8
Author:
Ronica Rupan
Ingredients
Ingredients
For the Roasted Butternut Squash:
- 1 small butternut squash (about 2 pounds), peeled and cubed
- 1 tablespoon olive oil
- 1 teaspoon kosher salt
- ½ teaspoon black pepper
- ½ teaspoon smoked paprika
- 3-4 fresh sage sprigs
- 2-3 fresh thyme sprigs
For the Mac & Cheese:
- 12 ounces pasta (shells, rigatoni, or cavatappi)
- 4 tablespoons unsalted butter
- 8-10 fresh sage leaves
- 2 tablespoons all-purpose flour
- 2 cups whole milk
- ½ cup heavy whipping cream
- 1 tablespoon Dijon mustard
- 1 teaspoon garlic powder
- ½ teaspoon smoked paprika
- ½ teaspoon ground nutmeg
- Salt and pepper to taste
- 1½ cups sharp white cheddar cheese, freshly grated
- 1 cup Gruyere or Gouda cheese, freshly grated
- ¼ cup Parmesan cheese, freshly grated
For Topping:
- ½ cup sharp cheddar cheese, freshly grated
- ¼ cup Parmesan cheese, freshly grated
- Fresh cracked black pepper
Instructions
1. Roast the Butternut Squash
Preheat your oven to 400°F (200°C). Peel and cube the butternut squash into roughly 1-inch pieces. Toss the squash cubes with olive oil, salt, pepper, smoked paprika, and nestle in the fresh sage and thyme sprigs. Spread everything in a single layer on a parchment-lined baking sheet. Roast for 25-30 minutes, flipping halfway through, until the squash is tender, caramelized, and easily pierced with a fork. Remove from the oven and discard the herb sprigs. Reserve about 1 cup of the best-looking cubed squash for topping later. Mash or blend the remaining squash into a smooth puree (you should have about 1 cup of puree). Set both aside.
2. Cook the Pasta
While the squash roasts, bring a large pot of salted water to a rolling boil. Cook the pasta according to package directions until al dente (it should still have a slight bite since it will bake later). Drain the pasta and set aside. Don't rinse it, you want that starch!
3. Make the Brown Butter Sage
Reduce oven temperature to 375°F (190°C). In a large pot or deep skillet over medium heat, melt the butter. Once melted, add the fresh sage leaves. Let the butter cook for 2-3 minutes, swirling the pan occasionally and watching carefully. The butter will foam, then the foam will subside and the butter will turn golden brown with a nutty aroma. This is brown butter! Once it reaches a light amber color and smells nutty, remove from heat immediately. Use a slotted spoon to remove the crispy sage leaves and set them aside on a paper towel for garnish later. Return the pot to low heat.
4. Create the Roux
Add the flour to the brown butter and whisk constantly for 1-2 minutes. The mixture should be bubbly and cook until it's golden and smells slightly toasted. This cooks out the raw flour taste and creates the base for your creamy sauce.
5. Add the Dairy
Slowly pour in the whole milk and heavy cream while whisking constantly to prevent lumps. Continue whisking until the mixture is completely smooth and begins to thicken, about 3-4 minutes. The sauce should coat the back of a spoon.
6. Add Squash and Seasonings
Stir in the butternut squash puree, Dijon mustard, garlic powder, smoked paprika, nutmeg, and season with salt and pepper to taste. Whisk everything together until the sauce is completely smooth, creamy, and has a beautiful orange color.
7. Melt the Cheese
Reduce the heat to low. Add the sharp white cheddar, Gruyere (or Gouda), and Parmesan cheese to the sauce. Stir constantly until all the cheese is melted and the sauce is velvety smooth and glossy. Taste and adjust the seasonings, you might need more salt, pepper, or a pinch more nutmeg.
8. Combine Pasta and Squash
Add the cooked pasta to the cheese sauce and toss until every piece is completely coated in that gorgeous, creamy sauce. Gently fold in the reserved roasted butternut squash cubes, being careful not to break them up too much. You want those caramelized chunks throughout!
9. Prep for Baking
Lightly butter a 9x13-inch baking dish. Transfer the mac and cheese to the dish, spreading it out evenly. Make sure the squash cubes are distributed throughout.
10. Add Cheese Topping
Sprinkle the remaining ½ cup sharp cheddar and ¼ cup Parmesan cheese evenly over the top. This will create a golden, bubbly, crispy cheese layer when it bakes.
11. Bake
Cover the dish with aluminum foil and bake for 10 minutes. This helps heat everything through evenly. Remove the foil and bake for another 10-15 minutes uncovered until the top is golden brown, bubbly around the edges, and the cheese is melted and slightly crispy in spots.
12. Rest and Serve
Remove from the oven and let the mac and cheese rest for 5-10 minutes before serving. This helps it set up slightly so it's not too runny when you scoop it. Garnish with the crispy sage leaves you set aside earlier and a generous amount of fresh cracked black pepper. Serve hot and watch it disappear!
Orange Creamsicle High-Protein Smoothie
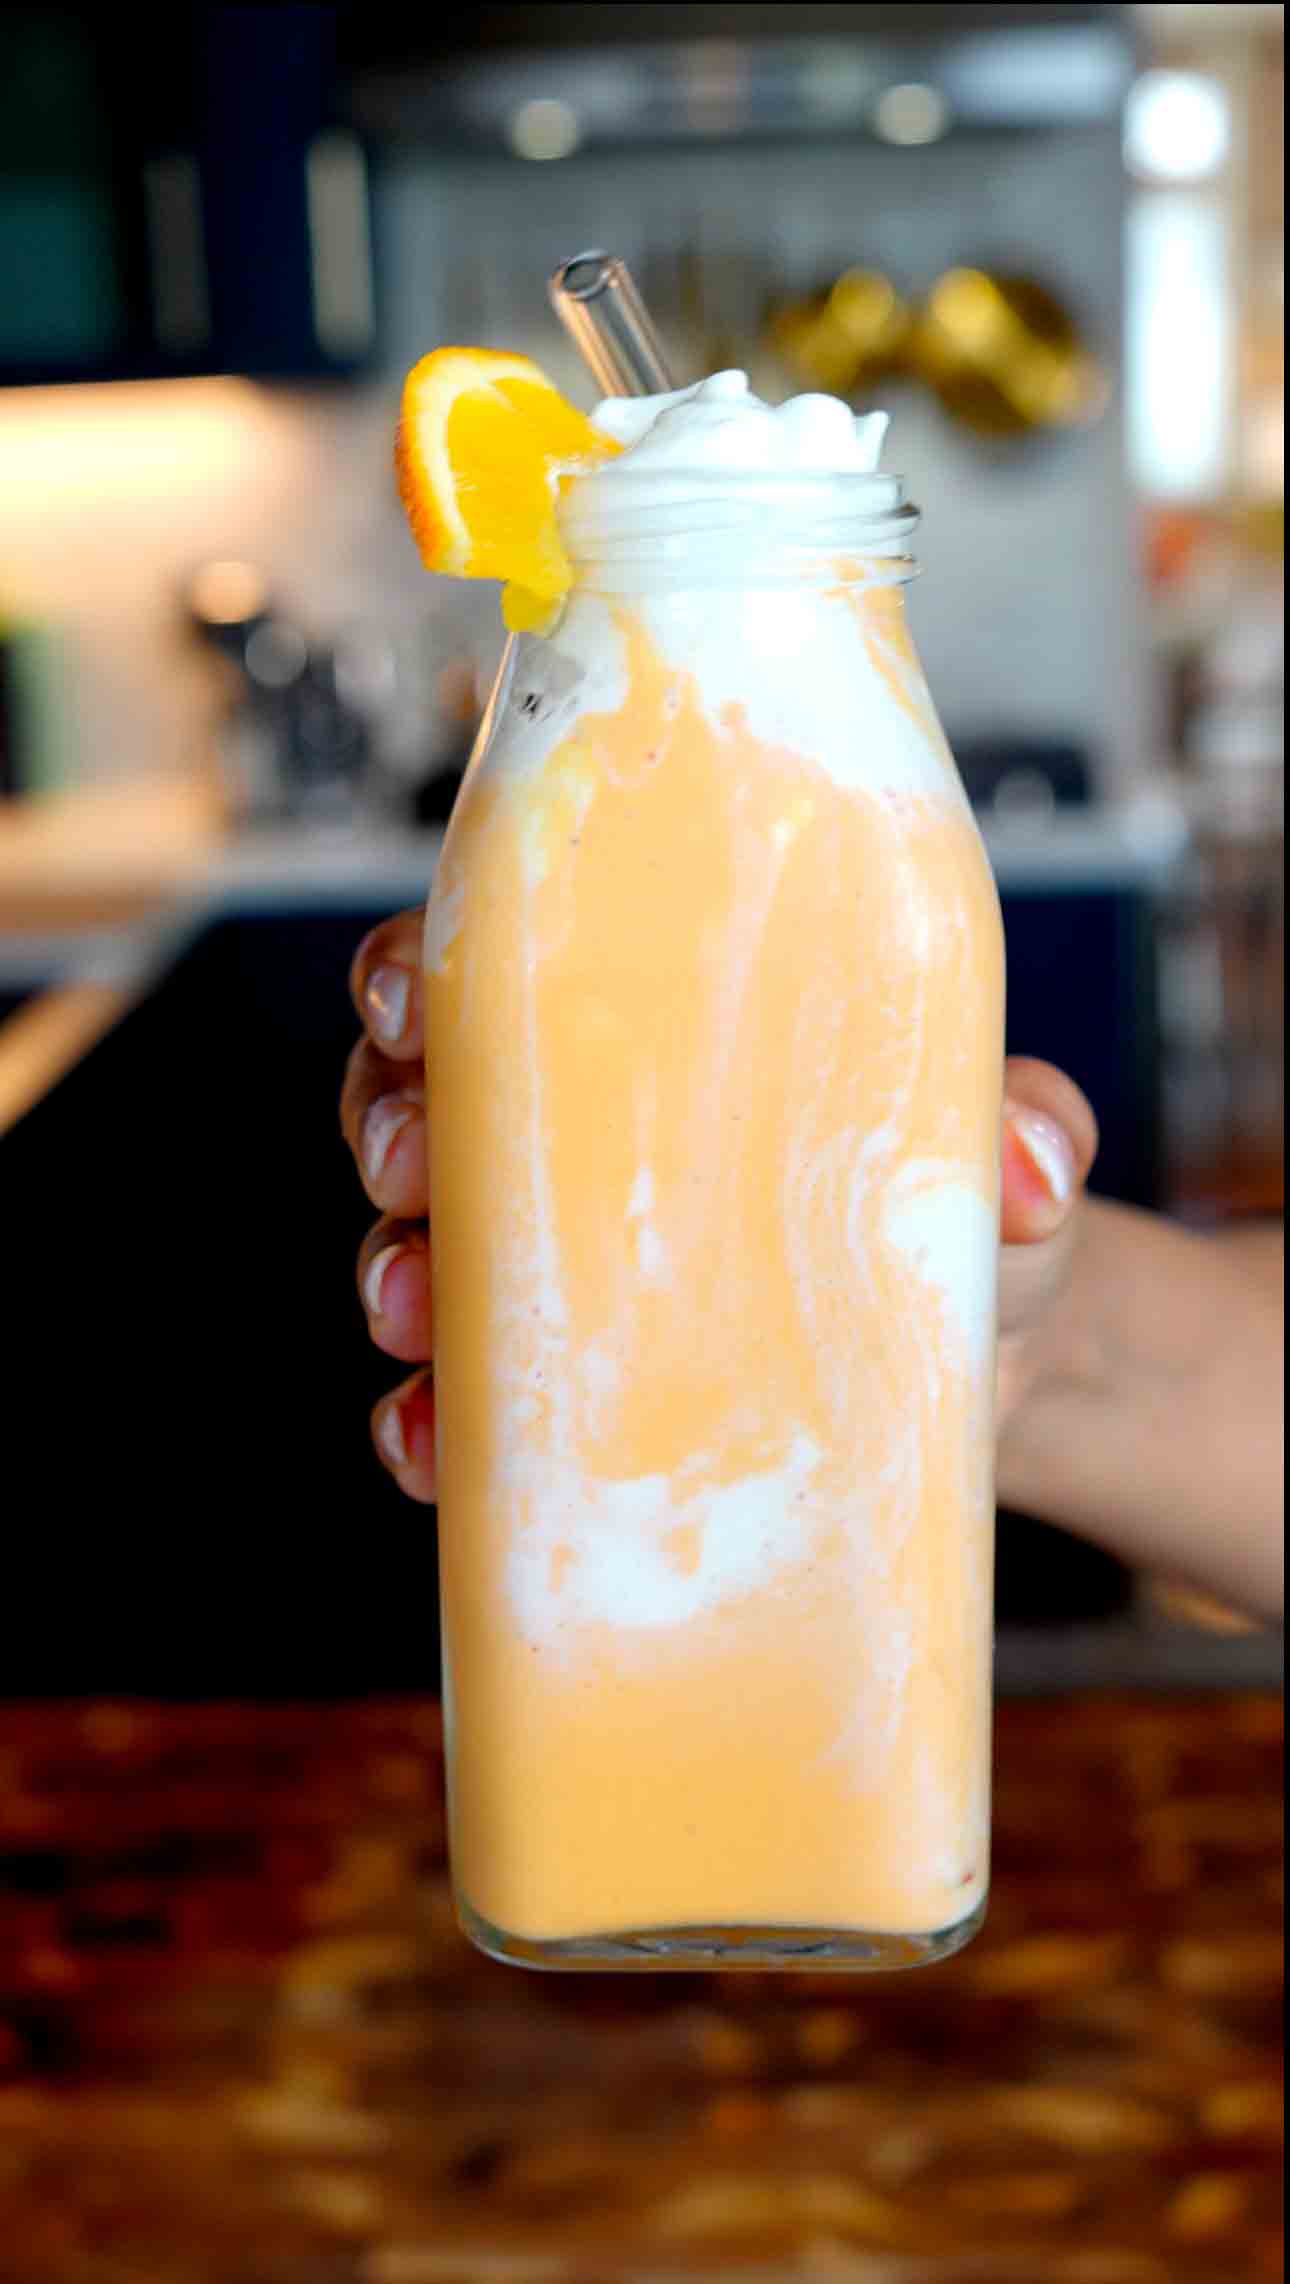
This Orange Creamsicle High-Protein Smoothie tastes like dessert but packs over 20 grams of protein in every glass! The secret ingredient is cottage cheese, which might sound surprising, but when you blend it with frozen orange juice concentrate, banana, and vanilla, it becomes incredibly smooth, creamy, and tastes exactly like those orange creamsicle popsicles from childhood. You'd never guess there's cottage cheese in here! The magic happens when you blend the cottage cheese until it's completely silky, no lumps or graininess, just pure creamy goodness. The frozen orange juice gives you that bright, tangy citrus flavor while the banana adds natural sweetness and helps create that thick, milkshake-like texture. But here's my favorite part, before you pour the smoothie, swirl whipped cream inside the glass in a circular motion. This creates these gorgeous white streaks that look impressive and add extra creaminess to every sip. The result is a smoothie that's thick, creamy, satisfying, and tastes like you're treating yourself to a milkshake when really you're getting all that protein, calcium, and nutrition from the cottage cheese. It's perfect for busy mornings when you need something quick but filling, post-workout fuel to help your muscles recover, or honestly anytime you want something that feels indulgent but is actually good for you. The best part? It comes together in 5 minutes and keeps you full for hours thanks to all that protein!
Frequently Asked Questions
Q: Do I have to use cottage cheese? What else can I use for protein?
A: Cottage cheese is the star of this recipe because it blends up incredibly creamy and gives you that 20+ grams of protein, but I understand not everyone loves it! If you want to substitute, try Greek yogurt (plain, full-fat works best) - use 1 cup and you'll get similar protein and creaminess. Silken tofu is another great option that blends silky smooth - use about ¾ cup firm silken tofu plus ¼ cup Greek yogurt for the best texture. You could also use ricotta cheese, which is milder than cottage cheese and very creamy. If you go with regular yogurt instead of cottage cheese or Greek yogurt, you'll want to add a scoop of vanilla protein powder to keep the protein content high. Just know that cottage cheese truly does blend up the smoothest and creamiest when you use a high-speed blender!
Q: My smoothie isn't completely smooth - I can still taste/see cottage cheese curds. What am I doing wrong?
A: The key to a perfectly smooth, creamy texture is blending long enough and having a powerful enough blender. If you're using a high-speed blender like a Vitamix or Ninja, blend for a full 45-60 seconds until you can't see any cottage cheese curds at all - it should look like a milkshake. If you have a regular blender, you may need to blend for up to 90 seconds, stopping to scrape down the sides if needed. Another trick is to blend the cottage cheese with the milk and vanilla first for 30 seconds to break it down, then add the frozen ingredients and blend again. Make sure you're using full-fat or 2% cottage cheese (not fat-free), as it blends smoother. Small curd cottage cheese also blends more easily than large curd.
Q: Can I make this smoothie ahead of time or freeze it?
A: This smoothie is best enjoyed fresh since the texture is so creamy and perfect right out of the blender. However, you can absolutely prep it ahead! Pour individual portions into freezer-safe containers or bags with all the ingredients (cottage cheese, frozen orange juice concentrate, banana, milk, vanilla) pre-measured. When you're ready, just dump the frozen ingredients into the blender and blend - it's like a smoothie kit! If you make the smoothie and need to store it, keep it in an airtight container in the fridge for up to 4 hours, but give it a good stir or quick re-blend before drinking as it may separate slightly. You can also pour it into popsicle molds and freeze for orange creamsicle protein popsicles - they're delicious!
Q: Is frozen orange juice concentrate necessary, or can I use regular orange juice?
A: The frozen orange juice concentrate is what gives this smoothie that intense, authentic creamsicle flavor without watering it down. Regular orange juice is much more diluted and won't give you the same bold orange taste - you'd need to use a lot more of it, which would make the smoothie too thin and less creamy. If you absolutely can't find frozen concentrate, you could use ½ cup fresh-squeezed orange juice plus the zest of 1 orange to boost the flavor, but you'll need to add more ice cubes (5-6) to compensate for the extra liquid and get that thick, creamy texture. You might also need to add a tablespoon of honey or maple syrup since concentrate is sweeter. The frozen concentrate really is worth seeking out - you'll find it in the freezer section near frozen juices!
This Orange Creamsicle High-Protein Smoothie tastes like dessert but packs over 20 grams of protein! Cottage cheese blends up incredibly smooth and creamy with frozen orange juice, banana, and vanilla for that nostalgic creamsicle flavor. The secret? Swirl whipped cream inside the glass first for a beautiful presentation and extra creaminess. It's perfect for busy mornings, post-workout fuel, or anytime you need a sweet treat that actually fuels your body!
Rate This Recipe!
Preparations
Prep Time:
5 minutes
Total Time:
5 minutes
Cuisine:
American
Course:
Breakfast, Drinks
Calories:
280 kcal (approx. per serving)
Servings:
1
Author:
Ronica Rupan
Ingredients
Ingredients
- 1 cup Knudsen cottage cheese (@knudsen_dairy)
- ½ cup frozen orange juice concentrate
- ½ frozen banana
- ¼ cup milk (any kind works, whole, almond, oat, or your favorite)
- 1 teaspoon pure vanilla extract
- 3-4 ice cubes (optional, for thicker texture)
- Whipped cream (for swirling inside glass and topping)
- Orange zest, for garnish (optional)
- Optional: honey or maple syrup to taste
Instructions
1. Prep the Glass
Take your serving glass and swipe the inside with whipped cream in a circular motion, creating swirls around the inside of the glass. This creates a beautiful presentation and adds extra creaminess! Place the prepared glass in the freezer while you make the smoothie. This keeps the whipped cream from sliding down.
2. Blend the Smoothie
Add the cottage cheese, frozen orange juice concentrate, frozen banana, milk, and vanilla extract to a high-speed blender. Blend on high speed for 30-45 seconds until completely smooth and creamy with no lumps. The cottage cheese should be totally silky. If you have a less powerful blender, you may need to blend for up to a full minute.
3. Adjust Consistency
Check the thickness. If you want it thicker like a milkshake, add 3-4 ice cubes and blend again for another 15-20 seconds. If it's too thick, add a splash more milk and blend briefly.
4. Taste and Sweeten
Taste your smoothie. The frozen orange juice and banana usually provide enough sweetness, but if you want it sweeter, add a drizzle of honey or maple syrup and blend for a few more seconds to incorporate.
5. Pour and Serve
Remove your prepared glass from the freezer. Pour the smoothie into the whipped cream-swirled glass. You'll see those gorgeous white streaks throughout! Top with a generous dollop of whipped cream and sprinkle with fresh orange zest if you want to make it extra pretty.
6. Enjoy Immediately
Serve right away with a straw or spoon. This smoothie is thick and creamy, perfect for sipping slowly or eating with a spoon like a smoothie bowl!
Strawberry Shortcake Ice Cream Sandwiches

These Strawberry Shortcake Ice Cream Sandwiches are the sweet treat you didn't know you needed! They're layers of pure nostalgic bliss that taste just like those classic strawberry shortcake ice cream bars from your childhood, but homemade with way better ingredients and flavor. The crust and topping are made from buttery shortbread cookies crushed together with tangy freeze-dried strawberries and melted white chocolate, creating this crunchy, sweet-tart layer that adds incredible texture to every bite. The middle is a dreamy no-churn strawberry ice cream that's ridiculously creamy and packed with real strawberry flavor from both powdered freeze-dried strawberries and fresh chopped strawberries. The best part? You don't need an ice cream maker! Just whip some heavy cream, fold it into sweetened condensed milk and strawberries, and freeze. The whole thing comes together in layers, press half the crumb mixture into a pan for the bottom crust, pour in the ice cream, top with the remaining crumbs, and freeze overnight. The next day you have these beautiful, sliceable ice cream bars with a perfect balance of creamy and crunchy in every bite. The freeze-dried strawberries give you that intense strawberry flavor and pretty pink color, while the fresh strawberries add little pockets of fruity sweetness throughout. These are perfect for summer parties, make-ahead desserts, or anytime you want something that feels special but doesn't require any fancy equipment. Just slice, serve, and watch them disappear!
These Strawberry Shortcake Ice Cream Sandwiches are the sweet treat you didn't know you needed! Buttery shortbread cookie crumbs mixed with freeze-dried strawberries and white chocolate create a crunchy crust and topping, while creamy no-churn strawberry ice cream fills the middle. They taste just like those nostalgic strawberry shortcake ice cream bars but homemade and so much better. No ice cream maker needed, just whip, fold, freeze, and enjoy!
Rate This Recipe!
Preparations
Prep Time:
20 minutes
Freeze Time:
Overnight (8+ hours)
Total Time:
8 hours 20 minutes
Cuisine:
American
Course:
Dessert
Calories:
320 kcal (approx. per bar)
Servings:
12 bars
Author:
Ronica Rupan
Ingredients
Ingredients
For the Crust & Topping:
- 25 shortbread cookies (about 10 ounces)
- 1 cup freeze-dried strawberries, crushed (not powdered)
- 5 tablespoons unsalted butter, melted
- ¼ cup white chocolate, chopped
For the No-Churn Ice Cream:
- 2 cups heavy whipping cream, cold
- 1 (14-ounce) can sweetened condensed milk
- 1 teaspoon vanilla paste (or vanilla extract)
- ½ cup freeze-dried strawberries, crushed into fine powder
- ½ cup fresh strawberries, finely chopped
Instructions
1. Prepare the Pan
Line an 8x8-inch square baking pan with parchment paper, leaving overhang on the sides for easy removal later. This is important for clean slicing!
2. Make the Crust Mixture
Add the shortbread cookies to a food processor and pulse until they're broken down into fine crumbs. Add the 1 cup of crushed freeze-dried strawberries (leave them in small pieces, not powdered) and pulse a few more times to combine. If you don't have a food processor, place the cookies in a sealed plastic bag and crush with a rolling pin, then mix with the strawberries in a bowl.
Transfer the cookie-strawberry mixture to a large bowl. Add the melted butter and chopped white chocolate. Mix everything together with a fork or your hands until the mixture is moistened and starts to clump together when pressed. It should look like wet sand with visible strawberry pieces and white chocolate chips throughout.
3. Press the Bottom Crust
Take half of the crumb mixture and press it firmly and evenly into the bottom of your prepared pan. Use the bottom of a measuring cup or glass to really pack it down, this creates a solid base that won't crumble when you slice. Set the remaining crumb mixture aside for the topping.
4. Make the Ice Cream Base
In a large bowl or stand mixer, whip the cold heavy cream on medium-high speed until soft peaks form, about 3-4 minutes. The cream should be fluffy and hold its shape but still look slightly glossy, not stiff and dry. Set aside.
5. Mix the Condensed Milk Mixture
In a separate large bowl, combine the sweetened condensed milk, vanilla paste, ½ cup powdered freeze-dried strawberries, and the finely chopped fresh strawberries. Stir everything together until well combined. The freeze-dried strawberry powder will give it a beautiful pink color and intense strawberry flavor.
6. Fold Together
Gently fold the whipped cream into the condensed milk-strawberry mixture using a spatula. Fold slowly and carefully, scooping from the bottom and folding over the top, until everything is fully combined and you have a uniform pink color. Don't overmix or you'll deflate the whipped cream and lose that airy texture.
7. Assemble
Pour the ice cream mixture over the pressed bottom crust in the pan. Use a spatula to spread it out evenly, smoothing the top. Sprinkle the remaining crumb mixture evenly over the top of the ice cream layer. Gently press down on the crumbs with your hands or the back of a spoon to help them stick to the ice cream.
8. Freeze Overnight
Cover the pan tightly with plastic wrap or aluminum foil. Freeze for at least 8 hours or overnight until completely solid. This freezing time is essential for the ice cream to set properly and for clean slicing.
9. Slice and Serve
When ready to serve, use the parchment paper overhang to lift the entire block out of the pan. Place on a cutting board and let it sit at room temperature for 2-3 minutes to make slicing easier. Use a large, sharp knife to cut into 12 bars (3 rows x 4 rows). Wipe the knife clean between cuts for the cleanest slices. Serve immediately and enjoy!
10. Store
Wrap individual bars in parchment paper or store them in an airtight container in the freezer for up to 1 week. They're perfect to grab whenever you need a sweet treat!
Eggnog Tiramisu Jars

This Eggnog Tiramisu is a festive holiday twist on the classic Italian dessert that everyone will love! Instead of the traditional coffee-soaked layers, this version combines the best of both worlds, rich mascarpone cream infused with homemade eggnog and warm spices like cinnamon and nutmeg, layered with espresso-dipped ladyfingers for that signature tiramisu flavor. The homemade eggnog is silky, custard-like, and adds this incredible depth and creaminess to the mascarpone filling that you just can't get from store-bought. Each individual jar gets layered with the spiced mascarpone cream and espresso-eggnog soaked ladyfingers, creating these beautiful striped layers that look as impressive as they taste. The whole thing gets topped with a cloud of sweetened whipped cream and finished with a festive dusting of finely ground gingerbread cookies, nutmeg, and cinnamon that makes it feel extra special. The best part about this dessert is that it actually gets better as it sits, the flavors meld together and the ladyfingers soften to the perfect texture, so you can make it a day ahead and just pull it out of the fridge when you're ready to serve. It's rich, indulgent, and tastes like the holidays in every spoonful, perfect for Christmas dinner, New Year's Eve, or any time you want a showstopping dessert that combines two classics into something uniquely delicious!
This Eggnog Tiramisu is a festive twist on the classic Italian dessert! Creamy mascarpone gets mixed with homemade eggnog and warm spices, then layered with espresso-soaked ladyfingers for the perfect holiday treat. Each jar is topped with fluffy whipped cream and a dusting of ground gingerbread cookies, cinnamon, and nutmeg. It's rich, indulgent, and tastes like the holidays in dessert form. Make it ahead and let it chill for the flavors to meld together beautifully!
Rate This Recipe!
Preparations
Prep Time:
30 minutes
Cook Time:
10 minutes
Chill Time
4 hours (or overnight)
Total Time:
4 hours 40 minutes
Cuisine:
Italian-American Fusion
Course:
Dessert
Calories:
380 kcal (approx. per serving)
Servings:
6 individual jars or 1 large dish (serves 8-10)
Author:
Ronica Rupan
Ingredients
Ingredients
For the Homemade Eggnog:
- 2 large egg yolks
- ¼ cup granulated sugar
- ⅔ cup whole milk
- ⅓ cup heavy whipping cream
- ⅓ teaspoon vanilla extract
- ⅛ teaspoon ground nutmeg
- Pinch of ground cinnamon
- Pinch of kosher salt
For the Mascarpone Cream:
- 2 large egg yolks
- ½ cup powdered sugar
- 8 ounces mascarpone cheese, at room temperature
- ¼ cup eggnog (from above)
- ½ teaspoon ground cinnamon
- ¼ teaspoon ground nutmeg
- ⅔ cup heavy whipping cream, cold
For the Assembly:
- ½ cup strong brewed espresso or coffee, cooled
- ¼ cup eggnog (from above)
- 24-30 ladyfinger cookies (savoiardi)
For the Topping:
- ⅓ cup heavy whipping cream, cold
- 3 tablespoons powdered sugar
- 2-3 gingerbread cookies, finely ground into crumbs
- Ground nutmeg, for dusting
- Ground cinnamon, for dusting
Instructions
1. Make the Homemade Eggnog
In a medium bowl, whisk together the egg yolks and sugar until thick, pale, and slightly fluffy, about 2 minutes. In a small saucepan, heat the milk over medium heat until it's steaming but not boiling. Slowly pour about half of the hot milk into the egg mixture while whisking constantly to temper the eggs. This prevents them from scrambling. Pour the tempered egg mixture back into the saucepan with the remaining milk.
Cook over medium-low heat, stirring constantly with a wooden spoon or spatula, until the mixture thickens slightly and coats the back of the spoon, about 3-5 minutes. It should reach about 160°F if you're using a thermometer. Remove from heat and stir in the heavy cream, vanilla extract, nutmeg, cinnamon, and a pinch of salt. Strain the eggnog through a fine-mesh sieve into a bowl to remove any cooked egg bits. Cover and refrigerate until completely chilled, at least 2 hours or up to 2 days.
2. Make the Mascarpone Cream
In a large bowl, whisk the egg yolks with ½ cup powdered sugar until thick and pale. Add the room temperature mascarpone cheese, ¼ cup of the chilled eggnog, cinnamon, and nutmeg. Beat with a hand mixer or whisk until smooth and creamy with no lumps.
In a separate clean bowl, whip ⅔ cup of cold heavy cream until soft peaks form, about 2-3 minutes. Gently fold the whipped cream into the mascarpone mixture using a spatula, being careful not to deflate it. This creates a light, airy filling. Set aside in the refrigerator while you prep the assembly.
3. Prepare the Dipping Liquid
In a shallow dish, mix together the cooled espresso or strong coffee with ¼ cup of the chilled eggnog. This is what you'll dip your ladyfingers in.
4. Assemble the Tiramisu
If making individual jars: Spread a few tablespoons of the mascarpone cream in the bottom of each jar or glass. Quickly dip ladyfingers one at a time into the espresso-eggnog mixture (about 1-2 seconds per side, don't oversoak or they'll fall apart), then break them to fit into your jars, creating a layer over the cream. Add another layer of mascarpone cream on top. Repeat the layers, ending with mascarpone cream on top. You should get 2-3 layers depending on your jar size.
If making one large dish: Spread about a third of the mascarpone cream in the bottom of a 9x9-inch dish or trifle bowl. Dip ladyfingers and arrange in a single layer over the cream. Spread half of the remaining mascarpone cream over the ladyfingers. Repeat with another layer of dipped ladyfingers and the remaining mascarpone cream.
5. Make the Whipped Cream Topping
In a clean bowl, whip the remaining ⅓ cup heavy cream with 3 tablespoons powdered sugar until stiff peaks form. Pipe or dollop the whipped cream on top of each jar or spread it over the large dish.
6. Chill
Cover the tiramisu jars or dish with plastic wrap and refrigerate for at least 4 hours, or preferably overnight. This chilling time is essential for the flavors to meld and the ladyfingers to soften to that perfect texture.
7. Finish and Serve
Just before serving, finely grind 2-3 gingerbread cookies in a food processor or crush them in a sealed bag. Dust the top of each tiramisu with the gingerbread cookie crumbs, a sprinkle of ground nutmeg, and a pinch of ground cinnamon. Serve cold and enjoy!
Garlic Confit
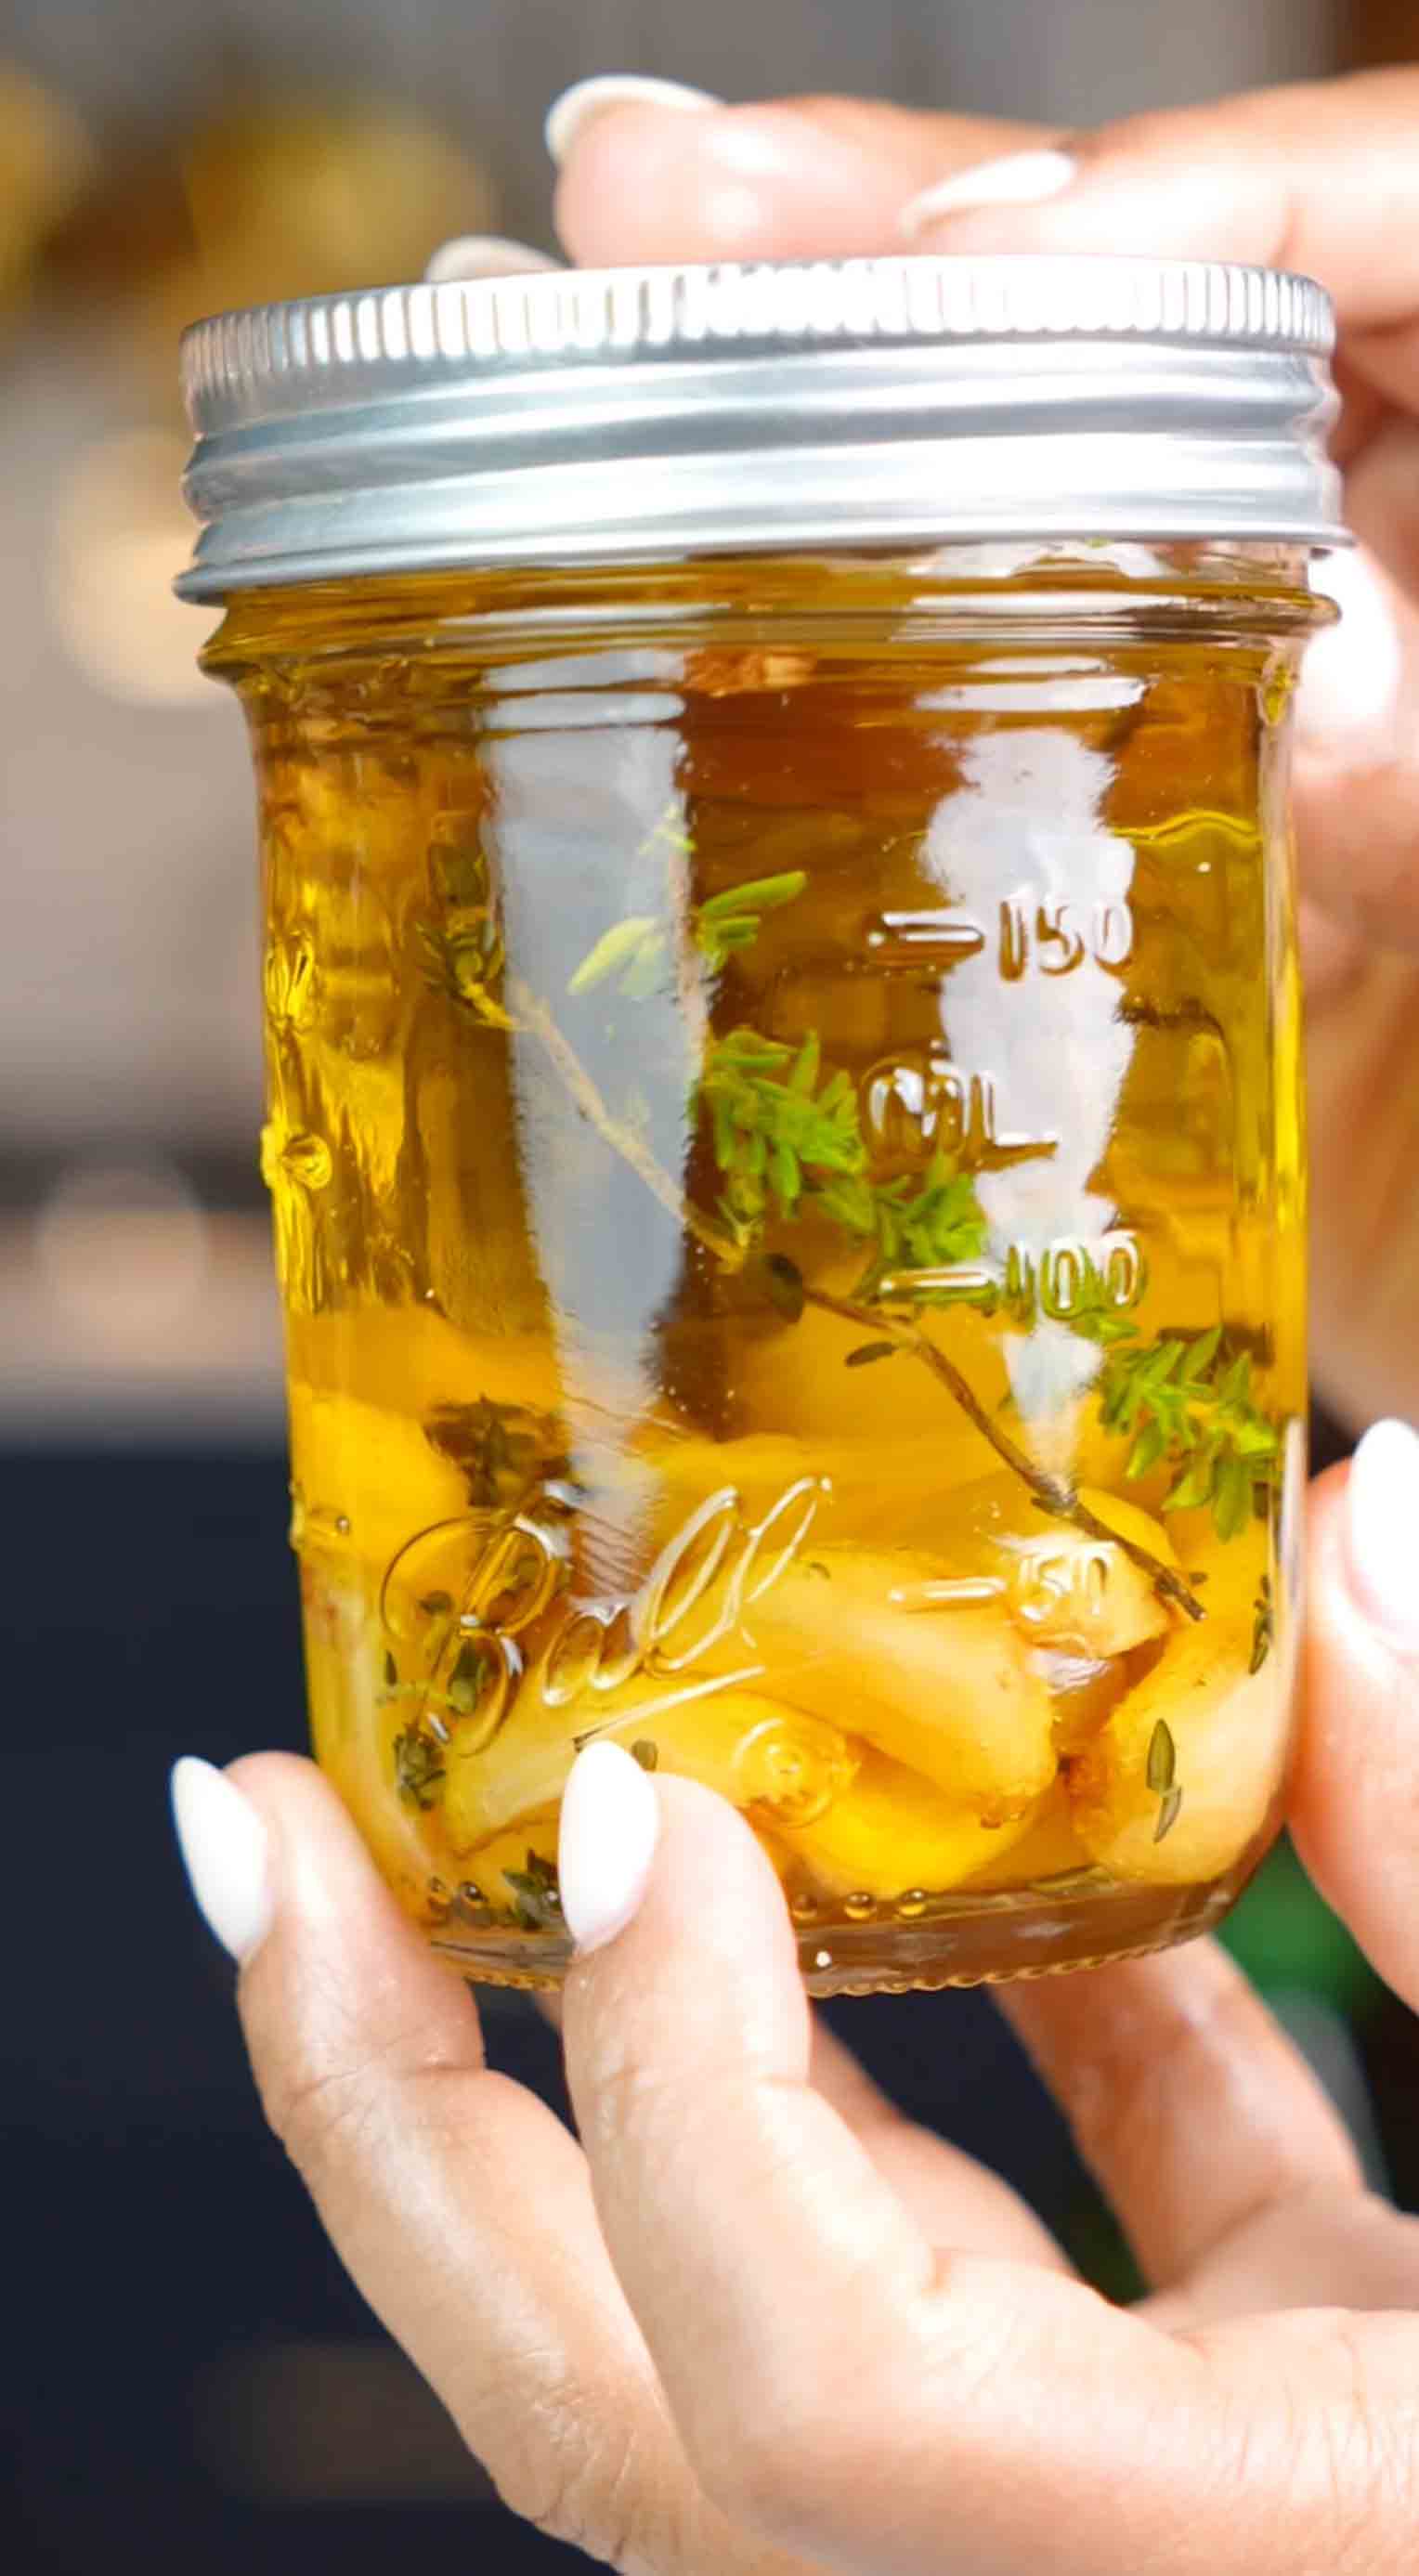
This Garlic Confit is pure kitchen gold and about to become your new secret weapon! Soft, buttery garlic cloves get slowly simmered in silky olive oil until they transform into something completely different from raw garlic. They become melt-in-your-mouth tender, sweet, and spreadable, losing all that sharp bite and developing this rich, mellow flavor that's almost caramelized. The best part? You get two ingredients for the price of one, the garlic cloves themselves and the aromatic, garlic-infused oil that's perfect for cooking, drizzling, or using as a dressing base. I love adding fresh herbs like thyme, rosemary, or bay leaf while it simmers to infuse even more flavor into the oil. The whole process takes less than 40 minutes and requires almost no effort, just gentle heat and patience. Once you have a jar of this in your fridge, you'll find yourself reaching for it constantly. Smear those soft cloves on crusty bread, toss them into pasta with the infused oil, mash them into mashed potatoes, stir them into soups, or add them to roasted vegetables for instant depth of flavor. It's one of those simple preparations that makes everything taste better and feels like you put in way more effort than you actually did. Fair warning though, once you start making garlic confit regularly, you'll want to put it on absolutely everything!
This Garlic Confit is pure kitchen gold! Soft, buttery garlic cloves slowly simmered in olive oil until they're melt-in-your-mouth tender and sweet. The result is spreadable garlic that's lost all its bite and infused oil that's packed with flavor. Smear it on toast, toss it with pasta, add it to roasted veggies, or use it as a base for dressings. Once you make this, you'll wonder how you ever cooked without it!
Rate This Recipe!
Preparations
Prep Time:
5 minutes
Cook Time:
25 minutes
Steep Time
10 minutes
Total Time:
40 minutes
Cuisine:
French-inspired
Course:
Sauce, Kitchen Essentials
Calories:
45 kcal (approx. per tablespoon with oil)
Servings:
About 1 cup (12-15 cloves plus oil)
Author:
Ronica Rupan
Ingredients
Ingredients
- 12-15 cloves garlic, peeled (about 2-3 whole heads)
- 1 cup extra virgin olive oil (or enough to fully submerge the garlic)
- Optional: 2-3 sprigs fresh thyme, rosemary, or 1-2 bay leaves
Instructions
1. Prep the Garlic
Peel your garlic cloves. To make peeling easier, you can smash them lightly with the flat side of a knife, the skins will slip right off. You can leave them whole or slice any extra-large cloves in half so they cook evenly.
2. Add Garlic and Oil to Saucepan
Place the peeled garlic cloves in a small, heavy-bottomed saucepan. Pour in enough olive oil to completely cover the garlic cloves by at least half an inch. If you're using herbs, add them now, tucking the sprigs or bay leaves into the oil.
3. Simmer on Low Heat
Place the saucepan over the lowest heat setting on your stove. You want the oil to barely simmer with just tiny bubbles forming around the garlic. This is not frying! If the oil starts bubbling vigorously or the garlic begins to brown too quickly, reduce the heat immediately. Let it gently simmer for 25 minutes, stirring occasionally. The garlic should be soft, golden, and tender when pierced with a fork, but not browned or crispy.
4. Steep Off Heat
Remove the saucepan from the heat and let the garlic steep in the hot oil for another 10 minutes. This allows the flavors to continue developing and ensures the garlic is completely tender throughout.
5. Cool and Store
Let the garlic confit cool to room temperature. Transfer everything, the garlic cloves, oil, and herbs if you want to keep them for presentation, to a clean, dry glass jar with a tight-fitting lid. Remove the herb sprigs if you prefer a cleaner look or if you're storing it for the full 2 weeks. Make sure the garlic is completely submerged in oil. Seal and refrigerate.
6. Use and Enjoy
Use the soft garlic cloves and infused oil in all your favorite dishes! The garlic will keep in the refrigerator for up to 2 weeks as long as it stays completely covered in oil.
How to Use Garlic Confit
- On Toast: Smash the soft cloves onto crusty bread and drizzle with the infused oil
- In Pasta: Toss with hot pasta, pasta water, and the garlic oil for instant sauce
- With Eggs: Add to scrambled eggs or omelets for rich, mellow garlic flavor
- Roasted Vegetables: Toss vegetables with the cloves and oil before roasting
- Mashed Potatoes: Mash the soft cloves right into your potatoes
- Salad Dressings: Use the infused oil as a base for vinaigrettes
- Pizza or Flatbread: Spread the cloves on dough before topping
- Soups and Stews: Stir in for deep, savory flavor
- Compound Butter: Mix with softened butter for garlic bread
Creamy Sour Cream Chicken Enchiladas
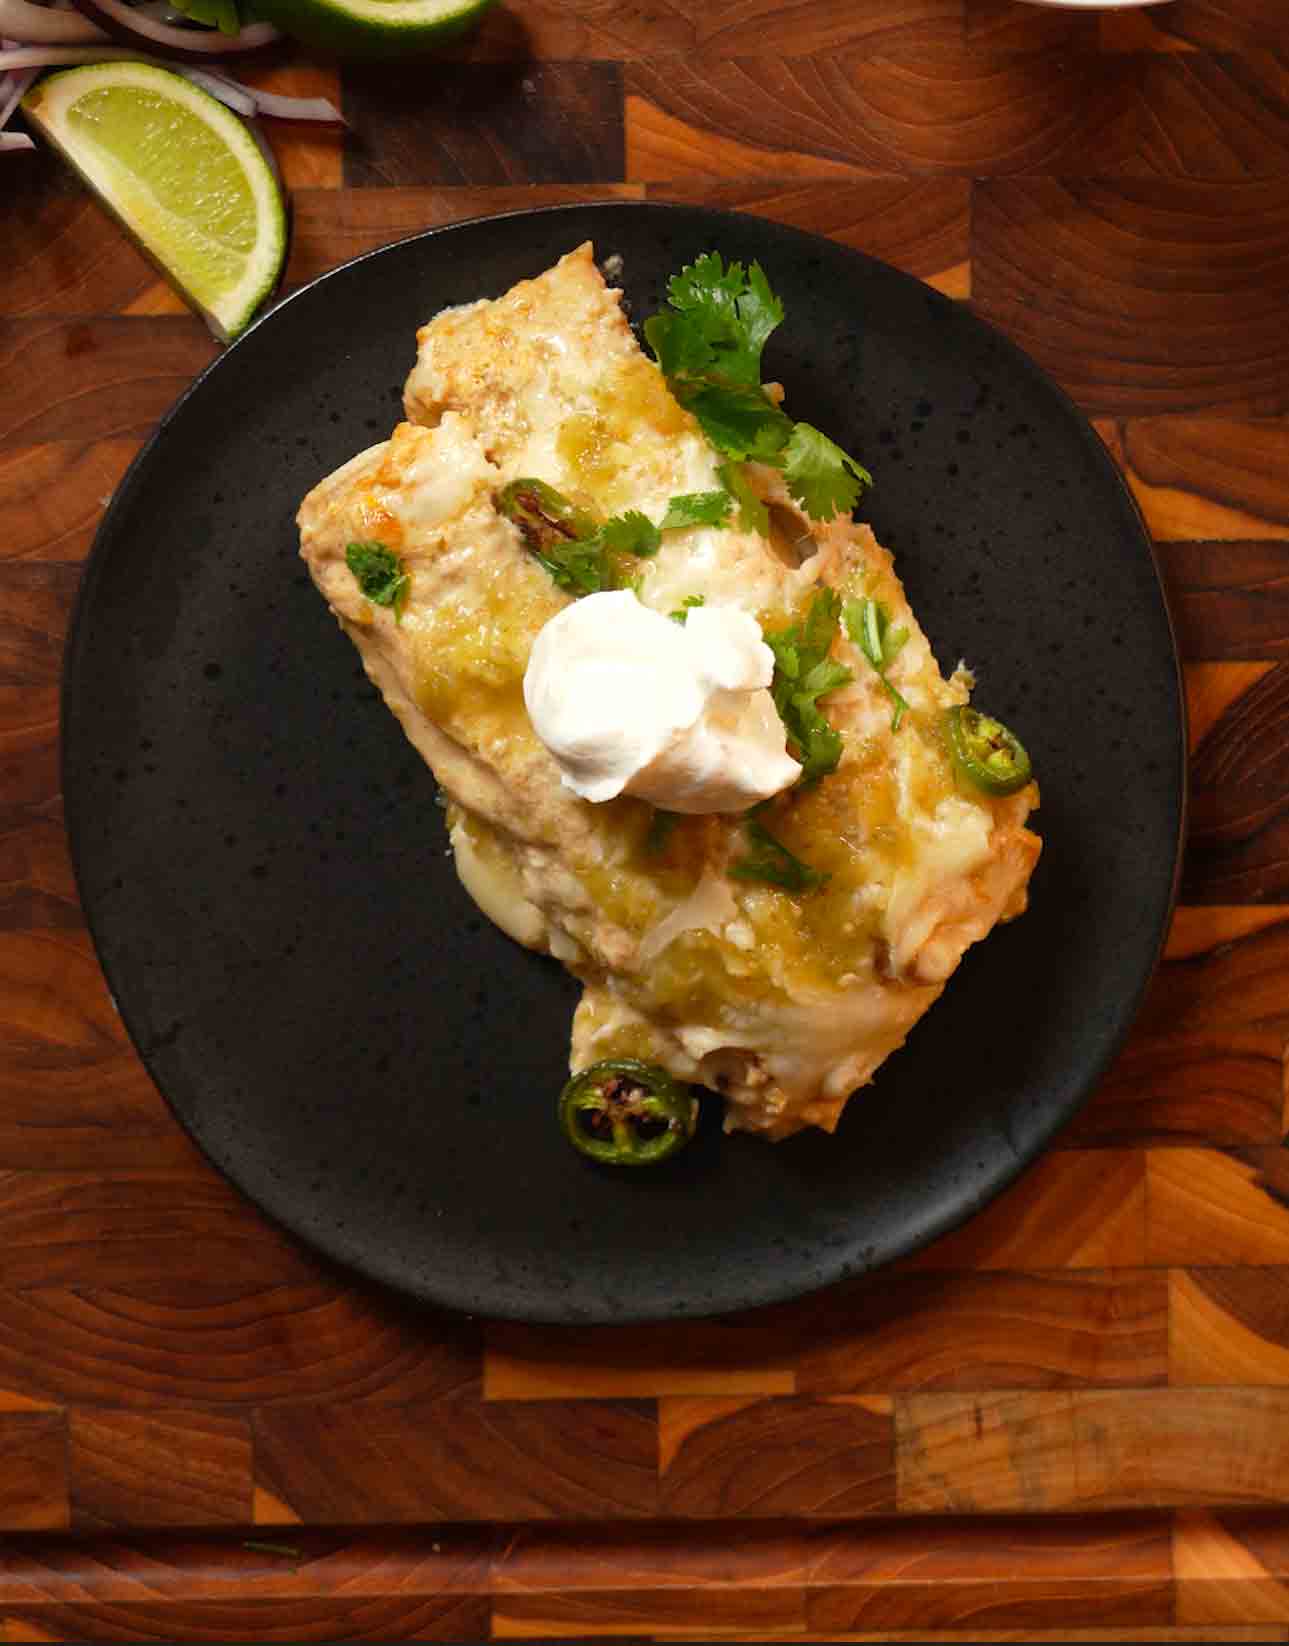
These Creamy Sour Cream Chicken Enchiladas are comfort food at its finest! Tender shredded chicken gets mixed with green chiles and melty cheese, rolled up in soft corn tortillas, then smothered in the creamiest sour cream sauce you've ever tasted. The sauce is what makes these special, a rich blend of sour cream, salsa verde, and warm spices that's tangy, slightly spicy, and absolutely delicious. Topped with more cheese and a drizzle of salsa verde, these bake up bubbly and golden, ready to be devoured with extra sour cream and fresh lime. They're perfect for weeknight dinners, potlucks, or anytime you're craving something cozy and satisfying. Plus, using rotisserie chicken means they come together in under an hour!
These Creamy Sour Cream Chicken Enchiladas are pure comfort food! Tender rotisserie chicken mixed with green chiles and melty cheese, rolled in soft corn tortillas, then smothered in a rich, tangy sour cream sauce made with salsa verde and warm spices. Topped with more cheese and baked until bubbly and golden. They're perfect for weeknight dinners or potlucks, and come together in under an hour thanks to the rotisserie chicken shortcut. Serve with extra sour cream and fresh lime for the ultimate cozy, satisfying meal!
Rate This Recipe!
Preparations
Prep Time:
20 minutes
Cook Time:
25 minutes
Total Time:
45 minutes
Cuisine:
Mexican-American
Course:
Main Course, Dinner
Calories:
420 kcal (approx. per serving)
Servings:
4-6
Author:
Ronica Rupan
Ingredients
Ingredients
For the Sour Cream Sauce:
- 3 tablespoons unsalted butter
- 2 tablespoons all-purpose flour
- ½ teaspoon ground cumin
- 1 teaspoon paprika
- ½ teaspoon kosher salt
- ⅔ cup low-sodium chicken broth
- 1 cup salsa verde
- 1 cup Knudsen sour cream
For the Filling:
- 4 cups pre-cooked shredded rotisserie chicken
- 1 (4-ounce) can mild diced green chiles
- ½ cup shredded Monterey Jack cheese
- ½ cup shredded Oaxaca cheese (or mozzarella)
- 1 teaspoon kosher salt
For the Enchiladas:
- 8-10 corn tortillas
- ½ cup shredded Monterey Jack cheese, for topping
- ½ cup shredded Oaxaca cheese, for topping
- ½ cup salsa verde, for drizzle
- ½ jalapeño, very thinly sliced (optional)
- 2 tablespoons finely chopped fresh cilantro
For Serving:
- Extra Knudsen sour cream, for dolloping
- Fresh lime wedges
Instructions
1. Preheat and Prep
Preheat your oven to 375°F (190°C). Generously grease a 9x13-inch baking dish with butter or cooking spray and set aside.
2. Warm the Tortillas
Warm your corn tortillas to make them pliable and prevent cracking when you roll them. Wrap them in damp paper towels and microwave for 30-45 seconds, or heat each one in a dry skillet for about 10 seconds per side. Keep them wrapped in a clean kitchen towel to stay warm while you work.
3. Make the Sour Cream Sauce
In a medium saucepan over medium heat, melt the 3 tablespoons of butter. Once melted and bubbling, add the flour and whisk constantly for about 1 minute to create a roux. It should smell slightly nutty but not burn. Add the cumin, paprika, and salt, whisking to combine. Slowly pour in the chicken broth while whisking constantly to prevent lumps. The mixture will thicken as you whisk. Stir in 1 cup of salsa verde and continue whisking until the sauce is smooth and thickened, about 2 minutes. Remove from heat and add 1 cup of Knudsen sour cream, whisking until completely smooth and creamy. Set aside.
4. Make the Chicken Filling
In a large bowl, combine the shredded rotisserie chicken, ½ cup of the sour cream sauce you just made, the diced green chiles, ½ cup Monterey Jack cheese, ½ cup Oaxaca cheese, and 1 teaspoon kosher salt. Stir everything together until the chicken is well coated and the mixture is evenly combined.
5. Assemble the Enchiladas
Spread ½ cup of the sour cream sauce evenly across the bottom of your prepared 9x13-inch baking dish, this prevents the enchiladas from sticking. Take one warm tortilla and spoon about ⅓ cup of the chicken filling down the center. Roll it up tightly and place it seam side down in the baking dish. Repeat with the remaining tortillas and filling, arranging them snugly in a single layer in the dish.
6. Add the Toppings
Pour the remaining sour cream sauce evenly over all the rolled enchiladas, making sure each one gets coated. Sprinkle the remaining ½ cup Monterey Jack cheese and ½ cup Oaxaca cheese over the top. Drizzle with ½ cup salsa verde for extra flavor and a pop of green color. If you like a little heat, scatter the thinly sliced jalapeño over the top.
7. Bake Until Bubbly
Place the baking dish in the preheated oven and bake uncovered for 20-25 minutes, until the cheese is completely melted, bubbly, and starting to turn golden in spots. The edges should be slightly crispy and the sauce should be bubbling around the sides.
8. Garnish and Serve
Remove from the oven and let the enchiladas rest for 5 minutes to set slightly. Garnish with freshly chopped cilantro. Serve hot with generous dollops of extra Knudsen sour cream and fresh lime wedges on the side for squeezing over the top. The lime really brightens everything up!