Quick links
Dutch Baby with Cranberry Compote & Cream Cheese Whip
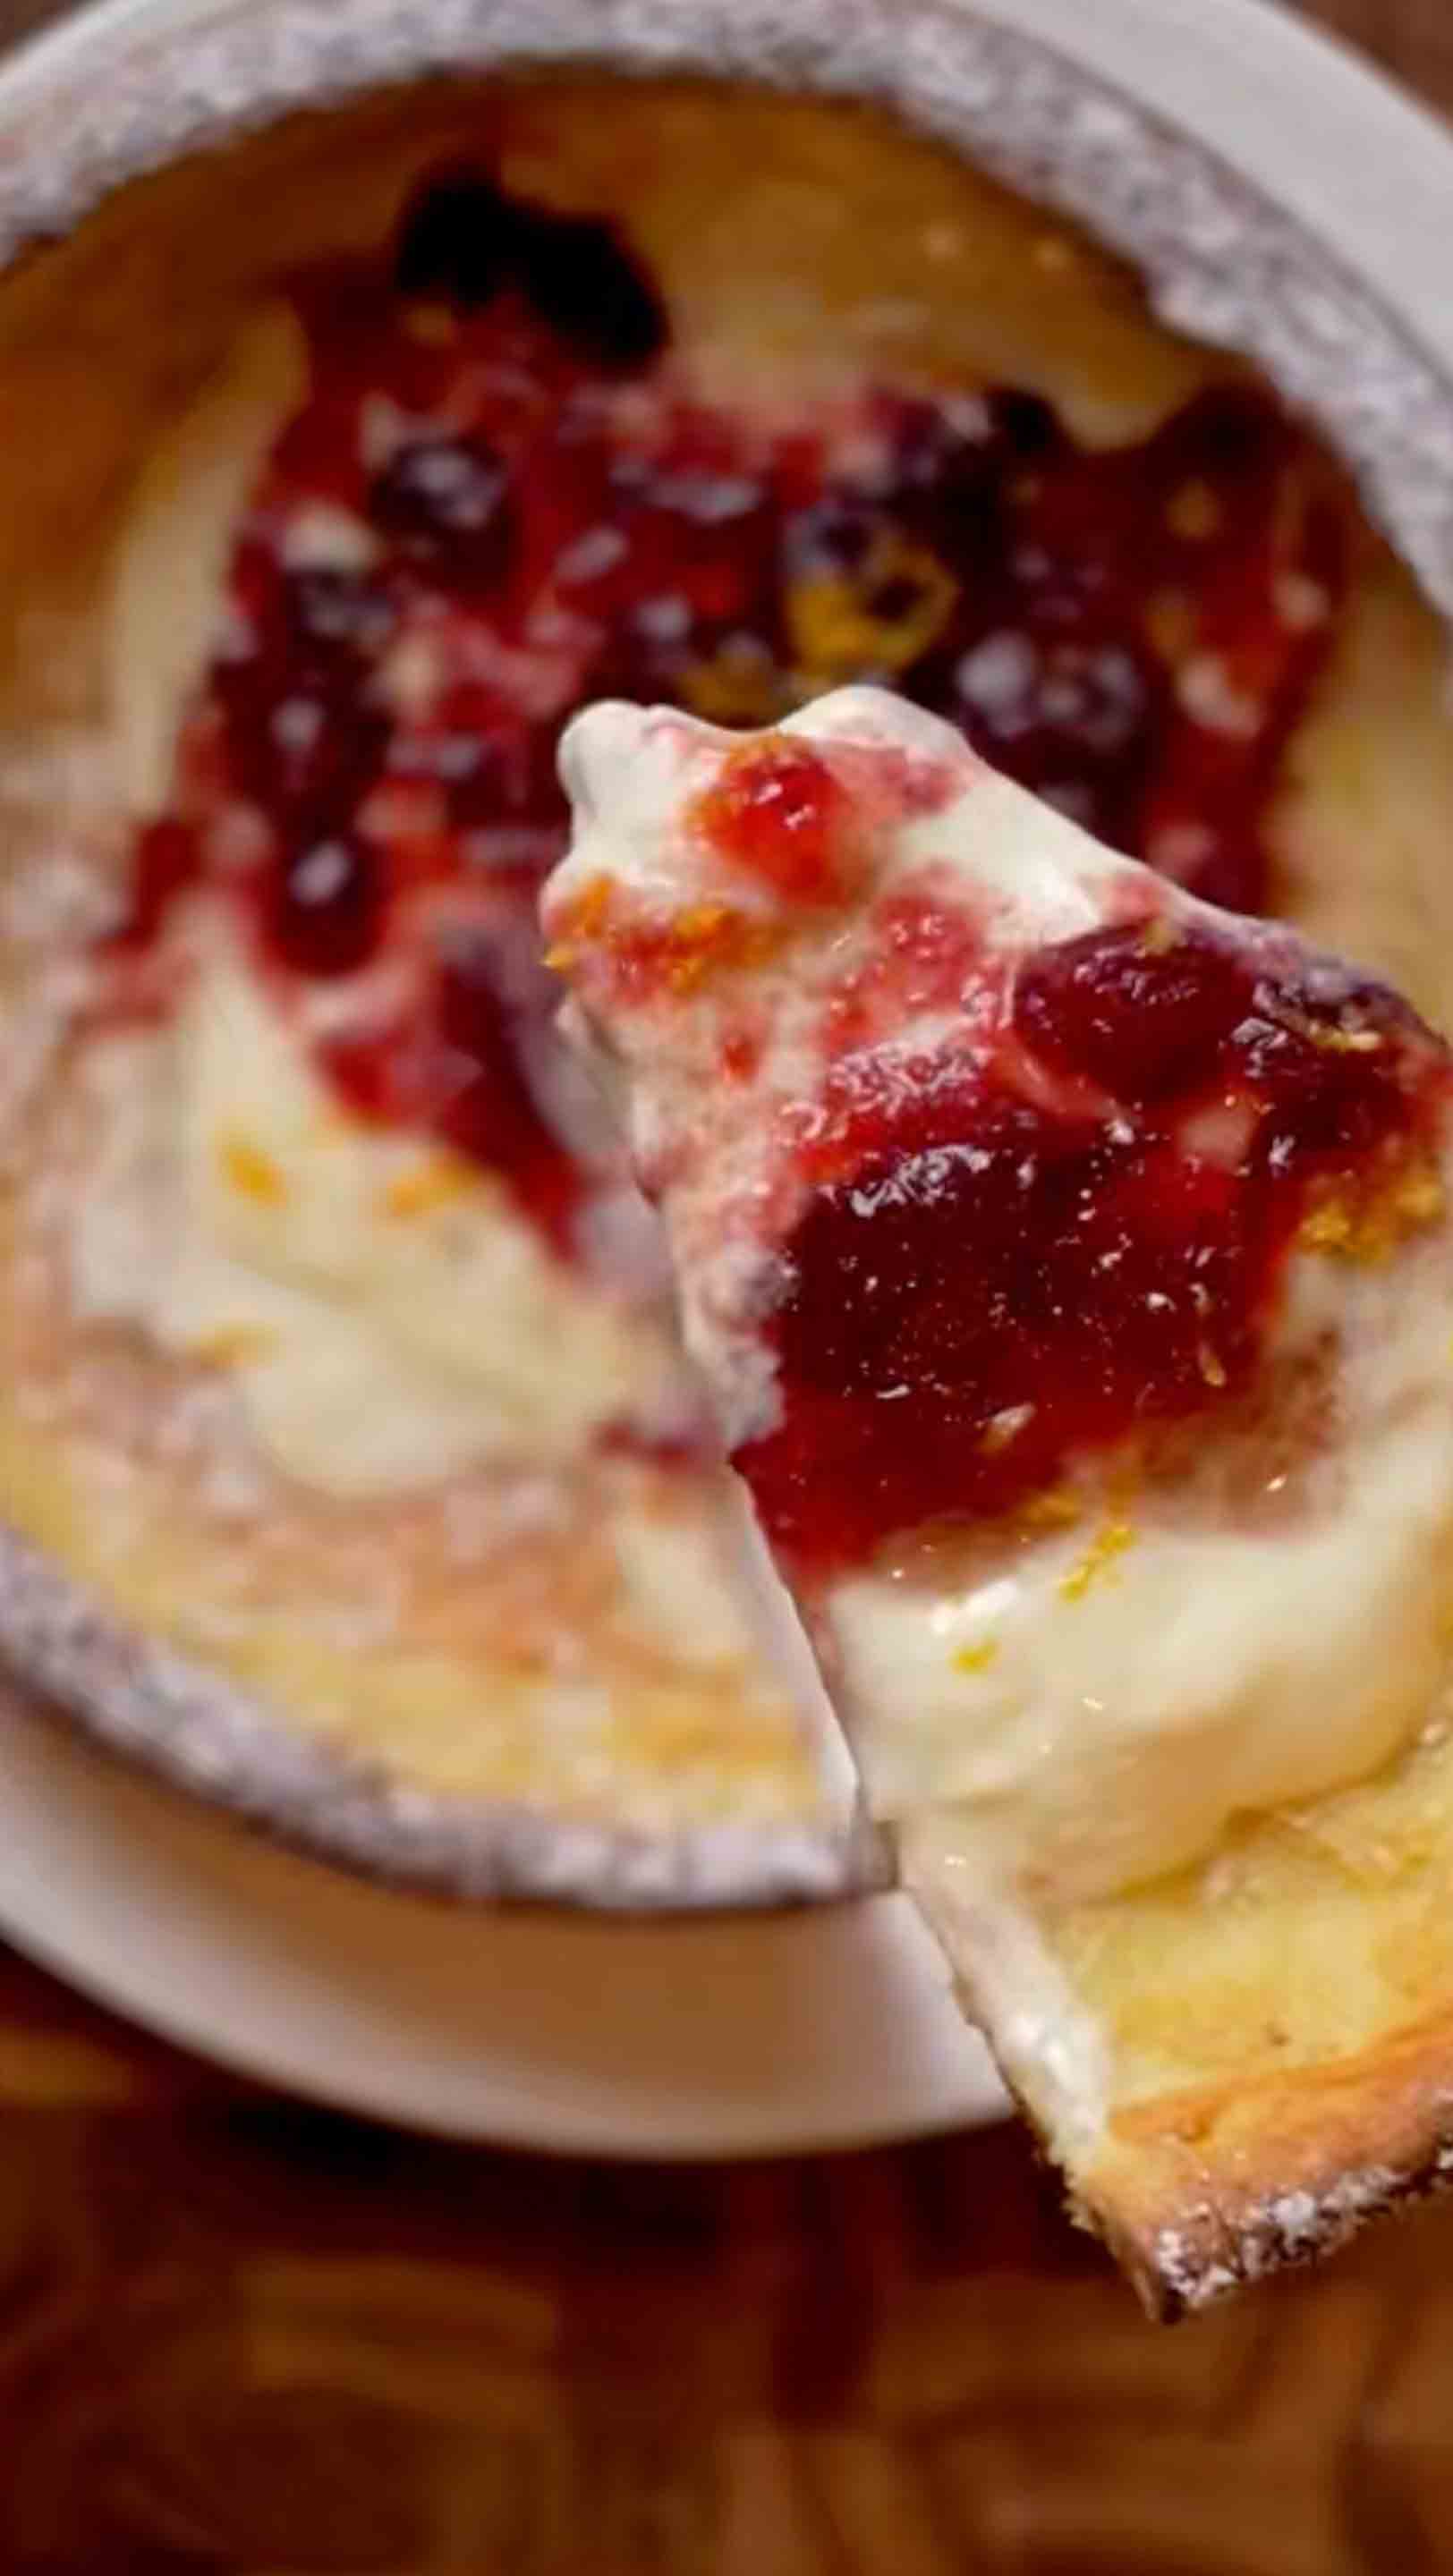
This Dutch Baby is seriously impressive! Also known as a Bismarck or Dutch puff, and made using the same technique as Yorkshire pudding (the classic British side dish), this dramatic dish puffs up beautifully in the oven using just the power of eggs, heat, and steam. It's one of those recipes that looks incredibly fancy but is surprisingly simple to make. The whole thing happens when you pour a simple egg-based batter into a screaming hot cast-iron skillet, the intense heat causes the edges to rise up tall and crispy while the center stays soft, custardy, and almost soufflé-like. What makes it even more amazing is that this dramatic puff happens without any baking powder or soda, just like Yorkshire pudding, it's all about the hot fat and high heat creating steam that lifts the batter. The secret to that perfect rise and crisp is all about temperature, the skillet needs to be so hot that the butter sizzles the moment it hits, and when you pour in the batter, it starts cooking instantly, creating those signature tall, golden edges. I love adding orange zest and warm nutmeg to the batter because it brings this bright, aromatic quality that makes every bite feel special, almost like you're eating at a fancy brunch spot. Then comes the topping situation, a tangy, fluffy cream cheese whip that balances the richness of the pancake, paired with a quick cranberry compote that adds tartness and a beautiful pop of color. The contrast is everything, crispy, buttery edges that shatter when you cut into them, a soft, pillowy center that's almost custard-like, the smooth creaminess of the whipped topping, and those bright, tart cranberries cutting through it all. Each forkful is different and interesting. This is the kind of breakfast that makes people think you spent hours in the kitchen when really it comes together in under 30 minutes. It's perfect for lazy weekend mornings when you want something more exciting than regular pancakes, holiday brunches where you need to feed a crowd something impressive, or anytime you want to wow guests without breaking a sweat. Just remember the golden rule: slice and serve it immediately while it's still puffed, hot, and looking like the showstopper it is, because once it deflates (which it will, and that's totally normal), the best part is eating it right away!
This Dutch Baby, also known as a Bismarck or Dutch puff, uses the same technique as Yorkshire pudding to create dramatic results. A screaming hot cast-iron skillet makes the batter puff up into tall, crispy golden edges with a soft, custardy center, no baking powder needed. I add orange zest and nutmeg for warmth, then top it with tangy cream cheese whip and cranberry compote for the perfect sweet-tart balance. It looks fancy but comes together in under 30 minutes, perfect for weekend mornings or holiday brunches. Just serve it immediately while it's still puffed and gorgeous!
Rate This Recipe!
Preparations
Prep Time:
10 minutes
Cook Time:
25 minutes
Total Time:
35 minutes
Cuisine:
German-American
Course:
Breakfast, Dessert
Calories:
280 kcal (approx. per serving)
Servings:
4
Author:
Ronica Rupan
Ingredients
For the Dutch Baby:
- 3 large eggs, room temperature
- ½ cup all-purpose flour
- ½ cup whole milk, room temperature
- 1 tablespoon granulated sugar
- ¼ teaspoon ground nutmeg
- 1 tablespoon orange zest (about 1 orange)
- 1 teaspoon vanilla extract
- 4 tablespoons unsalted butter
For the Cream Cheese Whip:
- 4 ounces cream cheese, softened to room temperature
- 2 tablespoons powdered sugar
- 3 tablespoons heavy cream
- 1 tablespoon orange zest
Optional Toppings:
- Maple syrup
- Fruit preserves
- Powdered sugar
- Cinnamon sugar
- Whipped cream
- Cranberry compote (see notes for recipe)
- Fresh berries
Instructions
1. Preheat and Prep
Preheat your oven to 425°F (220°C). Make sure your eggs and milk are at room temperature, this helps create a smoother batter and better rise. Place your 10-inch cast-iron skillet in the oven to heat up while you make the batter.
2. Make the Batter
In a blender, combine the eggs, flour, milk, sugar, nutmeg, orange zest, and vanilla extract. Blend on medium-high speed for about 30 seconds until completely smooth and slightly frothy. You can also whisk this by hand in a bowl, just make sure there are no lumps. Let the batter rest for a few minutes while the skillet heats.
3. Heat the Butter
Carefully remove the hot skillet from the oven using oven mitts (it will be very hot!). Add the 4 tablespoons of butter to the skillet and swirl it around until completely melted and coating the bottom and sides. The butter should sizzle immediately.
4. Bake the Dutch Baby
Quickly pour the batter into the center of the hot, buttered skillet. Immediately return the skillet to the oven. Bake for 20 minutes without opening the oven door, the Dutch Baby will puff up dramatically around the edges. After 20 minutes, reduce the temperature to 300°F (150°C) and bake for an additional 5 minutes to set the center. The edges should be golden brown and crispy, and the center should be set but still slightly custardy.
5. Make the Cream Cheese Whip
While the Dutch Baby is baking, make your cream cheese topping. In a medium bowl, beat the softened cream cheese and powdered sugar together with a hand mixer or whisk until smooth and creamy, about 1-2 minutes. Gradually add the heavy cream, one tablespoon at a time, beating after each addition until the mixture is light and fluffy. Fold in the orange zest. Set aside in the refrigerator until ready to use.
6. Serve Immediately
Remove the Dutch Baby from the oven. It will deflate slightly as it cools, and that's completely normal! Slice it into wedges right in the skillet or transfer to a serving plate. Top with generous dollops of the cream cheese whip, drizzle with maple syrup or cranberry compote, and dust with powdered sugar if desired. Serve immediately while it's still warm and crispy!
Quick Cranberry Compote (Optional)
Ingredients:
- 1 cup fresh or frozen cranberries
- ¼ cup sugar
- ¼ cup orange juice
- 1 teaspoon orange zest
Instructions: Combine all ingredients in a small saucepan over medium heat. Simmer for 8-10 minutes, stirring occasionally, until the cranberries burst and the mixture thickens. Let it cool slightly before serving. This compote can be made ahead and stored in the refrigerator for up to 1 week.
Creole Honey Chicken Wings
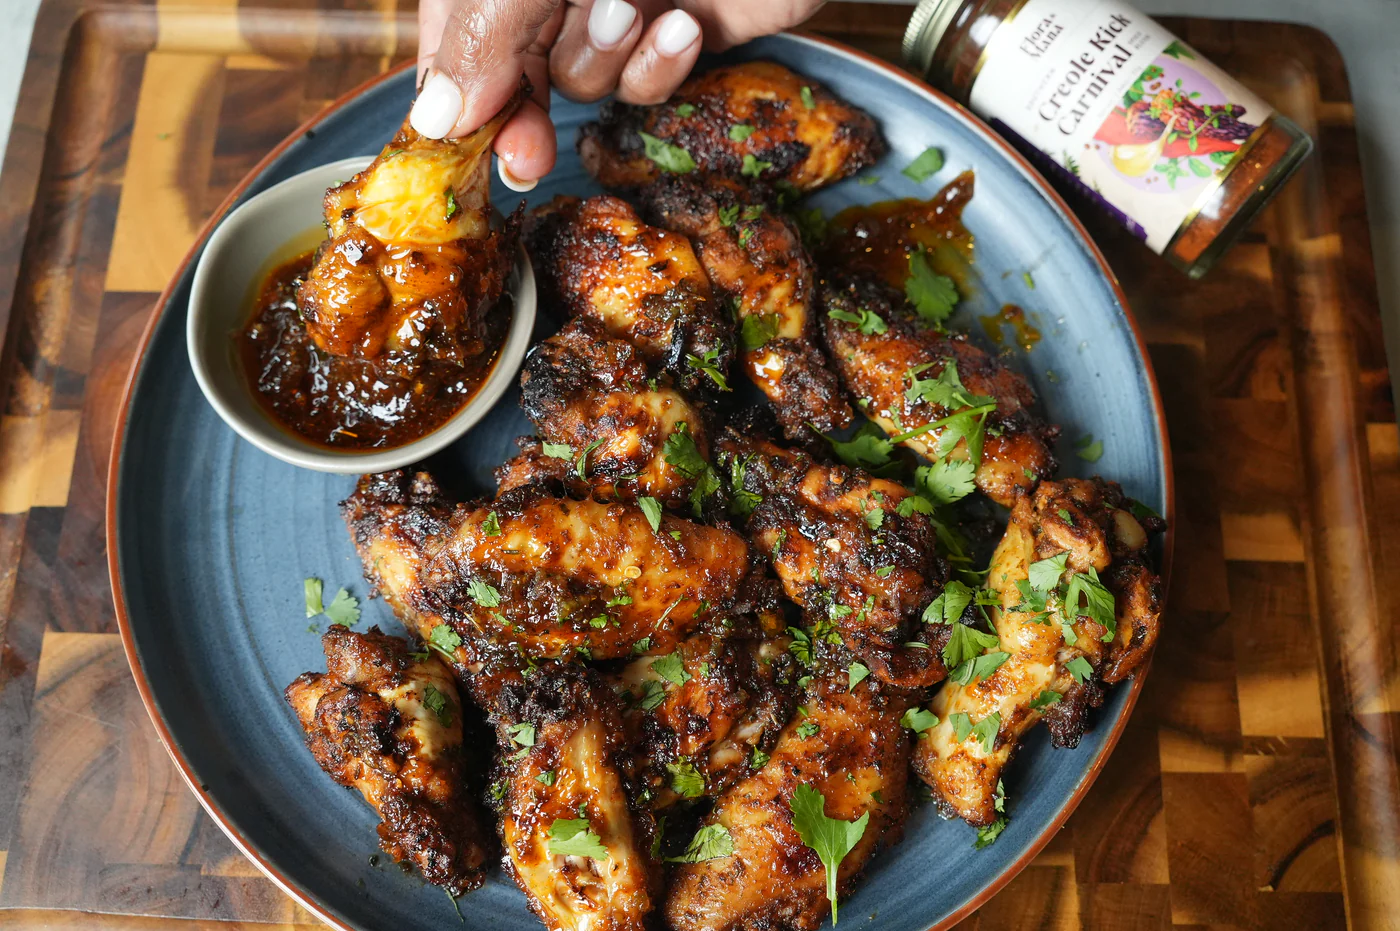
These Creole Honey Chicken Wings are an absolute flavor explosion that'll have everyone asking for the recipe! The wings start with a marinade of aromatic homemade green seasoning packed with fresh cilantro, garlic, and herbs, combined with bold Creole spices that bring warmth and a little kick. They get a quick char on the grill for that smoky flavor and those beautiful grill marks, then finish in the oven until they're perfectly tender and juicy. But here's where the magic really happens, while they're baking, you make this incredible sticky honey glaze with butter, garlic, fresh thyme, green chillies, and more Creole seasoning that gets brushed on in layers. Each glaze creates this glossy, caramelized coating that's sweet from the honey, tangy from fresh lemon, and just spicy enough to keep things interesting. The combination of tender, juicy meat with that crispy, sticky exterior is absolutely addictive. These wings are showstoppers for game day spreads, backyard barbecues, or any party where you want to bring something that feels like a celebration. They look impressive, taste incredible, and the mix of sweet, spicy, garlicky, and herbaceous flavors makes them impossible to stop eating. Fair warning, you'll want to make a double batch because these disappear faster than you can say "pass the napkins!"
These Creole Honey Chicken Wings are a flavor explosion! Marinated in aromatic green seasoning and Creole spices, then grilled and baked to perfection before getting coated in a sticky, sweet-and-spicy honey glaze. The combination of garlic, fresh herbs, green chillies, and that touch of honey creates the most addictive wings you'll ever make. They're perfect for game day, parties, or anytime you want something that tastes like a celebration. Fair warning, you'll want to make a double batch because these disappear fast!
Rate This Recipe!
Preparations
Prep Time:
10 minutes
Marinate Time:
1 hour
Cook Time:
5 minutes (grilling
Bake Time
Bake Time:
Total Time:
1 hour 50 minutes
Cuisine:
Creole
Course:
Appetizer, Main Course
Calories:
320 kcal (approx. per serving)
Servings:
4 (3 wings per person)
Author:
Ronica Rupan
Ingredients
Ingredients
For the Chicken Wings:
- 12 chicken wings
- Lemon and vinegar, for washing
- 2 tablespoons olive oil
- 2 tablespoons green seasoning (homemade or store-bought, see note below)
- 1 tablespoon Garlic of Eden seasoning (or garlic powder)
- 1 teaspoon garlic granules
- ½ teaspoon kosher salt
- ½ teaspoon liquid brown seasoning (optional, like Kitchen Bouquet or Gravy Master)
- 2 tablespoons Creole Carnival Kick seasoning (or your favorite Creole/Cajun blend)
For the Honey Creole Glaze:
- 3-4 tablespoons unsalted butter
- 4 garlic cloves, minced
- 2 green chillies, finely chopped (jalapeño or serrano work great)
- 1 sprig fresh thyme
- Juice of ½ lemon (about 1 tablespoon)
- ⅓ cup honey
- 1½ teaspoons Creole Kick Carnival seasoning (or Creole/Cajun blend)
- ½ teaspoon kosher salt, or to taste
For Garnish:
- Fresh cilantro, chopped
Instructions
1. Clean the Chicken
Wash the chicken wings in a mixture of lemon juice and vinegar to remove any impurities. Rinse well under cold water and pat completely dry with paper towels. This step helps ensure crispy skin!
2. Marinate the Wings
In a large bowl, combine the chicken wings with olive oil, green seasoning, Garlic of Eden seasoning, garlic granules, salt, liquid brown seasoning (if using), and Creole Carnival Kick seasoning. Toss everything together until the wings are well coated. Cover the bowl with plastic wrap and refrigerate for at least 1 hour, or up to 4 hours for even deeper flavor.
3. Make the Honey Creole Glaze
While the chicken marinates, prepare the glaze. In a medium saucepan over medium heat, melt the butter. Add the minced garlic, chopped green chillies, and fresh thyme. Sauté for about 1 minute until fragrant, being careful not to burn the garlic. Add the lemon juice, honey, Creole seasoning, and salt. Stir everything together and let it simmer for 2-3 minutes until the glaze thickens slightly and becomes glossy. Remove from heat and divide the glaze into two separate bowls, one for basting during cooking and one for serving. Set aside.
4. Preheat Grill and Oven
Preheat your outdoor grill or grill pan to medium-high heat. Also preheat your oven to 350°F (175°C) and place a wire rack on a baking sheet lined with foil for easy cleanup.
5. Grill the Wings
Remove the wings from the marinade and place them on the preheated grill. Grill for about 2 minutes per side to get those beautiful grill marks and add a smoky flavor. The wings don't need to be fully cooked at this point, just nicely charred on the outside.
6. First Bake
Transfer the grilled wings to the wire rack on your prepared baking sheet. Bake in the preheated oven for 20 minutes.
7. First Glaze
Remove the wings from the oven and brush them generously with the first bowl of Honey Creole Glaze. Flip each wing and glaze the other side as well. Return to the oven and bake for another 15 minutes.
8. Final Glaze and Broil
Remove the wings again and give them another coat of glaze from the first bowl. Turn your oven to broil on high. Return the wings to the oven and broil for 2 minutes, watching closely to prevent burning. You want that sticky, caramelized finish where the glaze gets bubbly and golden.
9. Final Touch
Remove the wings from the oven and brush them one more time with any remaining glaze from the first bowl. Transfer to a serving platter, garnish with fresh chopped cilantro, and serve immediately with the second bowl of glaze on the side for dipping.
Homemade Green Seasoning (Optional)
If you want to make your own green seasoning, here's the recipe:
Ingredients:
- ½ bunch fresh cilantro
- 6-7 green onions
- 4 tablespoons olive oil
- 6-8 garlic cloves
- ½ bunch fresh parsley
- 1 jalapeño pepper
Instructions: Combine all ingredients in a blender and blend until you have a smooth, vibrant green paste. Use 2 tablespoons for this recipe and store the rest in an airtight container in the refrigerator for up to 1 week, or freeze in ice cube trays for longer storage.
Blue Spirulina Smoothie Bowl
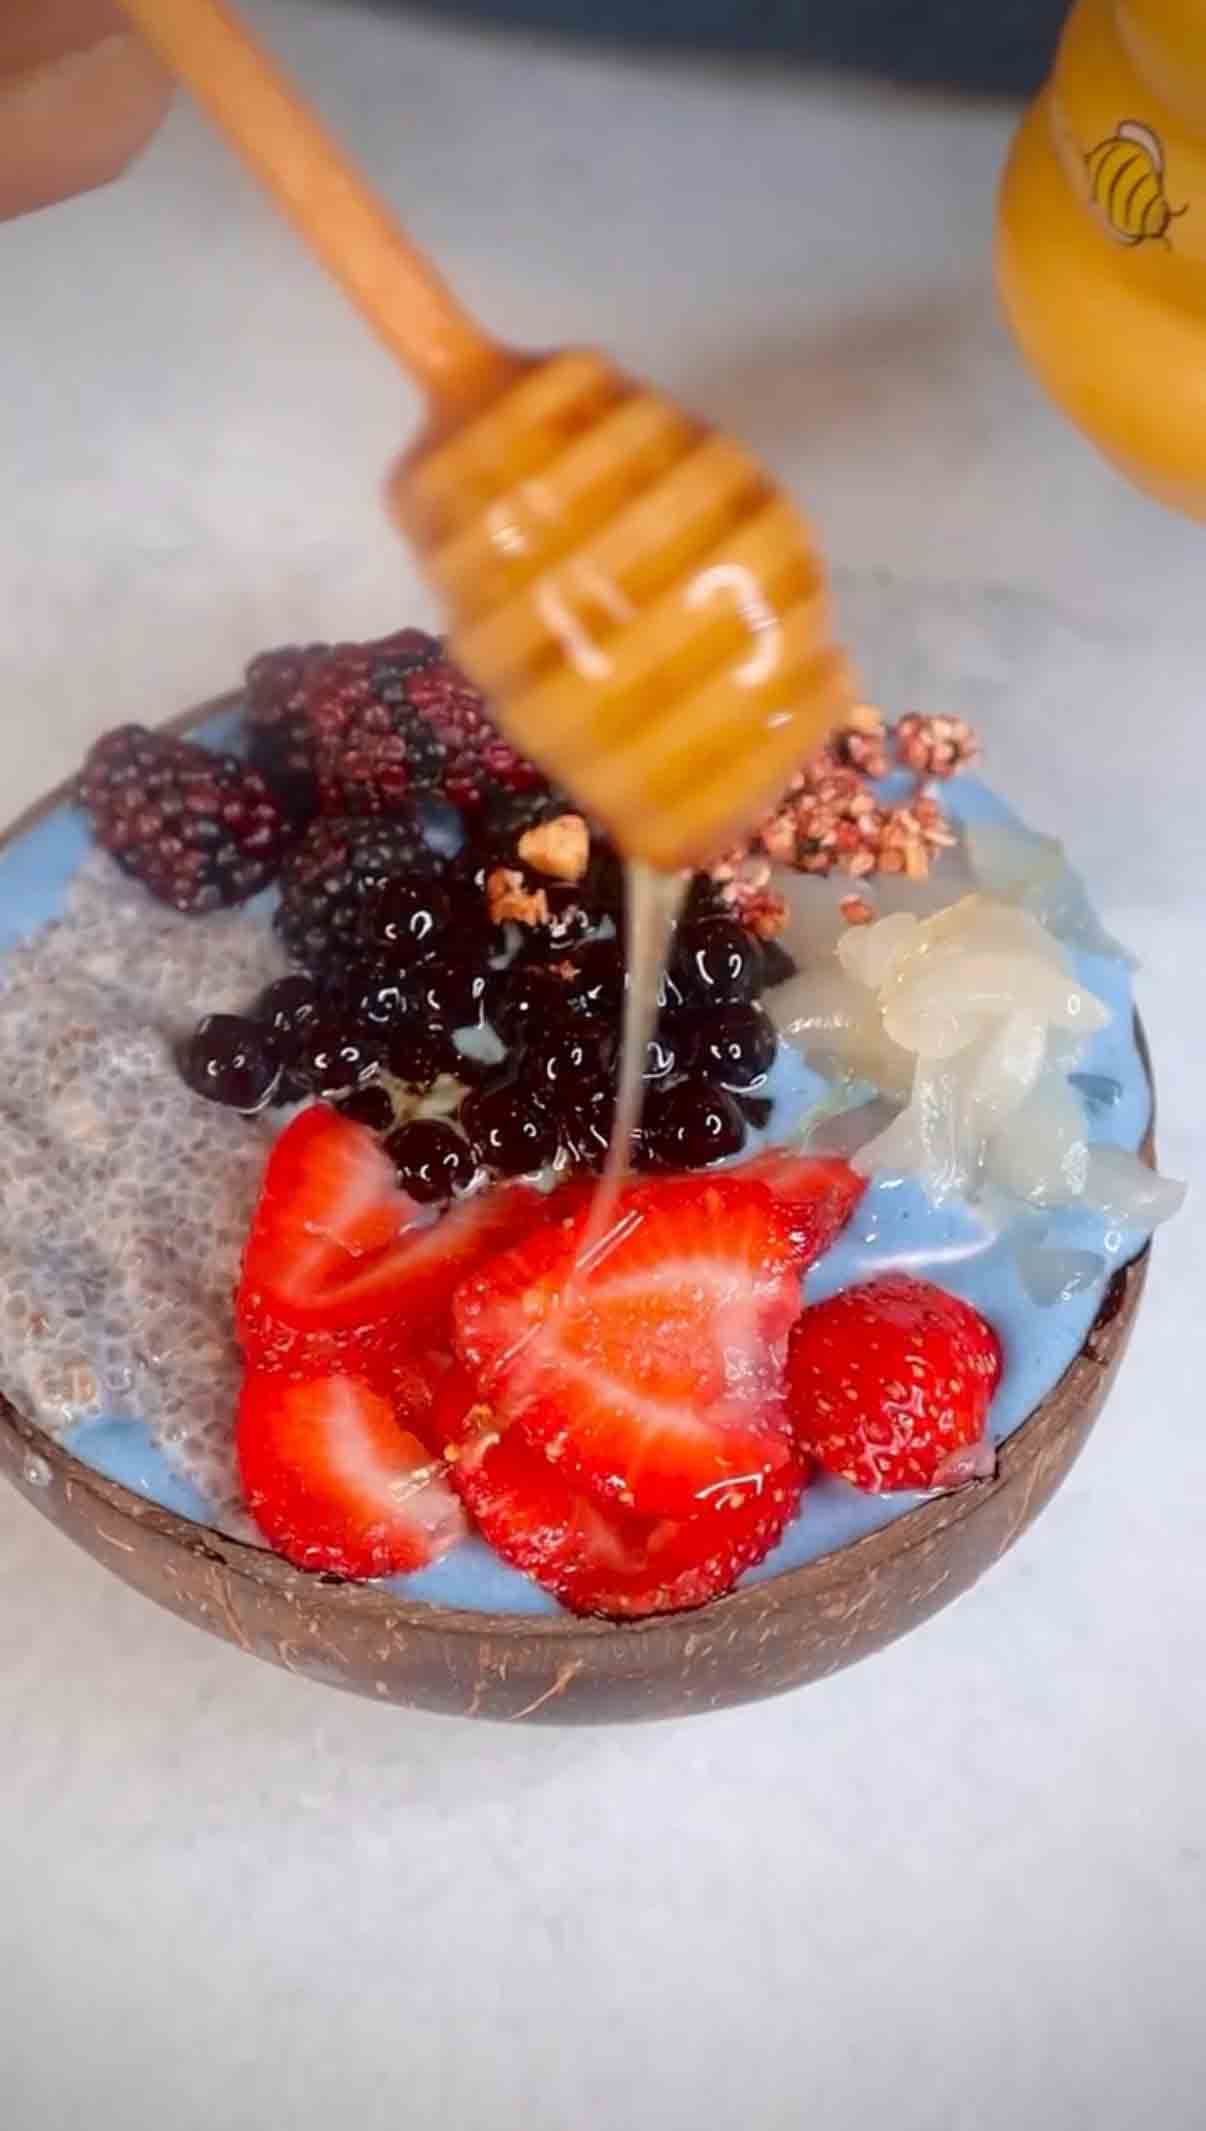
This gorgeous blue spirulina smoothie bowl is packed with nutrients and looks like something straight out of a tropical paradise! The base is ultra-creamy frozen bananas blended with blue spirulina powder, a nutrient-dense algae that creates that stunning, vibrant ocean-blue color you can't stop staring at. It's like eating a piece of the sky! But this bowl isn't just about looks, the toppings take it to another level. Creamy chia pudding adds omega-3s and staying power, fresh tropical fruit brings natural sweetness and bright pops of color, crunchy granola gives you that satisfying texture contrast, and chewy boba pearls make every bite feel like a fun little surprise. Each spoonful is different, sometimes you get the creamy smoothie with crunchy granola, other times it's the soft chia with sweet fruit, and then there's that moment when you hit a boba pearl and it all comes together. This bowl is substantial enough to be a complete breakfast or post-workout meal, but it's so pretty and delicious it could easily pass as the most Instagram-worthy dessert you've ever made. And here's the best part, it takes less than five minutes to blend and assemble, so you can have something this beautiful and nourishing on a busy morning. The taste matches the looks too, naturally sweet from the bananas, refreshing, and completely satisfying without any added sugar except for that final drizzle of honey.
This gorgeous blue spirulina smoothie bowl is packed with nutrients and looks like something straight out of a tropical paradise! Creamy frozen bananas blended with blue spirulina create that stunning ocean-blue color, while the toppings, chia pudding, fresh fruit, crunchy granola, and chewy boba, make every spoonful interesting. It's a whole meal in itself or the prettiest dessert you'll ever make, and it takes less than five minutes to throw together. The best part? It tastes as good as it looks, naturally sweet, refreshing, and completely satisfying.
Rate This Recipe!
Preparations
Prep Time:
5 minutes
Total Time:
Total Time:
Cuisine:
American
Course:
Breakfast, Dessert
Calories:
320 kcal (approx. per serving)
Servings:
1
Author:
Ronica Rupan
Ingredients
Ingredients
For the Smoothie Base:
- 2 frozen bananas, sliced
- 1 teaspoon blue spirulina powder
- ⅓ cup milk of choice (almond, oat, or coconut work great)
For the Toppings:
- 2-3 tablespoons plain or vanilla yogurt, for drizzling
- ¼ cup chia pudding (store-bought or homemade)
- ½ cup fresh fruit of choice (dragon fruit, strawberries, kiwi, mango, blueberries)
- ¼ cup granola of choice
- 2-3 tablespoons cooked boba pearls (optional, for chewiness)
- Honey, for drizzling
Instructions
1. Blend the Smoothie Base
Add the frozen banana slices, blue spirulina powder, and milk to a high-speed blender. Blend on high until completely smooth and thick, stopping to scrape down the sides if needed. The consistency should be thick like soft-serve ice cream, not runny. If it's too thick, add a splash more milk. If it's too thin, add more frozen banana or a handful of ice.
2. Pour Into Your Bowl
Pour the blue smoothie into a wide, shallow bowl. Use the back of a spoon to smooth the top, this creates the perfect canvas for all your toppings!
3. Add Your Toppings
Now comes the fun part! Drizzle the yogurt over one section of the smoothie. Add spoonfuls of chia pudding in another area. Arrange your fresh fruit, I love using dragon fruit for that white translucent tropical vibe, along with colorful berries and kiwi. Sprinkle the granola over the top for crunch, add the cooked boba pearls if using, and finish with a generous drizzle of honey.
4. Serve Immediately
Grab a spoon and dig in right away! Smoothie bowls are best enjoyed fresh while the base is still thick and cold.
Strawberry Jam
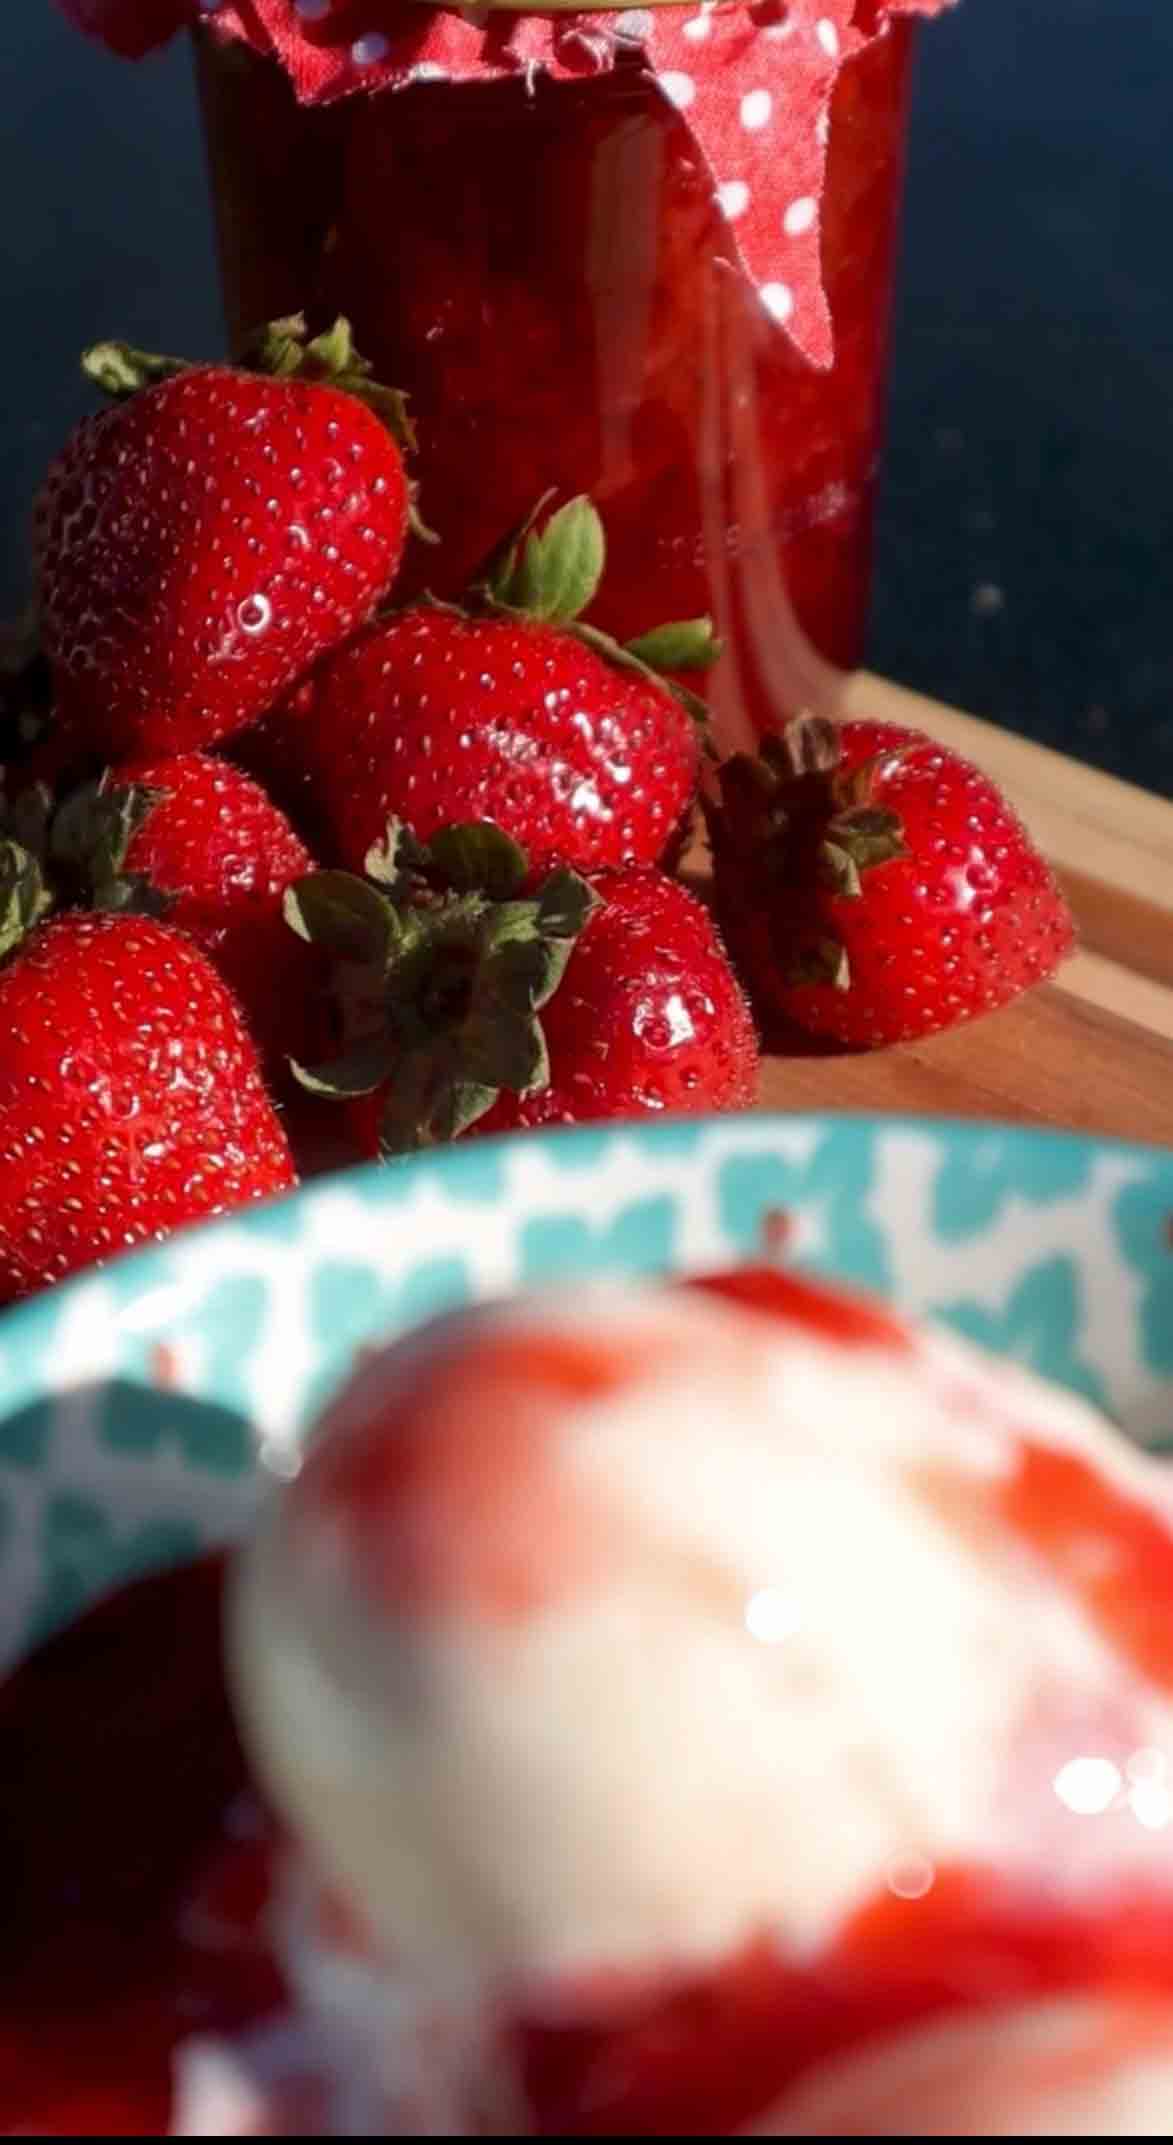
This homemade low-sugar strawberry jam is luscious, naturally sweet, and so much better than anything you'll find at the store. Made with fresh strawberries, just enough sugar to let the fruit shine, and low-sugar pectin to get that perfect spreadable consistency, this jam is incredibly versatile. Slather it on toast, swirl it into yogurt, layer it in cakes, or pair it with my sunflower butter for the ultimate sandwich. The best part? It's surprisingly easy to make, and your kitchen will smell absolutely amazing while it simmers.
This homemade low-sugar strawberry jam is naturally sweet and so much better than store-bought. Made with fresh strawberries, just enough sugar to let the fruit shine, and low-sugar pectin for that perfect spreadable consistency. Slather it on toast, swirl it into yogurt, layer it in cakes, or pair it with sunflower butter for the ultimate sandwich. The best part? It's surprisingly easy to make, and your kitchen will smell amazing while it simmers.
Rate This Recipe!
Preparations
Prep Time:
20 minutes
Cook Time:
15 minutes
Total Time:
35 minutes (plus canning time if preserving)
Cuisine:
American
Course:
Condiment
Calories:
45 kcal (approx. per 2 tablespoon serving)
Servings:
Makes approximately 8-10 cups (64-80 oz)
Author:
Ronica Rupan
Ingredients
Ingredients
- 12 cups fresh strawberries, hulled (approximately 4 lbs)
- 4 cups granulated sugar
- 1 package (1.75 oz) low-sugar pectin
- optional 1-2 tablespoons fresh lemon juice, for brightness
Instructions
1. Prep Your Strawberries
Wash your strawberries thoroughly under cold water. Hull and halve them, removing any bruised or overly soft spots. You want about 12 cups of prepped berries. Fresh, ripe strawberries are key here, they have the best flavor and natural sweetness.
2. Combine and Crush
In a large bowl, combine the strawberries, sugar, and low-sugar pectin. Use a potato masher to gently crush the berries, releasing their natural juices. You don't need to mash them into a complete puree, leave some texture! The sugar and pectin will start to pull out even more juice as the berries sit.
3. Bring to a Boil
Transfer the berry mixture to a large, heavy-bottomed pot. A wide pot works best because it allows for better evaporation and helps the jam thicken faster. Bring the mixture to a full rolling boil over medium-high heat, stirring occasionally to prevent sticking.
4. Simmer and Skim
Once boiling, reduce the heat slightly to maintain a steady rolling boil for 10 minutes. Stir frequently to prevent burning on the bottom. You'll notice foam forming on the surface, skim this off with a spoon for a clearer, more beautiful jam. This step helps concentrate the flavors and activate the pectin.
5. Add Remaining Sugar
After 10 minutes, incorporate any remaining sugar if you're adjusting sweetness. Maintain the rolling boil for an additional 2 minutes, stirring constantly. The jam should start to thicken noticeably.
6. Test for Doneness
To check if your jam is ready, place a small plate in the freezer for a minute, then drop a spoonful of jam onto the cold plate. Run your finger through it, if it wrinkles and holds its shape, it's done! If it's still runny, boil for another minute or two and test again.
7. Can or Refrigerate
Turn off the heat. At this point, you have two options:
For Canning (Highly Recommended for This Quantity):
Ladle the hot jam into sterilized mason jars, leaving ¼-inch headspace. Wipe the rims clean, place lids and rings on, and process in a boiling water bath for 10 minutes. Remove and let cool completely. Properly canned jam can last up to 1 year in a cool, dark place.
For Refrigerating:
Let the jam cool slightly, then transfer to clean jars or containers. Once completely cooled, refrigerate. Refrigerated jam will keep for up to 3 weeks.
8. Enjoy!
Once your jam has set (give it about 24 hours for the best texture), spread it on everything! Toast, biscuits, yogurt parfaits, PB&J sandwiches, you name it.
Honey Jerk Surf & Turf(Salmon + Lamb Chops)
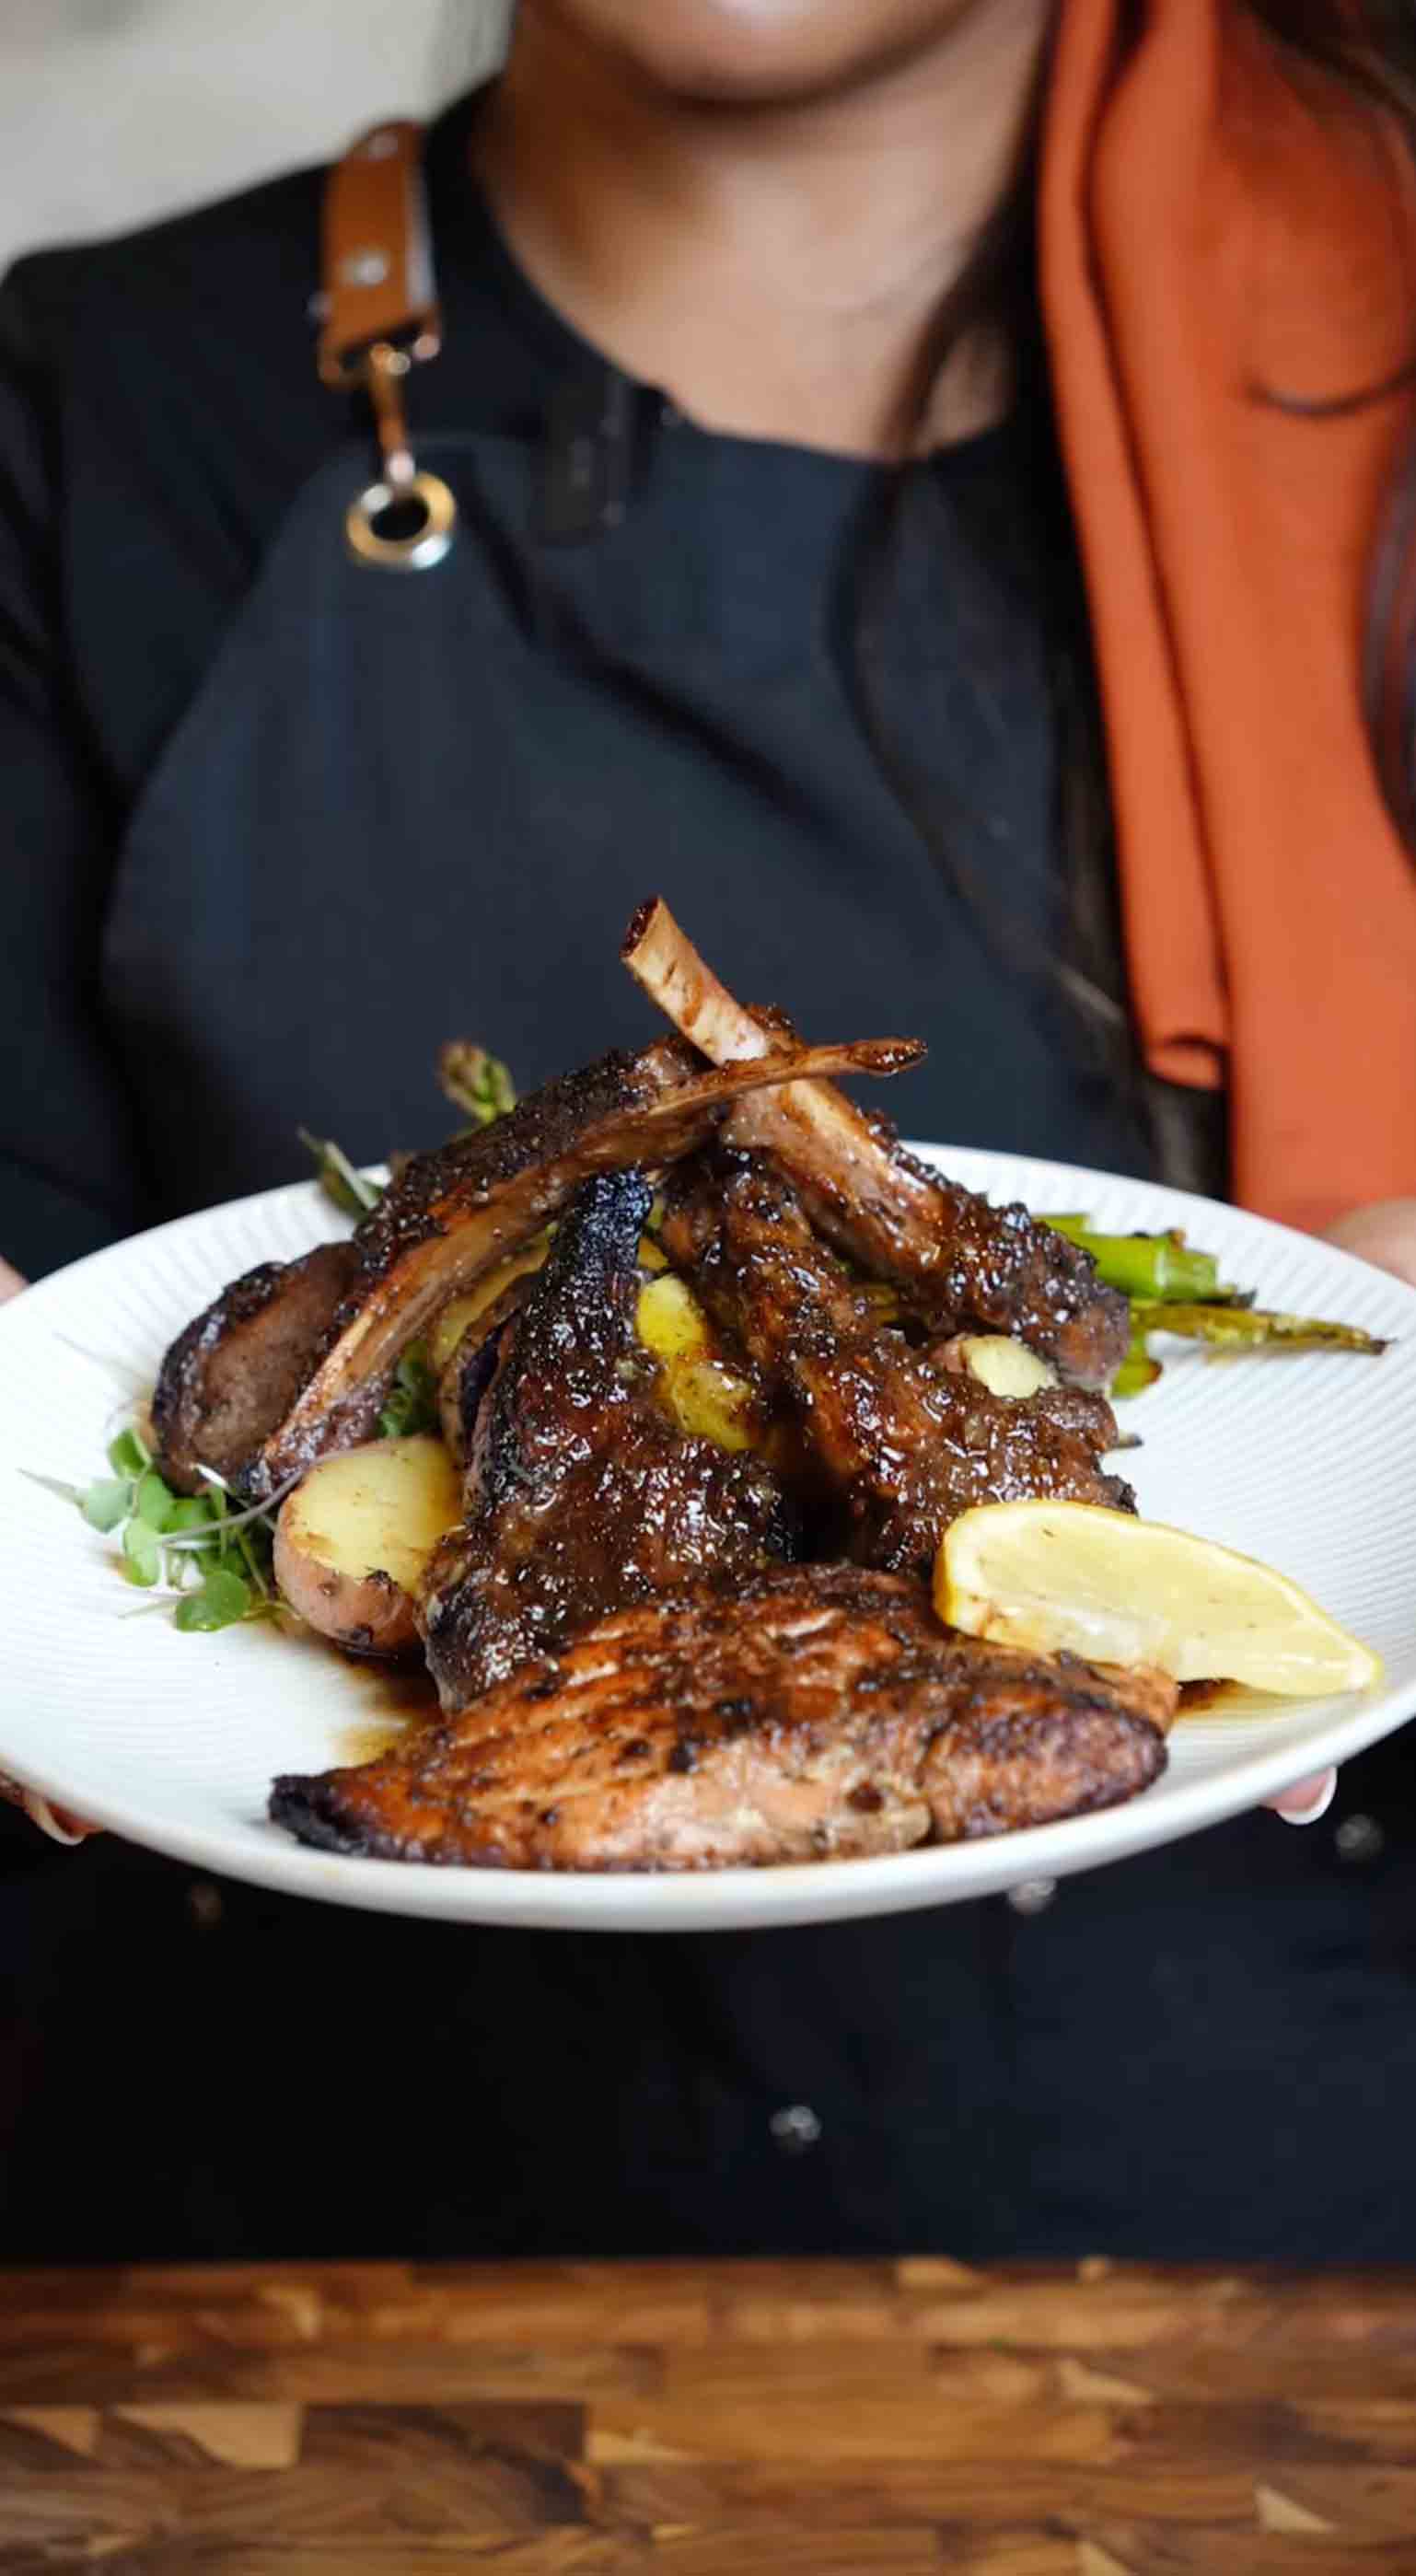
Honey Jerk Surf & Turf (Salmon + Lamb Chops)
What if I told you this surf and turf only takes 30 minutes, but it'll taste like you spent hours in the kitchen? This is the kind of meal that makes people think you're fancy. Sweet, spicy, buttery, with that perfect kick of Caribbean heat from jerk seasoning, every bite is an experience. The lamb chops come out juicy and tender with a gorgeous sear, the salmon gets that golden, crispy exterior while staying flaky inside, and the honey jerk butter sauce? It's the star that ties everything together. Rich, glossy, and packed with flavor from garlic, ginger, honey, and that unmistakable jerk spice blend. This is what I make when I want to impress without stressing, whether it's date night, a special celebration, or just because I deserve something amazing. The best part? It comes together so quickly that you'll have time to actually enjoy your evening instead of being stuck in the kitchen. Save this one, you'll want to run it back again and again. No leftovers, guaranteed.
What if I told you this surf and turf only takes 30 minutes but tastes like you spent hours in the kitchen? Sweet, spicy, buttery, with that perfect kick of Caribbean heat, this is the kind of meal that makes people think you're fancy. Juicy lamb chops with a gorgeous sear, golden salmon with a crispy exterior, and a honey jerk butter sauce that's rich, glossy, and packed with garlic, ginger, and unmistakable jerk spice. This is what I make when I want to impress without stressing, whether it's date night or just because I deserve something amazing. Save this one, you'll want to run it back again and again. No leftovers, guaranteed.
Rate This Recipe!
Preparations
Prep Time:
10 minutes
Cook Time:
15 minutes
Total Time:
25 minutes
Cuisine:
Caribbean-inspired
Course:
Main Course, Dinner
Calories:
580 kcal (approx. per serving)
Servings:
2-3
Author:
Ronica Rupan
Ingredients
Ingredients
For the Dry Rub Marinade (for both salmon & lamb):
- 2 tbsp olive oil
- 1 tbsp Flora & Mana Dry Jerk Seasoning (www.floraandmana.com)
- 1 tsp sweet dark soy sauce
- Salt to taste
For the Honey Jerk Butter Sauce:
- 2 tbsp unsalted butter
- 1 tbsp soy sauce
- 1 tsp sweet dark soy sauce
- 2 tbsp Walkerswood Wet Jerk Seasoning (or wet jerk paste)
- 3 tbsp honey
- Juice of ½ lemon
- 1 clove garlic, minced
- 1 tsp fresh ginger, grated
- 1-2 tbsp water (optional, to loosen if needed)
For the Proteins:
- 6 lamb chops (about 1-inch thick)
- 2 salmon fillets (6-8 oz each, skin-on or skinless)
Instructions
1. Marinate the Proteins
In a small bowl, whisk together the olive oil, dry jerk seasoning, sweet dark soy sauce, and a pinch of salt. This simple marinade is going to infuse both your lamb and salmon with incredible flavor. Rub the mixture generously all over the lamb chops and salmon fillets, making sure every surface is coated. Let them sit at room temperature for 10-15 minutes while you prep the sauce. This allows the seasoning to penetrate and the proteins to come to room temp for even cooking.
2. Make the Honey Jerk Butter Sauce
In a small saucepan over medium heat, melt the butter. Once it's bubbling, add the minced garlic and grated ginger. Cook for about 1 minute until fragrant, but don't let the garlic burn. Add both soy sauces, the wet jerk seasoning paste, honey, and lemon juice. Stir everything together and let it simmer for 3-4 minutes until the sauce thickens slightly and becomes glossy. If it gets too thick, add 1-2 tablespoons of water to loosen it up. Taste and adjust, if you want more heat, add a bit more jerk paste. Set aside and keep warm.
3. Sear the Salmon
Heat a large skillet or cast-iron pan over medium-high heat. Add a drizzle of olive oil. Once the pan is hot, place the salmon fillets skin-side down (if using skin-on) and sear for 3-4 minutes without moving them. You want that beautiful golden crust to form. Flip carefully and cook for another 3-4 minutes on the other side until the salmon is cooked through but still tender and flaky. In the last minute of cooking, spoon some of the honey jerk sauce over the salmon to glaze it. Remove from the pan and set aside, tented with foil to keep warm.
4. Sear the Lamb Chops
In another large skillet (or wipe out and reuse the same pan), heat over medium-high heat with a touch of olive oil. Once the pan is smoking hot, add the lamb chops. Sear for 3-4 minutes per side for medium-rare, or 5 minutes per side for medium. Don't move them around, let them develop that gorgeous caramelized crust. In the last minute, spoon the honey jerk sauce over the lamb chops, letting it sizzle and create a beautiful glaze. Remove from heat and let the lamb rest for 2-3 minutes.
5. Plate and Serve
Arrange the salmon and lamb chops on a serving platter or individual plates. Drizzle generously with the remaining honey jerk butter sauce. The sauce should pool around the proteins and look absolutely irresistible. Serve with your favorite sides, I love this with coconut rice, roasted vegetables, or a simple arugula salad. Watch it disappear!
White Chocolate Cranberry Oatmeal

These White Chocolate Cranberry Oatmeal Cookies are the ultimate holiday treat that hits all the right notes! Imagine chewy, hearty oats studded with tart, jewel-toned cranberries and pockets of melty white chocolate in every bite. But here's where these cookies get really special, I add cardamom, a warm, aromatic spice my grandmother taught me to bake with that brings this subtle floral sweetness you can't quite put your finger on but absolutely love. The texture is perfection, thick and substantial with soft, almost gooey centers and golden, slightly crisp edges that give way to all that chewy goodness. Each cookie is generously sized, the kind that feels like a real treat, not a sad little store-bought disk. And if you take the extra minute to drizzle melted white chocolate over the top once they've cooled, they look like they came straight from an expensive bakery. These cookies are perfect for holiday cookie swaps, gift boxes for neighbors, or honestly just because you deserve something delicious with your afternoon coffee or tea. Fair warning though, once you make these, you'll be getting requests for the recipe at every gathering.
These White Chocolate Cranberry Oatmeal Cookies are the ultimate holiday treat! Chewy oats, tart cranberries, and creamy white chocolate come together with cardamom, a warm, aromatic spice my grandmother taught me to use that adds subtle floral sweetness to every bite. They're thick and substantial with soft, gooey centers and golden edges that stay perfectly chewy. Each generously-sized cookie looks bakery-worthy, especially with that optional white chocolate drizzle on top. Whether you're baking for a cookie exchange, filling gift boxes, or just treating yourself with afternoon tea, these are about to become your new go-to recipe.
Rate This Recipe!
Preparations
Prep Time:
15 minutes
Chill Time:
30 minutes
Bake Time:
16 minutes
Total Time:
1 hour
Cuisine:
American
Course:
Dessert
Calories:
380 kcal (approx. per cookie)
Servings:
8 large cookies
Author:
Ronica Rupan
Ingredients
Ingredients
For the Cookies:
- 1 cup all-purpose flour
- ½ teaspoon baking soda
- 1 teaspoon ground cardamom
- ¼ teaspoon kosher salt
- ½ cup unsalted butter, room temperature
- ½ cup packed light brown sugar
- ¼ cup granulated sugar
- 1 large egg
- 1 teaspoon vanilla paste (or vanilla extract)
- 1¼ cups old-fashioned rolled oats
- ¾ cup sweetened dried cranberries, divided
- 1 (4-ounce) white chocolate bar, chopped
- ¼ cup white chocolate chips
For the Drizzle (Optional):
- ¼ cup white chocolate chips, melted
Instructions
1. Mix the Dry Ingredients
In a large bowl, whisk together the flour, baking soda, cardamom, and salt until well combined. Set aside. The cardamom is what makes these cookies special, adding a warm, slightly floral note that pairs beautifully with the tart cranberries.
2. Cream the Butter and Sugars
In a stand mixer fitted with the paddle attachment (or using a hand mixer), beat the butter, brown sugar, and granulated sugar on medium-high speed for 6-8 minutes, stopping to scrape down the sides as needed. You want the mixture to be light, fluffy, and pale in color. This step incorporates air and creates that soft, chewy texture we're after. Add the egg and vanilla paste, and beat until fully incorporated.
3. Combine Wet and Dry Ingredients
With the mixer on low speed, gradually add the dry ingredients to the wet ingredients, mixing until just combined. Don't overmix, or your cookies will be tough. Gently fold in the oats, ½ cup of the cranberries (save the rest for topping), and the chopped white chocolate using a spatula or wooden spoon.
4. Chill the Dough
Cover the bowl with plastic wrap and refrigerate the dough for at least 30 minutes, or up to 3 hours. Chilling the dough helps the cookies hold their shape and creates a thicker, chewier texture. If you're short on time, 30 minutes will do, but longer is even better.
5. Preheat and Prep
Preheat your oven to 350°F (180°C). Line two large baking sheets with parchment paper. This prevents sticking and makes cleanup a breeze.
6. Shape the Cookies
Scoop out ⅓-cup-sized portions of dough (I use a large cookie scoop for consistency), and roll them into balls. Place 4 cookies on each baking sheet, leaving plenty of space between each one, they'll spread as they bake.
7. First Bake
Bake in the preheated oven for 13 minutes. The edges should just be starting to set, but the centers will still look underdone. That's exactly what you want!
8. Add Toppings and Finish Baking
Remove the baking sheets from the oven and gently press down on each cookie with the back of a spatula or your hand (be careful, they're hot!). Quickly press the remaining cranberries and white chocolate chips into the tops of the cookies for that beautiful bakery look. Return to the oven and bake for about 3 more minutes, or until the edges are golden brown but the centers are still soft and slightly underbaked.
9. Cool the Cookies
Let the cookies cool on the baking sheets for 5-10 minutes. They'll continue to set as they cool. Then transfer them to a wire rack to cool completely.
10. Optional Drizzle
If you want to go the extra mile, melt ¼ cup of white chocolate chips in the microwave in 20-second intervals, stirring between each, until smooth. Use a fork or piping bag to drizzle the melted chocolate over the cooled cookies for that gourmet finish.
11. Enjoy!
Serve these cookies with a glass of milk, a cup of tea, or just grab one straight off the rack. They're best enjoyed within 3-4 days, but honestly, they never last that long!
Korean Fried Cauliflower
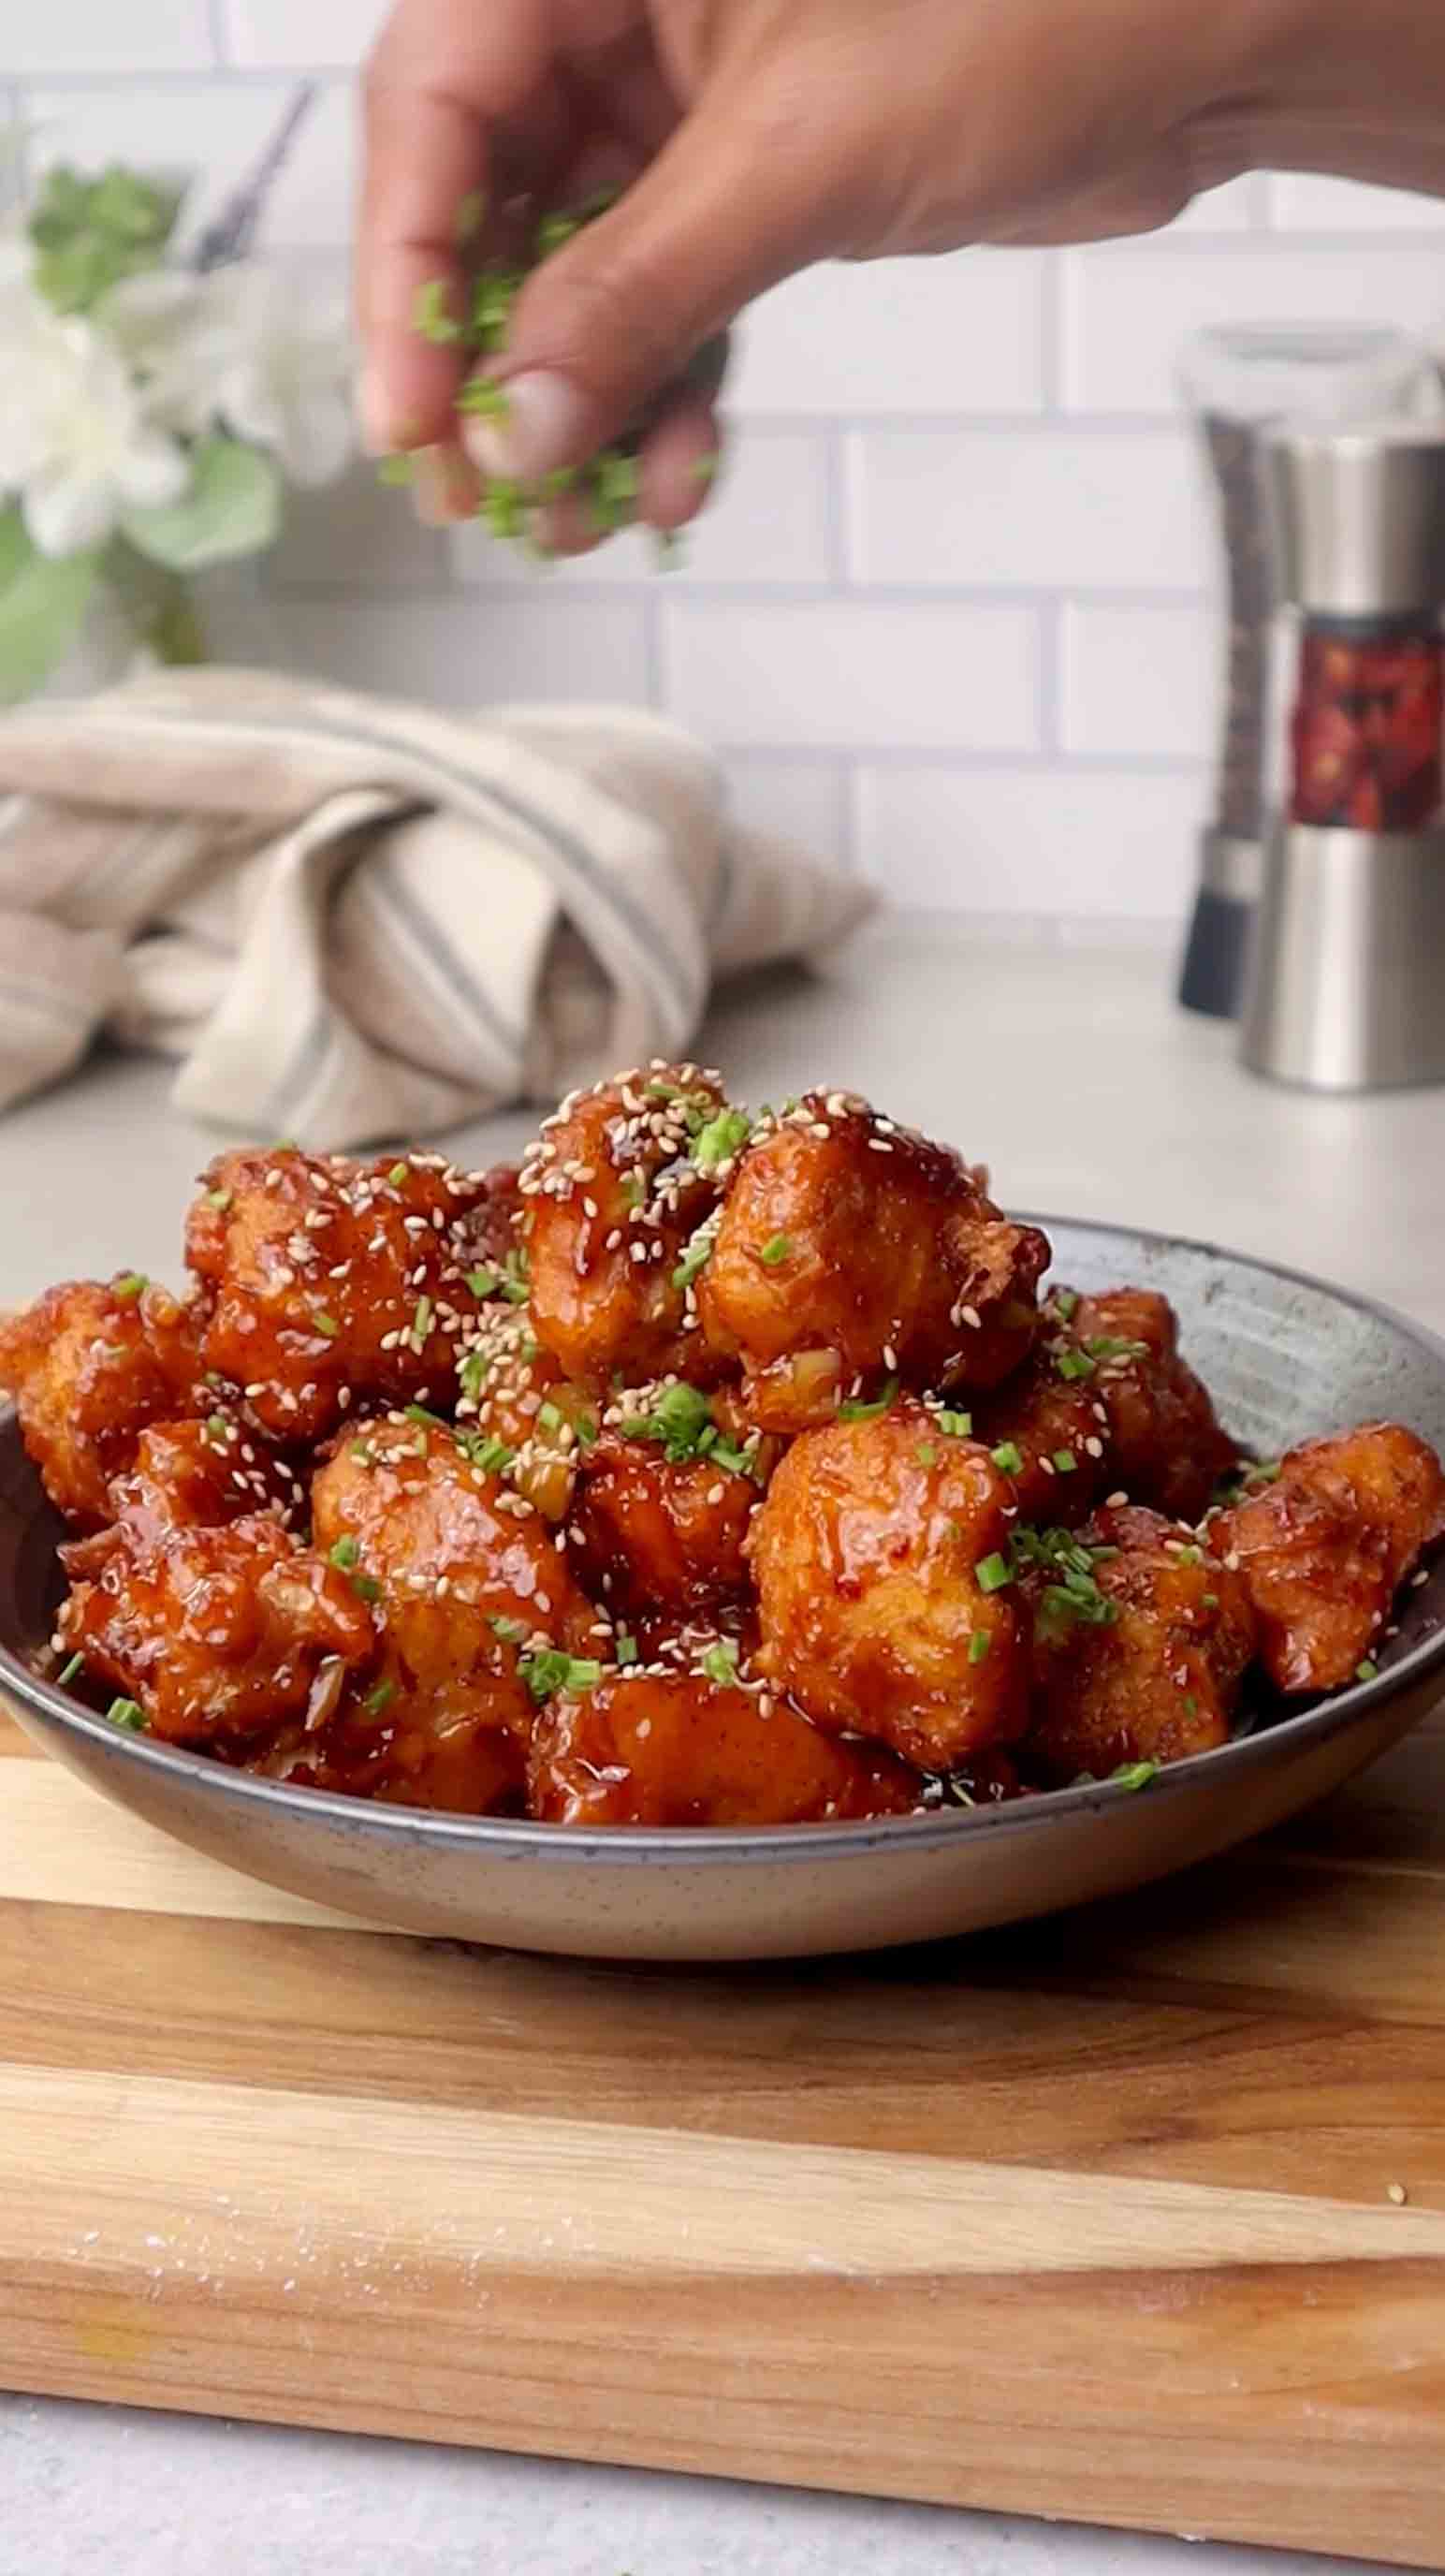
This is my version of Korean fried cauliflower bites, and you can thank me now because they are that good! Crispy, golden cauliflower florets get a double fry for that extra-crunchy exterior, then get tossed in a sticky-sweet Korean-inspired sauce loaded with garlic, ginger, and just the right amount of heat. The rice flour batter gives you that light, airy crunch while the sauce, a perfect balance of sweet honey, tangy rice vinegar, and spicy chili garlic sauce, clings to every piece. You can even air fry them for a healthier version that still delivers on flavor and texture. But fair warning: whether you fry or air fry, these disappear fast. They're the kind of appetizer that has everyone hovering around the plate asking for the recipe.
This is my version of Korean fried cauliflower bites, and you can thank me now because they are that good! Crispy, double-fried cauliflower gets tossed in a sticky-sweet Korean-inspired sauce with garlic, ginger, and just the right amount of heat. You can even air fry them for a healthier version, but either way, these won't last long at the table.
Rate This Recipe!
Preparations
Prep Time:
15 minutes
Cook Time:
15 minutes (double fry method)
Total Time:
30 minutes
Cuisine:
Korean-inspired
Course:
Appetizer, Side Dish
Calories:
220 kcal (approx. per serving)
Servings:
4-6
Author:
Ronica Rupan
Ingredients
Ingredients
For the Cauliflower:
- 1 head cauliflower, cut into 1-inch pieces
- Oil for frying
For the Batter:
- ½ cup rice flour
- ½ cup unbleached all-purpose flour
- 1 tbsp cornstarch
- ½ tsp kosher salt
- ½ tsp black pepper
- ½ tsp dried chili flakes
- 1 tsp sugar
- 1 tsp smoked paprika
- 1 tsp garlic granules
- ¾ cup milk or water (start with ½ cup and add more as needed)
For the Sauce:
- 1 tbsp olive oil
- 5 garlic cloves, minced
- 1 tbsp fresh ginger, minced
- 3 tbsp soy sauce (or coconut aminos)
- 3 tbsp honey or maple syrup
- 1 tsp tomato paste
- 2 tbsp chili garlic sauce
- 3 tbsp brown sugar
- 2 tbsp rice vinegar
For Garnish:
- Sesame seeds
- Chives or green onions, sliced
Instructions
1. Prep the Cauliflower and Batter
Cut your cauliflower into 1-inch florets—try to keep them similar in size for even cooking. In a large bowl, whisk together the rice flour, all-purpose flour, cornstarch, salt, black pepper, chili flakes, sugar, smoked paprika, and garlic granules. Add ½ cup of milk or water and whisk until smooth. If the batter is too thick, add the remaining ¼ cup liquid a little at a time until it reaches a pancake batter consistency. Add the cauliflower pieces and toss until every piece is well coated.
2. Heat the Oil
Pour about 2-3 inches of oil into a heavy-bottomed pot or deep fryer. Heat the oil to 350°F using a thermometer—this is important for getting that perfect crisp without greasy cauliflower.
3. First Fry
Working in batches (don't overcrowd the pot), carefully add the battered cauliflower to the hot oil. Fry for 3-4 minutes, turning occasionally, until the pieces are lightly golden brown. Remove with a slotted spoon and drain on a paper towel-lined plate. Repeat with remaining cauliflower.
4. Double Fry for Extra Crisp
Once all the cauliflower has been fried once, increase the oil temperature to 380°F. Add the cauliflower back to the oil in batches and fry for an additional 2 minutes. This second fry is the secret to that irresistible extra-crispy texture! Drain again on paper towels and set aside while you make the sauce.
5. Make the Sauce
In a large pan or wok, heat the olive oil over medium heat. Add the minced garlic and ginger and cook for 1-2 minutes until fragrant—be careful not to burn them. Add the soy sauce, honey, tomato paste, chili garlic sauce, brown sugar, and rice vinegar. Stir everything together and let it simmer for 3-4 minutes until the sauce thickens and becomes glossy.
6. Toss and Serve
Add the crispy cauliflower to the pan with the sauce and toss until every piece is coated. Transfer to a serving plate and garnish with sesame seeds and sliced chives or green onions. Serve immediately while they're hot and crispy!
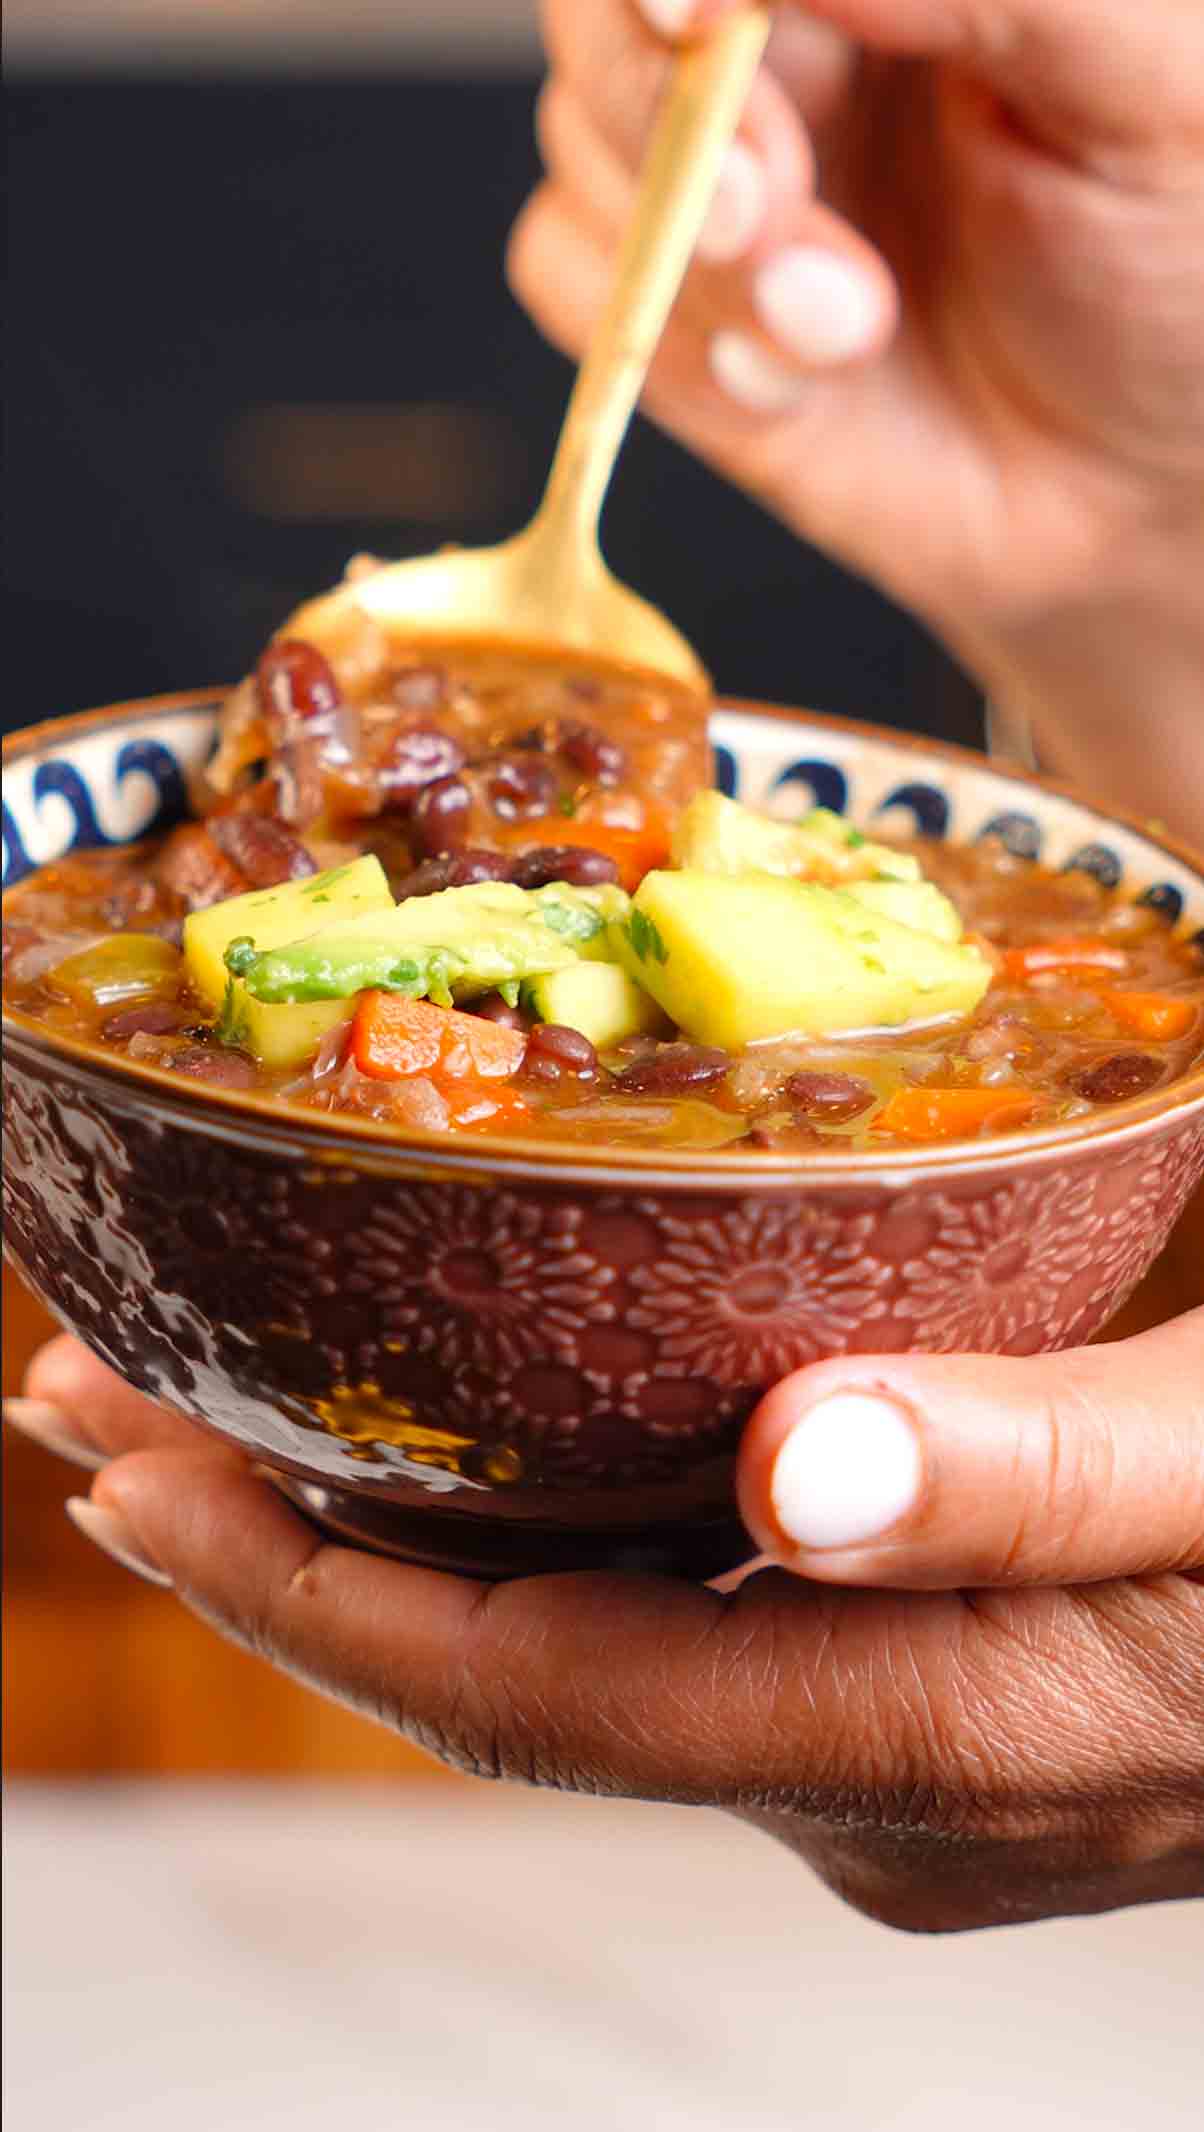
Vegetarian Feijoada ( Black Bean soup)
Let me introduce you to one of my favorite ways to bring the vibrant, soul-warming flavors of Brazil right into your kitchen! If you've never experienced Feijoada before, you're in for such a treat. This iconic Brazilian dish is traditionally a slow-simmered black bean stew loaded with various meats, and it's the kind of meal that brings families together around the table for hours. It's comfort food at its absolute finest, rich, deeply flavorful, and meant to be shared.
Now, I know the traditional version might feel intimidating or not work for everyone's dietary preferences, which is why I created this vegetarian take that honestly? It's become a staple in our home. Here's the thing, you don't need meat to create those deep, complex layers of flavor that make feijoada so special. Instead, we're building that richness from the ground up with a technique that's all about patience and love.
We start by slowly caramelizing onions until they're sweet and golden, then add vibrant red and green bell peppers that bring both color and a subtle sweetness. From there, we bloom a gorgeous blend of warm spices, smoked paprika, cumin, coriander, in the oil, which creates this incredible aromatic base that makes the whole house smell amazing. The black beans? They soak up every single bit of those flavors and become absolutely irresistible, creamy on the inside with this savory, slightly smoky coating that's just chef's kiss.
But we're not stopping there. This meal is all about contrast and balance. The rich, hearty feijoada gets topped with a bright, fresh mango avocado salsa that cuts through all that depth with sweet, tangy notes. And the coconut lime rice underneath? It's creamy, slightly sweet, with that citrusy pop that ties everything together beautifully. Plus, we're serving it the traditional Brazilian way, with fresh orange slices on the side. I know it sounds different, but that burst of citrus is exactly what you need to balance each bite.
This is comfort food that feels like a celebration, feeds a crowd (or gives you amazing leftovers for days), and honestly tastes even better the next day. Whether you're looking for a hearty weeknight dinner or something special for weekend entertaining, this one delivers every single time.
Let me introduce you to the soul-warming flavors of Brazil! This vegetarian take on traditional Feijoada brings all the hearty, aromatic richness of the classic dish without the meat. We're building layers of flavor with caramelized onions, colorful peppers, and a blend of warm spices that make black beans absolutely sing. Topped with bright mango avocado salsa and served over creamy coconut lime rice, this is comfort food that feels like a celebration.
Rate This Recipe!
Preparations
Prep Time:
20 minutes
Cook Time:
30 minutes
Total Time:
50 minutes
Cuisine:
Brazilian
Course:
Main Dish
Calories:
320 kcal (approx. per serving)
Servings:
6
Author:
Ronica Rupan
Ingredients
Ingredients:
For the Feijoada:
- 2 tablespoons olive oil
- 1 cup yellow onion, diced (about 1 medium onion)
- 1 green bell pepper, diced
- 1 red bell pepper, diced
- 4-5 cloves garlic, minced
- 3 tablespoons fresh cilantro, chopped, plus extra for garnish
- 1 bay leaf
- 1½ teaspoons smoked paprika
- 1 teaspoon ground coriander
- 2 teaspoons ground cumin
- 1½ teaspoons garlic powder
- 1 teaspoon chili powder
- 1 teaspoon dried oregano
- 3 cups cooked black beans (from 1 cup dry beans, or two 15-oz cans, drained and rinsed)
- 1 cup low-sodium vegetable broth, plus more as needed
- 1 cup water
- 3 medium tomatoes, diced (about 2 cups)
- 1 large carrot, peeled and diced
- 1 teaspoon apple cider vinegar
- ¼ teaspoon freshly ground black pepper
- Salt to taste (start with 1 teaspoon)
- Dash of hot sauce (optional, adjust to preference)
For Serving:
- Coconut lime rice
- Mango avocado salsa
- Orange slices (traditionally served with feijoada to cut through the richness)
Equipment Needed:
- Large heavy-bottomed pot or Dutch oven
- Wooden spoon
- Cutting board and sharp knife
- Measuring cups and spoons
Instructions:
Step 1: Build Your Flavor Base
Heat 2 tablespoons of olive oil in a large pot or Dutch oven over medium heat. Once the oil shimmers, add the diced onions and both bell peppers. Sauté, stirring occasionally, for about 5-7 minutes until the onions turn translucent and the peppers begin to soften. This is where we're building sweetness into the dish, so don't rush this step.
Add the minced garlic and cook for another minute, stirring constantly to prevent burning. You'll know it's ready when your kitchen smells amazing and the garlic is fragrant.
Stir in the chopped cilantro and bay leaf, cooking for 2 more minutes to release those fresh herbal notes.
Step 2: Toast Your Spices
Add the smoked paprika, coriander, cumin, garlic powder, chili powder, and oregano directly to the vegetables. Stir everything together and cook for 1-2 minutes. This step is crucial—toasting the spices in the oil helps bloom their flavors and creates that deep, complex taste that makes this dish special.
Step 3: Bring It All Together
Add your cooked black beans, vegetable broth, water, diced tomatoes, and carrot to the pot. Stir well to combine everything. Bring the mixture to a gentle simmer, then reduce heat to medium-low. Cover and let it cook for 10-15 minutes, stirring occasionally. The carrots should be tender, and the flavors will meld beautifully as it simmers. If the stew looks too thick, add a splash more broth or water.
Step 4: Final Seasonings
Stir in the apple cider vinegar (this brightens everything!), black pepper, salt, and hot sauce if using. Let it simmer uncovered for another 5 minutes. Remove and discard the bay leaf. Taste and adjust seasonings—you might want more salt, pepper, or a squeeze of lime juice.
Step 5: Serve & Enjoy
Spoon the feijoada over a generous portion of coconut lime rice. Top with fresh mango avocado salsa and garnish with extra cilantro. Serve with orange slices on the side—trust me on this! The citrus cuts through the richness and is traditional in Brazilian feijoada.
Why You'll Love This: Black beans are packed with plant-based protein and fiber that may help keep you satisfied for hours. The vibrant vegetables add nutrients while the warming spices may support digestion. Plus, it's a one-pot wonder that feeds a crowd!
Iron-Boosting Beet Juice
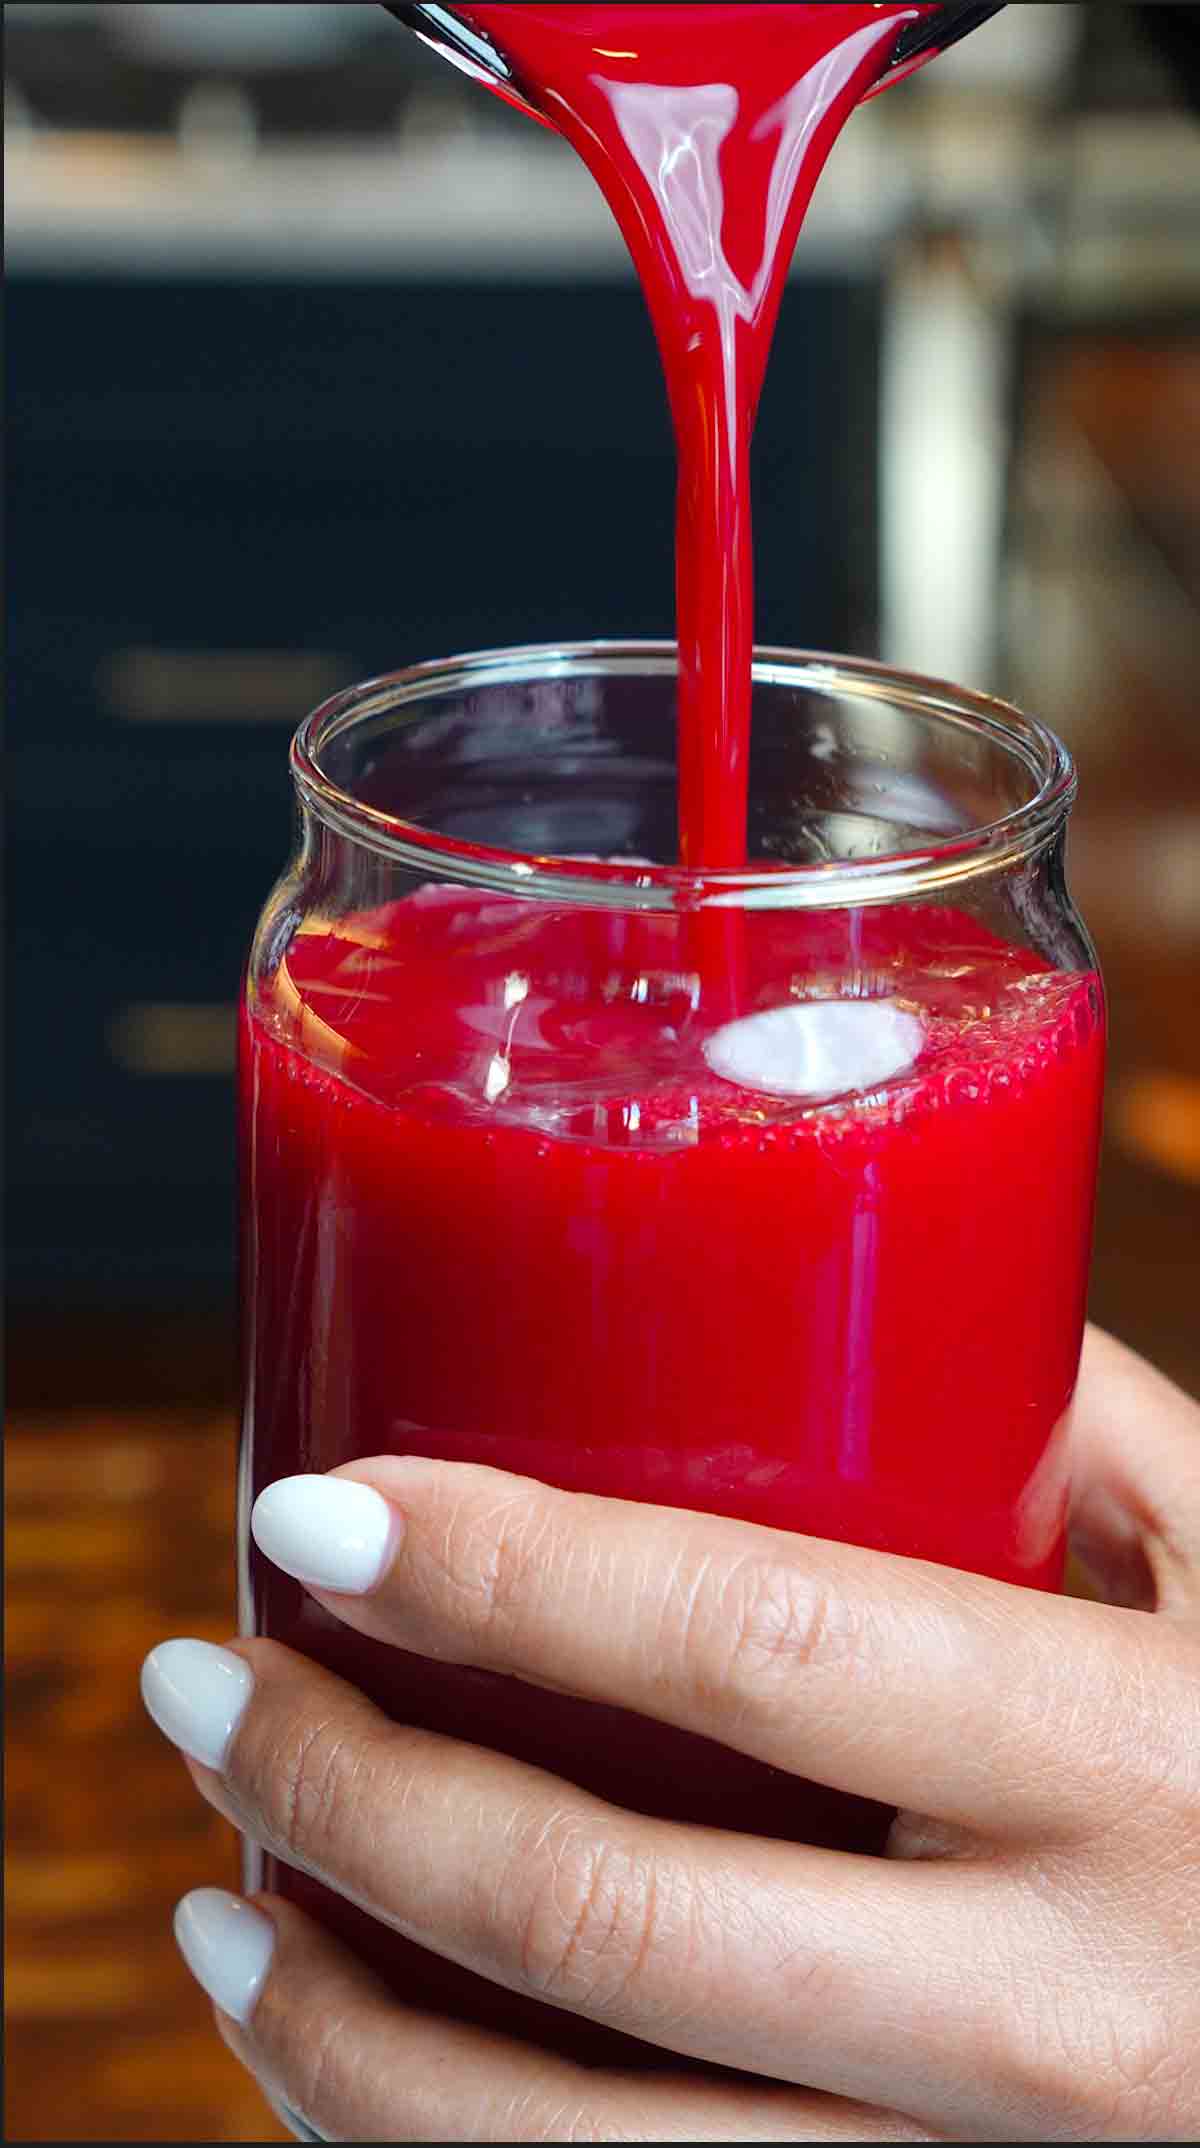
This Iron-Boosting Beet Juice is the ultimate energy boost packed with ingredients that work together to support your body from the inside out. Beets bring natural nitrates that may help boost blood flow and oxygen delivery throughout your body, while also providing a rich source of iron that could support healthy red blood cells. The fresh citrus from lemon and orange isn't just for flavor, it's loaded with Vitamin C, which may help your body absorb iron more effectively. Apples add natural sweetness and fiber that could support digestion and help balance blood sugar, while carrots deliver beta-carotene that may promote glowing skin, sharp vision, and immune health. Ginger brings its anti-inflammatory properties that could help soothe digestion and add a warming, spicy kick that makes every sip feel energizing. Sweet, earthy, and refreshing, this juice is perfect for your morning routine or as an afternoon pick-me-up when you need a natural energy boost without the caffeine crash.
This Iron-Boosting Beet Juice is the ultimate energy boost! Beets bring natural nitrates to boost blood flow, while the citrus helps with iron absorption. Apples add natural sweetness, carrots promote healthy skin and vision, and ginger soothes digestion. Sweet, earthy, and refreshing, this is your new morning pick-me-up.
Rate This Recipe!
Preparations
Prep Time:
10 minutes
Total Time:
10 minutes
Cuisine:
American
Course:
Drinks
Calories:
95 kcal (approx. per serving)
Servings:
2-3 (about 16-20 oz)
Author:
Ronica Rupan
Ingredients
Ingredients
- 2 beets, peeled and chopped
- 1 apple, cored and sliced
- 2 carrots, peeled
- 1 lemon, peeled
- 1 orange, peeled
- A thumb-sized piece of ginger (about 1-2 inches)
- optional Ice, for serving
Instructions
1. Prep Your Ingredients Wash all your produce thoroughly. Peel and chop the beets into chunks. Core and slice the apple. Peel the carrots, lemon, and orange. Peel your thumb-sized piece of ginger.
2. Juice It Up Run everything through your juicer in this order: ginger first (it's small and can get lost), then carrots, beets, apple, lemon, and orange. This helps push everything through smoothly.
3. Serve and Enjoy Pour your juice over ice if desired, give it a quick stir, and enjoy immediately for maximum freshness and nutrients!
Storage Instructions
Store in an airtight container or jar in the refrigerator for up to 24 hours. The juice may separate—just give it a good shake before drinking. For best flavor and nutrients, drink within a few hours of making.
3 Key Ingredients
- Beets - Natural nitrates boost blood flow and energy; rich in iron for healthy red blood cells
- Citrus (Lemon & Orange) - Packed with Vitamin C to enhance iron absorption and support immunity
- Ginger - Natural anti-inflammatory that aids digestion and adds a warming spicy kick
Turmeric Ginger Immunity Booster Cubes
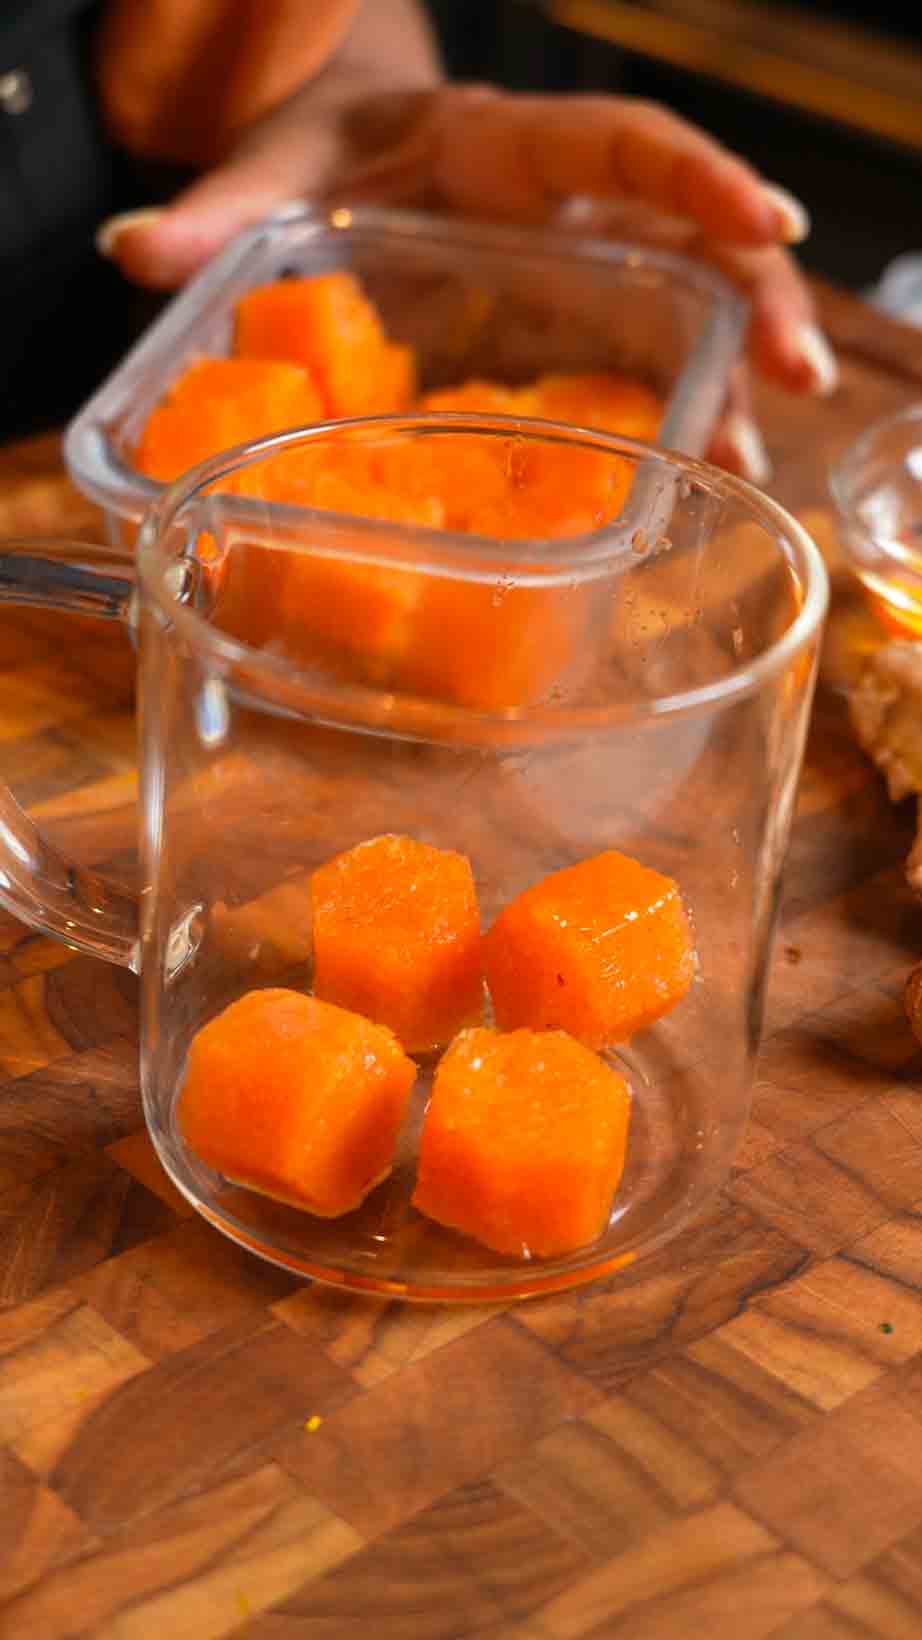
These immunity booster cubes are my go-to during flu season and year-round wellness support. Each ingredient is carefully chosen for its powerful healing properties, creating a synergistic blend that supports your immune system, reduces inflammation, and keeps you feeling your best.
Lemons and Oranges deliver a serious vitamin C punch—one of nature's most potent immune boosters. Vitamin C helps your white blood cells function more effectively, protecting you from infections and helping you recover faster when you're under the weather. The citrus also contains flavonoids that have antiviral and anti-inflammatory properties. Plus, I'm keeping those rinds because they're packed with even more beneficial compounds and add a bright, zesty flavor.
Carrots bring beta-carotene to the party, which your body converts to vitamin A—essential for maintaining the health of your respiratory system and gut lining, your body's first line of defense against pathogens. They also add a natural sweetness and beautiful color to the cubes.
Fresh Turmeric is a powerhouse anti-inflammatory thanks to its active compound, curcumin. It helps reduce inflammation throughout your body, supports liver detoxification, and has been used in traditional remedies for centuries. This is one of those ingredients my grandmother always had on hand.
Fresh Ginger is antibacterial, antiviral, and helps soothe digestive issues while reducing nausea. It also has warming properties that help break up congestion and support circulation. When combined with turmeric, these two create an incredibly powerful anti-inflammatory duo.
Raw Honey isn't just for sweetness—it's antimicrobial, soothes sore throats, and contains antioxidants and enzymes that support your immune system. Make sure to use raw honey for maximum benefits.
Black Pepper might seem like an odd addition, but it contains piperine, which increases the absorption of curcumin from turmeric by up to 2000%. Without it, your body can't effectively use all that turmeric goodness.
Each cube bursts with immune-supporting nutrients, ready to dissolve into a warm, soothing drink whenever you need it. Just drop 2-3 cubes into hot water, stir, and sip your way to better health.
These immunity booster cubes are packed with lemon, orange, carrots, and the powerful duo of turmeric and ginger—your best defense during flu season. Each cube bursts with vitamin C, beta-carotene, and antibacterial properties. Just drop a few into hot water for a quick, soothing wellness drink.
Rate This Recipe!
Preparations
Prep Time:
15 minutes
FreezingTime:
overnight
Total Time:
15 minutes (plus overnight freezing)
Cuisine:
Wellness
Course:
Beverage
Calories:
Approx. 20 kcal per cube (60 kcal per serving of 3 cubes)
Servings:
Makes approximately 12-14 cubes (4-5 servings)
Author:
Ronica Rupan
Ingredients
Ingredients
- 2 lemons, peeled and chopped (keep the rind)
- 2 oranges, peeled and chopped (keep the rind)
- 2 medium carrots, peeled and chopped
- 1½ inches fresh ginger, peeled
- 1 inch fresh turmeric, peeled (or 1 tsp ground turmeric if fresh is unavailable)
- ¼ cup raw honey (adjust to taste)
- ¾ cup water
- ¼ tsp black pepper
Method
- Prepare the Ingredients: Ensure all fruits and vegetables are thoroughly cleaned, peeled, and chopped as needed.
- Blend: Place all ingredients (including rind) into a high-speed blender. Blend until the mixture is completely smooth, ensuring there are no large chunks. This should take about 2 minutes.
- Freeze: Pour the blended mixture into an ice cube tray. Freeze overnight until solid.
- Storage: Once frozen, transfer the cubes to an airtight container or freezer bag and keep them stored in the freezer for up to 3 months.
To Use: Drop 2-3 cubes into a mug of hot water, stir until dissolved, and enjoy your immunity-boosting drink. You can also add a cube to smoothies or warm tea for an extra wellness boost!
3 Ingredient Viral Candied Cranberries
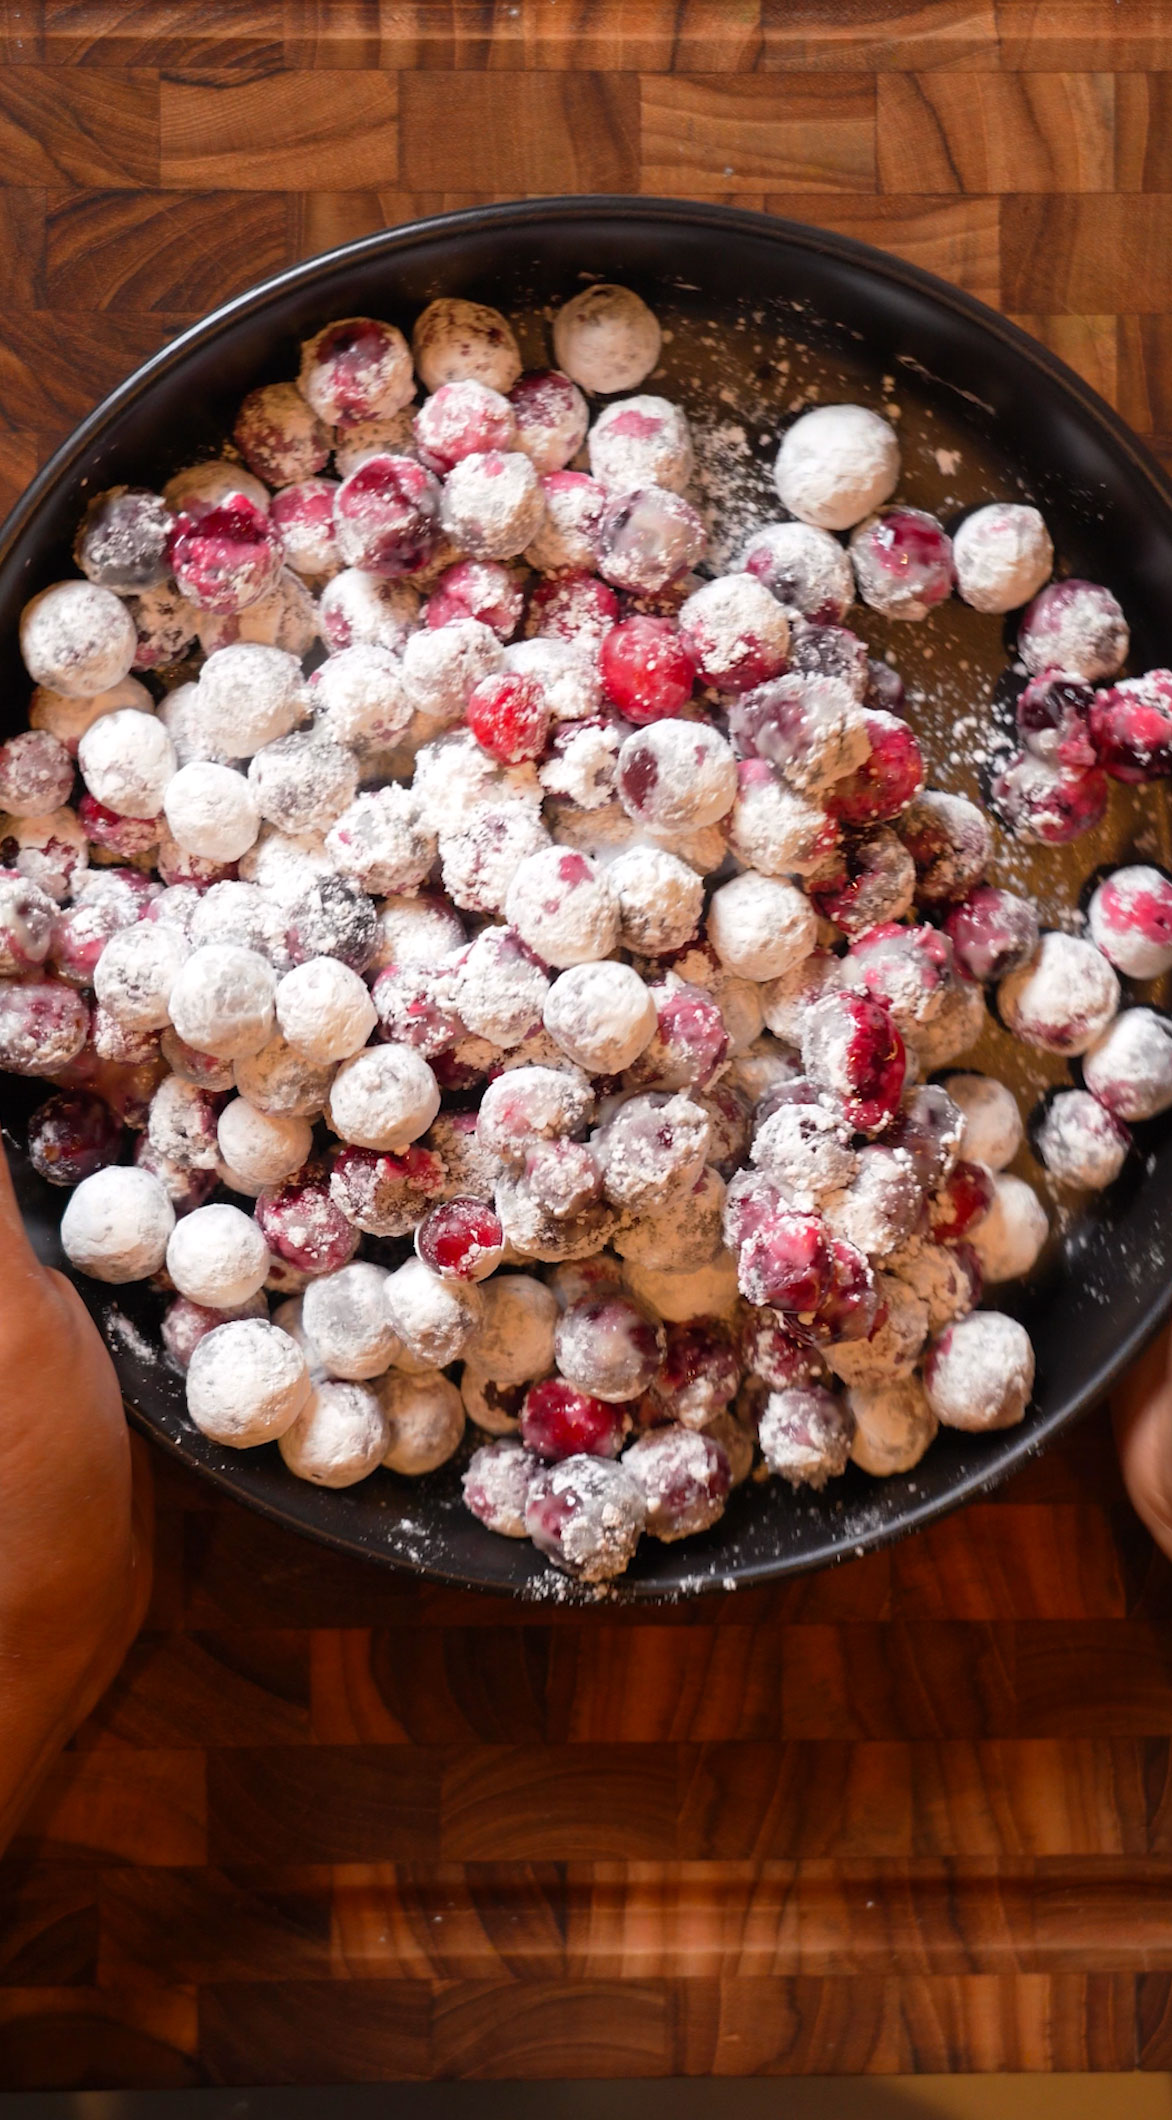
I've been seeing these all over my feed and had to try them, they're like little sour patch candies that pop in your mouth! I used a combo of sparkling apple cider and orange juice for mine, but you can totally customize with your favorite juice or even Sprite. The sugar coating gets this perfect crunchy shell that's so satisfying.
These are the viral candied cranberries everyone's been talking about—they taste like little sour patch candies with a satisfying pop! I used sparkling apple cider and orange juice, but you can use any sweet juice or soda.
Rate This Recipe!
Preparations
Prep Time:
10 minutes (plus 1-24 hours soaking)
Cook Time:
5 minutes
Total Time:
1 hour 15 minutes (with minimum soak time)
Cuisine:
Holiday Treat
Course:
Snack/Dessert
Calories:
Approx. 4 kcal per cranberry
Servings:
About 150 candied cranberries
Author:
Ronica Rupan
Ingredients
Ingredients:
- 2 cups fresh cranberries, rinsed and dried
- 2 cups liquid (I did half sparkling apple cider, half orange juice)
- 1 cup powdered sugar (use good quality!)
Instructions:
- Soak cranberries in liquid for 1-24 hours in the fridge (even 1 hour works!)
- Drain but keep them wet, add to a ziploc bag with powdered sugar
- Shake until fully coated with a thick white layer
- Spread on parchment-lined baking sheet, bake at 200°F for 4-5 minutes
- Cool completely, then chill in fridge for an hour before serving
Store in an airtight container in the fridge for 2-3 days. Best enjoyed the day you make them!
Ratio: 1 cup cranberries : 1 cup liquid : ½ cup powdered sugar
Let's Talk Ingredients: Why They Matter
Fresh Cranberries The key to that satisfying pop! Fresh cranberries hold their shape and create that crispy candy shell. Frozen cranberries have too much moisture and won't give you the same crunchy texture.
Sparkling Apple Cider & Orange Juice The liquid coats the outside of the cranberries so the sugar sticks, plus adds a hint of flavor. Use any sweet juice or soda you love, Sprite, sparkling wine, or straight OJ all work beautifully.
Powdered Sugar Creates that signature candy coating that gets crispy when baked. Quality matters here, good powdered sugar means no weird aftertaste, just pure sweet crunch that balances the tart cranberry.
Morning Glow Shot
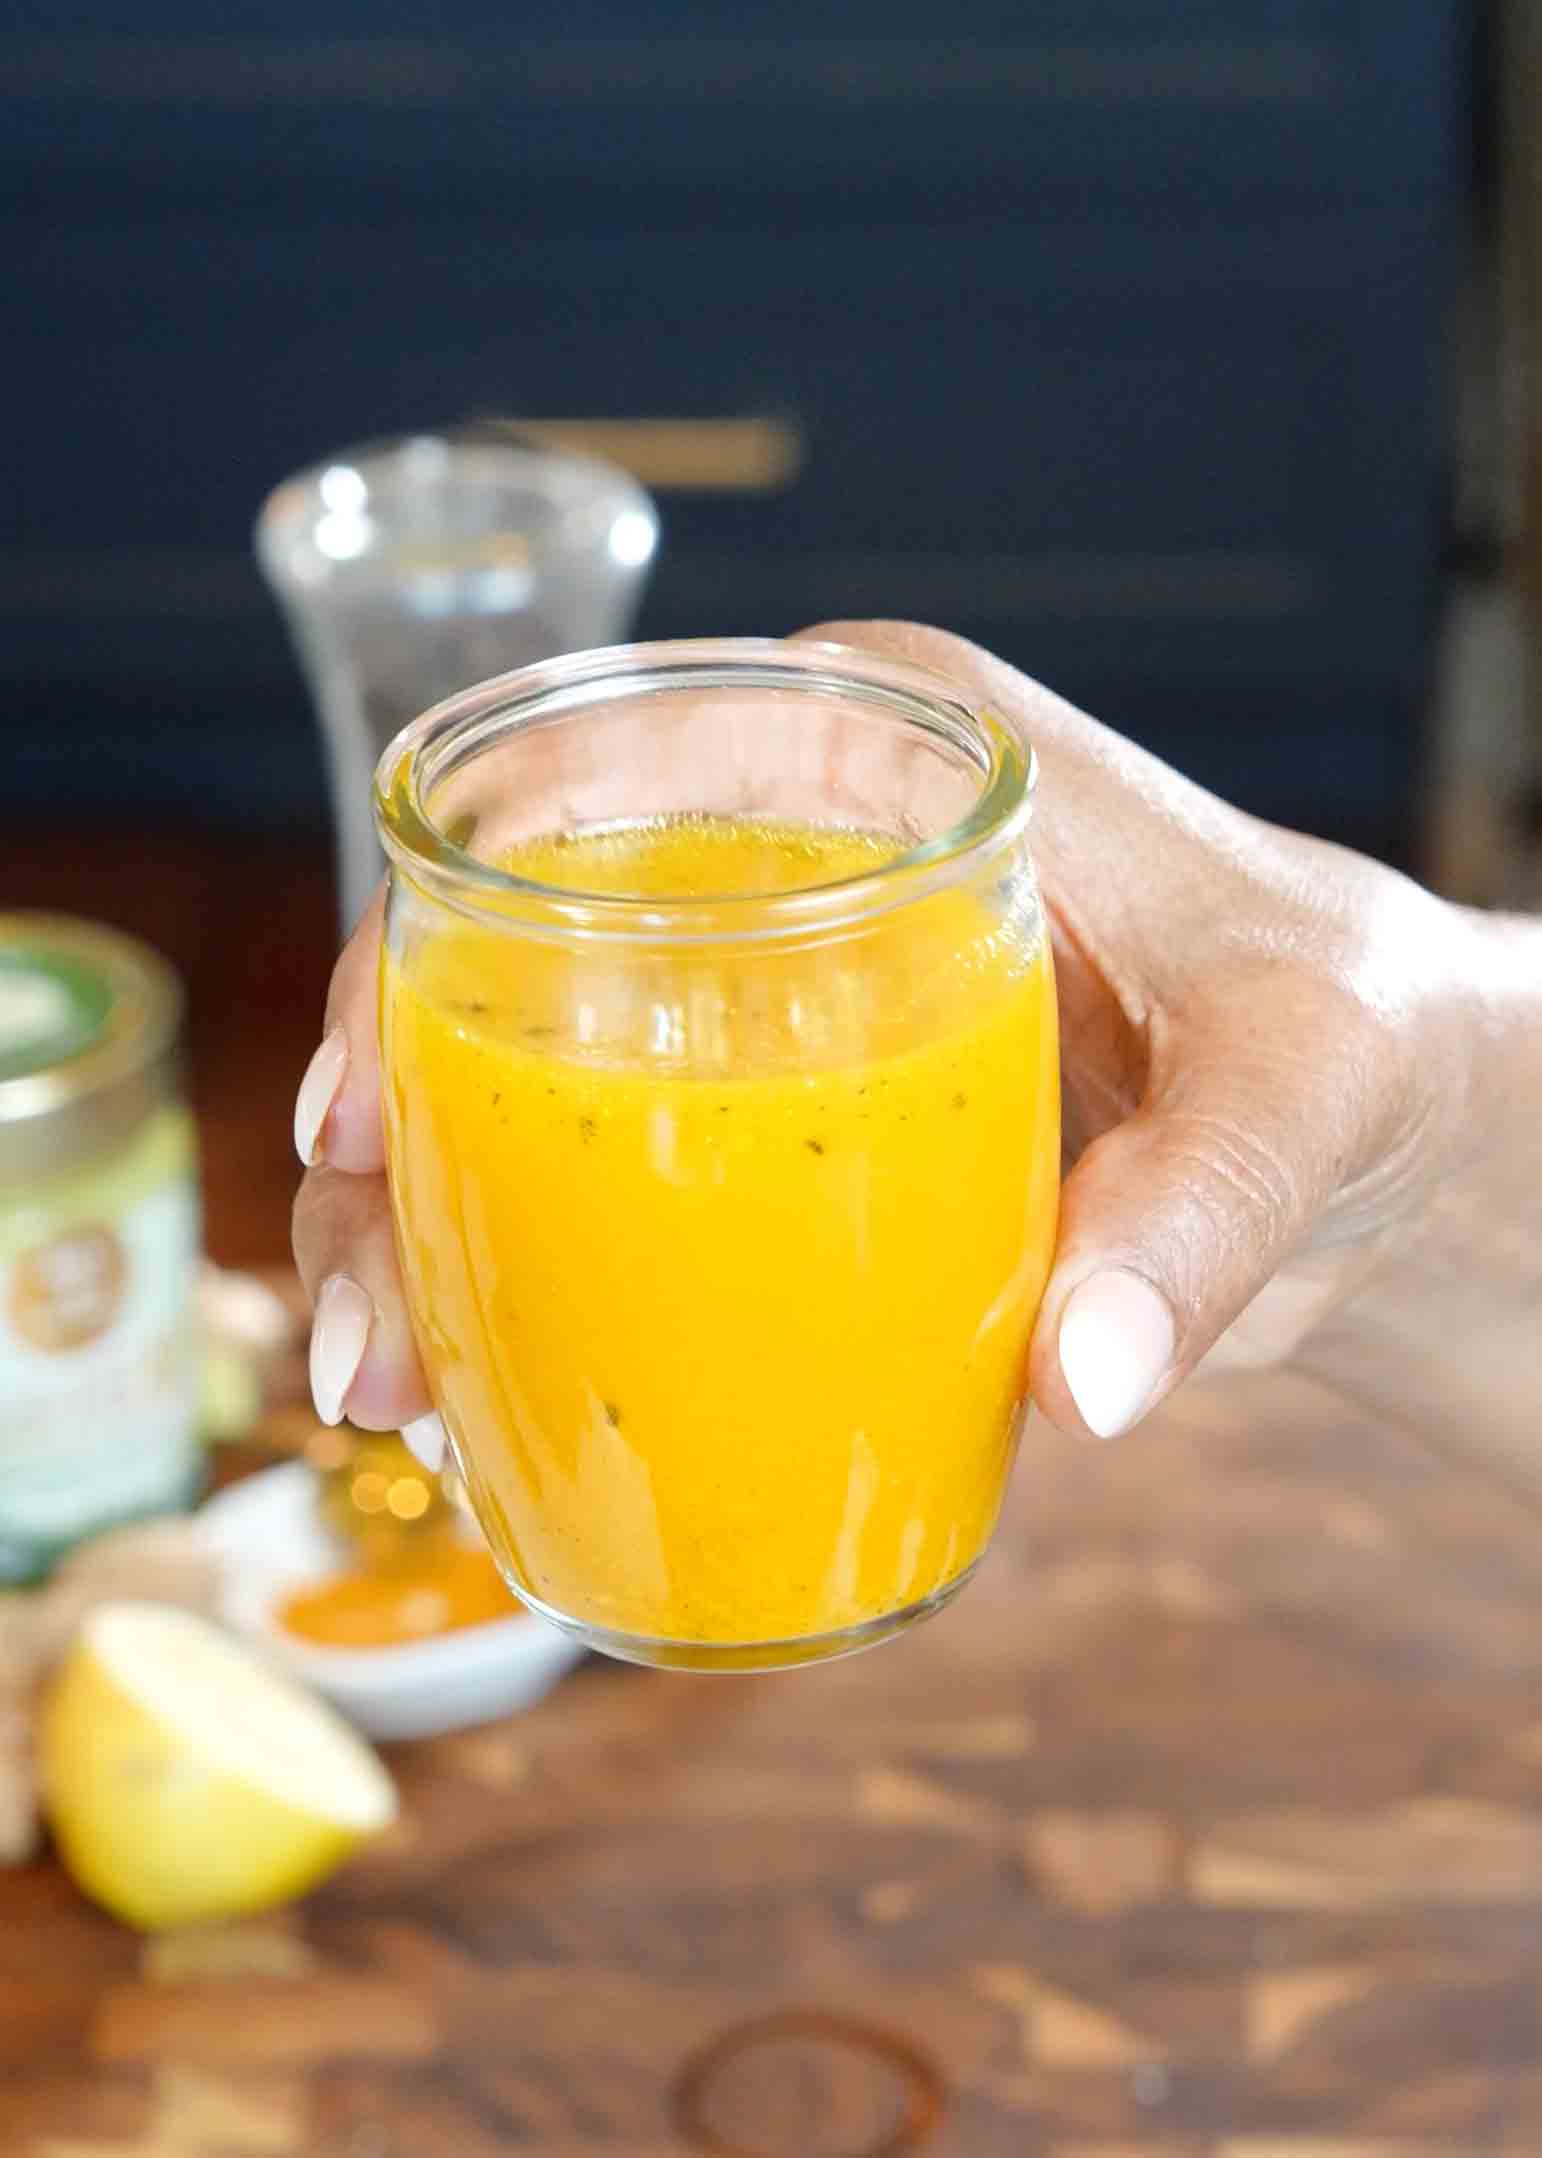
This glow shot is my quick wellness ritual to start the day. Warm water, turmeric, ginger, lemon, and a spoonful of ghee create a smooth, creamy drink that supports gut health with butyric acid and is rich in Vitamin A for skin, vision, and immunity. I sip it first thing for steady energy and better digestion—a small change that makes a big difference.
This glow shot is my quick wellness ritual to start the day. Warm water, turmeric, ginger, lemon, and a spoonful of ghee create a smooth, creamy drink that supports gut health with butyric acid and is rich in Vitamin A for skin, vision, and immunity. I sip it first thing for steady energy and better digestion, a small change that makes a big difference.
Rate This Recipe!
Preparations
Prep Time:
5 minutes
Cook Time:
0 minutes
Total Time:
5 minutes
Cuisine:
Ayurvedic/Wellness
Course:
Breakfast, Drink
Calories:
40kcal (approx. per serving)
Servings:
1
Author:
Ronica Rupan
Ingredients
Ingredients:
½ cup warm water (about 120-130°F, not boiling)
1 teaspoon freshly grated ginger (or ½ teaspoon ginger powder)
½ teaspoon ground turmeric (or 1 teaspoon freshly grated turmeric root)
Juice of ½ lemon (about 1 tablespoon)
1 teaspoon ghee
Pinch of black pepper (optional, boosts turmeric absorption)
½-1 teaspoon honey (optional, for sweetness)
Instructions:
Heat the water until warm but not boiling and pour into a glass.
Add ginger, turmeric, and lemon juice. Stir to combine.
Stir in ghee until fully melted and the drink looks smooth.
Add a pinch of black pepper and honey if desired.
Sip warm as your first drink of the morning.
Let's Talk Ingredients: What Makes This Morning Shot Work
When it comes to quick wellness rituals, it's the quality ingredients that create real benefits. This Morning Glow Shot combines ancient wisdom with modern wellness in just five simple ingredients. Here's what makes each one count:
1. Turmeric
This golden spice is packed with curcumin, a powerful anti-inflammatory compound. It supports immune function, helps with joint health, and gives your skin that natural glow from the inside out.
2. Ginger
Fresh ginger brings warmth and aids digestion, helping to reduce bloating and nausea. It's also anti-inflammatory and adds a zingy kick that wakes up your system naturally.
3. Lemon
A squeeze of fresh lemon juice adds vitamin C for immune support and helps balance the drink's flavor with bright acidity. It also aids in hydration and supports your body's natural detox processes.
4. Ghee
The real MVP here. Ghee makes this drink creamy and smooth while delivering butyric acid for gut health. It's also rich in fat-soluble vitamins like Vitamin A, which supports healthy skin, vision, and immunity. Plus, the healthy fats help your body absorb the turmeric more effectively.
5. Black Pepper (optional)
Just a pinch of black pepper contains piperine, which can boost turmeric absorption by up to 2,000%. It's a tiny addition that makes a huge difference in getting the most benefits from your glow shot.
Garlic and honey syrup
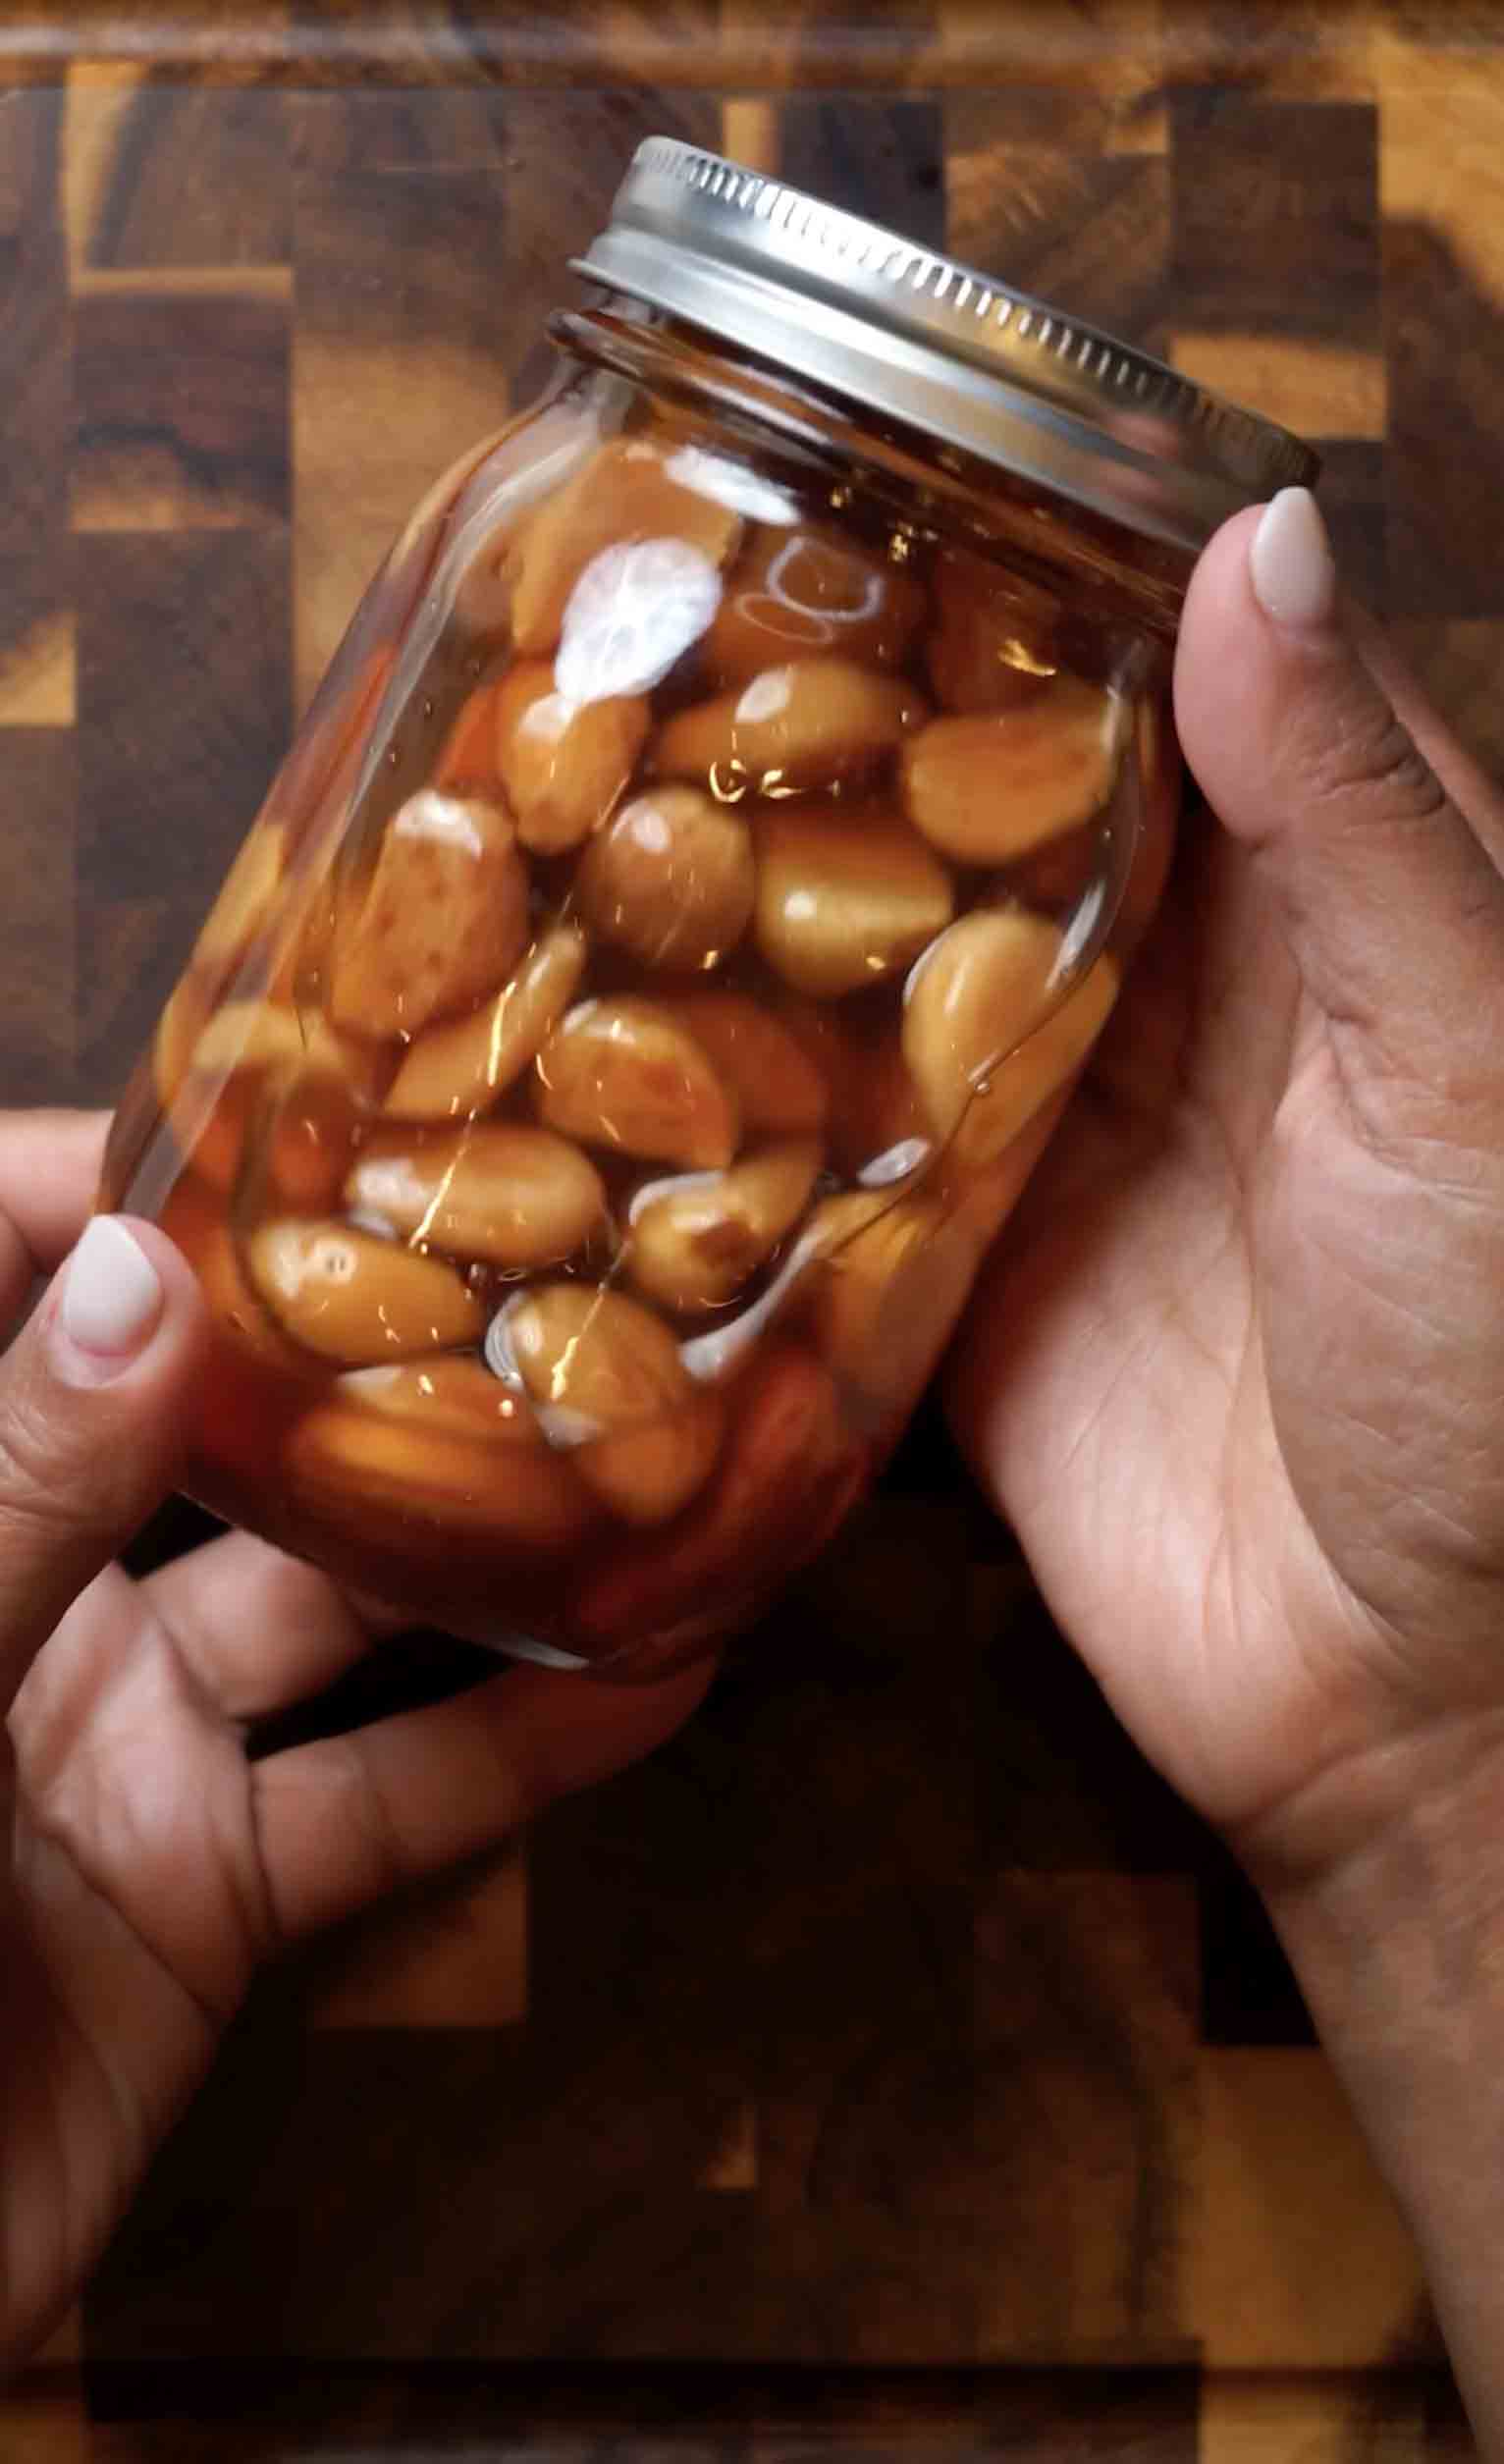
This traditional remedy combines two powerful ingredients, raw honey and garlic, to create a naturally fermented syrup that supports your immune system and soothes respiratory discomfort. Passed down through generations, this simple preparation harnesses the antimicrobial properties of garlic and the soothing qualities of honey.
This Fermented Garlic Honey is a powerful, time-honored remedy that transforms two simple ingredients into your cold season secret weapon! Raw garlic cloves slowly infuse into honey over weeks, mellowing into a golden syrup with immune-supporting properties. The fermentation process creates a naturally soothing remedy that eases sore throats, calms coughs, and helps your body fight off seasonal bugs. With antimicrobial garlic and healing honey working together, this ancient preparation has been passed down through generations for one reason—it works.
Rate This Recipe!
Preparations
Prep Time:
15 minutes
Fermentation Time:
3–4 weeks
Total Time:
3–4 weeks (including fermentation)
Cuisine:
Home Remedy
Course:
Natural Syrup / Wellness
Calories:
About 65 kcal per teaspoon (approx.)
Servings:
About 1 cup
Author:
Ronica Rupan
Ingredients
Ingredients
- 1 head of garlic (8–12 cloves), separated and peeled
- 1 cup raw honey, enough to fully cover the garlic
This fermented garlic honey is a powerful two-ingredient remedy that's been trusted for generations. Pierced garlic cloves slowly release their natural compounds into raw honey over several weeks, creating a mellow, golden syrup packed with immune-supporting properties. The fermentation process transforms sharp garlic into a sweet, savory remedy that soothes sore throats and helps your body fight off seasonal bugs naturally.
Instructions
Sterilize the Jar: Boil a glass jar and its lid for 10 minutes, then let them air dry completely. This prevents unwanted bacteria during the fermentation process.
Prepare the Garlic: Peel each garlic clove, then use a fork to gently pierce each one 3–4 times. This helps release the garlic's natural juices into the honey.
Assemble: Place all the pierced garlic cloves into your sterilized jar. Pour raw honey over them until completely submerged, leaving about an inch of headspace at the top.
Ferment: Seal the jar tightly and place it in a dark spot at room temperature (like a pantry or cupboard). Let it ferment for 3–4 weeks.
Burp Daily: For the first week, "burp" the jar daily by slightly loosening the lid to release gases, then resealing. Flip the jar upside down and back to coat all the garlic. After the first week, burp every 2–3 days.
Store & Use: After 3–4 weeks, your garlic honey is ready. Store at room temperature or in the refrigerator for up to a year. Take 1 teaspoon every few hours at the first sign of illness, or eat a whole honey-soaked garlic clove for extra relief.
Let's Talk Ingredients: Why They Matter
Garlic: Garlic contains allicin, a powerful compound with natural antibacterial and antiviral properties. It's been used in traditional medicine for centuries to support respiratory health and help the body fight infections. The fermentation process mellows its harsh bite while making its beneficial compounds easier to digest.
Raw Honey: Raw honey is naturally antimicrobial and anti-inflammatory, coating and soothing irritated throats while acting as a natural cough suppressant. It contains beneficial enzymes, antioxidants, and immune-supporting properties that are preserved when kept raw and unfiltered.
Homemade Crystallized Ginger
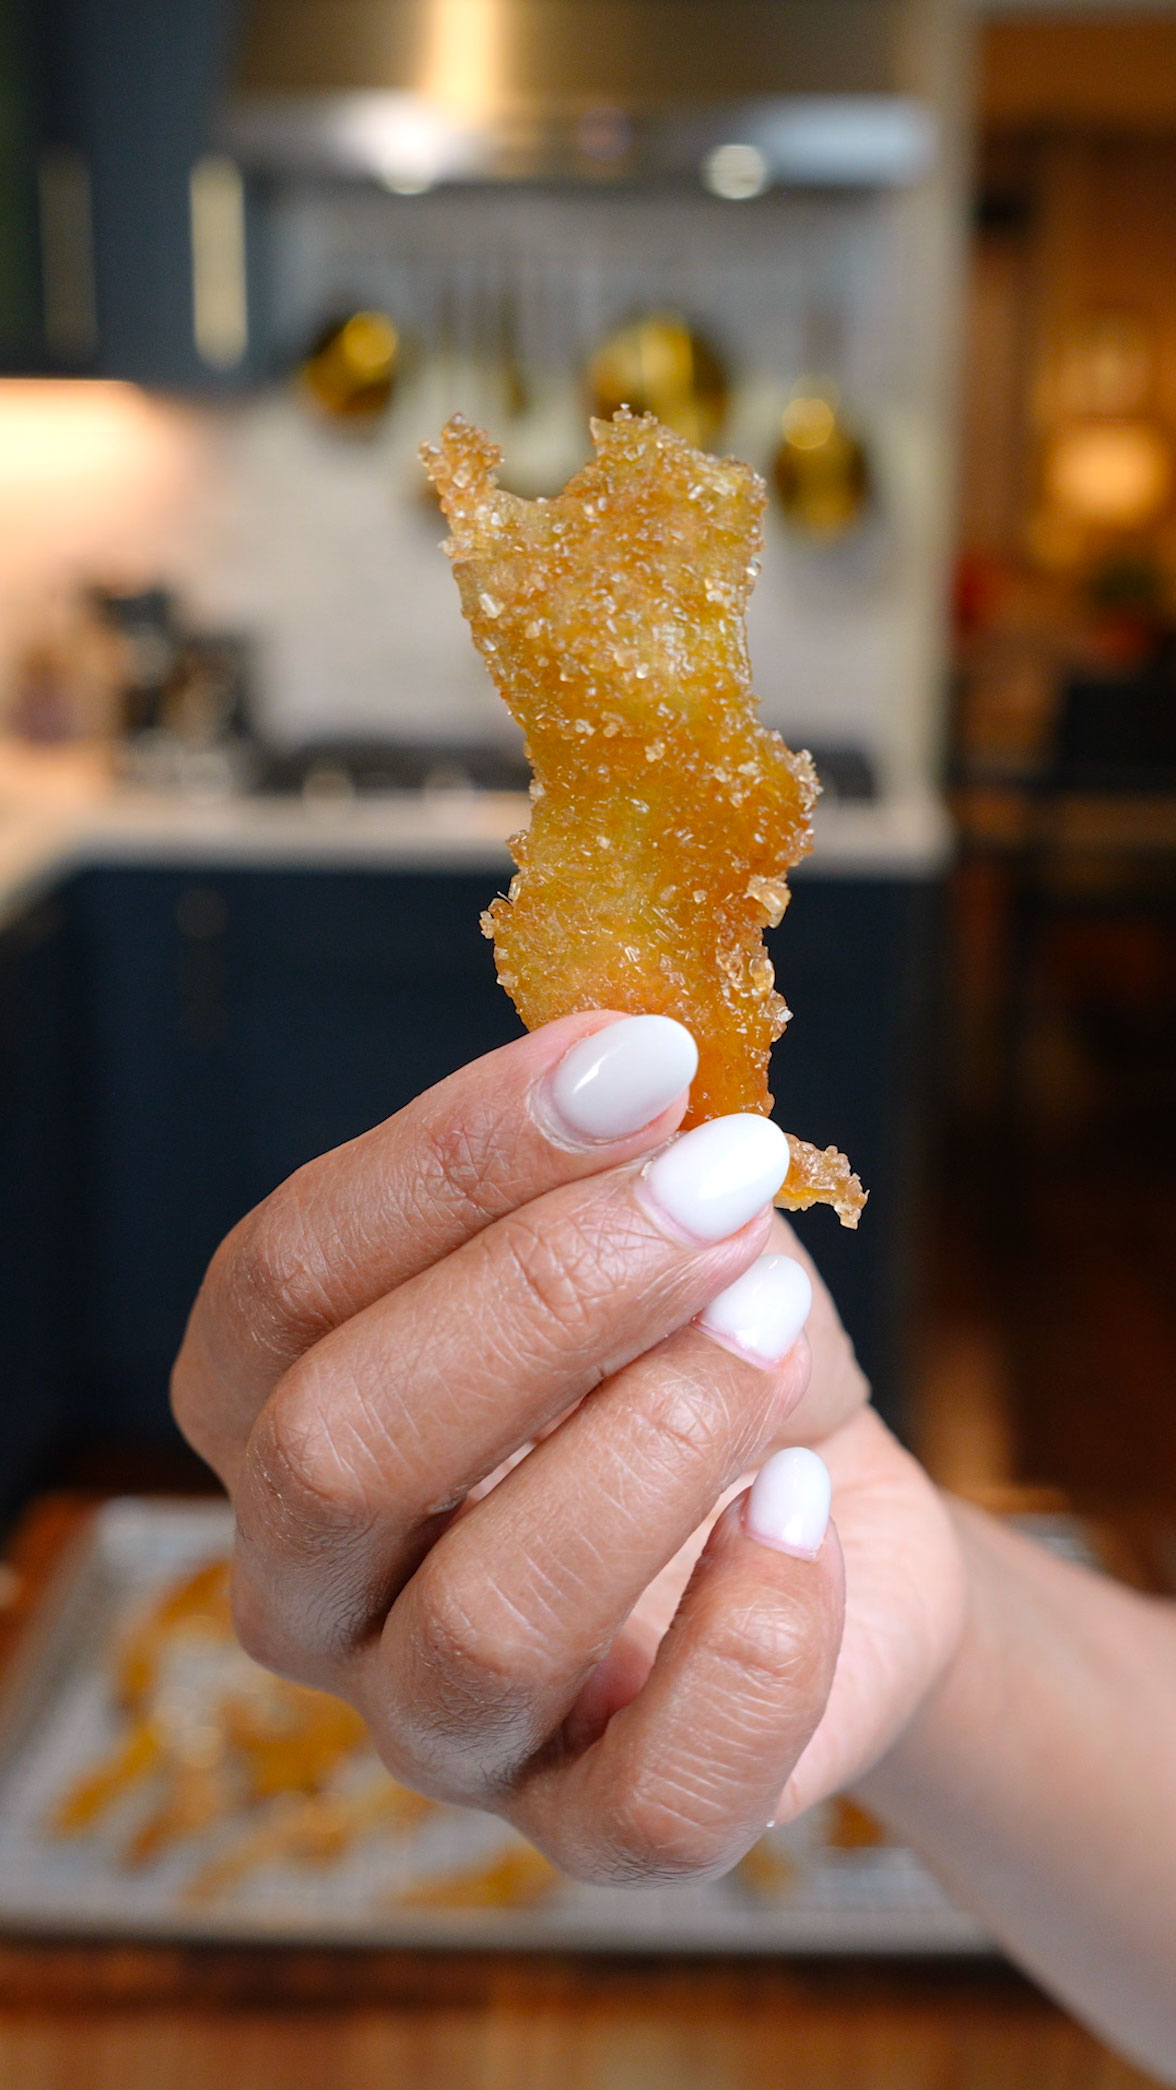
Homemade crystallized ginger is a spicy-sweet treat that may help with nausea, upset stomach, and inflammation. This easy recipe transforms fresh ginger root into chewy, flavorful candy in under 30 minutes, plus you get a bonus ginger tea syrup!
I learned this recipe from my great aunt, who always kept crystallized ginger on hand for digestive issues. Ginger has been used in traditional remedies for thousands of years, and even with the sugar, it retains those beneficial compounds that may support your digestive health.
The best part? You only need three ingredients: fresh ginger, sugar, and water. The process is simple, boil the ginger until tender, simmer it in sugar syrup until glossy, then roll in sugar. Don't toss that leftover syrup! I add it to my tea for an instant ginger boost.
Keep a batch in your pantry for motion sickness, morning nausea, or just when you want something naturally sweet with a kick. It stores for weeks in an airtight container and makes a thoughtful homemade gift during cold and flu season.
Homemade crystallized ginger is a spicy-sweet treat that may help with nausea, upset stomach, and inflammation. This easy recipe takes under 30 minutes and gives you chewy ginger candy plus a bonus tea syrup!
Rate This Recipe!
Preparations
Prep Time:
10 minutes
Cook Time:
25 minutes
Total Time:
35 minutes (plus drying time)
Cuisine:
Asian-inspired
Course:
Snack, Dessert, Natural Remedy
Calories:
25 kcal (approx. per piece, 2-3 pieces)
Servings:
Makes about 40-50 pieces (depending on slice size)
Author:
Ronica Rupan
Ingredients
Yields: 8 ounces crystallized ginger
Ingredients:
For the Ginger
- ½ lb fresh ginger root
- 5 cups water
For the Syrup
- 1½ cups organic granulated cane sugar
For Coating
- ½ cup turbinado sugar
Instructions:
Prep the Ginger Remove the ginger skin using a spoon or vegetable peeler. Thinly slice the ginger about ⅛ inch thick. Using a spoon to peel helps you get into all the curves while wasting less of the flesh.
Boil to Soften Add the ginger slices to a saucepan and cover with 5 cups water. Bring to a boil over medium-high heat, then reduce to medium and simmer for about 15 minutes, or until the ginger is tender when pierced with a fork. This step softens the fibers and mellows the intensity.
Simmer in Syrup Drain the ginger, but don't toss that liquid, reserve it! Return the ginger to the pot and add the cane sugar and 2 cups of the reserved ginger liquid. Stir until the sugar dissolves completely, then simmer over medium heat, stirring occasionally, until the syrup thickens and the mixture reaches 225°F on a candy thermometer, about 30 minutes. The ginger will become glossy and translucent.
Drain & Save the Syrup Strain the ginger using a fine-mesh strainer or slotted spoon. Save that leftover syrup in a clean, airtight container, it'll last 2-3 months in the refrigerator and is incredible in teas, mocktails, or drizzled over desserts.
Coat in Sugar Spread the turbinado sugar evenly on a baking sheet. While the ginger is still warm, toss the slices in the sugar until fully coated. The warmth helps the sugar stick better.
Dry & Store Transfer the sugar-coated ginger to a wire rack or parchment paper and let it dry for about 3 hours at room temperature, or until it's no longer sticky to the touch. Once fully set, store in an airtight container at room temperature for up to 1 month, or in the refrigerator for 2-3 months. Keep some on hand for nausea, upset stomach, or whenever you want a spicy-sweet treat.
.
Green Detox Smoothie
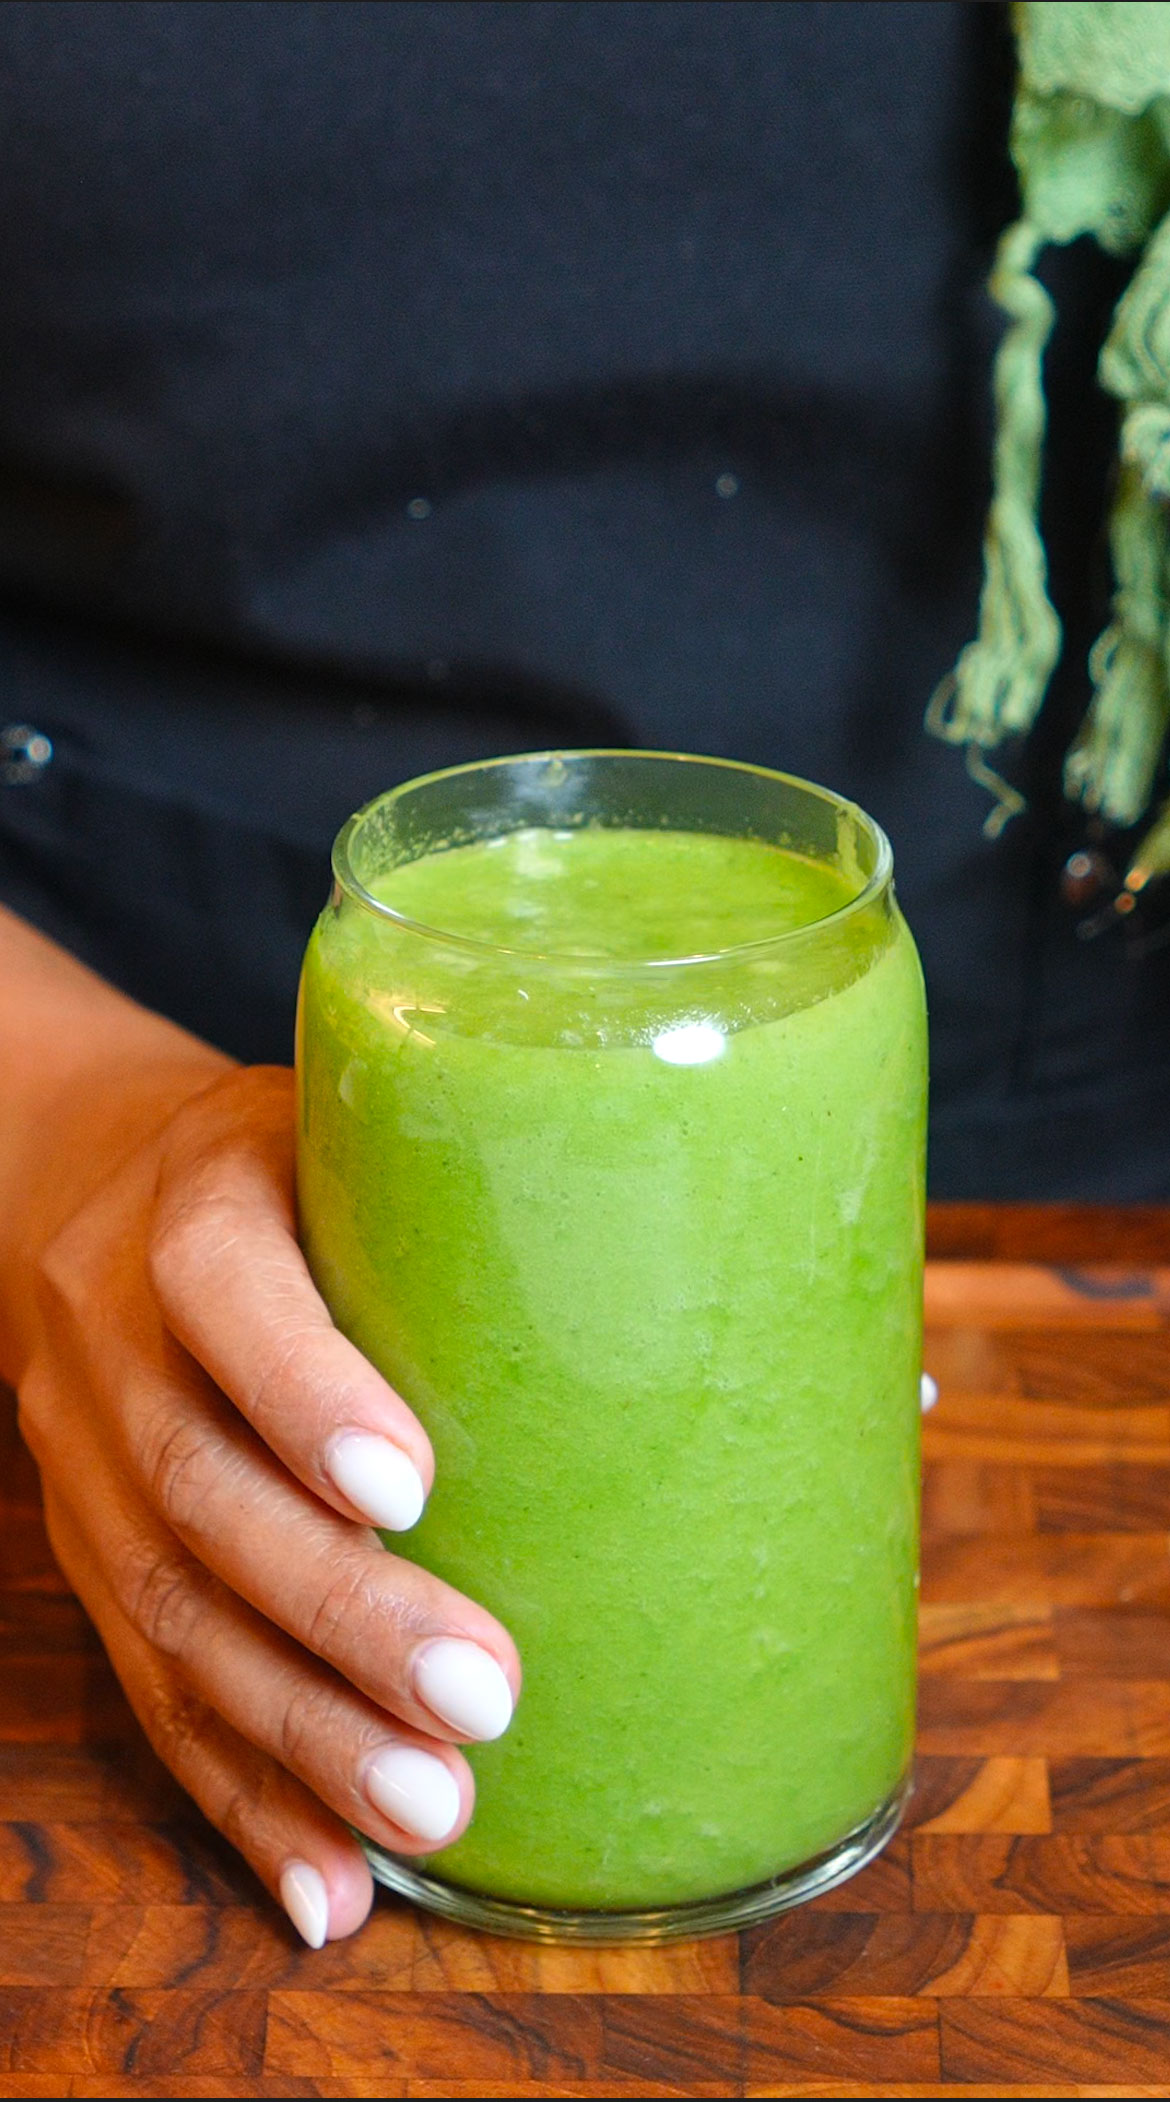
Light, refreshing, and naturally energizing, this green smoothie is packed with ingredients that support digestion and help reduce bloating. Pineapple and ginger work together to soothe your digestive system, while cucumber and celery keep you hydrated. The green apple adds fiber and a hint of natural sweetness, and lemon provides a bright boost of vitamin C. Perfect for when you need a reset or want to feel lighter from the inside out.
A refreshing green smoothie designed to help with bloating and digestion. Pineapple, ginger, and lemon support your digestive system while cucumber and celery keep you hydrated. Light, naturally sweet, and energizing—the perfect way to reset and feel your best.
Rate This Recipe!
Preparations
Prep Time:
5 minutes
Total Time:
5 minutes
Cuisine:
American
Course:
Drinks
Calories:
80 kcal (approx. per serving)
Servings:
1
Author:
Ronica Rupan
Ingredients
Ingredients:
- ½ cup pineapple chunks
- ¼ cucumber, sliced
- 1 stalk celery, chopped
- ½ green apple, cored and sliced
- 1 handful spinach
- ¼ cup fresh parsley
- ½ inch fresh ginger, peeled
- ½ lemon, juiced
- 1 cup cold water or coconut water
- Ice (optional, for a chilled smoothie)
Instructions:
Step 1: Add all ingredients to a high-speed blender.
Step 2: Blend until smooth and creamy. If the consistency is too thick, add more water or coconut water.
Step 3: Pour into a glass and enjoy immediately for maximum benefits.
Notes:
- Pineapple contains bromelain, a digestive enzyme that helps break down food and reduce bloating.
- Cucumber and celery are high in water and electrolytes, keeping you hydrated while flushing out toxins.
- Green apple provides fiber to aid digestion and gut health while balancing the sweetness with a natural tartness.
- Spinach delivers iron and essential nutrients, supporting energy and metabolism.
- Parsley acts as a natural diuretic, helping to eliminate excess water and detoxify the body.
- Ginger stimulates digestion and metabolism, reducing bloating and promoting gut health.
- Lemon is rich in vitamin C, which aids in detoxification and supports immune function.
- Best consumed within 15-20 minutes for maximum nutrient retention.
- If the flavor is too tart, add a small banana or a couple of dates for natural sweetness.
CRANBERRY ORANGE CARDAMOM OLIVE OIL CAKE
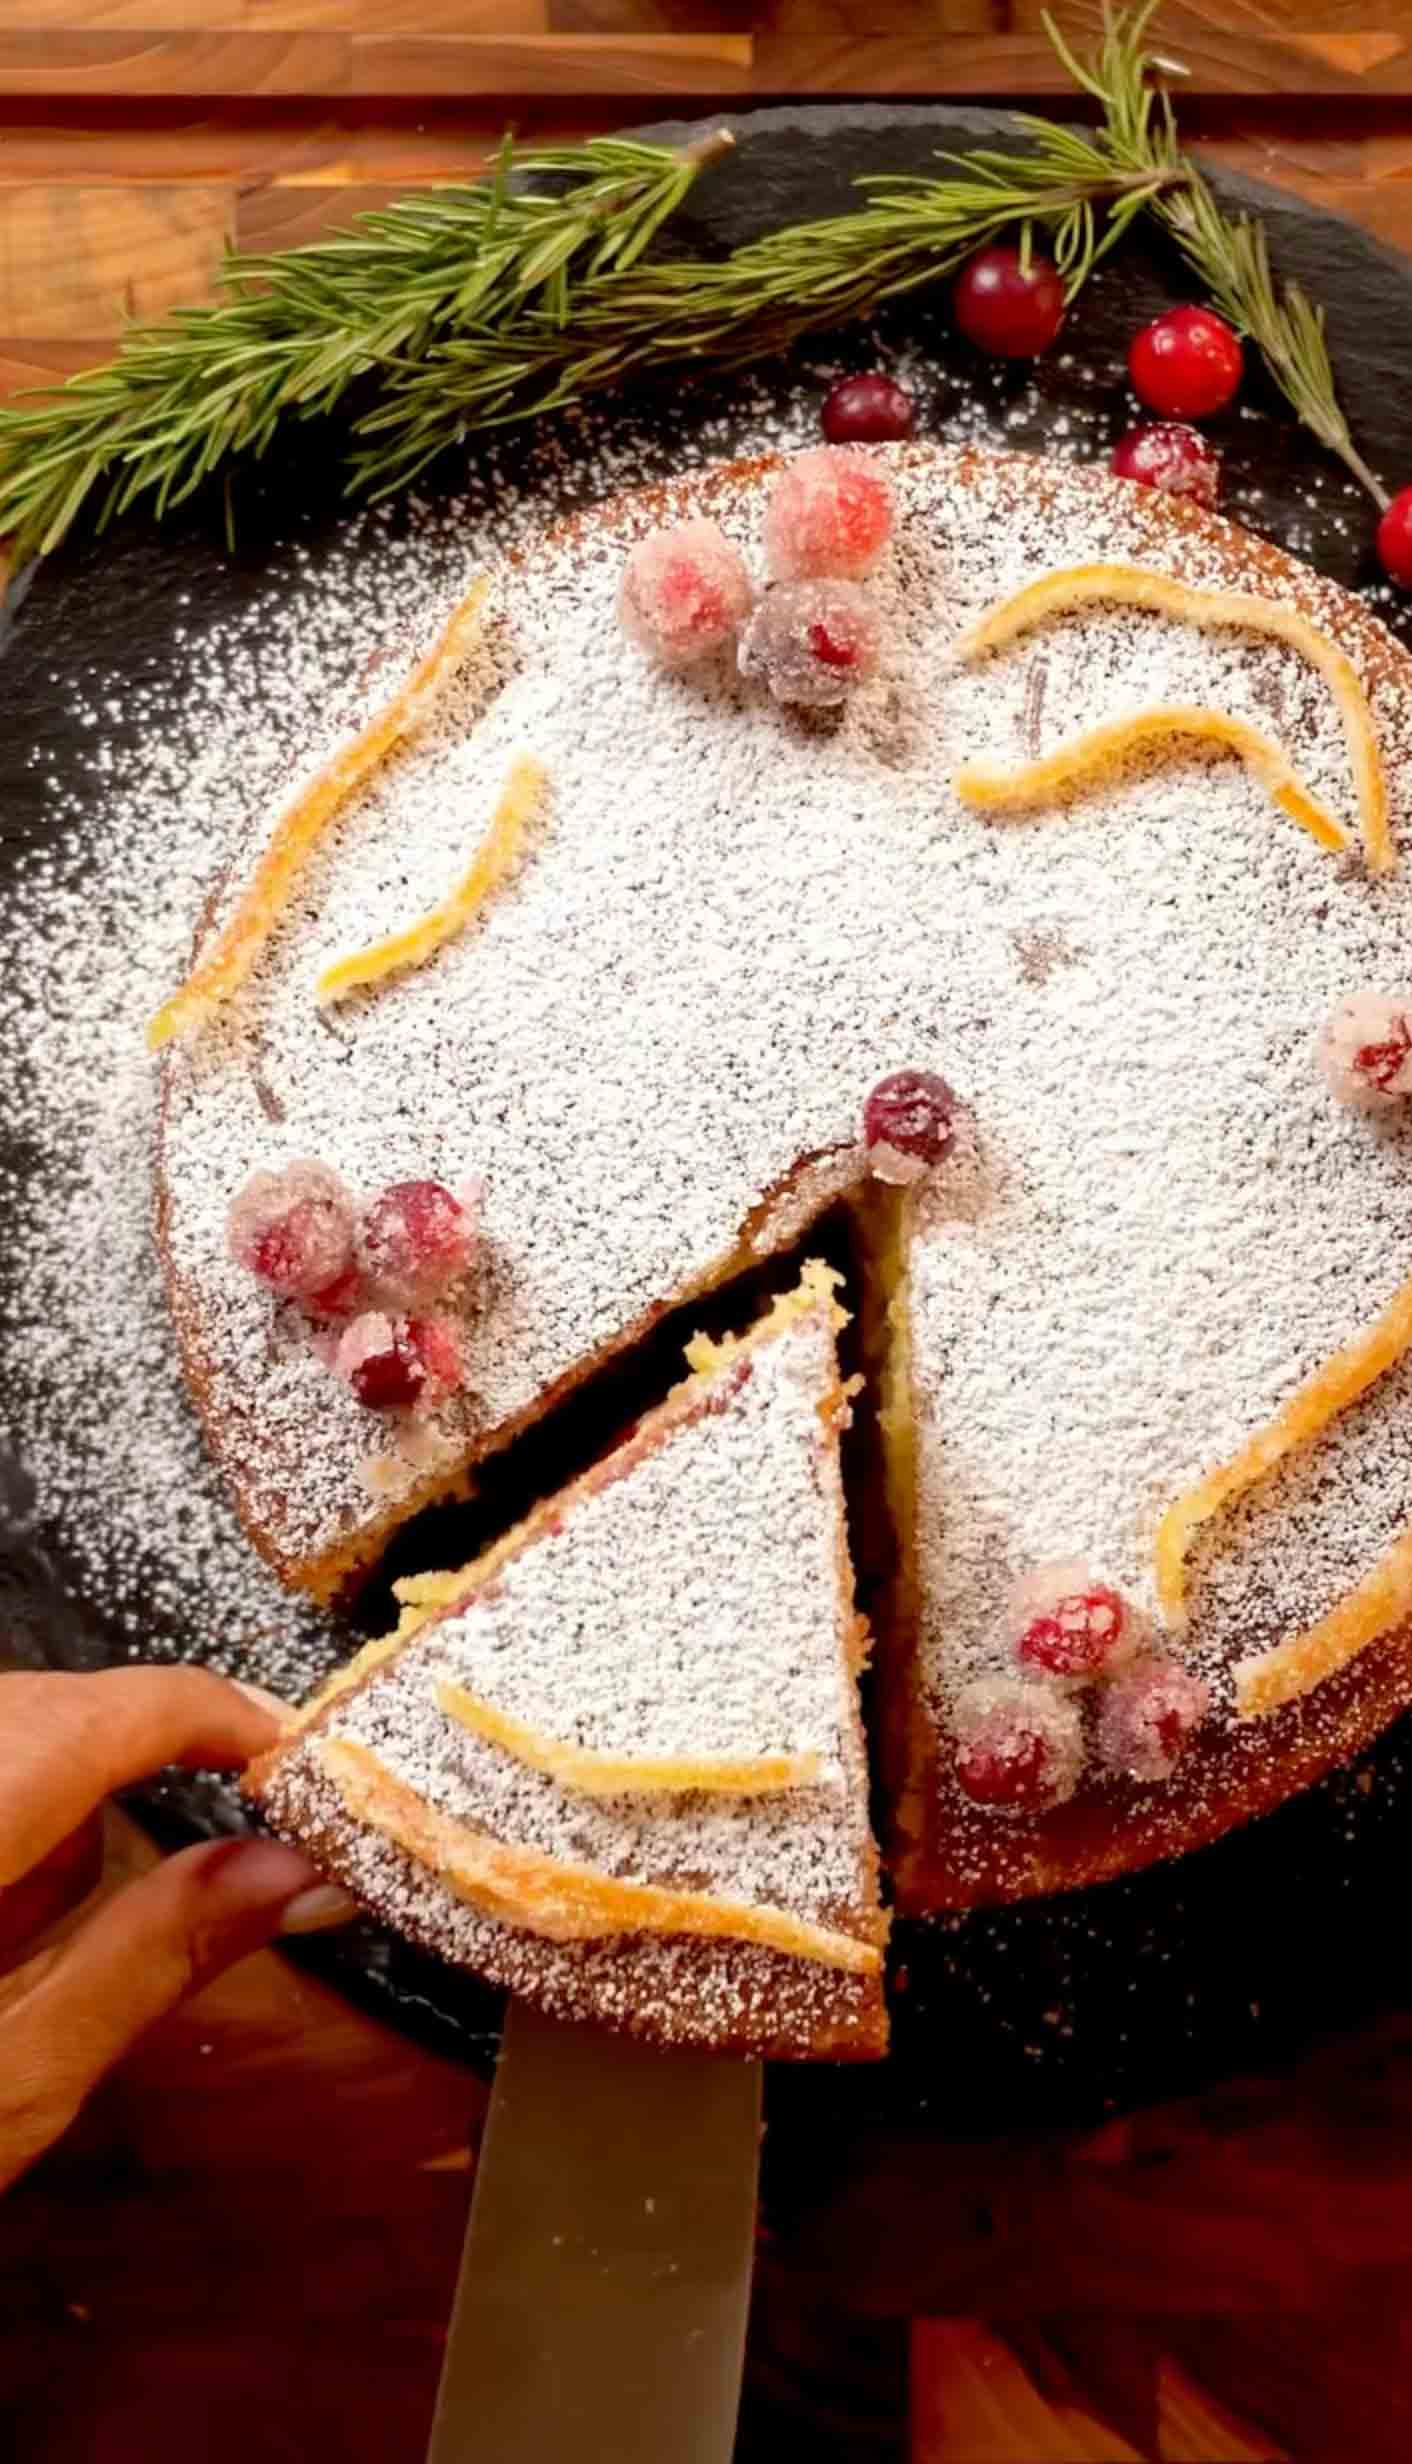
If you've never had olive oil cake, you're in for a treat. This Cranberry Orange Cardamom Cake is everything a holiday cake should be, rich, incredibly moist, and it literally melts in your mouth. The best part? It actually tastes better the next day as the flavors deepen and the texture becomes even more tender.
I'm using Bob's Red Mill Superfine Cake Flour for the most delicate, tender crumb you've ever experienced. The olive oil keeps this cake moist for days (seriously, up to a week!), making it perfect for gifting to neighbors, friends, and family during the holidays.
The secret ingredient? Cardamom. It's a warm, aromatic spice my grandmother taught me to use, and it pairs beautifully with the tart cranberries and bright orange zest. Together, they create a flavor that's unforgettable, people always ask, "What IS that flavor?"
I keep the finishing simple: a generous dusting of powdered sugar and homemade sugared cranberries with candied orange peel. Sometimes the best things don't need to be complicated.
Cranberry Orange Cardamom Cake
If you've never had olive oil cake, you're in for a treat. This Cranberry Orange Cardamom Cake is rich, incredibly moist, and literally melts in your mouth. The best part? It actually tastes better the next day as the flavors deepen and the texture becomes even more tender. Made with superfine cake flour and aromatic cardamom ,a spice my grandmother taught me to use, this cake pairs warm spices with tart cranberries and bright orange zest for an unforgettable flavor. Perfect for holiday gifting or sharing with family and friends.
Rate This Recipe!
Preparations
Prep Time:
20 minutes
Bake Time:
40-45 minutes
Cooling time
1 hour
Total Time:
2 hours 5 minutes
Cuisine:
Mediterranean-inspired
Course:
Dessert
Calories:
320 kcal (approx. per serving)
Servings:
One 8-inch round cake, serves 8-10
Author:
Ronica Rupan
Ingredients
Ingredients
For the Cake:
- 1½ cups + 2 tbsp superfine cake flour (plus extra for dusting pan)
- 1 tsp baking powder
- ½ tsp baking soda
- ½ tsp salt
- 1 tsp ground cardamom
- 3 large eggs
- 1 cup granulated sugar
- ½ cup extra virgin olive oil
- 2 tbsp unsalted butter, melted
- ⅓ cup fresh orange juice (about 1 large orange)
- Zest of 1 large orange
- ½ cup sour cream
- 1 cup fresh cranberries
For Finishing:
- 2–3 tbsp powdered sugar, for dusting
- Sugared cranberries and candied orange peel, for garnish (optional but gorgeous!)
Instructions
1. Prep and Preheat Position a rack in the center of your oven and preheat to 350°F (175°C). Generously grease and flour an 8-inch round cake pan, tapping out any excess flour. Line the bottom with a circle of parchment paper for easy removal, trust me, this step is a lifesaver!
2. Mix the Dry Ingredients In a medium bowl, whisk together the cake flour, baking powder, baking soda, salt, and cardamom until well combined. The cardamom is my signature spice, it adds this warm, aromatic depth that makes people stop and ask, "What IS that flavor?" Set the bowl aside.
3. Beat the Wet Ingredients In the bowl of a stand mixer fitted with the paddle attachment (or in a large bowl using a hand mixer), beat the eggs, sugar, and olive oil on medium-high speed for 2–3 minutes, until the mixture is smooth, pale yellow, and slightly thickened. This step incorporates air and creates that tender, melt-in-your-mouth texture we're after.
4. Add Butter and Citrus With the mixer on low speed, mix in the melted butter, fresh orange juice, and orange zest until just combined. The orange zest brings bright, aromatic oils that make every bite feel fresh and vibrant, while the juice adds moisture and tangy sweetness.
5. Incorporate the Flour Gradually add the flour mixture to the wet ingredients, mixing on low speed just until you don't see any streaks of dry flour. Don't overmix here—stop as soon as it comes together to keep the cake tender and delicate.
6. Fold in Sour Cream and Cranberries Gently stir in the sour cream until just incorporated, it adds richness and keeps the crumb incredibly soft. Using a spatula, carefully fold in the fresh cranberries, distributing them evenly throughout the batter. The batter will be thick, and that's exactly what you want!
7. Bake Pour the batter evenly into your prepared pan and smooth the top with a spatula. Bake on the center rack for 40–45 minutes, or until a toothpick inserted into the center comes out clean and the center doesn't jiggle when you gently shake the pan. The top should be golden brown and the edges will start to pull away slightly from the sides of the pan.
8. Cool Completely Let the cake cool in the pan for 10–15 minutes, this allows it to set and makes removal much easier. Run a knife around the edge, then carefully invert the cake onto a wire rack. Remove the parchment paper, flip the cake right-side up, and let it cool completely for at least 1 hour before finishing. This cooling time is crucial, the cake continues to develop its texture and flavor as it cools.
9. Finish and Serve Once completely cool, place the cake on your serving plate or cake stand. Using a fine-mesh sieve, generously dust the top with powdered sugar for an elegant, snowy finish. If you've made sugared cranberries and candied orange peel, arrange them beautifully on top, they add a gorgeous jewel-toned touch that makes this cake gift-worthy. Slice and serve at room temperature. The combination of rich, moist cake with tart cranberries, bright orange, and warm cardamom is absolutely unforgettable.
Why These Ingredients Matter
Superfine Cake Flour Cake flour has less protein than all-purpose flour, which creates an incredibly tender, delicate crumb that practically melts on your tongue. The superfine texture makes this cake feel light and sophisticated, perfect for special occasions.
Extra Virgin Olive Oil Olive oil is the secret to this cake's incredible moisture. Unlike butter cakes that can dry out, olive oil keeps this cake tender for days, it actually gets better overnight as the flavors deepen and marry together. It adds a subtle, fruity richness without feeling heavy.
Ground Cardamom Cardamom is my signature spice, passed down from my grandmother. It brings a warm, aromatic quality with hints of citrus and spice that pairs beautifully with cranberries and orange. It's what makes people remember this cake.
Fresh Cranberries Fresh cranberries burst during baking, creating little pockets of tart, jammy sweetness throughout the cake. Their natural tartness balances the richness of the olive oil and creates a more complex, grown-up flavor profile.
Orange Zest & Juice Freshly grated orange zest and juice brighten everything up, adding vibrant citrus notes that cut through the richness and make each bite feel fresh. The zest brings aromatic oils that perfume the entire cake.
Sour Cream Sour cream adds tanginess and extra moisture, creating a cake that's incredibly soft and stays fresh for days. It also helps achieve that perfect, tender crumb we're looking for.
Warm Spinach Artichoke Dip Recipe
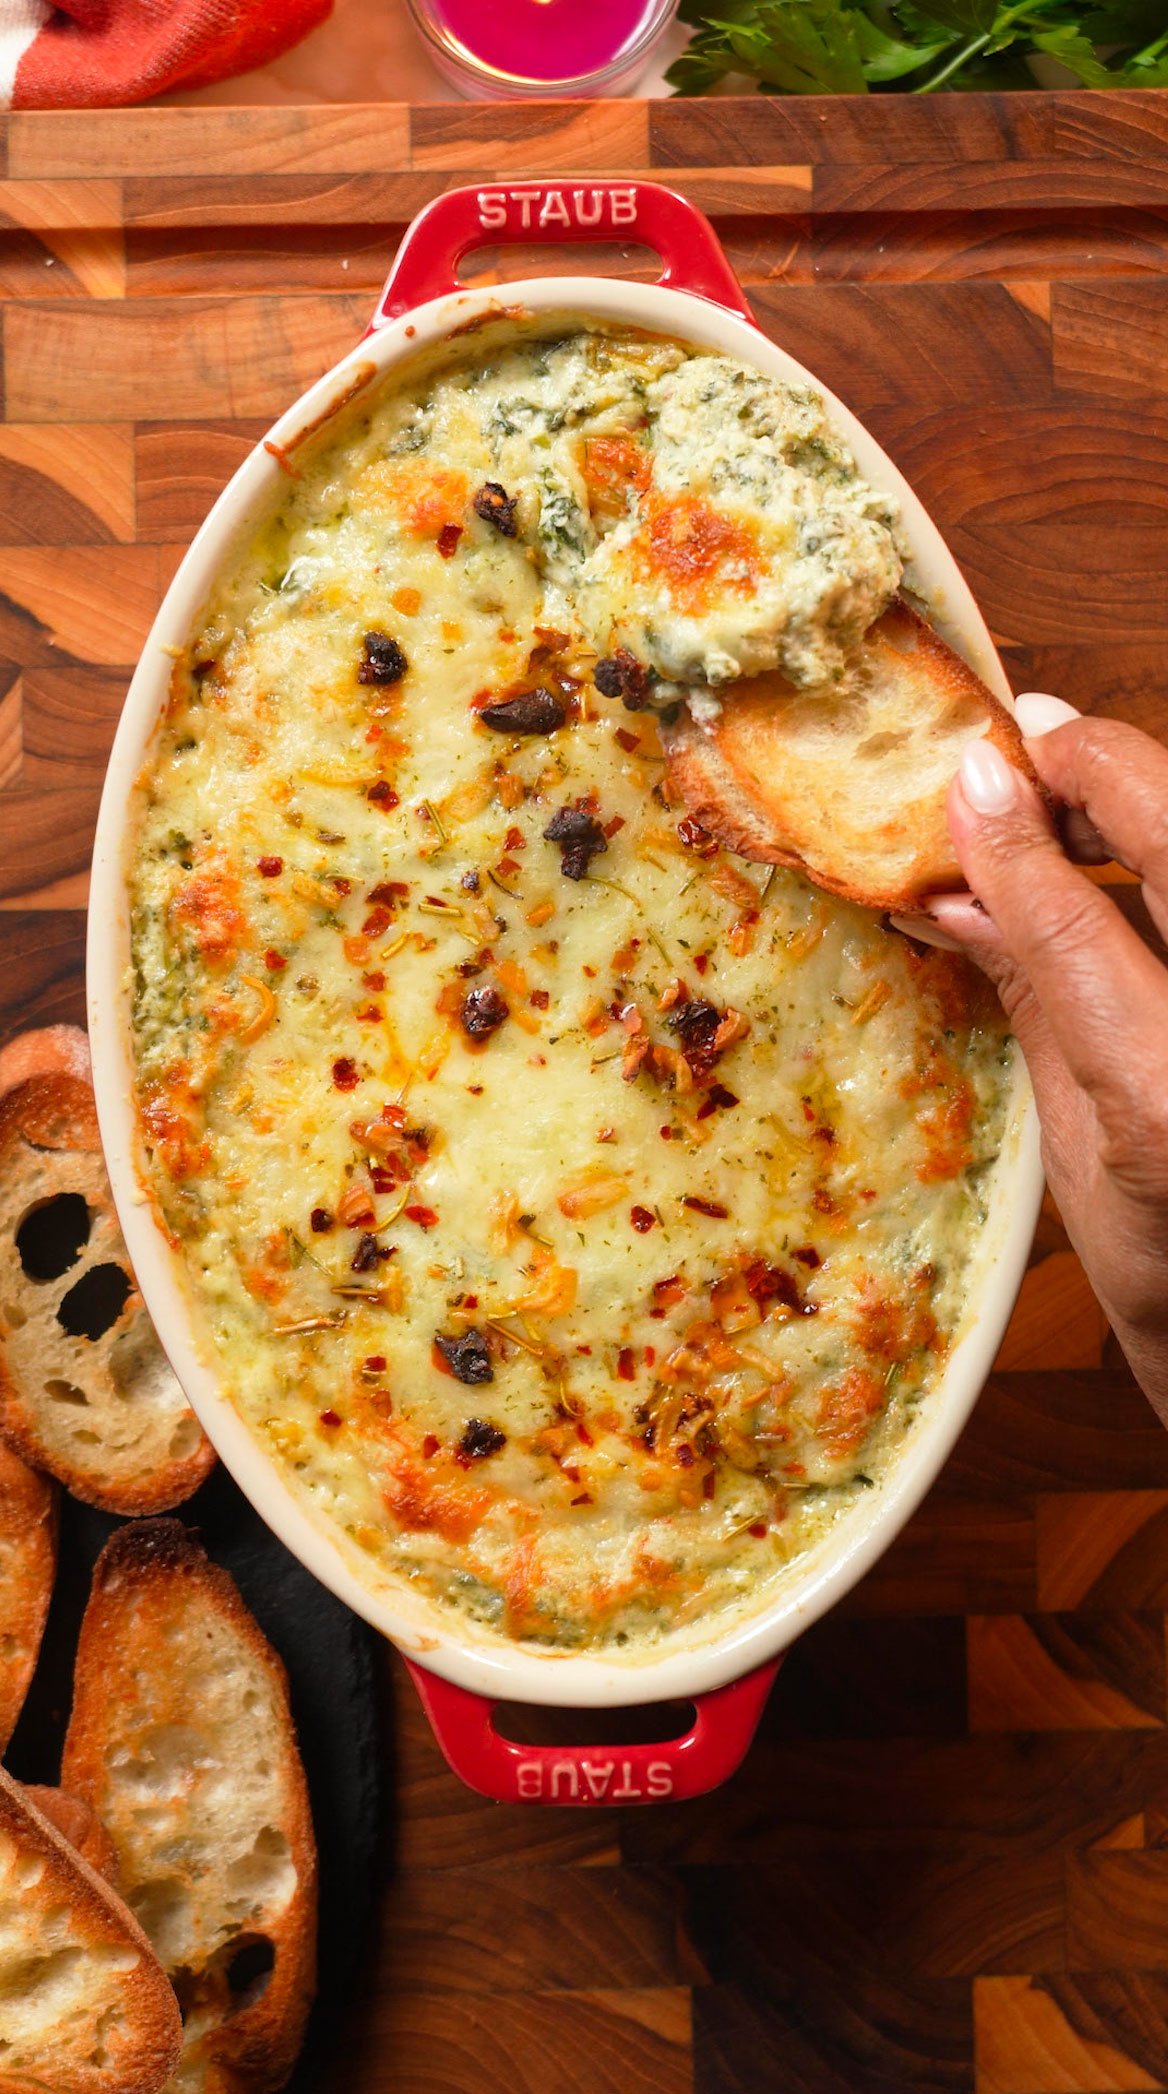
This spinach artichoke dip is creamy, cheesy, and dangerously addictive, the perfect balance of rich, tangy filling and golden bubbly top in every scoop. The blended Knudsen cottage cheese and sour cream give you that velvety smooth base, while the garlic, spinach, and artichokes deliver bold, savory flavor. Whether you're serving it for Friendsgiving, holiday parties, or a cozy night in, this high-protein warm dip turns any gathering into something special. Fair warning: it disappears fast, so you might want to make two batches.
This spinach artichoke dip is creamy, cheesy, and dangerously addictive. The blended Knudsen cottage cheese and sour cream create a velvety base packed with garlic, spinach, and artichokes, topped with golden bubbly cheese. Perfect for holiday gatherings or cozy nights in, and fair warning: it disappears fast.
Rate This Recipe!
Preparations
Prep Time:
15 minutes
Cook Time:
25 minutes
Total Time:
40 minutes
Cuisine:
American Comfort Food
Course:
Appetizer
Calories:
Approx. 120 kcal per serving
Servings:
8-10 servings
Author:
Ronica Rupan
Ingredients
Ingredients
For the Dip:
- 1 cup Knudsen cottage cheese (@knudsen_dairy)
- ½ cup Knudsen sour cream (@knudsen_dairy)
- ¼ cup mayo
- 1 (14 oz) can artichoke hearts, drained and patted dry
- 10 oz frozen spinach, thawed and squeezed dry
- 5-6 garlic cloves, minced
- ½ tsp onion powder
- ¼ tsp kosher salt (plus more to taste)
- ¼ tsp freshly ground black pepper
- 1¼ cups shredded mozzarella cheese, divided (1 cup for mixing in, ¼ cup for topping)
- ½ cup grated parmesan cheese
- Fresh parsley and thyme, for garnish
- Hot chili oil, for drizzle (optional)
For Serving:
- Toasted crostini, crackers, pita chips, or fresh vegetables
Instructions
1. Preheat Oven
Preheat oven to 400°F. Grease a cast iron skillet or 8x8 baking dish and set aside.
2. Blend the Base
In a food processor, combine Knudsen cottage cheese and Knudsen sour cream. Blend until completely smooth and creamy with no lumps—this is the secret to that silky texture.
3. Add the Veggies
Add mayo, drained artichoke hearts, squeezed-dry spinach, and minced garlic to the food processor. Pulse until combined, leaving some texture for a hearty dip.
4. Mix in the Cheese & Seasonings
Transfer mixture to a bowl. Stir in onion powder, salt, black pepper, and mozzarella cheese until evenly distributed. Taste and adjust seasoning as needed.
5. Transfer & Top
Spread the mixture evenly into your prepared dish. Top with reserved mozzarella cheese and grated parmesan cheese for that extra cheesy, golden, bubbly finish.
6. Bake to Golden Perfection
Bake for 20–25 minutes until the dip is bubbly around the edges and the cheese is melted throughout. For extra color, broil for 1–2 minutes until the top is golden brown (watch closely to avoid burning).
7. Garnish & Serve
Remove from oven and immediately garnish with fresh parsley and thyme. Drizzle with hot chili oil if desired. Serve warm with toasted crostini, crackers, or fresh vegetables.
8. Enjoy Immediately
This dip is best served warm, when it's at peak creaminess with that irresistible golden top. Fair warning: it disappears fast, you might want to hide a portion for yourself.
Let's Talk Ingredients: Why They Matter
Knudsen Cottage Cheese
Blended until smooth, cottage cheese creates an ultra-creamy, high-protein base that's lighter than traditional cream cheese-heavy dips while still delivering rich, luxurious texture.
Knudsen Sour Cream
Adds that signature tangy flavor and velvety consistency that makes this dip irresistibly creamy. The sour cream balances the richness and brings everything together.
Artichoke Hearts
These tender, slightly tangy vegetables add hearty texture and a subtle sweetness that pairs perfectly with spinach and cheese.
Fresh Garlic
Using fresh minced garlic (not powder) delivers bold, aromatic flavor that infuses the entire dip with savory depth—this is what makes it taste homemade, not store-bought.
Mozzarella & Parmesan
The mozzarella creates those gorgeous cheese pulls, while parmesan on top gives you that golden, crispy, irresistible crust everyone fights over.
HONEY GLAZED CARROTS WITH ORANGE & THYME
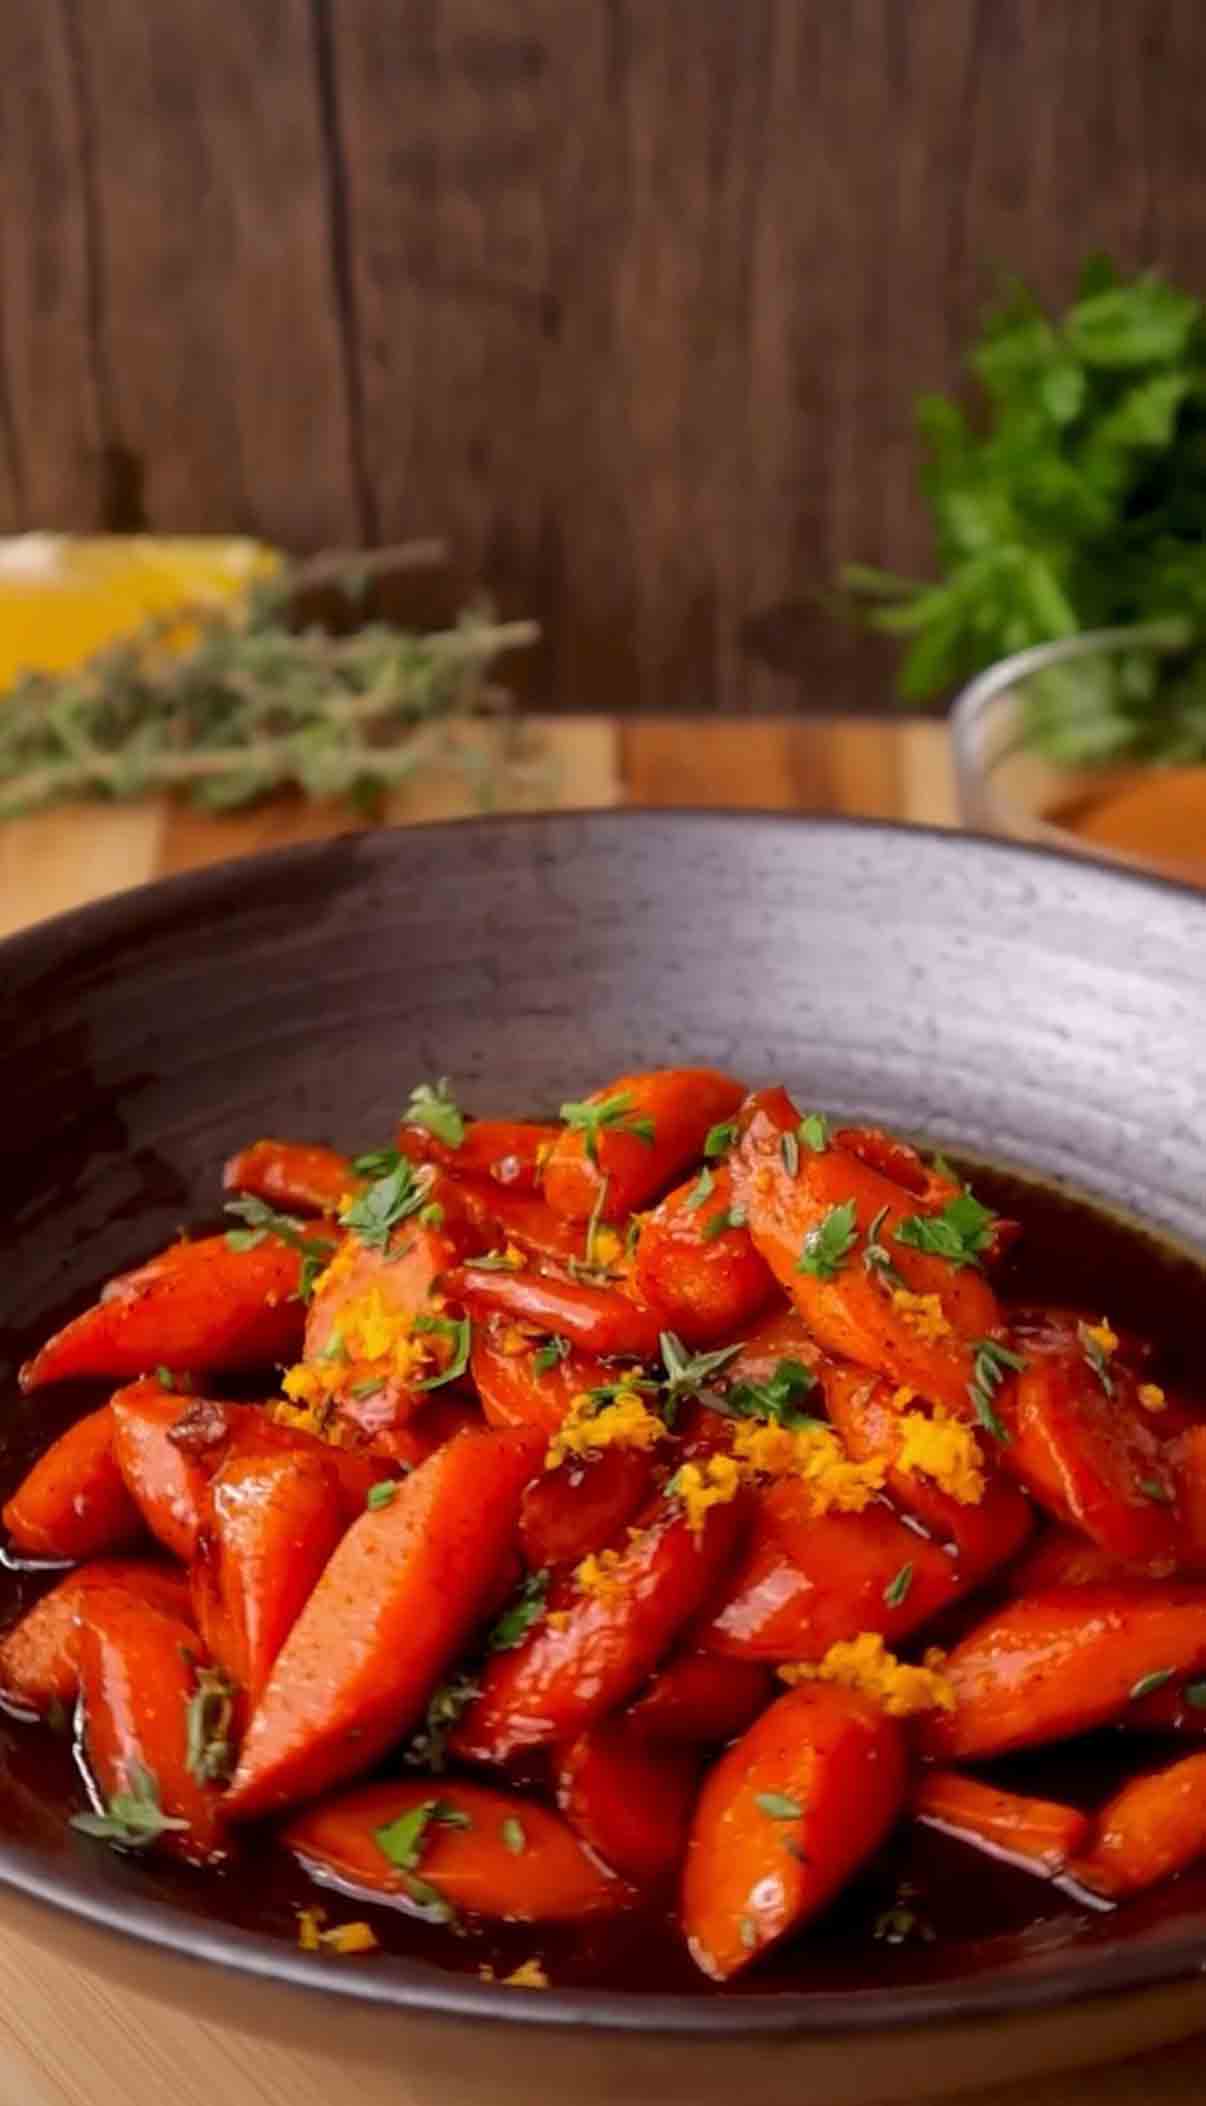
These honey glazed carrots are a show-stopping side dish that transforms simple carrots into something truly special. Roasted until tender and caramelized, then tossed in a luscious glaze made with butter, brown sugar, honey, and warm spices like cinnamon and nutmeg, every bite is perfectly balanced between sweet and savory. The addition of fresh orange juice and zest brings a bright, citrusy note that cuts through the richness, while fresh thyme and parsley add an herby finish. This recipe comes together in under 30 minutes, making it perfect for busy weeknight dinners or holiday gatherings when you want a side dish that looks impressive but doesn't require hours in the kitchen.
These honey glazed carrots are the perfect balance of sweet and savory. Roasted until caramelized and tossed in a buttery glaze with brown sugar, honey, and warm spices, they're finished with bright orange zest and fresh herbs. Ready in under 30 minutes, this simple side dish is impressive enough for the holidays but easy enough for any weeknight dinner.
Rate This Recipe!
Preparations
Prep Time:
10 minutes
Cook Time:
25 minutes
Total Time:
35 minutes
Cuisine:
American
Course:
Side Dish
Calories:
~150 kcal per serving (approx.)
Servings:
4-6
Author:
Ronica Rupan
Ingredients
These honey glazed carrots are what happens when you treat a simple vegetable like the star it deserves to be. Roasted until caramelized and coated in a buttery glaze made with brown sugar, honey, and warming spices, they're finished with bright orange zest and fresh herbs for a side dish that feels special but comes together in under 30 minutes. Perfect for holiday tables or busy weeknights when you want something that looks impressive without the stress.
Ingredients
Main Ingredients
- 6 large carrots, peeled and cut on the bias
- ¼ cup butter
- ¼ cup brown sugar
- 3 tbsp honey
- ½ tsp salt (adjust to taste)
- Juice of ½ orange
- 1 tsp vanilla paste or extract
Spices
- 1 tsp cinnamon
- ¼ tsp nutmeg
- ⅛ tsp ground cloves
Garnish
- Zest of 1 orange
- 1 sprig fresh thyme
- Fresh Italian parsley, chopped
Instructions
Prep and Preheat Preheat your oven to 400°F and line a baking sheet with parchment paper. Peel your carrots and cut them on the bias for those beautiful angled pieces that roast evenly and look restaurant-worthy.
Start the Glaze In an oven-safe skillet over medium heat, melt the butter. Add the carrots, brown sugar, cinnamon, nutmeg, cloves, and salt. Toss everything together and cook for 4-5 minutes until the carrots are well coated and starting to caramelize. You want them glistening and fragrant.
Roast Transfer the carrots to your prepared baking sheet, but keep that glaze in the skillet—you'll need it. Roast the carrots for 20 minutes until they're tender with golden, caramelized edges.
Build the Sauce While the carrots roast, return the skillet with the reserved glaze to medium heat. Let it cook down for 5-7 minutes until it thickens slightly and deepens in color. Stir in the orange juice, honey, and vanilla, letting everything meld together.
Finish and Glaze Add the roasted carrots back to the skillet with the glaze. Toss and cook for 3-4 minutes until the sauce becomes thick and glossy, coating each carrot piece beautifully.
Plate and Garnish Transfer to your serving dish and garnish with fresh orange zest, thyme leaves pulled from the sprig, and a sprinkle of chopped parsley. Serve immediately while they're warm and glossy.
Let's Talk Ingredients: Why They Matter
Carrots The star here—cutting them on the bias gives you more surface area for caramelization and makes them look elegant on the plate.
Butter Creates that rich, velvety base for the glaze and helps the spices bloom while adding depth to every bite.
Brown Sugar Brings molasses notes and helps create that beautiful caramelization on the carrots, balancing the natural earthiness of the vegetable.
Honey Adds floral sweetness and helps the glaze cling to the carrots while creating that glossy, restaurant-quality finish.
Cinnamon, Nutmeg & Cloves Warm spices that transform this from plain roasted carrots into something cozy and special—perfect for fall and winter tables.
Orange Juice & Zest The citrus cuts through the richness and adds brightness that keeps the dish from feeling too heavy. The zest at the end gives you bursts of fresh flavor.
Vanilla A secret weapon that rounds out the sweetness and adds subtle depth without being obvious—it just makes everything taste more cohesive.
Fresh Thyme & Parsley The herbs bring freshness and a savory note that balances all that sweetness, making these carrots feel complete.
Soft Whole Wheat Honey Rolls with Cinnamon Butter
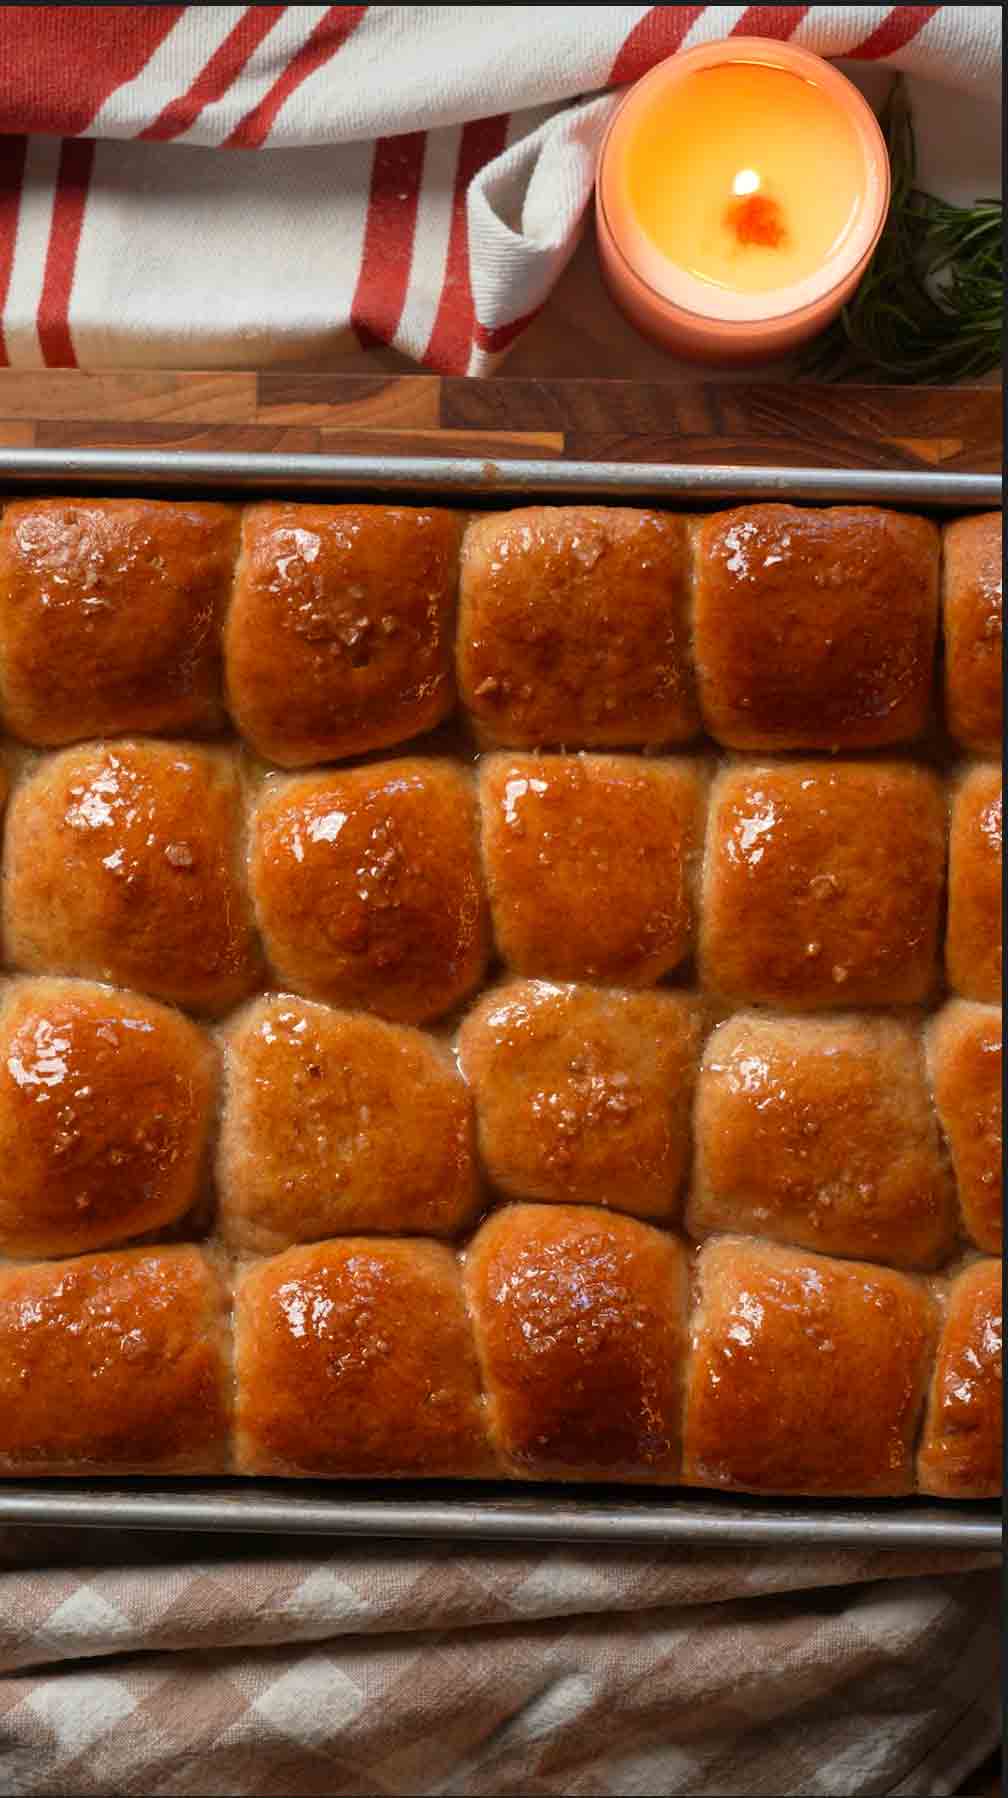
These are the softest, most pillowy whole wheat dinner rolls you'll ever make! The secret? A blend of whole wheat and all-purpose flour for that perfect tender crumb, extra honey for sweetness, and avocado oil to keep them incredibly soft for days. Shaped into 24 perfectly portioned rolls and baked until golden, they're brushed with an egg wash and sprinkled with flaky sea salt before baking for that gorgeous bakery finish. The real showstopper? A honey-cinnamon butter that gets brushed on while they're piping hot, creating an irresistible sweet-and-salty combination. These rolls disappear faster than you can make them and are perfect for holidays, weeknight dinners, or any gathering where you want to impress. Comfort food that feels like a warm hug!
Pillowy-soft dinner rolls made with whole wheat and all-purpose flour, kissed with honey sweetness and finished with dreamy honey-cinnamon butter
Rate This Recipe!
Preparations
Prep Time:
20 minutes
Wait Time (Rising):
2 hours total
Cook Time:
20-25 minutes
Total Time
2 hours 45 minutes
Cuisine:
American
Course:
Side Dish, Bread
Calories:
Approx. 210 kcal per roll
Servings:
2 people (2 rolls each)
Author:
Ronica Rupan
Ingredients
Ingredients:
For the Rolls:
- 2 packets or 4½ teaspoons
- ½ cup warm water (90-110°F)
- ½ cup butter, softened
- ⅓ cup honey
- 3 large eggs
- 1 cup lukewarm whole milk (95-100°F)
- 3½ cups whole wheat flour
- 1 cup all-purpose flour PLUS extra 2-4 tablespoons if needed for kneading
- 1½ teaspoons sea salt
- 2 tablespoons avocado oil
For the Egg Wash:
- 1 egg
- 2 tablespoons milk
- Flaky sea salt for sprinkling
For the Honey-Cinnamon Butter:
- ½ cup softened butter
- 2-3 tablespoons honey
- 1 teaspoon cinnamon
- Pinch of salt
Instructions:
Step 1: Activate the Yeast Dissolve the yeast in ½ cup warm water in a glass measuring cup. Stir and set aside for 5 minutes.
Step 2: Mix Wet Ingredients In the bowl of a stand mixer with the paddle attachment, cream together the softened butter and ⅓ cup honey until smooth. Add the eggs and mix well, scraping down the sides. Pour in the warmed milk, avocado oil, and the yeast mixture. Mix until combined (it's okay if it looks a bit lumpy).
Step 3: Add Dry Ingredients Add 3½ cups whole wheat flour, 1 cup all-purpose flour, and the salt. Mix on low speed for 1-2 minutes until everything comes together and no dry flour streaks remain.
Step 4: Knead the Dough Switch to the dough hook attachment. Knead for only 1-2 minutes, just until the dough is no longer super tacky to the touch. Add 1-2 tablespoons of flour at a time if needed, but be careful not to add too much - the dough should still look slightly sticky but shouldn't stick to your finger when you touch it.
Step 5: First Rise Cover the bowl with a clean kitchen towel and let the dough rise at room temperature for 1 hour (or 20-45 minutes in a proofing oven at 95°F). The dough will puff up but may not fully double - that's perfect!
Step 6: Rest the Dough Turn the dough out onto a lightly floured surface and knead gently with your hands 2-3 times. Cover with the kitchen towel and let rest for 3 minutes.
Step 7: Prep Your Pan While the dough is resting, generously butter a 13x9-inch baking pan on the bottom and all sides.
Step 8: Shape the Rolls Gently flatten the dough into a rectangle shape. The total dough weight should be approximately 1370 grams. Cut into 24 equal pieces (each piece should weigh about 57-58 grams). Shape each piece into a ball by pushing it through your thumb and fingers, then pinching the bottom closed. Place seam-side down in the buttered pan, arranging them 4 across and 6 down so they're all touching.
Step 9: Second Rise Cover the pan with a clean kitchen towel and let rise for 1 hour at room temperature (or 30-45 minutes in a proofing oven at 95°F), until the rolls have risen to the top of the pan or just slightly above and are touching on all sides.
Tip: Set a timer for 45 minutes to preheat your oven to 350°F, then set it again for the final 15 minutes of rising time.
Step 10: Prepare Egg Wash Beat 1 egg with 2 tablespoons milk until smooth.
Step 11: Apply Egg Wash & Salt Gently brush the tops of the risen rolls with the egg wash. Immediately sprinkle with flaky sea salt while the egg wash is still wet.
Step 12: Bake Bake at 350°F for 20-25 minutes until golden brown on top. Rotate the pan halfway through (around 10 minutes) for even browning.
Step 13: Make the Honey-Cinnamon Butter While the rolls are baking, whip together the softened butter, honey, cinnamon, and pinch of salt until light and fluffy.
Step 14: Finish As soon as the rolls come out of the oven, generously brush the tops with the honey-cinnamon butter. Let cool in the pan for 5-10 minutes, then gently pull apart and serve warm.
Storage:
- Counter: Store covered for 1-2 days
- Freezer: Freeze in freezer bags for up to 4 months. Thaw and reheat wrapped in foil at 300°F for 15-20 minutes
Notes:
- The avocado oil keeps these rolls incredibly soft for days - perfect for meal prep!
- The extra honey adds just the right amount of sweetness without making them dessert-like
- The combination of whole wheat and all-purpose flour gives you wholesome rolls with an incredibly soft, fluffy texture
- Don't skip the egg wash and flaky sea salt - they create that beautiful bakery-style finish!
Mediterranean Bread Dip
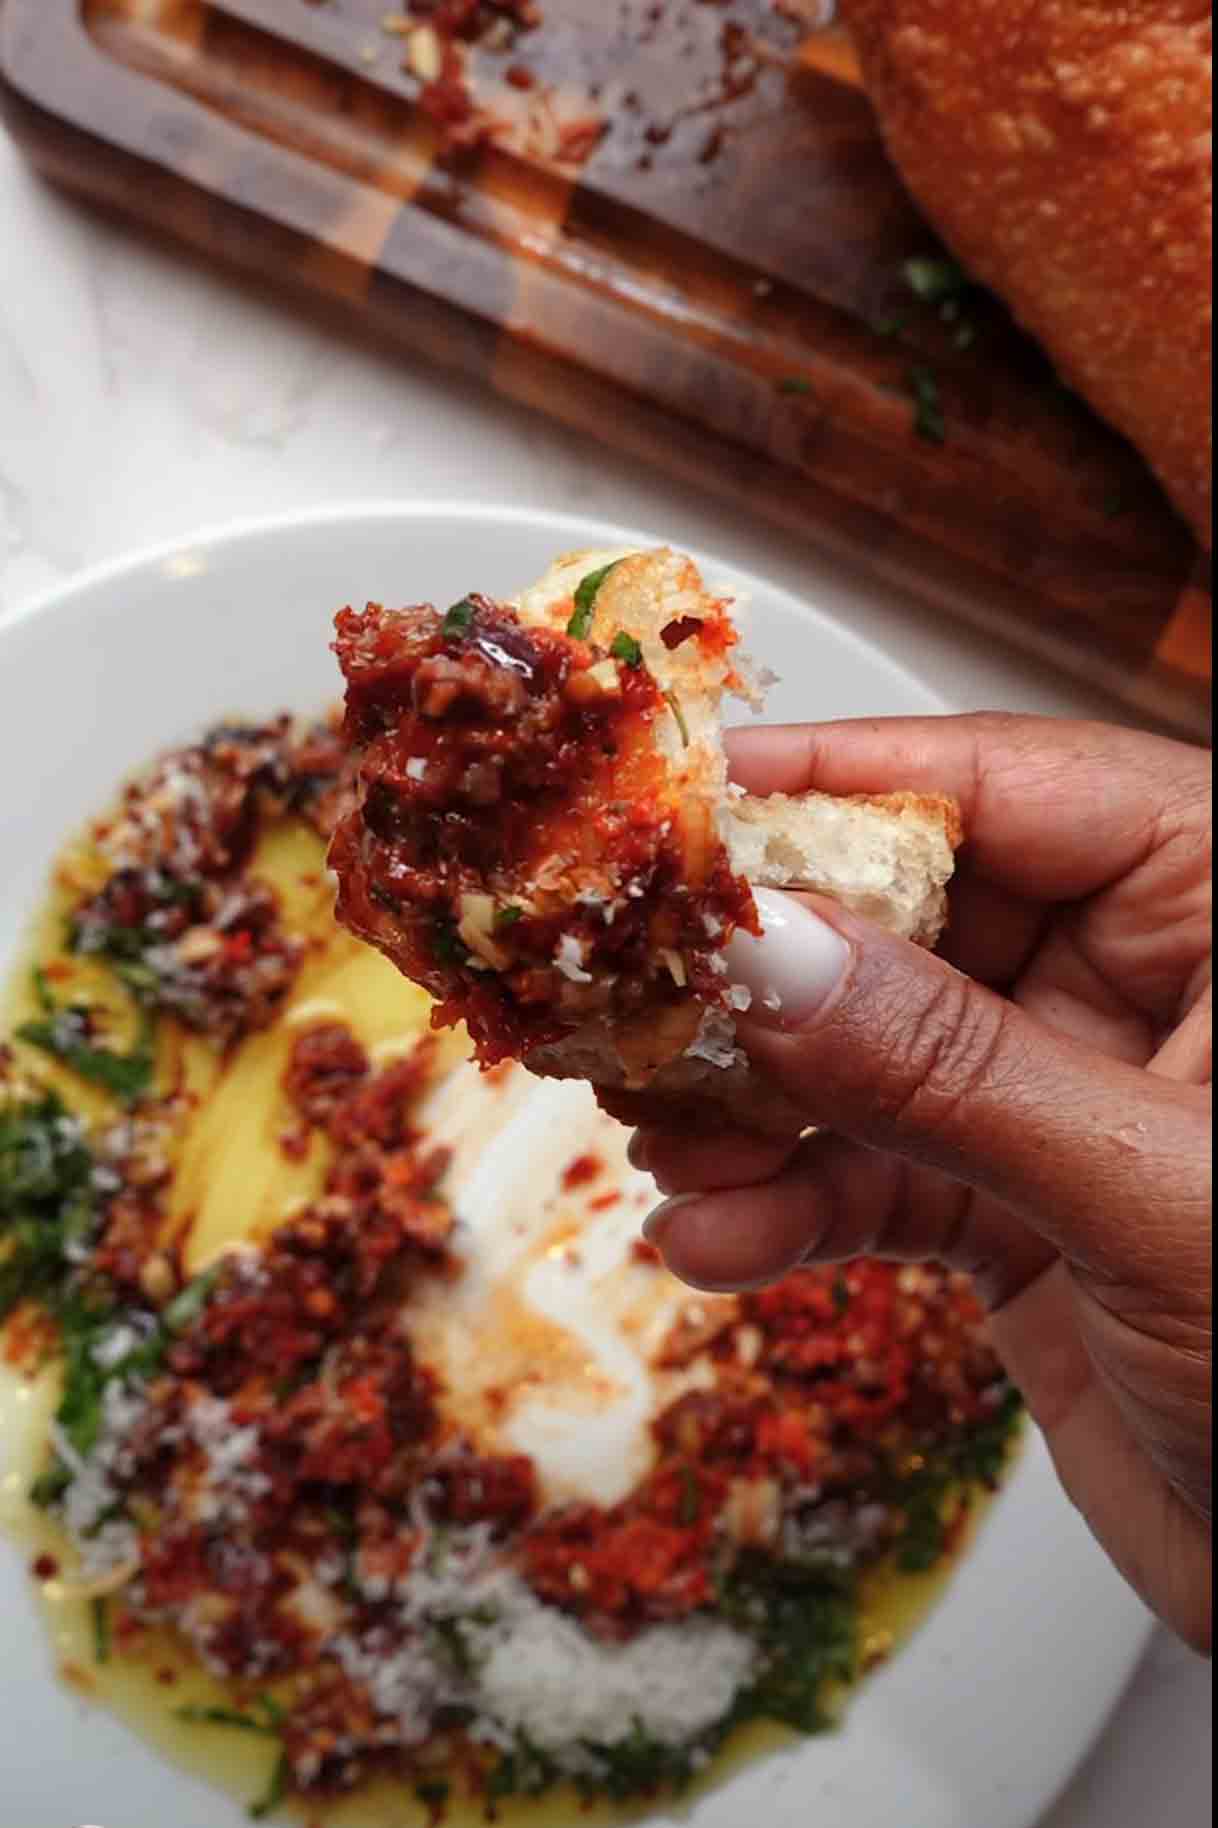
This vibrant Mediterranean bread dip brings together sundried tomatoes, kalamata olives, artichoke hearts, and fresh basil in a flavor-packed olive oil base with a hint of harissa heat. Perfect for entertaining or a quick weeknight snack, this no-cook dip comes together in minutes and only gets better as it sits. Serve with crusty sourdough bread for an effortless appetizer that tastes like it came from a fancy Italian restaurant.
Key Ingredients
1. Sundried Tomatoes
These intensely flavored tomatoes bring a concentrated sweetness and rich umami to the dip. Their chewy texture and deep red color add visual appeal while infusing the olive oil with a robust Mediterranean essence that forms the flavor foundation of the dish.
2. Kalamata Olives
These Greek olives deliver a briny, fruity depth that balances the sweetness of the tomatoes. Their meaty texture and bold flavor add sophistication to every bite, creating that authentic Mediterranean taste that makes this dip feel like a restaurant-quality appetizer.
3. Marinated Artichoke Hearts
Tender and tangy, artichoke hearts bring an earthy richness and subtle acidity to the mix. Their delicate flavor ties all the ingredients together while adding body to the dip, making it feel substantial enough to satisfy without being heavy.
Frequently Asked Questions
1. Can I make this Mediterranean Bread Dip ahead of time?
Yes! This dip actually tastes better when made ahead. Prepare it up to 2 days in advance and store it covered in the refrigerator. The flavors will continue to develop and deepen as it sits. Just remember to bring it to room temperature 20–30 minutes before serving so the olive oil softens and the flavors come alive.
2. What can I serve with this dip besides sourdough bread?
This versatile dip pairs beautifully with so many options! Try it with warm pita bread, focaccia, crostini, or crispy baguette slices. For a lighter option, serve it with cucumber rounds, bell pepper strips, or cherry tomatoes. It also makes a fantastic topping for grilled chicken or fish..
3. Can I adjust the spice level in this recipe?
Absolutely! The harissa paste and chili flakes control the heat, so feel free to customize to your taste. For a milder version, skip the harissa and use just a pinch of chili flakes. If you love heat, add extra harissa or a dash of cayenne pepper. Start with less and taste as you go, you can always add more!
This vibrant Mediterranean bread dip brings together sundried tomatoes, kalamata olives, artichoke hearts, and fresh basil in a flavor-packed olive oil base with a hint of harissa heat. Perfect for entertaining or a quick weeknight snack, this no-cook dip comes together in minutes and only gets better as it sits. Serve with crusty sourdough bread for an effortless appetizer that tastes like it came from a fancy Italian restaurant.
Rate This Recipe!
Preparations
Prep Time:
10 minutes
Rest Time:
30 minutes
Total Time:
40 minutes
Cuisine:
Mediterranean
Course:
Appetizer
Calories:
Approx. 180 kcal per serving
Servings:
4–6 people
Author:
Ronica Rupan
Ingredients
This Mediterranean Bread Dip is rich, tangy, and perfectly balanced, the briny olives play off the sweet tomatoes, while the artichoke hearts add substance and the harissa brings just enough warmth to keep things interesting. Think elevated antipasto meets your favorite Italian restaurant's bread service, a sophisticated yet approachable recipe that's perfect for entertaining or a cozy night in. The secret? Letting it rest for 30 minutes so all those bold Mediterranean flavors can meld together into something truly special.
Yields
4-6 servings
Ingredients
1/4 cup olive oil
2 tbsp balsamic glaze
1-2 cloves garlic, finely chopped
2 tbsp sundried tomatoes, chopped
1 tbsp kalamata olives, chopped
1/4 cup marinated artichoke hearts, chopped
2 tbsp fresh basil, chopped
1/2 tsp harissa paste
1/4 tsp chilli flakes
1/4 cup freshly shredded parmesan
Flaky salt, to taste
Freshly ground black pepper, to taste
1 loaf sourdough bread, for serving
Instructions
- Combine the Ingredients
In a mixing bowl, combine olive oil, balsamic glaze, garlic, sundried tomatoes, olives, artichoke hearts, basil, harissa paste, chili flakes, parmesan, salt, and pepper. Mix until well incorporated. - Let It Rest
Allow the mixture to sit for 30 minutes at room temperature, letting the flavors meld together and develop. - Serve and Enjoy
Serve with slices of toasted sourdough bread and top with additional parmesan shavings if desired. Enjoy as an appetizer, snack, or light lunch.
Let's Talk Ingredients: Why They Matter
Sundried Tomatoes
These intensely flavored tomatoes bring concentrated sweetness and umami, infusing the olive oil with robust Mediterranean essence.
Kalamata Olives
Their briny, fruity depth balances the sweetness and adds that authentic Greek flavor that makes this dip taste restaurant-quality.
Marinated Artichoke Hearts
Tender and tangy, they bring earthy richness and body to the dip, making it satisfying without being heavy.
Classic Bruschetta
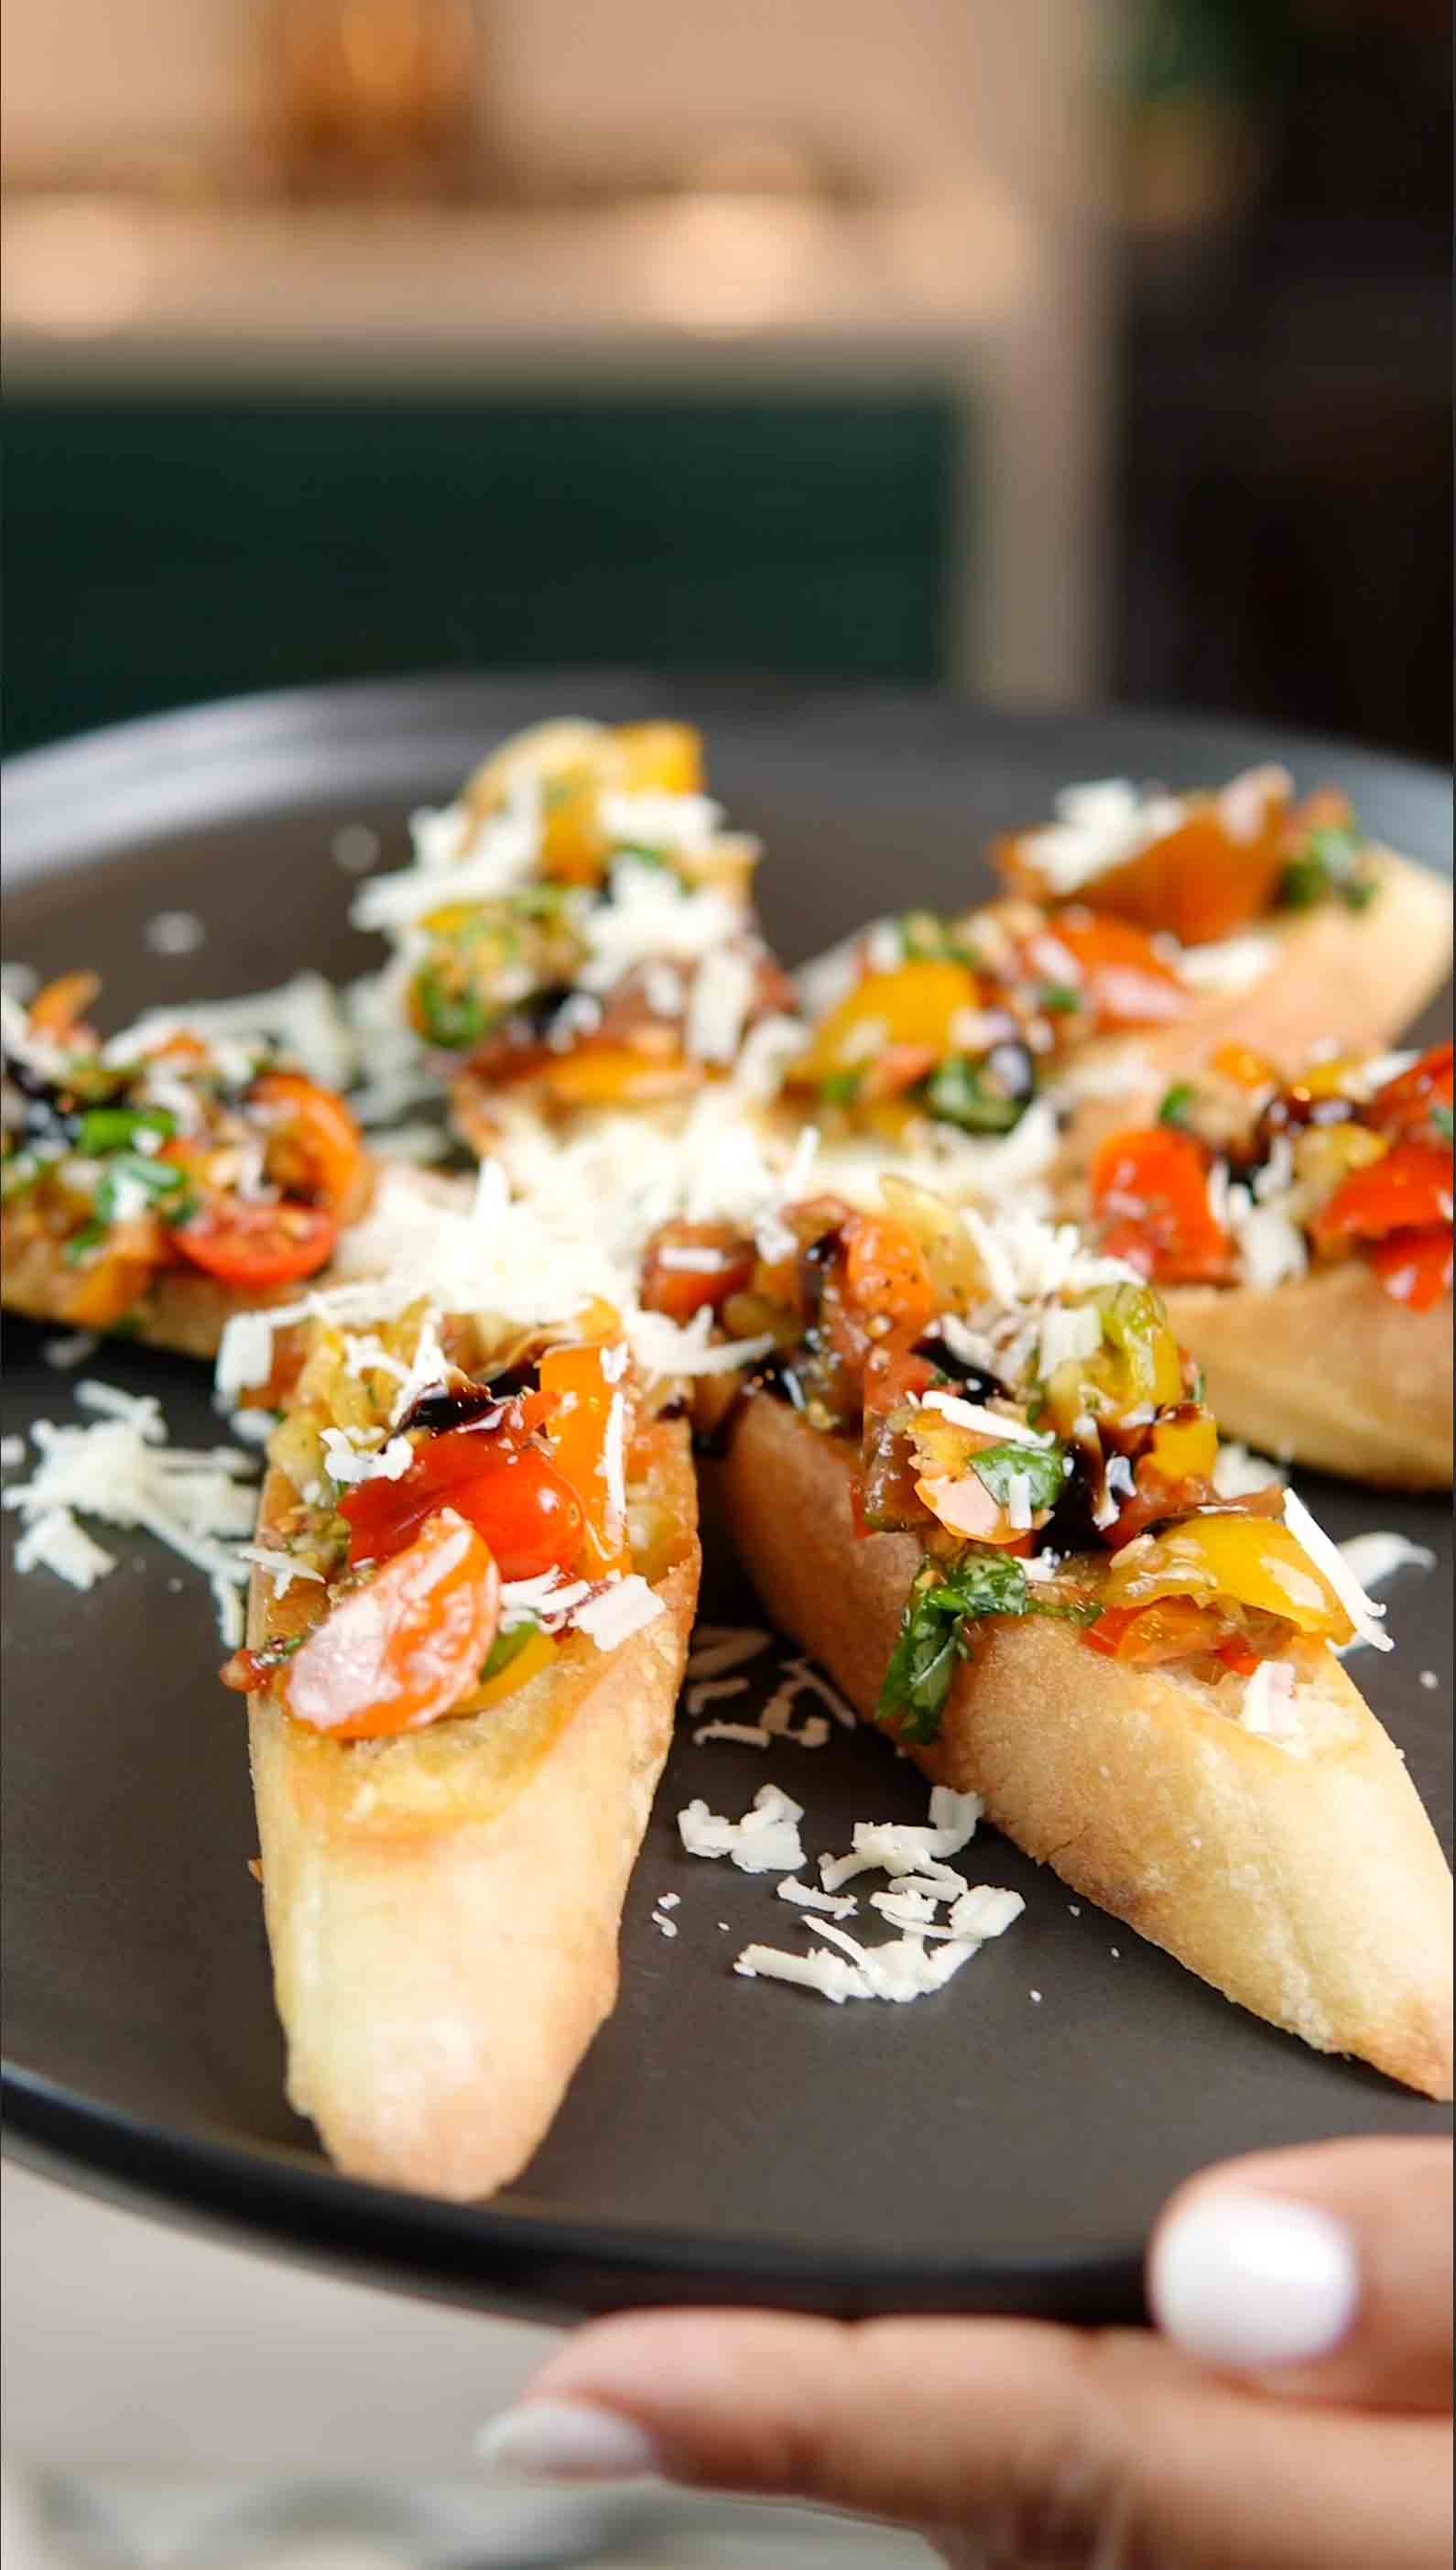
Fresh, vibrant, and bursting with flavor - this classic bruschetta recipe is the appetizer everyone asks me to bring to every gathering! The secret? Quality ingredients and the process. Let the tomatoes marinate in good olive oil and fresh basil, pile them high on crispy toasted bread, and finish with parmesan and a balsamic drizzle. Simple, authentic, and always a crowd-pleaser.
Key Ingredients
1. Cherry or Grape Tomatoes
Cherry tomatoes are the secret to perfect bruschetta that never gets watery or bland. Unlike large beefsteak tomatoes, cherry and grape varieties are naturally sweeter, have less water content, and pack more concentrated flavor into every bite. When chopped and marinated, they release just enough juice to coat the bread without making it soggy—giving you that ideal balance of fresh, juicy topping on crispy bread.
2. Extra-Virgin Olive Oil
This is where quality really matters. Extra-virgin olive oil is the backbone of bruschetta, carrying all the flavors and creating that silky coating that makes every bite feel luxurious. When the tomatoes marinate in good olive oil, they soak up that fruity, peppery richness—and when you brush it on the bread before toasting, it creates a golden, crispy barrier that keeps everything from getting soggy. Don't cheap out here; you'll taste the difference.
3. Fresh Basil
Fresh basil brings that bright, aromatic, slightly sweet flavor that screams "Italian summer." When thinly sliced (chiffonade style) and mixed into the tomato mixture, it infuses the olive oil and releases its essential oils, creating layers of flavor that dried basil simply can't match. As it marinates with the tomatoes, the basil softens slightly and melds into the mixture, giving you that authentic, herbaceous taste in every spoonful.
4. Balsamic Vinegar (and Glaze)
Balsamic vinegar adds that subtle tang and slight sweetness that balances the richness of the olive oil and the brightness of the tomatoes. Mixed into the topping, it helps all the flavors marry together during the marinating process. The optional balsamic glaze drizzled on top at the end? That's your finishing touch—adding a glossy, professional look and an extra pop of sweet-tangy flavor that makes people say "wow, this is restaurant-quality!"
Frequently Asked Questions
Can I make bruschetta ahead of time?
Yes, but with a smart strategy! Make the tomato topping up to 2 hours ahead and let it sit at room temperature to marinate (or refrigerate for up to 24 hours). Toast your bread up to 1 hour before serving and keep it at room temperature. The key is to assemble just before serving—pile that tomato mixture on the crispy bread right when you're ready to eat. This keeps the bread from getting soggy and ensures every bite has that perfect crunch.
What's the best way to prevent soggy bruschetta?
Three simple tricks: First, brush the bread with olive oil before toasting—this creates a protective barrier. Second, use a slotted spoon when topping the bread so excess liquid drains off. Third, assemble right before serving. If your tomato mixture looks very juicy after marinating, that's actually good! Just drain off a bit of the liquid (save it for salad dressing—it's delicious) before spooning onto the bread.
Can I use regular tomatoes instead of cherry tomatoes?
ou can, but cherry or grape tomatoes work better because they're sweeter and have less water content, which means less sogginess. If you're using regular tomatoes, choose Roma tomatoes (they're meatier and less watery), cut them in half, scoop out the seeds and jelly, then chop and let them drain in a colander for 10-15 minutes before mixing with the other ingredients. This extra step removes excess moisture.
How do I store leftover bruschetta?
Store the tomato mixture and bread separately—that's the golden rule! Keep the leftover tomato topping in an airtight container in the fridge for up to 24 hours. Store any leftover toasted bread in an airtight container at room temperature. When you're ready to eat again, crisp up the bread in a 350°F oven for 2-3 minutes, let the tomato mixture come to room temperature, and assemble fresh. Trust me, it's worth the extra minute!
Fresh, vibrant, and bursting with flavor - this classic bruschetta recipe is the appetizer everyone asks me to bring to every gathering! The secret? Quality ingredients and the process. Let the tomatoes marinate in good olive oil and fresh basil, pile them high on crispy toasted bread, and finish with parmesan and a balsamic drizzle. Simple, authentic, and always a crowd-pleaser.
Rate This Recipe!
Preparations
Prep Time:
10 minutes
Marinating Time:
15-30 minutes
Cook Time
6 minutes
Total Time:
31-46 minutes
Cuisine:
Italian
Course:
Appetizer
Calories:
104 per piece
Servings:
12-16 pieces
Author:
Ronica Rupan
Ingredients
Classic Bruschetta
This classic bruschetta is fresh, vibrant, and bursting with flavor, the appetizer everyone asks me to bring to every gathering! With juicy marinated tomatoes piled high on crispy, golden toasted bread and finished with Parmesan and a balsamic drizzle, it's simple, authentic, and always a crowd-pleaser. The secret? Quality ingredients and the process, let those tomatoes marinate so the flavors really come together.
Ingredients:
For the Tomato Topping:
- 2 1/2 cups cherry or grape tomatoes, finely chopped
- 2 teaspoons minced fresh garlic
- 1/3 cup fresh basil leaves, thinly sliced
- 2 tablespoons balsamic vinegar
- 3 tablespoons extra-virgin olive oil
- 1/4 teaspoon salt, or to taste
- 1 teaspoon freshly ground black pepper
- 1 teaspoon all-purpose seasoning (@floraandmana)
For the Bread:
- 1 baguette, sliced into 1/2-inch pieces
- Extra-virgin olive oil for brushing
For Garnish:
- 1/4 cup grated Parmesan cheese
- 1-2 teaspoons balsamic glaze (optional)
Instructions:
Make the Tomato Topping:
Combine everything: In a medium mixing bowl, combine the chopped tomatoes, minced garlic, sliced basil, balsamic vinegar, 3 tablespoons olive oil, salt, all-purpose seasoning, and black pepper. Stir everything together until well mixed and the tomatoes are evenly coated.
Let it marinate (THE SECRET!): Let the mixture sit at room temperature for 15-30 minutes. This is the game-changer—the salt draws out just enough juice from the tomatoes, the garlic mellows, the basil infuses the oil, and all the flavors marry together. Don't skip this step!
Prepare the Bread:
Preheat the oven: Preheat your oven to 400°F (200°C).
Slice the baguette: Cut the baguette into individual serving pieces, about 1/2-inch thick. You should get 12-16 slices. Slice on a slight diagonal for larger, more elegant pieces.
Brush with olive oil: Brush one side of each baguette slice generously with extra-virgin olive oil. This creates a barrier that prevents sogginess and adds incredible flavor.
Toast to perfection: Place the baguette slices, oil-side up, on a baking sheet. Toast in the oven for 5 minutes, then switch to broil for the last 1 minute to achieve that golden-brown crust. Keep a close eye on them—they can burn quickly under the broiler!
Assemble and Serve:
Top the bread: Remove the toasted bread from the oven and let cool for 1-2 minutes. Using a spoon (or slotted spoon to drain excess liquid), pile the tomato mixture generously onto each slice. Don't be shy—you want a good amount on each piece!
Add the Parmesan: Sprinkle grated Parmesan cheese over each piece. The cheese adds a lovely, salty, umami depth that complements the fresh tomatoes perfectly.
Finish with balsamic glaze: Drizzle a small amount of balsamic glaze over each piece for that sweet-tangy finish and bakery-beautiful presentation.
Serve immediately: Bruschetta is best enjoyed fresh! Serve within 15-20 minutes of assembly for the crispiest bread and brightest flavors.
Let's Talk Ingredients: Why They Matter
1. Cherry or Grape Tomatoes
Cherry tomatoes are the secret to perfect bruschetta that never gets watery or bland. Unlike large beefsteak tomatoes, cherry and grape varieties are naturally sweeter, have less water content, and pack more concentrated flavor into every bite. When chopped and marinated, they release just enough juice to coat the bread without making it soggy, giving you that ideal balance of fresh, juicy topping on crispy bread.
2. Extra-Virgin Olive Oil
This is where quality really matters. Extra-virgin olive oil is the backbone of bruschetta, carrying all the flavors and creating that silky coating that makes every bite feel luxurious. When the tomatoes marinate in good olive oil, they soak up that fruity, peppery richness—and when you brush it on the bread before toasting, it creates a golden, crispy barrier that keeps everything from getting soggy. Don't cheap out here; you'll taste the difference.
3. Fresh Basil
Fresh basil brings that bright, aromatic, slightly sweet flavor that screams "Italian summer." When thinly sliced (chiffonade style) and mixed into the tomato mixture, it infuses the olive oil and releases its essential oils, creating layers of flavor that dried basil simply can't match. As it marinates with the tomatoes, the basil softens slightly and melds into the mixture, giving you that authentic, herbaceous taste in every spoonful.
4. Balsamic Vinegar (and Glaze)
Balsamic vinegar adds that subtle tang and slight sweetness that balances the richness of the olive oil and the brightness of the tomatoes. Mixed into the topping, it helps all the flavors marry together during the marinating process. The optional balsamic glaze drizzled on top at the end? That's your finishing touch—adding a glossy, professional look and an extra pop of sweet-tangy flavor that makes people say "wow, this is restaurant-quality!"
5. Fresh Garlic
Fresh minced garlic brings that punchy, aromatic bite that defines classic bruschetta. As it sits in the olive oil during marinating, it mellows slightly and infuses everything with savory depth. Use fresh garlic, not jarred—the flavor difference is night and day.
6. Parmesan Cheese
Freshly grated Parmesan adds a salty, nutty finish that ties everything together. It creates a beautiful contrast with the bright, acidic tomatoes and adds that umami depth that makes each bite irresistible. Sprinkle it on generously right before serving so it stays light and fluffy.
Herb-Fried Angel Eggs

Forget basic deviled eggs, let me introduce you to Herb-Fried Angel Eggs, a crispy, indulgent twist on the classic that takes your appetizer game to a whole new level. Golden-fried egg white shells with a perfectly crisp exterior are filled with a rich, creamy yolk mixture infused with tangy Dijon, herbaceous Garlic of Eden seasoning, and a kick of hot sauce, then topped with fresh chives, smoky paprika, and crispy turkey bacon crumbles for the ultimate finish.
These angel eggs are creamy, savory, and dangerously addictive—the perfect balance of delicate filling and satisfying crunch in every bite. The steamed eggs give you that velvety smooth center, while the Italian-seasoned breadcrumb coating delivers that irresistible golden crispiness. Whether you're serving them for holiday gatherings or Sunday brunch, these Herb-Fried Angel Eggs turn any occasion into something special. Fair warning: they disappear fast, so you might want to double the batch.
Crispy on the outside, impossibly creamy in the center—these angel eggs are about to become your new holiday obsession. Imagine golden-fried egg white shells with a perfectly crisp exterior, filled with a rich, herbaceous yolk mixture that's equal parts tangy and spicy. Topped with fresh chives, a dusting of smoky paprika, and crispy turkey bacon crumbles, these elevated deviled eggs are the definition of lowkey elegant. Fair warning: they disappear fast.
Rate This Recipe!
Preparations
Prep Time:
25 minutes
Cook Time:
20 minutes
Total Time:
1 hour 15 minutes (includes 30 minutes chilling time)
Cuisine:
American Comfort Food
Course:
Appetizer
Calories:
Approx. 110 kcal per piece
Servings:
24 pieces
Author:
Ronica Rupan
Ingredients
Yields
24 pieces | Serves 12
Ingredients
For the Eggs:
- 12 large eggs
- ½ cup sour cream
- 1 tsp Dijon mustard
- ½ tsp kosher salt (plus more to taste)
- ½ tsp freshly ground black pepper
- 1–2 tsp hot sauce (optional, but recommended)
- 1 tsp Garlic of Eden seasoning (@floraandmana)
- 3–4 strips turkey bacon, cooked until crispy and crumbled
- 1½ tbsp fresh chives, finely chopped
- Paprika, for garnish
For the Breading Station:
- ¾ cup all-purpose flour
- 2 large eggs, beaten
- ¾ cup Italian-seasoned breadcrumbs
- 2–3 cups neutral oil for frying (vegetable, canola, or grapeseed)
Instructions
1. Steam the Eggs
Fill a large pot with about 1½ inches of water and place a steamer basket inside. Bring to a rolling boil over high heat. Add eggs to the basket, cover with a tight-fitting lid, and steam for exactly 15 minutes for perfectly creamy yolks.
2. Ice Bath & Peel
Prepare a large bowl filled with ice water. Transfer steamed eggs immediately to the ice bath and chill for 30 minutes to stop the cooking process. Gently tap and roll each egg to crack the shell, then peel under cool running water for smooth results.
3. Prep the Eggs
Slice each peeled egg in half lengthwise. Carefully scoop out the yolks and place them in a medium mixing bowl. Arrange the egg white halves on a baking sheet and set aside.
4. Make the Creamy Filling
Add sour cream, Dijon mustard, hot sauce (if using), Garlic of Eden seasoning, salt, and black pepper to the bowl with the yolks. Mash with a fork or potato masher until completely smooth and creamy with no lumps. Taste and adjust seasoning as needed.
5. Set Up Your Breading Station
Arrange three shallow bowls in a row: one with all-purpose flour, one with beaten eggs, and one with Italian-seasoned breadcrumbs. This assembly line makes coating quick and efficient.
6. Bread the Egg Whites
Working one at a time, coat each egg white half completely in flour, shaking off excess. Dip into beaten egg, allowing excess to drip off, then press into breadcrumbs until fully coated on all sides. Return to baking sheet and repeat with remaining halves.
7. Fry to Golden Perfection
Heat 2–3 inches of neutral oil in a heavy-bottomed pot or deep skillet to 360°F (use a thermometer for best results). Carefully lower 3–4 breaded egg whites into hot oil, avoiding overcrowding. Fry for 30 seconds to 1 minute until golden brown and crispy. Use a slotted spoon to transfer to a paper towel-lined plate. Repeat with remaining egg whites, allowing oil to return to temperature between batches.
8. Fill & Garnish
Transfer yolk filling to a piping bag fitted with a star tip (or use a zip-top bag with one corner snipped off). Pipe filling generously into each fried egg white. Top each with fresh chives, a light dusting of paprika, and crispy turkey bacon crumbles.
9. Serve Immediately
Arrange on a platter and serve warm for the best contrast between crispy shell and creamy filling. These disappear fast—consider yourself warned.
Let's Talk Ingredients: Why They Matter
Sour Cream
Creates an ultra-rich, tangy base for the filling that's smoother and more luxurious than traditional mayo-based deviled eggs.
Garlic of Eden Seasoning
This herbaceous, aromatic blend adds depth and complexity to the yolk mixture, elevating it beyond basic deviled eggs with layers of savory flavor.
Italian-Seasoned Breadcrumbs
The secret to that golden, crispy exterior—pre-seasoned breadcrumbs give you restaurant-quality crunch and flavor in every bite without extra work.
Raspberry Galette
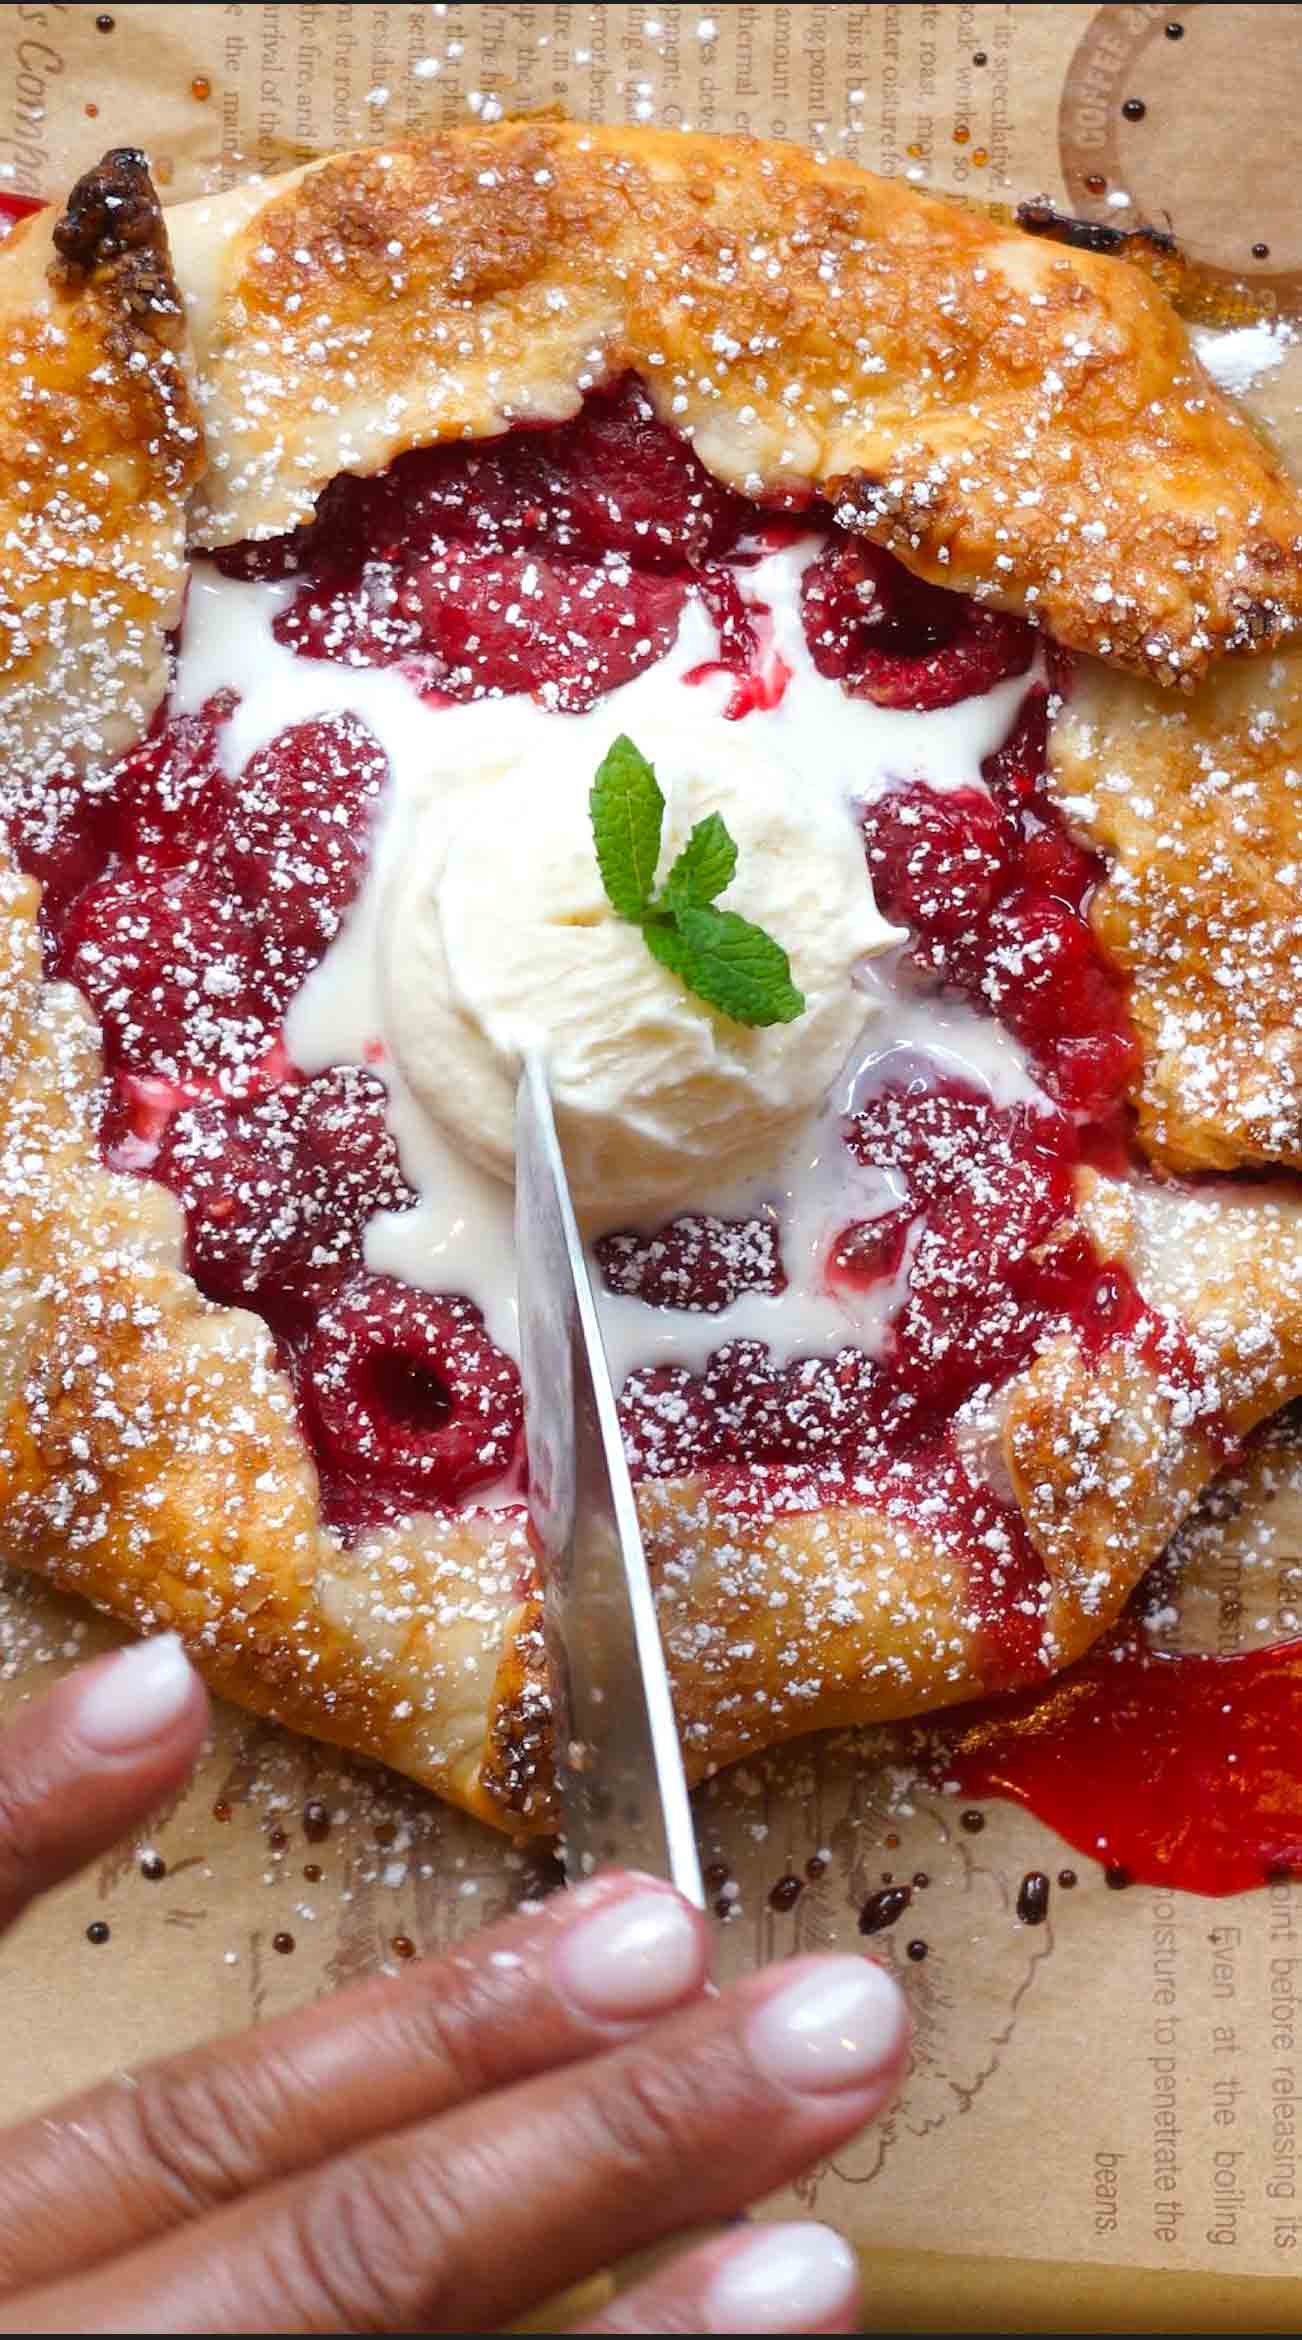
Let me introduce you to Raspberry Galette, a rustic free-form tart that's as beautiful as it is delicious. Fresh raspberries mingle with bright lemon zest and juice, all nestled in a buttery, flaky homemade crust that folds up around the edges. The crust gets brushed with egg wash and sprinkled with sparkly coarse sugar, baking up golden and crisp. A quick brush of warmed apricot jam adds a glossy finish, and when served warm with a scoop of vanilla ice cream, the tart berries and rich crust create the perfect balance of sweet and tangy.
Key Ingredients
Cold Butter
Cold, diced butter is the secret to a flaky, tender crust. As it bakes, the cold butter creates steam pockets that give you those beautiful, buttery layers. Keeping it cold until the dough comes together is key to that melt-in-your-mouth texture.
Fresh Raspberries
Fresh raspberries bring a burst of tart, fruity flavor that's perfectly balanced with sugar and lemon. Their natural juices bubble and caramelize during baking, creating a jammy filling that's both sweet and tangy.
Lemon Zest & Juice
Freshly grated lemon zest and a squeeze of juice brighten up the raspberries, adding a pop of citrus that cuts through the sweetness. The zest brings aromatic oils that make every bite feel fresh and vibrant.
Apricot Jam Glaze
A warm brush of apricot jam creates a gorgeous glossy finish that not only looks bakery-perfect but also adds a subtle sweetness and helps seal in the berry juices. It's the final touch that makes this galette truly shine.
Let me introduce you to Raspberry Galette, a rustic free-form tart that's as beautiful as it is delicious. Fresh raspberries mingle with bright lemon zest and juice, all nestled in a buttery, flaky homemade crust that folds up around the edges. The crust gets brushed with egg wash and sprinkled with sparkly coarse sugar, baking up golden and crisp. A quick brush of warmed apricot jam adds a glossy finish, and when served warm with a scoop of vanilla ice cream, the tart berries and rich crust create the perfect balance of sweet and tangy.
Rate This Recipe!
Preparations
Prep Time:
20 minutes (plus 30 minutes chilling)
Bake Time:
35–40 minutes
Total Time:
1 hour 30 minutes (including chilling and cooling)
Cuisine:
French-inspired
Course:
Dessert
Calories:
280 kcal (approx. per serving)
Servings:
1 galette, serves 4–6
Author:
Ronica Rupan
Ingredients
Yields
1 galette | Serves 4–6
Ingredients
For the Crust
- 1/2 cup all-purpose flour, plus 2 tsp. (plus extra for rolling)
- 2 tsp. granulated sugar
- 1/8 tsp. fine sea salt or table salt
- 2 tbsp. cold salted butter, cut into small 1/4-inch cubes
- 1/4 tsp. white vinegar
- 2–3 tbsp. ice-cold water
For the Filling
- 6 oz. fresh raspberries (about 1 1/2 cups)
- 2 tsp. all-purpose flour
- 4 tsp. granulated sugar
- Zest of 1 lemon (about 1 tsp.)
- 1 tsp. fresh lemon juice
For Assembly & Finishing
- 1 large egg yolk, lightly beaten with 1 tsp. water (egg wash)
- 1–2 tbsp. coarse sugar (such as turbinado or demerara)
- 2–3 tbsp. apricot jam, warmed and strained (for glaze)
- Vanilla ice cream, for serving
Instructions
1. Make the Dough
In a medium bowl, whisk together 1/2 cup flour, 2 tsp. sugar, and salt until well combined. Add the cold, diced butter and work it into the flour using a pastry cutter, fork, or your fingertips until the mixture resembles coarse crumbs with pea-sized pieces of butter still visible—this creates those flaky layers. In a small bowl, stir together the white vinegar and 2 tbsp. cold water. Drizzle this over the flour mixture and gently mix with a fork until the dough looks shaggy and begins to come together. If it feels too dry and won't hold when pinched, add the remaining 1 tbsp. water, 1 tsp. at a time. Turn the dough out onto a clean surface and gently press it into a flat disk about 1-inch thick. Wrap tightly in plastic wrap and refrigerate for at least 30 minutes (or up to 2 days).
2. Preheat and Prep
Position a rack in the center of your oven and preheat to 375°F (190°C). Line a large baking sheet with parchment paper and set aside.
3. Prepare the Filling
In a medium bowl, gently toss the fresh raspberries with 2 tsp. flour, 4 tsp. sugar, lemon zest, and lemon juice. The flour helps absorb any excess moisture released during baking, while the lemon zest and juice brighten the berries with a pop of citrus. Set the filling aside while you roll out the dough.
4. Roll and Assemble
On a lightly floured surface, roll the chilled dough into a roughly 10-inch circle, about 1/8-inch thick. Don't worry about perfect edges—rustic is what makes a galette beautiful! Carefully transfer the dough circle to your prepared baking sheet. Spoon the raspberry mixture into the center of the dough, leaving a 2-inch border around the edges. Arrange the berries in a relatively even layer. Working your way around the circle, gently fold the edges of the dough up and over the berries, pleating as you go to create those signature rustic folds. The center should remain open with berries peeking through. Press gently to seal any cracks in the dough.
5. Brush and Bake
Using a pastry brush, brush the exposed crust generously with the beaten egg wash—this will give it a beautiful golden color. Sprinkle coarse sugar over the egg-washed crust for a gorgeous sparkly finish and delicate crunch. Bake on the center rack for 35–40 minutes, or until the crust is deep golden brown and the berry juices are bubbling. If the crust starts to brown too quickly, loosely tent the galette with foil during the final 10 minutes of baking.
6. Glaze and Serve
Remove the galette from the oven and let it cool on the baking sheet for at least 15–20 minutes—this allows the filling to set and makes slicing much neater. While the galette is still slightly warm, warm the apricot jam in the microwave for 15–20 seconds, then strain out any fruit chunks for a smooth glaze. Using a pastry brush, gently brush the warmed jam over the berries for a glossy, bakery-worthy finish. Slice and serve warm or at room temperature with a generous scoop of vanilla ice cream. The combination of tart berries, buttery crust, and creamy ice cream is absolutely perfect.
Cold Butter
Cold, diced butter is the secret to a flaky, tender crust. As it bakes, the cold butter creates steam pockets that give you those beautiful, buttery layers. Keeping it cold until the dough comes together is key to that melt-in-your-mouth texture.
Fresh Raspberries
Fresh raspberries bring a burst of tart, fruity flavor that's perfectly balanced with sugar and lemon. Their natural juices bubble and caramelize during baking, creating a jammy filling that's both sweet and tangy.
Lemon Zest & Juice
Freshly grated lemon zest and a squeeze of juice brighten up the raspberries, adding a pop of citrus that cuts through the sweetness. The zest brings aromatic oils that make every bite feel fresh and vibrant.
Apricot Jam Glaze
A warm brush of apricot jam creates a gorgeous glossy finish that not only looks bakery-perfect but also adds a subtle sweetness and helps seal in the berry juices. It's the final touch that makes this galette truly shine.
Coarse Sugar
Sprinkling coarse sugar (like turbinado or demerara) on the crust before baking gives it a beautiful sparkle and delicate crunch that contrasts perfectly with the tender, flaky pastry
Cheesecake-Stuffed Strawberries
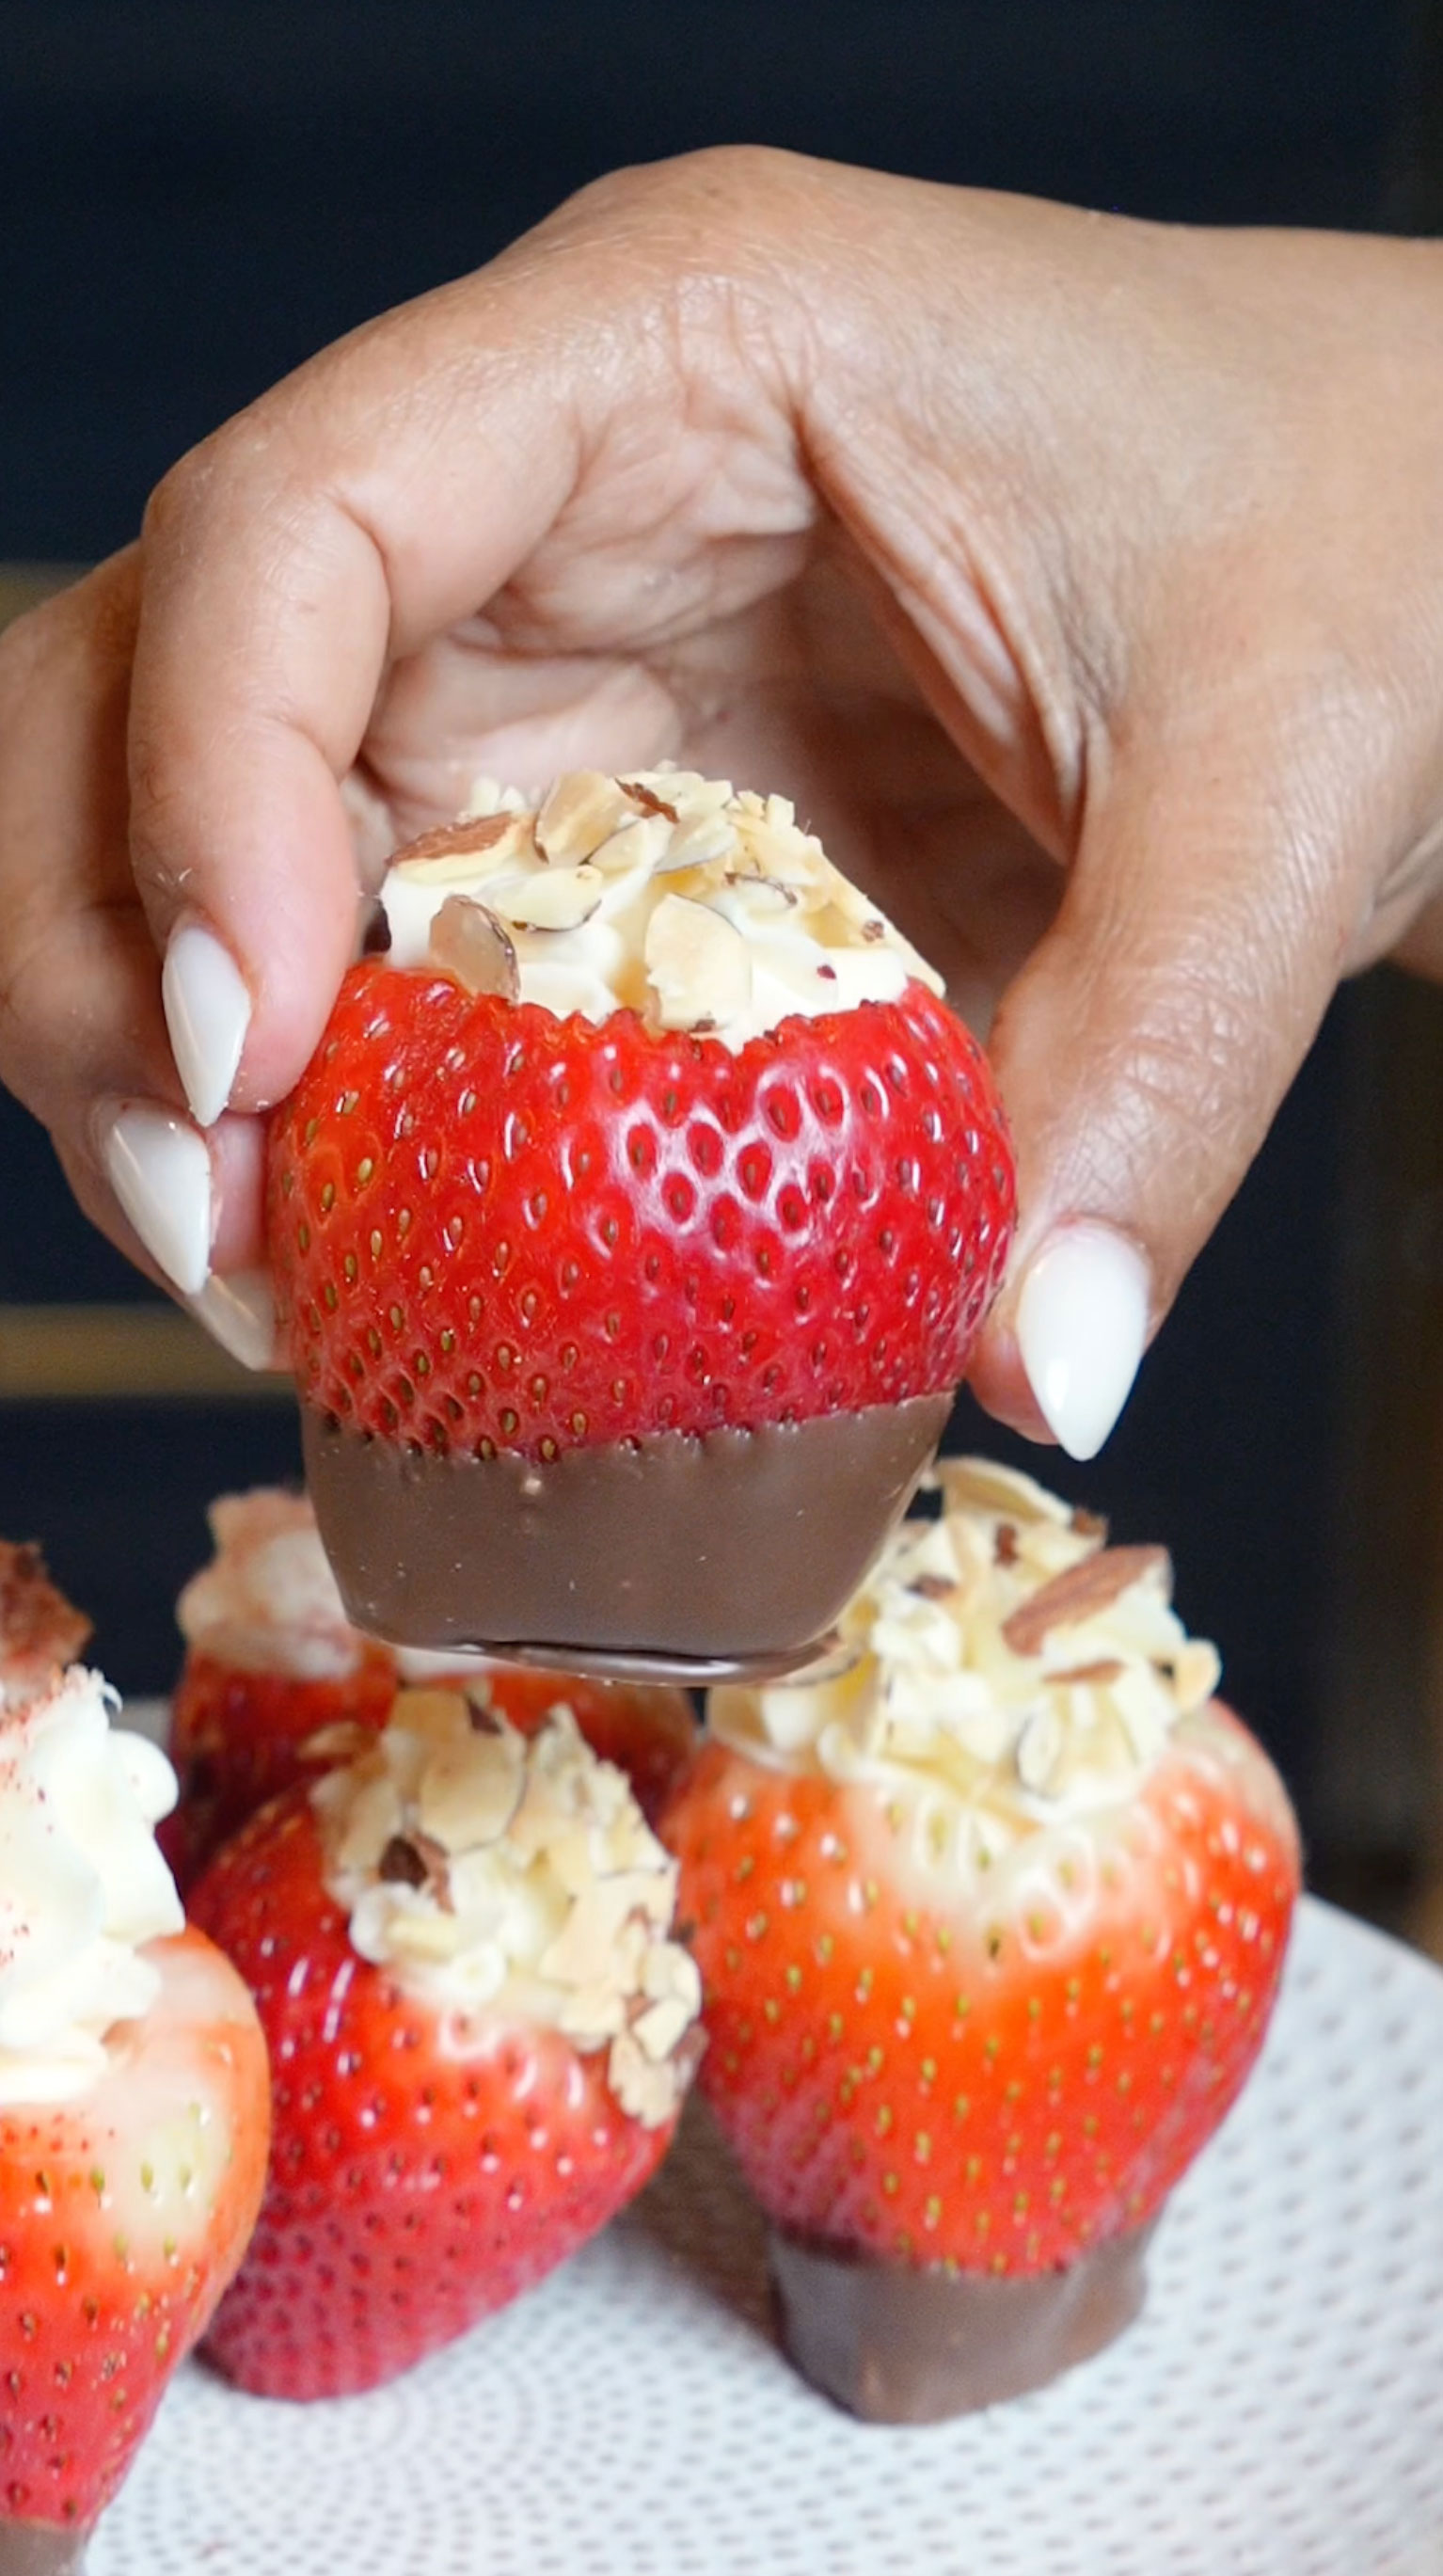
Let me introduce you to Cheesecake-Stuffed Strawberries: elegant, easy, and ready in just 15 minutes. A party staple that looks bakery-fancy but requires zero baking, these bite-sized beauties have been stealing the show at gatherings for years, disappearing faster than any cake or pie ever could.
These chocolate-dipped strawberries are creamy, customizable, and irresistibly delicious, a beloved treat that combines fresh fruit with rich cheesecake filling and your favorite toppings. They're often described as the perfect finger dessert, with their sweet-tart strawberry base, velvety cream cheese center, and crunchy chocolate coating. The key is using large, firm strawberries and creating a stable chocolate base, giving each bite that perfect balance of textures and flavors.
Key Ingredients
1. Fresh Strawberries
Large, firm strawberries are the edible vessel for this dessert. Look for berries with bright red color and fresh green tops they need to be sturdy enough to hold the creamy filling without collapsing. The natural sweetness and slight tartness create the perfect balance against the rich cheesecake center.
2. Cream Cheese & Powdered Sugar
Softened cream cheese whipped with powdered sugar creates that signature cheesecake flavor and silky-smooth texture. The powdered sugar dissolves completely (no graininess!) and adds just the right amount of sweetness, while vanilla extract brings warmth and depth to the filling.
3. Semi-Sweet Chocolate
Melted chocolate creates a stable, delicious base for the strawberries to stand on. A touch of coconut oil makes the chocolate smooth and glossy, giving each berry that professional chocolate-dipped look. The chocolate also adds a satisfying snap with every bite.
4. Graham Cracker Crumbs
This classic cheesecake topping brings it all together. The buttery, slightly sweet crumbs add crunch and that unmistakable cheesecake crust flavor. You can also swap for crushed cookies, nuts, or any topping you love, this is where you get creative!
Step-by-Step Instructions
Step 1. Prep the Strawberries Rinse and pat dry 1 lb large, firm strawberries. Cut off the tops and use a small paring knife or melon baller to carefully hull out the centers, creating a cavity for the filling. Slice a small portion off the bottom of each berry so they can stand upright without tipping. Set aside on a parchment-lined tray.
Step 2. Melt the Chocolate Base In a microwave-safe bowl, combine ½ cup semi-sweet or dark chocolate chips with 1 teaspoon coconut oil (optional, but it makes the chocolate smoother). Microwave in 30-second intervals, stirring between each, until completely melted and glossy—about 1–1½ minutes total.
Step 3. Dip the Strawberry Bottoms Working one at a time, dip just the bottom tip of each hollowed strawberry into the melted chocolate, creating a stable base. Place chocolate-side down on the parchment paper and let set at room temperature for 10–15 minutes, or refrigerate for 5 minutes to speed it up.
Step 4. Make the Cheesecake Filling In a medium bowl, beat 8 oz softened cream cheese with ¼ cup powdered sugar, 1–2 tablespoons heavy cream, and ½ teaspoon vanilla extract until smooth, fluffy, and no lumps remain. Taste and adjust sweetness if needed—add more powdered sugar 1 tablespoon at a time.
Step 5. Prepare Your Piping Bag Transfer the cheesecake filling to a piping bag fitted with a large round or star tip. If you don't have a piping bag, use a zip-top bag and snip off one corner—just make sure the opening is wide enough to pipe smoothly.
Step 6. Fill the Strawberries Once the chocolate bases are set, pipe the cheesecake filling into each hollowed strawberry, filling generously until it mounds slightly above the top. Don't worry about being perfect—a little overflow looks rustic and delicious!
Step 7. Add Your Toppings Sprinkle each filled strawberry with your favorite toppings while the filling is still soft so they stick. Try graham cracker crumbs for classic cheesecake vibes, mini chocolate chips, crushed cookies, chopped nuts, or a drizzle of melted white or dark chocolate.t mauris.
Step 8. Chill and Set Refrigerate the filled strawberries for at least 15–20 minutes to let the filling firm up and flavors meld. They'll hold their shape better and taste even more amazing slightly chilled.
Step 9. Serve and Enjoy Arrange on a platter and watch them disappear! These are best enjoyed the same day but can be stored covered in the refrigerator for up to 24 hours. Pro tip: bring them to room temperature for 10 minutes before serving for the creamiest texture.
Frequently Asked Questions
Can I make these ahead of time?
Yes, but with a caveat. You can prep the strawberries (hull and chocolate-dip the bottoms) up to 24 hours ahead and store them in the fridge. However, it's best to fill them no more than 4–6 hours before serving. The cream cheese filling can make the strawberries weep if they sit too long, and you'll lose that fresh, crisp texture.
How long do cheesecake-stuffed strawberries last?
These are best enjoyed within 24 hours of filling. Store them in a single layer in an airtight container in the refrigerator. The strawberries will start releasing moisture after a day, which can make the filling runny and the chocolate base soften. For the freshest taste and texture, make them the same day you plan to serve.
Can I use a different type of chocolate?
Absolutely! Semi-sweet or dark chocolate is classic, but milk chocolate works great if you prefer something sweeter. White chocolate is also delicious and creates a beautiful contrast against the red strawberries. Just make sure to use real chocolate (not candy melts) for the best flavor and that satisfying snap.
What are the best toppings for stuffed strawberries?
The options are endless! Classic graham cracker crumbs give you that authentic cheesecake flavor. Other favorites include: crushed Oreos, mini chocolate chips, chopped pecans or almonds, shredded coconut, caramel or chocolate drizzle, or even a sprinkle of sea salt. Mix and match to create a variety platter, something for everyone!.
Cheesecake-Stuffed Strawberries are an elegant, no-bake dessert that's ready in just 15 minutes. Fresh strawberries are hollowed out, dipped in chocolate for a stable base, then filled with a sweet cream cheese mixture and topped with your favorite garnishes. Perfect for parties, these bite-sized treats combine the freshness of strawberries with rich cheesecake flavor, no oven required. Customize with graham cracker crumbs, chocolate drizzle, nuts, or caramel for a dessert that looks impressive but couldn't be easier to make.
Rate This Recipe!
Preparations
Prep Time:
15 minutes
Chill Time:
15 minutes
Total Time:
30 minutes
Cuisine:
American
Course:
Dessert
Calories:
85 kcal (approx. per strawberry)
Servings:
20-24 stuffed strawberries (depending on size)
Author:
Ronica Rupan
Ingredients
Cheesecake-Stuffed Strawberries Recipe
Forget about fussy, time-consuming desserts—let me introduce you to Cheesecake-Stuffed Strawberries: elegant, easy, and ready in just 15 minutes. A party staple that looks bakery-fancy but requires zero baking, these bite-sized beauties have been stealing the show at gatherings for years, disappearing faster than any cake or pie ever could.
These chocolate-dipped strawberries are creamy, customizable, and irresistibly delicious—a beloved treat that combines fresh fruit with rich cheesecake filling and your favorite toppings. They're often described as the perfect finger dessert, with their sweet-tart strawberry base, velvety cream cheese center, and crunchy chocolate coating. The key is using large, firm strawberries and creating a stable chocolate base, giving each bite that perfect balance of textures and flavors.
Yields
20-24 stuffed strawberries
Ingredients
For the Strawberries:
- 1 lb fresh strawberries (large and firm, about 20-24 berries)
- ½ cup semi-sweet or dark chocolate chips
- 1 teaspoon coconut oil (optional, for smoother chocolate)
For the Cheesecake Filling:
- 8 oz cream cheese, softened (room temperature)
- ¼ cup powdered sugar (adjust to taste)
- 1–2 tablespoons
- ½ teaspoon pure vanilla extract
For the Toppings:
- ¼ cup graham cracker crumbs (or crushed cookies)
- 2 tablespoons mini chocolate chips (optional)
- 2 tablespoons chopped sliced almonds (optional)
- 1 tablespoon melted white chocolate (for drizzle, optional)
- Caramel sauce, for drizzling (as desired)
- Additional toppings of choice (crushed Oreos, shredded coconut, sea salt)
Instructions
1. Prep the Strawberries
Rinse and pat dry the strawberries. Cut off the tops and use a small paring knife or melon baller to carefully hull out the centers, creating a cavity for the filling. Slice a small portion off the bottom of each berry so they can stand upright. Set aside on a parchment-lined tray.
2. Melt the Chocolate Base
In a microwave-safe bowl, combine the chocolate chips and coconut oil. Microwave in 30-second intervals, stirring between each, until completely melted and glossy—about 1–1½ minutes total.
3. Dip the Strawberry Bottoms
Working one at a time, dip just the bottom tip of each hollowed strawberry into the melted chocolate, creating a stable base. Place chocolate-side down on the parchment paper and let set at room temperature for 10–15 minutes, or refrigerate for 5 minutes.
4. Make the Cheesecake Filling
In a medium bowl, beat the softened cream cheese with powdered sugar, 1–2 tablespoons heavy whipping cream and vanilla extract until smooth, fluffy, and no lumps remain. The texture should be creamy and pipeable—think thick frosting consistency.
Tip: Make sure your cream cheese is fully softened to room temperature for the smoothest filling. Cold cream cheese will be lumpy and difficult to pipe.
5. Prepare Your Piping Bag
Transfer the cheesecake filling to a piping bag fitted with a large round or star tip. If you don't have a piping bag, use a zip-top bag and snip off one corner.
6. Fill the Strawberries
Once the chocolate bases are set, pipe the cheesecake filling into each hollowed strawberry, filling generously until it mounds slightly above the top.
Pro Tip: Work quickly and keep filled strawberries refrigerated. The cream cheese filling is stable but tastes best when fresh and chilled.
7. Add Your Toppings
Sprinkle each filled strawberry with your favorite toppings while the filling is still soft. Try graham cracker crumbs for classic cheesecake vibes, mini chocolate chips, crushed cookies, chopped nuts, or a drizzle of melted chocolate or caramel.
8. Chill and Set
Refrigerate the filled strawberries for at least 15–20 minutes to let the filling firm up and flavors meld.
9. Serve and Enjoy
Arrange on a platter and serve chilled. These are best enjoyed the same day for optimal freshness and texture.
Let's Talk Ingredients: Why They Matter
Fresh Strawberries
Large, firm strawberries are essential—they act as the edible vessel and need to be sturdy enough to hold the filling without collapsing. Look for berries with vibrant red color and fresh green tops. The natural sweetness and slight tartness balance perfectly against the rich cream cheese filling.
Cream Cheese & Powdered Sugar
This duo creates that signature cheesecake flavor and silky-smooth texture. Powdered sugar dissolves completely (no graininess!) and sweetens without weighing down the filling. Make sure the cream cheese is fully softened for the fluffiest, most pipeable consistency.
Semi-Sweet Chocolate
The chocolate base isn't just decorative—it creates a stable foundation so your strawberries stand upright and adds a delicious flavor contrast. A touch of coconut oil makes the chocolate smooth and glossy with that satisfying snap.
Graham Cracker Crumbs
This classic cheesecake topping brings authentic flavor and a satisfying crunch. It's the bridge between "stuffed strawberry" and "actual cheesecake experience." Feel free to swap for any topping that makes your heart happy, that's the beauty of this recipe!
Cookie Monster Ice Cream Bars Recipe

These Cookie Monster Ice Cream Bars are fun, colorful, and packed with cookie goodness! With a crunchy Oreo crust on the bottom, creamy blue vanilla ice cream naturally colored with spirulina, and chocolate chip cookies on top, every bite is a sweet adventure. Easy enough for the kids to help make and naturally delicious—these homemade ice cream bars are way better than anything from the store.
Key Ingredients
1. Heavy Whipping Cream
Heavy whipping cream is the foundation of this no-churn ice cream, creating that rich, creamy texture without needing an ice cream maker. When whipped to stiff peaks and folded with sweetened condensed milk, it gives you that perfect soft, scoopable consistency that stays smooth even after freezing.
2. Blue Spirulina Powder
Blue spirulina is what gives these bars that vibrant Cookie Monster blue—naturally! It's a plant-based powder made from algae, packed with antioxidants, and has a very mild taste that won't overpower your ice cream. No artificial dyes needed, making this a fun treat you can feel good about serving to the kids.
3. Oreo Cookies
Oreos form the crunchy bottom crust that holds everything together. Mixed with melted butter and pressed into the pan, they create that classic cookies-and-cream base that everyone loves. Keep the cream filling in for extra flavor and easier prep.
4. Candy Eyeballs
hese fun little candy eyes are what make this recipe truly Cookie Monster-worthy! They add pops of color, a bit of crunch, and make the bars incredibly playful and kid-friendly. You can find them in the baking aisle, and the kids will love folding them into the ice cream.
5. Mini Chocolate Chip Cookies
Mini chocolate chip cookies scattered throughout the ice cream give you those delicious cookie chunks in every bite. They stay slightly soft when frozen, adding texture and that nostalgic cookies-and-cream vibe we all grew up loving.
Step-by-Step Instructions
Step 1. Prepare the Oreo Crust In a bowl, combine 12-15 crushed Oreo cookies (keep the cream filling in) with 3 tablespoons melted butter. Mix until the cookies are evenly coated. Press this mixture firmly into the bottom of an 8x8 inch pan lined with parchment paper. Place the pan in the freezer while you make the ice cream.
Step 2. Whip the Cream In a large bowl using an electric mixer, whip 2 cups of cold heavy whipping cream on high speed for 3-4 minutes until stiff peaks form. Be careful not to over-whip or it may become grainy.
Step 3. Make the Ice Cream Base Gently fold the sweetened condensed milk, 2 teaspoons vanilla extract, and ¼ teaspoon salt into the whipped cream. Add ½ to ¾ teaspoon blue spirulina powder gradually, starting with less and adding more until you reach your desired Cookie Monster blue color. Fold gently to keep the mixture light and fluffy.
Step 4. Add the Mix-Ins Fold in 1 cup chopped mini chocolate chip cookies and ½ cup candy eyeballs. Be gentle so you don't deflate the whipped cream. You can also add white chocolate chips at this stage if using.
Step 5. Assemble the Bars Remove the pan from the freezer. Pour half of the ice cream mixture over the Oreo crust. Sprinkle a few extra mini cookies and candy eyeballs in the middle layer. Add the remaining ice cream mixture and smooth the top.
Step 6. Add the Cookie Topping Roughly chop 8-10 chocolate chip cookies, mix with 2 tablespoons melted butter, and sprinkle them over the top. Add white chocolate chips if desired.
Step 7. Freeze Cover the pan tightly with plastic wrap or aluminum foil. Freeze for at least 6-8 hours or overnight until completely firm.
Step 8. Slice and Serve Remove from freezer and let sit for 5-10 minutes to soften slightly. Use the parchment paper to lift the entire block out of the pan. Cut into bars with a sharp knife, dipping the knife in warm water between cuts for cleaner slices. Serve immediately and enjoy!
Frequently Asked Questions
Can I make these ice cream bars ahead of time?
Absolutely! These bars are perfect for meal prep. You can make them up to a week in advance and store them covered in the freezer. For longer storage, wrap individual bars in plastic wrap to keep them fresh.
Can I use regular food coloring instead of blue spirulina?
Yes, you can use blue gel food coloring if you prefer. Start with a small amount (about ¼ teaspoon) and add more until you reach your desired shade. Gel food coloring works better than liquid because it won't thin out the ice cream mixture.
Do I need an ice cream maker for this recipe?
Nope! This is a no-churn ice cream recipe, which means you just need a mixer to whip the cream and a freezer. No special equipment required, making it super easy and accessible for everyone.
Can I substitute the candy eyeballs with something else?
Of course! If you can't find candy eyeballs or want to skip them, you can use mini M&Ms, chocolate chips, or even mini marshmallows. The recipe is flexible, so feel free to use whatever fun mix-ins your family loves.
These Cookie Monster Ice Cream Bars are fun, festive, and loaded with cookie goodness! With a crunchy Oreo crust, naturally blue spirulina-colored ice cream, and chocolate chip cookies on top, every bite is pure nostalgia. Easy enough for kids to help make and completely dye-free, this is your new favorite homemade frozen treat.
Rate This Recipe!
Preparations
Prep Time:
30
Freeze Time:
6-8 hours
Total Time:
6 hours 30 minutes (with freezing)
Cuisine:
American
Course:
Dessert
Calories:
320kcal (approx. per serving)
Servings:
12-16 bars
Author:
Ronica Rupan
Ingredients
Cookie Monster Ice Cream Bars (No-Churn, Naturally Colored)
These Cookie Monster ice cream bars are fun, festive, and loaded with cookie goodness! With a crunchy Oreo crust, naturally blue spirulina-colored ice cream, and chocolate chip cookies on top, every bite is pure nostalgia. Easy enough for kids to help make and completely dye-free—this is your new favorite homemade frozen treat.
These Cookie Monster ice cream bars are fun, festive, and loaded with cookie goodness! With a crunchy Oreo crust, naturally blue spirulina-colored ice cream, and chocolate chip cookies on top, every bite is pure nostalgia. Easy enough for kids to help make and completely dye-free—this is your new favorite homemade frozen treat.
Ingredients:
For the Ice Cream Base:
- 2 cups heavy whipping cream, cold
- 1 (14 oz) can sweetened condensed milk
- 2 teaspoons vanilla extract
- 1/4 teaspoon salt
- 1/2 to 3/4 teaspoon blue spirulina powder
For the Mix-ins:
- 1 cup mini chocolate chip cookies, roughly chopped
- 1/2 cup candy eyeballs
- Optional: 2 tablespoons mini marshmallows
For the Bottom Crust (Oreos):
- 12-15 Oreo cookies, crushed into chunks
- 3 tablespoons butter, melted
For the Top Layer (Chocolate Chip Cookies):
- 8-10 chocolate chip cookies (like Chips Ahoy), roughly chopped
- Optional: 1/4 to 1/2 cup white chocolate chips
Instructions:
Prepare the Oreo Crust:
- Line your pan: Line an 8x8 inch square pan with parchment paper, leaving overhang on the sides for easy removal later.
- Make the crust: Crush 12-15 Oreo cookies into chunky pieces (keep the cream filling in). Mix with 3 tablespoons melted butter until evenly coated.
- Press and freeze: Press the Oreo mixture firmly into the bottom of the pan. Place in the freezer while you make the ice cream.
Make the No-Churn Ice Cream:
- Whip the cream: In a large bowl using an electric mixer, whip 2 cups cold heavy whipping cream on high speed for 3-4 minutes until stiff peaks form. Don't over-whip or it may become grainy.
- Fold in the base: Gently fold in the sweetened condensed milk, vanilla extract, and salt. Be gentle to keep the mixture light and fluffy.
- Add the color: Gradually add blue spirulina powder, starting with 1/2 teaspoon and adding more until you reach that perfect Cookie Monster blue. The color will deepen slightly as it freezes.
- Mix in the goodies: Fold in chopped mini chocolate chip cookies and candy eyeballs. Add mini marshmallows or white chocolate chips if using.
Assemble the Bars:
- Layer the ice cream: Remove the pan from the freezer. Pour half of the ice cream mixture over the Oreo crust and spread evenly.
- Add a middle layer: Sprinkle a few extra mini cookies and candy eyeballs over the ice cream.
- Top it off: Pour the remaining ice cream on top and smooth it out.
- Finish with cookies: Roughly chop 8-10 chocolate chip cookies, mix with 2 tablespoons melted butter, and sprinkle them over the top. Add white chocolate chips if desired.
Freeze and Serve:
- Freeze: Cover the pan tightly with plastic wrap or aluminum foil. Freeze for at least 6-8 hours or overnight until completely firm.
- Slice: Remove from freezer and let sit 5-10 minutes to soften slightly. Use the parchment overhang to lift the entire block out. Cut into bars with a sharp knife, dipping it in warm water between cuts for clean slices.
- Enjoy: Serve immediately and watch them disappear!
Let's Talk Ingredients: Why They Matter
1. Heavy Whipping Cream Heavy whipping cream is the secret to no-churn ice cream magic. When whipped to stiff peaks, it creates air pockets that give you that creamy, scoopable texture without needing an ice cream maker. Make sure it's cold before whipping for best results.
2. Blue Spirulina Powder Blue spirulina gives these bars that vibrant Cookie Monster blue naturally—no artificial dyes needed. It's made from algae, packed with antioxidants, and has such a mild taste you won't even notice it. Start with less and add more until you love the color.
3. Sweetened Condensed Milk This is what sweetens the ice cream and keeps it creamy even when frozen. It also helps prevent ice crystals from forming, so you get smooth, soft ice cream bars every time.
4. Oreo Cookies Oreos make the perfect crunchy bottom crust. Keep the cream filling in—it adds flavor and helps bind everything together with the melted butter. Crush them into chunks, not powder, for the best texture.
5. Candy Eyeballs These fun little candy eyes are what make this recipe truly Cookie Monster-approved! They're playful, colorful, and kids absolutely love folding them into the ice cream. You'll find them in the baking aisle near sprinkles and decorating supplies.
6. Chocolate Chip Cookies Mini chocolate chip cookies throughout and regular-sized ones on top give you those delicious cookie chunks in every bite. They soften slightly when frozen, adding that nostalgic cookies-and-cream texture we all grew up loving.
Crispy Fried Onion Potatoes au Gratin
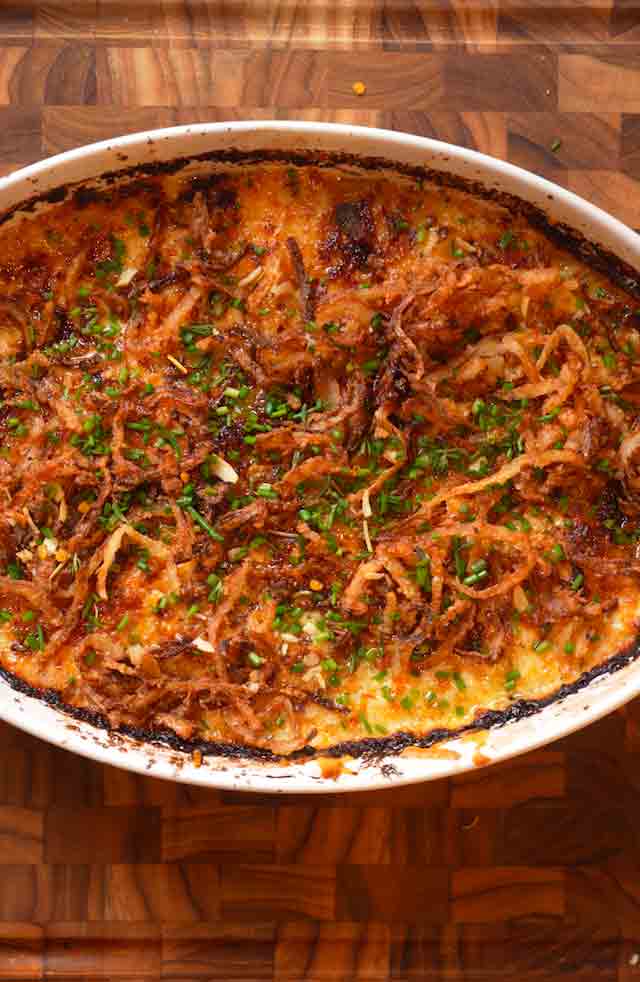
Forget about plain potatoes, let me introduce you to Crispy Fried Onion Potatoes au Gratin, a rich and cozy twist on the classic that takes comfort food to the next level. Thin layers of buttery Yukon Gold potatoes are baked in a creamy roasted garlic sauce, infused with fresh rosemary and thyme, then topped with a mountain of golden, crunchy fried onions for the ultimate finish.
This dish is creamy, cheesy, and irresistibly crisp, the perfect balance of soft, tender potatoes and savory crunch in every bite. The roasted garlic deepens the flavor, while the herbs add freshness that cuts through the richness. Whether you’re serving it for the holidays or just a Sunday dinner, these Potatoes au Gratin turn any meal into a special occasion.
Key Ingredients
1. Yukon Gold Potatoes
These creamy, buttery potatoes are the heart of the dish. Their smooth texture and golden color make each layer rich and tender without falling apart. They bake beautifully and soak up the garlic-herb sauce perfectly.
2. Roasted Garlic
Roasted garlic adds a mellow sweetness and deep flavor that transforms the sauce. It blends into the cream mixture for a subtle, nutty richness that sets this dish apart from classic Potatoes au Gratin potatoes.
3. Cheddar Cheese
A mix of sharp yellow and white cheddar gives the dish a bold, tangy flavor and that irresistible cheesy pull. It melts into the sauce for a creamy, savory base and forms a golden crust on top.
4. Crispy Fried Onions
The crispy onions bring the crunch that completes every bite. Fried until golden and lightly salted, they add texture and a hint of sweetness that perfectly contrasts the creamy layers underneath.
Step-by-Step Instructions
Step 1. Make the Cream Sauce In a large saucepan, melt butter over medium heat. Whisk in the flour and cook for about 1 minute to form a roux. Slowly pour in the milk and broth, whisking constantly until the sauce thickens — about 5–8 minutes. Stir in mashed roasted garlic, rosemary, thyme, Garlic of Eden seasoning, salt, and pepper. Remove from heat, then mix in 1 cup of shredded cheddar until smooth and creamy.
Step 2. Layer the Potatoes Grease a 9×13-inch baking dish with butter or nonstick spray. Layer half of the thinly sliced Yukon Gold potatoes evenly in the dish. Pour half of the cream sauce over the potatoes, spreading it to cover each layer. Repeat with the remaining potatoes and sauce, then finish with the rest of the cheese on top.
Step 3. Bake Until Tender Cover the dish tightly with foil and bake at 375°F for 50 minutes. Then uncover and bake for an additional 15 minutes, or until the potatoes are fork-tender and the top is bubbling and golden.s.
Step 4. Make the Crispy Fried Onions While the potatoes bake, heat oil in a deep skillet to 350°F. Toss thinly sliced onions with a little flour, shaking off the excess. Fry in batches for 2–5 minutes until golden and crisp. Drain on paper towels and sprinkle with kosher salt.
Step 5. Assemble & Serve Once the Potatoes au Gratin are done, let them rest for 10 minutes. Top generously with crispy fried onions and a sprinkle of fresh thyme or parsley. Serve hot for the perfect creamy and crunchy side dish.
Frequently Asked Questions
1. Can I make these Potatoes au Gratin ahead of time?
Yes! You can assemble the potatoes and sauce up to one day in advance. Cover tightly with foil and refrigerate. When ready to serve, bake as directed — just add an extra 10–15 minutes to the baking time since it will be cold from the fridge. Add the fried onions right before serving for the best crunch.
2. What kind of potatoes work best for Potatoes au Gratin potatoes?
Yukon Gold potatoes are ideal because they hold their shape while staying creamy and tender. You can also use russet potatoes for a softer, melt-in-your-mouth texture, but they may break apart more easily.
3. Can I use store-bought fried onions instead of making my own?
Absolutely! While homemade fried onions have a fresher, lighter crunch, store-bought crispy onions (like French’s) work perfectly for convenience. Just sprinkle them on right before serving so they don’t lose their crispness.
4. How do I make this recipe vegetarian-friendly?
Simply swap the chicken broth for vegetable broth, everything else stays the same! The dish remains just as rich, flavorful, and creamy.
5. How can I reheat leftovers without drying them out?
Reheat in a 350°F oven, covered with foil, for 15–20 minutes or until warmed through. You can also add a splash of milk or cream before reheating to keep the potatoes moist and creamy. Avoid microwaving for too long, as it can make the sauce separate..
6. How to Keep Fried Onions Crispy
Step 1. Slice Evenly Use a sharp knife or mandoline to slice the onions into uniform rings. Even thickness helps them cook evenly and crisp up perfectly without burning. Step 2. Lightly Coat with Flour Toss the onions with just enough flour to coat them. Too much flour makes the coating heavy, while too little won’t create that golden crust. Step 3. Heat the Oil Correctly Bring your oil to 350°F before frying. If it’s too cool, the onions will absorb oil and turn soggy; too hot, and they’ll burn before crisping. Step 4. Fry in Small Batches Avoid overcrowding the pan. Fry a handful of onions at a time to allow proper airflow and even cooking. Step 5. Drain and Cool Properly Transfer fried onions to a paper towel or wire rack in a single layer. Let them cool completely before storing so they stay light and crunchy. Step 6. Store for Later Once cooled, keep them in an airtight container at room temperature for up to a day. Re-crisp in the oven for a few minutes if needed before serving.
Creamy, cheesy, and perfectly golden, these Crispy Fried Onion Potatoes au Gratin are the ultimate comfort side dish. Layers of tender Yukon Gold potatoes are baked in a roasted garlic cream sauce with fresh herbs and cheddar, then topped with homemade crispy fried onions for that irresistible crunch. Perfect for holidays, dinner parties, or any cozy meal.
Rate This Recipe!
Preparations
Prep Time:
25 minutes
Cook Time:
1 hour 5 minutes
Total Time:
1 hour 30 minutes
Cuisine:
American Comfort Food
Course:
Side Dish
Calories:
Approx. 360 kcal per serving
Servings:
1 (9 x 13-inch) dish, serves 8–10
Author:
Ronica Rupan
Ingredients
Forget about plain Potatoes au Gratin potatoes, let me introduce you to Crispy Fried Onion Potatoes au Gratin, the ultimate comfort side that’s creamy, cheesy, and finished with golden fried onions for a satisfying crunch. This dish layers buttery Yukon Gold potatoes in a rich roasted garlic cream sauce, infused with herbs and topped with sharp cheddar. Once baked to perfection, it’s crowned with homemade crispy onions for that irresistible texture contrast — the kind of side dish that steals the show at every dinner table.
These Crispy Fried Onion Potatoes au Gratin potatoes are rich, savory, and perfectly balanced — the creamy layers soak up the garlic-herb sauce, while the crispy onions add the crunch you didn’t know you needed. Think comfort food meets gourmet — a cozy, crowd-pleasing recipe ideal for holidays or weeknight dinners alike. The secret? Roasting the garlic first to bring out its sweetness and making your own fried onions for an extra hit of freshness and flavor.
Yields
1 (9 x 13-inch) pan | Serves 8–10
Ingredients
3 lbs Yukon Gold potatoes, thinly sliced
3 tablespoons unsalted butter
1 head roasted garlic, mashed
¼ cup all-purpose flour
1½ cups whole milk, room temperature
1 cup vegetable or chicken broth
1½ cups sharp cheddar cheese (mix of yellow and white), divided
1 tablespoon fresh rosemary, chopped
1 tablespoon fresh thyme, chopped
1 tablespoon Garlic of Eden seasoning - salt free (@floraandmana)
as desired Salt and black pepper, to taste
for frying 4 cups vegetable oil
2 tablespoons all-purpose flour
1 large yellow onion, thinly sliced into rings
1 teaspoon kosher salt
for garnish Fresh parsley and thyme, chopped
Instructions
1. Preheat the Oven
Preheat your oven to 375°F and grease a 9×13-inch baking dish with nonstick spray or butter.
2. Make the Garlic Cream Sauce
Melt butter in a saucepan over medium heat. Whisk in the flour and cook for 1 minute to form a roux. Gradually whisk in the milk and broth until thickened, about 5–8 minutes. Stir in mashed roasted garlic, herbs, Garlic of Eden seasoning, salt, and pepper. Remove from heat and add 1 cup of shredded cheese. Stir until smooth and melted.
3. Layer the Potatoes
Arrange half of the sliced Yukon Gold potatoes in the prepared dish. Pour half of the sauce over the top, spreading evenly. Repeat with remaining potatoes and sauce. Sprinkle with the remaining cheese.
4. Bake Until Tender
Cover tightly with foil and bake for 50 minutes. Remove foil and bake another 15 minutes, until the top is bubbling and golden and potatoes are fork-tender.
5. Make the Crispy Fried Onions
While the potatoes bake, heat oil in a skillet to 350°F. Toss onion rings in flour, shaking off excess. Fry in batches for 2–5 minutes until golden and crisp. Drain on paper towels and sprinkle with salt.
6. Assemble and Serve
Let the baked potatoes rest for 10 minutes. Top generously with crispy fried onions and garnish with fresh thyme or parsley. Serve hot and enjoy the creamy-meets-crunchy perfection.
Let’s Talk Ingredients: Why They Matter
Yukon Gold Potatoes
Their buttery texture and golden hue make them perfect for Crispy Fried Onion Potatoes au Gratin, creamy without falling apart.
Roasted Garlic
Adds a sweet, nutty depth that blends beautifully into the sauce, elevating every layer with flavor.
Cheddar Cheese
A mix of white and yellow cheddar gives a tangy, melty richness and that classic cheesy pull.
Crispy Fried Onions
They’re the finishing touch — crunchy, aromatic, and irresistible, turning this classic side into something unforgettable.
Easy Quick Pickled Garlic Recipe

Inspired by Sinners by Ryan Coogler, this quick pickled garlic isn’t just flavor it’s function. Crisp garlic cloves soak in apple cider vinegar, mustard seeds, and bay leaf to create a tangy, gut-loving condiment that supports digestion and heart health. Add it to bowls, salads, marinades, or enjoy straight from the jar for a boost of bold flavor and natural benefits.
Key Ingredients
1. Garlic
Garlic is the star of this recipe, delivering bold flavor and powerful benefits. Once pickled, the cloves mellow out, becoming slightly sweet and tangy while still retaining their signature bite. Fresh peeled garlic (not pre-peeled) ensures the best texture and flavor.
2. Apple Cider Vinegar
Apple cider vinegar gives this pickle its signature tang and depth. It’s known for supporting digestion and balancing blood sugar, making it both flavorful and functional.
3. Mustard Seeds
Tiny but mighty, mustard seeds add a hint of warmth and spice while supporting circulation and digestion. They also give that classic pickled garlic crunch.
4. Black Peppercorns
Black pepper adds subtle heat and enhances nutrient absorption, helping the body make the most of garlic’s natural compounds.
5. Bay Leaves
Fragrant bay leaves infuse the brine with a herbal, slightly floral aroma. They’re also known to help ease bloating and support digestion.
Step-by-Step Instructions
Step 1. Prep the Garlic Bring a small pot of water to a boil. Blanch 2 cups peeled garlic cloves for 30 seconds, then transfer to an ice bath to cool. Drain well and pat dry so the brine does not get diluted.
Step 2. Clean the Jars Wash two 8 oz glass jars and lids with hot soapy water, then rinse. For extra cleanliness, simmer jars and lids for 5 minutes and let air dry on a clean towel.
Step 3. Pack the Jars Divide the cooled garlic between the jars. Add ½ teaspoon mustard seeds and ½ teaspoon black peppercorns to each jar, plus 1 bay leaf and 1 small sprig of fresh dill per jar.
Step 4. Make the Brine In a saucepan, combine ½ cup apple cider vinegar, ½ cup white vinegar, 1 cup distilled or filtered water, 1 teaspoon salt, and 1½ teaspoons sugar. Bring just to a simmer, stirring until the salt and sugar dissolve.
Step 5. Fill with Brine Pour the hot brine over the garlic, leaving ½ inch headspace at the top. Tap the jars gently to release air bubbles and make sure all cloves are fully submerged..
Step 6. Seal and Chill Wipe the rims clean, add lids, and let the jars cool to room temperature. Refrigerate right away. This is a refrigerator quick pickle, not for pantry storage.
Step 7. Wait and Enjoy Let the garlic pickle for at least 14 days before tasting. The flavor will mellow and deepen over time. Keep cloves submerged and use a clean utensil each time you dip in. Refrigerate for up to 2 months.
Frequently Asked Questions
Why did my garlic turn blue or green?
This color change is completely natural! Fresh garlic contains sulfur compounds that can react with the vinegar and trace minerals, creating blue or green hues. It’s safe to eat and doesn’t affect the flavor or quality at all.
How can I prevent my garlic from turning blue or green?
Use older, cured garlic instead of freshly harvested cloves, and blanch the garlic for 30 seconds before pickling. Also, use distilled or filtered water to reduce mineral reactions. These small steps help keep your cloves white and bright.
Can I make this recipe shelf-stable?
This is a refrigerator quick pickle, not a shelf-stable canning recipe. For pantry-safe garlic, you’ll need a lab-tested canning formula. Keep this version refrigerated and enjoy within 2 months.
How long should I let the garlic sit before eating?
For the best flavor, let it rest at least 14 days in the fridge before tasting. The longer it sits, the mellower and sweeter the garlic becomes.
How do I know if my pickled garlic went bad?
How do I know if my pickled garlic went bad?
Easy Quick Pickled Garlic Recipe
Inspired by Sinners by Ryan Coogler, this quick pickled garlic is flavor with benefits—tangy, crisp, and packed with gut-loving goodness. Fresh garlic cloves are mellowed in a mix of apple cider vinegar, mustard seeds, and bay leaves for a bright, balanced condiment that’s as good for you as it tastes.
Rate This Recipe!
Preparations
Prep Time:
15 minutes
Cook Times:
5 minutes
Rest Times:
14 days (for best flavor)
Total Time:
14 days 20 minutes
Cuisine:
American, Wellness
Course:
Condiment, Side
Calories:
~10 kcal per clove (approx.)
Servings:
2 (8 oz) jars
Author:
Ronica Rupan
Ingredients
If you’ve seen Sinners by Ryan Coogler and heard about that pickled garlic, it’s not just movie magic — it’s real flavor with benefits. This quick pickled garlic is tangy, crisp, and mellowed to perfection. Fresh garlic cloves soak in a warm mix of apple cider vinegar, mustard seeds, and bay leaf for a bold, gut-loving condiment you’ll want to add to everything.
Ingredients
Main Ingredients
2 cups fresh garlic cloves, peeled (about 6 heads)
½ cup apple cider vinegar (5% acidity)
½ cup white vinegar (5% acidity)
1 cup distilled or filtered water
1 teaspoon sea salt or kosher salt (not iodized)
1½ teaspoons sugar
Spices & Aromatics
1 teaspoon mustard seeds
1 teaspoon whole black peppercorns
2 bay leaves
2 small sprigs fresh dill (optional)
Instructions
Prep the Garlic
Bring a small pot of water to a boil. Blanch the peeled garlic cloves for 30 seconds, then transfer them to an ice bath to cool. This helps soften the raw bite and keeps the garlic firm once pickled. Drain and pat dry.
Sterilize the Jars
Rinse two 8 oz jars and lids with hot water. To ensure cleanliness, simmer the jars and lids in boiling water for 5 minutes, then let them air dry on a clean towel.
Pack the Jars
Divide the blanched garlic evenly between the jars. Add mustard seeds, black peppercorns, 1 bay leaf, and 1 sprig of dill (if using) to each jar.
Make the Brine
In a small saucepan, combine apple cider vinegar, white vinegar, water, salt, and sugar. Bring to a gentle boil over medium heat, stirring until the salt and sugar dissolve completely.
Pour the Brine
Carefully pour the hot brine over the garlic, leaving about ½ inch of space at the top. Tap the jars gently to release air bubbles and make sure all cloves are submerged in the brine.
Seal and Cool
Wipe the rims clean and seal the jars with lids. Let them cool at room temperature before refrigerating. This recipe is for refrigerator pickling only — do not can for shelf storage.
Wait and Enjoy
Let the jars sit in the fridge for at least 14 days before tasting. The longer they rest, the mellower and more flavorful the garlic becomes.
Let’s Talk Ingredients: Why They Matter
Garlic
The star of the recipe—fresh garlic mellows in the brine, turning sweet, tangy, and crisp while still keeping its signature bite.
Apple Cider Vinegar
Adds tang and subtle fruitiness, while naturally supporting digestion and balancing blood sugar.
White Vinegar
Brightens the brine and balances the depth of apple cider vinegar for that clean pickle flavor.
Mustard Seeds
Add gentle warmth and crunch while boosting circulation and digestion.
Black Peppercorns
Bring subtle spice and help enhance nutrient absorption for those garlic benefits.
Bay Leaves
Infuse a light herbal note that ties the flavors together and helps ease bloating.
Fresh Dill
Optional but refreshing, adding color and an aromatic lift that complements the vinegar base.
Nashville Hot Chicken Sandwich
If you’re craving that perfect combination of crispy, juicy, and spicy, this Nashville hot chicken sandwich delivers every time. Marinated chicken gets double-breaded for maximum crunch, then coated in a fiery hot honey glaze that balances heat with just the right amount of sweetness. Add homemade coleslaw, creamy mayo, and tangy pickles on a toasted bun, and you’ve got a sandwich that rivals any restaurant version. Whether it’s game day, a weekend treat, or just because you’re craving something bold and delicious, this recipe is a guaranteed crowd-pleaser.
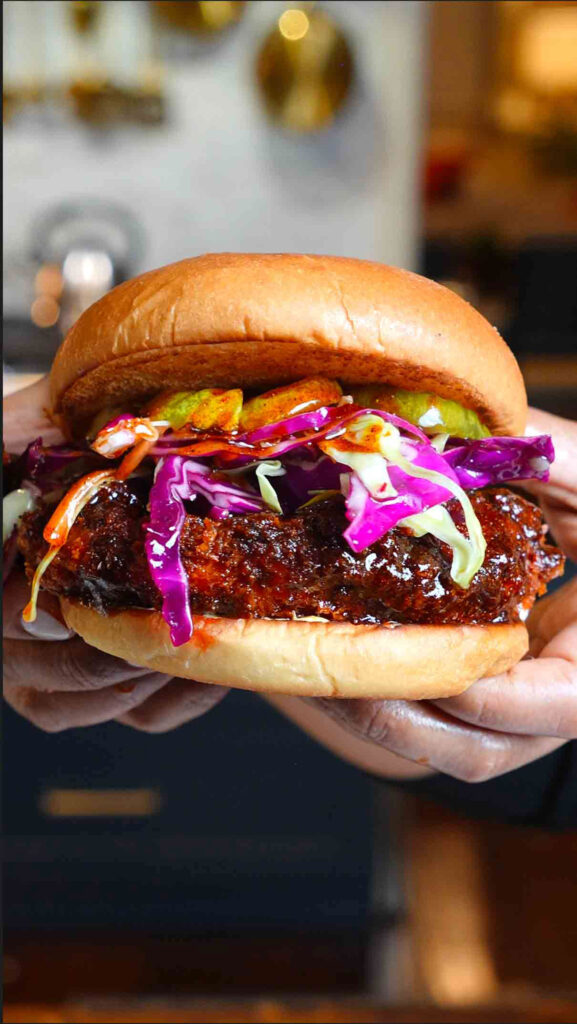
Yields 4 sandwiches
Ingredients
For the Chicken:
- 2 lb chicken breast
- 2 cups buttermilk
- 1/4 cup pickle brine
- 2 tablespoons hot sauce
- 2 cups all-purpose flour
- 1 cup panko bread crumbs
- 1 teaspoon salt
- 1 teaspoon black pepper
- 1 teaspoon garlic powder
- Vegetable oil, for frying
For the Hot Honey Glaze:
- 1/4 cup honey
- 4 tablespoons cayenne pepper
- 1 tablespoon light brown sugar
- 1 teaspoon chili powder
- 1 teaspoon garlic powder
- 1 teaspoon paprika
- 1/2 cup frying oil (reserved from cooking)
For Assembly:
- 4 burger buns
- Mayonnaise
- Coleslaw (homemade or store-bought)
- Dill pickle chips
Instructions
Marinate the Chicken In a large bowl, whisk together the buttermilk, pickle brine, and hot sauce until well combined. Add the chicken breast pieces, making sure each one is fully submerged and coated in the marinade. Cover the bowl with plastic wrap and refrigerate for at least 1 hour—though overnight marinating will give you the most tender, flavorful results. The acidity in the buttermilk and pickle brine helps break down the proteins, ensuring juicy chicken with every bite.
Set Up Your Breading Station In a shallow dish, whisk together the all-purpose flour, salt, black pepper, and garlic powder. This seasoned flour will be your first coating. Place your panko bread crumbs in a separate dish—they’ll add that signature crunch. Having everything ready before you start makes the process smooth and keeps your hands from getting too messy.
Bread the Chicken Remove the chicken pieces from the marinade, letting any excess drip off. Dredge each piece in the seasoned flour mixture, coating it completely. Dip it back into the buttermilk marinade, then press it firmly into the panko bread crumbs, making sure every surface is covered. The double-dredge technique creates layers of texture that fry up incredibly crispy. For best results, place the breaded chicken on a wire rack and let it rest for 10 minutes—this helps the coating adhere better during frying.
Fry the Chicken Pour vegetable oil into a deep skillet or heavy-bottomed pot, filling it about 2-3 inches deep. Heat the oil to 350°F—use a thermometer to keep it accurate. Carefully lower the chicken pieces into the hot oil, working in batches to avoid overcrowding (which can lower the oil temperature). Fry for 6-8 minutes, flipping halfway through, until the coating is golden brown and crispy and the internal temperature reaches 165°F. Transfer the fried chicken to a wire rack set over a baking sheet to drain. Before you clean up, reserve 1/2 cup of the frying oil for the glaze—this is where the magic happens.
Make the Hot Honey Glaze In a heat-safe bowl, combine the cayenne pepper, light brown sugar, chili powder, garlic powder, and paprika. Carefully pour in the 1/2 cup of reserved hot frying oil, stirring constantly as the spices bloom and release their aroma. The oil should sizzle slightly—this is good! It means the spices are toasting and deepening in flavor. Drizzle in the honey and stir until the mixture is smooth and glossy. Taste and adjust the heat level by adding more cayenne if you like it extra spicy, or a bit more honey if you prefer it sweeter. This glaze is the heart of the sandwich—sweet, smoky, and with just the right kick.
Coat the Chicken While the chicken is still warm, generously brush or dip each piece into the hot honey glaze, making sure it’s completely coated. The warmth of the chicken helps the glaze absorb slightly, creating that signature sticky, spicy exterior. Let any excess drip off onto the rack—it should look glossy and deeply colored.
Assemble the Sandwiches Toast your burger buns until golden and slightly crisp—this helps them hold up to the juicy chicken and toppings. Spread a generous layer of mayonnaise on both the top and bottom buns. Place a glazed chicken piece on the bottom bun, then pile on a handful of coleslaw for crunch and freshness. Add a few dill pickle chips for tang and acidity that cuts through the richness. Top with the other half of the bun, press down gently, and serve immediately while everything is warm and the textures are at their peak.
Let’s Talk Ingredients: Why They Matter
Buttermilk & Pickle Brine This dynamic duo tenderizes the chicken and infuses it with flavor from the inside out. The acidity breaks down proteins, ensuring every bite is juicy and never dry.
Double Breading (Flour + Panko) The flour creates a base layer that helps the panko stick, while the panko bread crumbs deliver that shatteringly crispy texture. This method gives you restaurant-quality crunch at home.
Hot Frying Oil in the Glaze Using oil straight from frying the chicken isn’t just about convenience—it carries flavor from the breading and chicken, adding depth to the glaze that you can’t get from fresh oil.
Hot Honey Glaze The balance of cayenne heat, brown sugar sweetness, and honey creates a complex flavor profile that’s addictive. It’s spicy, sweet, smoky, and slightly sticky—everything a Nashville hot sauce should be.
Coleslaw & Pickles These aren’t just toppings—they’re essential. The cool, creamy slaw and tangy pickles provide contrast to the heat and richness, making each bite balanced and craveable.
Pro Tips:
- Let the breaded chicken rest for 10 minutes before frying—this helps the coating stick better and prevents it from falling off
- Maintain your oil temperature at 350°F for the crispiest results
- Make extra hot honey glaze—you’ll want to drizzle more on top or use it for dipping
- If the heat is too intense, add a slice of cheese or extra mayo to mellow it out
Brown Butter Banana Bread with Chocolate Chips
If you love classic banana bread but want to take it up a notch, this recipe is it. Browning the butter gives it a deep, nutty aroma, while ripe bananas keep it extra moist and flavorful. A touch of sour cream adds creaminess, and the dark chocolate chips melt into little pockets of goodness. Topped with a crunchy turbinado sugar crust, this loaf is cozy, rich, and perfect for any occasion, from weekend baking to sharing with friends over coffee.
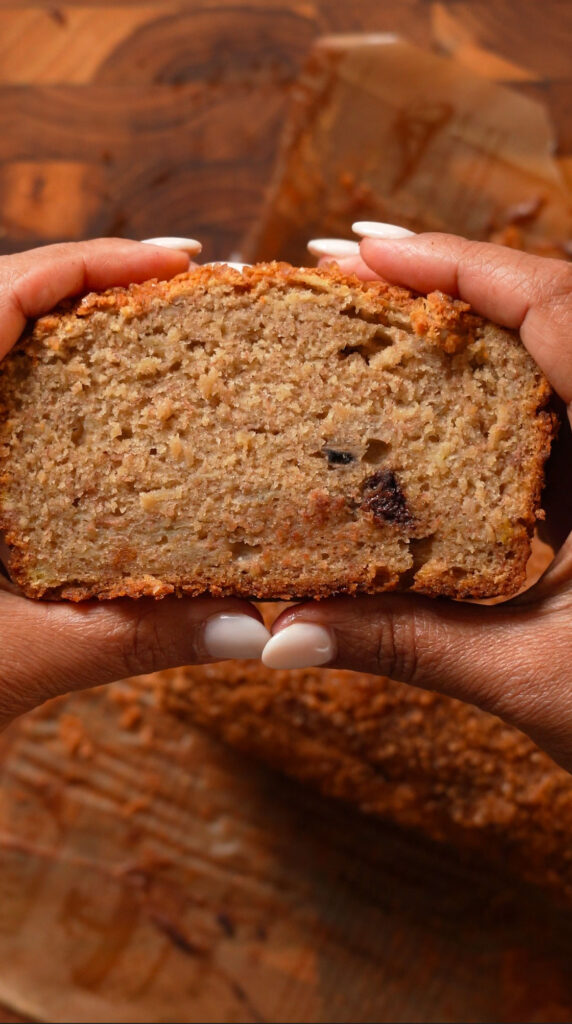
Yields
1 (9 x 5-inch) loaf | Serves 8–10
Ingredients
Wet Ingredients
- 1 stick unsalted butter
- 1 ¼ cups light brown sugar, packed
- 1 large egg
- 2 cups ripe banana, mashed (about 4 medium)
- ½ cup full-fat sour cream
- 2 teaspoons vanilla paste
Dry Ingredients
- 1 ½ cups all-purpose flour
- 1 teaspoon kosher salt
- ½ teaspoon baking soda
- 1 teaspoon ground cinnamon
Mix-Ins & Toppings
- ½ cup dark chocolate chips
- 2 tablespoons turbinado sugar
Nonstick cooking spray, for greasing
Instructions
- Preheat the Oven
Preheat your oven to 350°F (180°C). Lightly grease a 9 x 5-inch loaf pan with nonstick cooking spray, then line it with parchment paper so it overhangs on the long sides—this will make it easy to lift the bread out later. Give the parchment one more light spray to make sure nothing sticks. - Brown the Butter
In a medium nonstick saucepan, melt the butter over medium heat. Once melted, continue to cook, stirring occasionally, as the milk solids settle and begin to turn golden brown. You’ll notice a toasty, nutty aroma and the butter will deepen to a rich amber color—this usually takes about 3–4 minutes. Remove from the heat as soon as it reaches that point (it can burn quickly), then pour it into a large mixing bowl. Let the butter cool for 10–15 minutes so it doesn’t melt the sugar or cook the egg when mixed.. - Cream the Butter & Sugar
Once the butter has cooled, add the light brown sugar to the bowl. Using an electric hand mixer on medium speed, beat the mixture for about 1 minute until smooth and glossy. Add the egg and beat again for 3–4 minutes, or until the mixture becomes lighter in color and fluffy—this step adds air and helps create a tender crumb in the final loaf. - Mix the Wet Ingredients
In a separate medium bowl, mash the ripe bananas until mostly smooth with just a few small lumps for texture. Stir in the sour cream and vanilla paste, mixing until the ingredients are fully blended and silky. This mixture adds moisture and flavor depth to the batter. - Combine the Dry Ingredients
In another bowl, whisk together the all-purpose flour, kosher salt, baking soda, and cinnamon. Whisking helps break up any clumps and evenly distributes the leavening agents, ensuring a consistent rise. - Bring the Batter Together
Switch to a rubber spatula and begin folding the wet and dry ingredients into the creamed butter mixture. Start by adding about one-third of the dry ingredients, folding gently until just combined. Next, add half of the banana mixture, folding again. Repeat this process, alternating between dry and wet, and end with the dry ingredients. Take care not to overmix—the goal is to stop as soon as there are no visible streaks of flour. Overmixing can lead to a dense or tough loaf. - Fold in the Chocolate
Add the dark chocolate chips and fold them in gently until they’re evenly distributed throughout the batter. If you like a few melty bits on top, set aside a tablespoon of chips to sprinkle over the surface before baking. - Bake
Pour the batter into the prepared loaf pan, smoothing the top with an offset spatula to help it bake evenly. Sprinkle the turbinado sugar evenly over the surface—this creates that signature crunchy, golden crust. Bake on the center rack of the oven for 60–70 minutes, or until the top is deeply golden and a toothpick inserted into the center comes out clean or with a few moist crumbs. If the top starts to brown too quickly, tent the loaf loosely with foil during the final 15–20 minutes of baking. An instant-read thermometer should register 200–205°F in the center when it’s done. - Cool & Slice
Place the loaf pan on a wire rack and let the bread cool for at least 1 hour—this helps the crumb set fully and prevents it from crumbling when sliced. Use the parchment overhang to gently lift the banana bread out of the pan. For the cleanest slices, let it cool another 10–15 minutes before cutting. Serve slightly warm or at room temperature. It’s especially good with a cup of coffee or tea, and it keeps beautifully for a few days (if it lasts that long!).
Let’s Talk Ingredients: Why They Matter
Brown Butter
Browning the butter adds a toasty, nutty depth of flavor that sets this banana bread apart from the usual. It makes the loaf smell incredible even before it hits the oven.
Bananas
Very ripe bananas are key here — the browner the better. They bring natural sweetness, moisture, and that signature banana flavor. Mashing them smooth ensures an even texture.
Sour Cream
A little sour cream adds moisture and richness, giving the bread a tender crumb without being heavy.
Dark Chocolate Chips
These melt into rich pockets throughout the loaf, adding a touch of indulgence to every slice.
Turbinado Sugar
Sprinkling turbinado sugar on top before baking gives the crust a beautiful crunch and sparkle.
Mango Lassi Tiramisu Recipe
If you love mango lassi and tiramisu, this dessert is the ultimate mashup. It layers creamy, spiced yogurt mascarpone filling with juicy mango purée and soft ladyfingers soaked in cardamom-spiced mango juice. It’s light, fruity, and luscious, a tropical twist on the Italian classic that’s perfect for summer gatherings, Diwali parties, or when you just want to impress without turning on the oven.

Yields
1 (9 x 9-inch) tiramisu, serves 8–10
Ingredients
Mango Soak
- 2 cups mango juice
- ½ teaspoon ground cardamom
Cream Filling
- 1½ cups plain Greek yogurt
- 1 cup mascarpone cheese
- ½ cup sweetened condensed milk
- 1 teaspoon vanilla extract
- ¼ teaspoon ground cardamom
Mango Layer
- 2 cups mango purée (from ripe mangos or canned)
Assembly
- 24–28 ladyfinger cookies
- Fresh mango slices, for topping
- Optional: crushed pistachios or edible rose petals, for garnish
Instructions
1. Make the Mango Soak
In a shallow bowl, whisk together the mango juice and cardamom. This is what you’ll dip your ladyfingers into to infuse them with tropical flavor.
2. Prepare the Cream Filling
In a large bowl, combine the yogurt, mascarpone, sweetened condensed milk, vanilla, and cardamom. Whisk until smooth and creamy. The mixture should be thick but spreadable.
3. Soak and Layer
Quickly dip each ladyfinger into the mango soak — just 1–2 seconds per side so they soften but don’t fall apart. Arrange a single layer of soaked ladyfingers on the bottom of a 9 x 9-inch dish.
4. Add Cream & Mango
Spread half of the cream mixture evenly over the soaked ladyfingers. Spoon half of the mango purée over the cream and gently swirl it in with the back of a spoon.
5. Repeat the Layers
Add another layer of soaked ladyfingers, followed by the remaining cream mixture and mango purée. Swirl again for a marbled effect.
6. Chill
Cover and refrigerate for at least 4 hours, or overnight if possible. This helps the flavors meld and the tiramisu to set.
7. Garnish & Serve
Just before serving, top with fresh mango slices, crushed pistachios, or edible rose petals for a beautiful finish. Slice and enjoy chilled.
Let’s Talk Ingredients: Why They Matter
Mango
Mango gives this tiramisu its vibrant flavor and color. Using puréed ripe mangoes or high-quality canned purée ensures a naturally sweet, rich taste that complements the creamy filling.
Greek Yogurt & Mascarpone
This combo creates a light but luscious filling. The yogurt adds tanginess and body, while mascarpone provides that silky Italian tiramisu texture.
Cardamom
A touch of cardamom ties the flavors together, giving the dessert a subtle warmth that plays beautifully with the tropical mango and creamy layers.
Ladyfingers
Their sponge-like texture absorbs the mango soak perfectly, creating soft, pudding-like layers without getting soggy.
Navy Bean Pie Recipe
Forget about all the other pies, let me introduce you to the Navy Bean Pie: rich, creamy, and packed with 3 times more protein and fiber than sweet potato or pumpkin pie. A Black Muslim American staple since the 1930s, this all-year-round pie has a velvety, creamy texture and warm spices in every bite.
This classic bean pie is smooth, spiced, and irresistibly rich, a beloved dessert that blends warm spices with the creamy texture of pureed navy beans. It’s often described as a cross between a custard pie and sweet potato pie, with its velvety filling and buttery crust. The key is making sure your beans are perfectly cooked and silky smooth, giving the pie its signature texture.
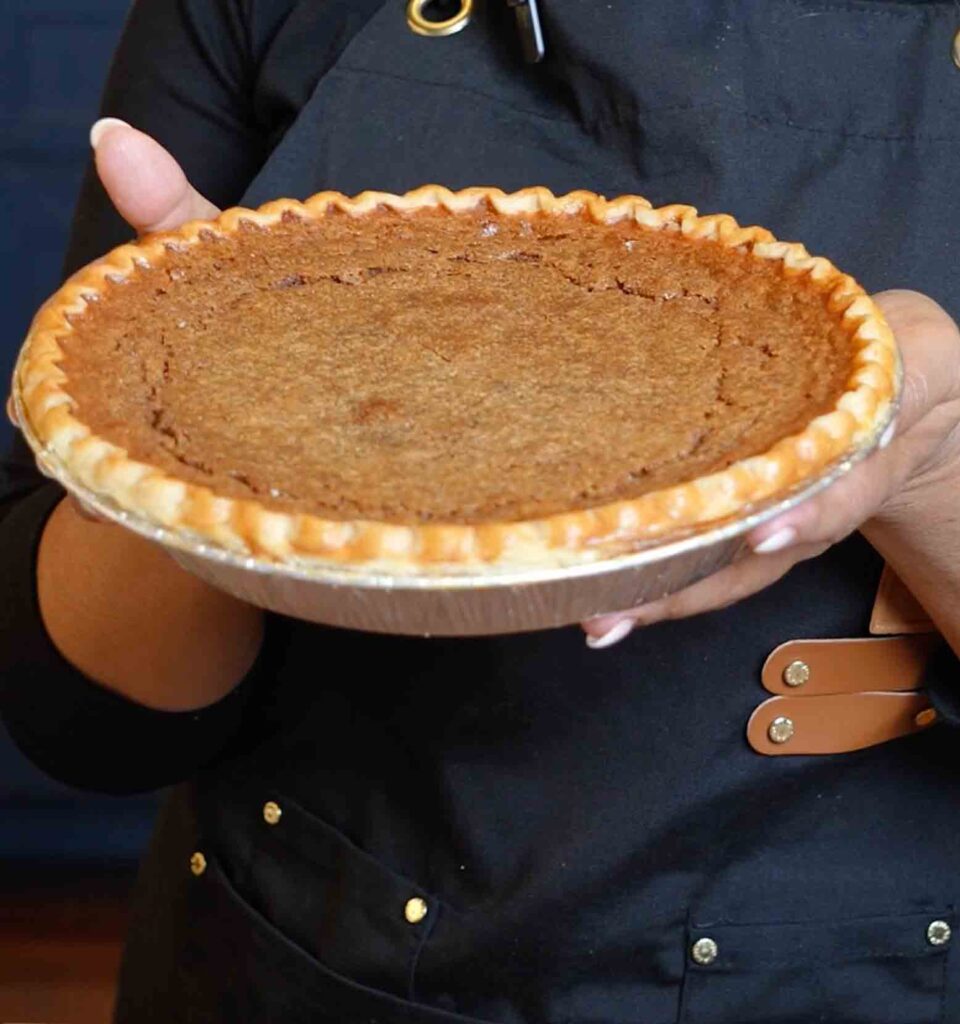
Yields
3 (9-inch) pies
Ingredients
- 3 cups cooked, pureed navy beans (room temperature, very smooth)
- 1½ cups light brown sugar
- 1 cup cane sugar
- 4 tablespoons cornstarch
- 3½ teaspoons cinnamon
- 1¼ teaspoon nutmeg
- 1 teaspoon cardamom
- 2 sticks (1 cup) butter, softened
- 5 large eggs (room temperature)
- 2 (12 oz) cans evaporated milk
- 2 tablespoons pure vanilla bean paste or extract
- 3 (9-inch) pie crusts (homemade or store-bought)
- Homemade whipped cream, for topping
- Optional: egg wash for crust
Instructions
1. Preheat the Oven
Preheat your oven to 350°F.
2. Pre-Bake the Crusts
Place the pie crusts on a baking sheet and bake for 5 minutes. This helps keep the crust crisp and prevents soggy bottoms. Remove and let cool while preparing the filling.
3. Mix the Dry Ingredients
In a large mixing bowl, combine the light brown sugar, cane sugar, cornstarch, cinnamon, nutmeg, and cardamom. Whisk together until no lumps remain.
4. Cream the Butter
Add the softened butter to the sugar-spice mixture. Use a hand or stand mixer to cream until light and fluffy.
5. Add the Eggs
In a separate bowl, whisk the eggs thoroughly. Gradually pour the eggs into the butter mixture while mixing on low speed, ensuring a smooth custard base.
6. Add the Bean Purée
Stir in the cooked, pureed navy beans. The texture should be completely smooth before adding, think hummus consistency.
Tip: For the silkiest filling, soak dry navy beans overnight, cook until soft, then blend until perfectly smooth. Avoid using beans straight from the can without blending well.
7. Incorporate the Milk
Slowly pour in the evaporated milk while mixing, until the filling becomes smooth and pourable.
8. Add the Vanilla
Mix in the vanilla bean paste or extract until evenly distributed.
Pro Tip: For an ultra-smooth pie, strain the mixture through a fine-mesh sieve to remove any remaining bean skins or lumps.
9. Fill the Crusts
Divide the filling evenly among the three pre-baked pie crusts. If desired, lightly brush the edges of the crust with egg wash for a golden finish.
10. Bake
Bake the pies for 1 hour, or until the filling is set and no longer jiggles in the center.
11. Cool and Serve
Allow the pies to cool completely before slicing. Top with homemade whipped cream for the perfect finish.
Let’s Talk Ingredients: Why They Matter
Navy Beans
Navy beans create the smooth, custard-like base of the pie. They’re mild in flavor, making them perfect for absorbing warm spices. Using freshly cooked beans that have been soaked, cooked, and pureed gives the best texture and depth of flavor.
Warm Spices
Cinnamon, nutmeg, and cardamom give the pie its signature aromatic flavor, making it comforting and familiar — perfect for gatherings and holiday tables.
Butter & Sugar
The combination of butter and a mix of brown and cane sugars provides richness, moisture, and that caramelized undertone essential to the filling.
Evaporated Milk & Eggs
These create a custard structure that sets beautifully when baked, holding the smooth filling together without becoming dense.
Honey Onion Cough Syrup
This natural honey onion cough syrup is as simple as it gets — just two ingredients that work together to soothe a sore throat and calm a nagging cough. Thinly sliced onions release their natural juices, which combine with raw honey to form a sweet, syrupy remedy loaded with antioxidants and anti-inflammatory benefits. It’s a timeless, make-at-home recipe that’s ready overnight and gentle enough for the whole family.

Ingredients:
- 1 large onion, thinly sliced or diced
- Enough raw honey to completely cover the onions (about 1–1 ½ cups, depending on the jar size)
Instructions:
Prepare the Onions:
Peel and thinly slice or dice the onion. The thinner the slices, the more quickly the juices will release into the honey.
Assemble the Syrup:
In a clean, sanitized glass jar, layer the onions. Pour honey over the top until the onions are completely submerged.
Steep:
Seal the jar tightly and let it sit at room temperature for 6–12 hours, or overnight. The honey will pull the liquid out of the onions, creating a syrup.
Strain (Optional):
If you prefer a smoother syrup, strain out the onion pieces before storing. Otherwise, leave them in and scoop syrup as needed.
Store & Use:
Keep the jar in the refrigerator and use within 3 weeks. Take 1–2 teaspoons as needed to help soothe a sore throat or cough.
Let’s Talk Ingredients: Why They Matter
Onions
Onions are rich in quercetin, a plant antioxidant that helps fight inflammation and supports your immune system. They also contain natural antibacterial properties that can help calm throat irritation.
Raw Honey
Honey is naturally antibacterial and anti-inflammatory, coating the throat to relieve irritation while providing a natural sweetness. Using raw honey retains its full range of beneficial enzymes and antioxidants.
Upside-Down Peach Cobbler Cake
This upside-down peach cobbler cake is part cobbler, part cake, and fully irresistible. Juicy peach slices get a pour of buttery brown sugar caramel, then a soft spiced batter and a buttery crumble on top. It bakes up glossy and jammy on the fruit, tender in the center, and crunchy around the edges. Save half the caramel and half the crumble for after baking so you can finish with a warm drizzle and extra crunchy bits. Perfect goodbye-to-summer bite.
Upside-Down Peach Cobbler Cake
Ingredients:
For the Caramel Sauce:
- ½ cup (1 stick) unsalted butter
- 1 cup packed brown sugar
- ¼ cup water
- Pinch of salt (optional)
For the Crumble :
- ½ cup (1 stick) salted butter, melted
- 1 cup + 2 tbsp all-purpose flour (about 146 g)
- ½ cup light brown sugar, packed (106 g)
- 4 tsp raw sugar (optional, for crunch)
- ¼ tsp salt
- ¼ tsp cinnamon
For the Cake Batter:
- 1 ½ cups all-purpose flour
- 2 tsp baking powder
- ½ tsp salt
- 1 tsp cinnamon
- ¼ tsp nutmeg
- ½ cup (1 stick) unsalted butter, room temp
- 1 cup granulated sugar
- 2 large eggs
- 1 tsp vanilla paste
- ½ cup plain yogurt
- ¼ cup milk
For the Fruit Layer:
- 3-4 ripe peaches, sliced
Instructions:
Make the Caramel Sauce:
- In a saucepan over medium heat, melt butter. Stir in brown sugar, water, and a pinch of salt if using.
- Cook for 3-4 minutes, whisking until smooth and glossy. Remove from heat.
- Pour half the caramel into a greased 9-inch cake pan. Save the other half for topping after baking.
Prepare the Crumble:
- In a bowl, mix melted butter, flour, brown sugar, raw sugar, salt, and cinnamon until crumbly.
- Spread half onto a parchment-lined baking sheet. Bake at 350°F (175°C) for 8-10 minutes until lightly golden. Let cool for topping later.
- Set aside the other half (unbaked) to use directly on the cake.
Arrange the Fruit Layer:
- Lay peach slices evenly on top of the caramel in the cake pan.
Make the Cake Batter:
- Whisk together flour, baking powder, salt, cinnamon, and nutmeg.
- In a large bowl, beat butter and sugar until fluffy. Add eggs one at a time, then mix in vanilla.
- Stir in sour cream and milk until smooth.
- Gently fold in the dry ingredients until just combined.
Assemble the Cake:
- Pour batter over the peach-caramel layer.
- Sprinkle the unbaked crumble evenly over the top.
Bake:
- Bake at 350°F (175°C) for 45–50 minutes, or until a toothpick inserted comes out clean.
- Cool in the pan for 10 minutes, then carefully invert onto a serving plate.
Finish & Serve:
- Sprinkle the baked crumble (from the sheet pan) over the top for extra crunch.
- Drizzle with reserved caramel sauce.
- Serve warm with whipped cream or ice cream.
Let’s Talk Ingredients: Why They Matter
- Peaches
Fresh peaches are the heart of this cake. They become glossy, caramelized, and jammy when baked. Use ripe but firm peaches for the best texture. - Caramel Sauce
The buttery brown sugar caramel creates a glossy, candy-like coating for the peaches and adds a deep molasses sweetness. Saving half for drizzling at the end doubles the indulgence. - Spices (Cinnamon + Nutmeg)
These warm spices turn the batter into a cozy base that balances the fruit’s sweetness and makes the cake taste like the start of fall. - Crumble
The crumble does double duty – baked right into the cake and crisped separately for topping. This adds texture and makes the cake feel like a cobbler-cake hybrid. - Plain Yogurt
This ensures the cake stays moist and tender with a rich, bakery-style crumb.
Shibuya Banana Pudding Toast
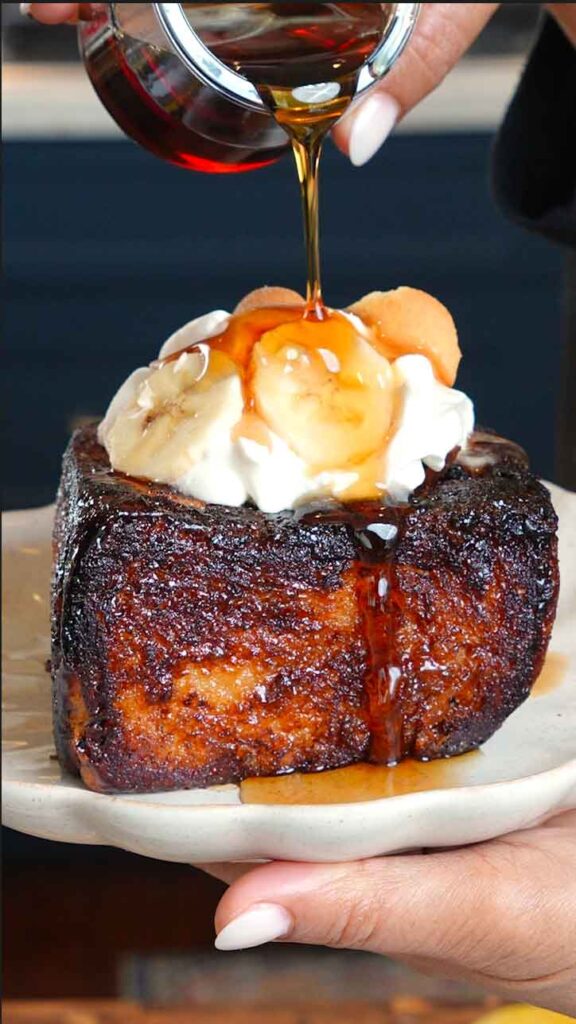
This Shibuya Banana Pudding Toast is crispy, creamy, and totally over-the-top! Buttery milk bread gets caramelized into golden toast boxes, then layered with silky banana pudding, fresh bananas, and crunchy toasted bread cubes. Topped with whipped cream, crushed vanilla wafers, and maple syrup—it’s basically a banana pudding sundae in toast form. Surprisingly easy to make, and definitely a showstopper for brunch or dessert.
Ingredients:
Banana Pudding Filling:
- 1 (3.4 oz) box instant vanilla pudding mix
- 1¾ cups cold whole milk
- 1 tsp vanilla extract
- ½ cup heavy whipping cream
- 2 ripe bananas, sliced
Toast Boxes:
- 1 large egg
- ½ cup whole milk
- 2 Tbsp brown sugar
- ½ tsp cinnamon
- ¼ tsp salt
- 1 (10-inch) Japanese milk bread loaf (or brioche), cut into 2 (5-inch) cubes, crusts removed
- ¼ cup sugar
- 2 Tbsp unsalted butter, plus more as needed
Toasted Bread Cubes:
- 1 Tbsp melted butter
- 1 Tbsp sugar
Toppings:
- Crushed vanilla wafers
- Extra banana slices
- Powdered sugar (optional)
- Maple syrup (optional)
Instructions:
Whisk the pudding mix, cold milk, and vanilla until thick, about 2 minutes. In a separate bowl, whip the cream to soft peaks, then fold half into the pudding. Chill 10–15 minutes, reserving the rest of the cream for topping.
Mix the egg, milk, brown sugar, cinnamon, and salt. Quickly dip bread cubes on all sides, then roll in sugar.
Melt butter in a skillet over medium-low. Cook the sugared bread cubes until golden and caramelized, 8–10 minutes total, turning often. Cool slightly.
Cut a 2-inch square opening in each cube, leaving a ½-inch border. Remove and save the inside bread.
Toss the saved bread with melted butter and sugar. Toast in the skillet until golden and crisp, 5–6 minutes.
Layer pudding, banana slices, and toasted bread cubes inside each toast box until filled.
Top with whipped cream, crushed wafers, bananas, powdered sugar, and maple syrup. Serve right away and enjoy!
Homemade Flavored Butters
Homemade Flavored Butters

These homemade butters are rich, creamy, and totally customizable! Whether you’re keeping it classic with a pinch of sea salt or adding bold flavors like garlic herb or sweet strawberry, these butters will elevate everything from toast to brunch boards. They’re easier to make than you think—and super fun to flavor your way.
Ingredients:
2 cups heavy cream
For Salted Butter:
• Pinch of flaky sea salt
For Strawberry Butter:
• 1 Tbsp strawberry jam
For Garlic Herb Butter:
• 1 Tbsp chopped fresh herbs (rosemary, parsley, thyme)
• 1 clove garlic, finely chopped
• 1/4 tsp kosher salt
• Squeeze of lemon juice
For Salted Honey Butter:
• 2 Tbsp honey
• 1/2 tsp flaky sea salt
Instructions:
- Beat the heavy cream in a stand mixer with the paddle attachment on medium until stiff peaks form. Increase to medium-high and beat until it separates into butter and buttermilk—this takes about 12–15 minutes.
- Transfer the butter solids to a cheesecloth and squeeze out all the buttermilk. Rinse the butter under cold water until the water runs clear.
- Divide into portions and mix in flavorings at room temp. Roll into logs, wrap in parchment or plastic, and refrigerate until firm. Spread and enjoy!
Brazilian-Style Coconut Limeade (Limonada Suíça)
Brazilian-Style Coconut Limeade (Limonada Suíça)

This ice-cold Brazilian-style limeade is sweet, tart, creamy, and insanely refreshing. Inspired by Brazil’s famous limonada suíça, this version uses coconut condensed milk to add a tropical twist that’s perfect for summer sipping.
Ingredients (6 servings):
- 4 limes, scrubbed and washed (plus wedges for garnish)
- 1/3 cup sugar
- 7 oz sweetened coconut condensed milk (or regular condensed milk)
- 4 cups cold water
- 4 cups ice, plus more for serving
Instructions:
Prep the limes:
Trim the ends off each lime, then quarter them.
First blend:
Add the lime quarters, sugar, and water to a blender. Pulse 5–8 times—just enough to release the oils and juices from the peel without making it bitter.
Strain:
Pour the mixture through a fine-mesh sieve into a pitcher to remove the pulp and peel pieces. Press with a spoon to get every drop.
Final blend:
Return the strained liquid to the blender. Add the coconut condensed milk and ice. Blend until smooth, frothy, and creamy.
Serve:
Pour over lots of ice and garnish with lime wedges. Serve immediately and enjoy the chill.
Let’s Talk Ingredients: The Stars of This Limeade!
When it comes to this drink, simplicity is key—but the ingredients do all the heavy lifting when it comes to flavor and texture. Here’s why each one deserves a little spotlight:
3- Ingredient Mango Ice Cream with Semi-Sweet Chocolate Magic Shell
3- Ingredient Mango Ice Cream with Semi-Sweet Chocolate Magic Shell

These creamy, dreamy mango ice cream bowls are made with just three ingredients and served straight from the shell! Ripe champagne mangoes blend into a naturally sweet soft serve, then get tucked back into their frozen skins and finished with a glossy semi-sweet chocolate magic shell that cracks when you bite into it. Tropical, rich, and way too easy not to try.
Ingredients:
- 3–4 ripe champagne (Ataulfo) mangoes
- 1 cup semi-sweet chocolate chips
- 2 tablespoons coconut oil
Instructions:
Prep the mangoes:
Slice each mango in half lengthwise and carefully remove the pit. Scoop out the mango flesh, leaving the shells intact—they’ll be your serving bowls! Place the empty mango shells in the freezer to firm up. Dice the mango flesh and freeze overnight on a tray or in a freezer-safe bag.
Make the ice cream:
Once frozen solid, blend the mango chunks in a high-speed blender or food processor until smooth and creamy, scraping down the sides as needed. It should look like soft serve.
Scoop and freeze:
Fill the frozen mango shells with the mango soft serve. Smooth out the tops and freeze again for 2–3 hours or overnight until completely firm.
Make the magic shell:
Combine the chocolate chips and coconut oil in a microwave-safe bowl. Melt in 20–30 second intervals, stirring between each, until completely smooth. (Or, if it’s hot outside, set the bowl in the sun—it really works!) Let cool slightly before using.
Finish and serve:
Pour the magic shell over the frozen mango ice cream. It’ll harden on contact into a chocolatey shell. Serve immediately and crack into tropical bliss!
Let’s Talk Ingredients: The Stars of This Dessert!
1. Champagne Mangoes
These smaller, golden mangoes are velvety and super sweet—perfect for ice cream. Their low fiber content makes the texture ultra-smooth, and freezing intensifies their tropical flavor.
2. Semi-Sweet Chocolate Chips
They give just the right richness to balance the fruitiness of the mango, and when melted with coconut oil, they create that perfect “snap” that shatters like magic.
3. Coconut Oil
Coconut oil is the secret weapon behind the magic shell. It helps the chocolate melt smoothly and harden quickly once it hits the cold mango ice cream. Plus, it adds a subtle tropical note that ties everything together.
Crispy Gochujang Wings with Yuzu Mandarin Glaze
Crispy Gochujang Wings with Yuzu Mandarin Glaze
These wings are next-level crispy thanks to a crushed corn cereal coating, then tossed in a sticky, sweet, and spicy gochujang glaze with bright citrusy notes. Best served with a cold Spindrift Yuzu Mandarin on the side, because that floral, real fruit flavor cuts through the heat perfectly.

Ingredients:
For the Wings:
- 2 lbs chicken wings, patted dry
- Salt, pepper, and garlic powder (to taste)
- 2 eggs, beaten
- 2–3 cups crushed corn cereal (like Cornflakes)
For the Glaze:
- 3 tbsp gochujang
- 2 tbsp yuzu marmalade
- 2 tbsp soy sauce
- 2 tbsp rice vinegar
- 2 tbsp mandarin juice (or orange juice)
- 1 tbsp yuzu juice
- 1 tsp garlic (grated)
- 1 tsp ginger (grated)
- 1 tsp sesame oil
For Finishing:
- Sesame seeds
- Sliced green onions
- Spindrift Yuzu Mandarin, to serve
Instructions:
Prep the wings: Pat your wings dry with paper towels. Season well with salt, pepper, and garlic powder.
Coat: Dip each wing in the beaten egg, then coat generously in crushed corn cereal. Press to help it stick.
Air fry: Place wings in a single layer in your air fryer. Air fry at 400°F for 20–25 minutes, flipping halfway through, until golden, crispy, and the internal temp hits 165°F.
Make the glaze: While wings cook, add all glaze ingredients to a small saucepan. Simmer over medium heat until thickened and glossy, about 5–7 minutes. Remove from heat.
Toss and finish: Once wings are cooked, brush or toss them in the warm glaze. Garnish with sesame seeds and sliced green onions.
Serve: Enjoy hot with a chilled can of Spindrift Yuzu Mandarin—trust me, you’re gonna want to sip between bites.
Let’s Talk Ingredients: The Stars of These Wings!
1. Crushed Corn Cereal
Think cornflakes, but crushed just enough to cling. This gives the wings that unbeatable crunch—way crispier than breadcrumbs and full of golden toasty flavor.
2. Gochujang
A bold Korean chili paste that’s spicy, sweet, and savory all at once. It’s the backbone of the glaze and brings heat without overpowering everything else.
3. Yuzu Marmalade
A citrus-forward jam that adds brightness, sweetness, and a touch of bitterness. It balances out the gochujang and makes the glaze sing.
4. Mandarin Juice
That little splash of mandarin or orange juice makes all the difference. It lightens up the sauce and brings in a soft, sweet tang.
5. Spindrift Yuzu Mandarin
This sparkling water isn’t just a pairing—it’s the reset button between bites. Real fruit juice, floral yuzu, and bubbles? Say less.
Homemade Ginger Ale, Two Ways (Syrup + Tea-Based)
Homemade Ginger Ale, Two Ways (Syrup + Tea-Based)
This homemade ginger ale hits with bold, spicy ginger flavor and fresh citrus in every bubbly sip. Whether you make it with a sweet ginger syrup or opt for a lighter, honey-sweetened tea base, both versions are refreshing, easy, and better than store-bought. Customize the sweetness and citrus to your liking, it’s your drink, your vibe.

Ingredients:
For Ginger Syrup Ginger Ale (Cane Sugar Version):
- 1 cup fresh ginger, peeled and chopped
- 2 cups organic cane sugar
- 1 cup filtered water
- 6 cups chilled sparkling water
- Lemon juice, to taste
- Lime juice, to taste
- Optional: splash of vanilla extract
For Ginger Tea Ginger Ale (Honey-Sweetened Version):
- 1 cup fresh ginger, peeled and chopped
- 2 cups filtered water
- 6 cups chilled sparkling water
- Lemon juice, to taste
- Honey or maple syrup, to taste
Instructions:
Make the Ginger Syrup (Cane Sugar Version):
- Simmer the syrup: In a saucepan, combine chopped ginger, cane sugar, and 1 cup water. Bring to a simmer and cook uncovered over medium heat for about 20 minutes, or until thickened and syrupy.
- Strain and cool: Strain out the ginger using a fine mesh sieve and let the syrup cool completely.
- Assemble your drink: For each serving, combine about 2 tablespoons of syrup with 1 cup chilled sparkling water. Add a squeeze of lemon and lime juice to taste. For a twist, add a tiny splash of vanilla extract.
Make the Ginger Tea Base (Honey Version):
- Simmer the tea: In a pot, add chopped ginger and 2 cups water. Simmer for about 15 minutes to extract the flavor.
- Strain and cool: Remove from heat, strain the liquid, and let it cool completely.
- Build your glass: For each drink, use about ¼ cup of the ginger tea, 1 cup chilled sparkling water, a good squeeze of lemon juice, and your choice of honey or maple syrup to sweeten.
Let’s Talk Ingredients: Why They Matter
1. Fresh Ginger
Fresh ginger is the star here. It’s spicy, citrusy, and known for its anti-inflammatory properties. Chop it fine to extract more flavor, and always use fresh—not powdered—for the best results.
2. Organic Cane Sugar or Honey
Cane sugar gives you that classic soda-shop sweetness and a thick syrupy base. Honey, on the other hand, brings a floral, soothing note and a more natural vibe. Maple syrup also works and adds warmth.
3. Sparkling Water
Bubbly water brings everything together. Use your favorite sparkling water or even club soda. Make sure it’s cold so the flavors pop.
4. Lemon & Lime Juice
Citrus balances the heat of ginger. Use freshly squeezed lemon and lime for brightness and tang. Adjust to your taste—some like it tart, others mellow.
5. Vanilla Extract (Optional)
A tiny splash of vanilla in the syrup-based version adds a soft, aromatic undertone that rounds out the spice beautifully.
Butter Chicken Stuffed Shell Pasta
Butter Chicken Stuffed Shell Pasta
This Butter Chicken Stuffed Shell Pasta is where cozy comfort meets bold flavor. Stuffed with tender marinated chicken thighs, creamy spiced butter sauce, and cheesy goodness in every bite, it’s a warm hug of a meal perfect for weeknights or when you want something a little extra without the fuss.

Ingredients:
Marinated Chicken
- 1 lb boneless, skinless chicken thighs, cut into bite-sized pieces
- ¼ cup plain Greek yogurt
- 1 tsp garam masala
- 1 tsp turmeric
- 1 tsp Kashmiri chili powder (or to taste)
- 1 tsp kosher salt (or to taste)
- 1 (½-inch) piece fresh ginger, peeled + minced
- 3 garlic cloves, minced
- 2 tbsp ghee or unsalted butter
Butter Chicken Sauce
- 2 tbsp unsalted butter
- ½ white onion, diced
- 1 (½-inch) piece fresh ginger, minced
- 3 garlic cloves, minced
- 1 tsp garam masala
- 1 tsp turmeric
- 1 tsp Kashmiri chili powder (or to taste)
- ½ tsp ground cumin
- ¼ cup tomato paste
- ¼ cup heavy cream
- ½ cup water (more if needed)
- ½ tsp kosher salt
Cheese Filling
- 15 oz container ricotta cheese
- 2 cups shredded mozzarella, divided
- ½ cup grated Parmesan, divided
- 1 large egg (optional)
- Salt + pepper, to taste
- 3 tbsp chopped fresh cilantro
Remaining
- 20 jumbo pasta shells
- ¼ cup chopped fresh cilantro
Instructions:
- Cook the Shells
Bring a large pot of salted water to a boil. Add shells and cook just until al dente. Drain and set aside. - Marinate the Chicken
Toss chicken with yogurt, spices, salt, ginger, and garlic. Let it sit while you prep everything else (about 10 minutes). - Cook the Chicken
In a large skillet over medium-high heat, melt ghee or butter. Add the marinated chicken and cook for 5–6 minutes, until browned and fully cooked. Set aside. - Make the Sauce
In the same skillet, melt butter. Add onion, ginger, garlic and sauté until soft (3–4 minutes). Add spices, stir for 1 minute, then stir in tomato paste. Cook for another minute. Add cream, water, and salt. Simmer until slightly thickened. Blend until smooth. - Combine Sauce & Chicken
Stir half the sauce into the cooked chicken. If too thick, add a splash of water. Reserve the remaining sauce. - Make the Cheese Filling
In a bowl, mix ricotta, 1 cup mozzarella, ¼ cup Parmesan, egg (if using), cilantro, salt, and pepper. - Assemble the Shells
Preheat oven to 400°F (200°C). Lightly grease a baking dish. Spread a layer of sauce on the bottom. Fill each shell with cheese + chicken mixture and arrange in the dish. Spoon remaining sauce on top and sprinkle with remaining cheese. - Bake & Serve
Bake uncovered for 20–25 minutes, until cheese is bubbling and golden. Let rest for a few minutes, then top with cilantro and serve warm.
Frozen Peaches and Cream Yogurt Clusters
Frozen Peaches and Cream Yogurt Clusters
These Frozen Peaches and Cream Yogurt Clusters are the perfect mix of creamy, fruity, and refreshing. Made with sweet peaches, thick Greek yogurt, a touch of honey, and coated in silky white chocolate, they’re the no-bake summer treat you’ll want to keep stocked in your freezer all season long.
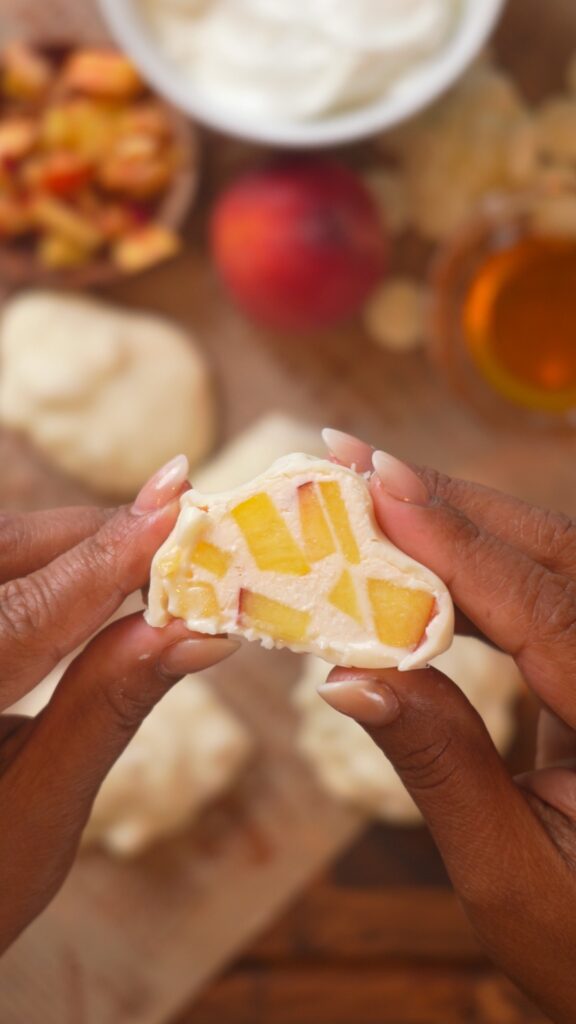
Ingredients:
1½ cups chopped peaches (fresh or frozen)
1 cup plain whole milk Greek yogurt
1 tablespoon honey
1 cup white chocolate melting wafers
1 teaspoon refined coconut oil (optional, for smoother melt)
Instructions:
Mix the filling: In a medium bowl, stir together the chopped peaches, Greek yogurt, and honey until well combined.
Scoop and freeze: Using a spoon or small cookie scoop, drop clusters onto a parchment-lined baking sheet. Freeze for about 2 hours or until firm.
Melt the chocolate: In a microwave-safe bowl, melt the white chocolate and coconut oil (if using) in 20-second intervals, stirring between each, until smooth.
Dip the clusters: Remove the frozen clusters from the freezer and dip each one in the melted chocolate, letting the excess drip off. Place them back on the lined sheet.
Freeze again: Pop the dipped clusters back in the freezer for 10–15 minutes, or until the chocolate is fully set.
Enjoy straight from the freezer for a creamy, fruity, frozen treat!
Let’s Talk Ingredients: The Stars of These Frozen Clusters!
When it comes to quick, refreshing treats, it’s the simple ingredients that make magic. These Frozen Peaches and Cream Yogurt Clusters come together in minutes with just four essentials. Here’s what makes each one shine:
1. Peaches
Whether you’re using fresh or frozen, peaches bring juicy sweetness and that perfect summer vibe to every bite. Their natural sugars make these clusters taste like dessert without needing much added sweetener.
2. Greek Yogurt
Thick, creamy, and packed with protein, Greek yogurt is the glue that holds these clusters together. It gives the perfect tangy contrast to the sweet peaches and adds that creamy, dreamy texture once frozen.
3. Honey
Just a touch of honey brings everything together with a gentle sweetness. It enhances the flavor of the peaches and balances the tang of the yogurt without being overpowering.
4. White Chocolate
Once melted, white chocolate turns these simple frozen bites into a legit dessert. It adds a sweet, creamy shell that crackles when you bite into it—kind of like a yogurt-dipped dream pop. Add a little coconut oil for a smoother dip.
Sheet-Pan Turkey Crunchwrap
Sheet-Pan Turkey Crunchwrap
This family-style crunchwrap is a fun, flavorful twist on taco night. It’s packed with seasoned ground turkey, sautéed peppers and onions, layers of nacho cheese, shredded cheese, crispy tostada shells, and a tangy cilantro-lime crema. Baked on a sheet pan until golden and crisp, it’s perfect for sharing and loaded with all your favorite Tex-Mex flavors.

Ingredients:
Turkey Filling:
2 tablespoons olive oil
1 small yellow onion, diced (about 1 cup)
1 medium bell pepper, diced (about 1 cup)
1½ pounds ground turkey
1 tablespoon chili powder
1 teaspoon kosher salt
1 teaspoon ground cumin
½ teaspoon smoked paprika
½ teaspoon garlic powder
½ teaspoon onion powder
½ teaspoon freshly ground black pepper
1 tomato, diced (about 1 cup)
3 tablespoons water
Cilantro-Lime Crema:
½ cup sour cream
¼ cup chopped fresh cilantro
Juice of 1 lime (about 2 tablespoons)
1 garlic clove, minced
Kosher salt, to taste
Assembly:
Cooking spray
8 large (10-inch) flour tortillas, divided
2 tablespoons melted unsalted butter or olive oil, plus more for brushing
1 cup nacho cheese sauce
2 cups shredded cheddar and Monterey Jack cheese blend
6 round tostada shells
2 cups shredded iceberg lettuce
2 medium roma tomatoes, diced
1 avocado, sliced
½ cup pickled red onions
Chopped fresh cilantro, for garnish
Instructions:
Make the turkey filling:
Heat the olive oil in a large nonstick skillet over medium heat. Add the onion and bell pepper and sauté for 3 to 4 minutes until softened. Add the ground turkey and cook, breaking it up with a spoon, until fully browned, 6 to 8 minutes. Stir in the chili powder, salt, cumin, paprika, garlic powder, onion powder, and black pepper. Add the diced tomato and water. Simmer for 1 to 2 minutes until well combined and the liquid has reduced. Remove from heat and set aside.
Make the cilantro-lime crema:
In a medium bowl, stir together the sour cream, cilantro, lime juice, garlic, and salt until smooth. Cover and refrigerate until ready to use.
Assemble the crunchwrap base:
Preheat the oven to 425°F (220°C). Line a half-sheet pan with parchment paper and coat with cooking spray. Arrange 7 tortillas around the edges of the pan, overlapping so the centers are covered and the edges hang over the sides. Place 1 additional tortilla in the center if needed. Brush tortillas lightly with melted butter or olive oil.
Layer the fillings:
Spread the nacho cheese sauce over the tortilla base. Spoon the turkey mixture evenly on top. Add a layer of tostada shells, breaking as needed to cover the surface. Sprinkle the shredded cheese blend over the tostadas. Drizzle 3 tablespoons of the crema over the cheese.
Fold and bake:
Place the final tortilla in the center and fold the overhanging tortillas up and over to enclose the filling. Press gently to flatten. Top with another parchment-lined sheet pan and place a cast-iron skillet on top to weigh it down. Bake for 20 minutes.
Broil and finish:
Remove the top pan and skillet. Brush the top of the crunchwrap with more melted butter or oil. Increase the oven temperature to broil and broil for about 2 minutes, watching closely, until golden brown and crisp. Let rest for 5 minutes before slicing.
Serve:
Cut into 8 squares. Top with shredded lettuce, diced tomatoes, sliced avocado, pickled red onions, remaining crema, and chopped cilantro.
Tips:
- Use a cast-iron skillet or heavy baking dish to weigh down the crunchwrap so it bakes evenly and holds together.
- Swap out ground turkey for ground beef or plant-based meat for a different twist.
- Prep the turkey filling and crema a day in advance for a faster dinner the next day.
Let’s Talk Ingredients: The Stars of This Crunchwrap!
When it comes to comfort food with a twist, this Sheet-Pan Turkey Crunchwrap delivers big flavor and texture in every bite. Here’s what makes each component shine:
1. Ground Turkey
Leaner than beef but still packed with flavor, ground turkey is seasoned with a bold spice mix that gives it a savory, taco-style kick. It’s the heart of the crunchwrap and the reason it satisfies.
2. Nacho Cheese Sauce
Creamy, melty, and nostalgic, nacho cheese adds a layer of richness that ties everything together. It melts into the tostadas and adds a gooey contrast to the crisp exterior.
3. Tostada Shells
These give the crunchwrap its signature crunch. Layered in the center, they stay crispy inside while the outside bakes to golden perfection. Every bite has that satisfying snap.
4. Cilantro-Lime Crema
Cool, zesty, and herby, this sauce cuts through the richness and adds a fresh, tangy finish. It’s perfect drizzled inside and on top before serving.
5. Fresh Toppings
Shredded lettuce, tomatoes, avocado, and pickled onions bring color, crunch, and brightness. They turn this from just a wrap into a complete, shareable meal that feels fresh and indulgent all at once.
Lemon Ginger Turmeric Wellness Shots
Lemon Ginger Turmeric Wellness Shots
These Lemon Ginger Turmeric Wellness Shots are your daily dose of sunshine in a glass. Packed with vibrant citrus, powerful anti-inflammatory roots, a touch of spice, and natural sweetness, they’re the perfect way to boost your immunity and energy, especially when the seasons start to shift. Blend, strain, chill, and sip your way to feeling your best.

Ingredients:
1 small orange, peeled
2 small lemons, peeled
1/4 cup chopped fresh turmeric (peeling optional)
1/4 cup chopped fresh ginger (peeling optional)
1/8 teaspoon freshly ground black pepper
1/2 cup coconut water
1/2 cup pineapple juice
2 teaspoons honey (adjust to taste)
1/4 teaspoon cayenne pepper (adjust to taste)
Instructions:
- Prepare the produce: Wash the orange, lemons, turmeric, and ginger. Peel the orange and lemons. Chop the turmeric and ginger into small pieces. Peeling is optional.
- Add to blender: Place the peeled orange, lemons, chopped turmeric, chopped ginger, coconut water, pineapple juice, black pepper, honey, and cayenne pepper into a high-speed blender.
- Blend until smooth: Blend on high for 1 to 2 minutes, or until the mixture is completely smooth and no chunks remain.
- Strain: Pour the mixture through a fine mesh strainer or cheesecloth into a bowl to remove the pulp. Use a spoon to press out as much liquid as possible.
- Bottle it: Transfer the strained juice into small glass bottles or shot glasses. Use a funnel for easy pouring.
- Store and enjoy: Refrigerate for up to 3 days. Shake well before drinking, as the ingredients may naturally settle.
Tips:
Use a high-speed blender to ensure the turmeric and ginger blend completely for a smooth finish.
Peeling the turmeric and ginger is optional, but chopping them into small pieces helps release more flavor and nutrients.
Adjust the honey and cayenne to your taste. Add more honey for sweetness or more cayenne for an extra kick.
Shake well before each shot, as natural settling is normal with fresh ingredients.
Store in airtight glass bottles in the fridge for up to 3 days for maximum freshness.
Let’s Talk Ingredients: The Power Players Behind These Wellness Shots!
When it comes to wellness, the magic is in the ingredients. These Lemon Ginger Turmeric Wellness Shots may look simple, but every single component brings something powerful to the table. Let’s break down what makes this blend so effective, and delicious:
1. Lemon
Bright, tangy, and full of vitamin C, lemons are the zesty foundation of this shot. They help alkalize the body, support digestion, and give your immune system a natural boost. That fresh, sour punch? It’s what wakes you up and gets everything moving.
2. Turmeric
This golden root is the real MVP. Turmeric has anti-inflammatory and antioxidant properties that help reduce inflammation and support overall health. When used fresh, it brings a slightly earthy, warm flavor and a vibrant golden hue that makes each shot look like liquid sunshine.
3. Ginger
Warming, spicy, and energizing, ginger not only adds a bold kick to each shot but also helps soothe digestion and fight inflammation. It’s especially perfect during cold season or when you need a little immune system backup.
4. Black Pepper
It might seem like a small addition, but black pepper plays a big role. It enhances your body’s absorption of curcumin, the active compound in turmeric, making the benefits more bioavailable. Just a pinch helps the whole shot work smarter.
5. Pineapple Juice
Tropical and sweet, pineapple juice helps mellow the spice while bringing its own health perks. It’s rich in bromelain, an enzyme known for its anti-inflammatory and digestive benefits. Plus, it gives the shot a naturally juicy finish.
6. Coconut Water
Hydrating and subtly sweet, coconut water balances the sharpness of the citrus and roots. It adds electrolytes and helps keep your body refreshed from the inside out. Bonus: it makes the shots easier to drink.
7. Honey
A natural sweetener with antibacterial properties, honey rounds out the sharpness of the lemon and spice. Just a touch goes a long way, and you can adjust it to taste depending on how bold or mellow you want your shot.
8. Cayenne Pepper
This little dash of heat is the kicker — literally. Cayenne adds a warming element that may help boost metabolism and circulation. It gives the shot that fiery finish and a quick wake-up call your body will thank you for.
Panda Express Hot Orange Chicken burrito
Hot Orange Chicken Burrito
Inspired by the Panda Express Innovation Kitchen, this Hot Orange Chicken Burrito is a bold, craveable fusion of sweet heat and savory comfort. Wrapped in a warm tortilla, it’s packed with fluffy rice, chow mein, spicy mayo, crisp cucumber salad, and that signature sweet and spicy chicken. The perfect quick and fun meal to recreate at home while Hot Orange Chicken is still on the menu!

Ingredients:
Burrito:
- 1 large tortilla, warmed
- ½ cup cooked white rice
- ½ cup chow mein
- ½ cup Hot Orange Chicken
- 2 tablespoons cucumber salad (see below)
- 1–2 tablespoons spicy mayo (see below)
Cucumber Salad:
- 1 cup thinly sliced cucumber
- ¼ cup rice vinegar
- 1 tsp sesame oil
- 1 tsp soy sauce
- ½ tsp sugar
- Red pepper flakes (optional)
- Sesame seeds
- Green onion, sliced
Spicy Mayo:
- ¼ cup mayonnaise
- 1–2 tsp sriracha (adjust to taste)
- 1 tsp lime juice
Instructions:
1. Make the cucumber salad:
In a bowl, combine sliced cucumbers with rice vinegar, sesame oil, soy sauce, sugar, and optional red pepper flakes. Toss to coat, then top with sesame seeds and green onion. Chill in the fridge for at least 10 minutes.
2. Mix the spicy mayo:
In a small bowl, stir together mayonnaise, sriracha, and lime juice until smooth.
3. Warm the tortilla:
Heat your tortilla in a dry skillet or microwave until soft and pliable.
4. Build your burrito:
Layer rice, chow mein, Hot Orange Chicken, cucumber salad, and spicy mayo in the center of the tortilla.
5. Roll & press:
Fold the burrito tightly, then place it seam-side down in a hot skillet. Press lightly and cook for 1–2 minutes until the outside is golden and crisp.
6. Slice & serve:
Remove from the pan, slice in half, and enjoy warm!
Tips:
- Chill your cucumber salad ahead of time for extra crunch and flavor.
- Pressing the burrito adds a crisp exterior and helps it hold together.
- Swap Hot Orange Chicken with any sweet-and-spicy chicken if it’s not available
Let’s Talk Ingredients: The Stars of This Burrito!
What takes this Hot Orange Chicken Burrito from a quick meal to something you’ll want to make again and again? It’s all about the details. Each layer brings a different texture and flavor, and together, they create that perfect bite. Let’s break down the ingredients that make this burrito shine:
1. Hot Orange Chicken
This is the bold, flavorful heart of the burrito. Sweet, spicy, and sticky in all the right ways, Hot Orange Chicken brings that signature Panda Express flavor we all crave. The glaze clings to every bite of chicken, giving you that perfect balance of citrusy tang and chili heat. If it’s still on the menu—run, don’t walk!
2. Chow Mein
Noodles in a burrito? Yes, and it totally works. Chow mein adds chewiness and depth, soaking up that spicy mayo and mingling beautifully with the rice. It’s a nod to Panda Express’s comfort classics, and it adds both flavor and texture in a fun, unexpected way.
3. Cucumber Salad
This cool, crunchy salad cuts through all the richness. Tossed with rice vinegar, sesame oil, and a touch of soy sauce, the cucumbers stay crisp and tangy—bringing a refreshing bite that brightens the whole burrito. It’s the secret weapon that keeps everything balanced.
4. Spicy Mayo
This creamy, spicy sauce ties it all together. A blend of mayo, sriracha, and lime juice, it adds heat, richness, and a tiny citrus kick. It’s drizzled right over the top of the fillings so every bite has a little zing and a little creaminess.
5. Warm Tortilla
The wrap that brings it all home. A warm tortilla makes everything cozy, while crisping it on a hot pan gives the outside that golden, griddled finish. It’s soft, sturdy, and just the right size to hold all that deliciousness inside.
Brown Butter Chocolate Chip Banana Muffins
Brown Butter Banana Chocolate Chip Muffins
These Brown Butter Chocolate Chip Banana Muffins are the perfect balance of nutty, sweet, and chocolatey goodness! Made with browned butter, ripe bananas, and a touch of Greek yogurt for extra moisture, they’re fluffy, rich, and impossible to resist.
Ingredients:
- 3 ripe bananas, mashed
- 1/2 cup unsalted butter, browned and cooled
- 1/2 cup white granulated sugar
- 1/2 cup brown sugar
- 1 egg, at room temperature
- 1/4 cup plain Greek yogurt
- 1 1/2 cups all-purpose flour
- 3/4 teaspoon baking soda
- 1/2 teaspoon baking powder
- 1/4 teaspoon salt
- 1 teaspoon vanilla paste
- 3/4 cup semi-sweet chocolate chips, plus more for topping
- 6 jumbo-sized muffin tins (or standard, but baking time may vary)
Instructions:
- Preheat the oven to 375°F (190°C). Grease or line your jumbo muffin tins with cupcake liners.
- Brown the butter: In a small saucepan, melt the butter over medium heat, stirring occasionally. Once it starts to foam and turn golden brown with a nutty aroma (about 5 minutes), remove from heat and let it cool for 10 minutes.
- Mix the wet ingredients: In a large bowl, combine the mashed bananas, cooled brown butter, white sugar, brown sugar, egg, Greek yogurt, and vanilla paste. Whisk until everything is well combined.
- Mix the dry ingredients: In a separate bowl, sift together the flour, baking soda, baking powder, and salt.
- Combine wet and dry: Gradually add the dry ingredients to the wet mixture. Stir until just combined—don’t overmix, or the muffins might get dense.
- Fold in chocolate chips: Gently fold in the 3/4 cup of chocolate chips, saving some extra to sprinkle on top.
- Fill muffin tins: Scoop the batter into your prepared muffin tins, filling them about 3/4 full. Top with additional chocolate chips for that extra indulgence.
- Bake: Bake the muffins at 375°F (190°C) for 25–26 minutes, or until a toothpick inserted in the center comes out clean.
- Cool: Let the muffins cool in the tin for about 5 minutes before transferring them to a wire rack to cool completely.
Tips:
- Sprinkle extra chocolate chips on top before baking for that bakery-style look.
- Browned butter adds a rich, nutty flavor that elevates these muffins to the next level!
Enjoy these perfectly baked, rich, and chocolatey banana muffins! Perfect for any time of day—let me know how they turn out!
Let’s Talk Ingredients: The Stars of These Muffins!
When it comes to baking, it’s the little details that really bring a recipe to life. In these Brown Butter Banana Chocolate Chip Muffins, a few key ingredients make all the difference, turning a simple muffin into something crave-worthy. Let’s break down the magic behind some of these stars:
1. Bananas
Ah, the humble banana. We all know them as a breakfast staple or a quick snack, but when they get a little too ripe, that’s when the magic happens. Those brown-speckled bananas? They’re pure gold in the world of baking. Overripe bananas bring natural sweetness, moisture, and that signature banana flavor that turns muffins from ordinary to irresistible. Plus, they’re packed with potassium, so let’s just call these muffins a tasty way to sneak in some health benefits!
2. Brown Butter
Now, let’s talk about the game-changer: brown butter. If you’ve never browned butter before, get ready for a flavor upgrade. By cooking the butter until the milk solids toast, you unlock this deep, nutty aroma that adds a rich, caramel-like flavor to your muffins. It’s like giving your classic muffin recipe a gourmet twist—no extra effort required, but your taste buds will definitely notice the difference.
3. Greek Yogurt
Next up, we’ve got Greek yogurt. You might think it’s just for parfaits or smoothies, but in baking, it’s the ultimate secret weapon for keeping things moist. Greek yogurt not only adds creaminess to the batter, but it also lends a slight tang that balances out the sweetness. Plus, it adds a sneaky bit of protein, so you can totally tell yourself these muffins are a power breakfast.
4. Vanilla Paste
Now, you could use vanilla extract, but we’re stepping it up a notch with vanilla paste. This ingredient is like vanilla on steroids (in the best way possible). Vanilla paste is packed with those lovely little seeds that give a more intense, pure vanilla flavor. Every bite of your muffin will have that aromatic, warm vanilla vibe. It’s subtle, but trust me, it makes a difference.
5. Chocolate Chips
And, of course, who could forget chocolate chips? Semi-sweet is my go-to because it gives you that perfect balance of richness without overpowering the banana. The melted chocolate running through the muffins creates these little pockets of indulgence that make you want to go back for seconds (or thirds… no judgment here). Pro tip: sprinkle a few extra on top before baking for that bakery-style muffin top!
Apple Pastry Donuts
Apple Pastry Donuts with Vanilla Ice cream and Caramel
These Apple Pastry Donuts are super easy to make and taste like fall in every bite! Wrapped in buttery puff pastry and sprinkled with cinnamon sugar, they’re perfect for a cozy afternoon snack or dessert. It’s like enjoying an apple pie without all the work of making one. Trust me, you’ll want to make these on repeat!
Crispy Apple Pastry Donuts with Caramel Drizzle & Vanilla Dream
These apple pastry donuts are the perfect fall indulgence—crispy, sweet, and spiced just right. Honeycrisp apples get wrapped in flaky puff pastry and baked to golden perfection. Drizzle with caramel, scoop some vanilla ice cream on the side, and you’ve got dessert heaven on a plate!
Extra Tips for a Next-Level Treat:
Apple Choice: Honeycrisp apples are the go-to here for their perfect balance of sweet and tart, but you can swap in Fuji or Pink Lady for a slightly different flavor.
Puff Pastry Hack: If you’re short on time, store-bought puff pastry is your best friend! But if you’re feeling ambitious, you can totally make your own.
Mix It Up: Want to make it extra fancy? Add a pinch of nutmeg or cloves to the cinnamon sugar mix for an extra layer of flavor.
Garnish: Dust the finished donuts with powdered sugar, or go big with whipped cream for that over-the-top café vibe.
Perfect Pairing: Serve these with hot spiced apple cider or a warm chai latte. You’re welcome!

INGREDIENTS
- 2 large Honeycrisp apples
- 1 puff pastry sheet, thawed
- 5 tablespoons sugar
- 2 tablespoons ground cinnamon
- 1 egg, lightly beaten
Optional for serving:
- Caramel sauce
- Vanilla ice cream
INSTRUCTIONS
- Preheat the Oven: Crank it up to 400°F. Get that pastry nice and crispy.
- Prep the Puff Pastry: Make sure it’s fully thawed if frozen. Follow the package instructions, but typically, it only takes about 30 minutes at room temp.
- Slice Those Apples: Cut your apples into ¼-inch thick rounds. You should get 8-10 slices. Use a small cookie cutter (or even a bottle cap!) to core them out for that donut shape.
- Cinnamon-Sugar Magic: Mix the sugar and cinnamon in a shallow dish. Dunk each apple slice into the mixture until fully coated. It’s like giving your apples a sweet, spiced spa day.
- Wrap It Up: On a floured surface, roll out the puff pastry and slice it into thin strips. Wrap each apple slice with 2-3 strips of puff pastry until you have a cute little apple “donut.”
- Egg Wash Shine: Brush the beaten egg over the pastry-wrapped apples, then sprinkle some extra cinnamon-sugar on top because we’re extra like that.
- Bake to Perfection: Pop those bad boys in the oven for 15-20 minutes. Check around 15 minutes to make sure they’re not burning. They’re ready when golden and crisp.
- Time to Serve: Plate your warm apple pastry donuts with a drizzle of caramel sauce and a generous scoop of vanilla ice cream on the side. Insta-worthy and absolutely delicious.